Yama Tsukami (Green) Weaknesses, Patterns, and How to Beat
This is a guide to the Yama Tsukami (Green) Elder Dragon Boss Fight found in Tarkuan in Monster Hunter Stories 3 (MHS3). Learn how to beat Yama Tsukami (Green), its weaknesses, behaviour and attack pattern, and the best strategy to beat Yama Tsukami (Green).
| Yama Tsukami Guides | |
|---|---|
 Main Story Boss Main Story Boss |
 Elder Dragon Boss Elder Dragon Boss |
List of Contents
Yama Tsukami (Green) Boss Weaknesses and Resistances
Yama Tsukami (Green) Weakness
| - | ↑ | - | |||
| ↑↑ | ↓ | ↓↓ |
Yama Tsukami (Green) Damage Type Weaknesses
| Body Part | |||
|---|---|---|---|
| Main Body | ◯ | ◯ | ◯ |
| Mouth | ◯ | ◯ | ◯ |
| Valve | ✕ | ✕ | ◯ |
| Right Tentacle | ◯ | ✕ | ✕ |
| Left Tentacle | ✕ | ◯ | ✕ |
Status Ailment Resistance and Weaknesses
| ↓ | ↑↑ | ↑↑ | ↑↑ | ||||||||
| ↑↑ | ↓ | ↓↓ | |||||||||
Yama Tsukami (Green) Pattern and Behaviour
 Attention! Attention! |
We are currently rushing out guides as quickly as possible. More details will be added here soon! |
|---|
 under the page's title to be notified of any updates!
| Health Threshold | |
|---|---|
| Above 50% | Below 50% |
Attack Behaviour Above 50% HP
| Normal State | |
|---|---|
| Open Mouth | |
| Exposed |
Yama Tsukami (Green) have 3 phases which are its normal state, open mouth and exposed.
Normal State
| Turn Count | Move |
|---|---|
| Turn 1 | Tentacle Vortex (AoE Skill) |
| Turn 2 | Power Attack |
| Turn 3 | Left/Right Overhead Smash |
| Turn 4 | Power Attack |
| Turn 5 | Steam Surge (AoE Skill) |
| Turn 6 | Body Press (Power Attack) |
| Turn 7 onwards Will transition to the Open Mouth state after breaking the two tentacle parts and using a Power Attack at the end of the next turn. |
Repeat moveset from Turns 1 to 6 exchanging the Overhead Smash skills to the unbroken part instead |
This is the state Yama Tsukami (Green) starts with. It will always start with a skippable AoE skill and another one on turn 5. In this state, it will use a Power attack so make sure to counter it with a Speed attack. One unique thing in this fight is that, destroying the tentacles and the valve will weaken Tentacle Vortex and Steam Surge respectively.
After destroying both tentacle part, it will do one Power Attack next turn then switch to the Open Mouth state at turn end.
Open Mouth State
| Turn Count | Move |
|---|---|
| Turns 1-4 | Randomly uses Wait-'n-See or a Speed Attack |
| Turn 5 | Yama Tsukami Pull (AoE Skill) |
| Turn 6 | Boulder Throw (AoE Skill) |
| Turn 7 onwards Will transition to the Normal state at any turn end after destroying the Mouth |
Repeat moveset from Turn 1 to 6 |
During this state, Yama Tsukami (Green) will have its mouth open while doing either nothing using its Wait-'n-See skill or do a Speed attack so make sure to counter it with a Technical attack. On turn 5, it will always do a unskipabble AoE skill so make sure to destroy it before it happens or delay it using kinship or disruptive status ailments to buy you more time.
If you managed to destroy its mouth, it will cancel its Yama Tsukami Pull and will use Boulder Throw only before switching back to the Normal state. Otherwise, it will do two back-to-back AoE skill if you cannot destroy its mouth on time.
Exposed State
| Turn Count | Move |
|---|---|
| Turn 1 Will be exposed after getting staggered from any state |
Steam Surge (AoE Skill) or Boulder Throw (AoE Skill) Depends on what state it has before getting exposed |
| Turns 2-4 Will return to the previous state at the end of turn 4 |
Randomly uses any Power Attack |
In this state, if Yama Tsukami (Green) came from the Normal state, it will use the moveset listed above. However, if it came from the Open Mouth state, it will be overwritten by the Open Mouth state moveset instead. Make sure to use either Speed or Technical attacks depending on what state it was before it is exposed.
After turn 3, it will return back to either Normal or Open Mouth state but will do one Power attack next turn before doing its moveset.
Attack Behaviour Below 50% HP
| This section is under construction. Check back again for updates! |
Recommended Monsties for Yama Tsukami (Green)
 Deviljho Deviljho
|
 Malzeno Malzeno
|
For the recommended monstie, it is highly advised to bring in dragon-type monsties that does not have any weakness to non-elemental attacks. The earliest strong dragon-type monstie you can get is Deviljho in the Canalta Timberlands but you need to tweak some genes so that it has access to Speed attacks.
The stronger monstie you can get is Malzeno which is capable of dealing high dragon damage while able to take decent damage. However, you need to defeat it first in The Sacrosanctum main story.
List of All Monsties (Monster List)
How to Beat Yama Tsukami (Green)
|
|
Recommended Level Is at Least 60
When you spawn in Yama Tsukami (Green), it will be at level 60. To survive most of its attacks, you can fight it at levels 55-60 making sure you do not get hit down to 0 HP instantly and deal reasonable damage to it so that the fight does not last long.
EXP Guide: How to Level Up Fast
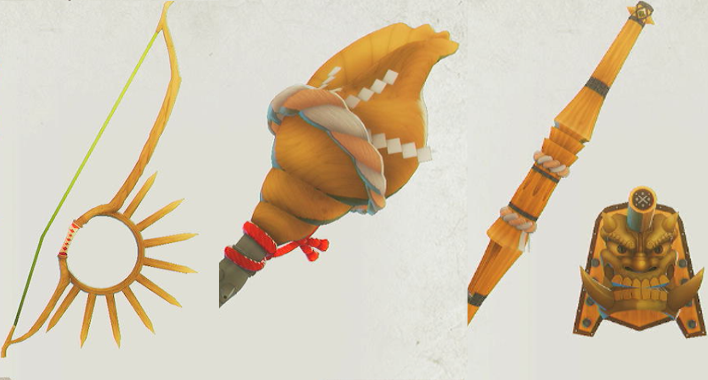
Equip a Hammer and Use Non-Elemental Armor
It is highly advised to break the parts of Yama Tsukami (Green) as fast as possible to lower the damage of its skills so make use of Hammers especially ones that deal dragon-type damage.
As for your armor, the best you can get at this point of the game is a Gravios U armor for more dragon damage and resistance to non-elemental attacks while providing decent defense stat. You can forge this armor by getting materials when defeating a Black Gravious.
Choose Ogden or Eleanor with a Hammer as Your Battle Ally
At this point of the game, you can use Ogden with a Hunting Horn or Eleanor equipped with a Hammer to help you deal damage to parts and wyvernsoul gauge. However, you need to complete the Chapter 2 side stories of Eleanor so you can unlock her secondary weapon.
Focus On the Valve and Ignore One Tentacle
Unlike the first Yama Tsukami fight, it is highly recommended to not switch to the open mouth state. The reason is because Yama Tsukami (Green) is capable of doing 2 back-to-back AoE skills that can kill your party if you are not prepared for it and you will lose out on head-to-head attacks that you can benefit from.
Only destroy the valve and one tentacle part to lower the damage of Steam Surge and Tentacle Vortex while keeping the ability to engage in head-to-head attacks in between these skills which can help charge kinship, negate the damage of its attacks and this makes the boss predictable.
Buff Up Your Defense and Damage
After you've destroyed its valve and one of the two tentacle parts, you can start focusing on enhancing your defense and attack so that you can close out the fight much faster and take some hits in exchange for more damage, reapply buffs or charge up kinship gauge.
You Have 5 Turns to Destroy the Mouth Part
During the Open Mouth state, you only have 4 turns to destroy the mouth before it uses a skill called Yama Tsukami Pull that deals high AoE damage to your party. If you are at or below level 70, you will die from it no matter how strong your defense buffs are. This is the reason why it is not recommended to go to this state unless you can destroy the mouth part within 4 turns.
Every 1/4th Health Reduced Above 50% HP Is a Checkpoint
A unique thing with Elder Dragon fights is the ability to repel the boss if you are able to reduce a specific amount of health and then dying. You can then redo the fight and the enemy will have reduced health when you start the battle again but you will not get the decoration for defeating the boss in a single fight.
How to Fight Yama Tsukami (Green)
Fight Enemies During the Night
You can spawn Yama Tsukami in the Bountiful Dunes in Tarkuan after you defeat enemies during night time. Once you activate a cutscene for Tarkuan, you will see a flying Yama Tsukami so make sure to use the updrafts to launch yourself in the air and fight it.
You can access night time after completing the main story, Endangered Species.
Yama Tsukami (Green) Rewards
Dragonmoss After Repelling or Losing the Fight
Even if you only repel or lose the fight against Yama Tsukami (Green), you will still get exactly 1 Dragonmoss that you can use to craft various powerful non-elemental Hunting Horn, Bow and Gunlance.
Slaying Yama Tsukami (Green) Rewards
New or Enhanced Ally and Equipment Skills
| Skill | Effects |
|---|---|
| Heroic Testament and Follower Testament |
Increases maximum HP and damage dealt to enemies and reduces damage taken. |
If you managed to defeat Yama Tsukami (Green) from full health to zero in a single fight without repelling it, then you will receive a decoration called Heroic Testament and all your battle allies will receive a passive skill called, Follower Testament.
If you already have one in your possession, it will upgrade the ones you have one level higher (S → M → L → XL) with each level increasing the effect of the skill.
List of All Decorations and Equipment Skills
Improved Tarkuan Habitat Stat Increases
Once you defeat Yama Tsukami (Green), every egg obtained and hatched in Tarkuan will have a bonus increase in their Maximum HP stat.
Monster Hunter Stories 3 (MHS3) Related Guides
Main Mission Bosses
| All Main Mission Bosses | |
|---|---|
| Azuria (Chapter 1) | |
 Honed Glavenus |
 Invasive Yian Garuga Invasive Yian Garuga |
 Dual Feral Velocidromes |
 Feral Gypceros Feral Gypceros |
 Magnamalo |
- | Cataracts (Chapter 2) |
 Feral Great Izuchi Feral Great Izuchi
|
 Invasive Arzuros Invasive Arzuros |
 Feral Somnacanth |
 Feral Aknosom |
Yama Tsukami |
- |
| Galyad (Chapter 3) | |
 Feral Ajarakan |
 Feral Rakna-Kadaki |
 Rey Dau Rey Dau |
- |
| Seranthis (Chapter 4) | |
 Feral Blangonga |
 Goss Harag Goss Harag |
Malzeno |
 Arkveld |
 Bound Azure Rathalos |
 Bound Lunagaron |
 Aenshin Aenshin |
|
Invasive Monster Bosses
| All Invasive Monster Bosses | |
|---|---|
| Invasive Yian Garuga |
 Invasive Seregios Invasive Seregios |
 Invasive Plesioth Invasive Plesioth |
Invasive Arzuros |
 Invasive Nerscylla Invasive Nerscylla |
 Invasive Shogun Ceanataur Invasive Shogun Ceanataur |
 Invasive Diablos Invasive Diablos |
 Invasive Odogaron Invasive Odogaron |
 Invasive Khezu Invasive Khezu |
- |
Feral Monster Bosses
| List of All Feral Monsters | |
|---|---|
 Feral Nerscylla Feral Nerscylla |
 Feral Brachydios Feral Brachydios |
 Feral Tobi-Kadachi Feral Tobi-Kadachi |
 Feral Glavenus Feral Glavenus |
 Feral Bishaten Feral Bishaten |
 Feral Espinas Feral Espinas |
 Feral Paolumu Feral Paolumu |
- |
Elder Dragon Bosses
| List of All Elder Dragon Bosses | |
|---|---|
 Namielle |
  |
| Yama Tsukami (Green) |
 Velkhana Velkhana |
| Aenshin |
- |
Exotic Monster Bosses
| List of All Exotic Monster Bosses | |
|---|---|
 Exotic Seregios |
 Exotic Velocidrome Exotic Velocidrome |
Optional Bosses
| List of All Optional Bosses | |
|---|---|
 Espinas Espinas
|
- |
Comment
Author

Monster Hunter Stories 3: Twisted Reflection Walkthrough & Guides Wiki
Yama Tsukami (Green) Weaknesses, Patterns, and How to Beat
Rankings
- We could not find the message board you were looking for.
Gaming News

![Death Stranding 2: On The Beach [PC] Review | A Port That Delivers](https://img.game8.co/4447392/15310a0c9aa1b6843bb713b2ea216930.jpeg/show)


Popular Games

Genshin Impact Walkthrough & Guides Wiki
Umamusume: Pretty Derby Walkthrough & Guides Wiki
Crimson Desert Walkthrough & Guides Wiki
Monster Hunter Stories 3: Twisted Reflection Walkthrough & Guides Wiki
Honkai: Star Rail Walkthrough & Guides Wiki
Pokemon Pokopia Walkthrough & Guides Wiki
The Seven Deadly Sins: Origin Walkthrough & Guides Wiki
Wuthering Waves Walkthrough & Guides Wiki
Zenless Zone Zero Walkthrough & Guides Wiki
Arknights: Endfield Walkthrough & Guides Wiki


Recommended Games
Fire Emblem Heroes (FEH) Walkthrough & Guides Wiki
Diablo 4: Vessel of Hatred Walkthrough & Guides Wiki
Cyberpunk 2077: Ultimate Edition Walkthrough & Guides Wiki
Yu-Gi-Oh! Master Duel Walkthrough & Guides Wiki
Super Smash Bros. Ultimate Walkthrough & Guides Wiki
Pokemon Brilliant Diamond and Shining Pearl (BDSP) Walkthrough & Guides Wiki
Elden Ring Shadow of the Erdtree Walkthrough & Guides Wiki
Monster Hunter World Walkthrough & Guides Wiki
The Legend of Zelda: Tears of the Kingdom Walkthrough & Guides Wiki
Persona 3 Reload Walkthrough & Guides Wiki


All rights reserved
©CAPCOM CO., LTD, and CAPCOM CO. logos are trademarks or registered trademarks of CAPCOM. All rights reserved.
The copyrights of videos of games used in our content and other intellectual property rights belong to the provider of the game.
The contents we provide on this site were created personally by members of the Game8 editorial department.
We refuse the right to reuse or repost content taken without our permission such as data or images to other sites.