Namielle Weaknesses, Patterns, and How to Beat
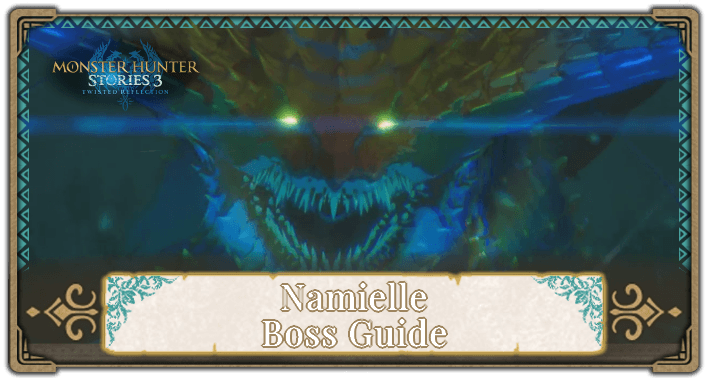
This is a guide to the Namielle Boss Fight in Monster Hunter Stories 3 (MHS3). Learn how to beat Namielle its weaknesses, behaviour and attack pattern, and the best strategy to beat Namielle.
| Namielle Pages | |
|---|---|
| Boss Guide | Monstie |
List of Contents
Namielle Boss Weaknesses and Resistances
Namielle Weakness
| - | ↓↓ | ↑↑ | |||
| ↑ | ↓ | ↓ |
Namielle Damage Type Weaknesses
| Body Part | |||
|---|---|---|---|
| Main Body | ◯ | ◯ | ◯ |
| Head | ✕ | ✕ | ◯ |
| Wings | ✕ | ◯ | ✕ |
| Tail | ◯ | ✕ | ✕ |
Status Ailment Resistance and Weaknesses
| ↓↓ | ↓ | ↑ | ↑ | ||||||||
| ↓ | ↑ | ↓ | |||||||||
Namielle Pattern and Behaviour
 Attention! Attention! |
We are currently rushing out guides as quickly as possible. More details will be added here soon! |
|---|
 under the page's title to be notified of any updates!
| Health Threshold | |
|---|---|
| Above 50% | Below 50% |
Attack Behaviour Above 50% HP
| Water Mantle | |
|---|---|
| Abyssal Charge | |
| Water Depleted |
Namielle have 3 phases which are its water mantle, abyssal charge and water depleted.
Water Mantle
| Turn Count | Move |
|---|---|
| Turn 1 | Glimmer Strike (only uses this at the start of the battle) Either Nami Shot or |
| Turn 2 | Either Nami Shot or |
| Turn 3 | Nami Shot (only uses this at the start of the battle) Either Nami Shot or Transitions to Abyssal Charge state at the end of the turn |
| Turn 4 (only goes to this turn at the start of the battle) | Nami Shot Transitions to Abyssal Charge state at the end of the turn |
Namielle starts at the Water Mantle state, visually it has a bit of a glow and its attacks are water element. During the first 4 turns of the battle it has a different moveset but after switching around to other states then going back to Water Mantle, it will reduce its moveset down to only 3 turns and with a different skillset too. Make sure you have a Power attack to counter its Technical attacks.
It will always transition to the Abyssal Charge state at the end of the turn on turn 4 or turn 3 after going back to the Water Mantle state.
Abyssal Charge
| Turn Count | Move |
|---|---|
| Turn 1 | Glimmer Strike |
| Turn 2-4 Namielle might repeat the same move for 1 or 2 turns |
Either Nami Shot or |
| Turn 3, 4 or 5 | Nami Torrent |
| Turn 4, 5 or 6 | Nami Blast |
In this state, Namielle intensely glow while all of its attacks are now thunder element. It will start with a Glimmer Strike again but you can interrupt it with a stagger, paralysis, stun, kinship skill, riding or surrogate gem. Make sure that you are ready to use all of these options especially the two consecutive AoE attacks.
Water Depleted
| Turn Count | Move |
|---|---|
| Turn 1-4 | Either Nami Shot or |
In this state, Namielle loses all of its glow and will only do Head-to-Head or a single-target skill. This is the best time to setup buffs, inflict status ailments or charge-up kinship. Make sure to fully utilize this 4 turns you are given.
Attack Behaviour Below 50% HP
| This section is under construction. Check back again for updates! |
Recommended Monsties for Namielle
 Purple Gypceros Purple Gypceros
|
The earliest recommended monstie we can suggest is Purple Gypceros. It has all the property you need such as the ability to stun with Tail Stun and a high Wyvernfell stat. If you are farther in the game you can select other monsties with a much higher Wyvernfell stat and transfer genes to it that will help you deal more Wyvernfell damage and higher chances to inflict status ailments.
List of All Monsties (Monster List)
How to Beat Namielle
|
|
Equip a Hammer and Use Brachydios Armor
Even at high levels, Namielle's HP is quite large and while dealing damage will shorten the length of the fight, you will have a hard time countering Namielle's attacks. It is highy advised to use weapons with high wyvernfell stats such as a Hammer like Venom Monster so that you can stagger and topple it consistently. Also, use a Bow that can inflict Blastblight to take advatange of its huge HP pool once it detonates after inflicting it.
As for the recommended armor, use Brachydios Armor using materials after you defeat a Brachydios. The special property of this armor is the ability to increase the damage of Blastblight you inflict and a one-time buff to survive a fatal hit.
Choose Ogden or Eleanor with a Hammer as Your Battle Ally
At this point of the game, you can use Ogden or Eleanor equipped with a Hammer to help you reduce the wyvernsoul gauge of Namielle. However, you need to complete the Chapter 2 side stories of Ogden and Eleanor so you can unlock their secondary weapon.
Stock Vital Essences and Surrogate Gem
Healing is mostly useless in this fight as the boss is capable of reducing your health down to 0 instantly even with high-end equipment. Make sure to get Vital Essences to restore hearts and Surrogate Gem to gain a Critical Eye buff which lets you avoid all damage for one turn from Melynx Emporium. This will let you fix mistakes you do during the fight.
Apply Blashblight and Poison as Much as Possible
The only reliable way to deal damage without wasting numerous turns is to apply status ailments such as Poison or Blastblight which deals damage based on the percentage of the enemy's max health.
Aim to Use Kinship When It Is About to Use Glimmer Strike
The only AoE attack you can interrupt is Glimmer Strike. Nami Torrent and Nami Blast will only prolong it, meaning that if it gets interrupted it will still use it the next turn. Save your Kinship or any skills that can interrupt it so that you can prevent Namielle from casting it.
Every 1/4th Health Reduced Above 50% HP Is a Checkpoint
A unique thing with Elder Dragon fights is the ability to repel the boss if you are able to reduce a specific amount of health and then dying. You can then redo the fight and the enemy will have reduced health when you start the battle again.
Recommended Level Is at Least 75
Namielle is level 75 from the start until the end of the game. If you want to be at equal footing against it, make sure to fight it when you are level 75 or above so that you can deal significant damage to it and with enough preparation survive its onslaught of attacks.
How to Spawn Namielle
Fight Enemies In Azuria During the Night
You can spawn Namielle in the Mirror Lake in Azuria after you defeat enemies during night time. You can access night time after completing the main story, Endangered Species.
Namielle Rewards
Namielle Hide After Repelling or Losing the Fight
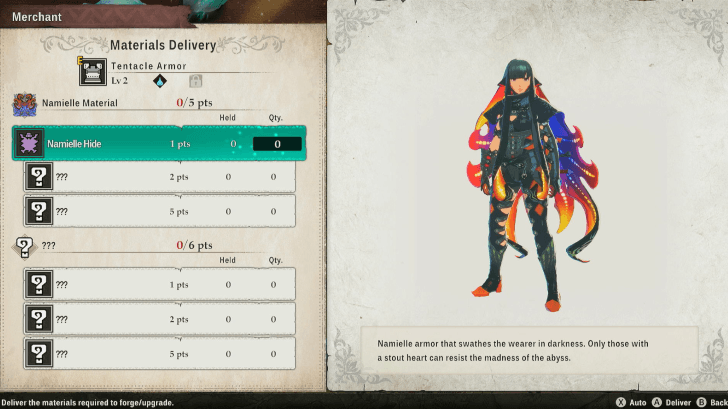
Even if you only repel or lose the fight against Namielle, you will still get exactly 1 Namielle Hide that you can use to craft its armor, Tentacle Armor.
Slaying Namielle Rewards
| This section is under construction. Check back again for updates! |
Monster Hunter Stories 3 (MHS3) Related Guides
Main Mission Bosses
| All Main Mission Bosses | |
|---|---|
| Azuria (Chapter 1) | |
 Honed Glavenus |
 Invasive Yian Garuga Invasive Yian Garuga |
 Dual Feral Velocidromes |
 Feral Gypceros Feral Gypceros |
 Magnamalo |
- | Cataracts (Chapter 2) |
 Feral Great Izuchi Feral Great Izuchi
|
 Invasive Arzuros Invasive Arzuros |
 Feral Somnacanth |
 Feral Aknosom |
 Yama Tsukami |
- |
| Galyad (Chapter 3) | |
 Feral Ajarakan |
 Feral Rakna-Kadaki |
 Rey Dau Rey Dau |
- |
| Seranthis (Chapter 4) | |
 Feral Blangonga |
 Goss Harag Goss Harag |
 Malzeno |
 Arkveld |
 Bound Azure Rathalos |
 Bound Lunagaron |
 Aenshin Aenshin |
|
Invasive Monster Bosses
| All Invasive Monster Bosses | |
|---|---|
| Invasive Yian Garuga |
 Invasive Seregios Invasive Seregios |
 Invasive Plesioth Invasive Plesioth |
Invasive Arzuros |
 Invasive Nerscylla Invasive Nerscylla |
 Invasive Shogun Ceanataur Invasive Shogun Ceanataur |
 Invasive Diablos Invasive Diablos |
 Invasive Odogaron Invasive Odogaron |
 Invasive Khezu Invasive Khezu |
- |
Feral Monster Bosses
| List of All Feral Monsters | |
|---|---|
 Feral Nerscylla Feral Nerscylla |
 Feral Brachydios Feral Brachydios |
 Feral Tobi-Kadachi Feral Tobi-Kadachi |
 Feral Glavenus Feral Glavenus |
 Feral Bishaten Feral Bishaten |
 Feral Espinas Feral Espinas |
 Feral Paolumu Feral Paolumu |
- |
Elder Dragon Bosses
| List of All Elder Dragon Bosses | |
|---|---|
 Namielle |
  |
 Yama Tsukami (Green) Yama Tsukami (Green) |
 Velkhana Velkhana |
| Aenshin |
- |
Exotic Monster Bosses
| List of All Exotic Monster Bosses | |
|---|---|
 Exotic Seregios |
 Exotic Velocidrome Exotic Velocidrome |
Optional Bosses
| List of All Optional Bosses | |
|---|---|
 Espinas Espinas
|
- |
Comment
Author

Monster Hunter Stories 3: Twisted Reflection Walkthrough & Guides Wiki
Namielle Weaknesses, Patterns, and How to Beat
Rankings
- We could not find the message board you were looking for.
Gaming News


Popular Games

Genshin Impact Walkthrough & Guides Wiki
Umamusume: Pretty Derby Walkthrough & Guides Wiki
Crimson Desert Walkthrough & Guides Wiki
Monster Hunter Stories 3: Twisted Reflection Walkthrough & Guides Wiki
Honkai: Star Rail Walkthrough & Guides Wiki
Pokemon Pokopia Walkthrough & Guides Wiki
The Seven Deadly Sins: Origin Walkthrough & Guides Wiki
Wuthering Waves Walkthrough & Guides Wiki
Zenless Zone Zero Walkthrough & Guides Wiki
Arknights: Endfield Walkthrough & Guides Wiki


Recommended Games
Fire Emblem Heroes (FEH) Walkthrough & Guides Wiki
Diablo 4: Vessel of Hatred Walkthrough & Guides Wiki
Cyberpunk 2077: Ultimate Edition Walkthrough & Guides Wiki
Yu-Gi-Oh! Master Duel Walkthrough & Guides Wiki
Super Smash Bros. Ultimate Walkthrough & Guides Wiki
Pokemon Brilliant Diamond and Shining Pearl (BDSP) Walkthrough & Guides Wiki
Elden Ring Shadow of the Erdtree Walkthrough & Guides Wiki
Monster Hunter World Walkthrough & Guides Wiki
The Legend of Zelda: Tears of the Kingdom Walkthrough & Guides Wiki
Persona 3 Reload Walkthrough & Guides Wiki


All rights reserved
©CAPCOM CO., LTD, and CAPCOM CO. logos are trademarks or registered trademarks of CAPCOM. All rights reserved.
The copyrights of videos of games used in our content and other intellectual property rights belong to the provider of the game.
The contents we provide on this site were created personally by members of the Game8 editorial department.
We refuse the right to reuse or repost content taken without our permission such as data or images to other sites.