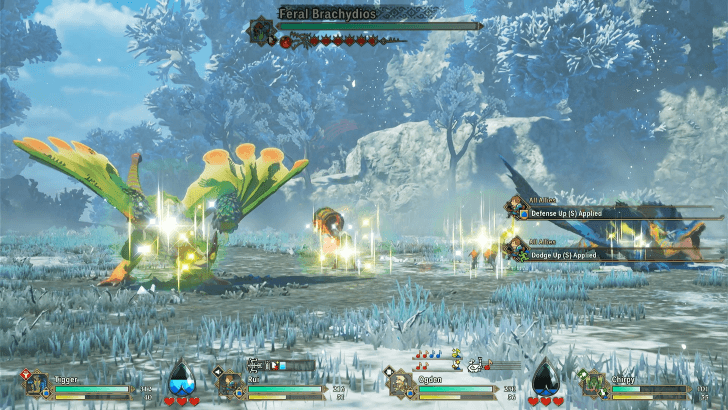
Feral Brachydios Weaknesses, Patterns, and How to Beat
This is a guide to the Feral Brachydios Boss Fight in Monster Hunter Stories 3 (MHS3). Learn how to beat the Feral Brachydios, its weaknesses, behaviour and attack pattern, and the best strategy to beat the Feral Brachydios.
List of Contents
Feral Brachydios Boss Weaknesses and Resistances
Feral Brachydios Weakness
| - | ↑ | ↓ | |||
| ↓↓ | - | ↑↑ |
Feral Brachydios Damage Type Weaknesses
| Body Part | |||
|---|---|---|---|
| Main Body | ◯ | ◯ | ◯ |
| Head (Slime) | ✕ | ✕ | ◯ |
| Forelegs (Slime) | ✕ | ◯ | ✕ |
| Tail | ◯ | ✕ | ✕ |
Status Ailment Resistance and Weaknesses
| ↓ | ↓ | ↑ | ↑ | ||||||||
| ↑↑ | ↑ | ↓ | |||||||||
Feral Brachydios Pattern and Behaviour
| Jump to a Section |
|---|
|
2. Normal State |
Attack Behavior
| Normal State | |
|---|---|
| Slime Active State | |
| Slime Depleted State |
The Feral Brachydios has 3 states which are its Normal, Slime Active and Slime Depleted state.
Normal State
| Turn Count | Move |
|---|---|
| Turn 1 | Power Attack |
| Turn 2 | Incendiary Bomb |
This will be the starting state of the Feral Brachydios. It will launch a Power Attack and the skill Incendiary Bomb. This skill on the second turn will be a very strong AoE attack but players can try to stop it by using a Shock Trap.
Slime Active State
| Turn Count | Move |
|---|---|
| Turn 1 From the Normal State |
Speed Attack |
| Turn 2 | Bomb Crash |
| Turn 3 | Feral Dragonfist or Weak Feral Dragonfist (Speed Type) |
| Turn 4 | Bomb Crash (Strong AoE) |
| Turn 5 From Normal State |
Feral Dragon Feller or Weak Feral Dragon Feller |
| Turn 6 When Weakened |
Slime Stomp (Speed Type) |
During this state, the Feral Brachydios will launch Speed type attacks and strong AoE attacks like Feral Dragon Feller. It is recommended to skip Bomb Crash turns if the Blightstone is destroyed.
During the latter part of the battle it will launch weaker versions of its attacks. However, these will still be quite strong so do not let your guard down when sustaining your team.
Slime Depleted State
This state will only activate if players break the head of the Feral Brachydios. It will be knocked down and it will only launch a Power Attack in 2 turns. This makes a great opening for attacking the Monster.
Recommended Monsties for the Feral Brachydios
 Purple Gypceros Purple Gypceros
|
 Dreadqueen Rathian Dreadqueen Rathian
|
The Purple Gypceros is extremely helpful during the fight as it can learn Flash which can apply Darkness. Similarly, Monsties with the move Tail Stun can help the Feral Brachydios turn skip.
The Dreadqueen Rathian is another good option to have during the fight as it can apply poison and helps counter the Feral Brachydios' head to head Power attacks. Keep in mind however that you still need a Technical Monster to counter its head to head Speed attacks when it changes forms.
How to Beat the Feral Brachydios
| Jump to a Section |
|---|
|
|
Level Up to at Least Level 40
The Feral Brachydios will be at Level 44 when you fight it so level up yourself and your party to be at least Level 40. It is doable to do it at around Level 35 but it will be difficult.
Use Skills and Passives to Help Fill the Kinship Gauge
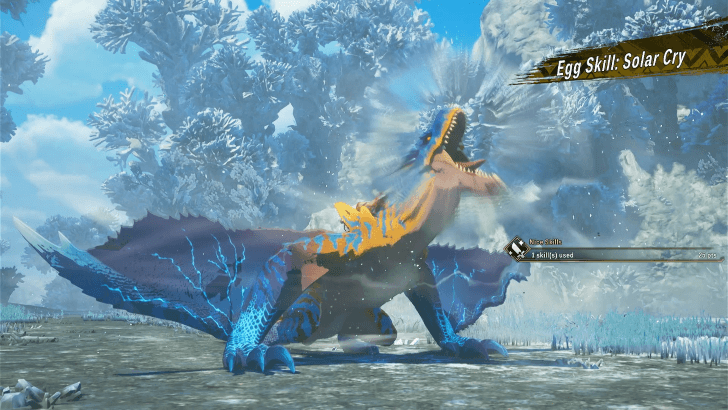
Skills such as Solar Cry or passives like Soul Kinship help fill your Kinship gauge faster. These are extremely helpful in battle as it allows for players to reliably use the Kinship Gauge to skip the Feral Brachydios' turn.
The fight against the Feral Brachydios itself is not a damage check but a battle of attrition, with players being able to beat it as long as they avoid the powerful AoE attacks. Make sure to save and time the use of the Kinship Gauge to only be during its strong attacks.
Equip Lagiacrus Armor
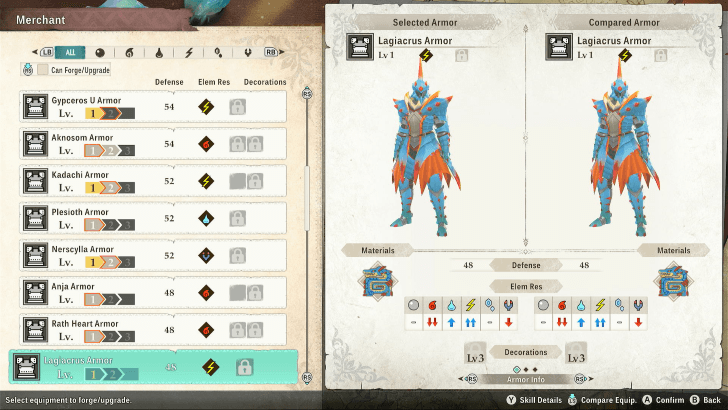
The Lagiacrus Armor is the perfect armor to equip during the fight as it helps boosts Thunder attacks, which is a weakness of Feral Brachydios, helps fill the Kinship gauge faster and boosts Kinship damage.
Use a Bow with Accuracy Down Coating
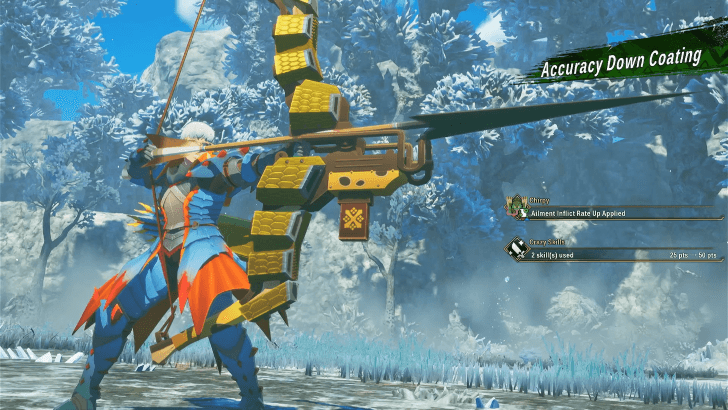
When choosing a weapon, consider equipping a bow with the move Accuracy Down Coating. This is immensely helpful as it increases the chance of fully negating Feral Brachydios' strong attacks
Invite Ogden as a Battle Ally
Ogden makes an excellent choice for this battle as he is able to both heal the party and employ the use of Traps and Poison (through his Monstie companion Chirpy).
Poison can help keep the damage going even when the player is healing themselves and traps help prevent the Feral Brachydios from acting during their turn.
All Characters and Companions
Finish Ogden's Side Story 2
In addition to selecting Ogden as your companion for the fight, we recommend finishing his side story quest 2 as it unlocks a strong skill of his partner Monster Chirpy, Fruit Frenzy.
Ready Strong Sustain Items and the Magia Charm
Because the Feral Brachydios will unleash strong attacks, players should take caution and stock up on Vital Essence to help keep the hearts from falling to zero.
On top of this, the Magia Charm is a good weapon to keep in mind for healing and buffs. Even with Ogden, this allows players to deliberately heal during needed turns.
Stock Up on Traps and Bombs
Make sure to stock up on Shock Traps and Flash Bombs as they can be used to delay the Feral Brachydios' attacks. Particularly, the Shock Trap skips the AoE attack on the second turn, helping players avoid receiving large damage early on.
Avoid Attacking the Forelegs
Avoid attacking the Forelegs of the Feral Brachydios during the Slime Active state as this will cause a strong backlash attack. Players can attack this part without causing a backlash during the other two states, Normal and Slime Depleted.
How to Fight Feral Brachydios
Head to the North Clearing in Azuria
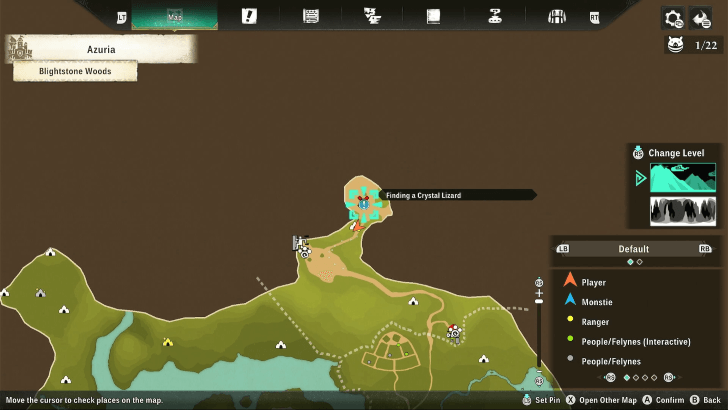
After unlocking the function to fight Feral Monsters in Azuria during the The Princess of Vermeil Main Quest, the Feral Brachydios will appear in the clearing to the North East.
Azuria Map and Exploration Guide
Monster Hunter Stories 3 (MHS 3) Related Guides
Main Mission Bosses
| All Main Mission Bosses | |
|---|---|
| Azuria (Chapter 1) | |
 Honed Glavenus |
 Invasive Yian Garuga Invasive Yian Garuga |
 Dual Feral Velocidromes |
 Feral Gypceros Feral Gypceros |
 Magnamalo |
- | Cataracts (Chapter 2) |
 Feral Great Izuchi Feral Great Izuchi
|
 Invasive Arzuros Invasive Arzuros |
 Feral Somnacanth |
 Feral Aknosom |
 Yama Tsukami |
- |
| Galyad (Chapter 3) | |
 Feral Ajarakan |
 Feral Rakna-Kadaki |
 Rey Dau Rey Dau |
- |
| Seranthis (Chapter 4) | |
 Feral Blangonga |
 Goss Harag Goss Harag |
 Malzeno |
 Arkveld |
 Bound Azure Rathalos |
 Bound Lunagaron |
 Aenshin Aenshin |
|
Invasive Monster Bosses
| All Invasive Monster Bosses | |
|---|---|
| Invasive Yian Garuga |
 Invasive Seregios Invasive Seregios |
 Invasive Plesioth Invasive Plesioth |
Invasive Arzuros |
 Invasive Nerscylla Invasive Nerscylla |
 Invasive Shogun Ceanataur Invasive Shogun Ceanataur |
 Invasive Diablos Invasive Diablos |
 Invasive Odogaron Invasive Odogaron |
 Invasive Khezu Invasive Khezu |
- |
Feral Monster Bosses
| List of All Feral Monsters | |
|---|---|
 Feral Nerscylla Feral Nerscylla |
 Feral Brachydios Feral Brachydios |
 Feral Tobi-Kadachi Feral Tobi-Kadachi |
 Feral Glavenus Feral Glavenus |
 Feral Bishaten Feral Bishaten |
 Feral Espinas Feral Espinas |
 Feral Paolumu Feral Paolumu |
- |
Elder Dragon Bosses
| List of All Elder Dragon Bosses | |
|---|---|
 Namielle |
  |
 Yama Tsukami (Green) Yama Tsukami (Green) |
 Velkhana Velkhana |
| Aenshin |
- |
Exotic Monster Bosses
| List of All Exotic Monster Bosses | |
|---|---|
 Exotic Seregios |
 Exotic Velocidrome Exotic Velocidrome |
Optional Bosses
| List of All Optional Bosses | |
|---|---|
 Espinas Espinas
|
- |
Comment
Author

Monster Hunter Stories 3: Twisted Reflection Walkthrough & Guides Wiki
Feral Brachydios Weaknesses, Patterns, and How to Beat
Rankings
- We could not find the message board you were looking for.
Gaming News


Popular Games

Genshin Impact Walkthrough & Guides Wiki
Umamusume: Pretty Derby Walkthrough & Guides Wiki
Crimson Desert Walkthrough & Guides Wiki
Monster Hunter Stories 3: Twisted Reflection Walkthrough & Guides Wiki
Honkai: Star Rail Walkthrough & Guides Wiki
Pokemon Pokopia Walkthrough & Guides Wiki
The Seven Deadly Sins: Origin Walkthrough & Guides Wiki
Wuthering Waves Walkthrough & Guides Wiki
Zenless Zone Zero Walkthrough & Guides Wiki
Arknights: Endfield Walkthrough & Guides Wiki


Recommended Games
Fire Emblem Heroes (FEH) Walkthrough & Guides Wiki
Diablo 4: Vessel of Hatred Walkthrough & Guides Wiki
Cyberpunk 2077: Ultimate Edition Walkthrough & Guides Wiki
Yu-Gi-Oh! Master Duel Walkthrough & Guides Wiki
Super Smash Bros. Ultimate Walkthrough & Guides Wiki
Pokemon Brilliant Diamond and Shining Pearl (BDSP) Walkthrough & Guides Wiki
Elden Ring Shadow of the Erdtree Walkthrough & Guides Wiki
Monster Hunter World Walkthrough & Guides Wiki
The Legend of Zelda: Tears of the Kingdom Walkthrough & Guides Wiki
Persona 3 Reload Walkthrough & Guides Wiki


All rights reserved
©CAPCOM CO., LTD, and CAPCOM CO. logos are trademarks or registered trademarks of CAPCOM. All rights reserved.
The copyrights of videos of games used in our content and other intellectual property rights belong to the provider of the game.
The contents we provide on this site were created personally by members of the Game8 editorial department.
We refuse the right to reuse or repost content taken without our permission such as data or images to other sites.