List of All Gunlances

This is a list of all Gunlances in Monster Hunter Stories 3. Learn about the Gunlance's mechanics, strengths, weaknesses, and how to use this Pierce-type weapon to deal explosive damage while maintaining strong defense.
List of Contents
 Attention! Attention! |
We are currently rushing out guides as quickly as possible. More details will be added here soon! |
|---|
 under the page's title to be notified of any updates!
List of All Gunlances
| Weapon | Element | Max Deco | Skills | How To Unlock |
|---|---|---|---|---|
| Iron Gunlance |
|
2 |
・ Shelling
Shelling Consumes 2 shells to damage one enemy with the weapon element, then grants Guard to the user. ・ Wyvern's Fire
Wyvern's Fire Deals damage to one enemy with the weapon element at the end of turn. Guaranteed to hit. Greatly reduces defense while preparing. The user is then inflicted with Overheat for 5 turns. ・ Guard Chance (S)
Guard Chance (S) Recovers a slight amount of HP after guarding. ・ Guard Reload
Guard Reload Loads 2 shells and grants Guard to the user. ・ Taunt
Taunt Makes enemies focus their attacks on the user. |
・Available as a starting weapon in the early story |
| Fiore Nulo Red |
|
2 |
・ Shelling
Shelling Consumes 2 shells to damage one enemy with the weapon element, then grants Guard to the user. ・ Quick Reload
Quick Reload Loads 3 shells. ・ Audacious Wyvern (S)
Audacious Wyvern (S) Slightly increases damage dealt when using Wyvern's Fire or Wyvern's Blaze, but also increases damage taken. ・ Wyvern's Blaze (TLNT)
Wyvern's Blaze (TLNT) Deals damage to all enemies with the weapon element at the end of turn. Guaranteed to hit. Greatly reduces defense while preparing. The user is then inflicted with Overheat for 10 turns. |
TBD
|
| Pukei Gunlance |
|
1 |
TBD
|
TBD
|
| Shell Gunbird |
|
2 |
・ Tactical Reload
Tactical Reload Deals damage to one enemy with the weapon element while loading 2 shells. Winning a Head-to-Head negates any damage taken. ・ Wyvern's Fire
Wyvern's Fire Deals damage to one enemy with the weapon element at the end of turn. Guaranteed to hit. Greatly reduces defense while preparing. The user is then inflicted with Overheat for 5 turns. ・ Guard Chance (S)
Guard Chance (S) Recovers a slight amount of HP after guarding. ・ Charged Shelling (SKL)
Charged Shelling (SKL) Consumes 5 shells to damage one enemy with the weapon element, then grants Guard to the user. |
TBD
|
| Ludroth Harpoon |
|
1 |
・ Guard Reload
Guard Reload Loads 2 shells and grants Guard to the user. ・ Burst Fire (HVY)
Burst Fire (HVY) Consumes 8 shells to damage one enemy with the weapon element, then grants Guard to the user. ・ Gunlance Mastery (S)
Gunlance Mastery (S) Slight chance to load 2 extra shells when loading. ・ Wyvern's Fire (HVY)
Wyvern's Fire (HVY) Deals damage to one enemy with the weapon element at the end of turn. Guaranteed to hit. Greatly reduces defense while preparing. The user is then inflicted with Overheat for 5 turns. ・ Shelling (BLNT)
Shelling (BLNT) Consumes 2 shells to damage one enemy with the weapon element, then grants Guard to the user. |
TBD
|
| Princess Panoply |
|
1 |
・ Shelling
Shelling Consumes 2 shells to damage one enemy with the weapon element, then grants Guard to the user. ・ Wyvern's Fire
Wyvern's Fire Deals damage to one enemy with the weapon element at the end of turn. Guaranteed to hit. Greatly reduces defense while preparing. The user is then inflicted with Overheat for 5 turns. ・ Guard Chance (S)
Guard Chance (S) Recovers a slight amount of HP after guarding. ・ Quick Reload
Quick Reload Loads 3 shells. ・ Single Combat
Single Combat Draws all type attacks from the target enemym then initiates a Head-to-Head. Winning a Head-to-Head redcovers the user's Stamina. ・ Burst Fire
Burst Fire Consumes 8 shells to damage one enemy with the weapon element, then grants Guard to the user. |
TBD
|
| Hard Hitter |
|
1 |
・ Wyvern's Fire
Wyvern's Fire Deals damage to one enemy with the weapon element at the end of turn. Guaranteed to hit. Greatly reduces defense while preparing. The user is then inflicted with Overheat for 5 turns. ・ Guard Reload
Guard Reload Loads 2 shells and grants Guard to the user. ・ Taunt
Taunt Makes enemies focus their attacks on the user. ・ Gunlance Mastery (S)
Gunlance Mastery (S) Slight chance to load 2 extra shells when loading. ・ Charged Shelling
Charged Shelling Consumes 5 shells to damage one enemy with the weapon element, then grants Guard to the user. |
TBD
|
| Ajara Gunpike |
|
1 |
TBD
|
TBD
|
| Fiore Nulo Black |
|
3 |
TBD
|
TBD
|
| Diore Gunlance |
|
2 |
TBD
|
TBD
|
| Almudron Gunlance |
|
2 |
TBD
|
TBD
|
| Fiore Nulo Green |
|
3 |
TBD
|
TBD
|
| Barroth Loader |
|
1 |
TBD
|
TBD
|
| Type 62 Stormlance |
|
2 |
TBD
|
TBD
|
| Aknosom Gunlance |
|
2 |
TBD
|
TBD
|
| Lagia Burst |
|
2 |
TBD
|
TBD
|
| Hellsting |
|
1 |
TBD
|
TBD
|
| Kadachi Striker |
|
1 |
TBD
|
TBD
|
❖ Select a weapon to see more details.
Gunlance Mechanics Explained
Pierce Weapon That Uses Shelling Attacks and Defensive Guard Buffs
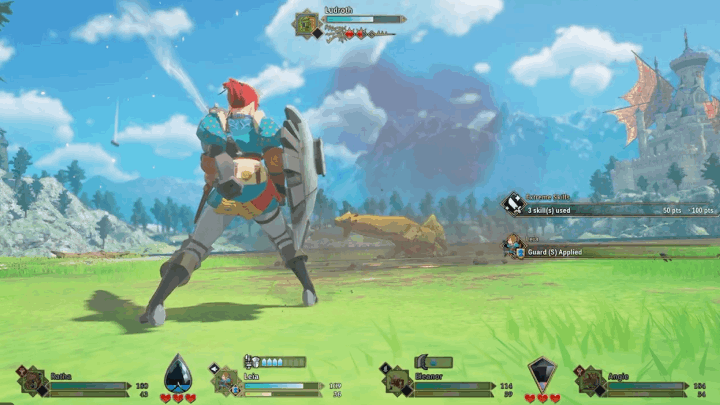
The Gunlance is a Pierce-type weapon that combines explosive offense with strong defensive capabilities. Its core mechanic revolves around Shelling attacks, which consume shell ammo to deal additional explosive damage.
The Gunlance uses an ammo gauge to perform Shelling attacks. Winning Head-to-Head encounters helps replenish this gauge, allowing Riders to continue using Shelling skills during longer battles.
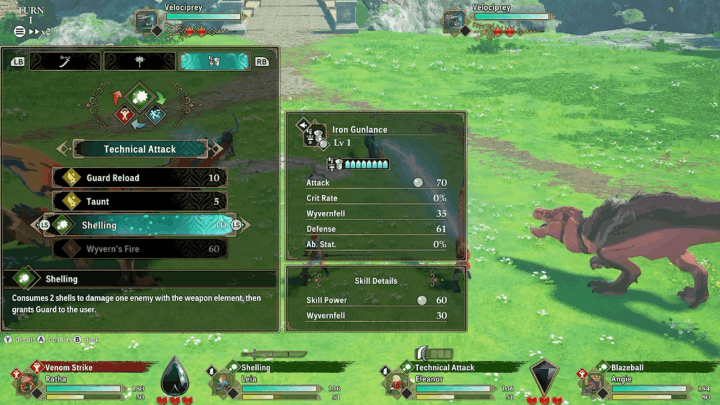
Wyvern Fire and Shelling Skills
The Gunlance’s strongest ability is Wyvern Fire, a powerful explosive attack that deals heavy damage but has a cooldown before it can be used again.
Gunlance users can also choose between different Shelling options depending on their situation.
| Shelling Type | Description |
|---|---|
| Shelling | Basic shell attack that consumes ammo. |
| Charged Shelling | Consumes more stamina and shells to deal higher damage. |
| Burst Fire | Consumes all shells to unleash a powerful burst attack. |
Many Shelling skills grant Guard buffs, allowing Riders to reduce damage taken while continuing to attack.
Gunlance Strengths
| Gunlance Strengths |
|---|
|
|
Strong Defensive Capabilities
The Gunlance provides strong defensive utility through its Guard buffs, which reduce incoming damage when using Shelling skills.
This makes the weapon particularly effective against powerful monsters that deal heavy damage.
High Burst Damage with Wyvern Fire
The Gunlance’s Wyvern Fire skill deals massive explosive damage to enemies.
While the skill has a cooldown and requires proper timing, it can significantly increase your damage output during longer encounters.
Shelling Attacks Provide Guard Buffs
Many Gunlance skills grant Guard effects when used. These buffs reduce damage taken from enemy attacks, allowing Riders to maintain offense while protecting themselves.
Because of this mechanic, Gunlance users can safely attack even during dangerous turns.
Reliable Pierce Damage
As a Pierce-type weapon, the Gunlance is effective at damaging monster parts that are weak to piercing attacks.
This makes it useful for targeting specific monster parts that are resistant to Slash or Blunt damage types.
Gunlance Weaknesses
| Gunlance Weaknesses |
|---|
|
|
Shelling Requires Ammo Management
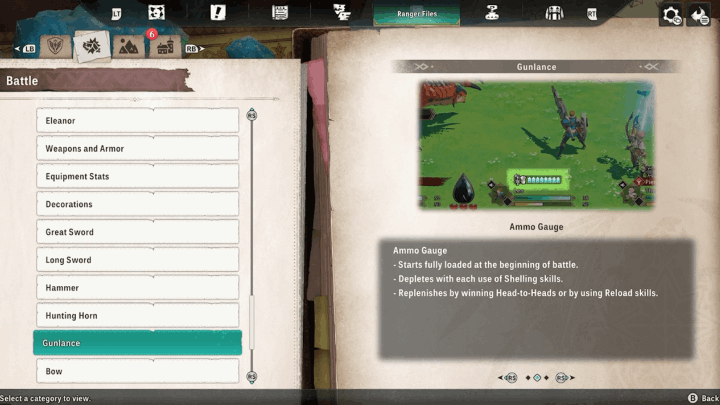
Shelling skills consume shells from the ammo gauge, meaning Riders must carefully manage their ammo during battle.
Winning Head-to-Head encounters helps replenish the gauge, allowing you to continue using Shelling attacks.
Wyvern Fire Has a Cooldown
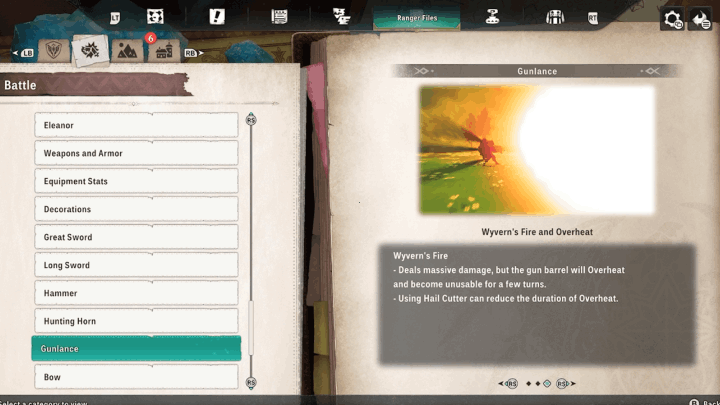
Although Wyvern Fire deals extremely high damage, it cannot be used repeatedly because it has a cooldown.
Players must time their usage carefully to maximize its effectiveness during combat.
Monster Hunter Stories 3 (MHS3) Related Guides
Weapons by Type
| Slash | Blunt | Pierce |
|---|---|---|
 Great Swords Great Swords |
 Hammers Hammers |
 Bows Bows |
 Long Swords Long Swords |
Hunting Horns |
 Gunlances Gunlances |
Weapon Guides
| Best Weapons |
Comment
Author

Monster Hunter Stories 3: Twisted Reflection Walkthrough & Guides Wiki
List of All Gunlances
Rankings
- We could not find the message board you were looking for.
Gaming News

![Star Savior Review [First Impressions] | Engaging, Entertaining, and Expensive](https://img.game8.co/4447603/8f500e9bf666bdb8adb1af478e9dfdbd.png/show)


Popular Games

Genshin Impact Walkthrough & Guides Wiki
Umamusume: Pretty Derby Walkthrough & Guides Wiki
Crimson Desert Walkthrough & Guides Wiki
Monster Hunter Stories 3: Twisted Reflection Walkthrough & Guides Wiki
Honkai: Star Rail Walkthrough & Guides Wiki
Pokemon Pokopia Walkthrough & Guides Wiki
The Seven Deadly Sins: Origin Walkthrough & Guides Wiki
Wuthering Waves Walkthrough & Guides Wiki
Zenless Zone Zero Walkthrough & Guides Wiki
Arknights: Endfield Walkthrough & Guides Wiki


Recommended Games
Fire Emblem Heroes (FEH) Walkthrough & Guides Wiki
Diablo 4: Vessel of Hatred Walkthrough & Guides Wiki
Cyberpunk 2077: Ultimate Edition Walkthrough & Guides Wiki
Yu-Gi-Oh! Master Duel Walkthrough & Guides Wiki
Super Smash Bros. Ultimate Walkthrough & Guides Wiki
Pokemon Brilliant Diamond and Shining Pearl (BDSP) Walkthrough & Guides Wiki
Elden Ring Shadow of the Erdtree Walkthrough & Guides Wiki
Monster Hunter World Walkthrough & Guides Wiki
The Legend of Zelda: Tears of the Kingdom Walkthrough & Guides Wiki
Persona 3 Reload Walkthrough & Guides Wiki


All rights reserved
©CAPCOM CO., LTD, and CAPCOM CO. logos are trademarks or registered trademarks of CAPCOM. All rights reserved.
The copyrights of videos of games used in our content and other intellectual property rights belong to the provider of the game.
The contents we provide on this site were created personally by members of the Game8 editorial department.
We refuse the right to reuse or repost content taken without our permission such as data or images to other sites.