Final Boss Guide: How to Beat Aenshin
✦ All Monsties | Monster Weaknesses
✧ Final Boss Guide | Best Monsties | Best Team
✦ All Endangered Monsties | All Mutated Monsties
✧ Beginner's Guide | All Eggs | All Poogies
✦ Best Weapons | Best Armor | Egg Skills
✧ All Invasive Monsters | Habitat Restoration
This is a guide on how to beat Aenshin, the final boss in Monster Hunter Stories 3 (MHS3). Learn how to beat the final boss, its weaknesses, behaviour and attack pattern, and the best strategy to beat Aenshin.
List of Contents
Aenshin Boss Weaknesses and Resistances
Aenshin Weakness
| ↑↑ | ↓↓ | ↓ | |||
| ↓ | ↓ | ↓↓ |
| ↓↓ | ↓ | ? | |||
| - | - | ↓ |
| - | ↓ | ↓ | |||
| ↓ | ↓ | ↓↓ |
Blight Crystal Weakness
| ↓ | ↑↑ | ↓↓ | |||
| ↑↑ | ↓↓ | - |
| ↓ | ↓↓ | ↑↑ | |||
| ↓↓ | ↑↑ | - |
Aenshin Damage Type Weaknesses
| Body Part | | | |
|---|---|---|---|
| Head | X | X | O |
| Blightstone Shell | O | O | O |
| Body Part | | | |
|---|---|---|---|
| Core | O | X | X |
| Core | X | O | X |
| Core | X | X | O |
| Body Part | | | |
|---|---|---|---|
| Core | O | X | X |
| Core | X | O | X |
| Core | X | O | X |
| Core | X | X | O |
| True Core | O | O | O |
Aenshin Status Ailment Resistance and Weaknesses
| ? | ? | ↓↓ | ? | ||||||||
| ↓ | ? | ? | |||||||||
| ↓↓ | ↑↑ | ↑ | ? | ||||||||
| ? | ↑ | ? | |||||||||
| ↑↑ | ↑↑ | ↑↑ | ↑↑ | ||||||||
| ↑↑ | ↓↓ | ↓↓ | |||||||||
Blight Crystal Status Ailment Resistance and Weaknesses
| ↑↑ | ↑↑ | ↑↑ | ↑↑ | ||||||||
| ↑↑ | ↑↑ | ↑↑ | |||||||||
Aenshin Pattern and Behaviour
| Jump to a Section |
|---|
|
|
Attack Behavior
| Blightstone Protection | |
|---|---|
| Blightstone Unleashed | |
| Third Encounter | |
| Blight Crystal (Fire) | |
| Blight Crystal (Water) |
Aenshin has 2 states which are its Blightstone Protection and Blightstone Unleashed state.
Blightstone Protection (First Encounter)
| Turn Count | Move |
|---|---|
| Turn 1 | Technical Attack Blightstone Active |
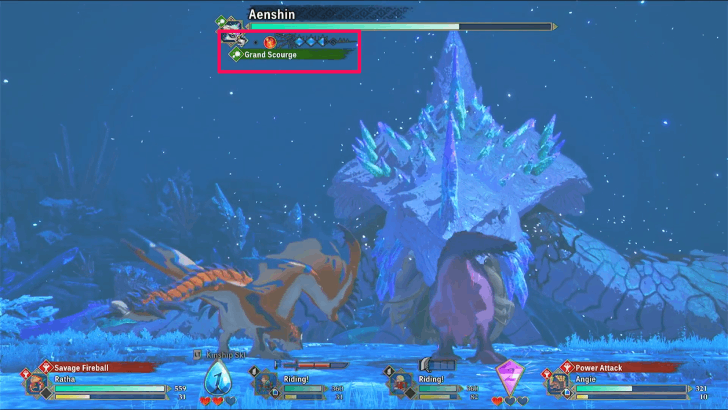
| Turn 2 | Grand Scourge |
| Turn 3 | Technical Attack Blightstone Active |
| Turn 4 | Grand Upheaval |
| Turn 5 | Technical Attack |
During your first encounter, Aenshin is in Blightstone Protection form, and it will use a Technical Attack then use Blightstone Activate at the end of the same turn. This sets it up to use powerful attacks such as Grand Scourge (AoE) and Grand Upheaval (Single Target).
Blightstone Protection (Second Encounter)
| Turn Count | Move |
|---|---|
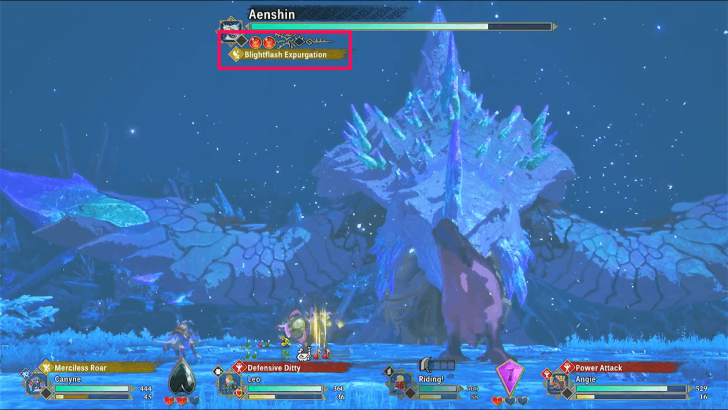
| Turn 1 | Blightflash Expurgation Blightstone Active |
| Turn 2 | Blightgale Expurgation (Technical) |
| Turn 3 | Grand Scourge/Grand Upheaval/Expurgation |
| Turn 4 | Blightgale Expurgation (Technical) |
| Turn 5 | Grand Scourge/Grand Upheaval/Expurgation |
In your second encounter with Aenshin, it will begin the battle in Blightstone Protection form, attacking your whole party with Blightflash Expurgation, which causes Petrification. It will then use Blightgale Expurgation, a Technical Attack, so use a Power Type Attack and win the Head-to-Head.
Afterward, it will attack with a Skill that has no Attack Type, such as Grand Scourge, Grand Upheaval, and Expurgation, an AoE attack that also applies Petrification. It will then attack with another Blightgale Expurgation followed by one of its three special Skills before restarting the rotation.
Blightstone Unleashed
| Turn Count | Move |
|---|---|
| Turn 1 | Blightgale Expurgation (Power) Grand Purge |
| Turn 2 | Grand Scourge/Grand Upheaval/Expurgation |
| Turn 3 | Grand Scourge/Grand Upheaval/Expurgation |
| Turn 4 | Blightflash Expurgation Return to Blightstone Protection |
Once you break Aenshin's Blightstone Shell, it will transform into Blightstone Unleashed. In this form, it will attack with a Blightgale Expurgation, which is now a Power Type Attack, followed by Grand Purge at the end of the same turn, which grealy buffs its attack.
In the next two turns, it will then attack with two Skills with no Attack Types. Afterward, it will unleash a Blightflash Expurgation and return to Blightstone Protection form.
Third Encounter
| Turn Count | Move |
|---|---|
| Turn 1 | Blight Crystallization Shardshower Expurgation |
| Turn 2 | Blightgale Expurgation Blight Crystallization |
| Turn 3 | Cosmic Scourge/Cosmic Upheaval |
| Turn 4 | Blightgale Expurgation |
| Turn 5 | Cosmic Scourge/Cosmic Upheaval Blight Crystallization |
| Turn 6 | Blightflash Expurgation |
| Turn 7 | Blightgale Expurgation |
| Turn 8 | Cosmic Scourge/Cosmic Upheaval |
In the final encounter, the goal is to destroy each of its four Cores to reveal the True Core. Once the True Core is revealed, you have 9 turns to break it to finally beat Aenshin.
Aenshin will begin with Blight Crystallization, followed by Shardshower Expurgation an AoE skill that deals heavy damage. Similar to the previous encounters, it will then alternate between Blightgale Expurgation and its No Type Skills..
It also uses Blight Crystallization at the end of certain turns, either summoning a Fire or Water element Blight Crystal that attack with Power and Speed Type Skills, respectively.
Recommended Monsties for Aenshin
 Espinas Espinas
|
 Deviljho Deviljho
|
 Magnamalo Magnamalo
|
In Blightstone Protection form, Aenshin attacks with Technical Type skills and is weak to Fire and Dragon Element skills. Both Espinas and Deviljho are Power Type Monsties that ensure you win every Head-to-Head while covering both of Aenshin's weaknesses. However, Deviljho is weak to Dragon Element moves as well, so switch it out for Espinas when Aenshin attacks your Monstie with a skill without an Attack Type.
Once Aenshin transforms into its Blightstone Unleashed form, it will attack with a Power Type move and gains a significant weakness to Non-Elemental skills, so use Magnamalo against the transformation as it covers Aenshin's Attack Type and weakness changes.
In the final encounter, Aenshin still uses Technical Skills but is now weak to every element except Non-Elemental attacks and is especially weak to Dragon. Therefore, Espinas and Deviljho will still prove to be effective.
How to Beat Aenshin
| Jump to a Section |
|---|
|
|
Level Up to Level 65

Aenshin will be at level 60 during the First Encounter and Level 70 during the Second and Third Encounters. You will want to level your party up to at least Level 65 to avoid getting wiped by its attacks.
Ride Your Monstie to Cure Petrification
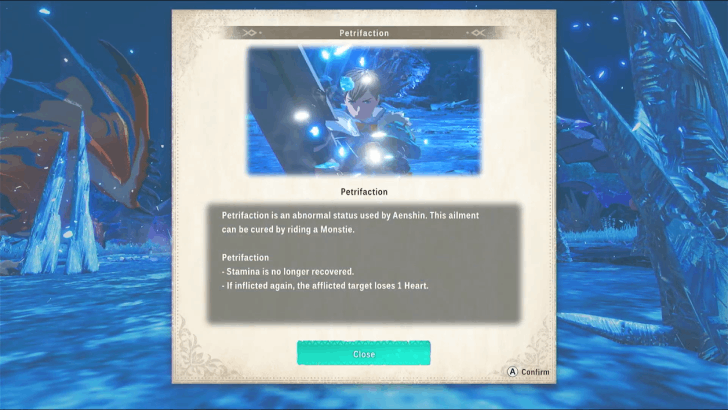
Petrification is a status ailment unique to Aenshin, that stops your stamina recovery and takes a Heart if it is re-applied on you and your party members. The only way to cure Petrification is by riding your Monstie, so fill your Kinship Gauge quickly through Double Attacks or by using the Monstie skill Solar Cry.
Interrupt Blightflare and Shardshower Expurgation
During the second and third encounters, you can interrupt Aenshin from using his powerful AoE attacks, Blightflare Expurgation and Shardshower Expurgation, by using a Kinship Skill on that turn. Alternatively, you can try to Stagger your Aenshin on the turn that it will use those moves.
Keep Aenshin Exposed
Elder Dragons, such as Aenshin, become Exposed when their Wyvernsoul Gauge is reduced to zero and one of their Wyvernsoul stocks are consumed. While Aenshin is exposed, No Type Skills, such as Grand Upheaval, turn into skills with Attack Types, allowing you to win more Head-to-Heads and prevent Aenshin from dealing more damage.
Since Aenshin takes a few turns before it recovers from being exposed, you can take its second Wyvernsoul Stock and expose it again to make it use Attack Type skills even longer.
Focus on Aenshin's Cores
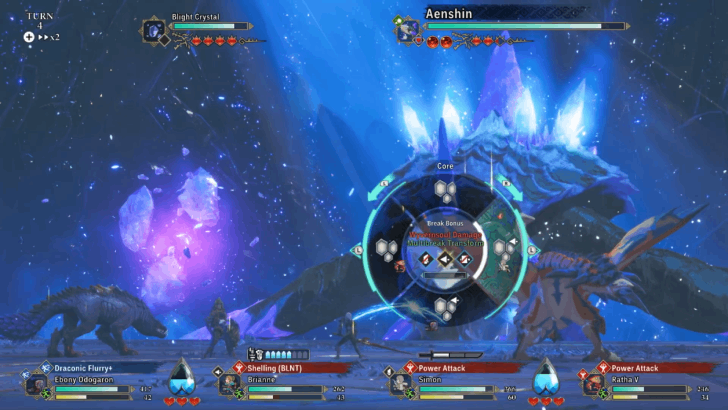
In the final encounter, Aenshin will summon Blight Crystals to fight alongside it. However, you should focus all of your attacks on Aenshin's Cores as the crystals will dissappear each time you break a Core.
How to Fight Aenshin
Fought During the Multiple Main Quests
Aenshin is first encountered during the quest Father and Child. After you fend it off, you will battle it once again in Echoes of Life. After it flees, you must then fight it one last time in Inherited Dream.
Monster Hunter Stories 3 (MHS 3) Related Guides
Main Mission Bosses
| All Main Mission Bosses | |
|---|---|
| Azuria (Chapter 1) | |
 Honed Glavenus |
 Invasive Yian Garuga Invasive Yian Garuga |
 Dual Feral Velocidromes |
 Feral Gypceros Feral Gypceros |
Magnamalo |
- | Cataracts (Chapter 2) |
 Feral Great Izuchi Feral Great Izuchi
|
 Invasive Arzuros Invasive Arzuros |
 Feral Somnacanth |
 Feral Aknosom |
 Yama Tsukami |
- |
| Galyad (Chapter 3) | |
 Feral Ajarakan |
 Feral Rakna-Kadaki |
 Rey Dau Rey Dau |
- |
| Seranthis (Chapter 4) | |
 Feral Blangonga |
 Goss Harag Goss Harag |
 Malzeno |
 Arkveld |
 Bound Azure Rathalos |
 Bound Lunagaron |
 Aenshin Aenshin |
|
Invasive Monster Bosses
| All Invasive Monster Bosses | |
|---|---|
| Invasive Yian Garuga |
 Invasive Seregios Invasive Seregios |
 Invasive Plesioth Invasive Plesioth |
Invasive Arzuros |
 Invasive Nerscylla Invasive Nerscylla |
 Invasive Shogun Ceanataur Invasive Shogun Ceanataur |
 Invasive Diablos Invasive Diablos |
 Invasive Odogaron Invasive Odogaron |
 Invasive Khezu Invasive Khezu |
- |
Feral Monster Bosses
| List of All Feral Monsters | |
|---|---|
 Feral Nerscylla Feral Nerscylla |
 Feral Brachydios Feral Brachydios |
 Feral Tobi-Kadachi Feral Tobi-Kadachi |
 Feral Glavenus Feral Glavenus |
 Feral Bishaten Feral Bishaten |
 Feral Espinas Feral Espinas |
 Feral Paolumu Feral Paolumu |
- |
Elder Dragon Bosses
| List of All Elder Dragon Bosses | |
|---|---|
 Namielle |
  |
 Yama Tsukami (Green) Yama Tsukami (Green) |
 Velkhana Velkhana |
| Aenshin |
- |
Exotic Monster Bosses
| List of All Exotic Monster Bosses | |
|---|---|
 Exotic Seregios |
 Exotic Velocidrome Exotic Velocidrome |
Optional Bosses
| List of All Optional Bosses | |
|---|---|
| Espinas
|
- |
Author

Monster Hunter Stories 3: Twisted Reflection Walkthrough & Guides Wiki
Final Boss Guide: How to Beat Aenshin
Rankings
- We could not find the message board you were looking for.
Gaming News

![Star Savior Review [First Impressions] | Engaging, Entertaining, and Expensive](https://img.game8.co/4447603/8f500e9bf666bdb8adb1af478e9dfdbd.png/show)


Popular Games

Genshin Impact Walkthrough & Guides Wiki
Umamusume: Pretty Derby Walkthrough & Guides Wiki
Crimson Desert Walkthrough & Guides Wiki
Monster Hunter Stories 3: Twisted Reflection Walkthrough & Guides Wiki
Honkai: Star Rail Walkthrough & Guides Wiki
Pokemon Pokopia Walkthrough & Guides Wiki
The Seven Deadly Sins: Origin Walkthrough & Guides Wiki
Wuthering Waves Walkthrough & Guides Wiki
Zenless Zone Zero Walkthrough & Guides Wiki
Arknights: Endfield Walkthrough & Guides Wiki


Recommended Games
Fire Emblem Heroes (FEH) Walkthrough & Guides Wiki
Diablo 4: Vessel of Hatred Walkthrough & Guides Wiki
Cyberpunk 2077: Ultimate Edition Walkthrough & Guides Wiki
Yu-Gi-Oh! Master Duel Walkthrough & Guides Wiki
Super Smash Bros. Ultimate Walkthrough & Guides Wiki
Pokemon Brilliant Diamond and Shining Pearl (BDSP) Walkthrough & Guides Wiki
Elden Ring Shadow of the Erdtree Walkthrough & Guides Wiki
Monster Hunter World Walkthrough & Guides Wiki
The Legend of Zelda: Tears of the Kingdom Walkthrough & Guides Wiki
Persona 3 Reload Walkthrough & Guides Wiki


All rights reserved
©CAPCOM CO., LTD, and CAPCOM CO. logos are trademarks or registered trademarks of CAPCOM. All rights reserved.
The copyrights of videos of games used in our content and other intellectual property rights belong to the provider of the game.
The contents we provide on this site were created personally by members of the Game8 editorial department.
We refuse the right to reuse or repost content taken without our permission such as data or images to other sites.
The blight crystals dont get destroyed when you break a core, I did that and it didnt do anything, they were stll standing and got me killed next turn. Thanks for that