Kora Side Story Walkthrough and Rewards

This is a guide for Kora's Side Story in Monster Hunter Stories 3 (MHS3). Learn more about Kora's Side Stories, its objectives, rewards, and how to unlock them with this guide!
| Kora Guides | |
|---|---|
| Partner Profile | Side Stories |
List of Contents
Kora's Side Stories
A Rocky Past
| Unlock Condition | 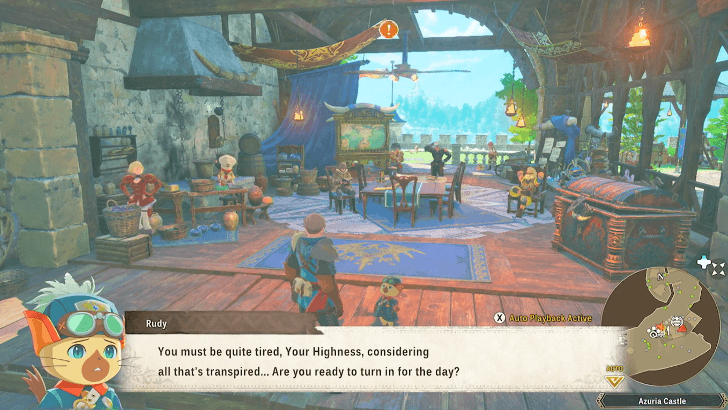 Complete the Main Quest Amara's Child and speak with Rudy in Azuria Castle. |
|---|---|
| Location | Azuria Castle, Azuria |
Chapter 1 Walkthrough
| # | Objective |
|---|---|
| 1 | 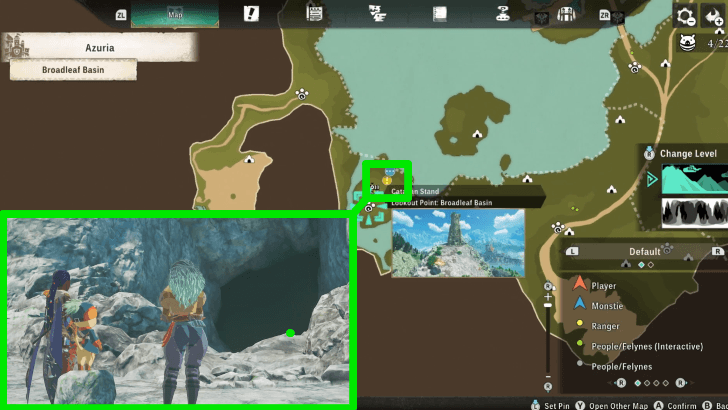 Speak with Kora at the base and choose Side Story to start the quest. After the cutscene, travel to the marked location on the map. You can teleport to the Broadleaf Basin Catavan Stand to get to the location more easily. Jump down the mountain, and another cutscene will trigger in front of the cave. |
| 2 | 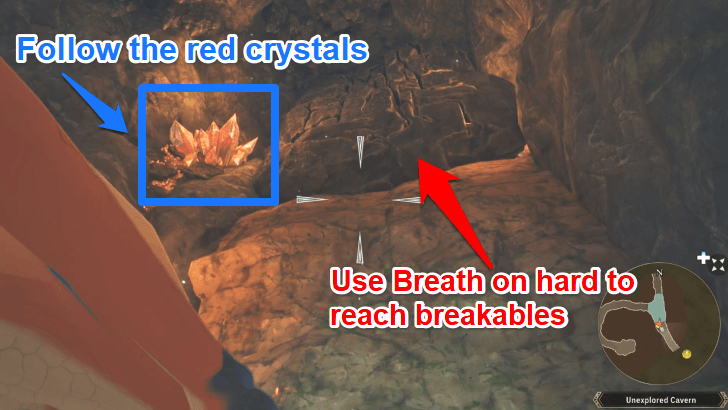 Enter the cave, you can call for your mount in this location. Take note of the crystals on the wall, follow the red ones to get to the marked location. There are enemies lurking in this area, so make sure to come prepared for a few battles. There are also a few breakable walls that are hard to reach; you can use Breath to clear the way. |
| 3 | 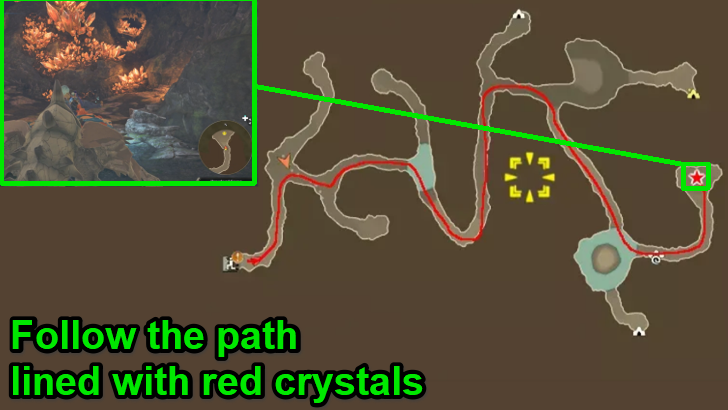 At the end of the red crystal-lined path, you will find a sleeping Gypceros. Attack it to initiate the battle. |
| 4 | 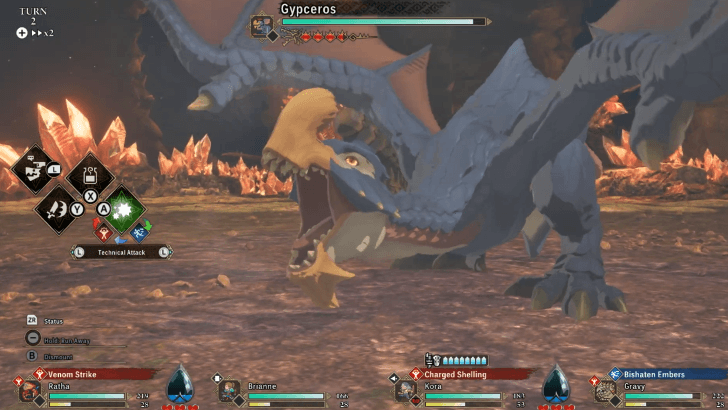 The Gypceros attacks with poison, so make sure that you have antidotes or a skill that nullifies status ailments on hand. |
| 5 |  After defeating the Gypceros, watch the final cutscene to end the quest. |
Kora's Gunlance
| Unlock Condition |  Complete the Main Quest Forbidden Ground and set up a base in Sheparden. |
|---|---|
| Location | Sheparden, Canalta Timberland |
Chapter 2 Walkthrough
| # | Objective |
|---|---|
| 1 | 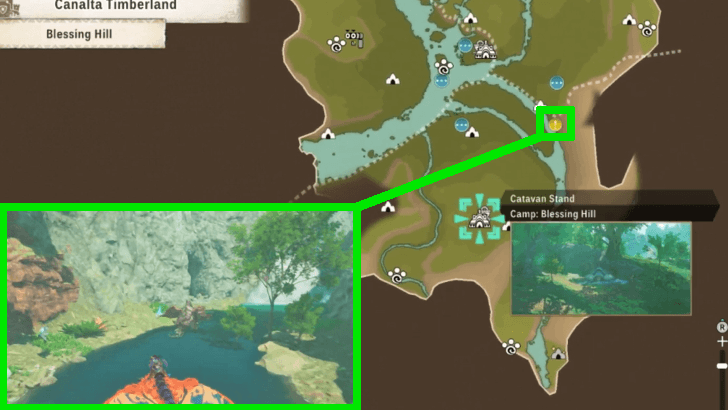 Speak with Kora and choose Side Story to start the quest. After the cutscene, follow the waypoint to the target location in Blessing Hill. |
| 2 | 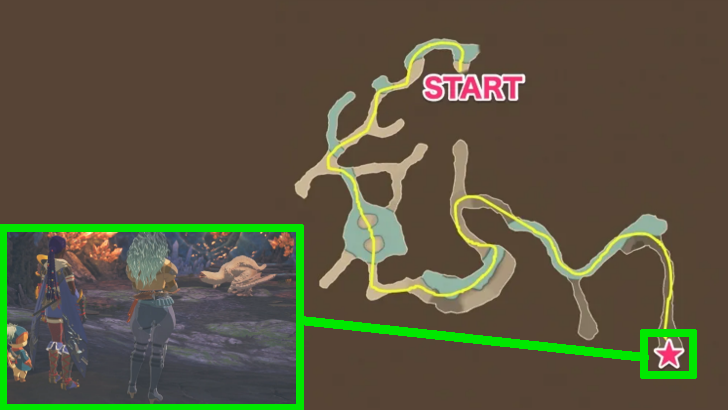 Enter the cave, the path is pretty straightforward to the end, all you need to worry about are the enemies you may come across on the way and the water. Make sure to bring a swimming monstie with you to make travelling easier. |
| 3 | 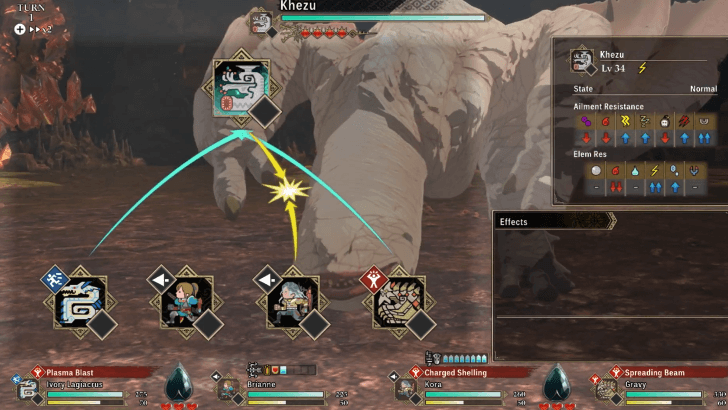 The Khezu is an electric type monster. Make sure to have an item like Paracare or a skill that can prevent status ailments on hand. |
| 4 | 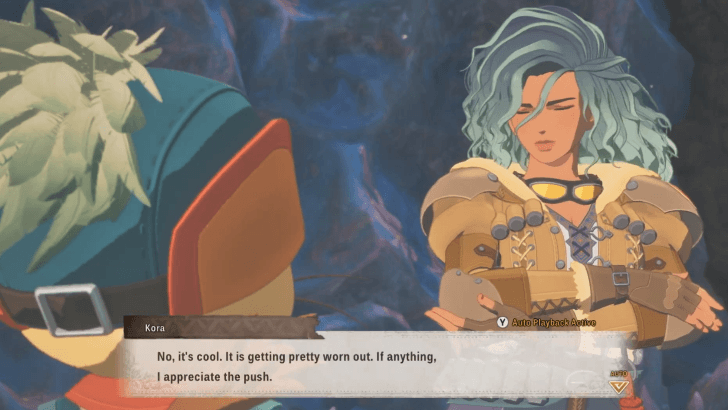 After defeating the Khezu, watch the final cutscene to end the quest. |
Cave Kids
| Unlock Condition | 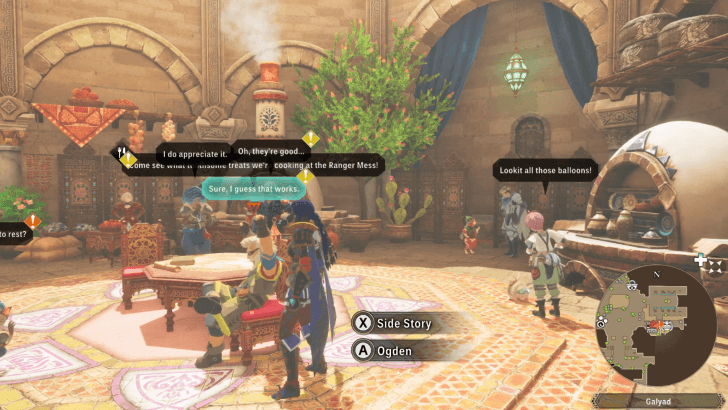 Complete the Main Quest Ena and set up a base in Galyad. |
|---|---|
| Location | Galyad, Tarkuan |
Chapter 3 Walkthrough
| # | Objective |
|---|---|
| 1 | 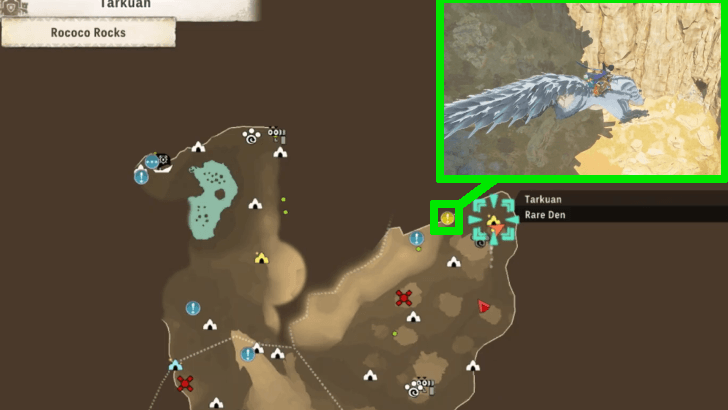 Speak with Kora at the base. After the cutscene, travel to Rococo Rocks to reach the quest location. |
| 2 | 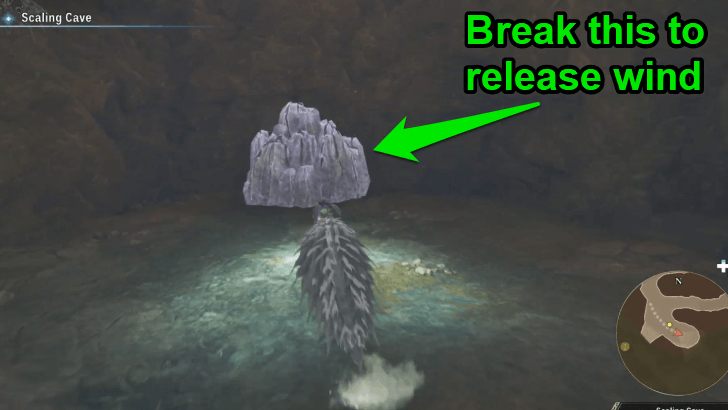 Enter the Scaling Cave. Follow the red crystals to get to the end of the cave. As you go through the cave, you will encounter children along the way. Find the missing child deeper in the cave. Make sure to bring a climbing and swimming Monstie with you to travel through the different terrain inside the cave. Some sections will require you to break a large rock to release a wind draft. |
| 3 |  When you reach the end of the cave, you will find the missing child trapped with a Shogun Ceanataur. Defeat the monster to rescue the boy. |
| 4 | 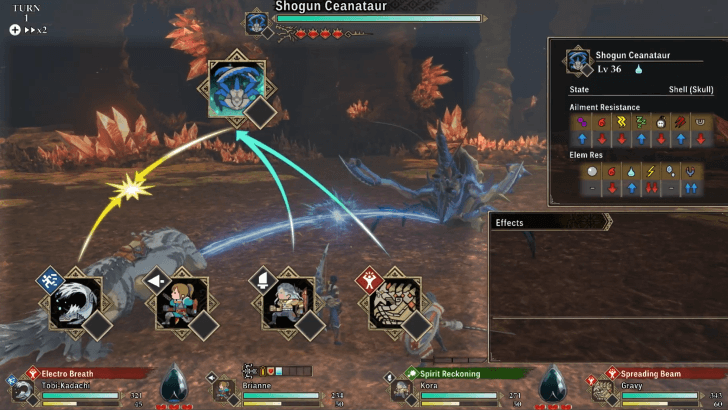 The Shogun Ceanataur is weak against electric attacks, which will also make it vulnerable to paralysis and stun. Bring Monsties that deal this type of damage to effectively deal with the monster. |
| 5 |  After defeating the Shogun Ceanataur, watch the final cutscene to end the quest. |
A Sense of Belonging
| Unlock Condition | 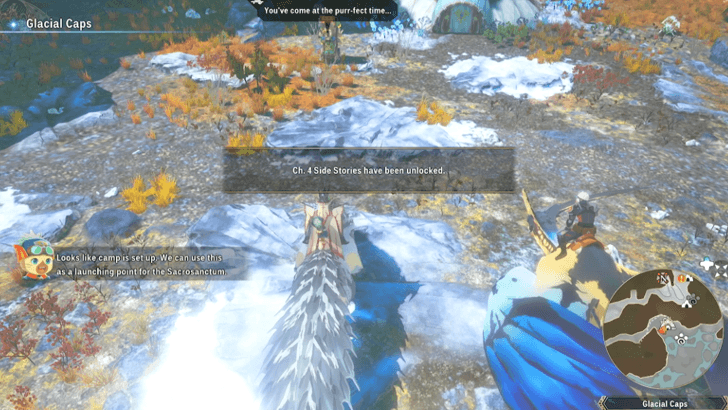 Defeat the Feral Blangonga and set up your first camp at the Glacial Caps in Serathis to unlock Chapter 4. You will need to go back to a base in another region to take on the quest. |
|---|---|
| Location | Glacial Caps, Serathis |
Chapter 4 Walkthrough
| # | Objective |
|---|---|
| 1 | 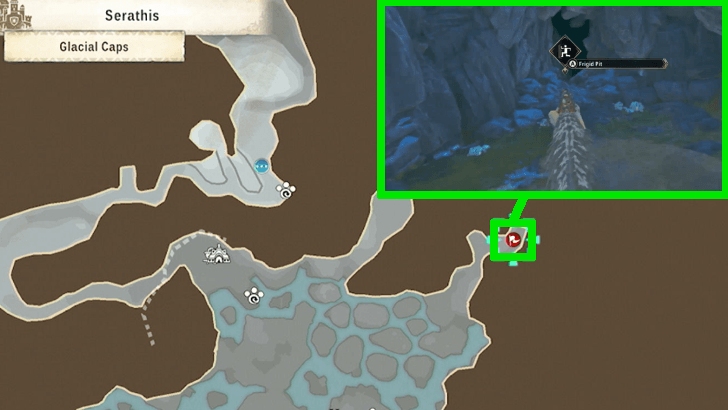 After unlocking the chapter 4 Side Stories return to any base on another region. Speak with Kora and choose Side Story to start the quest. After a cutscene, travel to Glacial Caps and enter the Frigid Pit found in the western edge of the map. |
| 2 | 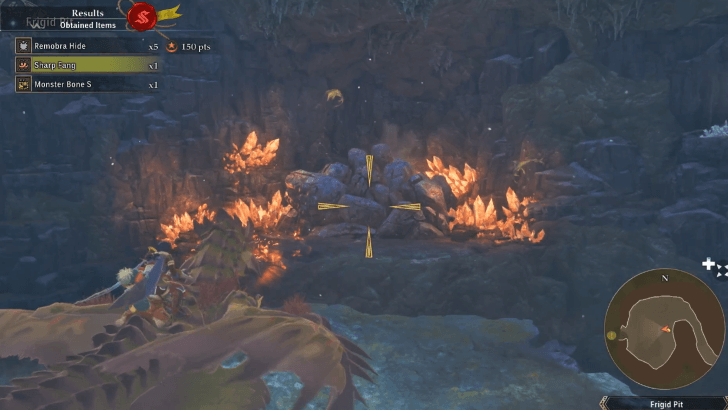 Follow the red crystals to reach the end of the cave. Make sure to bring a good flying monstie since traversing the cave will require some aerial maneuvering. After breaking through the wall at the end of the tunnel, you will find Ogden held hostage by a Diablos. |
| 3 | 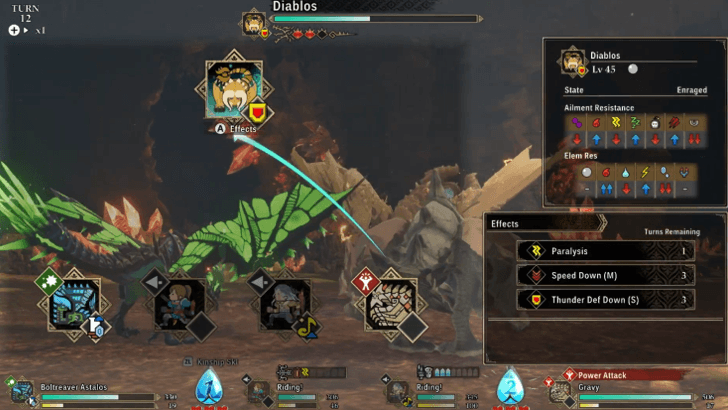 Defeat Diablos, this monster is weak to darkness and Ice so bring monsties that can attack with those attributes. Make sure to have something that can manage your party's health since this monster often does deadly party-wide attacks. |
| 4 |  After defeating the Diablos, watch the last cutscene to end the quest. |
Kora Side Story Rewards
All Chapter Rewards
| Chapter | Rewards |
|---|---|
| 1 | Big Barrel Bomb Recipe Big Barrel Bomb: Deals a set amount of damage to one enemy. Chance to Incflict Burn. Sonic Bomb Recipe Sonic Bomb: An explosive that releases a blast of pure sound. Chance to inflict Stun on one enemy. Flash Bomb Recipe Flash Bomb: An explosive that releases a blast of bright light. Chance to inflict Darkness on one enemy. |
| 2 | New Weapon: Long Sword Kora is now able to use Long Swords. Gravy Developed Kora's Gravy has learned "Protective Shell". Temporarily reduces damage taken from enemies when inflicted with abnormal status. |
| 3 | Active Skill Enhanced - Wyvern's Blaze (AMP) Kora's Active Skill "Wyvern's Blaze" has been enhanced to "Wyvern's Blaze (AMP)". Active Skill Enhanced - Sakura Spiritblade (AMP) Kora's Active Skill "Sakura Spiritblade" has been enhanced to "Sakura Spiritblade (AMP)". Azure Armore Recipe Text containing forging instructions for a certain set of armor. Enables forging at the smithy. Mega Barrel Bomb Recipe A Combo Recipe for Mega Barrel Bomb. Lists a Big Barrel Bomb and Scatterfish as the required materials. |
| 4 | Golma Joined The Grangolm "Golma" has been added to Kora's Monsties. |
Monster Hunter Stories 3 (MHS 3) Related Guides
List of All Allies
| Party Member Selection | ||
|---|---|---|
 Eleanor Eleanor |
 Thea Thea |
 Gaul Gaul |
 Kora Kora |
 Ogden Ogden |
- |
Comment
Author

Monster Hunter Stories 3: Twisted Reflection Walkthrough & Guides Wiki
Kora Side Story Walkthrough and Rewards
Rankings
- We could not find the message board you were looking for.
Gaming News

![Death Stranding 2: On The Beach [PC] Review | A Port That Delivers](https://img.game8.co/4447392/15310a0c9aa1b6843bb713b2ea216930.jpeg/show)


Popular Games

Genshin Impact Walkthrough & Guides Wiki
Umamusume: Pretty Derby Walkthrough & Guides Wiki
Crimson Desert Walkthrough & Guides Wiki
Monster Hunter Stories 3: Twisted Reflection Walkthrough & Guides Wiki
Honkai: Star Rail Walkthrough & Guides Wiki
Pokemon Pokopia Walkthrough & Guides Wiki
The Seven Deadly Sins: Origin Walkthrough & Guides Wiki
Wuthering Waves Walkthrough & Guides Wiki
Zenless Zone Zero Walkthrough & Guides Wiki
Arknights: Endfield Walkthrough & Guides Wiki


Recommended Games
Fire Emblem Heroes (FEH) Walkthrough & Guides Wiki
Diablo 4: Vessel of Hatred Walkthrough & Guides Wiki
Cyberpunk 2077: Ultimate Edition Walkthrough & Guides Wiki
Yu-Gi-Oh! Master Duel Walkthrough & Guides Wiki
Super Smash Bros. Ultimate Walkthrough & Guides Wiki
Pokemon Brilliant Diamond and Shining Pearl (BDSP) Walkthrough & Guides Wiki
Elden Ring Shadow of the Erdtree Walkthrough & Guides Wiki
Monster Hunter World Walkthrough & Guides Wiki
The Legend of Zelda: Tears of the Kingdom Walkthrough & Guides Wiki
Persona 3 Reload Walkthrough & Guides Wiki


All rights reserved
©CAPCOM CO., LTD, and CAPCOM CO. logos are trademarks or registered trademarks of CAPCOM. All rights reserved.
The copyrights of videos of games used in our content and other intellectual property rights belong to the provider of the game.
The contents we provide on this site were created personally by members of the Game8 editorial department.
We refuse the right to reuse or repost content taken without our permission such as data or images to other sites.