Wall Market Area Guide
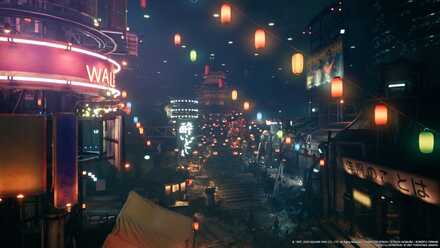
This is an all-in-one guide to the Wall Market area in the game Final Fantasy 7 Remake (FF7R). Read on for information about this intriguing area such as its shops, events, characters, and more!
List of Contents
Wall Market
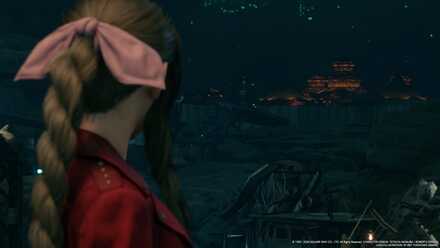
"Walled in on all sides, Midgar's biggest and most infamous entertainment quarter is run almost entirely by a man named Don Corneo. Free of Shinra's influence, this dangerous area of the city offers intriguing ways to pass the lonely nights."
- Final Fantasy VII Remake loading screen
Wall Market is Sector 6 Slums' shopping and entertainment district. It is free from Shinra's authority and was "walled" instead for its uncontainable behavior. Wall Market was then under Don Corneo's control.
It is first seen and entered in Chapter 9.
Chapter 9: The Town That Never Sleeps Story Guide & Walkthrough
Key Characters
Don Corneo

Don Corneo acts high and mighty because he can--he controls the entire Wall Market. He has many connections, including a possible connection with Shinra.
Andrea Rhodea

Andrea Rhodea is the owner and one of the dancers in Honeybee Inn. He is an influential person who manages the entertainment district and is one of the agents for the bridal audition for Don Corneo.
Every night, he goes up to the stage with his dancers to give quality entertainment to the people. In pursuit of perfection, he consistently trains both his body and mind.
Madam M
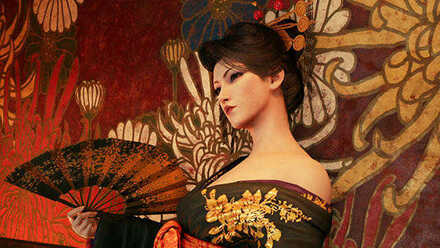
Madam M is an owner of a hand-massage parlor. She is an influential person managing the commercial district, and is one of the agents for the bridal audition for Don Corneo. Her courteousness adjusts directly to her customers' willingness to spend.
Chocobo Sam

Chocobo Sam is an exclusive solely made for the FF7 Remake. He has some part in the selection and/or transport of brides to the mansion of Don Corneo. He also appears to hold some sort of sway within the Wall Market.
Leslie Kyle

Leslie Kyle is a subordinate of Don Corneo. He is good at negotiating even at a young age and a very useful aide to Don Corneo.
Important Facilities and Events
Corneo's Mansion
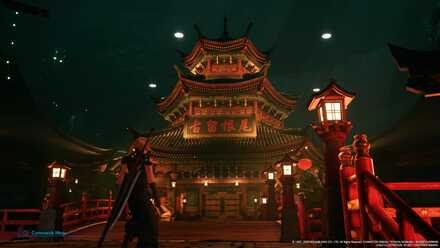
Don Corneo's evil lair, where he controls the entirety of Wall Market from the shadows. This is also the place where he holds his nightly bridal auditions for the next Mrs. Corneo, along with his darkest secrets. Cloud, Tifa, and Aerith will appear here as candidates wearing different dresses.
Honeybee Inn
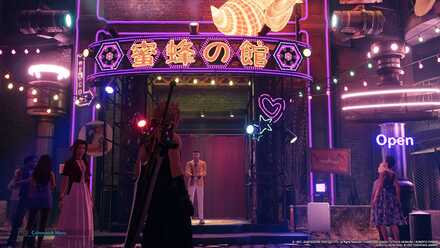
An entertainment facility owned by Andrea Rhodea, which takes Wall Market's spotlight every night with its spectacular shows. One of these shows involves Cloud and the Dance Off Minigame.
Hand-massage Parlor
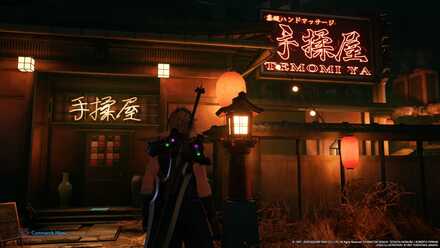
Owned by Madam M, this facility offers different hand-massage courses, which Cloud can choose from during his first visit. Aerith will also stay here to get changed for the audition while Cloud does Odd Jobs for the people of Wall Market during Chapter 9.
Chapter 9 Side Quests (Odd Jobs)
Chocobo Hut
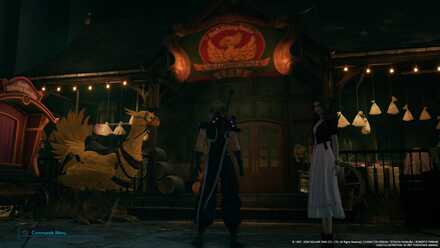
A stable for chocobos run by Chocobo Sam. Sam also runs a transport business called Sam's Delivery, which Cloud and the others can use to travel around Sector 5 and 6 Slums during Chapter 14. In this same chapter, Cloud can receive a reward from Sam for finding his lost chocobos.
Hotel

The hotel is located near the east entrance of Wall Market. There will be a barker outside during Chapter 9 who will initiate a conversation as soon as you approach him.
There is a special vending machine inside which does not function like the usual vending machines, instead it dispenses key items required for The Party Never Stops in Sam's Odd Job route.
In Chapter 14, a man inside will give you the Good Night, Until Tomorrow disc which is needed for The Power of Music Odd Job.
Gym
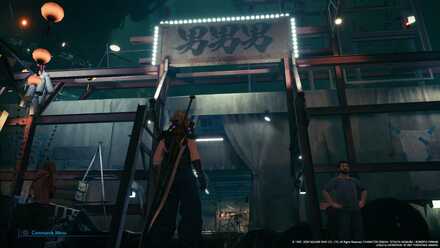
A place where people who likes being fit, or ripped, gather. The gym is overlooked by the head trainer, Jules, who, together with Ronnie and Jay, will challenge Cloud in a Squats Minigame as part of an Odd Job in Chapter 9.
The three will also challenge Tifa in a Pull-up Minigame as part of an Odd Job in Chapter 14.
The Colosseum
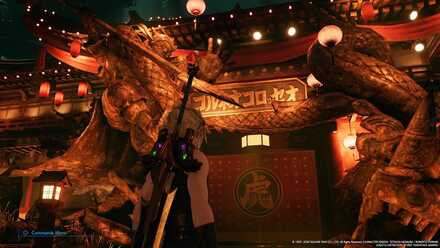
Corneo's Colosseum pits challengers, including monsters, to fight to the death for money, entertainment, and glory. Cloud and the other members can join a battle in the Colosseum after unlocking it at a certain point in Chapter 9. These Colosseum challenges rewards the player with manuscripts and rare items.
Corneo Colosseum Rewards and Battle Challenges
Clothing Store
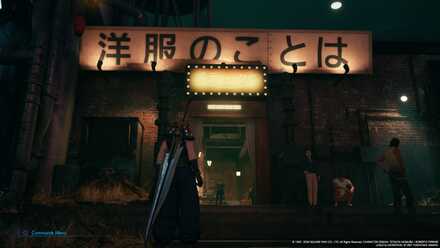
The clothing store is where you will accept The Party Never Stops Odd Job to start a series of errands for the owner's "inspiration".
The Party Never Stops Walkthrough
Bar
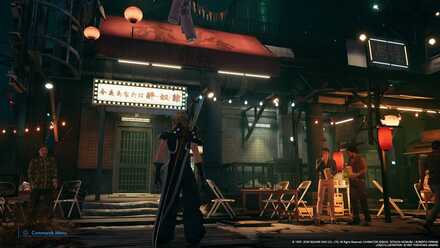
Just across the clothing store is the bar where you will find the clothing's store owner for The Party Never Stops Odd Job.
You can also obtain the The Midgar Blues disc here by talking to the singer.
Restaurant
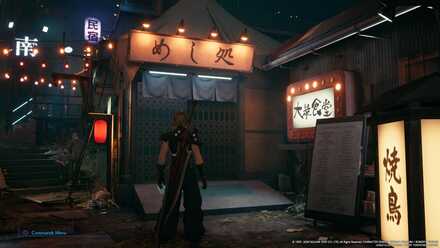
This is where you will find the restaurant owner which, supposedly, holds the "inspiration" during The Party Never Stops Odd Job.
Pharmacy
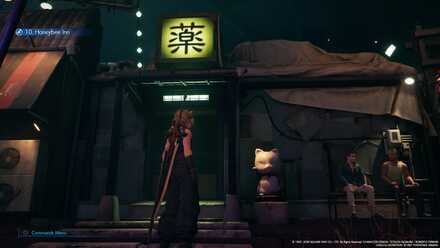
This place here is basically a pharmacy but they sell other stuff which also makes them an item shop.
One of the stops during The Party Never Stops Odd Job will lead you here, which will require you to help up to three sick people to progress.
Dialogue Choices
There are a lot of dialogue choices that will occur in Wall Market during Chapter 9 and these choices affect the Odd Job Route that you will take in the same chapter.
Click the link below for our complete guide on all the choices!
Dialogue Choices and Consequences
The girl we're looking for...
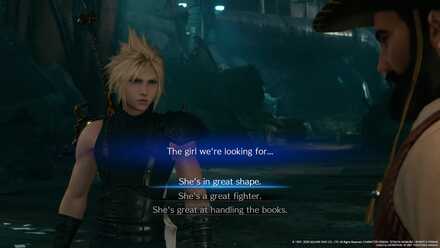
| Choice | Consequence / Effect |
|---|---|
| She's in great shape. | ・+1 point toward triggering Sam's side quests. |
| She's a great fighter. | ・No Effect |
| She's great at handling the books. | ・+1 point toward triggering Madam M's side quests. |
How Should You Respond to Sam?
Stay the night?

| Choice | Consequence / Effect |
|---|---|
| ...No thanks | ・+1 point toward triggering Sam's side quests. |
| How much? | ・+1 point toward triggering Madam M's side quests. |
| Back off. | No Effect |
What Should You Say to the Hotel Employee? (Chapter 9)
Heads or tails?

| Choice | Consequence / Effect |
|---|---|
| Heads. | ・+1.5 points toward triggering Sam's side quests. |
| Tails. | ・+1.5 points toward triggering Sam's side quests. |
| No deal. | ・+0.5 points toward triggering Sam's side quests. |
Choose which course?

| Choice | Consequence / Effect |
|---|---|
| Luxury Course - 3,000 G | ・+2 points toward triggering Madam M's side quests. |
| Standard Course - 1,000 G | ・+1 point toward triggering Madam M's side quests. |
| Poor Man's Course - 100 G | ・No effect |
| Not today. | ・Halt the choices |
Which Hand Massage Course Should You Choose?
How is Aerith's outfit?

| Choice | Consequence / Effect |
|---|---|
| It's alright. | ・+1 point toward triggering Sam's side quests. |
| Looks comfortable. | No Effect |
| It matters what I think? | ・+1 point toward triggering Madam M's side quests. |
How to Answer How is Aerith's Outfit?
Taste mystery drink?

| Choice | Consequence / Effect |
|---|---|
| I'll taste it. | ・+1 point toward triggering Sam's side quests. |
| I don't need that | ・No Effect |
Should You Taste the Mystery Drink?
Item Locations
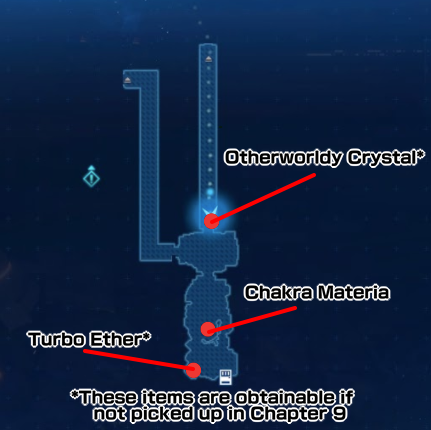
These items are all accessible during Chapter 14 though most of them are also accessible as early as Chapter 9.
Wall Market
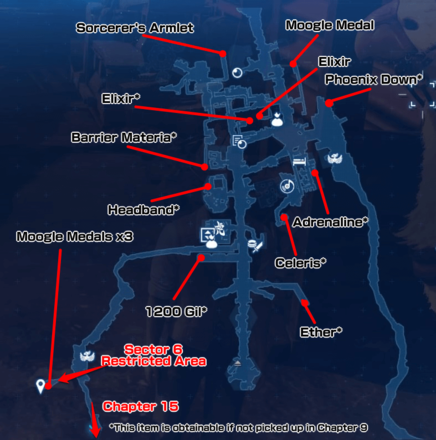
| Chapter 9 | ||
|---|---|---|
| Phoenix Down x1 | Elixir x1 | Barrier Materia |
| Adrenaline x1 | Celeris x1 | Headband |
| Ether x1 | Sedative x1 | Moogle Medal x1 |
| Chapter 14 | ||
| Sorcerer's Armlet | Moogle Medal x3 | Elixir x1 |
Corneo's Mansion
Corneo's Mansion - 1F
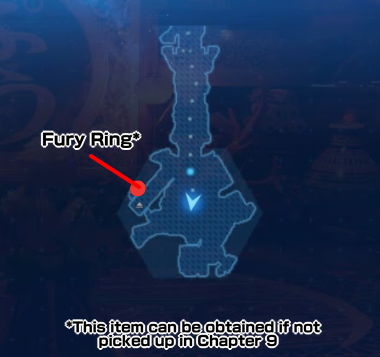
| Both chapters | ||
|---|---|---|
| Fury Ring | ||
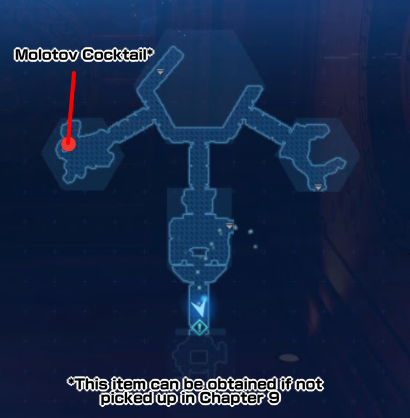
Corneo's Mansion - 2F
| Both chapters | ||
|---|---|---|
| Molotov Cocktail x1 | ||
Basement
| Chapter 9 | |
|---|---|
| Turbo Ether x1 | Otherworldly Crystal |
| Chapter 14 | |
| Chakra Materia | - |
Shops and Vending Machines
Item Shop

Chapter 9
| Items | Price |
|---|---|
| 10. Honeybee Inn (Stock: 1) | 50 Gil |
| Potion | 50 Gil |
| Hi-Potion | 300 Gil |
| Ether | 500 Gil |
| Phoenix Down | 300 Gil |
| Antidote | 80 Gil |
| Echo Mist | 100 Gil |
| Smelling Salts | 80 Gil |
Chapter 14
| Items | Price |
|---|---|
| 10. Honeybee Inn (Stock: 1) | 50 Gil |
| Potion | 50 Gil |
| Hi-Potion | 300 Gil |
| Mega-Potion | 700 Gil |
| Ether | 500 Gil |
| Phoenix Down | 300 Gil |
| Antidote | 80 Gil |
| Echo Mist | 100 Gil |
| Smelling Salts | 80 Gil |
| Remedy | 600 Gil |
Materia Shop
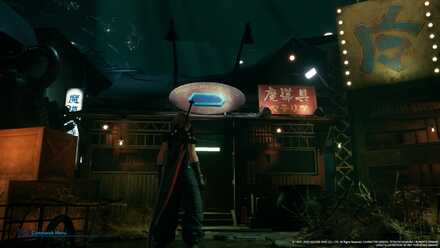
Chapter 9
| Materia | Price |
|---|---|
| Healing Materia | 600 Gil |
| Cleansing Materia | 1500 Gil |
| Revival Materia | 3000 Gil |
| Fire Materia | 500 Gil |
| Ice Materia | 500 Gil |
| Lightning Materia | 500 Gil |
| Poison Materia | 1500 Gil |
| Barrier Materia | 1500 Gil |
| Binding Materia | 3000 Gil |
| HP Up Materia | 2000 Gil |
| MP Up Materia | 2000 Gil |
| Deadly Dodge Materia | 600 Gil |
Chapter 14
| Materia | Price |
|---|---|
| Healing Materia | 600 Gil |
| Cleansing Materia | 1500 Gil |
| Revival Materia | 3000 Gil |
| Fire Materia | 500 Gil |
| Ice Materia | 500 Gil |
| Lightning Materia | 500 Gil |
| Poison Materia | 1500 Gil |
| Barrier Materia | 1500 Gil |
| Binding Materia | 3000 Gil |
| Subversion Materia | 3000 Gil |
| HP Up Materia | 2000 Gil |
| MP Up Materia | 2000 Gil |
| Deadly Dodge Materia | 600 Gil |
Weapons Store
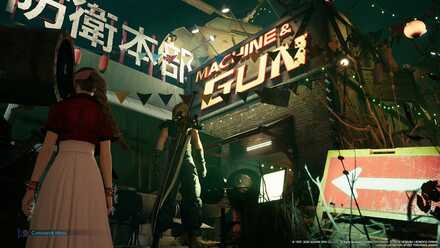
Chapter 9
| Weapons / Armor | Price |
|---|---|
| Hardedge (Stock: 1) | 2000 Gil |
| Titanium Bangle | 2000 Gil |
| Caliginous Bracelet | 3200 Gil |
| Studded Bracer | 3200 Gil |
| Mythril Armlet | 3200 Gil |
| Accessories | Price |
|---|---|
| Power Wristguards | 800 Gil |
| Bulletproof Vest | 800 Gil |
| Earrings | 800 Gil |
| Talisman | 800 Gil |
| Supernatural Wristguards | 5000 Gil |
| Survival Vest | 5000 Gil |
| Platinum Earrings | 5000 Gil |
| Timeworn Talisman | 5000 Gil |
| Star Pendant | 1500 Gil |
| Headband | 1500 Gil |
| Revival Earrings | 500 Gil |
Chapter 14
| Weapons / Armor | Price |
|---|---|
| Nail Bat (Stock: 1) | - |
| Hardedge (Stock: 1) | |
| Mythril Saber (Stock: 1) | 3000 Gil |
| Sonic Strikers (Stock: 1) | - |
| Arcane Scepter (Stock: 1) | - |
| Mythril Rod (Stock: 1) | - |
| Gothic Bangle | 3000 Gil |
| Magician's Bracelet | 4800 Gil |
| Heavy-Duty Bracer | 4800 Gil |
| Sorcerer's Armlet | 4800 Gil |
| Accessories | Price |
|---|---|
| Power Wristguards | 800 Gil |
| Bulletproof Vest | 800 Gil |
| Earrings | 800 Gil |
| Talisman | 800 Gil |
| Supernatural Wristguards | 5000 Gil |
| Survival Vest | 5000 Gil |
| Platinum Earrings | 5000 Gil |
| Timeworn Talisman | 5000 Gil |
| Star Pendant | 1500 Gil |
| Headband | 1500 Gil |
| Revival Earrings | 500 Gil |
Vending Machine - Underground Arena
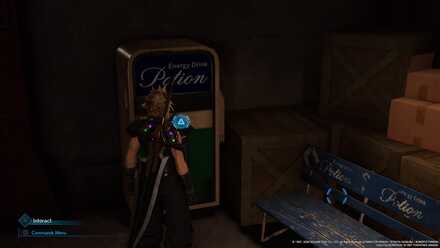
Both Chapters
| Items | Price |
|---|---|
| Potion | 50 Gil |
| Hi-Potion | 300 Gil |
| Mega-Potion (Stock: 1) | 300 Gil |
| Ether | 500 Gil |
| Ether (Stock: 1) | 100 Gil |
| Phoenix Down | 300 Gil |
| Phoenix Down (Stock: 1) | 100 Gil |
| Antidote | 80 Gil |
| Echo Mist | 100 Gil |
| Smelling Salts | 80 Gil |
| Weapons / Armor | Price |
|---|---|
| Titanium Bangle | 2000 Gil |
| Caliginous Bracelet | 3200 Gil |
| Studded Bracer | 3200 Gil |
| Mythril Armlet | 3200 Gil |
| Accessories | Price |
|---|---|
| Power Wristguards | 800 Gil |
| Bulletproof Vest | 800 Gil |
| Earrings | 800 Gil |
| Talisman | 800 Gil |
| Supernatural Wristguards | 5000 Gil |
| Survival Vest | 5000 Gil |
| Platinum Earrings | 5000 Gil |
| Timeworn Talisman | 5000 Gil |
| Star Pendant | 1500 Gil |
| Headband | 1500 Gil |
| Revival Earrings | 500 Gil |
| Materia | Price |
|---|---|
| Healing Materia | 600 Gil |
| Cleansing Materia | 1500 Gil |
| Revival Materia | 3000 Gil |
| Fire Materia | 500 Gil |
| Ice Materia | 500 Gil |
| Lightning Materia | 500 Gil |
| Poison Materia | 1500 Gil |
| Barrier Materia | 1500 Gil |
| Binding Materia | 3000 Gil |
| HP Up Materia | 2000 Gil |
| MP Up Materia | 2000 Gil |
| Deadly Dodge Materia | 600 Gil |
Souvenir Shop
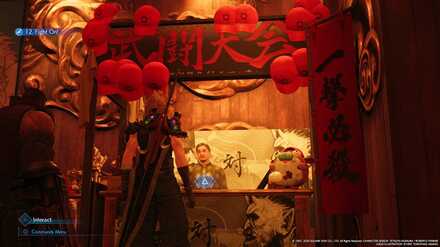
Chapter 9
| Items | Price |
|---|---|
| Fuzzy Wuzzy | 200 Gil |
| Mr. Cuddlesworth | 500 Gil |
Chapter 14
| Items | Price |
|---|---|
| 12. Fight On! (Stock: 1) | 50 Gil |
| Fuzzy Wuzzy | 100 Gil |
| Mr. Cuddlesworth | 250 Gil |
Don's Vending Machine - Forbidden Room

Both Chapters
| Items | Price |
|---|---|
| 11. Don of the Slums (Stock: 1) | 50 Gil |
| Potion | 50 Gil |
| Hi-Potion | 300 Gil |
| Mega-Potion (Stock: 3) | 300 Gil |
| Ether | 500 Gil |
| Ether (Stock: 1) | 100 Gil |
| Phoenix Down | 300 Gil |
| Phoenix Down (Stock: 1) | 100 Gil |
| Antidote | 80 Gil |
| Echo Mist | 100 Gil |
| Smelling Salts | 80 Gil |
| Weapons / Armor | Price |
|---|---|
| Titanium Bangle | 2000 Gil |
| Caliginous Bracelet | 3200 Gil |
| Studded Bracer | 3200 Gil |
| Mythril Armlet | 3200 Gil |
| Accessories | Price |
|---|---|
| Power Wristguards | 800 Gil |
| Bulletproof Vest | 800 Gil |
| Earrings | 800 Gil |
| Talisman | 800 Gil |
| Supernatural Wristguards | 5000 Gil |
| Survival Vest | 5000 Gil |
| Platinum Earrings | 5000 Gil |
| Timeworn Talisman | 5000 Gil |
| Star Pendant | 1500 Gil |
| Headband | 1500 Gil |
| Revival Earrings | 500 Gil |
| Materia | Price |
|---|---|
| Healing Materia | 600 Gil |
| Cleansing Materia | 1500 Gil |
| Revival Materia | 3000 Gil |
| Fire Materia | 500 Gil |
| Ice Materia | 500 Gil |
| Lightning Materia | 500 Gil |
| Poison Materia | 1500 Gil |
| Barrier Materia | 1500 Gil |
| Binding Materia | 3000 Gil |
| HP Up Materia | 2000 Gil |
| MP Up Materia | 2000 Gil |
| Deadly Dodge Materia | 600 Gil |
Related Links
Author
Wall Market Area Guide
Rankings
- We could not find the message board you were looking for.
Gaming News
Popular Games

Genshin Impact Walkthrough & Guides Wiki

Honkai: Star Rail Walkthrough & Guides Wiki

Arknights: Endfield Walkthrough & Guides Wiki

Umamusume: Pretty Derby Walkthrough & Guides Wiki

Wuthering Waves Walkthrough & Guides Wiki

Pokemon TCG Pocket (PTCGP) Strategies & Guides Wiki

Abyss Walkthrough & Guides Wiki

Zenless Zone Zero Walkthrough & Guides Wiki

Digimon Story: Time Stranger Walkthrough & Guides Wiki

Clair Obscur: Expedition 33 Walkthrough & Guides Wiki
Recommended Games

Fire Emblem Heroes (FEH) Walkthrough & Guides Wiki

Pokemon Brilliant Diamond and Shining Pearl (BDSP) Walkthrough & Guides Wiki

Diablo 4: Vessel of Hatred Walkthrough & Guides Wiki

Super Smash Bros. Ultimate Walkthrough & Guides Wiki

Yu-Gi-Oh! Master Duel Walkthrough & Guides Wiki

Elden Ring Shadow of the Erdtree Walkthrough & Guides Wiki

Monster Hunter World Walkthrough & Guides Wiki

The Legend of Zelda: Tears of the Kingdom Walkthrough & Guides Wiki

Persona 3 Reload Walkthrough & Guides Wiki

Cyberpunk 2077: Ultimate Edition Walkthrough & Guides Wiki
All rights reserved
© SQUARE ENIX CO., LTD. All Rights Reserved.
CHARACTER DESIGN:TETSUYA NOMURA/ROBERTO FERRARI
The copyrights of videos of games used in our content and other intellectual property rights belong to the provider of the game.
The contents we provide on this site were created personally by members of the Game8 editorial department.
We refuse the right to reuse or repost content taken without our permission such as data or images to other sites.


![Neverness to Everness (NTE) Review [Beta Co-Ex Test] | Rolling the Dice on Something Special](https://img.game8.co/4414628/dd3192c8f1f074ea788451a11eb862a7.jpeg/show)


