Money Farming Guide: How to Earn Gold Fast
★ DQM3 releases on Steam and Mobile!
★ See all monster combinations: Synthesis Calculator
★ Some Helpful Articles:
┗ Story Walkthrough | Boss Guides | 100% Clear Guide
┗ List of Talents | List of Skills | List of Traits
┗ Level Up Guide | Mini Medal Locations | Egg Farming
The best way to money farming in Dragon Quest Monsters: The Dark Prince (DQM3) is repeatedly defeating Bag O' Tricks. Read on to learn the best gold farming spots in all stages of the game, items that increase gold gain, and the best ways to spend your money.
List of Contents
Early Game Gold Farming
In the early game, simply focus on defeating the strongest monsters you can, since you won't have access to the gold drop monsters yet.
Use Damaging AoE Attacks to Farm Monsters
| Recommended Gold Farmers | ||
|---|---|---|
 Raptile Raptile
|
 Powie Yowie Powie Yowie
|
 Jargon Jargon
|
 Drake Slime Drake Slime
|
 Cannonbrawler Cannonbrawler
|
 Dessert Demon Dessert Demon
|
During the early stages of the game, the recommended gold farming method is to simultaneously dispatch multiple monsters in the quickest way possible.
To do this, we recommend using monsters that have access to AoE skills like Flame Breath and Boom to deal damage to all enemies at once.
We particularly recommend using Raptile, since it has Shallow Breather as its talent, and Jargon which has Blazer, as these talents give them access to multiple AoE skills.
Grind in Newly Opened Areas
| Location | Estimated Gold Earned |
|---|---|
| Terrestria | Approximately 4G / 1 Monster |
| Circle of Conquest - Lower Echelon | Approximately 16G / 1 Monster |
| Circle of Temper - Lower Echelon | Approximately 25G / 1 Monster |
| Circle of Indulgence - Lower Echelon | Approximately 34G / 1 Monster |
| Circle of Caprice - Lower Echelon | Approximately 41G / 1 Monster |
| Circle of Fortitude - Lower Echelon | Approximately 43G / 1 Monster |
| Cradle of Corruption - Lower Level | Approximately 48G / 1 Monster |
It's recommended to farm gold by grinding in locations that you have recently unlocked as part of the story. As you progress, the gold that you get also increases.
Gold-wise, this method of farming may not be the most efficient. But if we were to consider exp, gold, new scoutable monsters, and potential item drops, there is more to be gained by farming using this method.
Don't Sell Monster Drops
We highly recommend holding onto dropped monster items instead of selling them for gold since the gold you earn is only 1/10th of the item's buying price.
Additionally, any dropped accessories can also be used as materials for synthesis, which you will unlock in later parts of the story.
Mid Game Gold Farming
In the mid game, you'll be able to encounter and farm the Bag O' Tricks monster, which drops a ton of gold when defeated.
Hunt Bag O' Tricks in the Circle of Conquest - Middle Echelon
 Bag O' Tricks Bag O' Tricks
|
|
| Time Required | Gold Earned |
|---|---|
| 2 minutes | 3,000G per monster |
The fastest way to farm gold during the mid-game of DQM3 is to hunt Bag O' Tricks in the Circle of Conquest - Middle Echelon. Successfully defeating these monsters will net the player 3,000G per kill.
Bag O' Tricks can also spawn in Circle of Indulgence - Middle Echelon, however, its spawn points are random and dispersed there, making hunting them in the Circle of Conquest the better choice.
Bag O' Tricks Mid Game Farming Route
| Circle of Conquest - Middle Echelon Money Farming Route |
|---|
 |
| Bag O' Tricks Step-by-Step |
└You cannot cross the river in spring and autumn, so skip to step 5 during those seasons. |
Bag O'Tricks Won't Respawn Unless You Change Areas
A mechanic that you have to note when farming is that monsters like Bag O'Tricks won't respawn unless you change to a different area (e.g. a different Circle or Echelon). Zooming to another area in the Middle Echelon won't respawn the Bag O' Tricks there.
In the guide above, we recommended the Laboratorium in the Lower Echelon since it's the fastest to select in the menu. You can choose another area if you like as long as it isn't in Circle of Conquest - Middle Echelon.
Shortcut from South to North Available in Summer and Winter
There is a shortcut you can take to quickly reach the southern spawn to the northern spawn. This shortcut is unavailable during spring and autumn because of the river.
It is recommended to farm in the winter since the shortcut path is simpler, but you can also try crossing in the summer by following a set of steps that are a bit difficult to see (refer to the video above to see where to jump).
End Game Gold Farming
In the mid game, you'll be able to encounter and farm the Bag O' Tricks monster, which drops a ton of gold when defeated.
Hunt Bag O' Tricks in the Circle of Indulgence - Upper Echelon
| Time Required | Gold Earned |
|---|---|
| 2 minutes | 3,500G per monster |
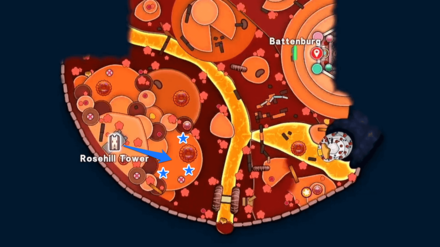
The best monster to hunt in the end game is still Bag o' Tricks, but there is now an area where you can farm them much faster, in the Circle of Indulgence - Upper Echelon. There are three spawn points just immediately to the east of Rosehill Tower, so you can quickly check for them and with higher chances than the previous one in the midgame.
Bag O' Tricks End Game Farming Route
| Circle of Conquest - Middle Echelon Money Farming Route |
|---|
 |
| Bag O' Tricks Step-by-Step |
└More Bag O'Tricks may appear if you defeat the surrounding enemies |
Defeating Surrounding Enemies First to Make More Bag O' Tricks Appear
If you clear the enemies surrounding the Bag O' Tricks before fighting one, more Bag O' Tricks are likelier to spawn. If you don't clear other surroundings enemies, it's likely that they fight alongside the Bag O' Tricks.
When fighting other monsters, you might see the Bag O' Tricks in the overworld disappear, but don't worry; just walk away a bit from the area then return to see the Bag O' Tricks again.
Useful Items and Accessories for Money Farming
There are certain items and accessories that increase the gold you get when used, so make sure to use them when farming.
- Use the Bonus Ball or Bumper Bonus Ball Items
- Equip Gold Increasing Accessories
- Get the Loyalty Card from the Medallist
Use the Bonus Ball or Bumper Bonus Ball Items

The Bonus Ball and Bumper Bonus Ball items are useful when farming money.
Bonus Ball multiplies the gold (and experience) you get by 1.5 for up to 10 battles. Bumper Bonus Ball is a much stronger version that gives 2x bonus and lasts for 25 battles.
You can get these items as rewards in the Arenas, in some treasure chests across the game world, and from the Treasure Trunks DLC.
Equip Gold Increasing Accessories
| Accessories | Effect and How to Obtain |
|---|---|
| Cupcake Cane | Effects: Gold Panner (1.1x Gold increase), 1.1x EXP gain, small item % increase How to Obtain: Obtained during the story in the Circle of Indulgence, Middle Echelon |
| Gold Badge | Effects: Gold Up (S): 1.3x Gold increase How to Obtain: Exchange for 40 Mini Medals with the Medallist |
| Gold Medal | Effects: Gold Up (L): 1.5x Gold increase How to Obtain: Exchange for 60 Mini Medals with the Medallist |
Accessories of the Same Type Don't Stack
While there are multiple accessories that increase gold gain, these effects don't overlap; only the accessory with the highest multiplier will get counted in the calculations.
For example, if you have the Gold Badge and Gold Medal equipped, only the Gold Medal's 1.5x Gold gain effect will count.
Get the Loyalty Card from the Medallist
While not directly related to farming, the Loyalty Card is an item that you want to have if you're spending a lot of money. Its effect is to permanently give you a 20% discount when purchasing items from the store.
You can get the Loyalty Card by exchanging 70 Mini Medals to the Medallist. It will take a while to obtain this item, but the reward is incredibly worth it.
Mini Medal Locations and Rewards
Do Gold Up Boosts Overlap?
The bonuses from the gold boost items and accessories have their set of rules of which boost effects stack.
- One Bonus Ball and Accessory Boost Can Stack With Each Other
- Bonus Ball will not Stack with Bumper Bonus Ball
- Only the Strongest Accessory Boost will Take Effect
One Bonus Ball and Accessory Boost Can Stack With Each Other
| Maximum Gold Boost |
|---|
| Bumper Bonus Ball (+100%) + Gold Medal (50%) = 2.5x Gold Gained (150%) |
The gold increase boost provided by Bonus Ball items and accessories will stack with each other. The resulting boost is additive, not multiplicative.
For example, if you have a Bonus Ball active (+50%) and a Gold Badge active (+30%), the resulting boost is 80%.
Bonus Ball will not Stack with Bumper Bonus Ball
If you have a Bonus Ball active and use a Bumper Bonus Ball, their effects won't get added to the other; the effect will simply be overwritten. The opposite is also true, so be careful of overwriting the stronger Bumper Bonus Ball effect with the weaker one.
Only the Strongest Accessory Boost will Take Effect
If you have multiple Gold Boost accessories equipped, only the strongest boost will be counted. For example, if you have Gold Badge equipped to one monster and Gold Medal equipped to another, you will only get the 1.5x boost from the Gold Medal.
What to Spend Money On
| How to Spend Money | Recommendation |
|---|---|
| Buy from the Online Shop | ★★★ |
| Purchase Treat Items | ★★★ |
| Pay Entry Fee for the Arenas | ★★★ |
| Buy Recovery and Buff Items for Boss Battles | ★★☆ |
| Synthesize Accessories in the Late Game | ★☆☆ |
Buy from the Online Shop
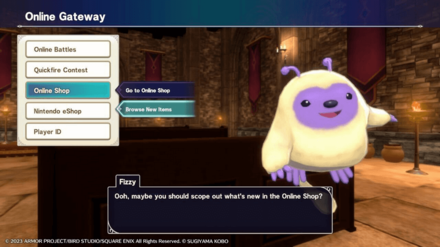
You can purchase various items from the Online Shop, accessible by talking to Fuzzy. We recommend purchasing the Scrolls, since these items allow your monster to obtain a specific skill, making them incredibly useful.
The selection in the Online Shop changes everyday, so make sure to frequently check there if there are any items that will be beneficial to your monsters.
Purchase Treat Items
| Item | Price | Effect |
|---|---|---|
| Better Beastie Bites | 1500G | Massive |
| Meaty Treat | 500G | Regular |
| Smoked Sirloin | 300G | Slight |
| Monster Munchies | 100G | Very Slight |
Treat items that raise the chances of monsters joining you are a useful thing to spend your money on. As you progress through the story, you'll be able to unlock better treats in the shops.
Pay Entry Fee for the Arenas
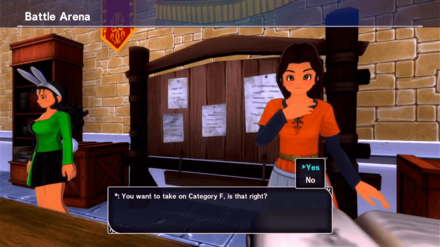
Another way to spend money is for the participation fees in the arenas in the Colosseum and Maulosseum. The fees get much higher as you increase in rank.
It's a good idea to progress through the arenas to unlock the rewards; the reward for the S category in the Maulosseum is the Trainee's Medal, which greatly increases experience gained and is mandatory for training monsters.
Endor Arena Guide and How to Win the Arena
Buy Recovery and Buff Items if You're Having Difficulty with Bosses
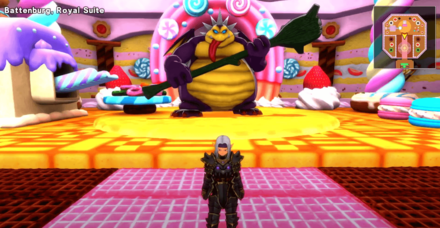
If you're having difficulty against a boss, try buying some recovery and buff items with your money. However, it's generally more recommended to spend your money on the Online Shop or treat items instead, so you can strengthen your monsters permanently.
Synthesize Accessories in the Late Game
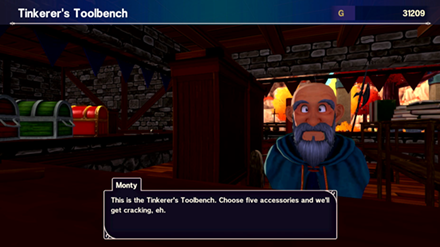
Money is also used for synthesizing accessories. Each synthesis will cost 1000G in addition to the 5 accessories needed, which can get quite costly.
Unless you have enough money to be able to afford these, prioritize spending your money on the other things above first.
Dragon Quest Monsters: The Dark Prince Related Guides

 Story Walkthrough Story Walkthrough
|
 Monsters Monsters |
 Skills Skills |
 Talents Talents |
 Traits Traits |
 Bosses Bosses
|
 Items Items |
 Maps & Locations Maps & Locations |
Popular Articles
Metal Slime Guides
| Metal Slime Guides | ||
|---|---|---|
| How to Beat Metal Slime and Locations | How to Beat Liquid Metal Slime and Locations | How to Beat Metal King Slime and Locations |
Beginner and Early Game Guides
Mid to Late Game Guides
Frequently Asked Questions (FAQs)
Updates and Patches
| Updates and Patches | |
|---|---|
| Updates and Patch Notes | McDonald's Promo: How to Get Exclusives Outside of Japan |
| List of Gift Codes (December 2023) | How to Fix Errors |
Comment
Author
Dragon Quest Monsters: The Dark Prince Walkthrough & Guides Wiki
Money Farming Guide: How to Earn Gold Fast
Rankings
- We could not find the message board you were looking for.
Gaming News
Popular Games

Genshin Impact Walkthrough & Guides Wiki

Umamusume: Pretty Derby Walkthrough & Guides Wiki

Pokemon Pokopia Walkthrough & Guides Wiki

Honkai: Star Rail Walkthrough & Guides Wiki

Monster Hunter Stories 3: Twisted Reflection Walkthrough & Guides Wiki

Arknights: Endfield Walkthrough & Guides Wiki

Wuthering Waves Walkthrough & Guides Wiki

Zenless Zone Zero Walkthrough & Guides Wiki

Pokemon TCG Pocket (PTCGP) Strategies & Guides Wiki

Monster Hunter Wilds Walkthrough & Guides Wiki
Recommended Games

Diablo 4: Vessel of Hatred Walkthrough & Guides Wiki

Cyberpunk 2077: Ultimate Edition Walkthrough & Guides Wiki

Fire Emblem Heroes (FEH) Walkthrough & Guides Wiki

Yu-Gi-Oh! Master Duel Walkthrough & Guides Wiki

Super Smash Bros. Ultimate Walkthrough & Guides Wiki

Pokemon Brilliant Diamond and Shining Pearl (BDSP) Walkthrough & Guides Wiki

Elden Ring Shadow of the Erdtree Walkthrough & Guides Wiki

Monster Hunter World Walkthrough & Guides Wiki

The Legend of Zelda: Tears of the Kingdom Walkthrough & Guides Wiki

Persona 3 Reload Walkthrough & Guides Wiki
All rights reserved
© ARMOR PROJECT/BIRD STUDIO/SQUARE ENIX © SUGIYAMA KOBO
Nintendo Switch is a trademark of Nintendo.
The copyrights of videos of games used in our content and other intellectual property rights belong to the provider of the game.
The contents we provide on this site were created personally by members of the Game8 editorial department.
We refuse the right to reuse or repost content taken without our permission such as data or images to other sites.
 Synthesis Guide & Calculator
 Best Team
 Best Early Game Monsters
 Egg Farming and Locations
 Best Monsters Tier List
 Metal Slime Farming Guide
 Best Scouting Monsters
 Strong Monsters & Locations
 Mini Medal Locations
 How to Level Up Fast
 Best Talents for Story and PVP
 Post-Game and 100% Guide
 9 Quick Tips to Master
 Ranked Guide: How to Win in Ranked PVP
 Best Healer Monsters
 Endor Arena Guide: How to Win
 Monster Tactics and Instructions
 Quickfire Contest: Best Teams and Rewards


![The Liar Princess and the Blind Prince Review [PC] | Lovely to Look at but Tedious to Play](https://img.game8.co/4442586/8d95f5faf05780f1765ce7e0938bd825.jpeg/show)
![The Liar Princess and the Blind Prince Review [PC] | Lovely to Look at but Tedious to Play](https://img.game8.co/4442586/8d95f5faf05780f1765ce7e0938bd825.jpeg/thumb)
![Marathon Cryo Archive Map Teased as [REDACTED] on Selection Screen](https://img.game8.co/4442236/6357203e58172f6de57f1991e7c39b22.png/thumb)


