Circle of Temper (Upper Echelon) Walkthrough: Chart 15
★ DQM3 releases on Steam and Mobile!
★ See all monster combinations: Synthesis Calculator
★ Some Helpful Articles:
┗ Story Walkthrough | Boss Guides | 100% Clear Guide
┗ List of Talents | List of Skills | List of Traits
┗ Level Up Guide | Mini Medal Locations | Egg Farming
A walkthrough for Circle of Temper (Upper Echelon) in Dragon Quest Monsters: The Dark Prince (DQM3). Read on to see the recommended level for Circle of Temper (Upper Echelon), as well as monsters that can be found there!
| ◄ Previous Section | Next Section ▶ |
|---|---|
| Cradle of Corruption (Middle Echelon) | Circle of Indulgence (Upper Echelon) |
List of Contents
Circle of Temper (Upper Echelon) Walkthrough
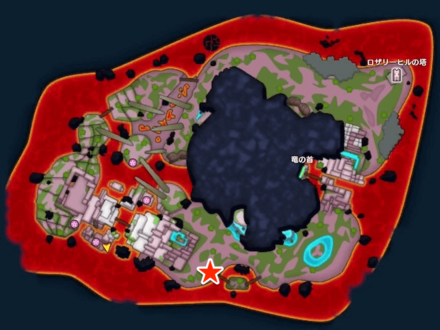
Circle of Temper (Upper Echelon)
| Map Layout | |
|---|---|
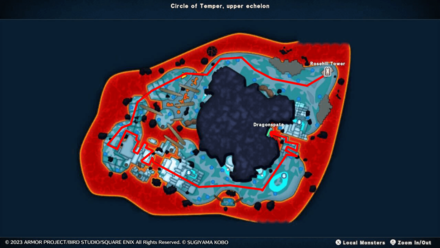 |
| 1 | Go to the second floor of Rosehill Tower and offer the Golden Travelite to the magic circle to be able to access new locations. |
|---|---|
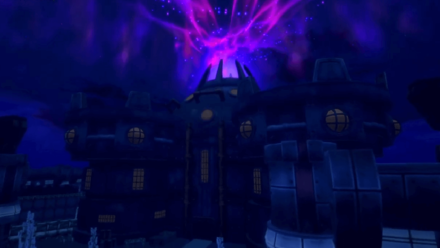
| 2 | Go to the Circle of Temper (???). When you leave the tower, you will arrive at Circle of Temper (Upper Echelon). Metal King Slimes will appear with a low chance here. ▶︎ Metal Slime Farming Guide |
| 3 | Go counterclockwise and enter the location named Dragonspate on the map. |
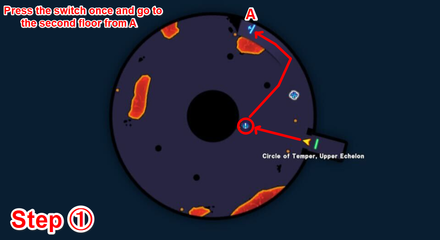
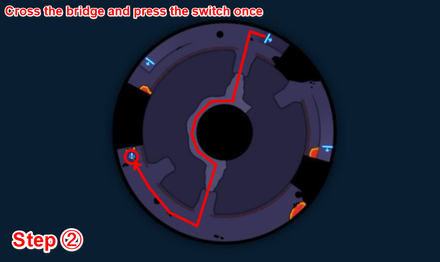
Dragonspate
| Dragonspate Map Route | ||
|---|---|---|
 |
 |
 |
 |
 |
 |
 |
 |
 |
 |
 |
 |
 |
 |
 |
 |
 |
- |
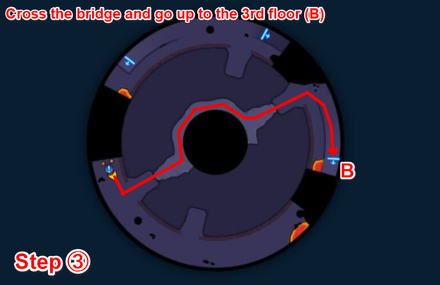
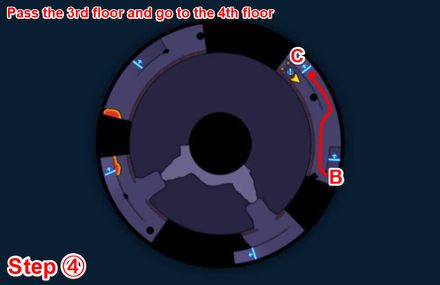
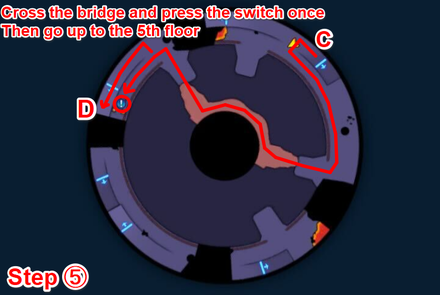
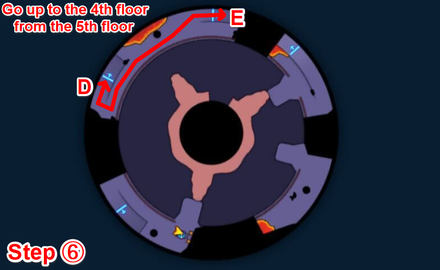
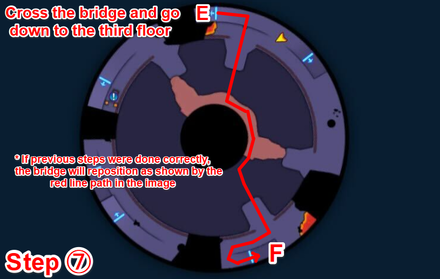
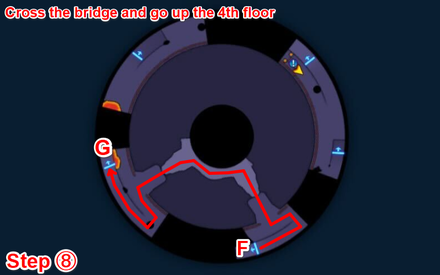
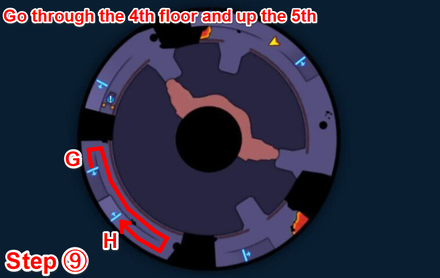
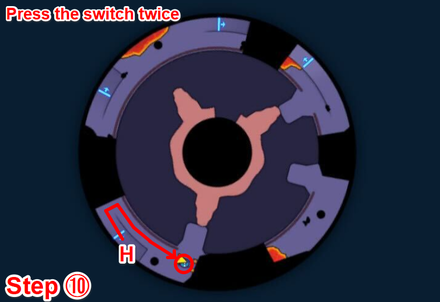
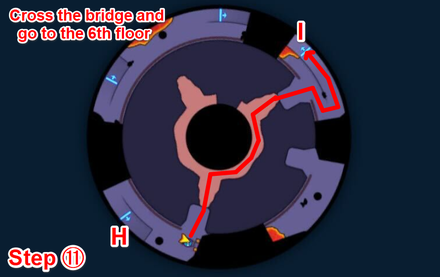
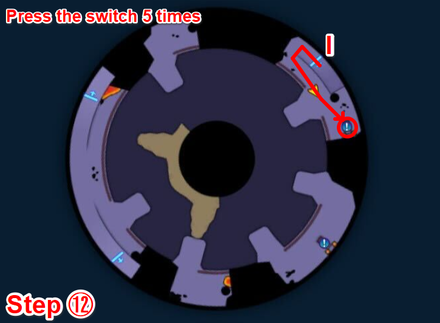
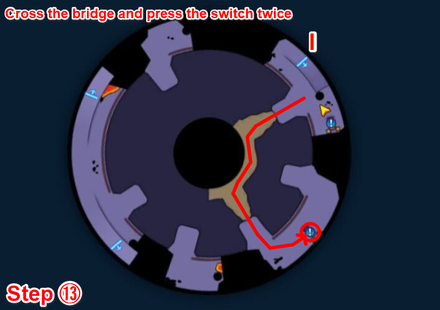
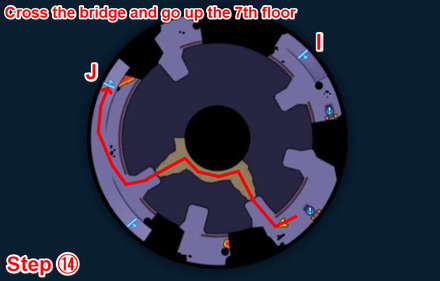
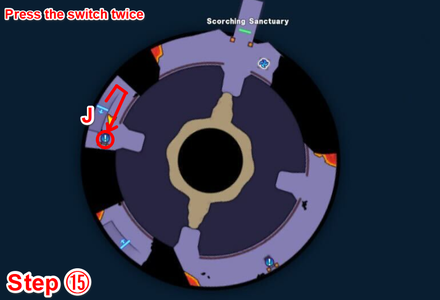
| 1 | Press the switch on the Dragon statue and proceed along the path to the top floor |
|---|---|
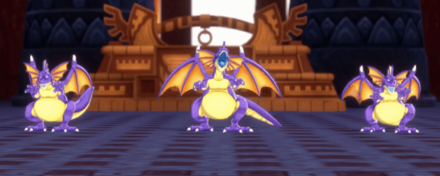
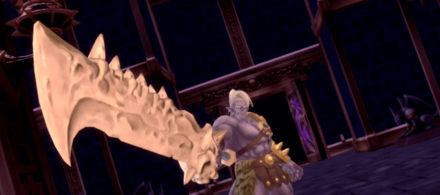
| 2 | Battle Ash, Blaise, and Bernie Upon defeating them, there will be a series of battles with the next boss. ► How to Beat The Brimstone Boys |
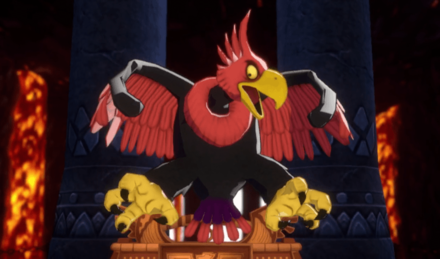
| 3 | Battle The Ifreann Eagle Defeating it will make it easier to scout higher level Demon Family Monsters in the Circle of Temper. ► How to Beat the Ifreann Eagle |
| 4 | Return to Rosehill Tower and go to the next world from the magic circle on the second floor. |
 Game8 Strategy Team Game8 Strategy Team |
Even if you lose consecutive times with the Ifreann Eagle, you can lose on purpose and fully recover health once! If you use this method, make sure to deposit your gold in the bank first! |
|---|
Circle of Temper (Upper Echelon) Recommended Monsters
Monsters to Scout for Battle
| Monster | Explanation |
|---|---|
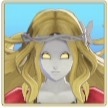
 Firn Fiend Firn Fiend
|
|
 Wyrtoise Wyrtoise
|
• Used as Synthesis material for
|
 Cureslime Cureslime
|
• Used as Synthesis material for
|
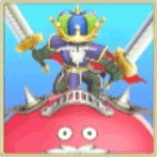
 Metal King Slime Metal King Slime
|
• Used as Synthesis material for
• The appearance rate for this Monster increases after clearing the story. |
Circle of Temper (Upper Echelon) Boss Guide
Boss Battle #1: Ash, Blaise, and Bernie
 |
|||
| Recommended Level | Family | ||
|---|---|---|---|
| 34 |
|
||
| Recommended Party | |||
| Main Strategy | |||
|
|
|||
 Briny Bronco
 King Cureslime
How to Beat Ash, Blaise, and Bernie (Brimstone Boys): Best Party Members and Weakness
Boss Battle #2: The Ifreann Eagle
 |
|||
| Recommended Level | Family | ||
|---|---|---|---|
| 34 |
|
||
| Recommended Party | |||
| Main Strategy | |||
|
|
|||
 Hacksaurus
How to Beat The Ifreann Eagle: Best Party Members and Weakness
Other Recommended Parties
| Party 1 | |||
|---|---|---|---|
 Dullahan Dullahan
|
 Killing Machine Killing Machine
|
 Iron Maiden Iron Maiden
|
 Drakulard Drakulard
|
| Party 2 | |||
 Archdemon Archdemon
|
Killing Machine
|
 Shogum Shogum
|
 Heligator Heligator
|
Circle of Temper (Upper Echelon) Monster List
Circle of Temper (Upper Echelon)
 Overtoad
 Grillerpillar
 Bag O' Tricks
 Shivery Shrubbery
 Scuttle Slime
 Corpsickle
 Metal Slime
 Frolicker
 Freezing Fog
 Rockbomb
 Drackolyte
 Gasbagon
 Spiny Slime
 Beleth
 Hell Niño
 Bodkin Fletcher
 Brownie
 Cannibox
 She-Slime
 Snowmangler
 Pogoin' Penguin
 Lampling
Strong Monsters
| Large Monster | Location |
|---|---|
 Stout Troll Stout Troll
|
 |
Monster List: All 526 Monsters
Dragonspate
 Liquid Metal Slime Liquid Metal Slime
|
 Mimic Mimic
|
|
 Bone Idol Bone Idol
|
 Dancing Flame Dancing Flame
|
 Skeleton Swordsman Skeleton Swordsman
|
 Shadow Shadow
|
||
Circle of Temper (Upper Echelon) Mini Medal Locations
| Obtained | Map / Image Location |
|---|---|
|
(Circle of Temper) Upper Echelon At the Northern Foot of the Volcano  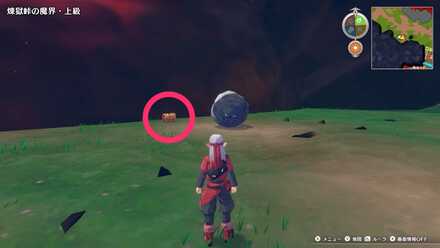
|
|
|
(Circle of Temper) Upper Echelon At the Southernwest Corner of the Map  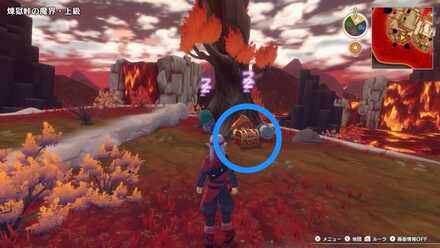
|
|
|
(Circle of Temper) Upper Echelon By the Southwest Pillar on the 1F 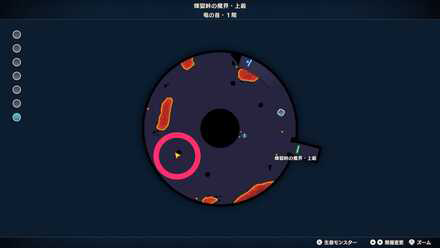 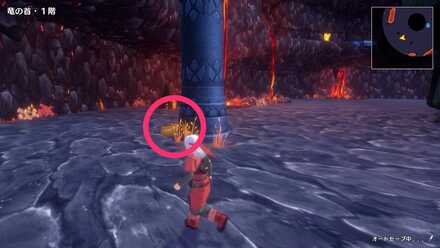
|
|
|
(Circle of Temper) Upper Echelon In a Pot on the 6F  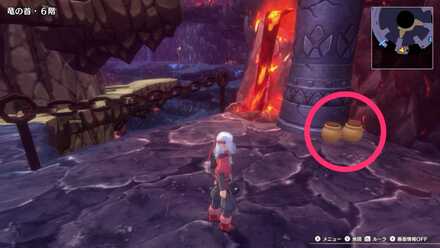
|
Mini Medal Checklist: All 72 Locations and Rewards
Dragon Quest Monsters: The Dark Prince Related Guides

Lower Echelon Guides
 Plains: Chart 1
 Circle of Conquest
  Circle of Temper (Lower Echelon): Chart 3
 Circle of Indulgence (Lower Echelon): Chart 4
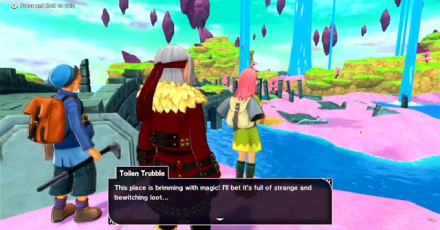 Circle of Caprice (Lower Echelon): Chart 5
 Circle of Fortitude (Lower Echelon): Chart 6
 Cradle of Corruption (Lower Level): Chart 7
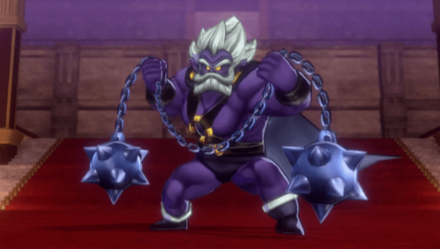 Terrestria (Diabolic Hall): Chart 8
Middle Echelon Guides
 Circle of Fortitude (Middle Echelon): Chart 9
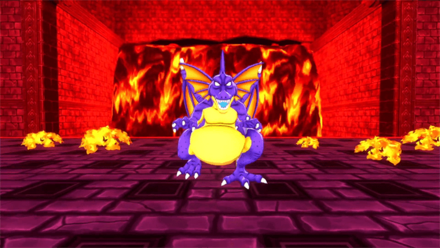 Circle of Temper (Middle Echelon): Chart 10
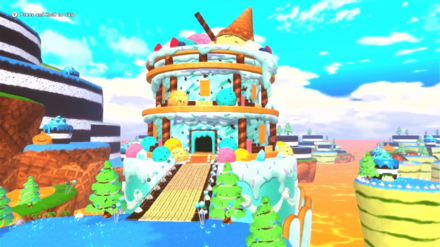 Circle of Indulgence (Middle Echelon): Chart 11
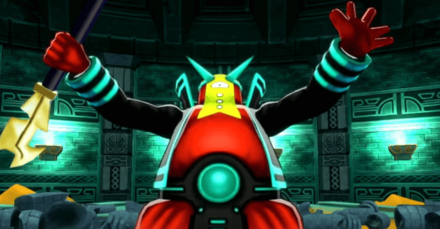 Circle of Caprice (Middle Echelon): Chart 12
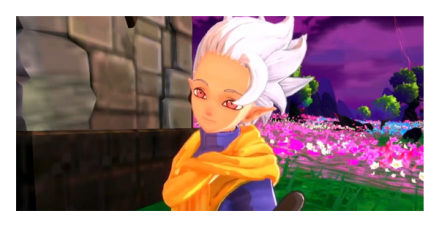 Circle of Conquest (Middle Echelon): Chart 13
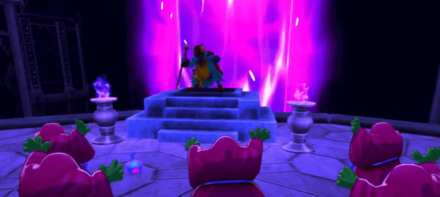 Cradle of Corruption (Middle Level): Chart 14
Upper Echelon Guides
 Circle of Temper (Upper Echelon): Chart 15
 Circle of Fortitude (Upper Echelon): Chart 17
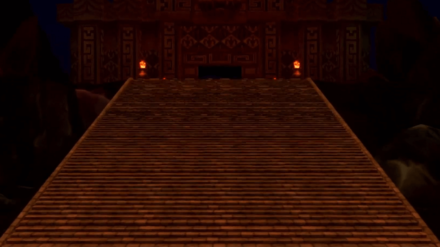 Cradle of Corruption (Upper Level): Chart 18
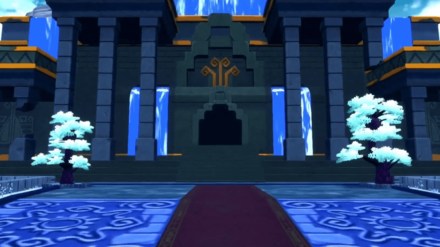
 Circle of Conquest (Upper Echelon): Chart 20
 The Whispwoods
Comment
Author

Dragon Quest Monsters: The Dark Prince Walkthrough & Guides Wiki
Circle of Temper (Upper Echelon) Walkthrough: Chart 15
Rankings
- We could not find the message board you were looking for.
Gaming News

![Death Stranding 2: On The Beach [PC] Review | A Port That Delivers](https://img.game8.co/4447392/15310a0c9aa1b6843bb713b2ea216930.jpeg/show)


Popular Games

Genshin Impact Walkthrough & Guides Wiki
Umamusume: Pretty Derby Walkthrough & Guides Wiki
Crimson Desert Walkthrough & Guides Wiki
Monster Hunter Stories 3: Twisted Reflection Walkthrough & Guides Wiki
Honkai: Star Rail Walkthrough & Guides Wiki
Pokemon Pokopia Walkthrough & Guides Wiki
The Seven Deadly Sins: Origin Walkthrough & Guides Wiki
Wuthering Waves Walkthrough & Guides Wiki
Zenless Zone Zero Walkthrough & Guides Wiki
Arknights: Endfield Walkthrough & Guides Wiki


Recommended Games
Fire Emblem Heroes (FEH) Walkthrough & Guides Wiki
Diablo 4: Vessel of Hatred Walkthrough & Guides Wiki
Cyberpunk 2077: Ultimate Edition Walkthrough & Guides Wiki
Yu-Gi-Oh! Master Duel Walkthrough & Guides Wiki
Super Smash Bros. Ultimate Walkthrough & Guides Wiki
Pokemon Brilliant Diamond and Shining Pearl (BDSP) Walkthrough & Guides Wiki
Elden Ring Shadow of the Erdtree Walkthrough & Guides Wiki
Monster Hunter World Walkthrough & Guides Wiki
The Legend of Zelda: Tears of the Kingdom Walkthrough & Guides Wiki
Persona 3 Reload Walkthrough & Guides Wiki


All rights reserved
© ARMOR PROJECT/BIRD STUDIO/SQUARE ENIX © SUGIYAMA KOBO
Nintendo Switch is a trademark of Nintendo.
The copyrights of videos of games used in our content and other intellectual property rights belong to the provider of the game.
The contents we provide on this site were created personally by members of the Game8 editorial department.
We refuse the right to reuse or repost content taken without our permission such as data or images to other sites.