Endor Arena Guide and How to Win the Arena
★ DQM3 releases on Steam and Mobile!
★ See all monster combinations: Synthesis Calculator
★ Some Helpful Articles:
┗ Story Walkthrough | Boss Guides | 100% Clear Guide
┗ List of Talents | List of Skills | List of Traits
┗ Level Up Guide | Mini Medal Locations | Egg Farming
Endor Arena is a tournament-style challenge in Dragon Quest Monsters: The Dark Prince (DQM3). Learn how to win each rank in the arena, what enemies to expect, what the rewards are, and more!
List of Contents
Arena Guide and Rewards List
| Endor Arena Guide | Mausoleum Arena Guide |
Endor Arena Guide and Rewards
| Rank | Challenge / Rewards |
|---|---|
|
|
Recommendation : Have Level 4 Monsters ・Medicinal Herb x3 |
|
|
Recommendation : Have Level 7 Monsters ・Monster Munchies x3 ・ Matchmmaking with a Nardragon ・Access to Circle of Conquest (Lower Echelon) |
|
|
Recommendation : Have Level 12 Monsters ・Seed of Skill x3 |
|
|
Recommendation : After Completing Cradle of Corruption (Lower Level) ・Bonus Ball x1 ・Matchmaking with a Scornet |
|
|
Recommendation : After Completing Circle of Fortitude (Middle Echelon) ・Metal Slimecard x4 |
|
|
Recommendation : After Completing Cradle of Corruption (Middle Echelon) ・Matchmaking with a Bomboulder ・Scavenger's Badge |
|
|
Recommendation : After Completing Cradle of Corruption (Middle Echelon) ・Cleric's Scroll |
|
|
Recommendation : After Clearing the Story ・Scavenger's Medal |
You can also find Matchmaking NPCs in the Endor Arena after you have cleared certain ranks.
McDonald's Collaboration Event Also in Endor Arena
| McDonald's Collab Event Rewards | ||
|---|---|---|
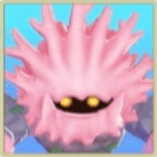
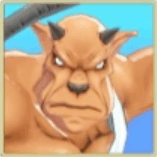
 Triple Splatty Triple Splatty
|
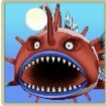
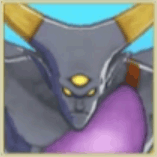
 Flurry Fiend Flurry Fiend
|
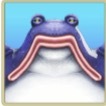
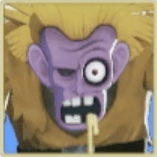
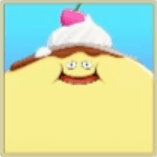
 Mimic With Cheese Mimic With Cheese
|
The Endor Arena will also have the McDonald's Collaboration Event where you can get exclusive Monsters shown above.
Maulosseum Arena Guide and Rewards
| Rank | Challenge / Rewards |
|---|---|
|
|
Recommendation : Have Level 10-11 Monsters ・Access to the Circle of Temper (Lower Echelon) └ Increased Scouting Rate in that Area |
|
|
Recommendation : Have Level 12 Monsters ・Smoked Sirloin |
|
|
Recommendation : Have Level 14 Monsters ・Yggdrasil Leaf x1 |
|
|
Recommendation : After Clearing Diabolical Hall ・Super Bounce Ball x1 |
|
|
Recommendation : After Clearing Circle of Fortitude (Middle Echelon) ・Matchmaking with a Dark Slime |
|
|
Recommendation : After Clearing Cradle of Corruption (Middle Echelon) ・Trainee's Badge |
|
|
Recommendation : After Clearing Cradle of Corruption (Middle Echelon) ・Matchmaking with a Sekerleton |
|
|
Recommendation : After Clearing the S Rank Endor Arena ・Trainee's Medal |
You can also find other Matchmaking NPCs inside the Mausoleum Arena after clearing certain ranks.
How to Win in the Arena
Level Up Monsters and Mix Up Your Team
When you have trouble winning in the arena, it is often because your team is underleveled. Try to grind levels and also mix up your traits or teams to gain an advantage. Certain Monsters do better in specific ranks depending on the types of enemies you have to face.
Learn Evolved Talents
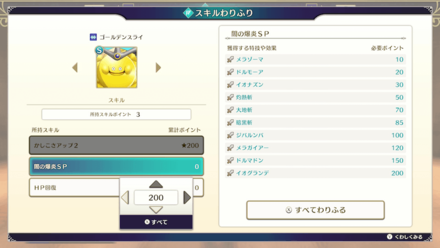
There are some talents that can be evolved if you put the maximum number of points to the Talent before synthesis. The evolved version will be passed down to the child Monster, which can make your team significantly stronger!
Talent Evolutions and How to Evolve
Set Instructions in the Menu
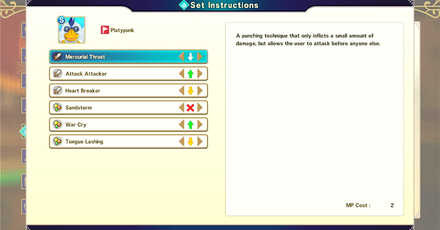
Since you cannot directly control your Monsters in the arena, it is useful to set up the behavior in the Instructions settings before challenging the ranks to optimize the way your monsters will fight.
List of Enemy Formations in the Arena
| Endor Arena Enemies | Mausoleum Arena Enemies |
|---|
Endor Arena Enemy Formations
| G Rank | F Rank | E Rank | D Rank |
| C Rank | B Rank | A Rank | S Rank |
G Rank Enemies
| Round 1 | |||
|---|---|---|---|
 Khalamari Kid Khalamari Kid
|
 Raptile Raptile
|
 Briny Bronco Briny Bronco
|
 Puffpoise Puffpoise
|
| Round 2 | |||
 Woebergine Woebergine
|
 Wing Slime Wing Slime
|
 Mouseflap Mouseflap
|
 Pogoin' Penguin Pogoin' Penguin
|
| Round 3 | |||
 Picksy Picksy
|
 Antguzzler Antguzzler
|
 Hammerhood Hammerhood
|
 Mischievous Mole Mischievous Mole
|
F Rank Enemies
| Round 1 | |||
|---|---|---|---|
 Buddy Slime Buddy Slime
|
 Great Sabrecub Great Sabrecub
|
 Damselfly Damselfly
|
 Bunicorn Bunicorn
|
| Round 2 | |||
 Walking Corpse Walking Corpse
|
 Bodkin Archer Bodkin Archer
|
 Mudraker Mudraker
|
 Hellbound Horror Hellbound Horror
|
| Round 3 | |||
 Bag O' Laughs Bag O' Laughs
|
 Flython Flython
|
 Jailcat Jailcat
|
|
E Rank Enemies
| Round 1 | |||
|---|---|---|---|
 Weaken Beakon Weaken Beakon
|
 Dark Sabrecub Dark Sabrecub
|
 Scornet Scornet
|
 Ratatattack Ratatattack
|
| Round 2 | |||
 Tortoceratops Tortoceratops
|
 Octopot Octopot
|
 Clockwork Cuckoo Clockwork Cuckoo
|
 Rubble Slime Rubble Slime
|
| Round 3 | |||
 Airbagon Airbagon
|
 Hell Niño Hell Niño
|
 Grinferno Grinferno
|
 Spiny Slime Spiny Slime
|
D Rank Enemies
| Round 1 | |||
|---|---|---|---|
 Silvapithecus Silvapithecus
|
 Chimaera Chimaera
|
 Hawk Man Hawk Man
|
 Wyvern Wyvern
|
| Round 2 | |||
 Tuskateer Tuskateer
|
 Stone Golem Stone Golem
|
 Palooka Prawn Palooka Prawn
|
|
| Round 3 | |||
 Spinchilla Spinchilla
|
 Coralossus Coralossus
|
 Dangler Fish Dangler Fish
|
 Mortoad Mortoad
|
C Rank Enemies
| Round 1 | |||
|---|---|---|---|
 Fandangow Fandangow
|
 Hooper Trooper Hooper Trooper
|
 Croc-A-Bugle-Doo Croc-A-Bugle-Doo
|
 Rockin' Rockhopper Rockin' Rockhopper
|
| Round 2 | |||
 Ripped Rabbit Ripped Rabbit
|
 Notso Macho Notso Macho
|
 Warhog Warhog
|
 Hyperboarean Hyperboarean
|
| Round 3 | |||
 Boss Troll Boss Troll
|
 Great Argon Lizard Great Argon Lizard
|
||
B Rank Enemies
| Round 1 | |||
|---|---|---|---|
 Sugarstar Slime Sugarstar Slime
|
 Tufty Tot Tufty Tot
|
 Drooling Ghoul Drooling Ghoul
|
 Shadow Slime Shadow Slime
|
| Round 2 | |||
 Fright Knight Fright Knight
|
 King Squid King Squid
|
 Demon-At-Arms Demon-At-Arms
|
- |
| Round 3 | |||
 Missing Lynx Missing Lynx
|
 Sintaur Sintaur
|
 Buffalogre Buffalogre
|
 Heligator Heligator
|
A Rank Enemies
| Round 1 | |||
|---|---|---|---|
 Cursed Crooner Cursed Crooner
|
 Bongo Fandango Bongo Fandango
|
 Overtoad Overtoad
|
 Sprite Bulb Sprite Bulb
|
| Round 2 | |||
 Bloodbonnet Bloodbonnet
|
 Alarmour Alarmour
|
 Dullahan Dullahan
|
 Goobonce Goobonce
|
| Round 3 | |||
 Tortured Soul Tortured Soul
|
 Hellspawn Hellspawn
|
 Hocus-Poker Hocus-Poker
|
 King Cureslime King Cureslime
|
S Rank Enemies
| Round 1 | |||
|---|---|---|---|
 Chihuawyrm Chihuawyrm
|
 Shogum Shogum
|
 Headless Horseman Headless Horseman
|
|
| Round 2 | |||
 Bilhaw Bilhaw
|
 Flapdragon Flapdragon
|
 Ne'er-Do-Well Ne'er-Do-Well
|
|
| Round 3 | |||
 Goomulonimbus Goomulonimbus
|
 Great Dragon Great Dragon
|
 Prism Peacock Prism Peacock
|
 Ronin Raccoon Ronin Raccoon
|
Mausoleum Arena Enemy Formations
| G Rank | F Rank | E Rank | D Rank |
| C Rank | B Rank | A Rank | S Rank |
G Rank Enemies
| Round 1 | |||
|---|---|---|---|
 Snowmangler Snowmangler
|
 Powie Yowie Powie Yowie
|
 Dead Resident Dead Resident
|
 Snail Slime Snail Slime
|
| Round 2 | |||
 Stark Raven Stark Raven
|
 Guaardvark Guaardvark
|
 Skullrider Skullrider
|
 Skeleton Skeleton
|
| Round 3 | |||
 Pocus Poppet Pocus Poppet
|
 Eggsoskeleton Eggsoskeleton
|
 Flying Saucers Flying Saucers
|
 Lampling Lampling
|
F Rank Enemies
| Round 1 | |||
|---|---|---|---|
 Bullfinch Bullfinch
|
 Succubat Succubat
|
 Bludgerigar Bludgerigar
|
 Vampire Cat Vampire Cat
|
| Round 2 | |||
 Bantamweight Bantamweight
|
 Jargon Jargon
|
 Killer Gila Killer Gila
|
 Knight Errant Knight Errant
|
| Round 3 | |||
 Erazor Blade Erazor Blade
|
 Hunter Mech
(L Size) Hunter Mech
(L Size) |
 Stabosaur Stabosaur
|
|
E Rank Enemies
| Round 1 | |||
|---|---|---|---|
 Awebergine Awebergine
|
 King Kelp King Kelp
|
 Prancing Pillar Prancing Pillar
|
 Kisser Kisser
|
| Round 2 | |||
 Weartiger Weartiger
|
 Escudogre Escudogre
|
 Ursa Major Ursa Major
|
 Jumping Jackal Jumping Jackal
|
| Round 3 | |||
 Drakularge Drakularge
|
 Rockbomb Rockbomb
|
 Gasbagon Gasbagon
|
 Dessert Demon Dessert Demon
|
D Rank Enemies
| Round 1 | |||
|---|---|---|---|
 Wild Slime Wild Slime
|
 Metal Slime Knight Metal Slime Knight
|
 Pasty Pastry Pasty Pastry
|
 Cureslime Cureslime
|
| Round 2 | |||
 Skeleton Soldier Skeleton Soldier
|
 Skellyfish Skellyfish
|
 Skeleton Swordsman Skeleton Swordsman
|
 Mummy Boy Mummy Boy
|
| Round 3 | |||
 Shivery Shrubbery Shivery Shrubbery
|
 Living Statue Living Statue
|
 Magmalice Magmalice
|
 Brollygagger Brollygagger
|
C Rank Enemies
| Round 1 | |||
|---|---|---|---|
 Bloody Hand Bloody Hand
|
 Fowl Beast Fowl Beast
|
 Roistering Rooster Roistering Rooster
|
 Dancing Flame Dancing Flame
|
| Round 2 | |||
 Hard-Boiled Eggsoskeleton Hard-Boiled Eggsoskeleton
|
 Cyber Slime Cyber Slime
|
 Face Invader Face Invader
|
 Metal Dragon Metal Dragon
|
| Round 3 | |||
 Grim Keeper Grim Keeper
|
 Jester Slime Jester Slime
|
 Togre Togre
|
 Hypothermion Hypothermion
|
B Rank Enemies
| Round 1 | |||
|---|---|---|---|
 Corpsickle Corpsickle
|
 Grotwyrm Grotwyrm
|
 Mouldy Slime Mouldy Slime
|
|
| Round 2 | |||
 Peeper Peeper
|
 Buntzenberner Buntzenberner
|
 Belisha Beakon Belisha Beakon
|
 Drackyma Drackyma
|
| Round 3 | |||
 Crème Caraslime Crème Caraslime
|
 Slime Snack Slime Snack
|
 Admirer Admirer
|
 Foebergine Foebergine
|
A Rank Enemies
| Round 1 | |||
|---|---|---|---|
 Brimstone Bulb Brimstone Bulb
|
 Treevil Treevil
|
 Soy Soldier Soy Soldier
|
|
| Round 2 | |||
 Armoured Scorpion Armoured Scorpion
|
 Metal Scorpion Metal Scorpion
|
 Firebird Firebird
|
 Snowbird Snowbird
|
| Round 3 | |||
 Tuffpoise Tuffpoise
|
 Merman Merman
|
 Baleen Mage Baleen Mage
|
 Abyss Diver Abyss Diver
|
S Rank Enemies
| Round 1 | |||
|---|---|---|---|
 Dark Sabrecat Dark Sabrecat
|
 Pazuzu Pazuzu
|
 Lieutenant Goresby-Purrvis Lieutenant Goresby-Purrvis
|
 Draguar Draguar
|
| Round 2 | |||
 Gangleclaw Gangleclaw
|
 Grandpa Slime Grandpa Slime
|
 Greater Platypink Greater Platypink
|
 Crowgre Crowgre
|
| Round 3 | |||
 Great Keeper Great Keeper
|
 Xenlon Xenlon
|
 Phoenix Phoenix
|
|
Arena Challenge Rules
Three Round Elimination Battle
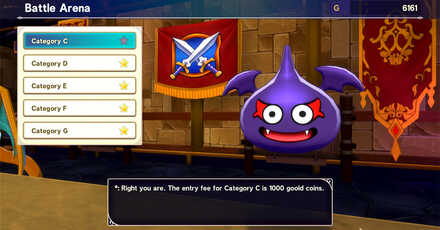
The arena is an area that you unlock early on in the game. There you can challenge different ranked Monsters, and you can win by clearing three rounds of battles in each class. After beating the rank, you will receive rewards useful for your Monsters and for progression.
Cannot Control Monsters and HP / MP Restored After
Inside the arena, you cannot give direct orders to your Monsters, but you can change their strategies. Additionally, your Monsters' HP and MP will be restored after each battle. This allows you to use strong traits in the beginning without worrying about managing MP.
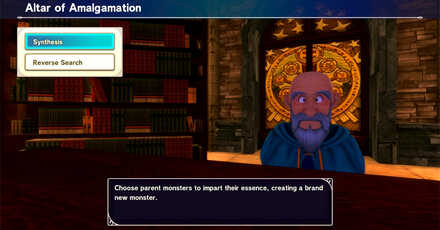
Matchmaking NPCs Appear After Clearing Ranks

After you clear a certain rank in the arenas, you will unlock Matchmaking NPCs that lets you synthesize with Monsters of a higher rank!
List of Matchmaking NPCs in the Arena
| Matchmaking Monster | Recommended Monster to Synthesize | Location / Unlock Condition |
|---|---|---|
 Nardragon Nardragon
|
 Komodo Komodo
|
Endor Arena and Waiting Room |
|
Scornet
|
Erazor Blade
|
Endor Arena and Waiting Room (After Clearing D Rank) |
 Bomboulder Bomboulder
|
 Mangleclaw Mangleclaw
|
Endor Arena and Waiting Room (After Clearing B Rank) |
|
Killer Gila
|
Skeleton
|
Exa Arena, 1st Floor |
 Dark Slime Dark Slime
|
 Jinkster Jinkster
|
Exa Arena, 2nd Floor (After Clearing C Class) |
 Sekerleton Sekerleton
|
 Grim Rider Grim Rider
|
Exa Arena, 2nd Floor (After Clearing A Class) |
Dragon Quest Monsters: The Dark Prince Related Articles

 Story Walkthrough Story Walkthrough
|
 Monsters Monsters |
 Skills Skills |
 Talents Talents |
 Traits Traits |
 Bosses Bosses
|
 Items Items |
 Maps & Locations Maps & Locations |
Popular Articles
| Popular Articles | ||
|---|---|---|
 Synthesis Guide & Calculator Synthesis Guide & Calculator |
 Best Team Best Team
|
 Best Early Game Monsters Best Early Game Monsters |
 Egg Farming and Locations Egg Farming and Locations |
 Best Monsters Tier List Best Monsters Tier List |
 Metal Slime Farming Guide Metal Slime Farming Guide |
| Popular Story Articles | ||
 Best Scouting Monsters Best Scouting Monsters |
 Strong Monsters & Locations Strong Monsters & Locations |
 Mini Medal Locations Mini Medal Locations |
 How to Level Up Fast How to Level Up Fast |
 Best Talents for Story and PVP Best Talents for Story and PVP |
 Post-Game and 100% Guide Post-Game and 100% Guide |
| Popular Battle Articles | ||
 9 Quick Tips to Master 9 Quick Tips to Master |
 Ranked Guide: How to Win in Ranked PVP Ranked Guide: How to Win in Ranked PVP |
 Best Healer Monsters Best Healer Monsters |
| Endor Arena Guide: How to Win |
 Monster Tactics and Instructions Monster Tactics and Instructions |
 Quickfire Contest: Best Teams and Rewards Quickfire Contest: Best Teams and Rewards |
Metal Slime Guides
| Metal Slime Guides | ||
|---|---|---|
| How to Beat Metal Slime and Locations | How to Beat Liquid Metal Slime and Locations | How to Beat Metal King Slime and Locations |
Beginner and Early Game Guides
Mid to Late Game Guides
Frequently Asked Questions (FAQs)
Updates and Patches
| Updates and Patches | |
|---|---|
| Updates and Patch Notes | McDonald's Promo: How to Get Exclusives Outside of Japan |
| List of Gift Codes (December 2023) | How to Fix Errors |
Author

Dragon Quest Monsters: The Dark Prince Walkthrough & Guides Wiki
Endor Arena Guide and How to Win the Arena
Rankings
- We could not find the message board you were looking for.
Gaming News

![The Liar Princess and the Blind Prince Review [PC] | Lovely to Look at but Tedious to Play](https://img.game8.co/4442586/8d95f5faf05780f1765ce7e0938bd825.jpeg/show)
![The Liar Princess and the Blind Prince Review [PC] | Lovely to Look at but Tedious to Play](https://img.game8.co/4442586/8d95f5faf05780f1765ce7e0938bd825.jpeg/thumb)
![Marathon Cryo Archive Map Teased as [REDACTED] on Selection Screen](https://img.game8.co/4442236/6357203e58172f6de57f1991e7c39b22.png/thumb)

Popular Games

Genshin Impact Walkthrough & Guides Wiki
Umamusume: Pretty Derby Walkthrough & Guides Wiki
Pokemon Pokopia Walkthrough & Guides Wiki
Honkai: Star Rail Walkthrough & Guides Wiki
Monster Hunter Stories 3: Twisted Reflection Walkthrough & Guides Wiki
Arknights: Endfield Walkthrough & Guides Wiki
Wuthering Waves Walkthrough & Guides Wiki
Zenless Zone Zero Walkthrough & Guides Wiki
Pokemon TCG Pocket (PTCGP) Strategies & Guides Wiki
Monster Hunter Wilds Walkthrough & Guides Wiki


Recommended Games
Diablo 4: Vessel of Hatred Walkthrough & Guides Wiki
Cyberpunk 2077: Ultimate Edition Walkthrough & Guides Wiki
Fire Emblem Heroes (FEH) Walkthrough & Guides Wiki
Yu-Gi-Oh! Master Duel Walkthrough & Guides Wiki
Super Smash Bros. Ultimate Walkthrough & Guides Wiki
Pokemon Brilliant Diamond and Shining Pearl (BDSP) Walkthrough & Guides Wiki
Elden Ring Shadow of the Erdtree Walkthrough & Guides Wiki
Monster Hunter World Walkthrough & Guides Wiki
The Legend of Zelda: Tears of the Kingdom Walkthrough & Guides Wiki
Persona 3 Reload Walkthrough & Guides Wiki


All rights reserved
© ARMOR PROJECT/BIRD STUDIO/SQUARE ENIX © SUGIYAMA KOBO
Nintendo Switch is a trademark of Nintendo.
The copyrights of videos of games used in our content and other intellectual property rights belong to the provider of the game.
The contents we provide on this site were created personally by members of the Game8 editorial department.
We refuse the right to reuse or repost content taken without our permission such as data or images to other sites.
Irecieved a single Smoked Sirloin for Mausoleum rank F.