How to Beat Randolfo the Tyrant (Final Boss): Best Party Members and Weakness
★ DQM3 releases on Steam and Mobile!
★ See all monster combinations: Synthesis Calculator
★ Some Helpful Articles:
┗ Story Walkthrough | Boss Guides | 100% Clear Guide
┗ List of Talents | List of Skills | List of Traits
┗ Level Up Guide | Mini Medal Locations | Egg Farming
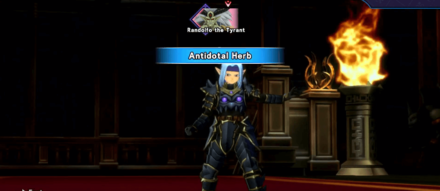
Randolfo the Tyrant is the final boss in Dragon Quest Monsters 3: The Dark Prince. Learn about Randolfo the Tyrant's weaknesses and recommended party members to beat Randolfo the Tyrant here!
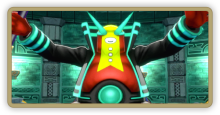
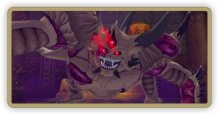
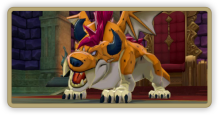
How to Beat Randolfo the Tyrant (First Form)
|
|
List of Randolfo the Tyrant (First Form) Attacks
|
Prepare Recovery Items For Consecutive Fights
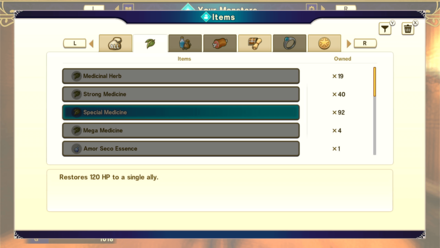
When fighting against Randolfo the Tyrant, bring as many MP recovery items as possible. This boss fight has two phases, and in the second phase Randolfo will use status effects like Poison and Sleep so purchase items like Antidotal Herb and Panacea. If your party has physical attackers, it is recommended to bring Sapperine to lower enemy defenses.
Recommended Items
| Recommended Items | ||
|---|---|---|
| Antidotal Herb | Panacea | Sapperine |
Synthesize a Monster with Omniheal

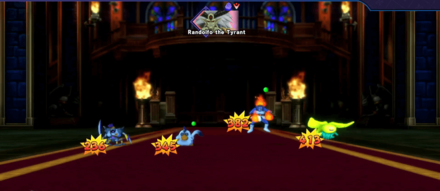
Keep HP Above 400 to Avoid Grim Breath
Randolfo the Tyrant deals nearly 400 damage to all enemies with Grim Breath. To offset this, bring Monsters that can use Omniheal to recover HP for your party.
Omniheal has a high MP consumption of 80, it is recommended to use it on Monsters that have MP recovery Traits like Auto-Cadabra to help offset the MP that the skill will consume.
Examples of Monsters That Can Learn Omniheal
| Monsters with Omniheal | ||
|---|---|---|
 Flutter Slime |
 King Cureslime |
 Slime Snack |
Avoid Using Buffs and Utilize Bedazzlement
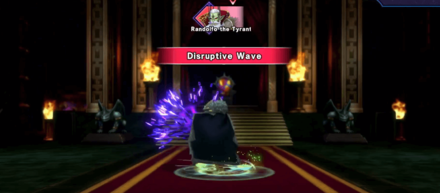
Buffs from skills like Brake Wind and Bounce will be nullified by Disruptive Wave, so try not to rely on any buffs applied on your party. Instead, try to use Bedazzlement from skills like Sandy Sigh or Dazzle to reduce the physical damage Randolfo will deal.
Skills that Inflict Bedazzlement
| Skills with Bedazzlement | |
|---|---|
| Sandy Sigh | Dazzleflash |
| Dazzle | Sandstorm |
How to Farm Talent Points and What to Spend Them On
Recommended Party
This party is based on our playtesting team's Monsters during the time of the boss's defeat.
| Monster | Main Skill |
|---|---|
|
|
Supreme Healer |
|
|
Good Knight |
|
|
Bad Breather |
|
|
Heretic |
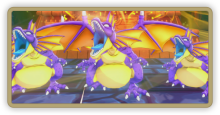
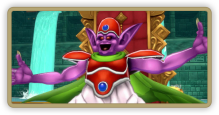
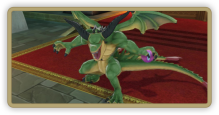
How to Beat Randolfo the Tyrant (Second Form)
|
|
List of Randolfo the Tyrant (Second Form) Attacks
|
AoE Healing and Bedazzlement Are Recommended
Randolfo's 2nd Form Deals More Damage
Like the fight with the 1st Form, AoE Healing and Bedazzlement are still recommended, so the strategy largely remains the same. However, in his second form, the damage of all of Randolfo's attacks have increased.
He also utilizes a powerful skill that inflicts Poison status which deals 90 damage over time each turn, so it is recommended to keep your HP very high in this phase.
Use Items to Cleanse Status Effects
If you are inflicted with either Poison or Sleep, use cleansing items like Antidotal Herb and Panacea to cure it. In his second form, Randolfo uses various debuffs like Poison, Sleep, and other status effect changes.
Panacea can cure multiple status effect conditions simultaneously and can also cure the debuffs inflicted by Wave of Panic.
Recommended Party
This party is based on our playtesting team's Monsters during the time of the boss's defeat.
| Monster | Main Skill |
|---|---|
|
|
Supreme Healer |
|
|
Good Knight |
|
|
Bad Breather |
|
|
Heretic |
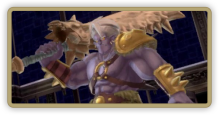
Randolfo the Tyrant Overview
| Location | Circle of Conquest (Upper Echelon) |
|---|---|
| Experience | 1st Form: 80000 2nd Form: 100000 |
| Money | 0 |
Circle of Conquest (Upper Echelon) Walkthrough: Chart 20
Dragon Quest Monsters: The Dark Prince (DQ3) Related Guides

Lower Echelon
| Lower Echelon Boss List | ||
|---|---|---|
 Bernie Bernie |
 Raph Raph |
 Penteratic Guardian Penteratic Guardian |
 Percival Percival |
 Foo Dog Foo Dog |
 Abracadabrador Abracadabrador |
 King Foo Dog King Foo Dog |
 Cheater Cheetah, Rhinoceraxe, & Hellion Cheater Cheetah, Rhinoceraxe, & Hellion |
 General Chayne General Chayne |
Middle Echelon
| Middle Echelon Boss List | ||
|---|---|---|
 Darius the Shadethrower Darius the Shadethrower |
 Ash Ash |
 Dessert Demon, Boss Troll, & Chocolate Golem Dessert Demon, Boss Troll, & Chocolate Golem |
 The Cane Custodian The Cane Custodian |
 Claudio Claudio |
 Petrarch Petrarch |
 Grimglow Cave Boss Grimglow Cave Boss |
 Whiteworl the Watcher Whiteworl the Watcher |
 Succubat Succubat |
Upper Echelon
| Upper Echelon Boss List | ||
|---|---|---|
 Ash, Blaise, and Bernie Ash, Blaise, and Bernie |
 The Ifreann Eagle The Ifreann Eagle |
 Massimus Massimus |
 Pruslas Pruslas |
 Hacksaurus Hacksaurus |
 Warhog Warhog |
 Escudogre Escudogre |
 Metal Dragon Metal Dragon |
 Barbatos Barbatos |
 Estark Izmah Estark Izmah |
 Aamon Aamon |
 Sir Goolahad Sir Goolahad |
 Lady Vinezzia Lady Vinezzia |
 Sir Sabrefang Sir Sabrefang |
 Sir Beefdrake Sir Beefdrake |
 Dolph the Destroyer Dolph the Destroyer |
 Final Boss Final Boss |
|
Post Game and Secret Bosses
| Post Game & Secret Bosses | ||
|---|---|---|
 Estark Venjah Estark Venjah |
Wyrmsworth |
Azabel |
| Secret Boss |
||
Comment
Author

Dragon Quest Monsters: The Dark Prince Walkthrough & Guides Wiki
How to Beat Randolfo the Tyrant (Final Boss): Best Party Members and Weakness
Rankings
- We could not find the message board you were looking for.
Gaming News

![Monster Hunter Stories 3 Review [First Impressions] | Simply Rejuvenating](https://img.game8.co/4438641/2a31b7702bd70e78ec8efd24661dacda.jpeg/show)
![The Seven Deadly Sins: Origin [First Impressions] | A Promising Start](https://img.game8.co/4440581/584e0bfb87908f12c4eab6e846eb1afd.png/thumb)
![The Liar Princess and the Blind Prince Review [PC] | Lovely to Look at but Tedious to Play](https://img.game8.co/4442586/8d95f5faf05780f1765ce7e0938bd825.jpeg/thumb)
![Marathon Cryo Archive Map Teased as [REDACTED] on Selection Screen](https://img.game8.co/4442236/6357203e58172f6de57f1991e7c39b22.png/thumb)
Popular Games

Genshin Impact Walkthrough & Guides Wiki
Umamusume: Pretty Derby Walkthrough & Guides Wiki
Pokemon Pokopia Walkthrough & Guides Wiki
Honkai: Star Rail Walkthrough & Guides Wiki
Monster Hunter Stories 3: Twisted Reflection Walkthrough & Guides Wiki
Arknights: Endfield Walkthrough & Guides Wiki
Wuthering Waves Walkthrough & Guides Wiki
Zenless Zone Zero Walkthrough & Guides Wiki
Pokemon TCG Pocket (PTCGP) Strategies & Guides Wiki
Monster Hunter Wilds Walkthrough & Guides Wiki


Recommended Games
Diablo 4: Vessel of Hatred Walkthrough & Guides Wiki
Cyberpunk 2077: Ultimate Edition Walkthrough & Guides Wiki
Fire Emblem Heroes (FEH) Walkthrough & Guides Wiki
Yu-Gi-Oh! Master Duel Walkthrough & Guides Wiki
Super Smash Bros. Ultimate Walkthrough & Guides Wiki
Pokemon Brilliant Diamond and Shining Pearl (BDSP) Walkthrough & Guides Wiki
Elden Ring Shadow of the Erdtree Walkthrough & Guides Wiki
Monster Hunter World Walkthrough & Guides Wiki
The Legend of Zelda: Tears of the Kingdom Walkthrough & Guides Wiki
Persona 3 Reload Walkthrough & Guides Wiki


All rights reserved
© ARMOR PROJECT/BIRD STUDIO/SQUARE ENIX © SUGIYAMA KOBO
Nintendo Switch is a trademark of Nintendo.
The copyrights of videos of games used in our content and other intellectual property rights belong to the provider of the game.
The contents we provide on this site were created personally by members of the Game8 editorial department.
We refuse the right to reuse or repost content taken without our permission such as data or images to other sites.