Monster List: All Enemies and How to Complete
A list of all enemies and bosses in the Monster List of Super Mario RPG Remake. Read on to see all 235 Monster List entries, all 100 Missable Enemies, how to complete the Monster List, how to check enemy stats, and how to access the Monster List.
| Boss and Enemy Guides | ||
|---|---|---|
List of Contents
All Enemies and Monster List Entries
All 235 Monsters in Super Mario RPG Remake
There are 235 monsters in the Monster List. These include regular enemies, bosses and secret bosses encountered in the main story, and post-game boss rematches.
There are 100 Missable enemies, which are marked in the chart below with a red star (*). If you don't use Thought Peek before they become unavailable, you'll have to pay 3 Frog Coins each for their entries at the Monster List Agent in Booster Pass to fully complete the Monster List.
| No. | Monster | Location |
|---|---|---|
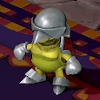
| 1 |
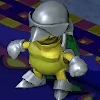 Terrapin
|
Bowser's Keep: Roaming the overworld. |
| 2 |
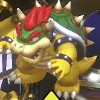 Bowser
(Boss)
|
Bowser's Keep: End of the castle. |
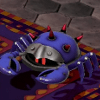
| 3 |
 Chaindelier
|
Bowser's Keep: In battle with Bowser. |
| 4 |
 Goomba
|
Mushroom Way: Roaming the overworld. |
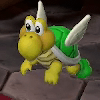
| 5 |
 Paratroopa
|
Mushroom Way: Roaming the overworld. |
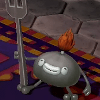
| 6 |
 Spikey
|
Mushroom Way: Roaming the overworld. |
| 7 |
 Hammer Bro
(Boss)
|
Mushroom Way: End of the area. |
| 8 |
 Frogog
|
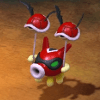
Bandit's Way: In battle with Goombas. |
| 9 |
 K-9
|
Bandit's Way: Roaming at the second area. |
| 10 |
 Croco
*
(Boss)
|
Bandit's Way: End of the area. |
| 11 |
 Shymore
*
|
Mushroom Kingdom: Roaming the overworld. Disappears after beating Claymorton. |
| 12 |
 Bodyguard
*
|
Mushroom Kingdom: In battle with Claymorton. |
| 13 |
 Claymorton
*
(Boss)
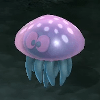
|
Mushroom Kingdom: Throne room area. |
| 14 |
 Cheep Cheep
|
Kero Sewers: Water area. |
| 15 |
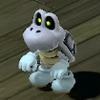
 Rat Funk
|
Kero Sewers: Roaming the overworld. |
| 16 |
 Hobgoblin
|
Kero Sewers: In battle with Rat Funk. |
| 17 |
 Shadow
|
Kero Sewers: In battle with Boo. |
| 18 |
 Boo
|
Kero Sewers: Roaming the overworld. |
| 19 |
 Huhwhat
*
|
Kero Sewers: Jump to hit the treasure chest in the right corner. |
| 20 |
 Belome
*
(Boss)
|
Kero Sewers: Boss fight at the end of the area. |
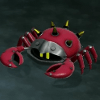
| 21 |
 Starslap
|
Rose Way: Roaming the overworld. |
| 22 |
 Shy Guy
|
Rose Way: Roaming the overworld. |
| 23 |
 Snapdragon
|
Rose Way: Second area. |
| 24 |
 Crook
|
Rose Way: Second area. |
| 25 |
 Arachne
|
Rose Way: In battle with Starslaps |
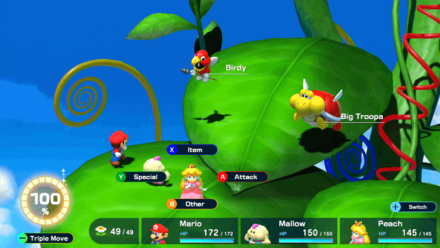
| 26 |
 Wiggler
|
Forest Maze: First area. |
| 27 |
 Guerrilla
|
Forest Maze: In battle with Wiggler. |
| 28 |
 Amanita
|
Forest Maze: Inside trees. |
| 29 |
 Octolot
|
Forest Maze: In battle with Amanita. |
| 30 |
 Buzzer
|
Forest Maze: Third area after emerging from the tree stump. |
| 31 |
 Bowyer
*
(Boss)
|
Forest Maze: After the savepoint area. |
| 32 |
 Lava Bubble
|
Pipe Vault: In battle with Magmite. |
| 33 |
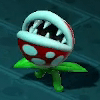 Piranha Plant
|
Pipe Vault: Emerges from the green pipes. |
| 34 |
 Shy Ranger
|
Pipe Vault: In battle with overworld enemies. |
| 35 |
 Magmite
*
|
Moleville Mines: Roaming the overworld. Disappears after beating Punchinello. |
| 36 |
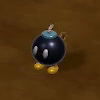
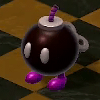
 Bob-omb
|
Moleville Mines: In battle with Magmites. |
| 37 |
 Enigma
|
Moleville Mines: In battle with Lava Bubbles. |
| 38 |
 Cluster
|
Moleville Mines: In battle with Clusters. |
| 39 |
 Croco (Mole Mines)
*
(Boss)
|
Moleville Mines: Jump on the trampoline to spawn him. |
| 40 |
 Microbomb
*
|
Moleville Mines: In battle with Punchinello. |
| 41 |
 Mezzo Bomb
*
|
Moleville Mines: In battle with Punchinello. |
| 42 |
 Punchinello
*
(Boss)
|
Moleville Mines: End of the area. |
| 43 |
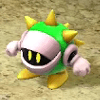 Spikester
|
Booster Pass: Roaming the first area. |
| 44 |
 Artichoker
|
Booster Pass: In battle with Spikesters. |
| 45 |
 Lakitu
|
Booster Pass: First area. |
| 46 |
 Carroboscis
|
Booster Pass: In battle with Spikesters. |
| 47 |
 Apprentice
|
Booster Pass: In battle with overworld enemies. |
| 48 |
 Snifit
|
Booster Tower: Roaming around the overworld. |
| 49 |
 Orb User
|
Booster Tower: In battle with Snifit. |
| 50 |
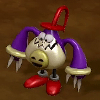
 Jester
|
Booster Tower: In battle with Snifit. |
| 51 |
 Snifster
*
|
Booster Tower: Behind the counter on the first floor. |
| 52 |
 Dollox
|
Booster Tower: In battle with Snifit. |
| 53 |
 Rob-omb
|
Booster Tower: Traintracks area. |
| 54 |
 Blaster
*
|
Booster Tower: In battle when you approach the Bullet Bill. Disappears after beating Knife Guy and Grate Guy. |
| 55 |
 Lava Blubble
|
Booster Tower: First savepoint. |
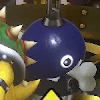
| 56 |
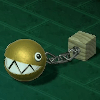
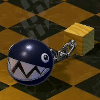 Chain Chomp
|
Booster Tower: Area with Chain Chomps. |
| 57 |
 Booster (When Caught)
*
(Boss)
|
Booster Tower: Boss fight if you fail the Curtain minigame. Only missable if you get caught during the curtain minigame; if you don't get caught, receive the Thought Peek entry automatically. |
| 58 |
 Knife Guy
*
(Boss)
|
Booster Tower: In battle with Grate Guy. |
| 59 |
 Grate Guy
*
(Boss)
|
Booster Tower: In battle with Knife Guy. |
| 60 |
 Torte
*
(Boss)
|
Marrymore: In battle with Bundt and Raspberry. |
| 61 |
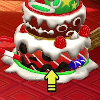
 Bundt
*
(Boss)
|
Marrymore: Boss fight inside Marrymore church. |
| 62 |
 Raspberry
*
(Boss)
|
Marrymore: Boss fight inside Marrymore church. |
| 63 |
 Thropher
|
Star Hill: In battle with Gecko. |
| 64 |
 Gecko
|
Star Hill: Roaming the second area. |
| 65 |
 Mastadoom
|
Star Hill: In battle with Sackit. |
| 66 |
 Sackit
|
Star Hill: In battle with Gecko. |
| 67 |
 Pulsar
|
Star Hill: In battle with Sackit. |
| 68 |
 Zeostar
|
Sea: Second area. |
| 69 |
 Blooper
|
Sea: Underwater sections. |
| 70 |
 Mr. Kipper
|
Sea: In battle with Bloooper. |
| 71 |
 Crusty
|
Sea: In battle with Bloooper. |
| 72 |
 Leuko
|
Sea: In battle with Zeostar |
| 73 |
 Greaper
|
Sunken Ship: First area. |
| 74 |
 Straw Head
|
Sunken Ship: In battle with Greaper. |
| 75 |
 Reacher
|
Sunken Ship: In battle with Greaper. |
| 76 |
 Dry Bones
|
Sunken Ship: Greaper room. |
| 77 |
 Alley Rat
|
Sunken Ship: Dry Bones room. |
| 78 |
 Enigmax
|
Sunken Ship: In battle with Alley Rat. |
| 79 |
 Tentacle (Left)
*
(Boss)
|
Sunken Ship: In battle with King Calamari. |
| 80 |
 Tentacle (Right)
*
(Boss)
|
Sunken Ship: In battle with King Calamari. |
| 81 |
 King Calamari
(Boss)
|
Sunken Ship: Area after the password room. |
| 82 |
 Whuhoh
*
|
Sunken Ship: Second savepoint room. |
| 83 |
 Mini Goomba
*
|
Sunken Ship: Summoned by Whuhoh in battle. |
| 84 |
 Bandana Red
*
|
Sunken Ship: Area after the Blooper room. Only appears as part of the story. |
| 85 |
 Bandana Blue
*
|
Sunken Ship: In battle with Johnny. |
| 86 |
 Johnny
*
(Boss)
|
Sunken Ship: End of the area. |
| 87 |
 Speardovich
*
(Boss)
|
Seaside Town: Left side of the town after defeating Johnny. |
| 88 |
 Speardovich (Duplicate)
*
|
Seaside Town: Summoned by Speardovich. |
| 89 |
 Formless
|
Land's End: Desert area. |
| 90 |
 Gassox
|
Land's End: Second form of Formless. |
| 91 |
 Chow
|
Land's End: Second area. |
| 92 |
 Shogun
|
Land's End: In battle with Chow. |
| 93 |
 Octovader
|
Land's End: In battle with Chow. |
| 94 |
 Geckit
|
Land's End: Roaming the third area. |
| 95 |
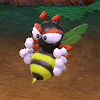
 Beezo
|
Land's End: In battle with Geckit. |
| 96 |
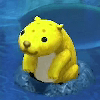
 Chewy
|
Bean Valley: In the green pipes being watered by Beezo. |
| 97 |
 Spinthra
|
Land's End: In battle with Geckit. |
| 98 |
 Stinger
|
Land's End: First savepoint. |
| 99 |
 Fink Flower
|
Land's End: In battle with Stinger. |
| 100 |
 Kriffid
|
Land's End: In battle with Geckit. |
| 101 |
 Ribbite
|
Land's End: In battle with Beezo. |
| 102 |
 Belome (Temple)
*
(Boss)
|
Belome Temple: Boss fight after obtaining the correct fortune. |
| 103 |
 Mario Clone
*
|
Belome Temple: In battle with Belome. |
| 104 |
 Mallow Clone
*
|
Belome Temple: In battle with Belome. |
| 105 |
 Geno Clone
*
|
Belome Temple: In battle with Belome. |
| 106 |
 Bowser Clone
*
|
Belome Temple: In battle with Belome. |
| 107 |
 Peach Clone
*
|
Belome Temple: In battle with Belome. |
| 108 |
 Jagger
*
(Boss)
|
Monstro Town: Second floor of the town. |
| 109 |
 Jinx (Testing Capabilities)
*
(Boss)
|
Monstro Town: Second floor of the town. |
| 110 |
 Jinx (You Asked for It)
*
(Boss)
|
Monstro Town: Second floor of the town. |
| 111 |
 Jinx (Sensei in Action)
*
(Boss)
|
Monstro Town: Second floor of the town. |
| 112 |
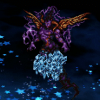 Culex
*
(Boss)
|
Monstro Town: Behind the Sealed Door that requires a Shiny Stone. |
| 113 |
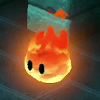
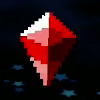 Fire Crystal
*
(Boss)
|
Monstro Town: In battle with Culex. |
| 114 |
 Water Crystal
*
(Boss)
|
Monstro Town: In battle with Culex. |
| 115 |
 Earth Crystal
*
(Boss)
|
Monstro Town: In battle with Culex. |
| 116 |
 Wind Crystal
*
(Boss)
|
Monstro Town: In battle with Culex. |
| 117 |
 Pleaseno
*
|
Bean Valley: Underground section after entering rightmost Chewy pipe. |
| 118 |
 Jinnie
*
(Boss)
|
Bean Valley: Summoned in battle by Pleaseno. |
| 119 |
 Chomp Chomp
|
Bean Valley: In battle with the overworld enemies. |
| 120 |
 Smilax
*
(Boss)
|
Bean Valley: End of the area. |
| 121 |
 Megasmilax
*
(Boss)
|
Bean Valley: Second form of Smilax. |
| 122 |
 Birdy
*
|
Bean Valley: Beanstalk and Nimbus Castle. Disappears after beating Valentina. |
| 123 |
 Big Troopa
*
|
Bean Valley: In battle with Birdy. Disappears after beating Valentina. |
| 124 |
 Sling Shy
|
Nimbus Castle: Room after the Statue Minigame. Disappears after beating Valentina, but still available in the Bowser's Keep Battle Course. |
| 125 |
 Orbison
|
Nimbus Castle: In battle with Sling Shy. Disappears after beating Valentina, but still available in the Bowser's Keep Battle Course. |
| 126 |
 Pinwheel
*
|
Nimbus Castle: Room after the Statue Minigame. Disappears after beating Valentina. |
| 127 |
 Muckle
|
Nimbus Castle: In battle with Sling Shy. Disappears after beating Valentina, but still available in the Bowser's Keep Battle Course. |
| 128 |
 Jawful
*
|
Nimbus Castle: In battle with Shaman. Disappears after beating Valentina. |
| 129 |
 Shaman
|
Nimbus Castle: Room with the Big Troopa. Disappears after beating Valentina, but still available in the Bowser's Keep Battle Course. |
| 130 |
 Bluebird
*
|
Nimbus Castle: Room with multiple Shamans. Disappears after beating Valentina. |
| 131 |
 Shelly
*
(Boss)
|
Nimubs Castle: Large egg room. |
| 132 |
 Birdo
*
(Boss)
|
Nimbus Castle: Second phase of Shelly. |
| 133 |
 Eggbert
*
|
Nimbus Castle: Summoned by Birdo. |
| 134 |
 Dodo
*
(Boss)
|
Nimbus Castle: Boss fight if you fail the Dodo Statue Minigame. Only missable if you get caught during the Dodo Status Minigame; if you don't get caught, receive the Thought Peek entry automatically. |
| 135 |
 Dodo (Valentina's Attendant)
*
(Boss)
|
Nimbus Land: Boss fight as part of Valentina boss fight. |
| 136 |
 Valentina
*
(Boss)
|
Nimbus Land: Enter the area after falling from the castle. |
| 137 |
 Magmus
|
Barrel Volcano: Roaming the overworld. |
| 138 |
 Armored Ant
|
Barrel Volcano: In battle with Magmus. |
| 139 |
 Lava Babble
|
Barrel Volcano: Roaming the overworld. |
| 140 |
 Chained Kong
|
Barrel Volcano: In battle with Vomer. |
| 141 |
 Vomer
|
Barrel Volcano: Roaming the overworld. |
| 142 |
 Urspike
|
Barrel Volcano: Roaming the overworld. |
| 143 |
 Stompillar
|
Barrel Volcano: Blocks certain entryways, |
| 144 |
 Body
|
Barrel Volcano: Part of Stompillar enemy. |
| 145 |
 Stumpet
|
Barrel Volcano: Area after the first savepoint. |
| 146 |
 Czar Dragon
*
(Boss)
|
Barrel Volcano: Area after the second savepoint. |
| 147 |
 Helio
*
|
Barrel Volcano: Summoned by Czar Dragon. |
| 148 |
 Zombone
*
(Boss)
|
Barrel Volcano: Second phase of Czar Dragon. |
| 149 |
 Axem Red
*
(Boss)
|
Barrel Volcano: After defeating Czar Dragon. |
| 150 |
 Axem Black
*
(Boss)
|
Barrel Volcano: After defeating Czar Dragon. |
| 151 |
 Axem Yellow
*
(Boss)
|
Barrel Volcano: After defeating Czar Dragon. |
| 152 |
 Axem Green
*
(Boss)
|
Barrel Volcano: After defeating Czar Dragon. |
| 153 |
 Axem Pink
*
(Boss)
|
Barrel Volcano: After defeating Czar Dragon. |
| 154 |
 The Blade
*
(Boss)
|
Barrel Volcano: After defeating Czar Dragon. |
| 155 |
 Terra Cotta
|
Bowser's Keep: First area. |
| 156 |
 Pro Goomba
|
Bowser's Keep: Second area. |
| 157 |
 Star Cruster
|
Bowser's Keep: In battle with Pro Goomba. |
| 158 |
 Forkie
|
Bowser's Keep: Summoned by Wizarkoopa. |
| 159 |
 Malakoopa
|
Bowser's Keep: In battle with Pro Goomba. |
| 160 |
 Grand Troopa
|
Bowser's Keep: In battle with Malakoopa. |
| 161 |
 Big Blaster
|
Bowser's Keep: In battle when you approach the Bullet Bill. |
| 162 |
 Comeon
|
Bowser's Keep: Summoned in battle by Wizakoopa. |
| 163 |
 Bahamutt
|
Bowser's Keep: Summoned in battle by Comeon and Wizakoopa. |
| 164 |
 Wizakoopa
*
(Boss)
|
Bowser's Keep: Area after the first savepoint area. |
| 165 |
 Jinx Clone
*
|
Bowser's Keep: Summoned by Wizakoopa. |
| 166 |
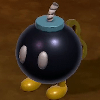
 King Bomb
*
|
Bowser's Keep: Summoned by Wizakoopa. |
| 167 |
 Boomer
*
(Boss)
|
Bowser's Keep: Area after the Bullet Bills. |
| 168 |
 Exor
*
(Boss)
|
Bowser's Keep: Defeat Boomer. |
| 169 |
 Right Eye
*
(Boss)
|
Bowser's Keep: Part of Exor boss fight. |
| 170 |
 Left Eye
*
(Boss)
|
Bowser's Keep: Part of Exor boss fight. |
| 171 |
 Mouth
*
(Boss)
|
Bowser's Keep: Part of Exor boss fight. |
| 172 |
 Glum Reaper
|
Bowser's Keep: Summoned in battle by Wizakoopa. |
| 173 |
 Ameboid
|
Weapon World: Second area. |
| 174 |
 Hippopo
|
Weapon World: In battle with Glum Reaper. |
| 175 |
 Count Down
*
(Boss)
|
Weapon World: Area after the second savepoint. |
| 176 |
 Ring-a-Ding
*
(Boss)
|
Weapon World: In battle with Count Down. |
| 177 |
 Axem Red (Machine Made)
|
Weapon World: Area after defeating Count Down. |
| 178 |
 Axem Black (Machine Made)
|
Weapon World: Area after defeating Count Down. |
| 179 |
 Axem Yellow (Machine Made)
|
Weapon World: Area after defeating Count Down. |
| 180 |
 Axem Green (Machine Made)
|
Weapon World: Area after defeating Count Down. |
| 181 |
 Axem Pink (Machine Made)
|
Weapon World: Area after defeating Count Down. |
| 182 |
 Jabit
|
Weapon World: Conveyor belt area. |
| 183 |
 Mad Mallet
|
Weapon World: In battle with Jabit. |
| 184 |
 Pounder
|
Weapon World: In battle with Jabit. |
| 185 |
 Poundette
|
Weapon World: In battle with Jabit. |
| 186 |
 Springer
|
Weapon World: Conveyor belt area. |
| 187 |
 Puppox
|
Weapon World: Conveyor belt area. |
| 188 |
 Claymorton (Machine Made)
|
Weapon World: Conveyor belt area. |
| 189 |
 Bodyguard (Machine Made)
|
Weapon World: In battle with Claymorton (Machine Made) |
| 190 |
 High Boo
|
Weapon World: Conveyor belt area. |
| 191 |
 Doppel
|
Weapon World: In battle with Glum Reaper. |
| 192 |
 Bowyer (Machine Made)
|
Weapon World: Conveyor belt area. |
| 193 |
 Ninja
|
Weapon World: Area after conveyor belt savepoint. |
| 194 |
 Cloaker
*
(Boss)
|
Weapon World: Area after the Machina Made Speardovich. |
| 195 |
 Domino
*
(Boss)
|
Weapon World: Area after the Machina Made Speardovich. |
| 196 |
 Cloaker (Fused)
*
(Boss)
|
Weapon World: Second phase of Cloaker and Domino boss fight. Only missable if you battle it, otherwise, get the Thought Peek entry automatically. |
| 197 |
 Bad Adder
*
(Boss)
|
Weapon World: Second phase of Cloaker and Domino boss fight. Only missable if you battle it, otherwise, get the Thought Peek entry automatically. |
| 198 |
 Domino (Fused)
*
(Boss)
|
Weapon World: Second phase of Cloaker and Domino boss fight. Only missable if you battle it, otherwise, get the Thought Peek entry automatically. |
| 199 |
 Mad Adder
*
(Boss)
|
Weapon World: Second phase of Cloaker and Domino boss fight. Only missable if you battle it, otherwise, get the Thought Peek entry automatically. |
| 200 |
 Speardovich (Machine Made)
|
Weapon World: Area after conveyor belt savepoint. |
| 201 |
 Jabit (Machine Made)
|
Weapon World: Area after defeating Cloaker and Domino. |
| 202 |
 Clerk
*
(Boss)
|
Weapon World: Factory area after defeating Cloak and Domino. |
| 203 |
 Manager
*
(Boss)
|
Weapon World: Factory area after defeating Clerk. |
| 204 |
 Director
*
(Boss)
|
Weapon World: Factory area after defeating Manager. |
| 205 |
 Factory Chief
*
(Boss)
|
Weapon World: Factory area after defeating Director. |
| 206 |
 Gunyolk
*
(Boss)
|
Weapon World: In battle with Factory Chief. |
| 207 |
 Smelter
(Boss)
|
Weapon World: In battle with Smithy. |
| 208 |
 Shyper
|
Weapon World: In battle with Smithy. |
| 209 |
 Smithy
(Boss)
|
Weapon World: End of the area and final boss. |
| 210 |
 Smithy (Real Form)
(Boss)
|
Weapon World: Part of Smithy's boss fight. |
| 211 |
 Smithy (Tank)
(Boss)
|
Weapon World: Part of Smithy's boss fight. |
| 212 |
 Smithy (Casket)
(Boss)
|
Weapon World: Part of Smithy's boss fight. |
| 213 |
 Smithy (Wizard)
(Boss)
|
Weapon World: Part of Smithy's boss fight. |
| 214 |
 Smithy (Treasure Chest)
(Boss)
|
Weapon World: Part of Smithy's boss fight. |
| 215 |
 Smithy (Body)
(Boss)
|
Weapon World: Part of Smithy's boss fight. |
| 216 |
 Scratchy-Throat Belome
*
(Boss)
|
Belome Temple: Post-game rematch. |
| 217 |
 Strong Mario Clone
*
|
Belome Temple: Summoned by Scratchy-Throat Belome. |
| 218 |
 Strong Mallow Clone
*
|
Belome Temple: Summoned by Scratchy-Throat Belome. |
| 219 |
 Strong Geno Clone
*
|
Belome Temple: Summoned by Scratchy-Throat Belome. |
| 220 |
 Strong Bowser Clone
*
|
Belome Temple: Summoned by Scratchy-Throat Belome. |
| 221 |
 Strong Peach Clone
*
|
Belome Temple: Summoned by Scratchy-Throat Belome. |
| 222 |
 Leveled-Up Punchinello
*
(Boss)
|
Moleville Mines: Post-game rematch. |
| 223 |
 Strong Bob-omb
*
|
Moleville Mines: Summoned by Leveled-Up Punchinello. |
| 224 |
 Engine 023 Booster
*
(Boss)
|
Booster Tower: Post-game rematch. |
| 225 |
 Strong Snifter
*
|
Booster Tower: Summoned by Engine 023 Booster. |
| 226 |
 Exhausted Torte
*
(Boss)
|
Marrymore: Post-game rematch. |
| 227 |
 Extra-Fancy Bundt
*
(Boss)
|
Marrymore: Post-game rematch. |
| 228 |
 Extra-Fancy Raspberry
(Boss)
|
Marrymore: Post-game rematch. |
| 229 |
 Mario-Style Jinx
*
(Boss)
|
Monstro Town: Post-game rematch. |
| 230 |
 Duel-Ready Johnny
(Boss)
|
Sunken Ship: Post-game rematch. |
| 231 |
 Culex 3D
(Boss)
|
Monstro Town: Behind the Sealed Door after defeating the post-game rematch boss and using Extra-Shiny Stone. |
| 232 |
 Fire Crystal 3D
(Boss)
|
Monstro Town: Part of Culex 3D boss fight. |
| 233 |
 Water Crystal 3D
(Boss)
|
Monstro Town: Part of Culex 3D boss fight. |
| 234 |
 Earth Crystal 3D
(Boss)
|
Monstro Town: Part of Culex 3D boss fight. |
| 235 |
 Wind Crystal 3D
(Boss)
|
Monstro Town: Part of Culex 3D boss fight. |
How to Complete the Monster List
Encounter the Monster in Battle Once
Encounter the enemy or boss in battle will fill in their entry on the Monster List. However, simply encountering the monster is not enough to completely fill their entry.
Use Thought Peek with Perfect Timing to Complete a Monster's Entry
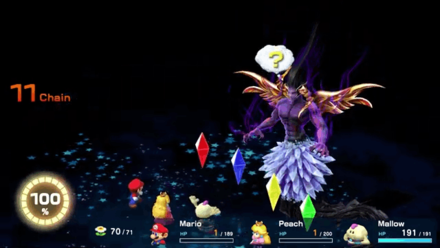
You need to use Mallow's Thought Peek special move with perfect timing to get a complete entry of the monster on the Monster List.
To time this special move, you need to press the A button as soon as the drum roll ends.
Make sure not to use Earlier Times after registering an enemy's Thought Peek as this causes it to reset and not count to the Monster List.
Thought Peek Timing and Effects
Complete the Main Story to Unlock the Names of All Enemies Encountered

Completing the main story lets you reveal all the names of the enemies marked with the three question marks ("???") in the Monster List.
This makes it easier for you to identify which enemy you need to use Thought Peek to complete their entry in the Monster List.
Fill in Missed Entries for 3 Frog Coins in Booster Pass

There is an NPC called Monster List Agent in Booster Pass who can fill in missed entries for the price of 3 Frog Coins.
You can use this to fill in entries from one-time enemies and bosses that you have not used Thought Peek at to obtain their information.
Where to Find the Monster List Agent
| Where to Find the Monster List Agent in Booster Pass | |
|---|---|
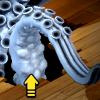
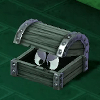
| 1 |  Go to Booster Pass and head to the top-right corner to enter the next area. |
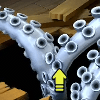
| 2 | 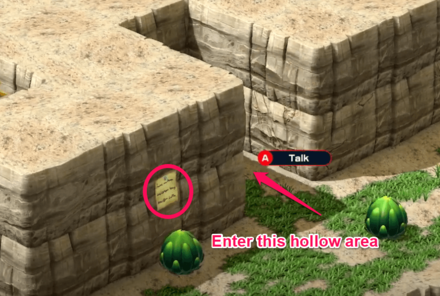 Head to the road on the bottom part of the area and find the sign on the wall. Enter the hollow part on the right side of the sign and talk to the Monster List Agent inside. |
Monster List Completion Reward
Monster Trophy
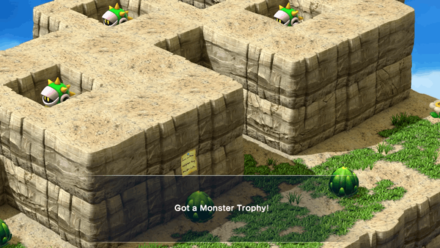
The Monster Trophy is the reward that you get for 100% completion of the Monster List. This is a Special Item that has no known effects other than it being a proof that you have completed the Monster List.
How to Check Enemy Stats
Access the Monster List in the Journal

Pause the game to enter the main menu and select Journal to find the Monster List.
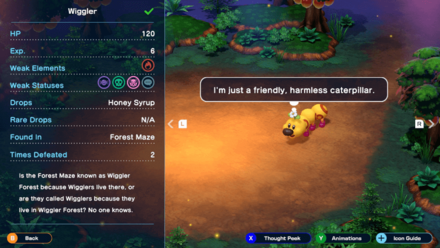
Accessing the Monster List will let players see the following stats indicated in the table below. Unfortunately, it does not show the Attack or Defense stat of enemies.
All Monster List Stats
| HP | Shows the enemy's health. |
|---|---|
| Exp. | Shows how much experience points the enemy gives. |
| Weak Elements | Shows what element the monster is weak at. |
| Weak Statuses | Shows what status ailment the enemy is weak at. |
| Drops | Shows what item the enemy drops. |
| Rare Drops | Shows what rare item the enemy drops. |
| Location Found | Shows where the enemy can be located. |
| Times Defeated | Shows how many times the player has defeated the enemy. |
| Thought Peek Text | Show the quotes inside the head of the enemy when using Mallow's Thought Peek special move. |
| Fun Facts | Facts about the enemy. |
What is the Monster List?
Bestiary of All Enemies and Bosses
The Monster List is a newly added feature in Super Mario RPG Remake which lets the player see the stats of the enemy after they've encountered them. This is a great new addition in order to show the players what they need to counter enemies.
This is surely going to challenge 100% completionists so keep an eye out for enemies in the field if you want to unlock everything in the Monster List!
Changes from the Original Game
Super Mario RPG Remake Related Guides

Super Mario RPG Remake Top Page
Super Mario RPG Remake Categories
| All Categories | |
|---|---|
 Walkthrough Walkthrough |
 Characters Characters |
 Bosses Bosses |
 Maps and Locations Maps and Locations |
 Weapons Weapons |
 Armor Armor |
 Accessories Accessories |
 Items Items |
 Special Moves Special Moves |
 Enemies and Monster List Enemies and Monster List |
 Enemy Attacks Enemy Attacks |
 Hidden Treasure Chests Hidden Treasure Chests |
Super Mario RPG Remake Tips and Tricks
Super Mario RPG Minigames
List of All Minigames and Rewards
Super Mario RPG Game Mechanics
| Game Mechanics and Stat Guides | |
|---|---|
| All Characters by Stats | Stats Explained |
| Level Up Bonus Explained | Bonus Flower Effects and How to Get |
| How to Flee From Battle | List of Controls |
| Element Guides | |
| Element Explained and List of Moves by Element | Jump Moves |
| Fire Moves | Thunder Moves |
| Ice Moves | Neutral Moves |
| Status Effect Guides | |
| List of Status Conditions | Sleep |
| Poison | Fear |
| Mute | Mushroom |
| Scarecrow | - |
All News Articles
-
![]()
Is there Multiplayer or Online Co-op?
Updated 11/8/2023
Find out if the game has multiplayer or online co-op.
-
![]()
Latest News and Updates
Updated 12/11/2023
All the latest news on Super Mario RPG Remake!
-
![]()
Available Platforms
Updated 11/8/2023
Find about the game's availability on consoles!
-
![]()
Will There be a Demo?
Updated 11/8/2023
Learn about any information regarding about a demo of the game.
-
![]()
When Will Preload Be Available?
Updated 11/13/2023
Learn about about the game's preload information.


Comment
Author
Monster List: All Enemies and How to Complete
Rankings
- We could not find the message board you were looking for.
Gaming News

![The Liar Princess and the Blind Prince Review [PC] | Lovely to Look at but Tedious to Play](https://img.game8.co/4442586/8d95f5faf05780f1765ce7e0938bd825.jpeg/show)
![Monster Hunter Stories 3 Review [First Impressions] | Simply Rejuvenating](https://img.game8.co/4438641/2a31b7702bd70e78ec8efd24661dacda.jpeg/thumb)
![The Seven Deadly Sins: Origin [First Impressions] | A Promising Start](https://img.game8.co/4440581/584e0bfb87908f12c4eab6e846eb1afd.png/thumb)

Popular Games

Genshin Impact Walkthrough & Guides Wiki
Umamusume: Pretty Derby Walkthrough & Guides Wiki
Pokemon Pokopia Walkthrough & Guides Wiki
Honkai: Star Rail Walkthrough & Guides Wiki
Monster Hunter Stories 3: Twisted Reflection Walkthrough & Guides Wiki
Arknights: Endfield Walkthrough & Guides Wiki
Wuthering Waves Walkthrough & Guides Wiki
Zenless Zone Zero Walkthrough & Guides Wiki
Pokemon TCG Pocket (PTCGP) Strategies & Guides Wiki
Monster Hunter Wilds Walkthrough & Guides Wiki


Recommended Games
Diablo 4: Vessel of Hatred Walkthrough & Guides Wiki
Cyberpunk 2077: Ultimate Edition Walkthrough & Guides Wiki
Fire Emblem Heroes (FEH) Walkthrough & Guides Wiki
Yu-Gi-Oh! Master Duel Walkthrough & Guides Wiki
Super Smash Bros. Ultimate Walkthrough & Guides Wiki
Pokemon Brilliant Diamond and Shining Pearl (BDSP) Walkthrough & Guides Wiki
Elden Ring Shadow of the Erdtree Walkthrough & Guides Wiki
Monster Hunter World Walkthrough & Guides Wiki
The Legend of Zelda: Tears of the Kingdom Walkthrough & Guides Wiki
Persona 3 Reload Walkthrough & Guides Wiki


All rights reserved
© Nintendo/SQUARE ENIX Characters: © Nintendo, © SQUARE ENIX
The copyrights of videos of games used in our content and other intellectual property rights belong to the provider of the game.
The contents we provide on this site were created personally by members of the Game8 editorial department.
We refuse the right to reuse or repost content taken without our permission such as data or images to other sites.