Dremuchij to Bolshaya Past: Walkthrough Part 2
☆ Fox Hunt Multiplayer releases Oct. 30!
★ How to Get FOXHOUND Rank | Titles
☆ Missables | Unlockables
★ Best Weapons | Best Camos
☆ Which MGS Game to Pick at Start?
This is part 2 of the Operation Snake Eater walkthrough in Metal Gear Solid Delta Snake Eater (MGS3 Remake). Read on for a guide to all objectives and collectibles from Dremuchij East all the way to Bolshaya Past Crevice, including info on the Ocelot boss fight at the end.
| ◀ Previous | Next ▶ |
|---|---|
| Virtuous Mission | Chyornaya Peschera Cave |
List of Contents
Dremuchij to Bolshaya Past Walkthrough
| Dremuchij to Bolshaya Past Summary | |
|---|---|
| 1 | Dremuchij East |
| 2 | Dremuchij North ┣ Dremuchij Swampland (Optional) ┗ Dremuchij South (Optional) |
| 3 | Dolinovodno |
| 4 | Rassvet |
| 5 | Chyornyj Prud |
| 6 | Bolshaya Past South |
| 7 | Bolshaya Past Base |
| 8 | Bolshaya Past Crevice (Boss: Ocelot) |
Dremuchij East
| Dremuchij East Loot | |
|---|---|
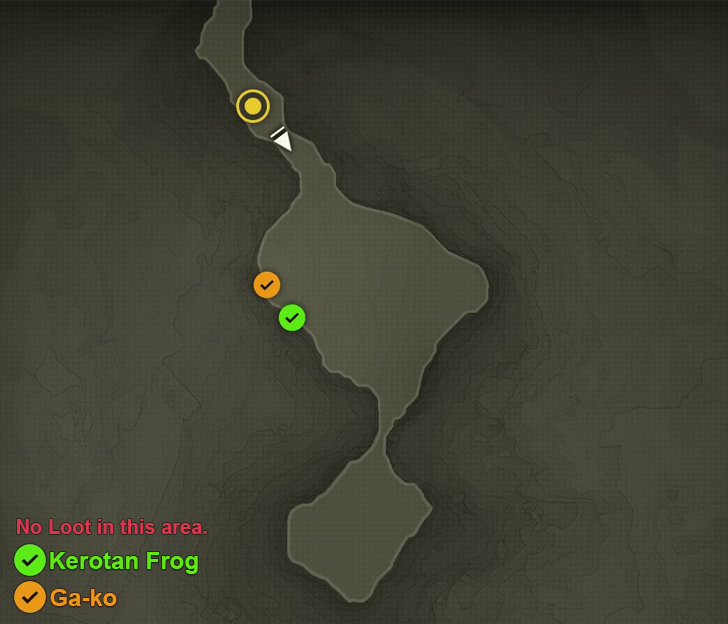 Kerotan | Ga-ko |
|
| Walkthrough | |
| 1 | After your aircraft crashes, Snake will find himself in Dremuchij East. Head northwest to begin the mission. |
| 2 | 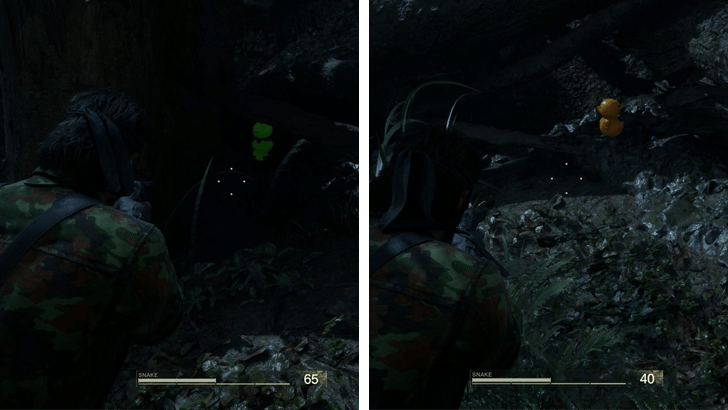 On the west side of the large clearing, you'll find a Kerotan Frog and a Ga-ko. Since you won't be able to backtrack to this location, make sure you shoot both before leaving. |
| 3 | Once you're ready, continue heading northwest until you reach Dremuchij North. |
Dremuchij North
| Dremuchij North Loot | |
|---|---|
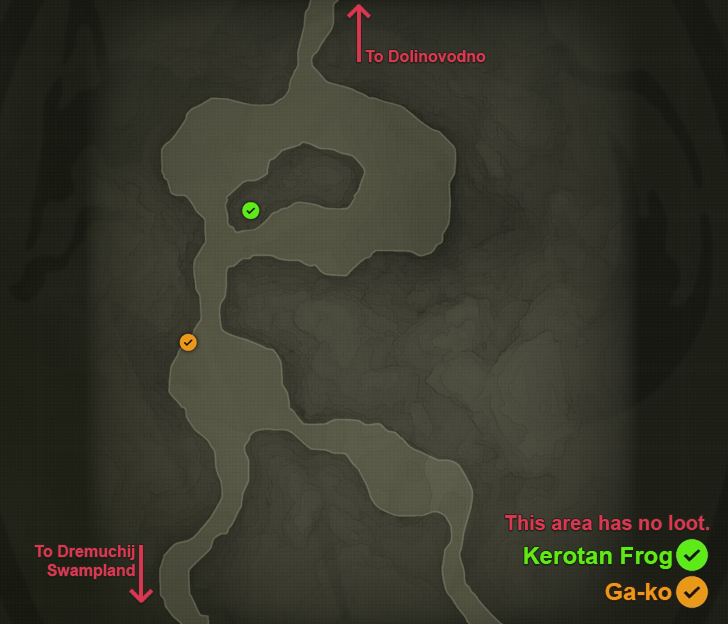 Kerotan | Ga-ko |
|
| Walkthrough | |
| 1 | 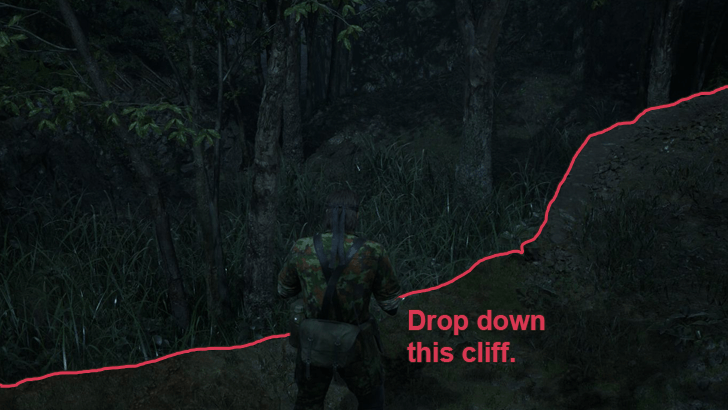 After emerging into Dremuchij North, drop down the cliff. Then, keep heading northwest until you reach the crash site. This triggers a cutscene where Snake meets The Boss. Note: There are a few snakes in the area after you drop down. You can kill them to stock up on food before you lose your gun to The Boss. |
| 2 | 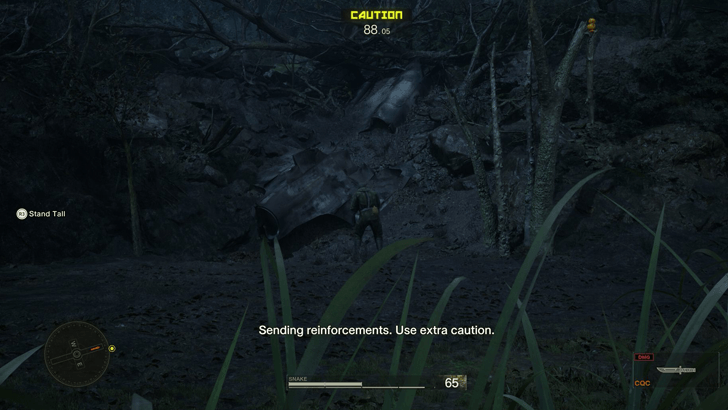 During the cutscene, The Boss destroys your M1911A1, rendering you weaponless. As soon as it ends, soldiers will approach the crash site, triggering a Caution phase that will last for 100 seconds. |
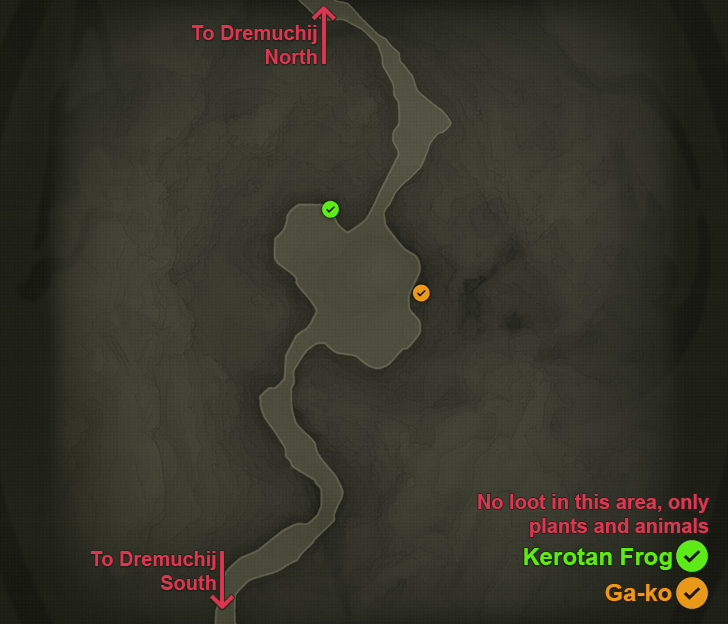
| 3 | Now, you have the option of pushing on or waiting out the 90 second Caution phase. If you want to push onwards, then keep heading north. Note: If you want to wait out the 100 seconds, the best option would be to head south into Dremuchij Swampland. There are no enemies here, and you can get a bunch of supplies while waiting out the Caution phase. |
| 4 | Once you hit the northwest corner of the area, start going northeast to reach Dolinovodno. There is a Kerotan and Ga-ko in this area but you won't be able to get either until you have a gun. Backtrack to this area after you finish up in Rassvet to get both collectibles. |
Dremuchij Swampland (Optional)
| Dremuchij Swampland Loot | |
|---|---|
 Kerotan | Ga-ko |
|
| Walkthrough | |
| 1 | Dremuchij Swampland is pretty much the same as when you first visited it during the Virtuous Mission. You can use your knife to kill crocodiles for food before moving on to Dremuchij South where the real juice is. There is a Kerotan and Ga-ko in this area but you won't be able to get the latter until you have a gun. Backtrack to this area after you finish up in Rassvet to get both collectibles. |
Dremuchij South (Optional)
| Dremuchij South Loot | |
|---|---|
 Kerotan | Ga-ko |
|
| Walkthrough | |
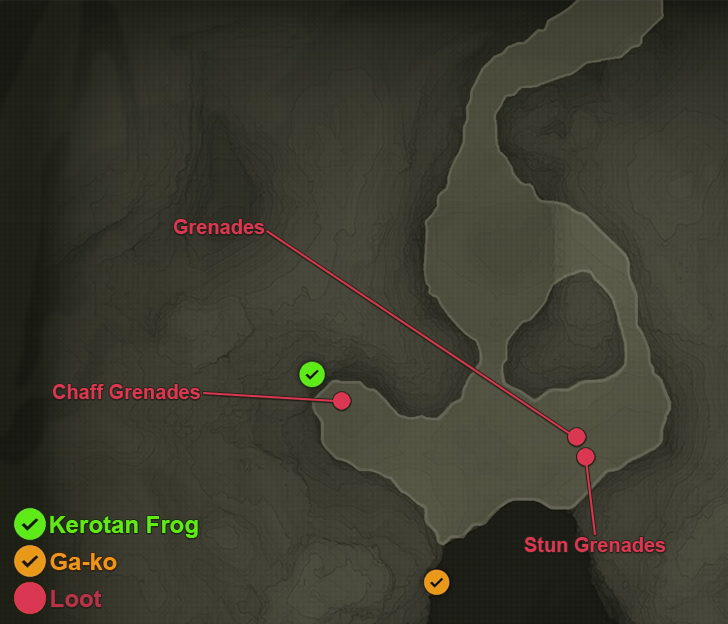
| 1 | Dremuchij South will have a bunch of items and animals that you can loot and capture. Stock up on Grenades, Stun Grenades, and Chaff Grenades, before killing the Markhor (a goat) and the snakes in the area for food. There is a Kerotan and Ga-ko in this area but you won't be able to get either until you have a gun. Backtrack to this area after you finish up in Rassvet to get both collectibles. |
| 2 | Once you're done resupplying, head back north, past Dremuchij Swampland, until you make it back to Dremuchij North to resume the main story. |
Dolinovodno
| Dolinovodno Loot | |
|---|---|
 Kerotan | Ga-ko |
|
| Walkthrough | |
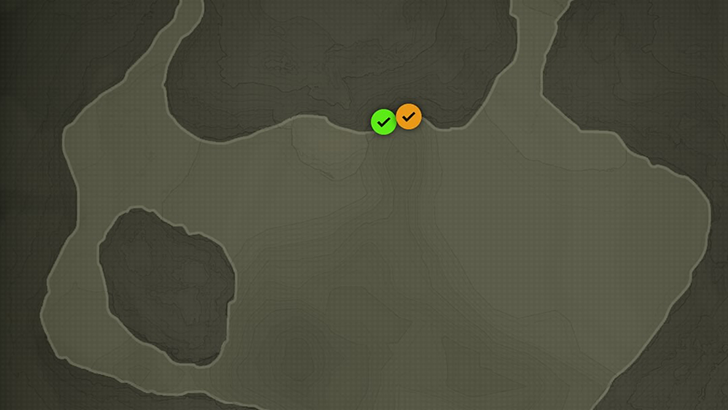
| 1 |  If you don't have the Caution phase active, you can go ahead and approach the soldier directly in front of you and CQC Throw him to knock him out. Tip: Before crossing the rope bridge, pick up the knocked out guard twice to get some loot. |
| 2 | 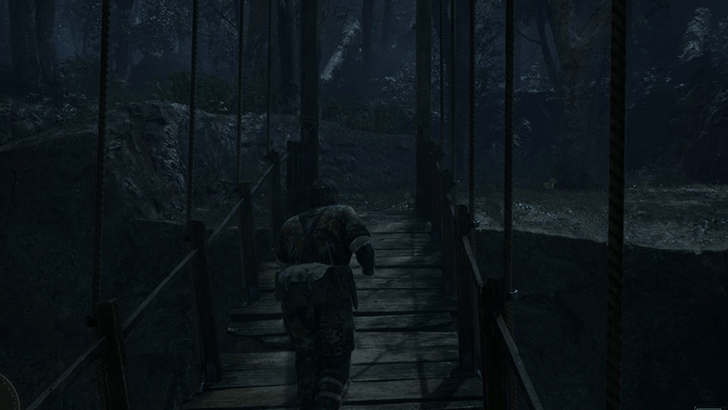 With the way clear, cross the bridge to reach the northern side of Dolinovodno. |
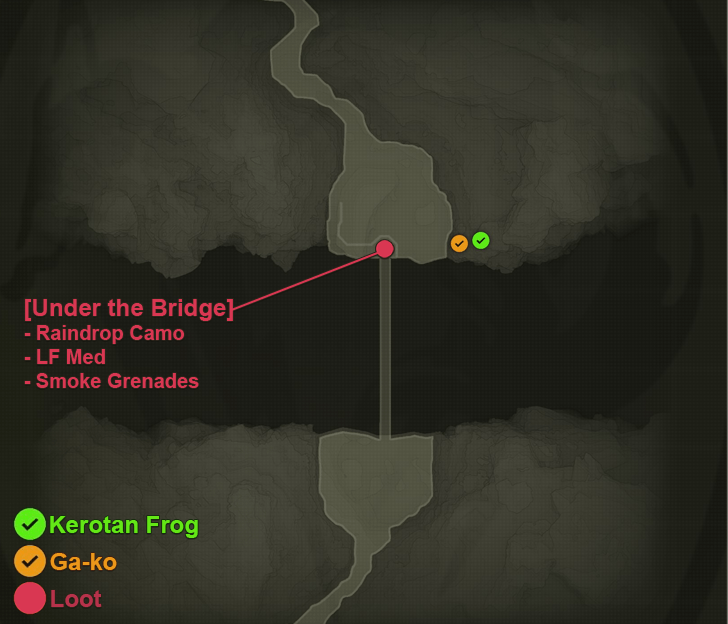
| 3 | 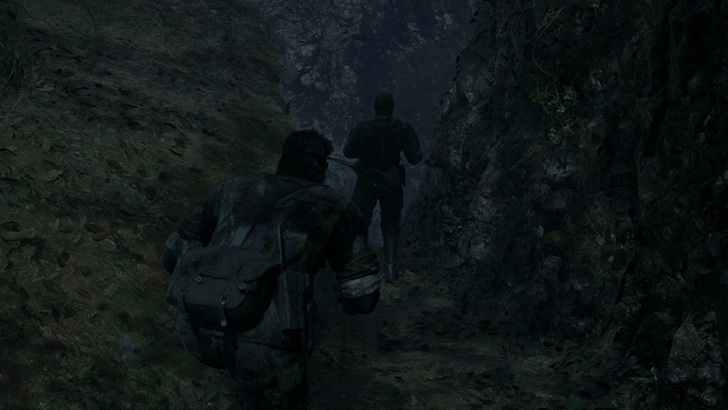 Once across, look for the nearby guard and CQC Throw him to knock him out as well. |
| 4 | Then, look for a small path on the west side of the rope bridge that leads to the small ledge beneath it. Make your way over to this ledge to get the Raindrop Camo as well as an LF Med and Smoke Grenades. |
| 5 | After looting everything, head back up and go northwest to reach Rassvet. |
Rassvet
| Rassvet Loot | |
|---|---|
 Kerotan | Ga-ko |
|
| Walkthrough | |
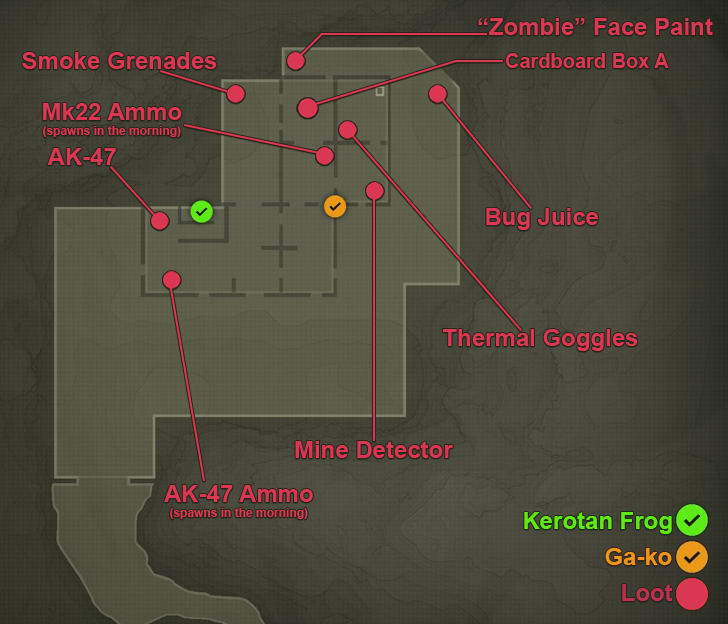
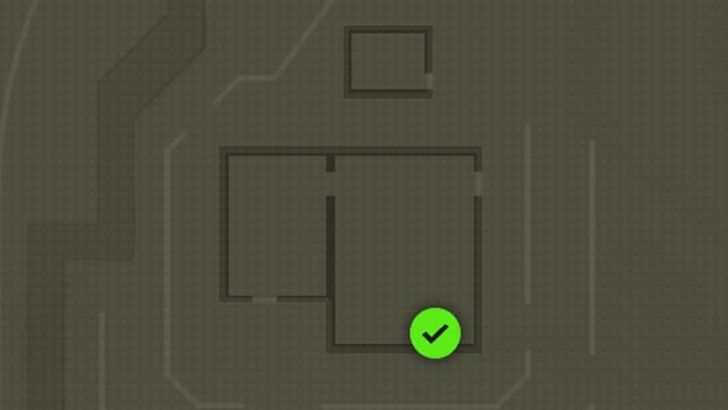
| 1 | 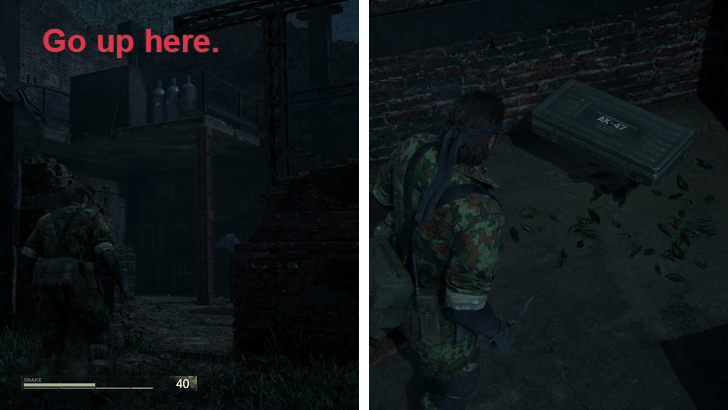 Upon arriving in Rassvet, take your time to loot everything in the vicinity. Your first stop is the second floor of the building's west side. Head up the stairs to get the AK-47 behind a few explosive barrels. |
| 2 | 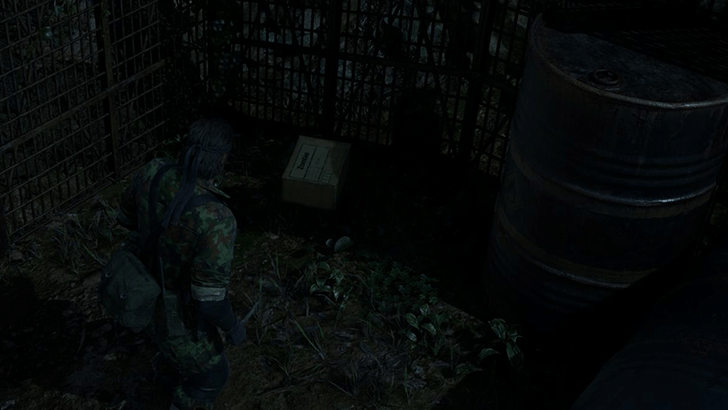 Next, head outside and over to the north side of the building. Behind another set of explosive barrels, you'll find the Zombie Face Paint. |
| 3 | 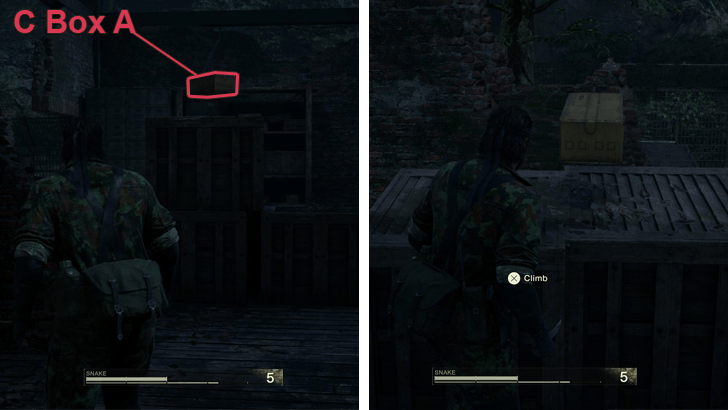 Next, head to the middle room of the building and look for a stack of crates that has an item above it. Climb up the crates to get Cardboard Box A. |
| 4 | Then, make your way over to the room where you first met Sokolov during the Virtuous Mission. But, before going through the door, go to the southeast corner of the room right before it. Pick up the Mine Detector before proceeding. |
| 5 | 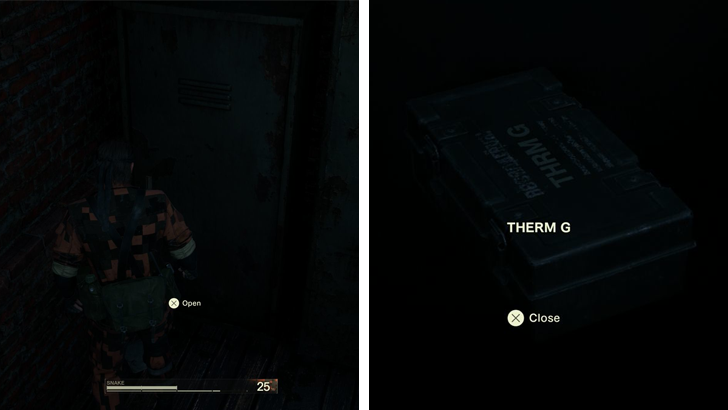 Inside Sokolov's room, there will be a locker that you can open. Loot the Thermal Goggles inside it. |
| 6 | 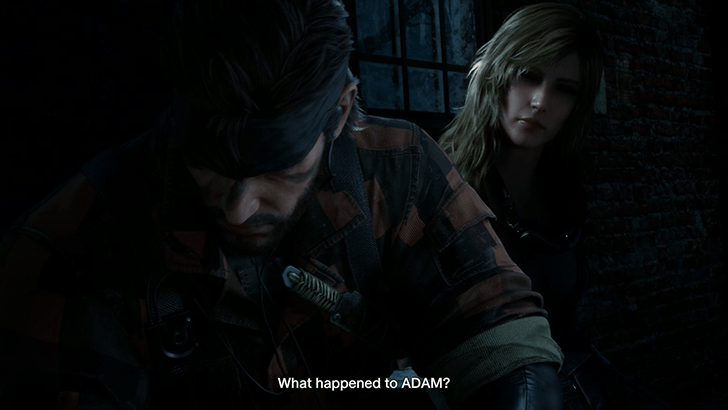 Now you should be set. Equip the Squares Camo and the Splitter Face Paint before exiting the room to trigger a cutscene where you meet EVA for the first time. Save your progress when prompted. |
| 7 | 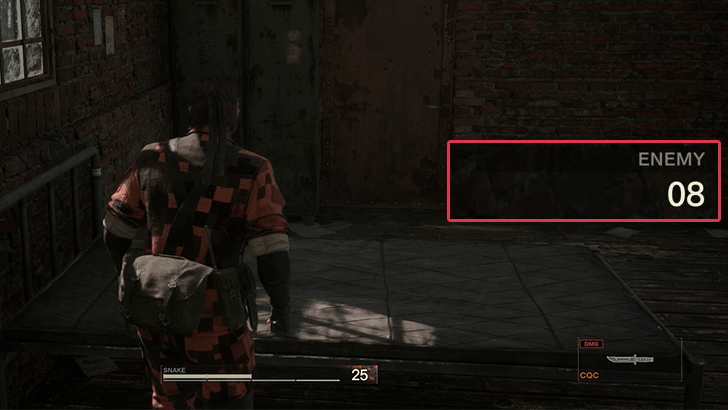 You'll wake up in the morning to the sounds of the Ocelot Unit assaulting the building. You'll need to take out a fixed amount of enemies. The number depends on your difficulty. On Normal, you'll need to take out 8 soldiers. |
| 8 | To avoid an alert, start by going prone under the bed and preparing Stun Grenades. Once the squad of 4 breaks down the door, throw 2 flashes into the open doorway. Throw one a bit to the left and the other to the right to get all 4 enemies. You'll know you did it right if the enemy counter drops down to 4 enemies. |
| 9 | 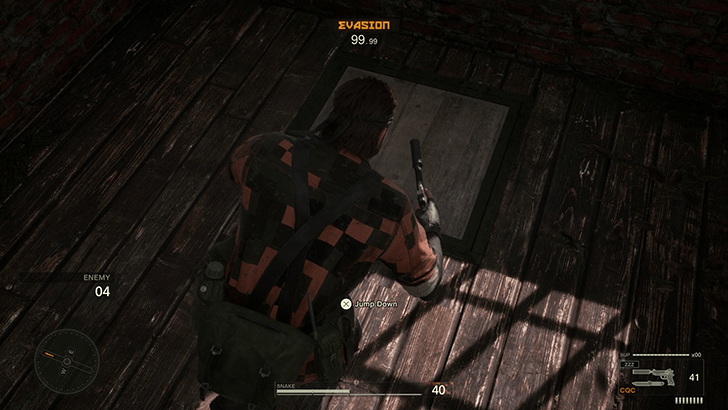 Once all 4 are down, go down the trap door next to the bed. This takes you to the underside of the building where small metal grates allow you to see the outside perimeter. |
| 10 | 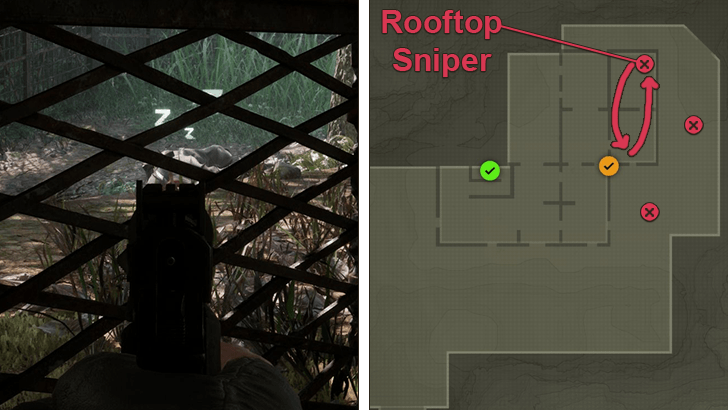 Equip a suppressed weapon (Mk22 or M1911A1) then start dealing with the soldiers patrolling the perimeter. There should be 1 to the east and another to the south. |
| 11 | 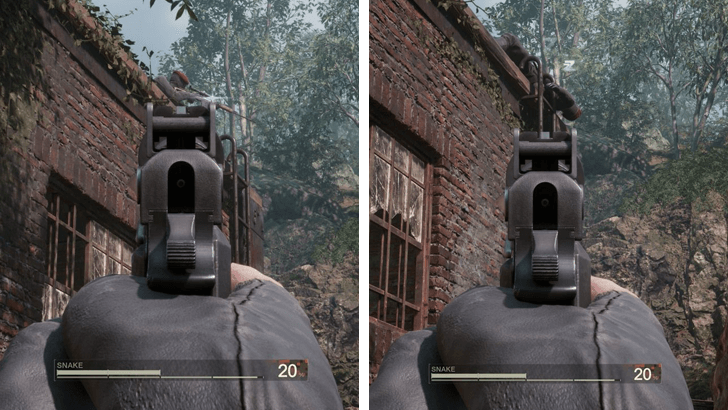 After dealing with those 2 soldiers, crawl out of the building while still hugging the eastern wall. There is a rooftop sniper right above this section of the building. Once he peeks out from the north or southern corner of the roof, aim for a headshot to knock him out without triggering an Alert. |
| 12 | 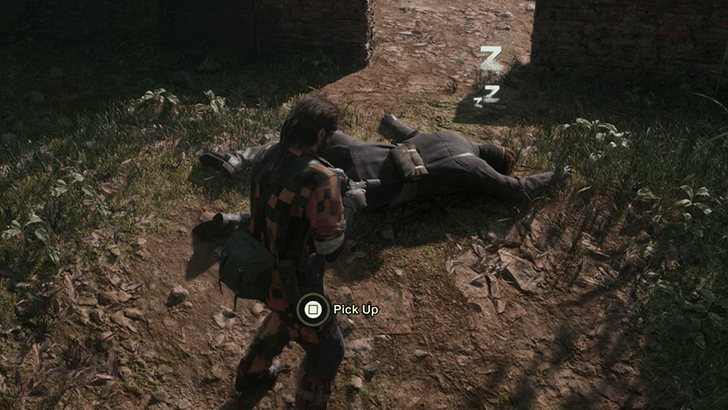 The final soldier (on Normal) will be found at the western perimeter of the building. Approach this last one with caution since he'll be facing towards you. Nail him with a headshot from a distance to complete the encounter. |
| 13 | With the entire Ocelot Unit dealt with, head over to the northeast of Rassvet to trigger a cutscene. Once it ends, you're free to backtrack to the ff. locations to get any collectibles you missed: ・Dolinovodno ・Dremuchij North ・Dremuchij Swampland ・Dremuchij South |
| 14 |  If you're done getting collectibles or if you want to move forward, simply head back over to the northeast corner of Rassvet where the gate should now be unlocked. Switch to more appropriate camo then continue onwards to reach Chyornyj Prud. |
Chyornyj Prud
| Chyornyj Prud Loot | |
|---|---|
 Kerotan | Ga-ko |
|
| Walkthrough | |
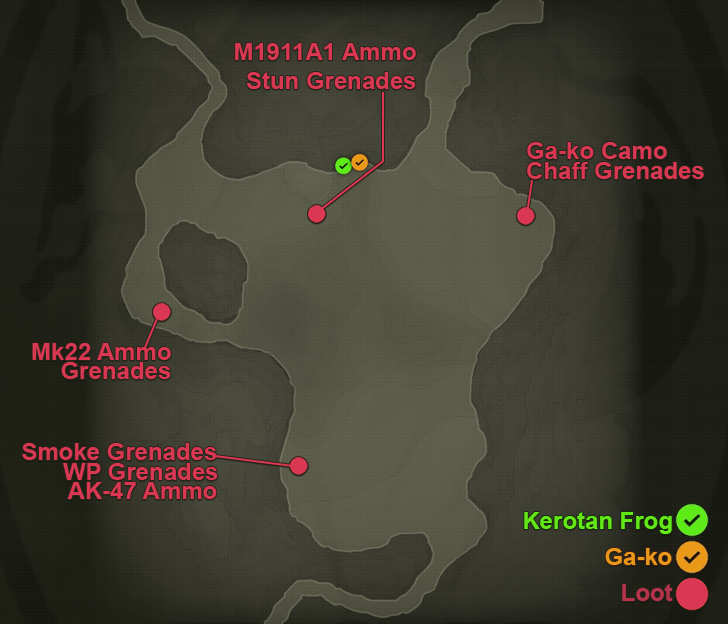
| 1 | 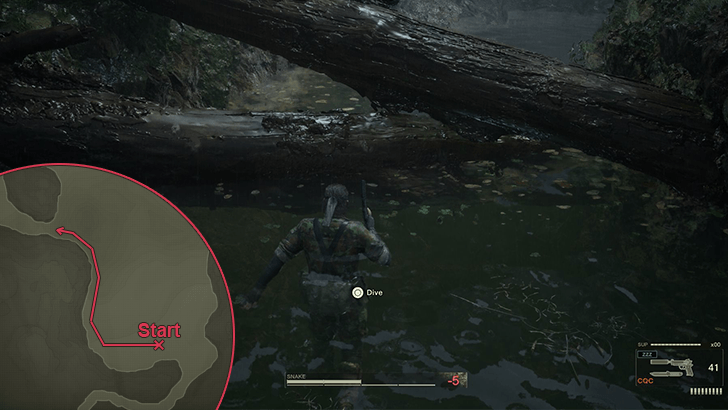 Upon arriving, head west until you hit the wall of the area. Then, follow this western wall and swim until you reach a fallen log that you can swim under. Note: If your Stamina bar starts going down rapidly, it probably means you have a leech stuck to you. Open the Cure menu and use the Cigar to remove leeches. |
| 2 | Dive and swim under the log to reach an elevated area on the west edge of the map. Head north to trigger a call from EVA. |
| 3 | After finishing the call, climb the nearby tree and complete the platforming segment that takes you to an isolated ledge at the north of the area. Here, you'll be able to get the Crocodile Cap. |
| 4 | 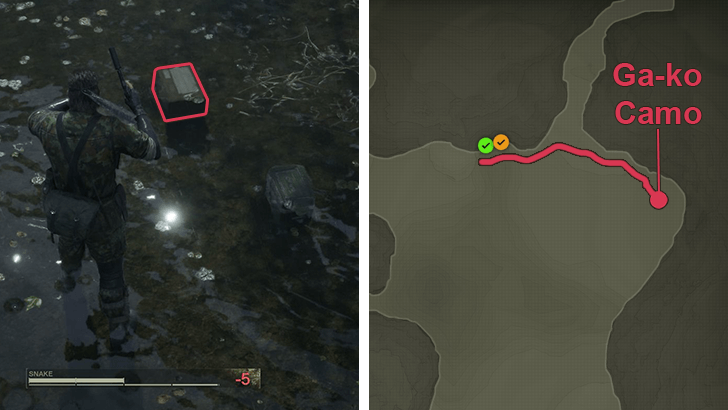 Next, drop off the ledge to your east. Swim until you reach land and keep heading east until you hit shallow water. You should be able to find the Ga-ko Camo here along with Chaff Grenades. |
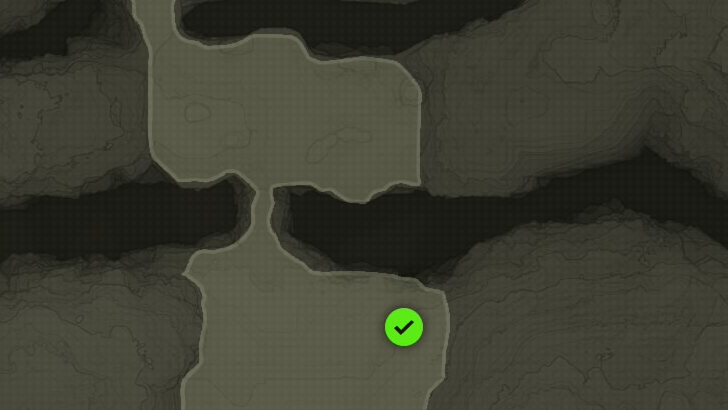
| 5 |  With all key items looted, take the northeast path. Dodge roll forward over the trap wire to avoid the swinging trap then make your way into Bolshaya Past South. |
Bolshaya Past South
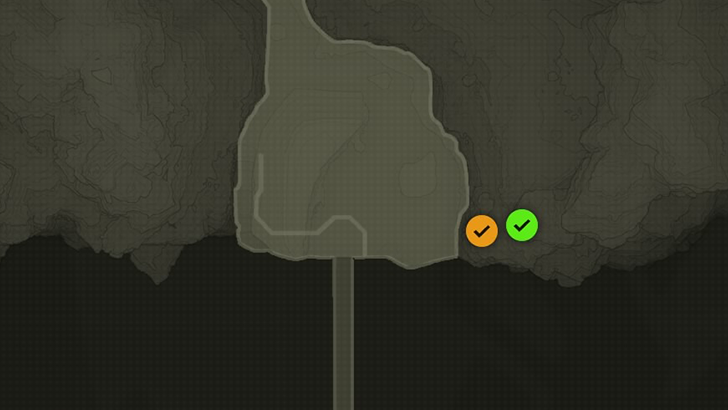
Note: Dropping down to the other side of the electric fence in Bolshaya Past South is a point of no return. Make sure any collectibles in past areas have been collected before continuing.
| Bolshaya Past South Loot | |
|---|---|
 Kerotan | Ga-ko | 8mm Film Reel |
|
| Walkthrough | |
| 1 |  Upon entering Bolshaya Past South, you'll be greeted by an electric fence and an active mine field. Approach the easternmost fence and crawl under the broken wire to get to the other side. |
| 2 |  This next area is a mine field. Rather than use the Mine Detector, equip your Thermal Goggles instead. This will allow you to see the mines and the safe path you can take to avoid getting blown up. Make your way to the next electric fence. |
| 3 | 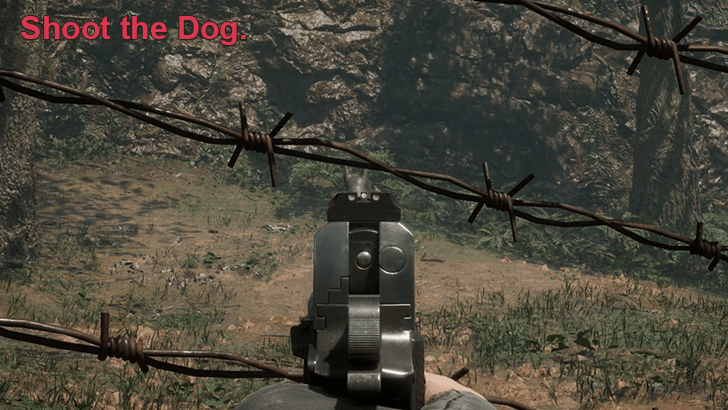 Once you're hugging this new electric fence, take out your silenced M1911A1 and shoot the guard dog on the other side. They don't count as "kills", so any title you're gunning for should be safe. |
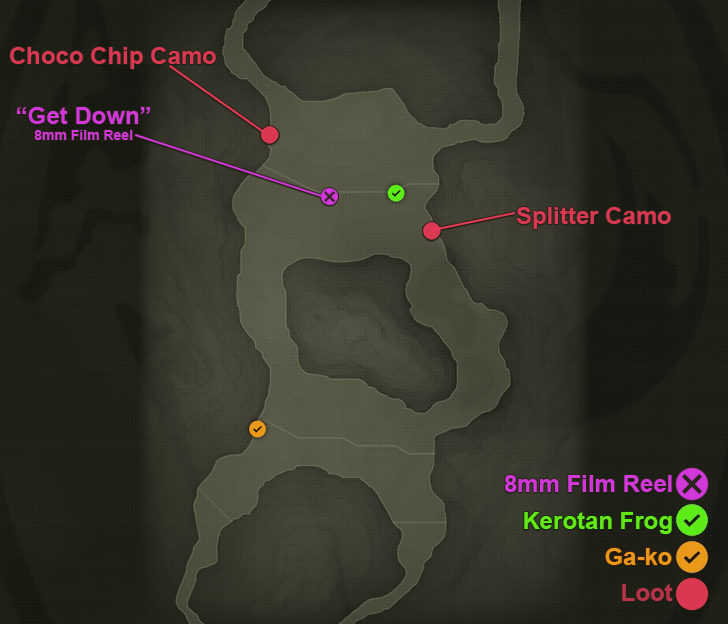
| 4 | 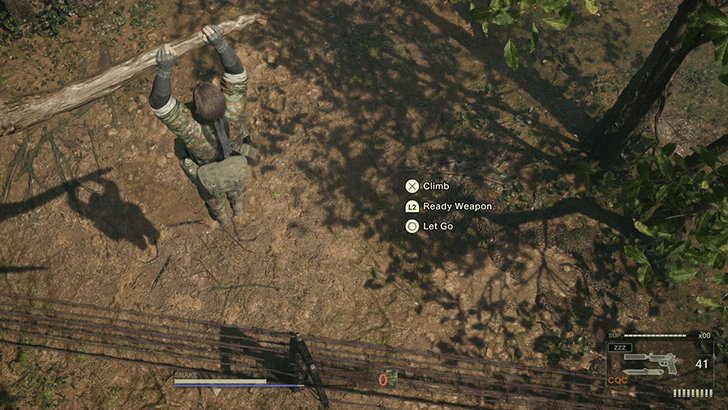 Then, follow the electric fence west until you reach a climbable tree. Interact with it then make your way to the branch that hangs over the other side of the fence. Note: Before dropping, look back towards the tree to see a Ga-ko. Make sure to shoot it because you might not have an angle to hit it once you're on the other side. |
| 5 |  When ready, drop down to the other side and head east. There will be a patrolling soldier here that you need to knock out before proceeding. |
| 6 |  Along this east wall is a ledge you can shimmy on. It's a bit tricky since you'll most likely fall off midway through. However, keep at it until you reach the wider ledge to the north. Here, you can loot the Splitter Camo. |
| 7 |  Next, backtrack south and loop down and over to the west end of the area. |
| 8 | 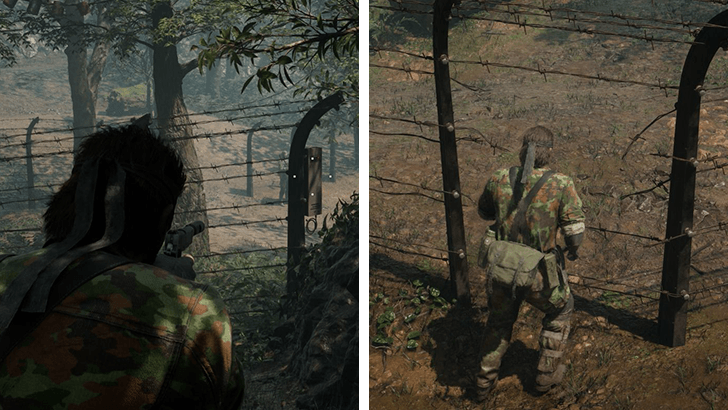 Disable the electric fence by shooting out its control panel before dodge rolling into the hole in the fence to reach the other side. |
| 9 | 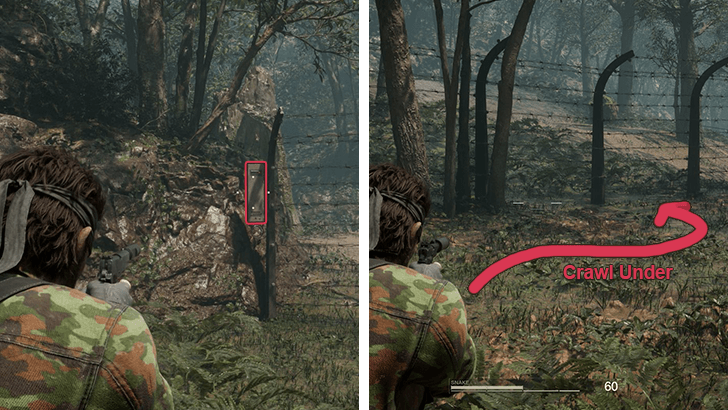 At the other side, shoot the control panel of the electric fence directly in front of you (it should be near the west end of the fence). Then, go prone and crawl under the hole on the fence to bypass the two guards guarding the gap. |
| 10 | 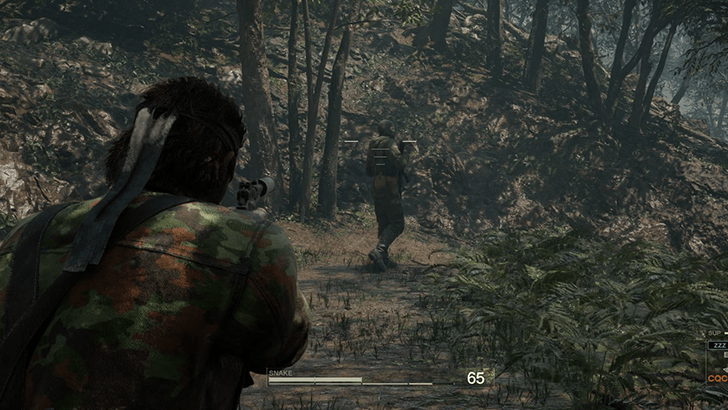 On the other side, take out the lone soldier patrolling the area. Note: This is optional, but the guard with the radio on the west side of the fence gap will have an 8mm Film Reel. Take out the guard beside him before getting into CQC range to hold him up for the film reel. |
| 11 | 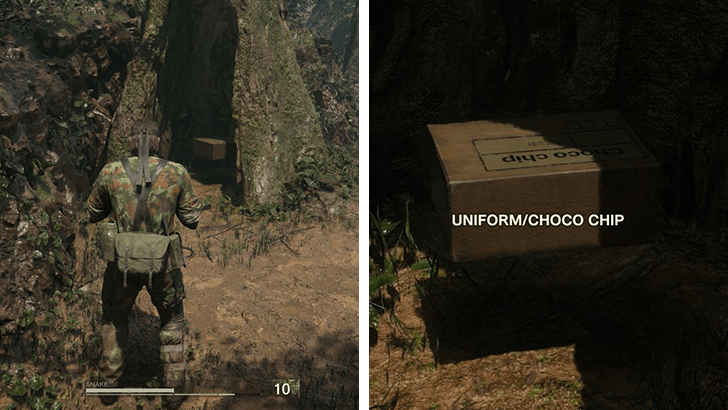 Finally, head over to the northwest side of the area and look for a hollow tree stump. Inside, you'll find the Choco Chip Camo. After looting it, go northwest towards Bolshaya Past Base. |
Bolshaya Past Base
| Bolshaya Past Base Loot | |
|---|---|
 Kerotan | Ga-ko | 8mm Film Reel |
|
| Walkthrough | |
| 1 | 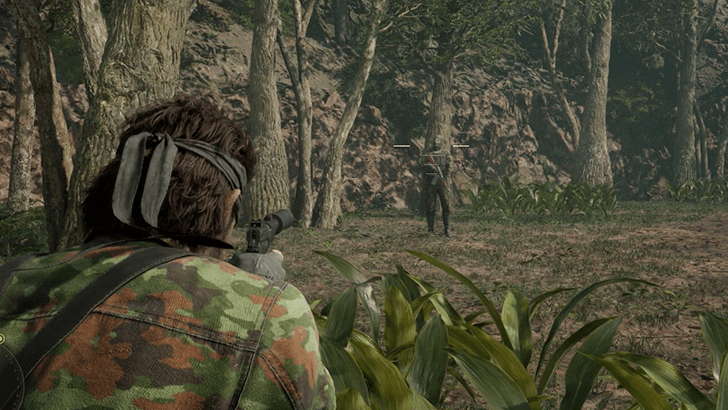 Having taken the northwest path from Bolshaya Past South, you'll soon emerge on the west side of Bloshaya Past Base. Head north and take out the soldier patrolling the area. |
| 2 | 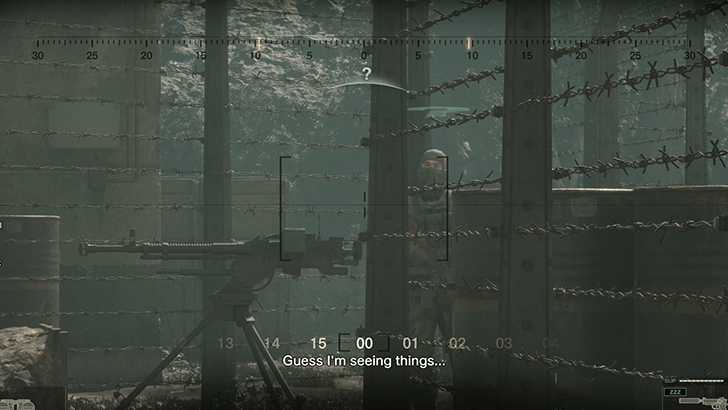 Once he's out, follow the trail east until you hit a machine gun nest manned by another soldier. Take him out to proceed. |
| 3 |  Next, face southeast towards the broken brick wall. Another soldier should be here with a patrol pattern that goes around the helicopter. Take him out before he can gain distance. |
| 4 | 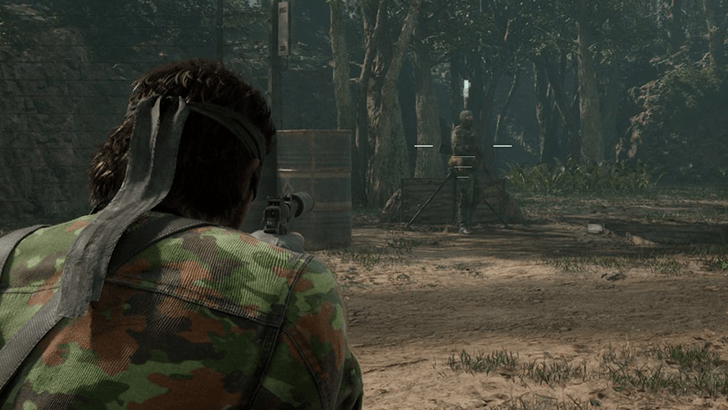 Directly south of you is another machine gun nest. If you timed it correctly, a different soldier should have his back to you. Take him out to freely explore most of the base. |
| 5 | 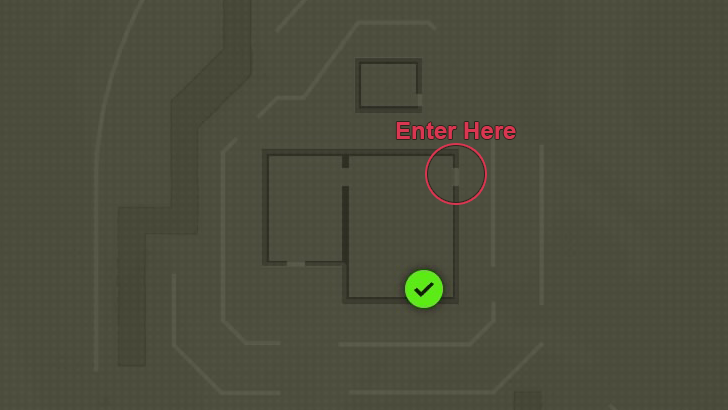 Now, you can focus on getting the guard near the building. To start, head over to the east side of the building and enter through the door there. |
| 6 | 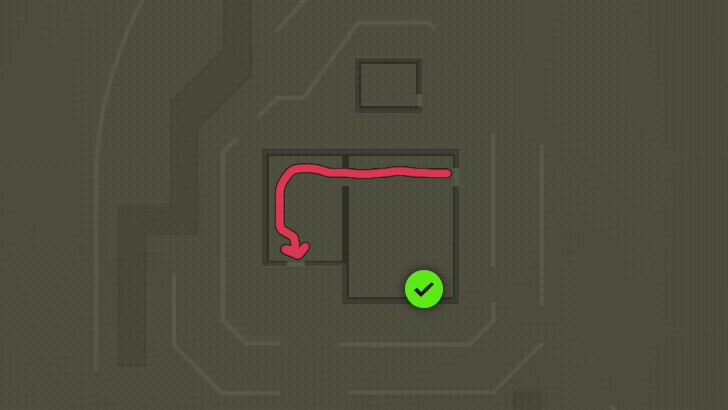 Once inside, go over to the western room then open the door leading to the south. |
| 7 | 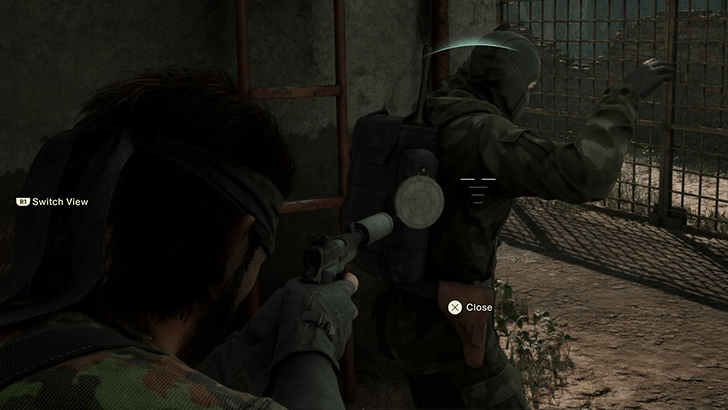 Directly in front of you will be the soldier holding an 8mm Film Reel. You'll immediately be in CQC range, so hold him up to get the reel before taking him out. |
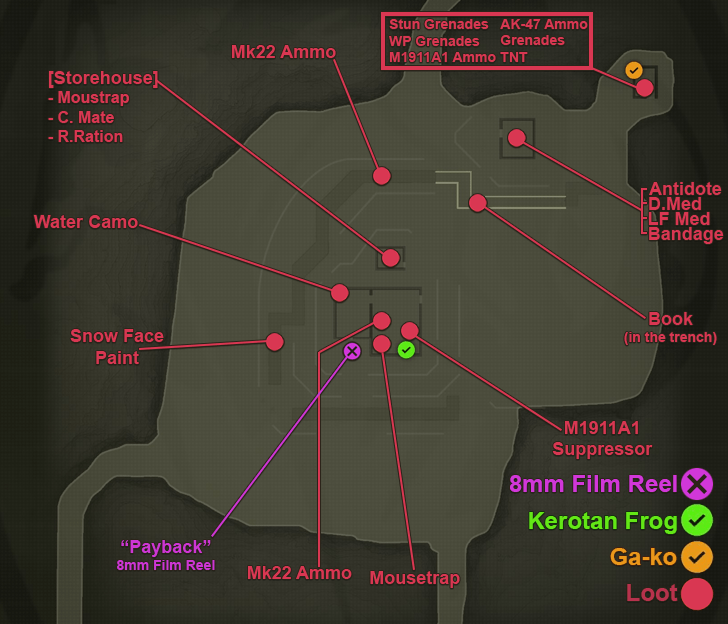
| 8 | 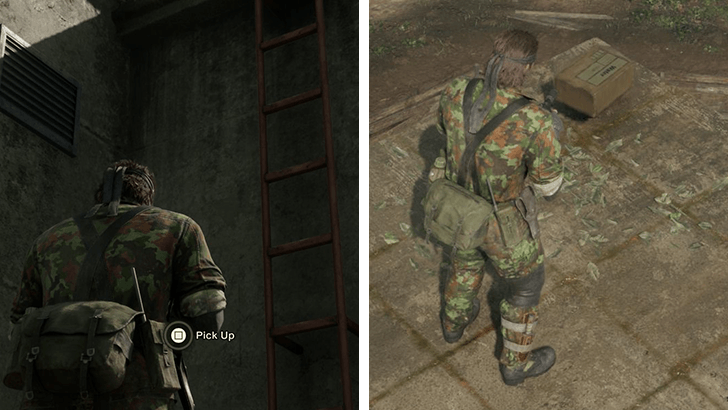 Now, all that's left is to loot the place. First, head up to the roof via the nearby ladder. Go to the northwest side to get the Water Camo. |
| 9 | 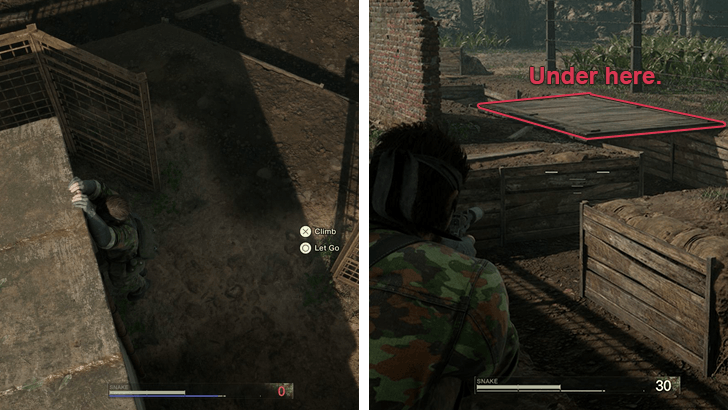 Next, immediately drop down the ledge and face southwest. Go to that location in the trench (by going prone) to get the Snow Face Paint. |
| 10 | 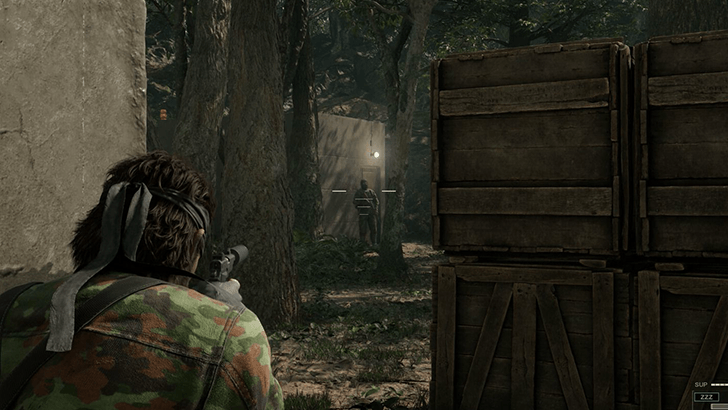 Finally, head on over to the northeast side of the area to find a storehouse guarded by one last soldier. Take him out and head inside to get some ammo, grenades, and TNT. |
| 11 | 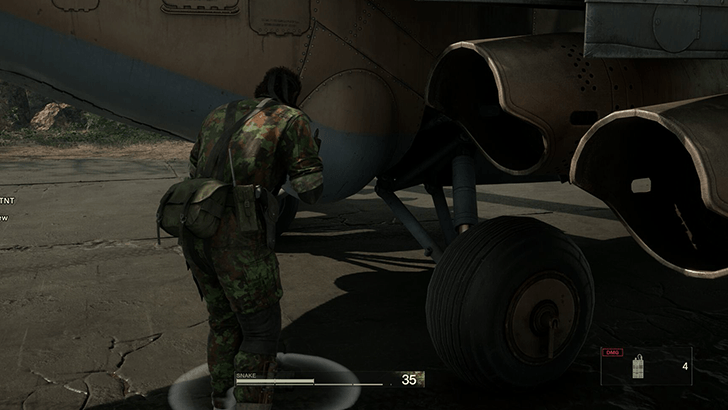 Before leaving the area, equip the TNT and plant one under the helicopter. This is optional, but doing this step prevents the helicopter from spawning later on in the game when you reach the Krasnogorje Mountainside. |
| 12 | 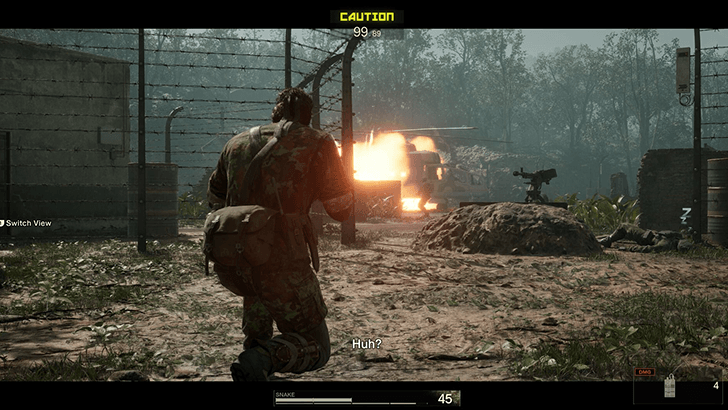 Once the TNT is planted, head north and detonate the TNT before you leave for Bolshaya Past Crevice. |
Bolshaya Past Crevice (Boss Fight)
| Bolshaya Past Crevice Loot | |
|---|---|
 Kerotan | Ga-ko |
|
| Walkthrough | |
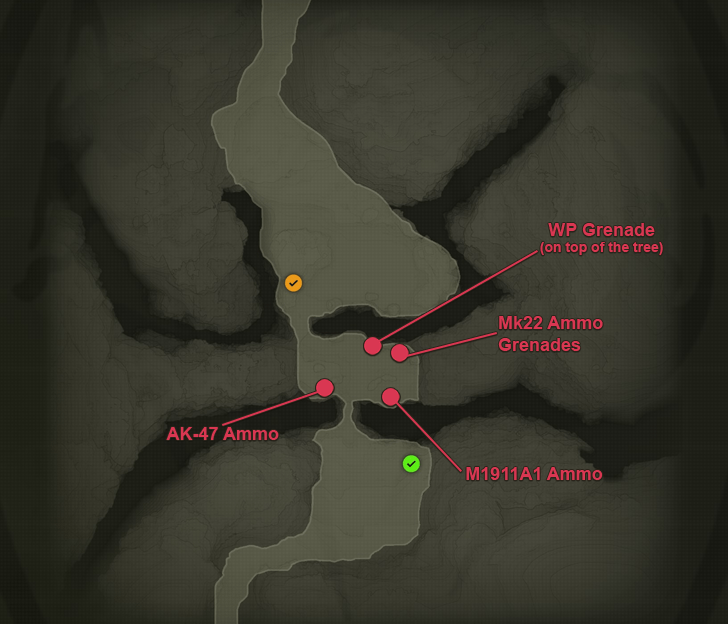
| 1 | 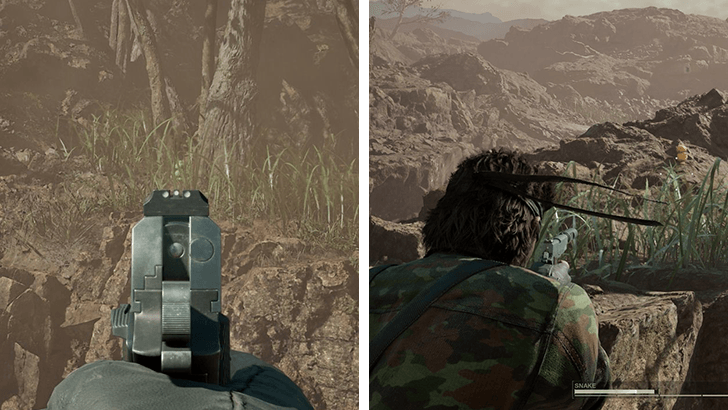 Entering Bolshaya Past Crevice will trigger a cutscene that will soon be followed by a boss battle against Ocelot. Before you fight him, make sure to get both the Kerotan and the Ga-ko here since you will no longer be able to backtrack once the fight ends. Tip: Unequip your suppressor before fighting him to avoid wearing it out during combat. |
| 2 | Defeat Ocelot to progress. This boss fight is pretty easy. Stay behind the rocks and wait for Ocelot to peek you. Go for headshots if you can, but body shots are prefectly fine on Normal difficulty. There are a number of things you can use to distract Ocelot to get free shots like shooting off his hat or killing the Markhor behind him. |
| 3 | 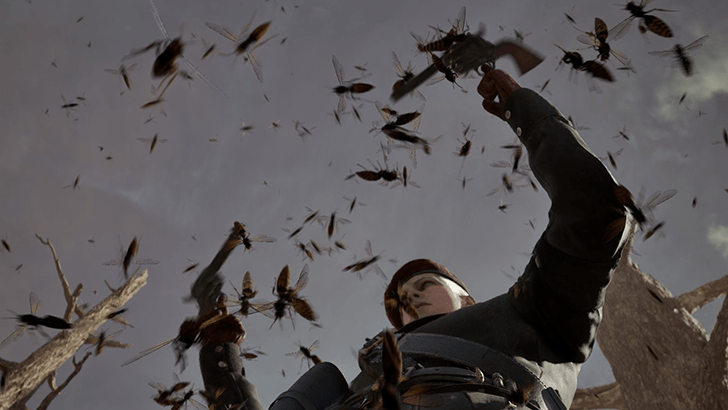 Once Ocelot drops to low HP, you'll be attacked by hornets sent by The Pain. Watch the cutscene and wait until you get dropped into the next area. ▶ Next Mission: Chyornaya Peschera Cave |
If you manage to do a non-lethal takedown of Ocelot (fully deplete his stamina bar), you'll be rewarded with the Animals Camo. If you want to get this reward, use Stun Grenades and your Mk22 during the boss fight to get a non-lethal takedown.
Dremuchij to Bolshaya Past Collectibles
Kerotan Frog Locations
| Dremuchij to Bolshaya Past Kerotan Frogs | ||
|---|---|---|
| 1 | 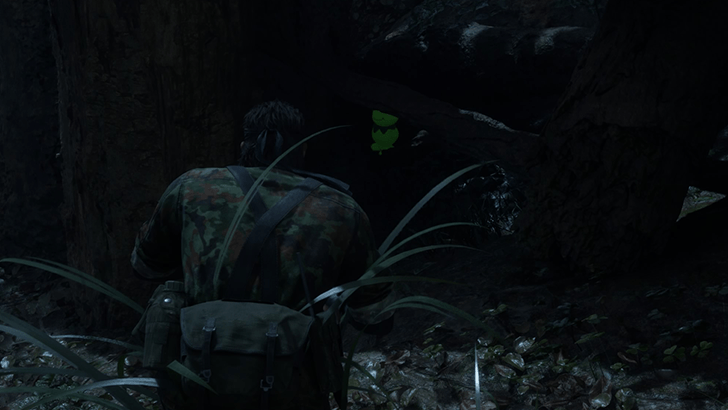 |
 |
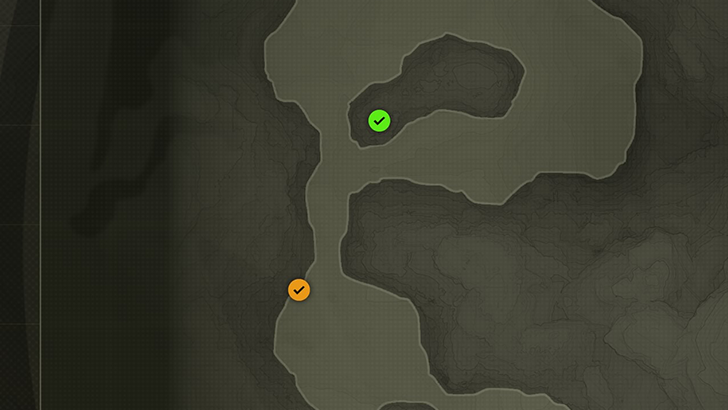
| Dremuchij East Underneath a log at the east side of the area. Make sure to get this before dropping down to Dremuchij North since you will no longer be able backtrack to Dremuchij East. |
||
| 2 | 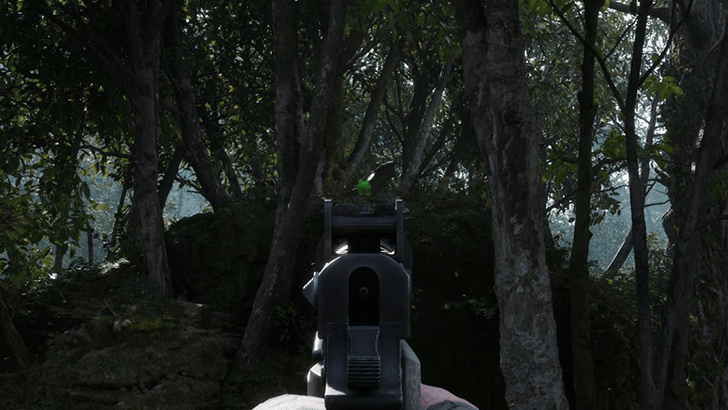 |
 |
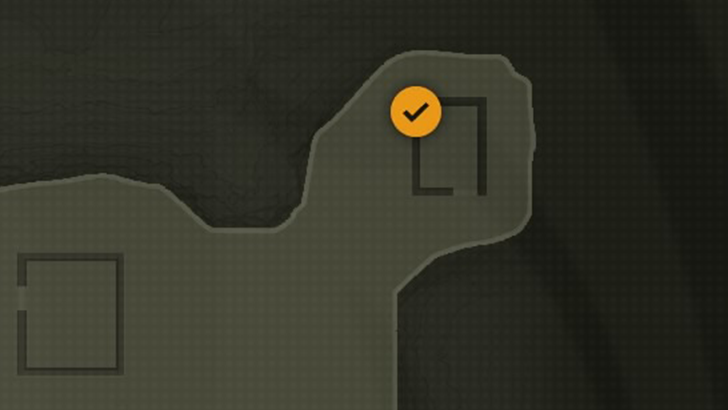
| Dremuchij North Atop the west side of a rocky outcrop. You can see it peeking over the edge by viewing it from the west or by climbing the nearby tree and looking northwest once on the branch. You'll need to backtrack to this Kerotan Frog after you complete the objectives in Rassvet since you won't have a gun when you first enter the area. |
||
| 3 | 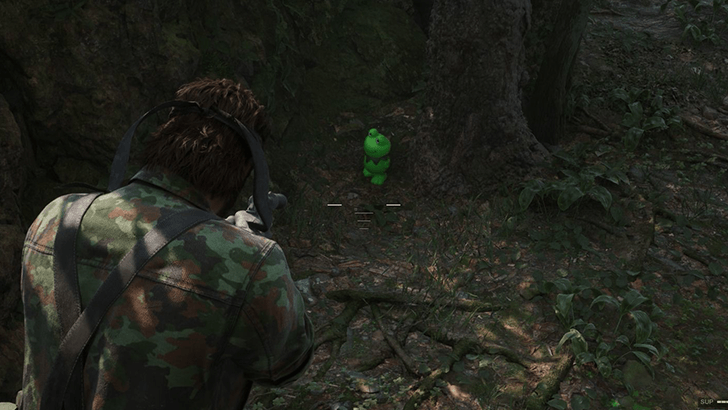 |
 |
| Dremuchij Swampland Hiding behind a copse of trees in the northern end of the swampy area. Beware of crocodiles nearby. You'll need to backtrack to this Kerotan Frog after you complete the objectives in Rassvet since you won't have a gun when you first enter the area. |
||
| 4 | 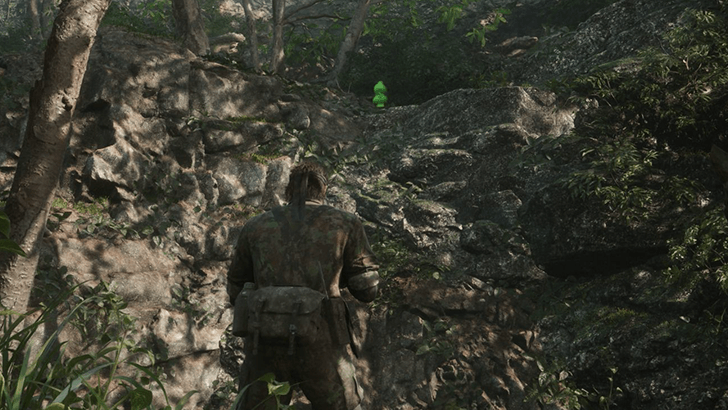 |
 |
| Dremuchij South Atop a rocky outcrop in the southwest corner of the area. It'll be in the area with 2 Reticulated Pythons and a Chaff Grenade loot drop. You'll need to backtrack to this Kerotan Frog after you complete the objectives in Rassvet since you won't have a gun when you first enter the area. |
||
| 5 | 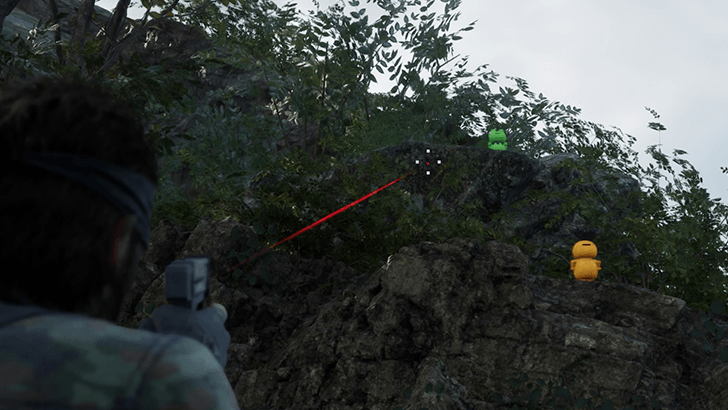 |
 |
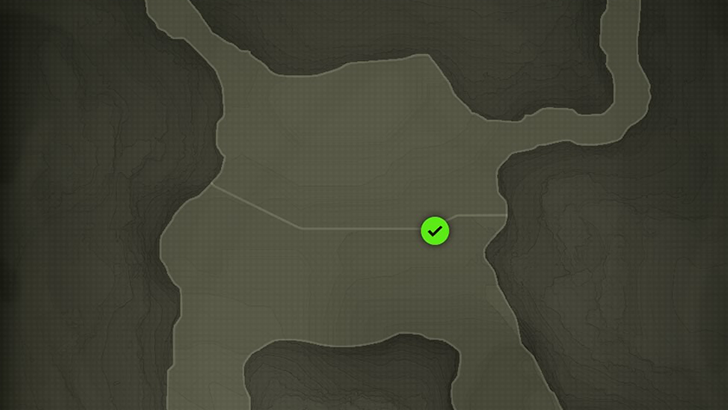
| Dolinovodno Located in the northern end of the area, to the east of the rope bridge along the cliff. You'll need to backtrack to this Kerotan Frog after you complete the objectives in Rassvet since you won't have a gun when you first enter the area. |
||
| 6 | 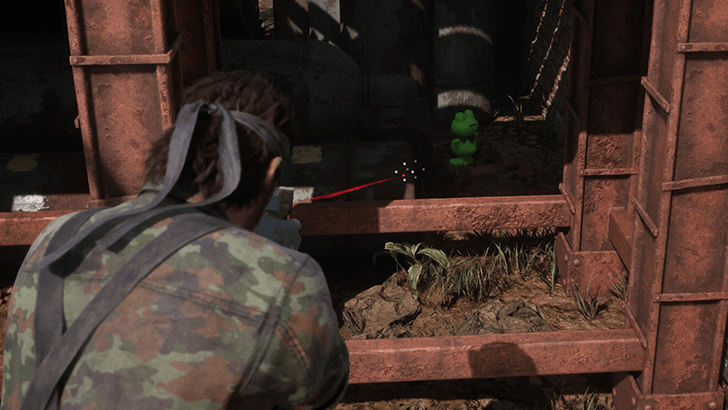 |
 |
| Rassvet Underneath the stairs leading up to Rassvet 2F. If you find it when you first enter Rassvet, you can shoot it by looting the AK-47 at the top of the stairs. |
||
| 7 |  |
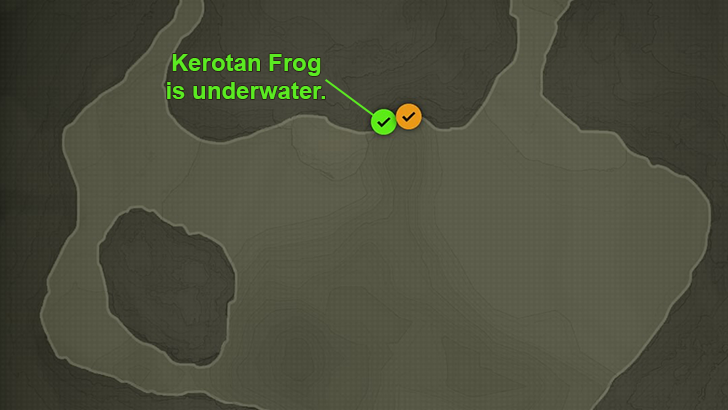 |
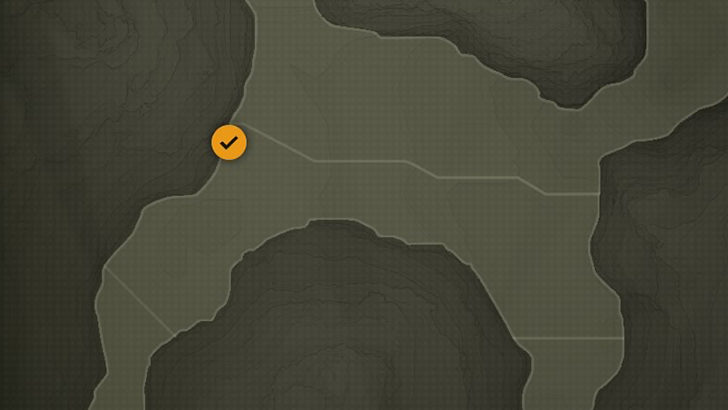
| Chyornyj Prud Underwater. Simply swim up to the center of the map's northern edge then dive down to see it tucked against the wall. |
||
| 8 | 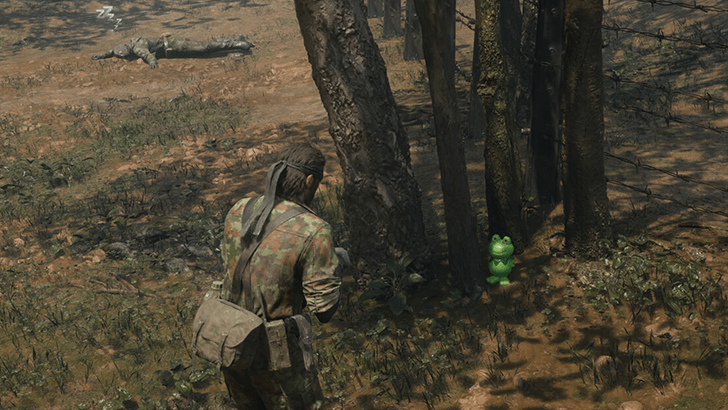 |
 |
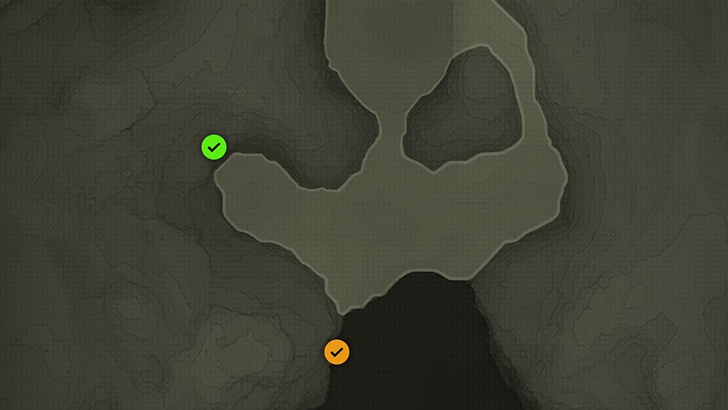
| Bolshaya Past South Hiding behind a copse of tree in the middle of the area. 2 enemy soldiers will be to its direct west guarding a gap in the electric fence so approach carefully. |
||
| 9 | 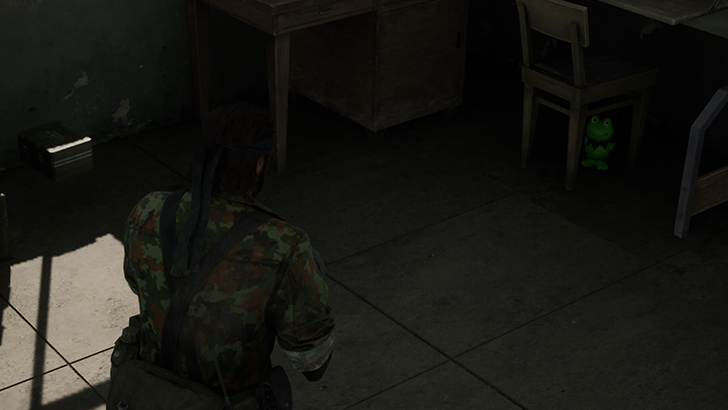 |
 |
| Bolshaya Past Base Within the east room of the base's central building. You can find it under a desk. |
||
| 10 | 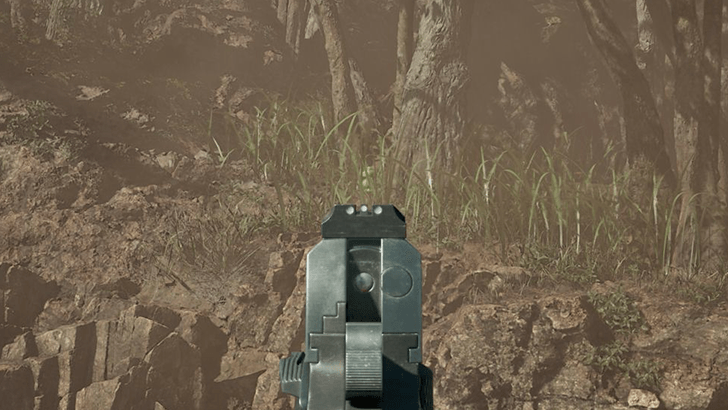 |
 |
| Bolshaya Past Crevice Once the boss fight starts, look southeast. The Kerotan Frog will be hiding in the tall grass. |
||
Ga-ko Locations
| Dremuchij to Bolshaya Past Ga-ko | ||
|---|---|---|
| 1 | 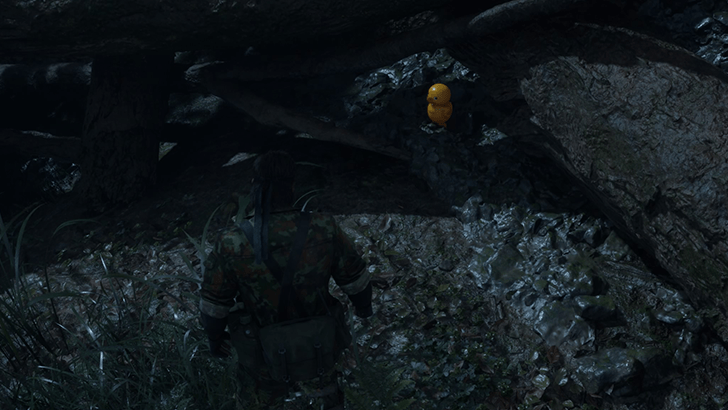 |
 |
| Dremuchij East Underneath a log at the east side of the area. Make sure to get this before dropping down to Dremuchij North since you will no longer be able backtrack to Dremuchij East. |
||
| 2 | 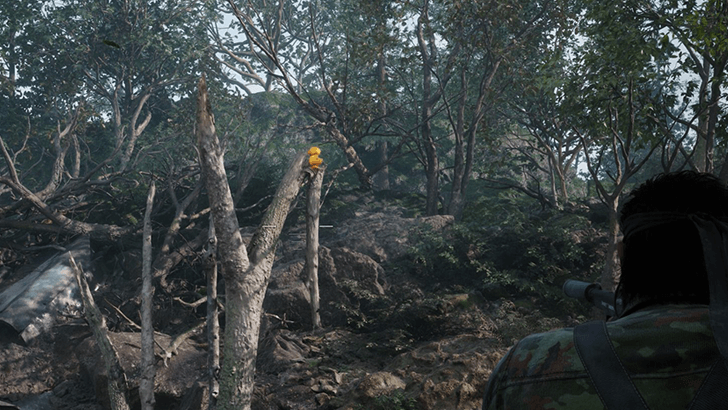 |
 |
| Dremuchij North Found perched on top of a burnt tree trunk next to the crash site. You'll need to backtrack to this Ga-ko after you complete the objectives in Rassvet since you won't have a gun when you first enter the area. |
||
| 3 | 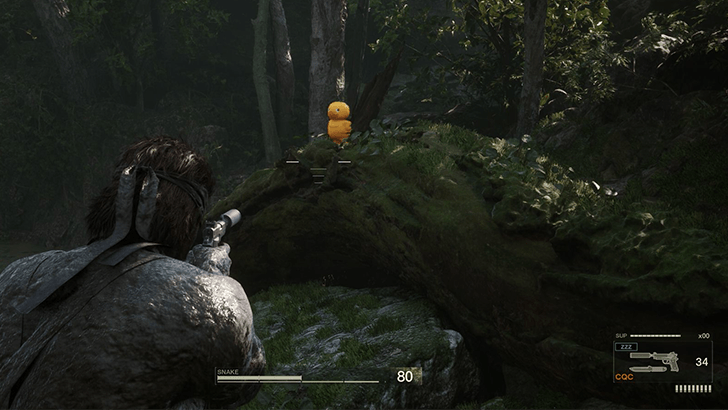 |
 |
| Dremuchij Swampland Found on top of a fallen log in the east side of the swampy area. Beware of the crocodiles nearby. You'll need to backtrack to this Ga-ko after you complete the objectives in Rassvet since you won't have a gun when you first enter the area. |
||
| 4 | 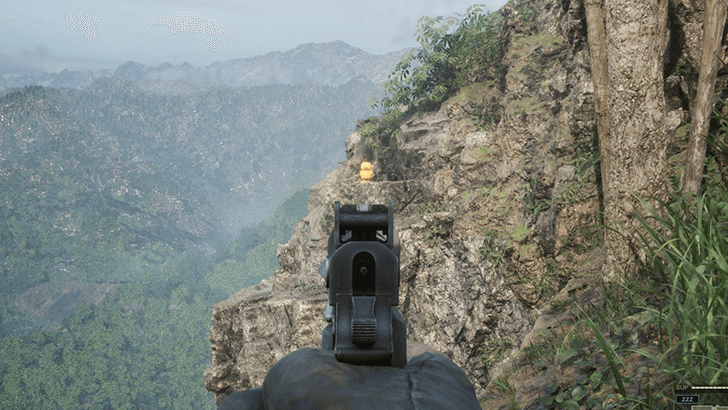 |
 |
| Dremuchij South Found camouflaged off of a cliff to the southwest of where you landed during the Virtuous Mission. You'll need to backtrack to this Ga-ko after you complete the objectives in Rassvet since you won't have a gun when you first enter the area. |
||
| 5 | 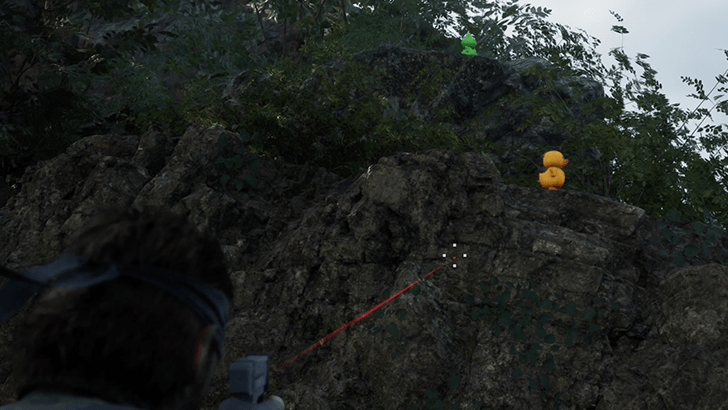 |
 |
| Dolinovodno Located in the northern end of the area, to the east of the rope bridge along the cliff. You'll need to backtrack to this Ga-ko after you complete the objectives in Rassvet since you won't have a gun when you first enter the area. |
||
| 6 | 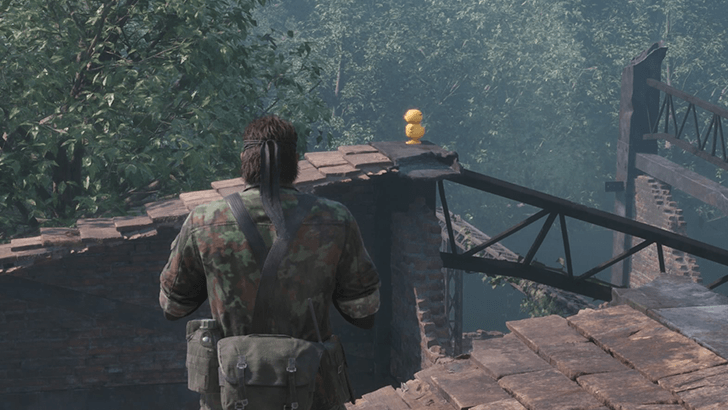 |
 |
| Rassvet Found on the roof of the building in Rassvet. Use the ladder at the northeast side of the building to climb up. Then, face southwest to see the camouflaged Ga-ko. |
||
| 7 | 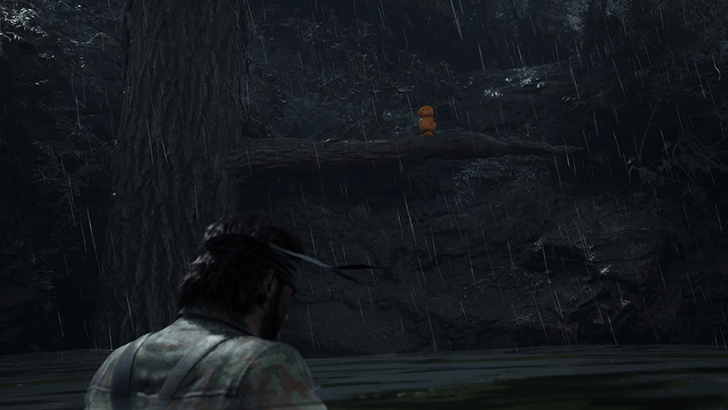 |
 |
| Chyornyj Prud Will be perched on a tree branch just above the water. You'll find it at the center of Chyornyj Prud's northern edge. |
||
| 8 | 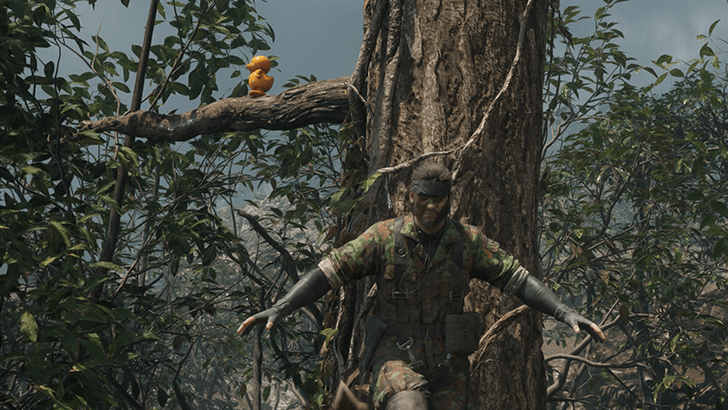 |
 |
| Bolshaya Past South On a branch of the tree you need to climb to get past the 2nd electric fence. After you start standing on the tree branch, look behind you to see the Ga-ko. |
||
| 9 | 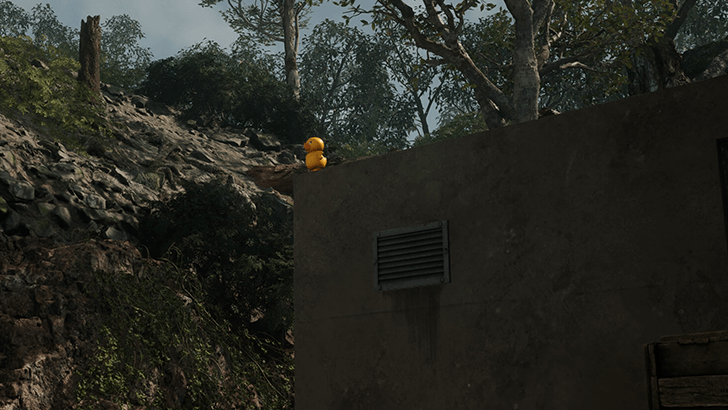 |
 |
| Bolshaya Past Base Perched on top of the northwest corner of the storehouse at the northeast section of the map. It will be facing away from you, so it'll be hard to spot the first time due to its rocky brown camouflage. |
||
| 10 | 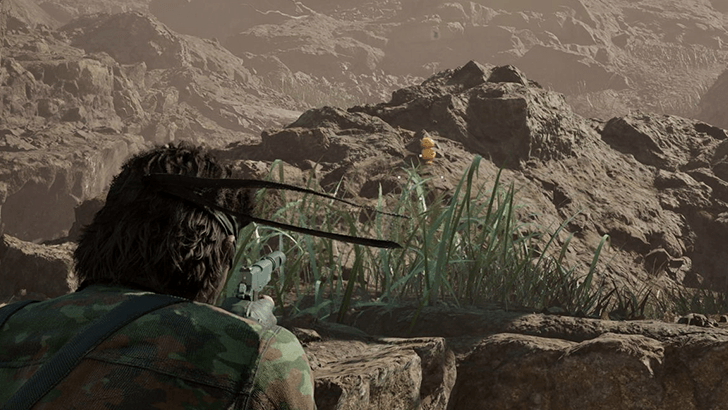 |
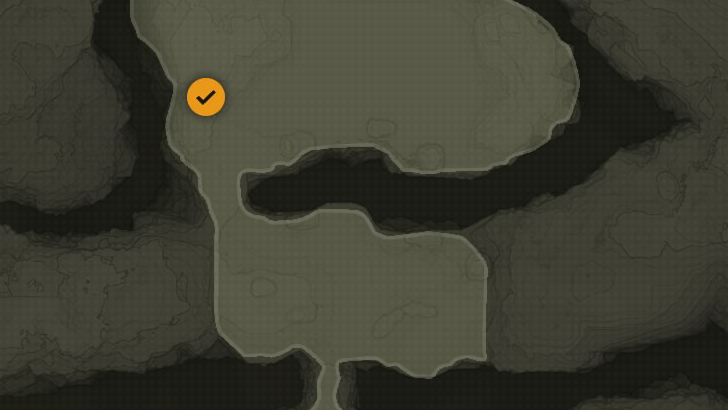 |
| Bolshaya Past Crevice Off to the northwest in Ocelot's side of the arena. If you're having trouble spotting it, chuck a grenade in the general vicinity to get the Ga-ko. |
||
8mm Film Reels
| Dremuchij to Bolshaya 8mm Film Reels | |
|---|---|
| 1 |
Bolshaya Past South In the northern half of Bolshaya Past South, you'll encounter an electric fence with a gap in the middle guarded by 2 Soldiers. The solder on the west side of the gap will have the 8mm Film Reel. The best approach is to attack from behind. Knock out the east soldier before holding up the one with the Get Down! film. |
| 2 |
Bolshaya Past Base The one soldier guarding the entrance to the central building of the base will be holding the 8mm Film Reel. To hold him up, enter the building via the door to its east. Once inside, open the southern door of the building and you'll find yourself in perfect CQC range to hold the soldier with the film reel up. Pull it off and you'll get the Payback film. |
All Secret Theater 8mm Film Reels
Metal Gear Solid Delta Related Guides
All Walkthrough Guides
| 1 | Virtuous Mission |
|---|---|
| 2 | Dremuchij to Bolshaya Past |
| 3 | Chyornaya Peschera Cave |
| 4 | Ponizovje to Graniny Gorki |
| 5 | Svyatogornyj and Sokrovenno |
| 6 | Krasnogorje Mountain |
| 7 | Groznyj Grad |
| 8 | Zaozyorje to Rokovoj Bereg |
Comment
Author
Metal Gear Solid Delta: Snake Eater Walkthrough & Guides Wiki
Dremuchij to Bolshaya Past: Walkthrough Part 2
Rankings
- We could not find the message board you were looking for.
Gaming News

![The Liar Princess and the Blind Prince Review [PC] | Lovely to Look at but Tedious to Play](https://img.game8.co/4442586/8d95f5faf05780f1765ce7e0938bd825.jpeg/show)
![Monster Hunter Stories 3 Review [First Impressions] | Simply Rejuvenating](https://img.game8.co/4438641/2a31b7702bd70e78ec8efd24661dacda.jpeg/thumb)
![The Seven Deadly Sins: Origin [First Impressions] | A Promising Start](https://img.game8.co/4440581/584e0bfb87908f12c4eab6e846eb1afd.png/thumb)

Popular Games

Genshin Impact Walkthrough & Guides Wiki
Umamusume: Pretty Derby Walkthrough & Guides Wiki
Pokemon Pokopia Walkthrough & Guides Wiki
Honkai: Star Rail Walkthrough & Guides Wiki
Monster Hunter Stories 3: Twisted Reflection Walkthrough & Guides Wiki
Arknights: Endfield Walkthrough & Guides Wiki
Wuthering Waves Walkthrough & Guides Wiki
Zenless Zone Zero Walkthrough & Guides Wiki
Pokemon TCG Pocket (PTCGP) Strategies & Guides Wiki
Monster Hunter Wilds Walkthrough & Guides Wiki


Recommended Games
Diablo 4: Vessel of Hatred Walkthrough & Guides Wiki
Cyberpunk 2077: Ultimate Edition Walkthrough & Guides Wiki
Fire Emblem Heroes (FEH) Walkthrough & Guides Wiki
Yu-Gi-Oh! Master Duel Walkthrough & Guides Wiki
Super Smash Bros. Ultimate Walkthrough & Guides Wiki
Pokemon Brilliant Diamond and Shining Pearl (BDSP) Walkthrough & Guides Wiki
Elden Ring Shadow of the Erdtree Walkthrough & Guides Wiki
Monster Hunter World Walkthrough & Guides Wiki
The Legend of Zelda: Tears of the Kingdom Walkthrough & Guides Wiki
Persona 3 Reload Walkthrough & Guides Wiki


All rights reserved
©Konami Digital Entertainment
The copyrights of videos of games used in our content and other intellectual property rights belong to the provider of the game.
The contents we provide on this site were created personally by members of the Game8 editorial department.
We refuse the right to reuse or repost content taken without our permission such as data or images to other sites.