This survey will take about 1 minute.
Your answers will help us to improve our website.
Final Fantasy Crystal Chronicles
Story Walkthrough and All Dungeons Guides
This is our complete walkthrough and guide to the story of Final Fantasy Crystal Chronicles: Remastered Edition (FFCC). Learn the basic steps to get through the entire game, with guides on how to beat each dungeon, and tips and tricks for getting through the game!
| All Story Guides | |
|---|---|
| Story Walkthrough | Post-Game Dungeons |
List of Contents
All Dungeon and Town Guides
| Tipa Peninsula | |
|---|---|
| Tipa | Port Tipa |
| River Belle Path | Goblin Wall |
| Iron Mine Downs | |
| Marr's Pass | Jegon River (East) |
| The Mushroom Forest | The Mine of Cathuriges |
| Vale of Alfitaria | |
| Alfitaria | Tida |
| Moschet Manor | - |
| Veo Lu | |
| Shella | Veo Lu Sluice |
| Plains of Fum | |
| The Fields of Fum | Jegon River (West) |
| Daemon's Court | Selepation Cave |
| Kilanda Islands | |
| Kilanda | - |
| Rebena Plains | |
| Conall Curach | Rebena Te Ra |
| Lynari Isle | |
| Leuda | Lynari Desert |
| The Abyss | |
| Mag Mell | Mount Vellenge |
| The Nest of Memories | - |
Complete Story Walkthrough
The walkthrough below gives details for completing the full game. Learn the basics of getting through the story with our one-look guide!
A few points to keep in mind first:
The story is Not a Straight Line
FFCC is not a game with one straight path to the finish line. The story unfolds based on the players' actions. Rarely will you be required to clear a specific dungeon to move to the next area. Explore freely and enjoy the world!
Try to Reach Year Five First
If your goal is to reach the game's ending, you'll need to complete Mount Vellenge, which is only accissible from Year Five on. Keep on collecting myrrh and advancing the years to reach Mount Vellenge!
Gather Three Drops of Myrrh to Advance the Story
The main requirement for continuing to the next year is gathering three drops of myrrh. You can gather myrrh from any of the game's dungeons, but each myrrh tree can only produce myrrh every two years, so you won't be able to gather myrrh from the same dungeons every time.
The complete walkthrough chart below gives details on the fastest way to collect Myrrh and advance through the game.
Story Walkthrough Chart
| ① | Year One Collect three drops of myrrh and advance to year two |
|---|---|
| ② | Year Two Collect three drops of myrrh and advance to year three |
| ③ | Year Three Collect three drops of myrrh and advance to year three Completing Veo Lu Sluice before the end of Year Three allows for fastest completion of the game |
| ④ | Year Four Collect three drops of myrrh and advance to year five |
| ⑤ | Year Five On Complete Lynari Desert and change your Crystal Chalice to the ??? Element. From year eight on, steps five and six can be skipped. |
| ⑥ | Complete Veo Lu Sluice for the second time and bring the flowers back to life. |
| ⑦ | Complete Mount Vellenge and continue to the ending of the game |
The guide below gives details on the fastest route from proceeding through the game. The dungeons listed are decided based on difficulty, but as long as you get three drops of myrrh each year, the dungeons you visit are up to you.
Year One Walkthrough Chart
What to Do in Year One
| Dungeon / Town | Tips & Strategies |
|---|---|
 Tipa Tipa |
Tips ・Home base for your adventure ・It's best to talk with your family here every year |
 River Belle Path River Belle Path |
Difficulty:★☆☆☆☆ Tips ・Learn the basics of battling monsters ・Change your Chalice's Element to Water to pass through the Miasma Stream Defeat the Giant Crab |
 Jegon River (East) Jegon River (East) |
Tips ・Nothing to do before Year Three ・Can cross the river from Year Three on ・Can travel to more areas from Year Four |
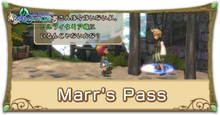 Marr's Pass Marr's Pass |
Tips ・Can use the Blacksmiths if you have a Scroll ・Sell items to the Merchant for gil |
 The Mushroom Forest The Mushroom Forest |
Difficulty:★☆☆☆☆ Tips ・Take down Flying-type Monsters with Gravity ・Dare to bypass Monsters without defeating them ・A great dungeon to repeat early in the game Defeat Malboro |
 The Mine of Cathuriges The Mine of Cathuriges |
Difficulty:★☆☆☆☆ Tips ・An early barrier for first-time players ・Hit the cart to move it, but make sure it goes the right way ・Hit the Bomb to damage other enemies Defeat the Orc King |
If you're planning on rushing through the story, there's no requirement to visit the towns. The towns feature Blacksmiths and Merchants which can prove useful, but are not necessary to complete the game.
Year One is limited to three dungeons
Only the three dungeons listed above can be visited in Year One. As the rest of the game allows more freedom to explore, Year One has a strong tutorial aspect to it. Simply go through each of the three dungeons once to continue.
The Mushroom Forest is the best dungeon to repeat
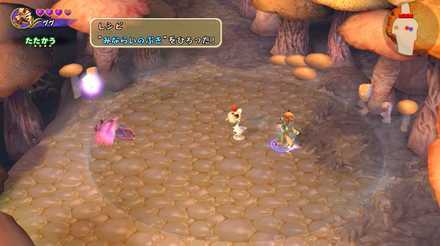
If you want to repeat any of the dungeons here, Mushroom Forest is the best choice. There's no required fights or gimmicks which make it difficult to advance, and the Boss is also fairly easy to take out. Go through the dungeon as many times as you like to grind Artifacts and gather crafting Materials for Weapons and Equipment!
Year Two Walkthrough Chart
What to Do in Year Two
| Dungeon / Town | Tips & Strategies |
|---|---|
 Goblin Wall Goblin Wall |
Difficulty:★☆☆☆☆ ・A slightly more confusing layout ・Don't use physical attacks against Electric Jellyfish ・The best dungeon to repeat in Year Two Defeat the Goblin King |
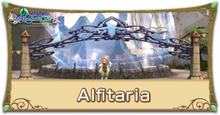 Alfitaria Alfitaria |
Tips ・Use the Blacksmith to craft Equipment |
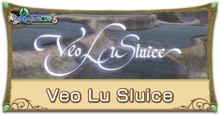 Veo Lu Sluice Veo Lu Sluice |
Difficulty:★☆☆☆☆ ・Use the switches and keys to proceed ・A frustrating dungeon on single-player mode ・Required to complete here in order to finish the game as fast as possible Defeat the Golem |
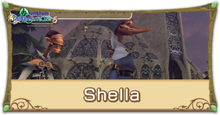 Shella Shella |
Tips ・The Blacksmith here can craft Accessories ・A Shella Mark is required if you are not a Yuke ・A Shella Mark can be found in Veo Lu Sluice |
 Tida Tida |
Difficulty:★★☆☆☆ ・It's easy to get hemmed in by enemies on the narrow paths ・A good second choice for dungeon grinding after Goblin Wall Defeat Armstrong |
Complete Veo Lu Sluice in Year Two
- Finishing Veo Lu Sluice within the first three years is required for the fastest possible clear
- Moschet Manor is fairly difficult and frustrating, so Veo Lu Sluice is the better option
For the reasons above, Year Two is the best time to go for Veo Lu Sluice for the first time. Doing so in Year Three is fine as well.
Grind Any Dungeon You Like
Although we recommended Goblin Wall and Tida for repeated plays, if these dungeons cause some problems or take too long, feel free to go ahead and grind the Year One dungeons instead.
Some Event Missable
As you traverse the world map you may occasionally run into a random event with a variety of different characters. Some of these events will become unavailable as you progress through the game so travel across the world map and try and see as many as you can! Ultimately these events don't amount to much other than some extra world building, buf for those hoping to experience all there is to offer you don't want to miss out.
Year Three Walkthrough Chart
What to Do in Year Three
| Dungeon / Town | Tips & Strategies |
|---|---|
 Moschet Manor Moschet Manor |
Difficulty:★★☆☆☆ ・Gimmicks are a pain in single-player mode ・The dungeon itself is not difficult ・Gigas Lord is best handled by going full-on offense Defeat the Gigas Lord |
 Jegon River (West) Jegon River (West) |
Tips ・Travel across from the East side of the river ・Has a Moogle House |
 Fields of Fum Fields of Fum |
Tips ・Only has a Merchant ・Play the Cow Race minigame |
 Daemon's Court Daemon's Court |
Difficulty:★★★☆☆ ・Easy to get surrounded, so advance with care ・Defeating the Bomb atop the bridge will have a lasting effect Defeat the Lizardman King |
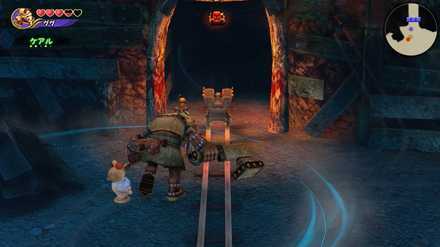
 Selepation Cave Selepation Cave |
Difficulty:★★★☆☆ ・Has a confusing structural arrangement ・Rare Materials can be easily collected here ・Cave Worm can take time to learn how to defeat Defeat the Cave Worm |
Year One Dungeons Will Advance to the Second Cycle
In Year Three, the Dungeons completed in Year One will begin to advance to the second Cycle, which means you've collected 5 myrrh since the last time you completed a dungeon for the first time. Myrrh will be available once again on the second Cycle, but the monsters will be more difficult. In addition, the monsters and obtainable items which appear will change as well.
If these dungeons still seem a bit too difficult, feel free to complete dungeons which are still on the first Cycle for now.
The First Year to Allow Substantial Freedom
Years One and Two were highly limited in which dungeons the players could complete, but Year Three gives wide berth for the player to choose which dungeons they want to complete in order to obtain the required myrrh.
If Selepation Cave is too big of a challenge for now, you can go through River Belle Path on its second cycle to complete myrrh instead. You can even leave the Year Three dungeons altogether and simply redo the three Year One dungeons to move on to Year Four.
Max Out Your Weapons and Equipment
The game is about to get harder, so be sure you're ready by getting the best possible tools for this part of the game. The Weapons and Equipment made from Mythril are obtainable at this point, so be sure you have them before moving on.
Mythril can be obtained in a variety of locations, but Selepation Cave and The Mine of Cathuriges (Cycle 2) are two of the best dungeons to hunt for it.
Year Four Walkthrough Chart
What to Do in Year Four
| Dungeon / Town | Tips & Strategies |
|---|---|
 Kilanda Kilanda |
Difficulty:★★☆☆☆ ・Can be reached for 500 gil from Jegon River (East) ・Not a difficult dungeon to clear ・Cut Mog's hair in advance Defeat the Iron Giant |
 Conall Curach Conall Curach |
Difficulty:★★★★☆ ・A long and spread-out dungeon ・Don't bother with defeating every enemy ・Hunt for the Ring of Cure Artifact Defeat the Dragon Zombie |
 Rebena Te Ra Rebena Te Ra |
Difficulty:★★★★☆ ・Plenty of gimmicks and lots of running around to do ・The gimmicks are a pain on single-player mode ・The dungeon itself has a fairly high difficulty Defeat the Lich |
Take the Water Element Across the Jegon River
To reach Conall Curach and Rebena Te Ra, you'll need to have the Water Element before you go across the Jegon River, as it won't be available on the other side, and you'll be forced to travel back and across again, paying fees both times to get across the Miasma Stream.
These dungeons aren't necessarily required to complete at any point, but keep this in mind if you want to cross the Jegon River to them on.
Time to Grind
By Year Four, you've gotten a hang of how this whole thing works. Get all the Scrolls, Materials and Artifacts you need to power yourself up to the max before proceeding to the following dungeons.
This chart lists the game's ending in Year Five, but feel free to continue grinding up and wait until Year Six or Year Seven to head to the end.
Try for the Ultimate Equipment
If you're hoping to get the game's best possible Equipment, you can delay heading to the ending. Some of the Scrolls and Materials are very difficult to obtain and require advancing to Year Eight, but this is the way to go if you want to take on the final boss at your character's max potential.
Year Five Walkthrough Chart
What to Do in Year Five
| Dungeon / Town | Tips & Strategies |
|---|---|
 Leuda Leuda |
Tips ・Take the ferry from Port Tipa ・Only has a Merchant ・Play the Selkie Jump mini-game |
 Lynari Desert Lynari Desert |
Difficulty:★★★★☆ ・Your goal is to get the ??? Element for the Chalice ・Solve four riddles to find a secret ・Antlion poses a significant threat Defeat the Antlion |
| Veo Lu Sluice (Second Time) |
Difficulty:★★☆☆☆ ・Cast Life on the Pump Flowers ・The Jegon River will be refilled on completion, allowing travel to all areas |
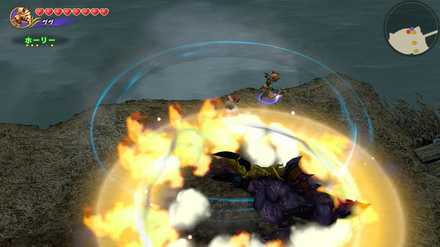
 Mount Vellenge Mount Vellenge |
Difficulty:★★★★★ ・??? Element is required to enter ・Last Dungeon in the story ・This is the strongest the enemies will get, so be ready! Defeat the Meteor Parasite Defeat Raem |
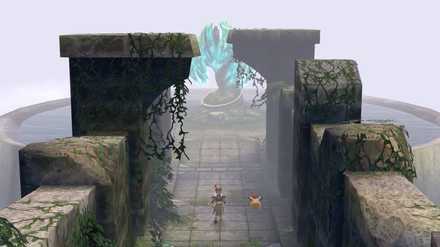
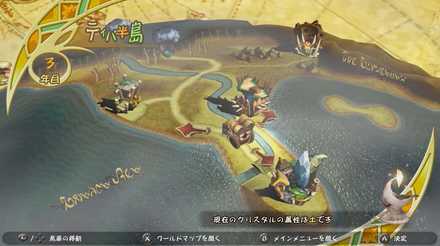
Some Areas Inaccessible Without the Jegon River
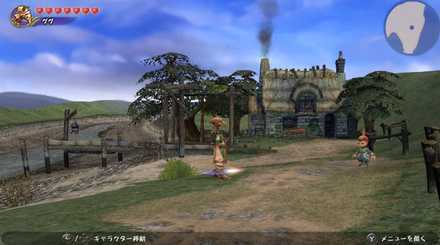 Enlarge
The Jegon River will dry up in Year Five, preventing travel to some areas of the map. It's required to go through the Veo Lu Sluice a second time to refill the river. To get to Veo Lu Sluice, you'll need to get the ??? Element from the Lynari Desert.
Take the Ferry from Port Tipa
The ferry from Jegon River will reappear at Port Tipa. You'll be able to travel to Lynari Isle for 300 gil, from where you'll be able to reach Lynari Desert.
Veo Lu Sluice not Necessary Starting in Year Eight
When Year Eight begins, the Jegon River will refill naturally. It's not needed to visit Veo Lu Sluice again in this case, so avoiding it can potentially save time if you're planning on waiting until Year Eight or longer to take on Mount Vellenge.
Have a Realistic Grasp of Your Strength
With this, you've achieved all the requirements for challenging the game's final dungeon. That said, even if you attempt Mount Vellenge now, with its extreme level of difficulty, there's a high chance of failure when simply rushing in. You will likely find it necessary to grind for Equipment and Artifacts at this point to make sure you're powered up enough for the final stretch.
Post-Game Contents
Post-Game Dungeons
The Remaster adds new harder versions of each of the standard Dungeons upon completing the game. More Monsters and harder Bosses await, but with more new loot to discover!
Post-Game Content | How to 100% Clear the Game
Related Guides
 Final Fantasy Crystal Chronicles Wiki Top Final Fantasy Crystal Chronicles Wiki Top |
| Final Fantasy Crystal Chronicles: Main Links | ||
|---|---|---|
| News | Story Walkthroughs | Boss Fights |
| Post-Game Dungeons | Side Quests | Events |
| Beginner Guides | Weapons | Equipment |
| Scrolls | Artifacts | Items |
| Monsters | Magic | Family Jobs |
| Races | Focus Attacks & Magic Strikes | Multiplayer |
| Message Boards | ||
Author
Story Walkthrough and All Dungeons Guides
Please participate in our site
improvement survey
03/2026
improvement survey
03/2026
Would you assist in
improving Game8's site?
improving Game8's site?

×
We are listening to our users' valuable opinions and discussing how to act on them.
The information collected through this survey will be used for the purpose of improving our services. In addition, the information will only be disclosed a part of a statistic in a format that will not allow identification of personal information.
Begin Survey
Not Now
×
Please rate each item regarding Game8.co's Advertisements.
Amount of Ads
Very Dissatisfied
Somewhat Dissatisfied
Fine
Somewhat Satisfied
Highly Satisfied
Placement of Ads
Timing of Ad Display
Ad Loading Speed
Safeness of Ads
Content of Ads
×
Please rate each item regarding Game8.co's Quality of Articles.
Amount of information
Very Dissatisfied
Somewhat Dissatisfied
Fine
Somewhat Satisfied
Highly Satisfied
Frequency of updates
Speed of new information
Accuracy of articles
Understandibility of articles
Readability of sentences
×
Please rate each item regarding Game8.co's Usability of the Site.
Ease of finding information
Very Dissatisfied
Somewhat Dissatisfied
Fine
Somewhat Satisfied
Highly Satisfied
Loading Speed
Use of Color
Font Size
Visibility of Images
Easy to Understand Layout
×
Please rate each item regarding Game8.co's Message Boards, Comments.
Ease of Writing
Very Dissatisfied
Somewhat Dissatisfied
Fine
Somewhat Satisfied
Highly Satisfied
Readability
Ease in Finding Information
Comment Quality
Comment Quantity
Admin Response
×
Please rate each item regarding Game8.co's Site's new design.
Please rate our site's new design
Very Dissatisfied
Somewhat Dissatisfied
Fine
Somewhat Satisfied
Highly Satisfied
Do you think that the website's design change makes the site easier to use?
Has the new design made it easier for you to find information on the site?
Has the new design improved the overall visual appeal of the site?
How would you rate your overall satisfaction with the new design of the site?
×
How likely are you to recommend Game8 to someone you know?
Very Unlikely
0
1
2
3
4
5
6
7
8
9
10
Very Likely
If you have other opinions regarding potential improvement to the website, please share them with us. We would appreciate your honest opinion.
Note: This is a free response section, so you can proceed without entering anything.
Note: Please be sure not to enter any kind of personal information into your response.
Note: Please be sure not to enter any kind of personal information into your response.
×
Thank You
×
Thank you for participating in our survey! Your answers will help us to improve the quality of our website and services.
We hope you continue to make use of Game8.
We hope you continue to make use of Game8.
Close
Rankings
Gaming News


![Monster Hunter Stories 3 Review [First Impressions] | Simply Rejuvenating](https://img.game8.co/4438641/2a31b7702bd70e78ec8efd24661dacda.jpeg/thumb)
Popular Games

Genshin Impact Walkthrough & Guides Wiki
Honkai: Star Rail Walkthrough & Guides Wiki
Umamusume: Pretty Derby Walkthrough & Guides Wiki
Pokemon Pokopia Walkthrough & Guides Wiki
Resident Evil Requiem (RE9) Walkthrough & Guides Wiki
Monster Hunter Wilds Walkthrough & Guides Wiki
Wuthering Waves Walkthrough & Guides Wiki
Arknights: Endfield Walkthrough & Guides Wiki
Pokemon FireRed and LeafGreen (FRLG) Walkthrough & Guides Wiki
Pokemon TCG Pocket (PTCGP) Strategies & Guides Wiki


Recommended Games
Diablo 4: Vessel of Hatred Walkthrough & Guides Wiki
Cyberpunk 2077: Ultimate Edition Walkthrough & Guides Wiki
Fire Emblem Heroes (FEH) Walkthrough & Guides Wiki
Yu-Gi-Oh! Master Duel Walkthrough & Guides Wiki
Super Smash Bros. Ultimate Walkthrough & Guides Wiki
Pokemon Brilliant Diamond and Shining Pearl (BDSP) Walkthrough & Guides Wiki
Elden Ring Shadow of the Erdtree Walkthrough & Guides Wiki
Monster Hunter World Walkthrough & Guides Wiki
The Legend of Zelda: Tears of the Kingdom Walkthrough & Guides Wiki
Persona 3 Reload Walkthrough & Guides Wiki


All rights reserved
© 2003, 2020 SQUARE ENIX CO., LTD. All Rights Reserved.
The copyrights of videos of games used in our content and other intellectual property rights belong to the provider of the game.
The contents we provide on this site were created personally by members of the Game8 editorial department.
We refuse the right to reuse or repost content taken without our permission such as data or images to other sites.