Story Walkthrough: List of All Main Missions
★ Story Walkthrough
★ Share a bug or error and get feedback on fixes!
★ Beginner's Guide: Tips and Tricks
┗Money Guide | Leveling Guide (XP)
★ Saints Row Interactive Map
┗Collectibles | Pinwheels | Shooting Galleries
This is a full walkthrough and guide to all the Main Missions for the 2022 reboot of Saints Row (Saints Row 5), Read on to learn all the Main Missions, and the complete walkthrough for the story!
List of Contents
List of All Saints Row (2022) Main Missions
| List of Missions | |
|---|---|
| 1 | First Fucking Day |
| 2 | Morning Commute |
| 3 | Making Rent |
| 4 | Observe and Report |
| 5 | A Piece of the Action |
| 6 | The Peter Principle |
| 7 | Be Your Own Boss |
| 8 | Take Me to Church |
| 9 | Office Decor |
| 10 | Shootin' the Shit |
| 11 | The Fast and the Foodiest |
| 12 | Networking |
| 13 | Neenah's Car |
| 14 | Idol Threat |
| 15 | Aggressive Recruiting |
| 16 | The Dustmoot |
| 17 | The Forge |
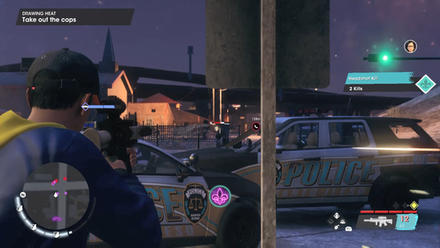
| 18 | Drawing Heat |
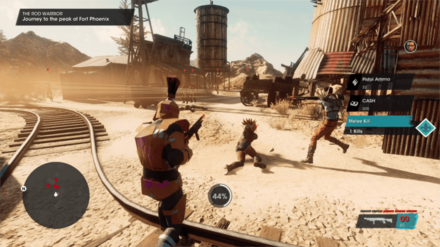
| 19 | The Rod Warrior |
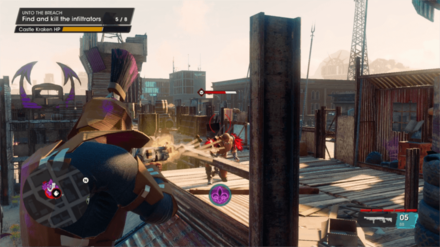
| 20 | Unto the Breach |
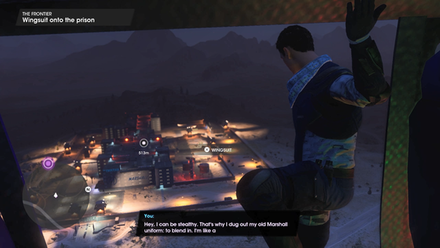
| 21 | The Frontier |
| 22 | Body of Evidence |
| 23 | Donut Run |
| 24 | Idol Hands |
| 25 | Corporate Retreat |
| 26 | The Great Train Robbery |
| 27 | Good Cop/Bad Cop |
| 28 | Art Appreciation |
| 29 | Going Overboard |
| 30 | Non-Compete Clause |
| 31 | Severance Package |
| 32 | After Party |
| 33 | High Noon |
| 34 | Showdown |
| 35 | Let's Build a Skyscraper |
| 36 | Best Friends Forever |
This section is currently under construction. Check back here for more mission walkthroughs later!
Complete Story Walkthrough
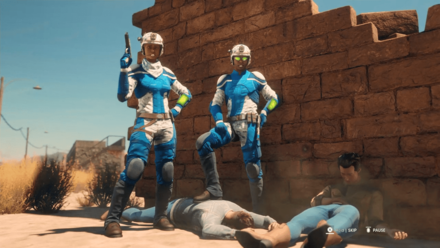
First Fucking Day
| Objectives: | |
|---|---|
| 1 | Advance to Your Squad After gaining control over your character, head forward and eliminate any enemy that you can encounter. Use cover to avoid the machine gun fire coming from elevated positions from the entrance. |
| 2 | Rendezvous with Bravo Team After you approach the entrance, you'll find another Marshall getting killed by a rocket from a distance. There's an alleyway to the right beside the building that you can navigate towards to round the corner and meet up with Bravo Team. |
| 3 | Protect the APC A small health bar will appear below the objective marker on the top left of the screen. This represents of the APC as you move along the street – eliminate any enemy that targets the APC. After reaching a short bridge, head up to the APC and climb up to the turret. |
| 4 | Eliminate the Hostiles With the turret in hand, shoot and eliminate any enemy in your way. A Helicopter will come along soon afterwards – hammer it with the turret until it falls. |
| 5 | Advance on Your Own After a short cutscene once the helicopter has been downed, move along the tunnel and eliminate the enemies that come in your way until you reach the end of the tunnels and back out into the small town. |
| 6 | Rendezvous with Gwen After exiting the mining tunnel, head forwards and continue past the small gathering of buildings. Several hostiles will come in your way as you enter the town square – eliminate them. |
| 7 | Get a C4 Satchel Charge Move close to the barrier blocking your way. Directly in front of the barrier will be a table – head towards it, then pick up the C4 on the table. |
| 8 | Regroup with Gwen Throw the C4 to the barrier, then take several steps back to protect yourself from the blast. Once ready, ignite the bombs. With the barricade down, continue down the path and link back up with Gwen and the rest of the squad. After re-meeting Gwen, follow her to the Saloon. Once she asks you to flank the enemies, you have the option of following her commands or simply attacking the saloon head on. |
| 9 | Take the Saloon Once you spot the saloon, enemies will pour out and attack the Marshalls. Defeat them, then enter the building. After the short cutscene, head up the stairs and follow the path, eliminating all the enemies in your way. Jump back to the squad below once you reach outside. |
| 10 | Eliminate the Hostiles After exiting, another short cutscene will play. The next several tasks will involve dangling from the plane while eliminating the enemies who are firing on you from the wooden structures all around you. There are several boxes of explosives you can shoot to execute these enemies. |
First Fucking Day Walkthrough and Rewards
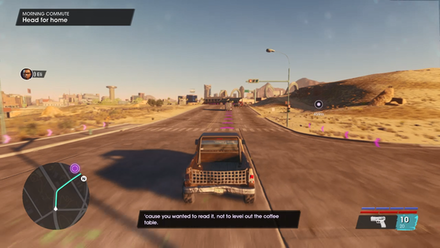
Morning Commute
| Objectives: | |
|---|---|
| 1 | Head for Home After completing First Fucking Day, you'll be dropped off at the parking area just outside of the Marshall's building. Head towards your car and board it – follow the nav marker on the road and on the mini map back to your apartment. |
| 2 | Enter Your Apartment Once you arrive, simply park your car outside and head into the apartment building to trigger a cutscene, ending the mission. |
Morning Commute Walkthrough and Rewards
Main Mission Walkthroughs are currently being worked on. Check back later for more updates!
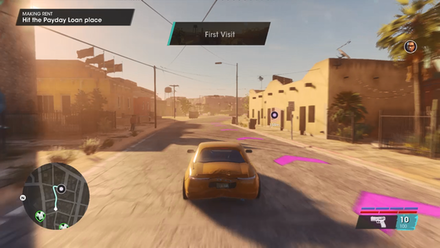
Making Rent
| Objectives: | |
|---|---|
| 1 | Talk to Neenah Once you regain control over your character, head outside of the apartment and to a nearby alley. Talk to Neenah. |
| 2 | Steal a Car Head to the street on the opposite end of where you talk to Neenah, then enter the yellow car. |
| 3 | Hit the Payday Loan Place Drive to the Payday Loan Place to trigger a cutscene. You will be given a new marker afterwards to head to after the cutscene – do so, while trying to ditch the cops. |
| 4 | Kill Los Panteros When you get to the area, you'll be greeted by Los Panteros trying to jack your getaway car. Kill them, then ride the motorcycle. |
| 5 | Ride Like Hell With the motorcycle, simply navigate to the Nav Marker to trigger a cutscene, ending the mission. |
Making Rent Walkthrough and Rewards
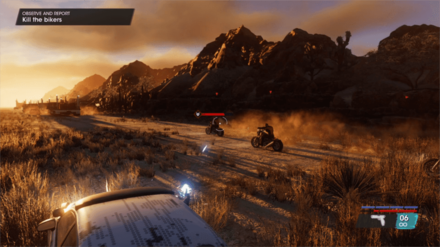
Observe and Report
| Objectives: | |
|---|---|
| 1 | Meet With Gwen After accepting the mission from the Missions app, make your way toward Rojas Desert North to meet up with Gwen. This triggers a cutscene which provides you with a briefing for your next operation. |
| 2 | Follow the Convoy You will arrive right behind the Panteros convoy after the cutscene ends. This begins a short on-rails section where you need to gun down pursuing bikers and other Panteros as you make your way towards the back of the convoy. |
| 4 | Jump to the Truck After reaching the back of the convoy, ride on the roof of your car to jump onto the truck in front of you. Clear out all of the Panteros in the back of the truck to proceed. |
| 5 | Kill the Pursuing Panteros More Panteros will arrive to take you down. Mount the turret at the back of the truck and kill all of them. |
| 6 | Advance Up the Convoy Move up through the convoy by leaping from the truck onto other cars and taking down any bikers and Panteros that block your path. Successfully doing all of this will trigger a cutscene. |
| 7 | Shoot Sergio's Monster Truck Stop Sergio's pursuit by continuously shooting at his monster truck. You will eventually lose him by making him crash into a wall of rocks. |
| 8 | Continue Chasing the Convoy After defeating Sergio, continue hopping from car to car and gunning through the convoy to reach the lead truck. |
| 9 | Clear the Lead Truck Take out the turrets at the back of the lead truck, then defeat all of the Panteros on top of it to proceed and trigger another cutscene. |
| 10 | Defeat the Remaining Panteros The mission ends with a fight against your first Tough Enemy and a few motorcycle-riding Panteros. Kill all of them to trigger the final cutscene and complete the mission. |
Observe and Report Walkthrough and Rewards
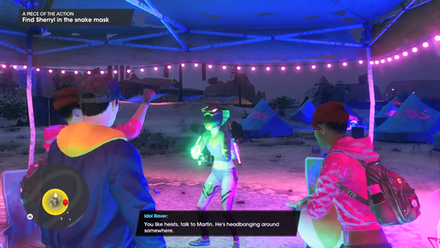
A Piece of the Action
| Objectives: | |
|---|---|
| 1 | Meet with JR After activating the mission, head to JR's location in West Providencia. Talking to him will give you the location of the camp where members of the Idols who stole JR's container are. |
| 2 | Find Sherryl in the Snake Mask Once you have the location, head to the camp to find a party going on. Head forwards until you engage in small talk with an Idol who tells you to find Sherry dancing beneath one of the tents in a Snake Mask. |
| 3 | Find Martin Headbanging After you locate and talk to Sherry, you will have to find Martin afterwards, who will be banging his head wildly under one of the tents. |
| 4 | Find Timmy O Near His Bike The last guy you need to talk to, Timmy O, is the sanest of the bunch and will be off to the side of the party looking over his motorbike. Talk to him to reveal the location of JR's container. |
| 5 | Find JR's Container The container will be marked on your HUD – head towards it, where several Idols will accost you. Kill them all, then ride the buggy. Aim it's backside to the container and then launch its Tow Cable to the container. |
| 6 | Steal the Buggy Ride all the way back to JR – you can ignore the Idols who try to stop you. |
| 7 | Clear Out the Remaining Idols After you arrive at JR's place, dispatch the Idols who followed you there, and then kill all of the rest who follow suit. Once all of the enemies are down, talk to JR to finish the mission. |
A Piece of the Action Walkthrough and Rewards
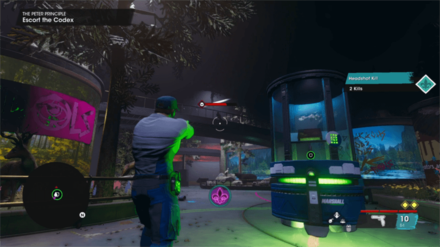
The Peter Principle
| Objectives: | |
|---|---|
| 1 | Go to the Museum After accepting the mission from the Missions app, make your way toward the Museum at Lakeshore North. Approaching the entrance of the Museum will instantly transport you inside. |
| 2 | Join the Gala Double-check security preparations as you walk towards the gala hall and make your way towards Atticus Marshall. |
| 3 | Talk to Atticus Speak with Atticus Marshall and reassure him of the Hummingbird Codex's safety. Afterward, grab a drink and talk to Gwen to proceed. |
| 4 | Defeat Los Panteros After an abrupt warning call from Neenah, the Los Panteros will crash the gala. Clear out all of them in the gala hall. |
| 5 | Find the Codex Defeat more Los Panteros as you run through the Museum to find and secure the Hummingbird Codex. |
| 6 | Defeat the Idols After reaching the Dinosaur exhibit, the Idols and their Collective make their appearance. Defeat their initial ambush and continue clearing them out as you look for the Codex. |
| 7 | Escort the Codex You will eventually find the Codex after gunning through several more rooms of Idols. Upon reaching it, activate the case and escort it towards safety. |
| 8 | Return to the Codex As you get close to the safe room, the Idols will lock you inside one of the exhibits and blow up the glass beneath you. Pick yourself up and navigate your way back toward the Codex. |
| 9 | Use the Cannon A blocked door will prevent you from moving forward. Search the nearby room for a rocket and load the cannon in the middle with it to blow a hole open. Advance through the hole and continue fighting your way toward the Codex. |
| 10 | Protect Myra Starr After clearing out more rooms of enemies and defeating a gunner for their mini gun, you will eventually meet up with Myra Starr. Protect her from the incoming waves of Los Panteros to complete the mission. |
The Peter Principle Walkthrough and Rewards
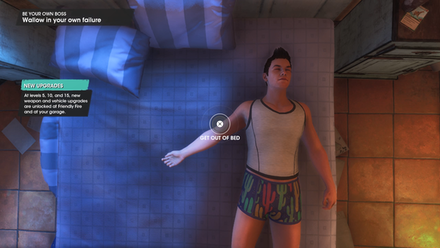
Be Your Own Boss
| Objectives: | |
|---|---|
| 1 | Wallow in Your Own Failure When you regain control of your character, you'll first find him in bed moping around. Complete several tasks in order to proceed to the next objective, such as getting out of bed, searching the fridge for foor, and toasting a waffle. |
| 2 | Get to the Idols Party After the cutscene, take the truck outside and drive your way to the Idols party. Once you reach the bridge connecting to the building where the party is, just ram straight through the Los Panteros blockades. |
| 3 | Defeat the Collective Member Hop off the car and enter the building. You'll have to fight through several waves of enemies before a cutscene is triggered with Kevin and Eli – a person called the Collective Member will appear. Kill him, and afterwards, try and make your way outside again to the truck. |
| 4 | Protect Your Friends At the site of the truck, simply defeat waves of enemies until the truck is restarted, then get in. |
| 5 | Defend the Truck A short chase will ensue, which sees you on the roof of the truck firing RPGs against chasing enemies. Simply keep doing this until the truck reaches its destination – do not allow the truck or yourself to take on too much damage from the enemies in order to not fail the mission. |
Be Your Own Boss Walkthrough and Rewards
Take Me to Church

| Objectives: | |
|---|---|
| 1 | Go to the Apartment A cutscene will play that introduces you to the group's plan regarding their new startup. |
| 2 | Take Your Friends to See the Church Once you gain control over your character once again, enter the truck and drive the group up to the church. |
| 3 | Destroy the Construction Site There will be a construction site at the church when you arrive. There is a construction vehicle at its front that you can ride to destroy the site. |
| 4 | Defeat Marshall Security Marshalls will come after you as soon as you destroy the site – you can either use the construction vehicle you're already in to ram them into death or step out of your vehicle to engage in a shootout with them. |
| 5 | Find Blande After the fight, take Kevin and locte Blande near the city hall. Once you locate him, enter his car. You will have to perform a series of stunts in order to scare Blande into giving up the deed for the church, including drifting around street corners, driving towards oncoming traffic, and driving the car up and over ramps to gain some airtime. |
| 6 | Find a Way Into the Church Once you finish with Blande, link back up with the group. You'll be tasked with finding a way inside – there'll be a path to the left of the church that brings you up and over the rooftop and into a small opening at the very top of the church that gives you access to its inside. Head towards the front and open it. |
| 7 | Defeat the Idols Idols will come and try to raid the church then. Defeat them all, then meet with your friends again to finish the mission. |
Take Me to Church Walkthrough and Rewards
Office Decor
| Objectives: | |
|---|---|
| 1 | Talk to Kev After making the mission active with your phone, head to the Church. You'll find Kevin waiting for you just outside of the entrance into the Church – approach him to begin a conversation. |
| 2 | Go to Fort Cullen After talking to Kevin, grab any of the vehicles outside the Church and follow the waypoint all the way to Fort Cullen. |
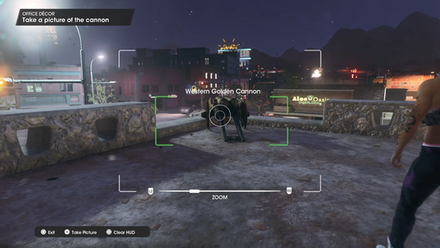
| 3 | Take a Picture of the Cannon At the Fort, look for a driveway that leads up to the upper wall of the Fort where you can find a cannon. Bring out your phone and take a photo of the cannon. |
| 4 | Return to the Church Return to the Church with Kevin and enter. Near the area with the Pool table, interact with the empty platform beside it to place the collectible – a cannon – on it to end the mission. |
Office Decor Walkthrough and Rewards
Shootin' the Shit
| Objectives: | |
|---|---|
| 1 | Meet up with Eli After accepting the mission from the Missions app, make your way toward the objective marker at Badlands North. Approaching the marker will instantly transport you to Eli's practice range. |
| 2 | Talk to Eli Approach Eli to speak with him. He explains that he wants to watch and learn from you as you shoot your gun. |
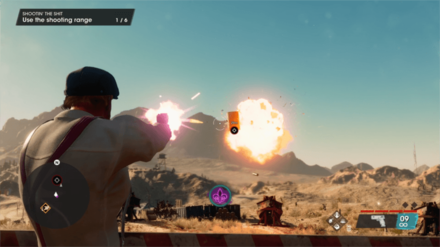
| 3 | Use the Shooting Range After talking to Eli, get into position at the nearby fence and activate the shooting range to begin target practice. Shoot down the four waves of explosive barrels to show off your gun prowess and teach Eli how to shoot. |
| 4 | Defeat Marshall Shooting down the fourth wave of explosive barrels will cause Marshall Defense Industries to notice your illegal presence. Clear all of their soldiers out from the practice range to proceed. |
| 5 | Escape Marshall Notoriety Eventually, backup Marshall Defense soldiers will arrive. Enter Eli's car and escape Marshall notoriety by shaking them off your trail. Successfully losing the Marshall Defense soldiers ends the mission. |
Shootin' the Shit Walkthrough and Rewards
The Fast and the Foodiest
| Objectives: | |
|---|---|
| 1 | Meet up with Kev After starting the mission, head to the Church to meet up with Kevin. Approaching him will automatically begin a short conversation with him, which leads to you needing to go out and get a vehicle. |
| 2 | Go to FBs Follow the map marker to an FBs branch. There will be a line along the drive-thru lane – just push past them and head straight to the order window. If a car is blocking your path, push it away. |
| 3 | Go to the Next FBs After failing to secure any burgers, head to the next FBs that will be marked on your map. There will be several Idols in the area – take them out. Afterwards, with a car, head through the drive-thru. |
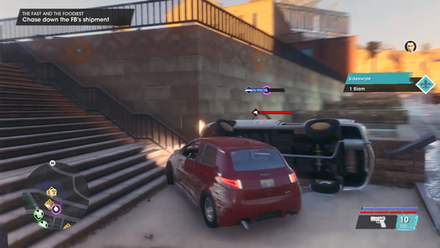
| 4 | Chase Down the FBs Shipment The vehicle with the FBs shipment will then be marked for you – chase it down and kill the driver without destroying the car. |
| 5 | Get Back to the Church Hop into the car carrying the FBs shipment then and head back to the Church to finish the mission. |
The Fast and the Foodiest Walkthrough and Rewards
Networking
| Objectives: | |
|---|---|
| 1 | Go to the Church After accepting the mission and receiving a call from Eli, make your way to the Church to meet up with your fellow Saints. This triggers a cutscene which explains the next step of your criminal empire: making connections. |
| 2 | Speak with JR The first contact you need to reach out to is JR. Go to JimRob's and talk to him to find out what you need to do for him to join the Saints. |
| 3 | Go to the Park JR needs you to clear out the Los Panteros harassing his business before he considers joining your empire. Go to the park and defeat the crew of Panteros there to proceed. |
| 4 | Clear Out the Train Depot After clearing out the park, JR asks you to cut the Los Panteros supply lines next. Head to the train depot and gun down all the Los Panteros members inside. |
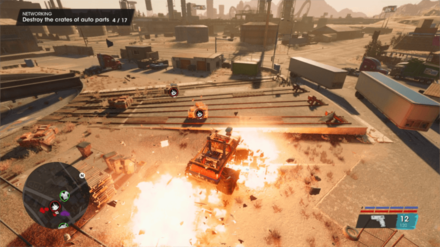
| 5 | Destroy the Auto Part Crates Head out to the trainyard after sweeping through the train depot to steal one of the Los Panteros' monster trucks. Use the truck to run over their smuggled auto parts and ruin their supply line. |
| 6 | Defend JimRob's After destroying the auto parts, JR will inform you that Derek and his crew have decided to attack his store. Return to JimRob's and defend it from Derek and the numerous waves of Los Panteros. |
| 7 | Talk to JR Speak with JR after defeating all of the Los Panteros. Doing this will confirm JimRob's participation in the Saints' criminal empire and begin a cutscene at the Church. |
| 8 | Use the Criminal Empire Table After the cutscene ends, access the Criminal Empire Table to pick a vacant lot and start your very first criminal venture. You can choose between Bright Future, Chalupacabra, and Shady Oaks. Picking your preferred venture will trigger a short cutscene describing the business before ending the mission. While each of these choices offer the same amount of XP and Cash and have no story consequences, they do provide unique miscellaneous rewards and venture-specific Activities, so choose wisely! |
Networking Walkthrough and Rewards:
Which Venture Should You Choose?
Neenah's Car
| Objectives: | |
|---|---|
| 1 | Go to the Church After beginning the mission, head to the Church and talk to Neenah. |
| 2 | Go to the Culvert There will be several vehicles nearby you can use to get to the Culvert – pick one and drive it all the way to the marked location. |
| 3 | Fight Los Panteros At the Culvert, battle against the Los Panteros in the area until none are left. |
| 4 | Go to Gabriel's Garage Select a vehicle and drive it to Gabriel's Garage. Approach him to begin a short interrogation, then enter the garage next to where Gabriel is. |
| 5 | Fuck with Gabriel's Car You will be put into the car customization menu. Simply choose parts of the vehicle to change, which will cause Gabriel to cry out until he eventually divulges the location of Neenah's car. |
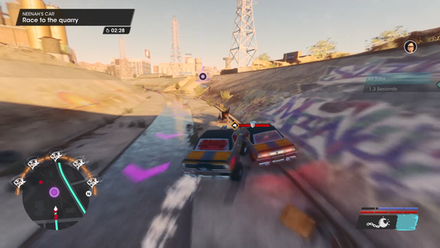
| 6 | Race to the Quarry You will be given control of Gabriel's car afterwards – drive it all the way to the marked locations on your HUD. Each location you come across will unlock the location of the next point on the map you'll have to go to, which eventually leads you to the Quarry. After a short cutscene, the mission will end. |
Neenah's Car Walkthrough and Rewards
Idol Threat
| Objectives: | |
|---|---|
| 1 | Talk to Eli After arriving at the Church, a short cutscene will play out that shows what happens to Kevin. You will be then given control over the Boss again – walk forward to talk to Eli. |
| 2 | Check Out the Snake Oil Saloon You will then be tasked with finding Kevin. Eli will inform you that his phone is at the Snake Oil Saloon. Pick out any of the vehicles outside the Church and head to the Saloon. |
| 3 | Bar Fight! After a short cutscene, walk towards the Idol member who's fiddling with the Jukebox. Press the button prompts on screen to beat him up – this will trigger a bar fight. Use your fists to knock out the other Idols in the saloon. |
| 4 | Shoot Until Somebody Talks After beating up the Idols, head outside and to the back of the Saloon where you'll find other Idols. Whip out your gun and start gunning them down. Once all Idols are gone, you will be given a new objective on your HUD – head to the portable toilet to trigger a cutscene. |
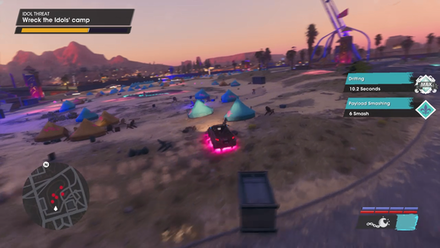
| 5 | Wreck the Idol's Camp After the portable toilet has been hooked up to your car, head to the Idol's Camp. Drive straight through the tents and other fixtures in the area to begin destroying the camp. |
| 6 | Get to the Santo Ileso Sign The survivor will eventually crack after wrecking the camp – head up to the Santo Ileso Sign on top of the mountain, and battle against the Idols there. |
| 7 | Disarm the Bombs You'll eventually come across a flight of stairs heading to the top of the sign – walk up these stairs and disable the bombs that you encounter along the way. At the top, after disabling the last bomb, untie Kevin and use your wingsuit to head down to the mansion below with Kevin to gatecrash the Idol's party. |
| 8 | Crash the Party Proceed through the mansion grounds, killing any Idol that comes along your way. By the very end of the linear path, you'll meet the Collective member who you'll have to kill in order to finish the mission. |
Aggressive Recruiting
| Objectives: | |
|---|---|
| 1 | Go to the Church After starting the mission, head into the Church and head up the stairs. |
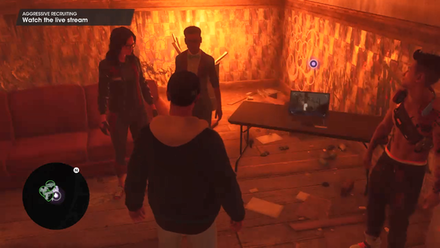
| 2 | Talk to Eli Talk to Eli who'll be standing with the rest of your friends, then interact with the laptop on the table to watch the livestream. |
| 3 | Start Boot Hill Head outside of the church and move towards the shoreline. You'll find a small docking area with a ship – head towards it, then interact with the ticket booth at the end to begin Boot Hill. |
| 4 | Survive Boot Hill Once you arrive at Boot Hill, you won't have any weapons on you. The goal is to reach each objective marker on your HUD/Map until you reach the very end, where you'll have to fight a Collective member. After defeating the Collective member, look for a turret nearby and hop on – the mission ends after you kill several enemies that begin to stream in to your area. |
Aggressive Recruiting Walkthrough and Rewards
The Dustmoot

| Objectives: | |
|---|---|
| 1 | Talk to Eli After arriving at the area, walk up to Eli to have a conversation, then board a car. |
| 2 | Acquire Weapons and Armor Follow the marker up to an alleyway flled with several boxes. Interact with the boxes to "arm" yourself, then take the toy gun that Eli offers. |
| 3 | Shoot Someone Test out the gun on somebody in the alley (not counting Eli). For the rest of the mission, keep this "weapon" as your primary weapon in order to not truly kill anyone during the mission. |
| 4 | Venture into the Dustland After testing the toy gun, get back into your car and head to the marker on your HUD/Map, until you reach the Tapeworm Beacon. There'll be a short conversation with the guard and Eli, before a firefight breaks out. |
| 5 | Set Tapeworm's Beacon Alight After defeating the guards, walk up to the beacon and interact with it to set it on fire. Several more Tapeworm guards will come up to the beacon to try and stop you – slay them all. |
| 6 | Venture to Fort Tapeworm After defeating the guards, hop back into your car and head to House Tapeworm's fort. Walk up to the gate with the guards standing on the platform above, and watch Eli interact with him. |
| 7 | Slay Thy Foes Head inside once the gate opens, then wait for Eli to give the signal before you start shooting any Tapeworm guard you encounter. The path forward will be pretty linear – just slay every guard you encounter until you reach a large area filled with containers and boxes. |
| 8 | Injure the Great Worm Once the fighting dies down, you will have to open several chests around the area in search of Duct Tape. Once the chests have been opened, you'll be tasked with entering the Great Worm and injuring it from the inside. Climb up into the snake, then battle against the Tapeworm guards inside. Several yellow balloons will be hanging in sections of the worm – shoot them to destroy them and "injure" the worm. At the very end of the worm will be several boxes. Interact with it to get the Duct Tape, then shoot out the wall at the end of the worm and jump back down to Eli to finish the mission. |
The Dustmoot Walkthrough and Rewards
The Forge
| Objectives: | |
|---|---|
| 1 | Meet Neenah at FBs After starting the mission, head towards the FBs to meet Neenah. Approach her outside of the fast food joint to properly begin the mission. |
| 2 | Steal the Helicopter You will be given a location to head to after meeting with Neenah. Hop into a car, then head to the locatino where there'll be a helicopter that you'll need to steal. You can ignore the guards that will shoot at you to try and stop you and take the helicopter up as soon as you're in it. |
| 3 | Go to the Scorpion Factory After getting the helicopter, head to the factory. Targets will pop up on the ground – destroy them all using either the helicopter's rockets or machine guns. |
| 4 | Land the Helicopter After several waves of targets have been destroyed, land the helicopter on to the factory roof. Get out of the chopper and interact with a small vent. |
| 5 | Enter the Scorpion Factory Once you've entered the factory, you'll be given several vehicles as targets for you to destroy. |
| 6 | Find the Forge Proceed along the pathways and onto the next area, where you'll be given even more Los Panteros vehicles to destroy. These will be protected by several Los Panteros members including Tough variants. |
| 7 | Buy Neenah Time After wiping out the vehicles and Los Panteros members, head to the next area with the Forge. You'll be tasked with interacting with several Relays while being assaulted by Los Panteros members. Knock out the enemies to buy Neenah time. |
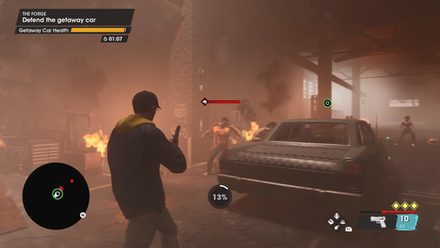
| 8 | Escape Soon, Neenah will activate the main console and hop onto the monster truck below, driving it into the wall and causing it it to explode. Follow the map marker into an area with a car. Enemies will try to rush you and try to damage the car – clear them out to prevent any damage to the car, then enter the vehicle to end the mission. |
The Forge Walkthrough and Rewards
Drawing Heat
| Objectives: | |
|---|---|
| 1 | Meet Up with the Saints After meeting up with Neenah at the Church, hop into a car and follow the map marker to the location where your Saints crew is. |
| 2 | Talk to Your Crew Approach the higlighted members of your crew to strike up conversations with them. Eventually, you'll be shown the bag where your cut of the robbery is – take it. |
| 3 | Take Out the Cops Cops will arrive at the scene afterwards, causing a fierce gun battle to start between your crew and the police. |
| 4 | Go to the Armored Truck After several waves of cops have been eliminated, head to the armored truck near where you talk to your crew the first time. Climb up to the roof of the truck when you're given control. |
| 5 | Keep the Cops Occupied The truck will then try to drive away, causing cop cars to try and follow you. Eliminate each of the following car. The chase will eventually end once a news report comes up on the radio regarding your exploits, which also ends the mission. |
Drawing Heat Walkthrough and Rewards
The Rod Warrior
| Objectives: | |
|---|---|
| 1 | Meeteth with Elijah the Wise After accepting the mission from the Missions app, make your way toward the objective marker at Monte Vista. Approaching the marker will instantly transport you to the Lookout with Eli and Neenah. |
| 2 | Confer with the Council Approach Eli and Neenah to receive a briefing for the mission ahead. Elijah the Wise talks about the Bowelrod, the "greatest weapon in all the realms," which you need to defeat Gwendolyn Firebird. |
| 3 | Travel to the Bowelrod's Lair To obtain the Bowelrod, make your way to its Lair in the Badlands. Talk to the Keeper, who will provide you with the incomplete Bowelrod as its parts have been taken away by House Phoenix. |
| 4 | Travel to Fort Phoenix Ride the incomplete Bowelrod toward Fort Phoenix, which contains the Bowelrod parts you need. Park near the gates and "stealth" your way inside. |
| 5 | Stealth Kill Thine Enemies Clear out the compound by performing "stealth kills" on each of the guards. Make sure not to get seen by any other guard as you take down each of them one by one. After successfully clearing out the compound unseen, open the chest near the back to get the first Bowelrod piece. |
| 6 | Storm the Warehouse Meet up with Elijah and Neenifer at the warehouse and defeat all of the Phoenix guards around the area. Open the chest inside the warehouse to get the second Bowelrod piece and a Dustlander Shotgun. |
| 7 | Journey to the Peak of Fort Phoenix Journey towards the top of Fort Phoenix to get the final piece of the Bowelrod. There will be plenty of Phoenix soldiers that block the way upward, so gun all of them down with your faux weapons as you move toward the top. Open the chest at the end of the path to get the last Bowelrod piece. |
| 8 | Wingsuit-eth to the Warehouse After getting the last missing piece of the Bowelrod, Elijah will stay behind as you wingsuit down toward the warehouse. Give Neenifer the final piece so she can begin conjuring the Bowelrod. |
| 9 | Protect Neenifer While Neenifer performs the ritual to bring the Bowelrod back to life, defend her from the assaulting House Phoenix members. There will be four waves of enemies in total, so prepare to gun each of them down one by one. |
| 10 | Rescue Elijah the Wise Ride the resurrected Bowelrod towards Elijah to rescue him from House Phoenix. Use the Bowelrod's Roar to take down the horde of soldiers that surround Elijah. Finishing this step completes the mission. |
The Rod Warrior Walkthrough and Rewards
Unto the Breach
| Objectives: | |
|---|---|
| 1 | Assemble Before Elijah After reaching Castle Kraken, assemble in front of Elijah and your fellow Kraken. You will receive a short briefing for the mission ahead, and DJ Keviticus will join your army. |
| 2 | Defend Thy Castle from Phoenix A Phoenix harbinger will arrive, proclaiming his intent to take over Castle Kraken and mentioning Gwen's current assault of Fort Thunderpump. Defeat him and the incoming waves of Phoenix soldiers to proceed. |
| 3 | Find and Kill the Infiltrators After clearing out the Phoenix soldiers, Elijah will shout out that enemies have breached the castle. There are a total of 8 infiltrating Phoenix soldiers in this section. Thoroughly check each floor and the highest point of Castle Kraken for these infiltrators and take them down before they destroy the castle. |
| 4 | Journey to Fort Thunderpump Enter the Bowelrod after clearing out the infiltrators and begin driving towards Fort Thunderpump to trigger a cutscene. |
| 5 | Defeat the Phoenix Steeds After the cutscene ends, take down each of the Phoenix's vehicles using the Bowelrod's Boost ability. Proceed to the Gate of Bones afterward and unleash the Bowel Growl to gain entrance to Fort Thunderpump. |
| 6 | Continue Through Fort Thunderpump Mow through the Dust King's warriors with the Bowelrod as you make your way inside Fort Thunderpump. You will eventually hit a blockade, forcing you to leave the Bowelrod behind and continue moving on foot. |
| 7 | Defend Thy Position The keep's walls block the path ahead, but a broken ballista nearby could be used to get over it. Defend your position while Neenifer repairs the ballista. Eventually, your Tapeworm allies arrive to help you hold your ground. |
| 8 | Launch Over the Wall Help Neenifer finish the repairs by bringing her a ballista lug nut from nearby. Afterward, use the ballista to launch yourself into the air and get past the keep walls. Continue moving through the fort to proceed. |
| 9 | Smite Gwen Gwen will confront you at the end of the fort, starting this mission's final battle. You will have to deplete her health bar three times in this section, as she will lie about getting hit twice during the fight. Focus all of your firepower toward Gwen to take her down. |
| 10 | Get to the Dust King After defeating Gwen, head past the keep and go to the Thunderpump Throne Room. Doing this triggers a cutscene and a quick-time event section where you have to "kill" the Dust King. Defeating the Dust King and taking his crown for yourself completes the mission. |
Unto the Breach Walkthrough and Rewards
The Frontier
| Objectives: | |
|---|---|
| 1 | Wingsuit to the Prison After the cutscene, jump off of the helicopter and use your wingsuit to fly down to the roof of the prison. Walk forwards towards the marker until you reach a vent that you can interact with that brings you inside of the prison. |
| 2 | Stealth Your Way Through Once inside of the prison, you will have to navigate your way to Nahualli's position deep in the prison complex. Several guards will be in your way and can cause your "stealth" to fail, which also fails the mission. Avoid getting detected. |
| 3 | Find the Nahualli After sneaking past the guards, you'll eventually come across Nahualli's room. |
| 4 | Go to the Control Room Boss will have a short conversation with him – after, move on to the corridor behind Nahualli and continue on until you reach the Control Room. Here, the guard will detect you, so immediately kill him and then proceed to destroy the Servers in the room. |
| 5 | Save the Nahualli After wrecking the servers, rush back down to Nahualli's position. |
| 6 | Escape the Prison With Nahualli in tow, navigate through the corridors and battle against both prisoners and Marshalls alike. |
| 7 | Steal the Truck You'll eventually reach a garage with a Marshall truck. Board the Truck, then run through the gate blocking your way. Follow the path that leads you up and through a canyon, to the roof of the prison, and then eventually out to the open roads. |
The Frontier Walkthrough and Rewards
Body of Evidence
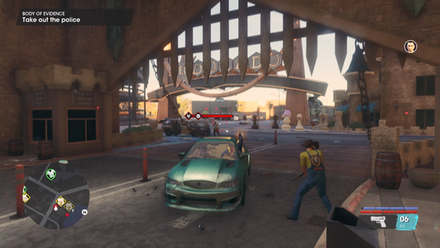
| Objectives: | |
|---|---|
| 1 | Meet up with Kev After starting the mission on your phone, hop into a car and rush to where Kevin is. After meeting up with him, drive your car to a "castle"-like building where JR is. |
| 2 | Rescue JR There will be several cops surrounding JR when you arrive – take them out. |
| 3 | Take Out the Police Several more waves of cops will arrive after a short conversation with JR – take them all out, then hop into a car and rush to the next objective. |
| 4 | Find and Burn the Evidence Once you arrive at the storage facility, you will have to search through each storage space whose doorway is open. Cops will litter the scene – you don't have to take them out before beginning your searches. Instead, take each cop out as you encounter them right in front of the storage spaces you need to search. Once you find the "evidence", interact with it to burn them. |
| 5 | Destroy the Helicopters After all the evidences have been destroyed, three helicopters will fly in to try and ruin your day. Hop into the APC in the middle of the storage warehouses and use its turret to gun down the choppers. |
Body of Evidence Walkthrough and Rewards
Donut Run
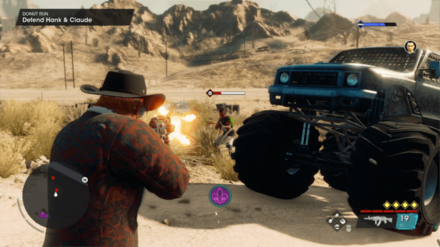
| Objectives: | |
|---|---|
| 1 | Get in Line for Donuts After reaching the donut shop, get in line. Ring up your crewmates for their orders as you wait for the line to pass. |
| 2 | Defend Yourself Right when you start ordering donuts, the pedestrian beside you will suddenly pull out their gun to attack you. Take them down and the rest of the hostile pedestrians nearby. |
| 3 | Survive Until Kevin Arrives Kevin explains that somebody put a bounty up for you on the Wanted app and that he'll be there shortly to pick you up. Defend your position at the donut shop until Kevin arrives. |
| 4 | Survive the Drive Get in Kevin's car as soon as he arrives. He'll mention that he knows the designers of the Wanted app and that they could take your listing down. Gun down the hostile vehicles following your car as Kevin drives towards the designers' house. |
| 5 | Talk to Hank and Claude Talk to Hank and Claude as you arrive at their house. While the designers initially refuse to take you off the app, putting up their own bounty listings forces them to act. |
| 6 | Defend Hank and Claude While Hank and Claude get to work removing you from the app database, you have to fend off more waves of bounty-hunting pedestrians. Survive this final onslaught and talk to Hank and Claude afterward to complete the mission. |
Donut Run Walkthrough and Rewards
Idol Hands

| Objectives: | |
|---|---|
| 1 | Find the Mailman After talking to Kevin about the situation, look for the mailman who just delivered your packages. He reveals that the Idols were the ones who stole your parcels before pointing toward where they went. |
| 2 | Go to the Bar Drive towards the bar where the Idols went and gun them down. Pick up the packages they drop to proceed. |
| 3 | Find a Surviving Idol The packages these Idols stole were only a fraction of the knife set that you ordered. Head to the back of the bar to find a surviving Idol and interrogate them about the location of the other packages. |
| 4 | Defeat the Idols at FB's Head to the nearby FB's and defeat the Idols there to obtain a second batch of stolen packages. |
| 5 | Clear Out the Idols in the Alley With a still-incomplete set of knives, Kevin points you toward a nearby Idol hideout that might have more of them. Make your way there and kill the Idols there to retrieve the final batch of stolen packages. Talk to Kevin after clearing out the Idols to complete the mission. |
Idol Hands Walkthrough and Rewards
Corporate Retreat
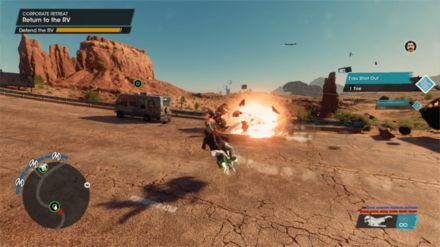
| Objectives: | |
|---|---|
| 1 | Hit the Road After explaining to the Nahualli that he was actually called for a corporate retreat and not a train robbery meeting, enter the RV and begin driving towards each of your crew's activity spots. |
| 2 | Drive to Neenah's Activity Your first destination is Mercado, where Neenah wants to paint a Saints mural on Panteros turf. Park the RV after reaching the spot and let Neenah start painting her mural. |
| 3 | Take Out the Panteros After a short while, the Panteros will find out what your crew is doing and begin heading toward your location. Defend Neenah from the incoming waves of Panteros to proceed. |
| 4 | Drive to the Bar With Neenah finishing up her mural, it's now time to drive to Eli's activity. Get in the RV and make your way to El Bar Visual to talk to the bartender there. |
| 5 | Defeat Marshall Security Forces As you talk to the bartender, Marshall soldiers will come in looking for you and the Nahualli. Defeat the guards and the incoming Marshall security forces to continue the mission. |
| 6 | Board the Hoverbike After defeating the Marshall forces, Kevin changes his activity to stealing one of their hoverbikes and racing towards Jetski Point. Get on a hoverbike with the Nahualli and head toward the lake. |
| 7 | Clear Out the Idols Kevin forgot to mention that Jetski Point was an Idols hangout. Use the hoverbike to clear out the Idol jetskis in the lake with the Nahualli, then return to the RV to rendezvous with your crew. |
| 8 | Defend the RV Using your hoverbike, defend the RV from incoming Marshall and Panteros vehicles as you make your way towards a safe location. The drive towards the Nahualli's safehouse takes a while, so focus all of your firepower toward taking each enemy vehicle down. |
| 9 | Enter the Safehouse Upon reaching the safehouse, the Nahualli allows you to borrow one of his special weapons. Enter the safehouse to pick the weapon up and go back outside to meet up with your friends. |
| 10 | Defeat All Enemies With your entire crew ready to fight, defend your position at Nahualli's safehouse and defeat all of the incoming Marshall, Panteros, and Idols to complete the mission. This final part of the mission is a long, drawn-out firefight, so don't hesitate to take cover and switch weapons whenever you need to. |
Corporate Retreat Walkthrough and Rewards
The Great Train Robbery
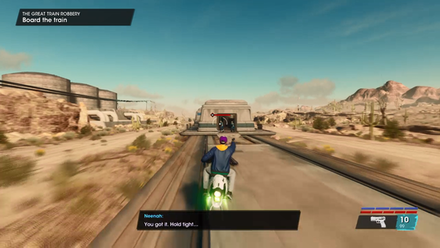
| Objectives: | |
|---|---|
| 1 | Go to the Graveyard After starting the mission, head to the graveyard to meet up with Nahualli and your crew. |
| 2 | Board the Train The mission will start off with you being on the passenger side of a hoverbike as you rush towards the back end of the train. After the hoverbike boards the train, you will be left behind by Neenah. Follow the train down the path towards sections of the train while battling against the Marshals. |
| 3 | Destroy the Servers At some point, you will come across an open section of the train with a turret on top. Don't bother trying to destroy the turret – instead, wait for it to stop firing before jumping from cover to cover. As soon as you enter the section directly beneath the turret, there'll be servers you can destroy to disable the turret. Do this for all turrets that you encounter on the train. |
| 4 | Move Up the Train Continue down the train – there'll be a section where a Marshal guard disengages the section of the train you're in from the rest, which slows and leaves behind your section. Deal with the remaining Marshals in this section until Neenah comes with her Hoverbike to come pick you up. Board the bike with her and leave it when you reach the new back end of the train. |
| 5 | Re-Board the Train As you progress through the train, Los Panteros will drive up in turreted trucks along either side of the train as well as try to board it directly, prompting a three-way fight between you, the Marshals, and their crew. After mowing down several of them as you move up the train, you'll come across a section where you'll be locked inside. Several Marshals will enter this section from the roof, along with trying to blind you by filling the room with smoke. |
| 6 | Get in the Tank After you make it out of the Marshal's trap, continue down the path. A helicopter will be in your way and will fly up. Ignore it for now and proceed down the path until you reach a Marshal Tank. Board it, then start blasting away at both the helicopters, trucks, and APCs that try to block your way. |
| 7 | Destroy the VTOL Finally, a large aircraft will fly up and attempt to destroy you. Shoot several tank shells into it to destroy it, then jump out of the tank and continue moving down the train until you hit a cutscene, ending the mission. |
The Great Train Robbery Walkthrough and Rewards
Good Cop/Bad Cop

| Objectives: | |
|---|---|
| 1 | Go to the Heli After talking to Eli, follow the map marker to a helicopter that you'll need for the mission. |
| 2 | Pick Up the Chief's Vehicle Fly over to a parking lot as marked on your HUD, then use the Helicopter's hook to pick up the vehicle from the ground. |
| 3 | Smash Into the Containers Head to the factory marked on your HUD. Once you arrive, dangle the vehicle to the same height as the stacked containers, then fly over them to knock them down. |
| 4 | Smash the Car into the Building Head to the second factory afterwards – this will be a building with lots of chimney spires around the area. Slam the Chief's car onto the building's side until you achieve enough damage. |
| 5 | Fly Over the Fire Head to the third factory afterward – this will be a factory with Soda Bottles acting as the chimneys. Fly over to the top of each soda bottle and dangle the Chief's car in the flames. |
| 6 | Fly to Panther Rock After the Chief gives in, head to Panther Rock and drop the Chief off there to end the mission. |
Good Cop/Bad Cop Walkthrough and Rewards
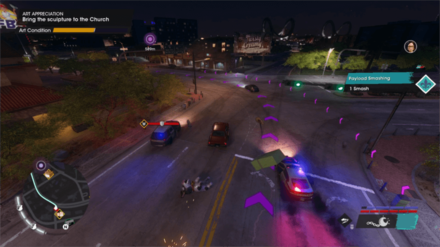
Art Appreciation
| Objectives: | |
|---|---|
| 1 | Talk to Neenah After reaching the Museum, talk to Neenah near the entrance. She explains that she'll purchase three Nizhoni Fisher sculptures around Santo Ileso. Get inside her car to continue the mission. |
| 2 | Get the First Sculpture After getting in the car, Neenah will negotiate with the sculpture's owner on the phone, but they will refuse to let it go. Drive towards the location of the first sculpture and prepare to tow it away. |
| 3 | Tow the Sculpture to the Church Attach the towing cable to the sculpture and start dragging it back towards the Church. Take care not to cause too much damage along the road to prevent yourself from getting notoriety. Detach the sculpture at the Church entrance to proceed. |
| 4 | Get the Second Sculpture After securing the first sculpture, Neenah will contact the owner of the second sculpture. They appear to be mistreating it, so Neenah reluctantly agrees to steal this one too. Drive towards its location and prepare for another towing job. |
| 5 | Carefully Tow It to the Church Attach the cable to the sculpture and carefully tow it back to the Church. This sculpture is particularly fragile, so avoid dragging it over pedestrians, vehicles, and other obstacles. Detach the statue at the Church entrance to continue. |
| 6 | Get the Third Sculpture Hopeful, Neenah contacts the owner of the last sculpture to see if she can purchase it. Hearing that they threw up on it, Neenah willingly decides to steal this statue too. Make your way towards the sculpture for the final towing job of the mission. |
| 7 | Avoid the Cops While Towing Attach the towing cable to the last sculpture and cautiously drag it back towards the Church. The police, having noticed your first two thefts, will also go after you in this section, so be extra careful when driving through the road. Reach the Church and safely detach the sculpture to complete the mission. |
Art Appreciation Walkthrough and Rewards
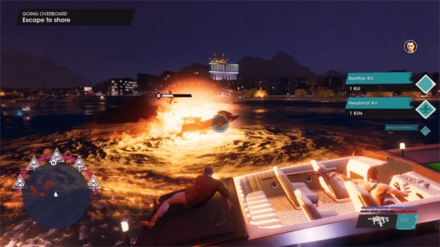
Going Overboard
| Objectives: | |
|---|---|
| 1 | Go to the Boathouse After deciding to steal the Hummingbird Codex to make a statement, get in the car and drive to the nearby Idols' boathouse with Kevin to get the Codex. |
| 2 | Fight Your Way to the Vault Kill the Idols guarding the boathouse entrance before going inside. Afterward, fight your way through multiple Idol members to reach the vault holding the Codex. |
| 3 | Get the Codex After entering the vault, the Collective will lock you inside. They reveal that they predicted your arrival and that the Codex before you is a fake. Disarm the trapped display case and prepare to break out of the vault. |
| 4 | Fight Your Way to the Exit Leave the vault after the Idols open the doors and gun each of them down as you make your way back through the boathouse. While you do this, Kevin points out that the real Codex is likely on the Collective's yacht. |
| 5 | Ride a Jetski to the Yacht Exit the boathouse and head to the docks nearby. Steal one of the Idols' jetskis and ride with Kevin toward the Collective's yacht. |
| 6 | Get the Real Codex Jump onto the yacht using the jetski and make your way through the boat to get to the real Codex. This section involves going through several Idol-filled hallways, so prepare yourself for multiple firefights. |
| 7 | Disarm and Rearm the Bomb After reaching the Codex, disarm the bomb on the display case before picking it up. Afterward, head to the yacht's bridge and rearm the bomb there to give the Idols a taste of their own medicine. |
| 8 | Go to the Helipad Head to the helipad after rearming the bomb. Doing this will trigger a cutscene showing the Collective shooting down your helicopter, preventing your escape. |
| 9 | Kill Both Collective Members After the cutscene ends, the two Collective members and their crew of Idols will leap down the roof to fight you. Prioritize taking down the Idol members first before focusing all of your fire on both Collective members. |
| 10 | Escape the Yacht As you defeat the Collective, the bomb you rearmed will explode, causing the yacht to combust. Run through the burning hallways and enter the speedboat at the end of the ship. Defeat the Idols chasing you down as you make your way back to shore to complete the mission. |
Going Overboard Walkthrough and Rewards
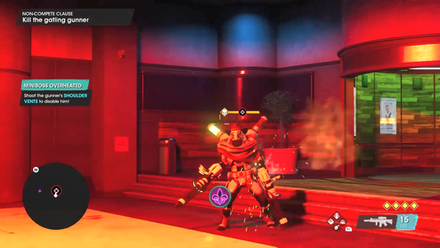
Non-Compete Clause
| Objectives: | |
|---|---|
| 1 | Go to Marshall HQ After the cutscene at the Church, hop into a car and drive to the Marshall HQ due west of the Church. |
| 2 | Defeat the Enemies Once you arrive, there'll be a fierce gun battle underway between Saints and the Marshalls. Aid in the fight – every now and then, you'll be given specific enemeis to target in order to progress the objectives. |
| 3 | Enter the Elevator Once the main lobby of the building has been cleared of enemies, the elevator at the center of the atrium will unlock. Enter it. |
| 4 | Get to the Stairs The elevator will be stopped by the Marshalls – step out, then take on the enemies. Follow the floor's main pathways up to a staircase that you can take to get to the above floors. |
| 5 | Find a Keycard At the floor above, you'll need to search through the cubicles around the floor for a keycard that will unlock the elevator. Several Marshalls will come to try and stop you. Soon afterward, there'll be one particular Marshall (wearing a cowboy hat) who can replicate himself. You'll get the keycard only after killing him. |
| 6 | Kill the Gatling Gunner Once you have taken the ID Card, head up the elevator to another floor. Proceed down to the adjacent elevator entrance where it will open to reveal a Gatling Gunner. Unlike most enemies, this enemy will be almost invulnerable to damage. Wait until his gatling guns overheat, which forces two cylinders to rise above his shoulders. Shoot at these, then go to his back while he short circuits and shoot the green cylinders on his back. Repeat this process until he dies. |
| 7 | Enter the Elevator After taking out the Gatling Gunner, the elevator he came from will open. Enter this to trigger a cutscene, ending the mission. |
Non-Compete Clause Walkthrough and Rewards
Severance Package

| Objectives: | |
|---|---|
| 1 | Get the Thumb Drive After initiating the mission, hop into a car and head to the marked location on the map. Interact with a post to get the thumb drive, then get back in your car. |
| 2 | Go to the Shipping Yard Drive to the Shipping Yard. Several Marshalls will be waiting for you there – take them out, then look around for Marshall vehicles that are next to red barrels. Shoot at the barrels to destroy the vehicles, and continue wrecking the vehicles in this manner until none are left. |
| 3 | Wait for the Tank A tank will roll up to your location afterward. Hop into it and start driving to the mall. |
| 4 | Go to the Mall Several cops will try to follow you – they are easily taken care of if you use the main gun of the tank to destroy the police cruisers and helicopters that will inevitably begin to hunt for you. |
| 5 | Destroy All You Can At the mall, let loose and wreck everything in your path. On your objective menu to the top left of your screen, a blue arrow will appear next ot the your mission objective. Everytime you destroy something in the mall, this arrow will turn red, signifying Marshall's stock price. |
| 6 | Destroy the Statue Afterward, you'll be tasked with destroying a statue. Once you arrive at the statue's location and destroy it, your tank will be immobilized for some time. Do not attempt to go out – just keep shooting to get the Marshalls off your back until your tank becomes operational again. |
| 7 | Go to the Expo Head to the back of the mall and continue your rampage. Once Marshall's stock price is low enough, you will receive a phone call. |
| 8 | Decide Atticus' Fate After the call, a short cutscene will play. At the end of the cutscene, you will be given two choices on what to do with Atticus – Shoot/Kill Him, or simply Fire Him. |
Severance Package Walkthrough and Rewards
After Party

| Objectives: | |
|---|---|
| 1 | Go to the Church Go to the Church to start the intro cutscene for the mission, where the Nahualli betrays you and buries you alive, taking the Saints for himself after realizing that having friends does make you stronger. |
| 2 | Find Snickerdoodle After the cutscene ends, you will suddenly wake up to Snickerdoodle's meow in a dream-like location. Walk through the area to recall events of the past. Eventually, you'll come across the Petting Zoo Safari board game. Look closer to continue the mission. |
| 3 | Find Your Friends After looking closer at the board, you will wake up inside the Petting Zoo Safari board game. Follow the marker and start looking for your friends. |
| 4 | Collect Llamas The first friend you find is Eli. He'll ask you to collect 7 llamas for a bear, which you need to win the board game. Collect each of the llamas behind you and return them to Eli to get your first bear. |
| 5 | Find the Baby Elephant Head towards Neenah after collecting the llamas. She'll ask you to find her missing baby elephant in exchange for another bear. Carefully navigate through the snake-infested area nearby to find the baby elephant. Chase it out of a bush to collect it, then return it to Neenah to get your second bear. |
| 6 | Collect Snails Go to Kevin next after finding the baby elephant. He needs you to find three snails in exchange for the last bear you need. Go to the group of bushes near Kevin and check each bush to find the first two snails. Some bushes contain snakes, so be careful when searching through them. |
| 7 | Enter the Barn After finding the second snail, Snickerdoodle will meow, alerting you to where the snakes seem to be coming from. Despite your friends' temptations to finish the game, enter the barn in the middle of the board to proceed. |
| 8 | Escape the Nightmare Entering the barn will place you inside a nightmare, where you start recalling the events of the party. Shoot down the Nahualli goons as you make your way through the area. The Nahualli and your friends will cast doubts on you as you travel through the nightmare, but ignore their words to reach the top and trigger a cutscene. |
| 9 | Look for Neenah, Kevin, and Eli After being motivated by Snickerdoodle to pursue the Nahualli, climb out of your shallow grave and enter the Church. Reaching the marker inside will trigger another cutscene, showing that the Nahualli has kidnapped your friends. Finishing this step completes the mission. |
After Party Walkthrough and Rewards
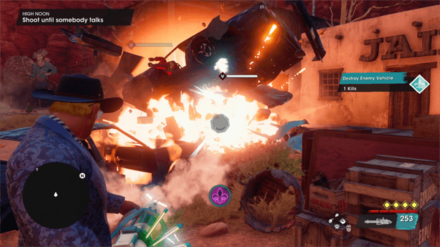
High Noon
| Objectives: | |
|---|---|
| 1 | Go to the Safehouse After completing After Party, leave the Church and head straight to the Nahualli's safehouse to prepare for the mission ahead. |
| 2 | Arm Yourself Enter the safehouse and arm yourself with your favorite loadout of weapons. The prior mission removes all of your previously equipped weapons, so make sure that you're fully loaded before leaving the Weapon Cache screen. |
| 3 | Defeat the Safehouse Grunts Leave the safehouse and warm up your aim by taking out the Nahualli grunts that were alerted to your location. |
| 4 | Go to Silver Gulch After defeating the Nahualli's men, hijack one of their cars and begin driving to Silver Gulch. More Nahualli grunts will attack you as you head to your destination, so prepare to sideswipe and shoot their vehicles to knock them off your tail. Reaching the mission marker will start a cutscene. |
| 5 | Shoot Until Somebody Talks After the cutscene ends, prepare to take out all of the Nahualli goons surrounding you. Don't hesitate to take cover behind some of the nearby crates to avoid taking too much damage. |
| 6 | Go to the Saloon Shoot your way toward the saloon after defeating the initial ambush. This section has several groups of the Nahualli's men to take down, so prepare to engage in multiple firefights. |
| 7 | Pick Up the Mini Gun Reaching the saloon reveals that the Nahualli wasn't in Silver Gulch at all. Head upstairs to retrieve your old Marshall mini gun before leaving the saloon. |
| 8 | Defeat the Nahualli Goons Using the mini gun, defend yourself against multiple waves of the Nahualli's goons. Surviving this section triggers a cutscene before ending the mission. |
High Noon Walkthrough and Rewards
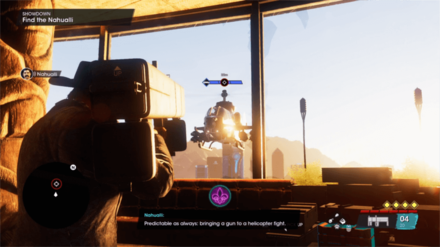
Showdown
| Objectives: | |
|---|---|
| 1 | Get to the Nahualli's Hideout Fly towards the Bikini Atoll Casino to start your final assault against the Nahualli and his men. |
| 2 | Take Out the Defenses Using the VTOL's laser and rockets, destroy the enemy helicopters and take out the rocketeers around the casino. |
| 3 | Enter the Casino Land the VTOL and defeat the Nahualli grunts guarding the entrance on foot. Afterward, make your way inside to trigger a cutscene. |
| 4 | Rescue Your Friends After the cutscene ends, start gunning your way through the casino to rescue Kevin, Neenah, and Eli. This section involves going through several hallways filled with Nahualli's men, so prepare to engage in multiple firefights. Reaching the Pacific Theater will trigger a cutscene. |
| 5 | Defeat the Nahualli After the cutscene ends, the first combat section against the Nahualli begins. Chase and shoot the Nahualli down as he slowly retreats up the theater. Prioritize taking down his men first to avoid taking too much damage. |
| 6 | Catch the Nahualli The Nahualli will eventually manage to escape the theater. Gun your way through the halls as you chase him down and follow him up the casino using the elevator. |
| 7 | Destroy the Nahualli's Helicopter At the top of the casino, the Nahualli appears riding a helicopter. Grab up the rocket launcher on the ground and start blasting away to knock him out of the sky. During this section, the Nahualli can burn down the room you're in, forcing you to switch locations. He does this twice, with each new room containing several Nahualli grunts, so prepare for a troublesome battle. |
| 8 | Kill the Nahualli After taking down the helicopter, a cutscene will trigger, leading up to the final showdown with the Nahualli. Complete the quick-time event to kill Nahualli once and for all. Finishing this section completes the mission. |
Showdown Walkthrough and Rewards
Let's Build a Skyscraper

| Objectives: | |
|---|---|
| 1 | Build All Criminal Ventures Completing Let's Build a Skyscraper requires you to build all 14 Criminal Ventures in the game. You can purchase these buildings at the Empire Table. This step is the most time-consuming part of the mission as Criminal Ventures increase in price with each tier. Start saving up money early to purchase each Criminal Venture and complete this objective as quickly as possible. |
| 2 | Complete All Missions The other requirement to finish Let's Build a Skyscraper is to complete every Main Mission in the game. Open the Missions app and finish every mission under the Main tab to finish this objective. |
Let's Build a Skyscraper Walkthrough and Rewards
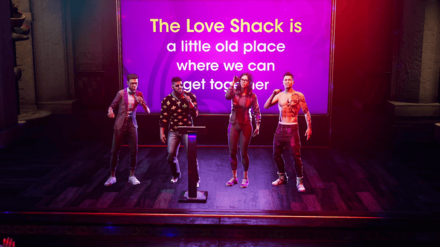
Best Friends Forever
| Objectives: | |
|---|---|
| 1 | Build the Saints Tower The quest starts as soon as you build the Saints Tower from the last mission, Let's Build a Skyscraper and completed every other mission in the game. |
| 2 | Watch a Long Cutscene Several cutscenes will play out as soon as you build the Saints Tower and teleport to its location. Sit back and watch as the Saints host a party, celebrating the construction of their second HQ! |
Best Friends Forever: How to Unlock the Saints Tower
Saints Row (2022) Related Guides

All Mission Types
| All Walkthroughs | |
|---|---|
 All Main Missions All Main Missions |
 Side Hustles Side Hustles |
 All Criminal Ventures All Criminal Ventures |
 All Wanted Missions All Wanted Missions |
Author

Story Walkthrough: List of All Main Missions
Rankings
- We could not find the message board you were looking for.
Gaming News

![Star Savior Review [First Impressions] | Engaging, Entertaining, and Expensive](https://img.game8.co/4447603/8f500e9bf666bdb8adb1af478e9dfdbd.png/show)


Popular Games

Genshin Impact Walkthrough & Guides Wiki
Umamusume: Pretty Derby Walkthrough & Guides Wiki
Crimson Desert Walkthrough & Guides Wiki
Monster Hunter Stories 3: Twisted Reflection Walkthrough & Guides Wiki
Honkai: Star Rail Walkthrough & Guides Wiki
Pokemon Pokopia Walkthrough & Guides Wiki
The Seven Deadly Sins: Origin Walkthrough & Guides Wiki
Wuthering Waves Walkthrough & Guides Wiki
Zenless Zone Zero Walkthrough & Guides Wiki
Arknights: Endfield Walkthrough & Guides Wiki


Recommended Games
Fire Emblem Heroes (FEH) Walkthrough & Guides Wiki
Diablo 4: Vessel of Hatred Walkthrough & Guides Wiki
Cyberpunk 2077: Ultimate Edition Walkthrough & Guides Wiki
Yu-Gi-Oh! Master Duel Walkthrough & Guides Wiki
Super Smash Bros. Ultimate Walkthrough & Guides Wiki
Pokemon Brilliant Diamond and Shining Pearl (BDSP) Walkthrough & Guides Wiki
Elden Ring Shadow of the Erdtree Walkthrough & Guides Wiki
Monster Hunter World Walkthrough & Guides Wiki
The Legend of Zelda: Tears of the Kingdom Walkthrough & Guides Wiki
Persona 3 Reload Walkthrough & Guides Wiki


All rights reserved
© 2022 and published by Deep Silver, a division of Koch Media GmbH, Austria. Developed by Deep Silver Volition LLC. Deep Silver, Saints Row, Volition and their respective logos are trademarks of Koch Media GmbH. All other trademarks, logos and copyrights are property of their respective owners. All Rights Reserved.
The copyrights of videos of games used in our content and other intellectual property rights belong to the provider of the game.
The contents we provide on this site were created personally by members of the Game8 editorial department.
We refuse the right to reuse or repost content taken without our permission such as data or images to other sites.