This survey will take about 1 minute.
Your answers will help us to improve our website.
Octopath Traveler 2 (Octopath 2)
Osvald Chapter 4 Walkthrough
★ See our Story Walkthrough and Side Story guides!
┣ Unlock the Final Chapter and get the True Ending!
┗ Learn how to beat the Secret Boss!
☆ Easily farm Money, EXP, JP, and Octopuff Travelers!
★ Best Character Tier List | Best Secondary Jobs
☆ All Guild Locations | All Altar Locations
This a walkthrough guide to Chapter 4 in Osvald's Storyline in Octopath Traveler 2 (Octopath 2). Read on to learn more about each section in this chapter, including enemies encountered, tips and strategies to defeat the Grieving Golem, and more!
| Osvald Related Guides | |||||||||
|---|---|---|---|---|---|---|---|---|---|
| Osvald Profile | Osvald Storyline | ||||||||
| Chap. 1 | Chap. 2 | Chap. 3 | Chap. 4 | Chap. 5 | |||||
List of Contents
Osvald Chapter 4 Walkthrough
Chapter Summary and Introduction
Osvald travels to Montwise to hunt down Harvey. His thirst for vengeance and retribution is close at hand. A ray of hope now flickers at the end of the tunnel.
| Objectives | |
|---|---|
| 1 | Make for the library. |
| 2 | Scrutinize the library for clues. Scrutinize three scholars in the library for information on Harvey's whereabouts as well as the secret entrance to his laboratory. |
| 3 | Make for Harvey's laboratory. |
| 4 | Make for the depths of the laboratory. |
| 5 | Defeat the Grieving Golem. |
Montwise
| Objectives | |
|---|---|
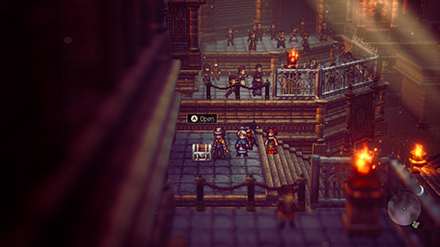
| 1 | 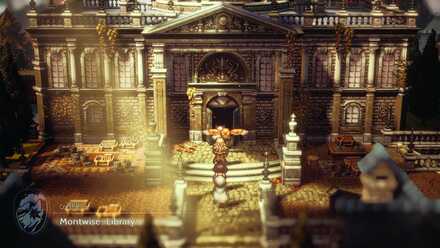 Make for the library. As soon as you arrive in Montwise, go directly to the Library at the center of town. |
Montwise Library
| Objectives | |
|---|---|
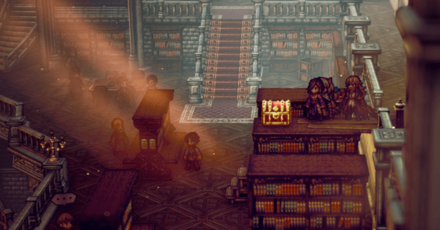
| 1 |  Scrutinize for clues in the library. Three scholars hold information on Harvey's whereabouts as well as the entrance to his secret laboratory. The first scholar is just by the left wing from the reception. The second scholar is located in the lower right wing behind the stairs. And the third scholar is found on the opposite side of the lower right wing. |
| 2 | 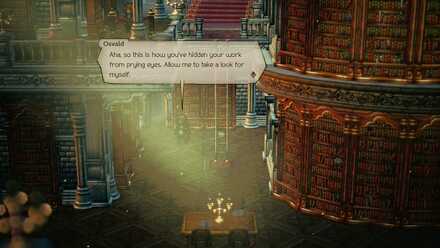 Make for the laboratory. once you have all three clues, go to the basement level on the left side. It will automatically trigger a cutscene that will open the entrance to the laboratory. |
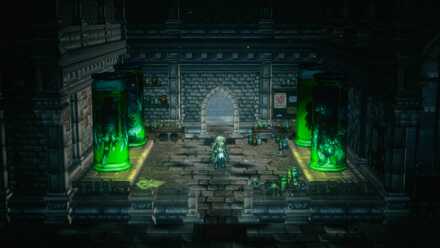
Underground Laboratory
| Objectives | |
|---|---|
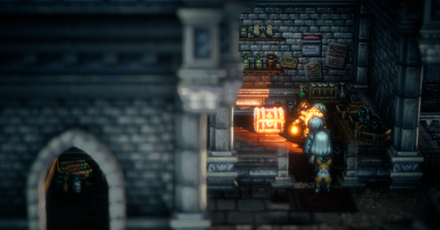
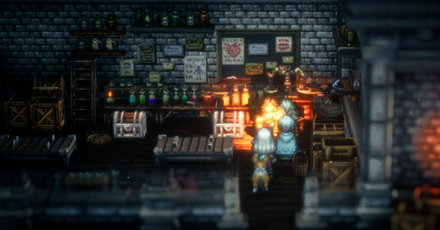
| 1 | 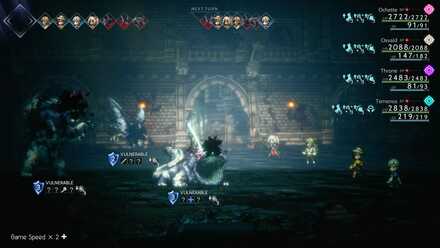 Head further into the laboratory. When you enter the laboratory, you will be confronted by Harvey's chimera creations. While they only have few Shield Points, they still put up quite the fight. Be sure to save just before entering the laboratory. |
| 2 |
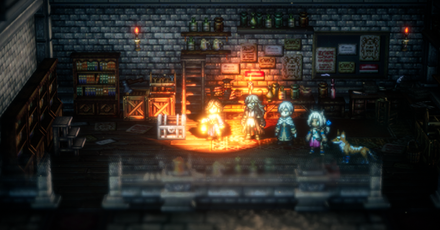
 Defeat the Grieving Golem. After defeating the creatures, it is recommended to go back to the save point and save the game before going further. Once you enter the depths of the laboratory Harvey will confront you with his latest creation, the Grieving Golem! |
Osvald Chapter 4 Side Stories
All Chapter 4 Side Stories
| Name | Information |
|---|---|
| Will Research for Money |
Location: Montwise Client: Octopus Researcher How to Complete: Bring the Octopus Enthusiast inside the Tavern of Conning Creek, Harborlands to the client. Rewards: Octopuff Pot |
| Procuring Peculiar Tomes |
Location: Montwise Client: Unusual Tome Specialist How to Complete: Procure Dispatches from Beastling Island, The Curious Legend of the Great Wall, and From the Far Reaches of Hell. Rewards: 6500 Leaves, Librarian's Amulet, Refreshing Jam |
| Tourney Champion |
Location: Montwise Client: Worried Woman How to Complete: Knock the Fainthearted Youth inside the arena and battle in his stead. Rewards: 2000 Leaves, Reinforcing Jam |
| From the Far Reaches of Hell |
Location: Montwise Client: AI How to Complete: Glean information from Georges in Nameless Isle, then return to client. Must complete Procuring Peculiar Tomes Side Story first. Rewards: 4500 Leaves, Coat of Arms |
List of All Side Stories and Side Quests
Osvald Chapter 4 Path Actions
Scrutinize
| Character | Information |
|---|---|
|
Received Info: ・An Eyewitness to Harvey Scholar Location: Found by the left wing of the library. |
|
|
Received Info: ・Library Rumor Scholar Location: Found behind the stairs down the right wing. |
|
|
Received Info: ・Harvey's Whereabouts Scholar Location: Found by the stairs going down the left lower wing. |
Osvald Chapter 4 Enemies Encountered
Underground Passageway
| Enemy | SP & Vulnerabilities |
|---|---|
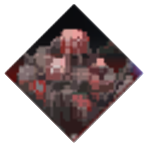
 Deformed Creature Deformed Creature
|
Shield Points: 3 SP Weaknesses: |
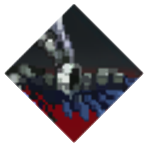
 Cobbled Creature Cobbled Creature
|
Shield Points: 2 SP Weaknesses: |
 Synthesized Creature Synthesized Creature
|
Shield Points: 3 SP Weaknesses: |
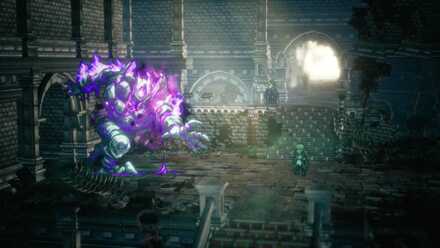
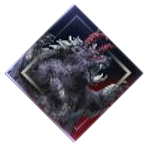
 Grieving Golem Grieving Golem
|
Shield Points: 7 SP Weaknesses: |
 Furious Fungoid Furious Fungoid
|
Shield Points: 3 SP Weaknesses: |
 Thunder Curator Thunder Curator
|
Shield Points: 2 SP Weaknesses: |
Osvald Chapter 4 Boss Guide
Grieving Golem Shield Points and Weaknesses
| Enemy | SP & Vulnerabilities |
|---|---|
|
Grieving Golem
|
Shield Points: 7 SP Weaknesses:Weakness Change: |
How to Beat Grieving Golem
Boosted Analyze Reveals More Weaknesses
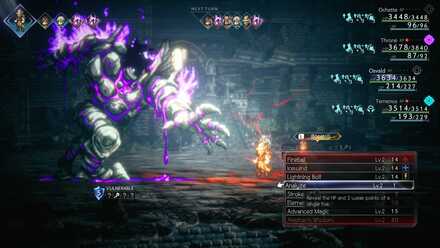
At the start of the battle, use Osvald's BP to boost Analyze and reveal more than 1 weakness. This will allow you to plan ahead in case you lose the fight.
Ideally having a Warrior, Hunter, Thief, or Armsmaster in your party will help as they have the widest range of physical attacks that can break the Golem. For elemental attacks, you should consider having a Cleric or Dancer in as a Secondary Job.
Breaking the Golem Consistently is Key
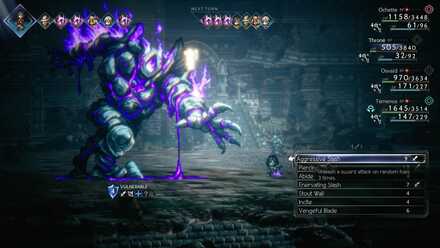
At the latter stages of the fight, the Golem will hasten its speed allowing it to move in multiple consecutive turns that can easily wipe out your team. Plan your moves accordingly, sometimes it's not about dealing the most damage, but dishing out the most number of attacks to break an enemy that wins the bout.
Turn Osvald into a Cleric
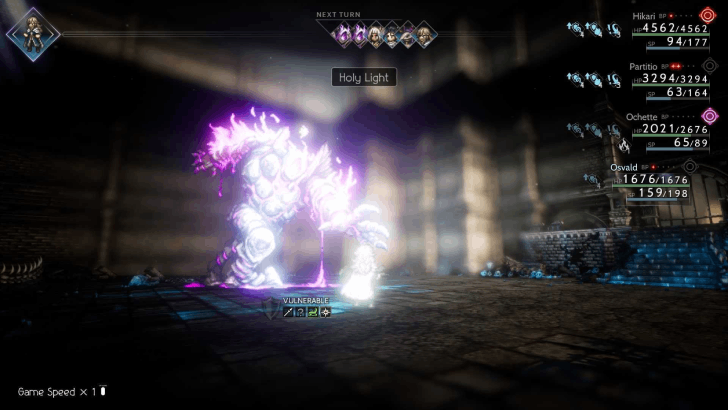
Since the Golem's weaknesses shifts, you can make Osvald's secondary job Cleric as its Light-attribute attacks cover the Golem's first set of weaknesses while Osvald's Icewind can reduce the Golem's SP once its weaknesses change.
Best Secondary Jobs for Each Character
Osvald Chapter 4 Chests
Montwise
| All Chest Locations | |
|---|---|
|
Feather Mantle |
 |
|
Bottle of Blinding Dust Hikari |
 |
|
Engagement Bow |
 |
Montwise Library
| All Chest Locations | |
|---|---|
|
Lapis Rod |
 |
Underground Laboratory
| All Chest Locations | |
|---|---|
|
14000 Leaves Osvald |
 |
|
Bottled Nightmares Osvald |
 |
|
Bottled Nightmares Osvald |
|
|
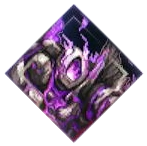
Fire Soulstone (L) Osvald |
 |
Octopath Traveler 2 (Octopath 2) Related Guides

Story Walkthrough: All Character Storylines
All Character Storylines & Routes
| Chap. 1 | Chap. 2 | Chap. 3 | |||||||||||||||||
| Cateracta | Tera | Glacis | |||||||||||||||||
| Chap. 1 | Chap. 2 | Chap. 3 | Chap. 4 | Chap. 5 | |||||||||||||||
| Chap. 1 | Chap. 2 | Chap. 3 | Chap. 4 | Chap. 5 | |||||||||||||||
| Chap. 1 | Chap. 2 | Chap. 3 | Chap. 4 | Chap. 5 | |||||||||||||||
| Chap. 1 | Chap. 2 | Chap. 3 | Chap. 4 | ||||||||||||||||
| Chap. 1 | Chap. 2 | Chap. 3 | Chap. 4 | ||||||||||||||||
| Winterbloom Sai |
|||||||||||||||||||
| Chap.1 | Chap. 2 | Chap. 3 | Chap. 4 | ||||||||||||||||
| Father Mother |
Father Mother |
||||||||||||||||||
| Chap. 1 | Chap.2 | Chap. 3 | Chap. 4 | ||||||||||||||||
| Crackridge Stormhail |
|||||||||||||||||||
All Crossed Paths Routes
| Crossed Paths Pairs | |||
|---|---|---|---|
Thief |
|||
Final Chapter: Extra Stories
| Introduction | |||
| Tranquil Grotto | Fellsun Ruins | Tombs of the Wardenbeasts | Flamechurch |
| Vidania (Epilogue) | |||
All Scent of Commerce Routes
| Tropu'hopu (Ship) |
Sai (Manuscript) |
Winterbloom (Gramophone) |
Author

Osvald Chapter 4 Walkthrough
Please participate in our site
improvement survey
03/2026
improvement survey
03/2026
Would you assist in
improving Game8's site?
improving Game8's site?

×
We are listening to our users' valuable opinions and discussing how to act on them.
The information collected through this survey will be used for the purpose of improving our services. In addition, the information will only be disclosed a part of a statistic in a format that will not allow identification of personal information.
Begin Survey
Not Now
×
Please rate each item regarding Game8.co's Advertisements.
Amount of Ads
Very Dissatisfied
Somewhat Dissatisfied
Fine
Somewhat Satisfied
Highly Satisfied
Placement of Ads
Timing of Ad Display
Ad Loading Speed
Safeness of Ads
Content of Ads
×
Please rate each item regarding Game8.co's Quality of Articles.
Amount of information
Very Dissatisfied
Somewhat Dissatisfied
Fine
Somewhat Satisfied
Highly Satisfied
Frequency of updates
Speed of new information
Accuracy of articles
Understandibility of articles
Readability of sentences
×
Please rate each item regarding Game8.co's Usability of the Site.
Ease of finding information
Very Dissatisfied
Somewhat Dissatisfied
Fine
Somewhat Satisfied
Highly Satisfied
Loading Speed
Use of Color
Font Size
Visibility of Images
Easy to Understand Layout
×
Please rate each item regarding Game8.co's Message Boards, Comments.
Ease of Writing
Very Dissatisfied
Somewhat Dissatisfied
Fine
Somewhat Satisfied
Highly Satisfied
Readability
Ease in Finding Information
Comment Quality
Comment Quantity
Admin Response
×
Please rate each item regarding Game8.co's Site's new design.
Please rate our site's new design
Very Dissatisfied
Somewhat Dissatisfied
Fine
Somewhat Satisfied
Highly Satisfied
Do you think that the website's design change makes the site easier to use?
Has the new design made it easier for you to find information on the site?
Has the new design improved the overall visual appeal of the site?
How would you rate your overall satisfaction with the new design of the site?
×
How likely are you to recommend Game8 to someone you know?
Very Unlikely
0
1
2
3
4
5
6
7
8
9
10
Very Likely
If you have other opinions regarding potential improvement to the website, please share them with us. We would appreciate your honest opinion.
Note: This is a free response section, so you can proceed without entering anything.
Note: Please be sure not to enter any kind of personal information into your response.
Note: Please be sure not to enter any kind of personal information into your response.
×
Thank You
×
Thank you for participating in our survey! Your answers will help us to improve the quality of our website and services.
We hope you continue to make use of Game8.
We hope you continue to make use of Game8.
Close
Rankings
- We could not find the message board you were looking for.
Gaming News


![Everwind Review [Early Access] | The Shaky First Step to A Very Long Journey](https://img.game8.co/4440226/ab079b1153298a042633dd1ef51e878e.png/thumb)

![Monster Hunter Stories 3 Review [First Impressions] | Simply Rejuvenating](https://img.game8.co/4438641/2a31b7702bd70e78ec8efd24661dacda.jpeg/thumb)
Popular Games

Genshin Impact Walkthrough & Guides Wiki
Honkai: Star Rail Walkthrough & Guides Wiki
Umamusume: Pretty Derby Walkthrough & Guides Wiki
Pokemon Pokopia Walkthrough & Guides Wiki
Resident Evil Requiem (RE9) Walkthrough & Guides Wiki
Monster Hunter Wilds Walkthrough & Guides Wiki
Wuthering Waves Walkthrough & Guides Wiki
Arknights: Endfield Walkthrough & Guides Wiki
Pokemon FireRed and LeafGreen (FRLG) Walkthrough & Guides Wiki
Pokemon TCG Pocket (PTCGP) Strategies & Guides Wiki


Recommended Games
Diablo 4: Vessel of Hatred Walkthrough & Guides Wiki
Fire Emblem Heroes (FEH) Walkthrough & Guides Wiki
Yu-Gi-Oh! Master Duel Walkthrough & Guides Wiki
Super Smash Bros. Ultimate Walkthrough & Guides Wiki
Pokemon Brilliant Diamond and Shining Pearl (BDSP) Walkthrough & Guides Wiki
Elden Ring Shadow of the Erdtree Walkthrough & Guides Wiki
Monster Hunter World Walkthrough & Guides Wiki
The Legend of Zelda: Tears of the Kingdom Walkthrough & Guides Wiki
Persona 3 Reload Walkthrough & Guides Wiki
Cyberpunk 2077: Ultimate Edition Walkthrough & Guides Wiki


All rights reserved
© 2023 SQUARE ENIX CO., LTD. All Rights Reserved.
The copyrights of videos of games used in our content and other intellectual property rights belong to the provider of the game.
The contents we provide on this site were created personally by members of the Game8 editorial department.
We refuse the right to reuse or repost content taken without our permission such as data or images to other sites.