Soli-Tree Walkthrough Guide
★ Mario & Luigi: Brothership out now!
★ How to Unlock and Complete Every Challenge!
★ Pull off strong Bros. Attacks for maximum damage!
★ Best Gear | Best Battle Plugs | Rank-Up Bonuses
★ Power up with Best Battle Plug Combos.
★ Share your Hammer Rally high scores!
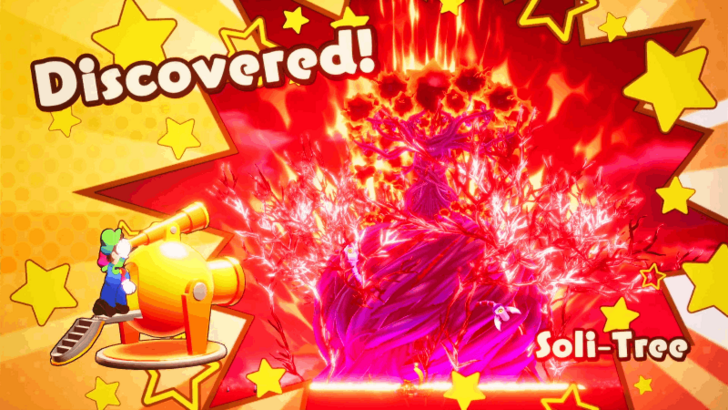
Soli-Tree is an Island located at Stormstar Sea in Mario & Luigi: Brothership. See a map of Soli-Tree, its location in Concordia, and how to unlock it.
List of Contents
Soli-Tree Map and Location
Soli-Tree Map
| Icon | How to Use |
|---|---|
 | Show Names This button reveals the Name of every icon currently shown. |
 | Show Pins This button will toggle between showing and hiding all the pins that you have already marked as acquired. |
 | Fullscreen This button will change the map display to fill the screen. |
 | Search Mode Toggle This button will display a search bar which you can use to search for an individual pin by its name. |
 | Icon Mode Toggle In Search Mode, this button will toggle you back to Icon Mode, removing the search bar and displaying the icons again. |
 | All Pins This button is shown along with the Icons on the right when there are over 6 types of pins. Click it for a full selection of all available pin types. |
 | Counter Tracks the number of pins you have of a certain type. The pin type shown is set to the page and currently cannot be changed; however, all pin type counters can be viewed by clicking the checklist icon on the right side. |
| View All Counters This icon is found on the right side of the Counter. When a map has more than one pin type, click this icon to see Counters for all pin types. |
List of All Islands and Islets
Soli-Tree Location
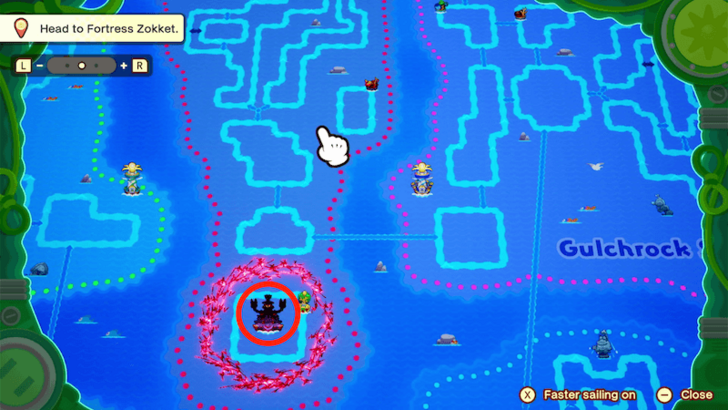
Soli-Tree is located on the bottom part of Stormstar Sea.
Soli-Tree Grampy Turnip Location
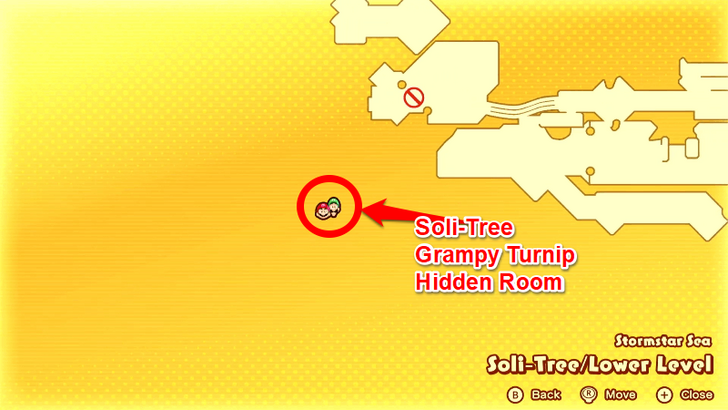
Inside the Hidden Grampy Turnip Room
| Map Image | Overworld Image |
|---|---|
 |
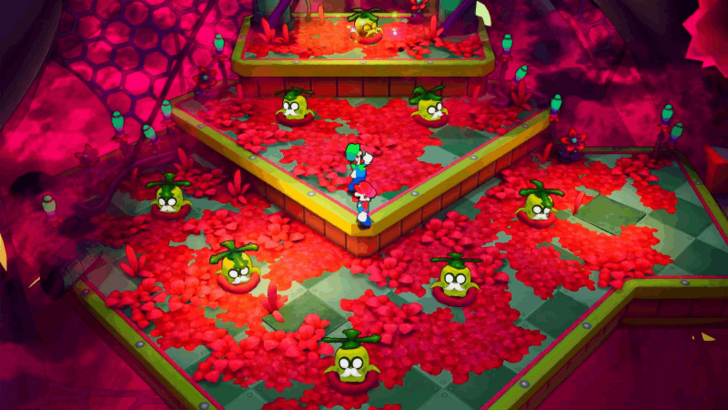 |
There is a hidden room in Soli-Tree that contains 8 Grampy Turnips. The topmost Grampy Turnip in the room is a golden variant that functions the same way as the one in Shipshape Island.
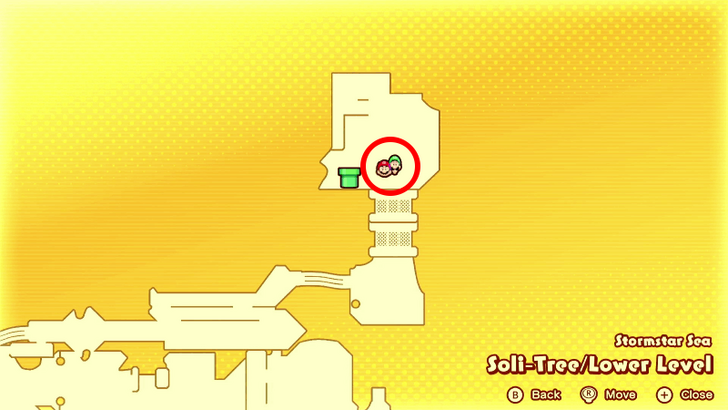
At the End of the Seesaw Area
| Map Image | Overworld Image |
|---|---|
 |
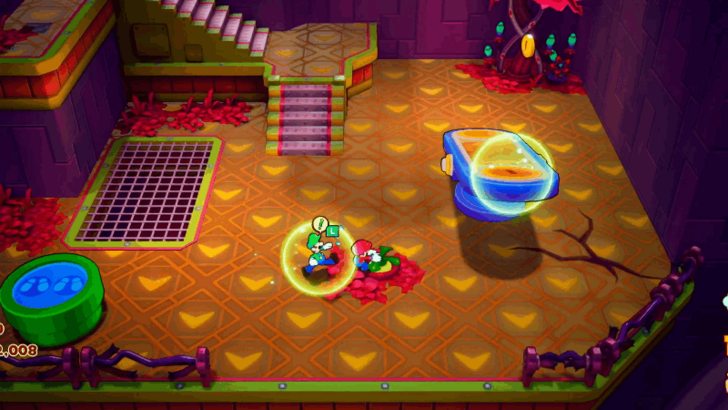 |
You can find the last Grampy Turnip at the end of the seesaw room in between the green warp pipe on the left and a seesaw on the right.
All 18 Grampy Turnip Locations
Soli-Tree Item Locations
| There doesn't appear to be any notable items to be found in Soli-Tree. Let us know in the comments if you found beans, or pieces of gear. |
Soli-Tree Walkthrough
| # | Step by Step Objectives |
|---|---|
| 1 |
 After collecting all of your allies' bonds into the watering can, head over to Soli-Tree in the same location where Fortress Zokket used to be on the ocean map, and use the ship's fast-travel function to hop onto its current. Peer through the telescope to view the imposing fortress, triggering a cutscene where everyone you have met during your journey sends Mario and Luigi off on their final quest. Connie sprinkles them with the Power of Bonds, and the brothers launch themselves toward Soli-Tree! |
| 2 |
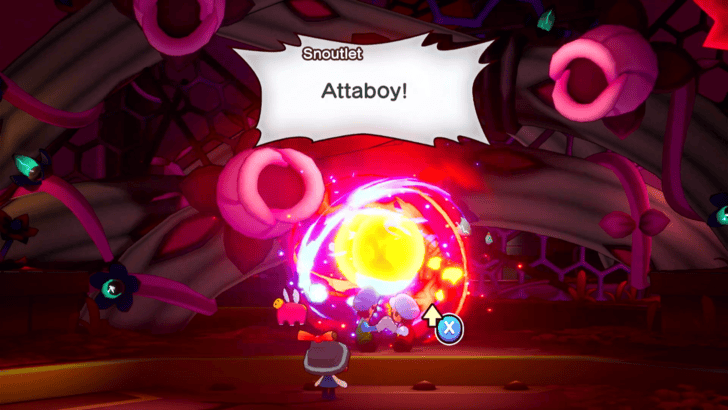 Upon landing, an imposing blockade of breathing Glohm Flowers blocks Mario and Luigi's entrance. Connie encourages them to use the Power of Bonds and activate the Bomb Bros. Bros. Move by holding and releasing the X Button when prompted. |
| 3 |
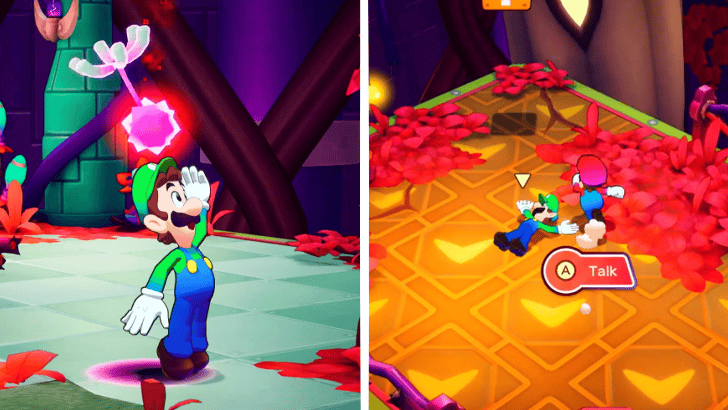 Proceed into Soli-Tree, where Mario and Luigi find it overrun by a mysterious Glohm Flower producing Glohm Seeds that slowly trickle down in the Lower Level. When touched, these seeds knock out either Mario or Luigi, sending them to a distant part of the area, and forcing either brother to be alone for a short while until they are able to retrieve the other. Head to the west side of the Lower Level afte Luigi is touched by one of these seeds, and wake him up. Be sure to evade or flee from the Glohm Hammer Bros patrolling the area, as we do not recommend facing them alone. |
| * |
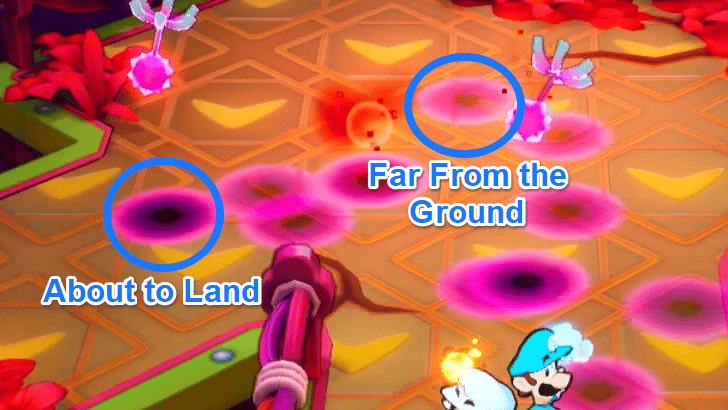 As the Glohm Seeds descend, the color of their shadow changes. When they are further from the ground, their shadow is a lighter color, and gets progressively darker as they near the ground. Pay attention to this and time your movements around the area to avoid getting hit! |
| 4 |
 Now with Luigi back in the party, make your way to the eastern side of the map while dodging the Glohm Seeds, and destroy the Glohm Flower using the Bros Bomb Bros. Move. Continue onward to the only doorway at the far eastern side of the area, where the brothers find themselves in the main area of the Lower Level. |
| * |
 Be sure to activate the Green Pipe Block by the entrance of the Lower Level's main area. This will create faster transit from the Lower Level to Soli-Tree's entrance. |
| 5 |
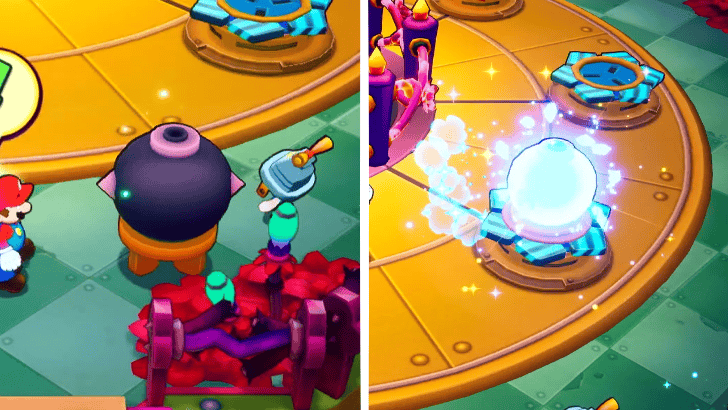 In the main area, there will be 7 locked gates, with 8 blue and red sockets around the floor that each correspond to an element. Pick up the first Bomb Plug available on the right side of the entryway, and place it on whichever socket you would like. Activate the Fire & Ice Bros. Move and use it to strike the Bomb Plugs according to their socket's color: press the X Button to hit red sockets with fire balls and the Y Button to strike blue sockets with ice balls. Once done, the gate to the northern doorway will open, allowing you to proceed through and face the trials inside. |
| 6 |
 Upon entering, an overview of the northern room will be shown and lead your sights to another Glohm Flower that spits out Glohm Seeds. Your objective will be to follow the straightforward path toward the Glohm Flower, destroy it with your Bro Bomb Bros. Move, and retrieve the Bomb Plug afterward. The obstacles preventing you from reaching the room’s goal include descending Glohm Seeds that knock out either brother upon contact, and enemies like Reclusiff, Weeping Trooper, and Glohm Palooka R, which roam the area. |
| * |
 The primary challenge in this room are the Glohm Seeds, which create a significant disadvantage by reducing your party to one member if touched. Given this, we recommend navigating the area while either in the Fire & Ice or Bro Ball Bros. Move form, which effectively allows Luigi to travel in sync with Mario, and lessens the probability of having either brother be touched by the seeds. |
| 7 |
 At the end of the path, instruct Luigi to hit the L Button by pressing the L Button on your controller to deploy a staircase. Afterward, proceed to the west and destroy the big Glohm Flower with the Bro Bomb Bros. Move, then use UFO Spin to fly across and retrieve the Bomb Plug. Ascend the staircase you deployed earlier and head back through the same doorway into the main area, and place the Bomb Plug you collected into any socket of your choice. Upon activating it, three gates to the west, east, and southeast will open. |
| 8 | 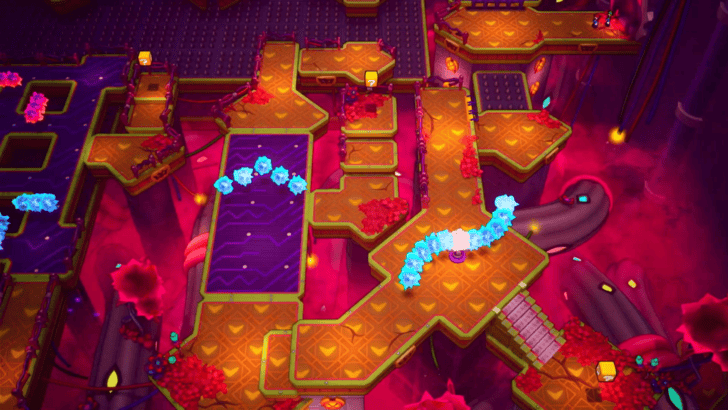 You may choose whichever doorway you would like to explore as the order in which you tackle them has no bearing, although we recommend passing through the western doorway first. Cross the gap using your UFO Spin Bros. Move, and enter through the open doorway. Upon entering, you will gain another overview of the area, which breaks down the obstacle course you will have to pass through in order to get the Bomb Plug. |
| 9 |
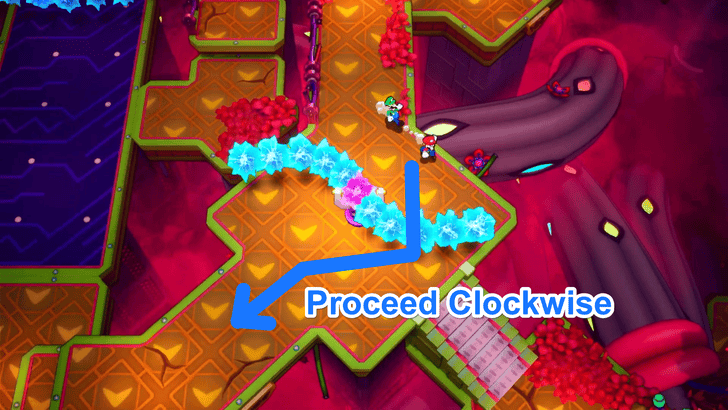 First, proceed south and cross the gap with your UFO Spin Bros. Move. On the first spinning electric balls, wait until a safe gap opens, then move in a clockwise direction until you reach the other side safely. |
| 10 |
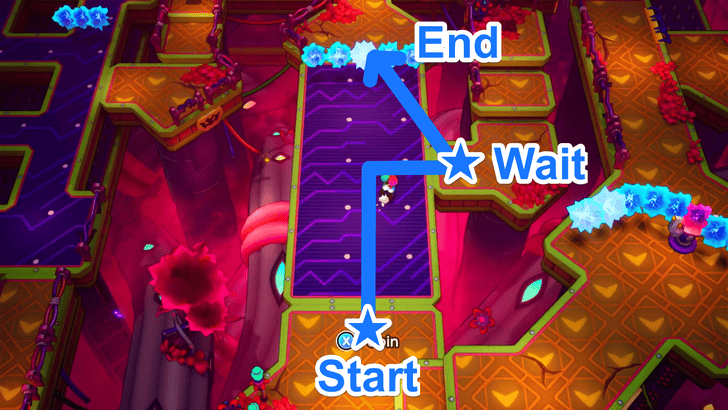 The next area features a row of electric balls moving back and forth on a blue track. When the balls pause at the upper section, seize the opportunity to dash to the safe zone on your right. Wait until the electricity moves downward, then quickly sprint forward to proceed to the next set of obstacles. |
| 11 |
 In this area, you will need to constantly be on the move with your UFO Spin Bros. Move active, and land on every platform to reach the other side. Align your movement with the concave side of the spinning electric balls’ arch to maintain a safe position, and adjust your pace as needed to stay in sync with the spinning electricity while avoiding being hit. |
| 12 |
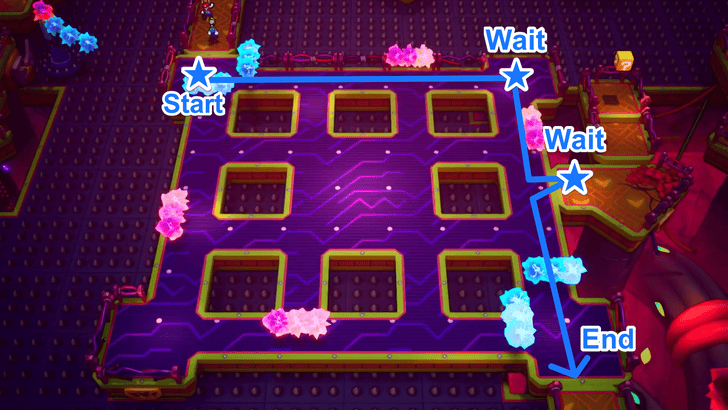 Proceed to the next area afterward, where you will be greeted by a square-shaped platform with moving clusters of electricity across the area. The blue beams moves slowly back and forth to cover the four corners of the square, while pink beams move rapidly across all four sides. Move to the upper right corner as the blue beams expand from it, and dodge the pink beams as they zoom across. Next, move to the middle-right platform as the blue beams expand away from the upper right corner, then move toward the lower-right corner to exit the area, as the blue beams move toward the upper-right corner. |
| 13 |
 The next area is split into two parts which require you to use your UFO Spin Bros. Move: the first part will be a repeat of the obstacle in step 11, so keep moving in sync with the spinning electricity's concave side to prevent getting hit. The second part will need you to cross two platforms as two beams of electricity spin clockwise in different intervals. Time your spins correctly when the beams are facing away to succesfully reach the other side. |
| 14 |
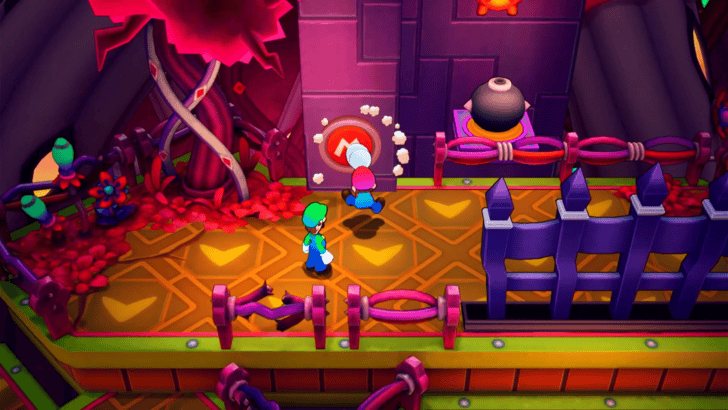 After landing safely on the large platform, hit the M Button as Mario with the X Button on your controller to activate the conveyor belt that delivers the Bomb Plug to the eastern side of the room. Follow its movements by crossing the final set of obstacles to get to the other side. |
| 15 |
 Use your UFO Spin Bros. Move to fly across the large gap. Make use of the raised fans to restore airtime and stay in flight while avoiding the beams of light that block your path, until you reach the other side. |
| 16 |
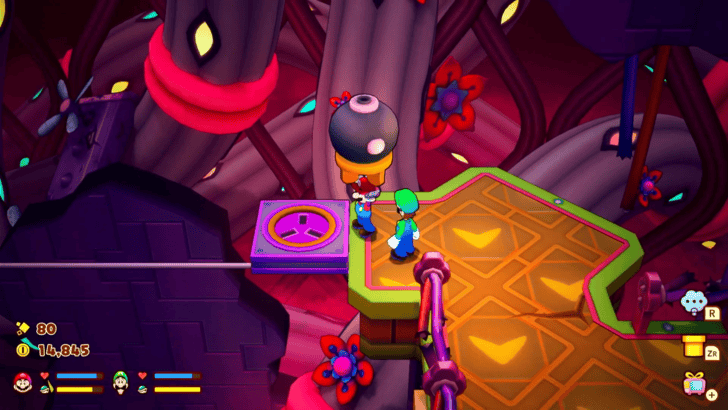 Collect the Bomb Plug from its container to unlock the gate leading back to the room’s entrance. Exit into the Lower Level’s main area and insert the Bomb Plug into a socket of your choice, then activate it with the matching element. You may now proceed to any room of your choice, but we recommend tackling the eastern room next. |
| 17 |
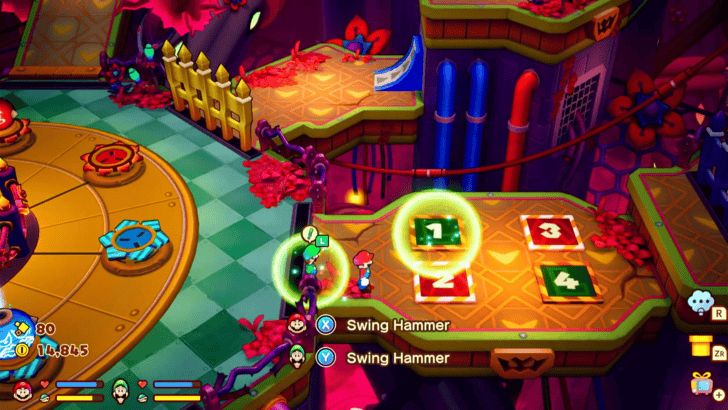 Unlock the inner gate to the eastern doorway by stepping on the numbered squares in sequential order, and by color. Instruct Luigi to step on the number 1, then as Mario, run to the numbers 3 and 4. The gate will unlock after Luigi steps on the number 4, allowing you to proceed into the room. |
| 18 |
 The goal in this room will be to step on all numbers 1 through 25 in sequential order to unlock the gate that keeps the Bomb Plug. However, make sure that either brother does not activate a number earlier than the intended sequence. For this puzzle, Mario is required to step on all even numbers, while Luigi steps on all odd numbers. The biggest challenge will be to plan your route faster than Luigi, as he automatically runs to the next button, which may cause him to activate them too early. To prevent this, always stay ahead of Luigi and move to the next red number immediately after activating the most recent one. |
| 19 |
 After successfully claiming the Bomb Plug, head back to the main area and insert it once more into a socket of your choice, then activate it with its designated element. Head into the southeastern room, and gain another overview of the challenges ahead. |
| 20 |
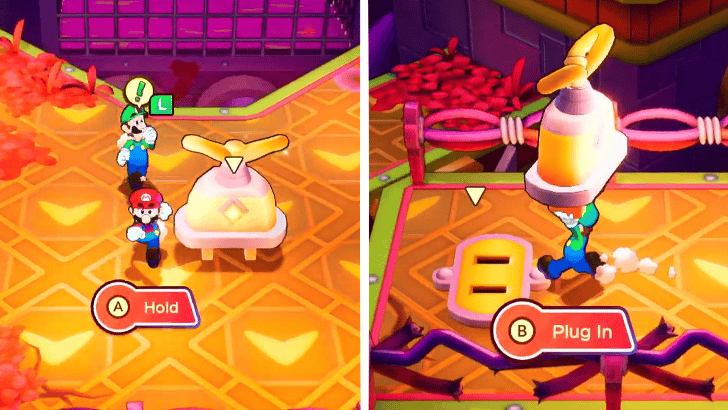 Similar to the northern room, the southeastern room features a straightforward path leading to the Bomb Plug, but it is heavily obstructed by descending Glohm Seeds, and enemies like Reclusiff, Weeping Trooper, and Seedlusa. Navigate safely toward the Power Plug at the southern part of the room, pick it up, and continue forward. Plug it into the socket at the end of the path to open a gate obstructing an M Button. |
| 21 |
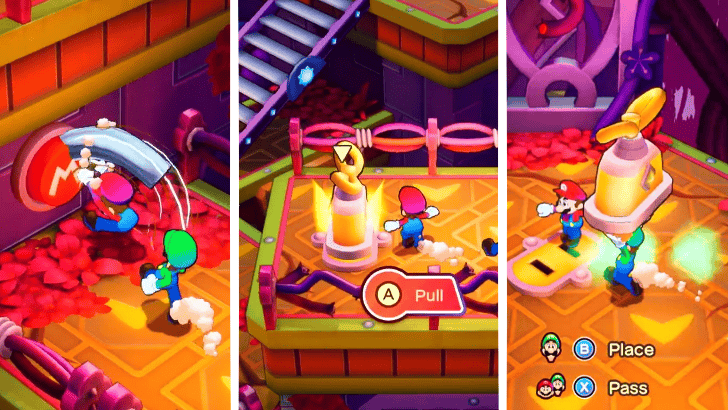 Hit the M Button with Mario to deploy a staircase, and maneuver back to the previous socket to retrieve your only Power Plug. Ascend the staircase you opened and continue forward. Insert the Power Plug into the socket at the end of the path to unlock the gate leading into the next area, and the room's entrance. |
| 22 |
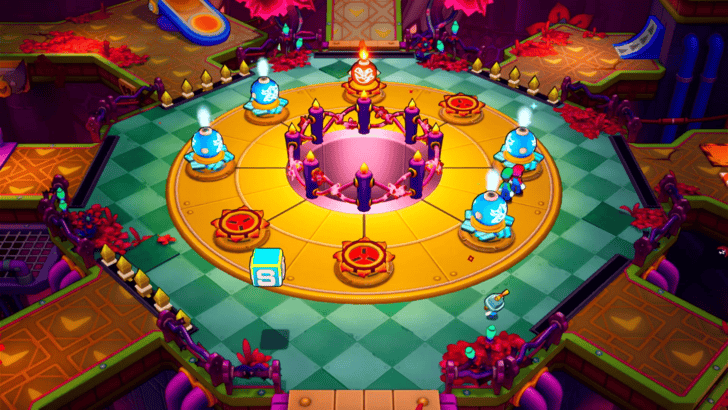 Collect the Bomb Plug from the other side, and exit back into the main area. Place it in any socket available, activate it with the corresponding element, and watch as the southwestern, northwestern, and northeastern gates open. |
| 23 |
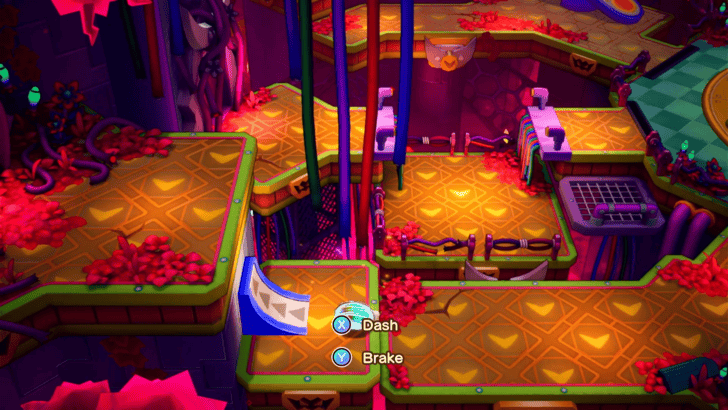 Once more, you may enter all rooms in the order of your choice, though we recommend starting with the southwestern room. Perform a Ball Blitz Bros. Move by holding and releasing the X Button to reach the high platform, and proceed toward the doorway. |
| 24 |
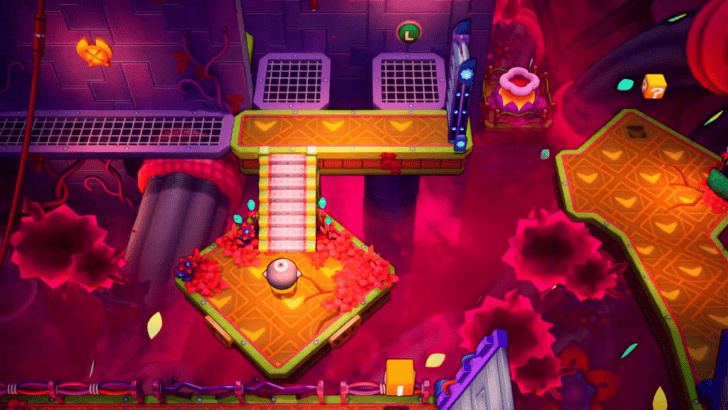 An overview of the area reveals another room filled with descending Glohm Seeds, and a familiar parade of enemies: Weeping Trooper, Seedlusa, and Glohm Foopfly R. Your main goal in this room would be to retrieve the Bomb Plug and destroy the Glohm Flower at the western side of the room to exit. |
| 25 |
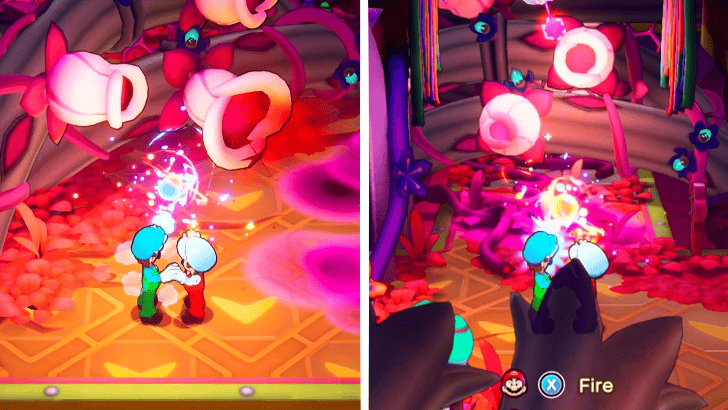 Head south and keep moving forward until you see an entanglement of vines with Glohm Flowers. Destroy it with your Bro Bomb Bros. Move, destroy the next Glohm Flower wall using the same move, and proceed forward. Do note that bigger Glohm Seeds will cascade onto the floor, so always stay cautious when maneuvering around the area! |
| 26 |
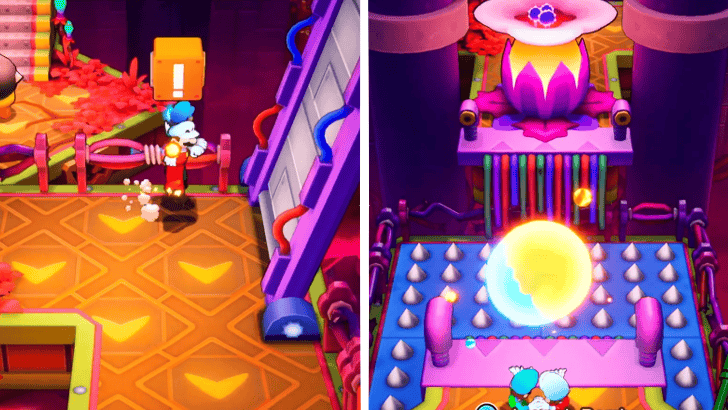 Activate the Orange Exclamation Block in front of the raised bridge to lower it for later, and proceed south. Keep going forward until you are face to face with the big Glohm Flower, and destroy it with your Bros Bomb Bros. Move, then use UFO Spin to cross to the other side. |
| 27 |
 Move forward and collect the Bomb Plug at the end of your path, then hit the L Button as Luigi to lower the staircase leading back to the room's entrance. Exit the room and insert the Bomb Plug into any socket of your choice, activate it using the correct element, then proceed to the northeastern room. |
| 28 |
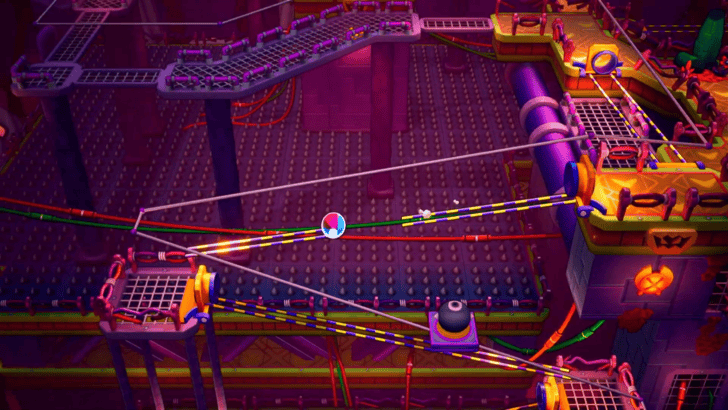 Use your Blitz Ball Bros. Move twice to dash upward to the highest platform, and enter the room. The challenge in this area is very straightforward: reach the end of the track within the same time as the Bomb Plug as it travels through the conveyor, and collect it once it reaches its stop. Be sure to keep using your Blitz Ball Bros. Move to catch up with the Bomb Plug as it moves, as it will only stay in its stop for a few seconds before restarting its position to the start of the track. After successfully retrieving the Bomb Plug, head back to the main area and insert it into any socket, then activate it via its corresponding element. Afterward, make your way to the northwestern room. |
| 29 |
 Through the northwestern gate, instruct Luigi to stand on one end of the seesaw by pressing the L Button, then activate the Orange Exclamation Block to open a smaller gate. Reunite with Luigi and ascend toward the doorway on the highest platform. |
| 30 | An overview of the room reveals a series of seesaws leading up to the Bomb Plug placed on a high pillar within the room. The goal will be to interact with all of the Exclamation Blocks within the room to lower the Bomb Plug from its pedestal by traversing platforms via the seesaws in the room. |
| 31 |
 In the first set of seesaws, allow Luigi to stand on the right side of seesaw 1. Jump onto the platform and align yourself over seesaw 2. Instruct Luigi to stand on the right of seesaw 2, then jump down to propel him upward on a floating platform. As Luigi, press the B Button to activate the Pink Exclamation Block to lower the Bomb Plug one level from its original position, and open the gate to the next area. |
| 32 |
 In the next location, head toward the M Button next to the seesaw, and hammer it as Mario to activate a bunch of moving platforms. Instruct Luigi to stand on the left side of the seesaw, ride the moving platforms up, jump down the gap, and hammer another M Button to activate an ascending platform. Jump down on the side of the seesaw opposite of Luigi to boost him across the gate, and activate the Orange Exclamation Block to unlock the gate. Proceed up the staircase on the southeast and activate the Pink Exclamation Block at the end of the path to lower the Bomb Plug another level. |
| * |
 Optionally, you can proceed west from the opened gate and uproot the turnips planted. If you destroy the crates further to your left, it will lead you into a secret room filled with 8 Grampy Turnips! ▶︎ All 18 Grampy Turnip Locations |
| 33 | Continue up the staircase leading north, and head to your left. Instruct Luigi to stand on the orange button on the floor to hold the gate open, and proceed forward. Ride the moving platform to the upper level, where multiple seesaws await. |
| 34 |
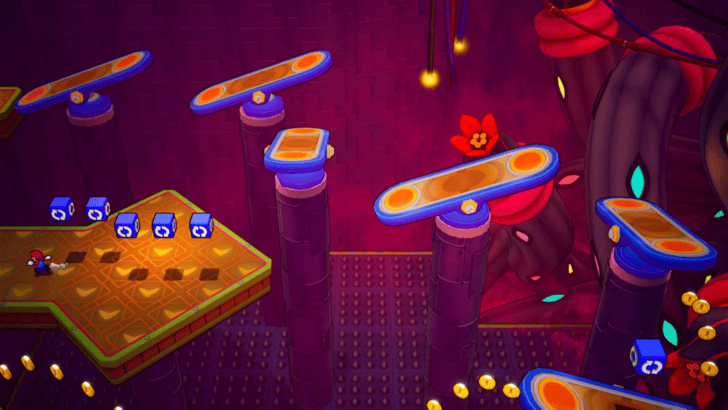 Activate each Blue Rotate Cube to position all 5 seesaws until it looks like the image shown above. Use them as a path to guide you to the 6th seesaw and collect coins along the way. |
| 35 |
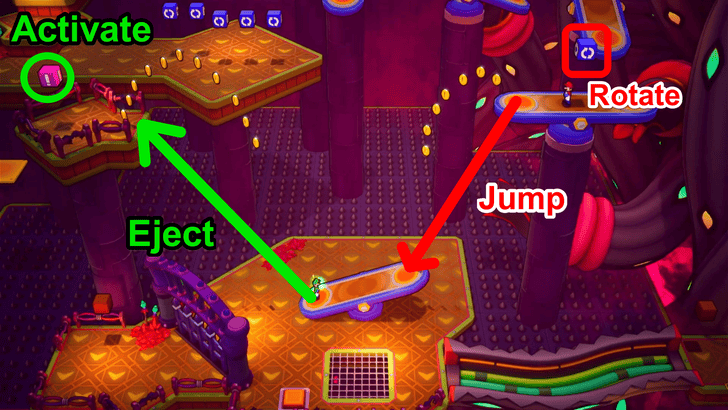 On the 6th seesaw, instruct Luigi to stand on one end of the seesaw below, and activate the Blue Rotate Block to position him on the left, opposite to where Mario is facing. Jump down to propel Luigi upward on a raised platform, and activate the Pink Exclamation Block by pressing the B Button to lower the Bomb Plug another level. |
| 36 |
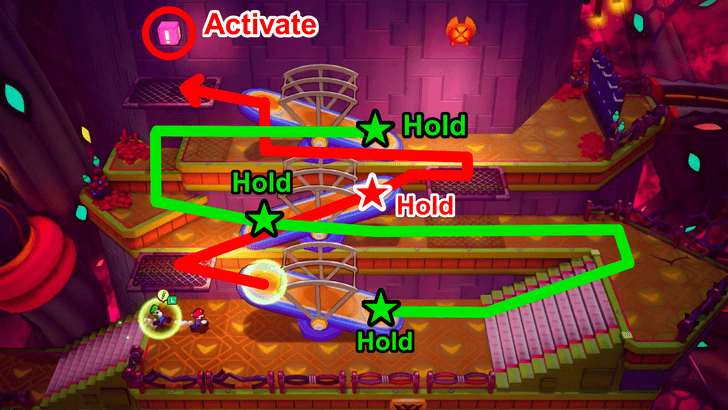 Exit the area and pass through an archway to your right to reach the next set of seesaws. Place Mario and Luigi accordingly, allowing both of them to balance every seesaw until Mario reaches the Pink Exclamation Point Block. Upon activating it, a gate leading east opens, and the Bomb Plug goes down a level once more. |
| 37 |  Proceed through the newly opened gateway. There is a hidden room to the right containing a lot of coins and Item Blocks if you want to make a short detour. Once you’re ready to proceed, use your Blitz Ball Bros. Move on the ramps thrice until you reach the upper level. Once there, activate the Green Pipe Block to create an easier route from your location and the entrance of the room. |
| 38 | 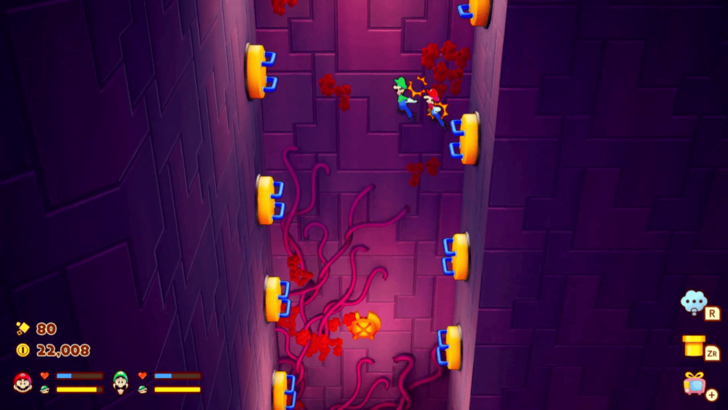 On the last seesaw, take Luigi to the back of the room where you can see bars mounted on the wall. Climb upward in an alternating motion by pressing the A and B Buttons as you ascend. |
| 39 |  Once at the top, instruct Luigi to stand on one side of the seesaw below, rotating him if necessary to make sure that he’s on the top side of the seesaw, then jump down to send him flying onto an upper platform. Have Luigi activate the Pink Exclamation Button to completely lower the Bomb Plug. Use the Green Pipe you activated earlier to travel to the Seesaw Area Entry. |
| 40 |  Claim the last Bomb Plug from its location, and exit the room. Insert it into the last available socket in the main area, and activate it with the corresponding element using the Fire and Ice Bros. Move. Once that is done, an elevator will spawn in the middle of the activated Bomb Plugs and allow you to access the Middle Level. |
| 41 | Once you arrive, proceed forward to view a cutscene where Connie finds Miss Cozette, and the brothers proceed forward on their own to stop Reclusa by themselves. Although as they press on, it seems as though they are transported to a different location with lush environs. |
| 42 | 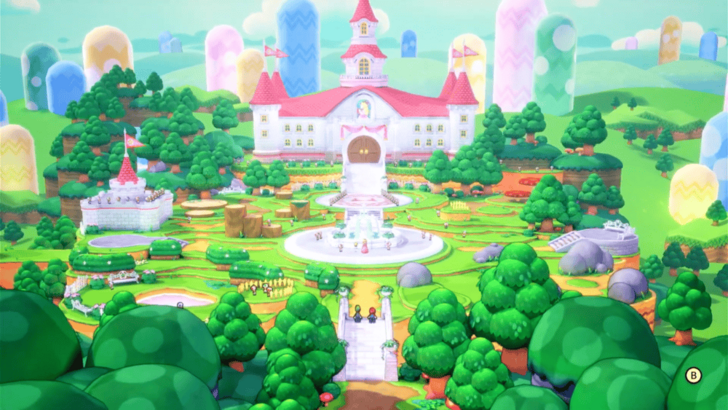 Proceed the new area and move forward to discover that the brothers have been transported back to the Mushroom Kingdom! Speak with Princess Peach by the fountain, where she and the toads will greet Mario and Luigi upon their return. You are free to explore the area as you please, and gain the chance to collect a lot of coins, then speak with the princess once more by the castle's entrance. |
| 43 | 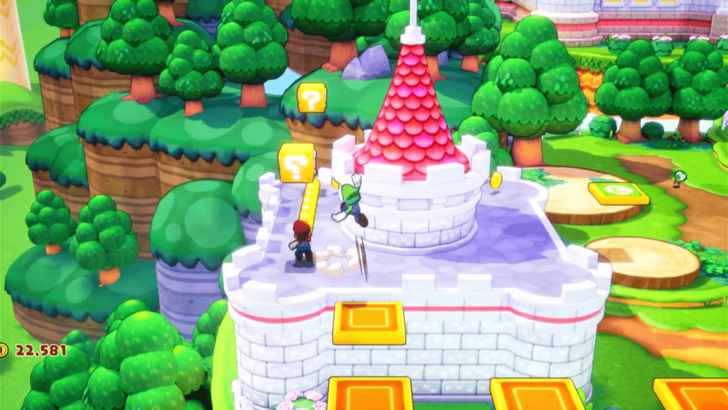 Past the castle entrance, the princess prepares a small course for you to complete. Humor her by playing through the course, though stop to activate a strange Question Mark Block. Upon doing so, the block convulses and opens up a smoke of Glohm. Regardless, press on and activate the Orange Exclamation Block at the end of the course. |
| 44 | 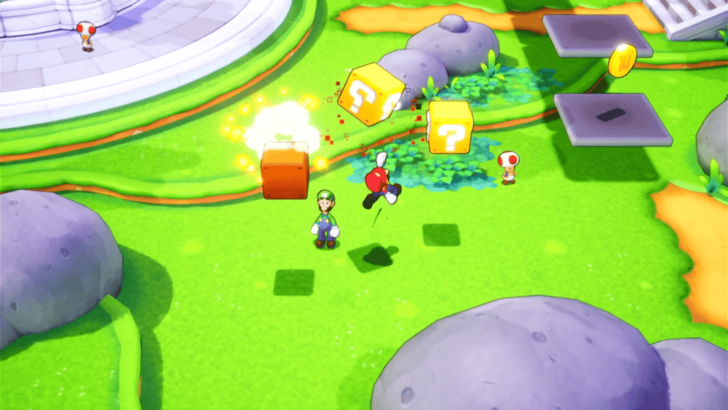 Afterward, the princess assigns another course for you to complete. Once more, progress through the course and collect all coins, but activate another strange Question Mark Block. It will topple over and convulse, convulse, revealing Reclusa who flies off upon being discovered. Complete the course anyway, and activate the Orange Exclamation Block at the end. After returning to the Princess and being praised once more, the gates to the castle behind her open, urging you to pass through them. |
| 45 | Going through the gates teleports you back to the Mushroom Kingdom's entrance, though this time, there seems to be a party involving Bowser in attendance! Lakitu flies into the scene with a camera that live broadcasts the event, which appears on a small playback feed at the upper right side of the screen. |
| 46 | 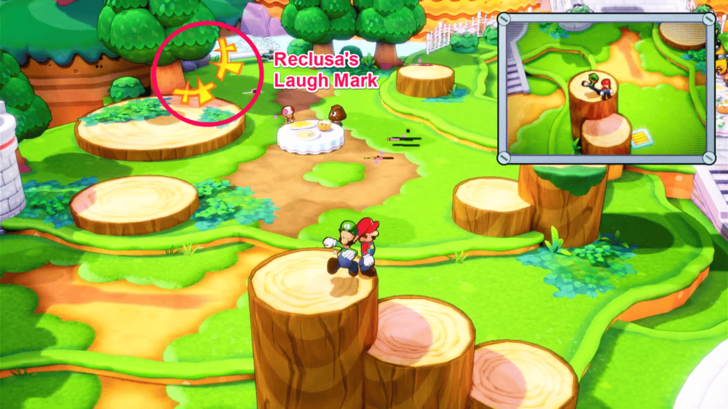 Find a way out of the uncanny domain by chasing Reclusa around. Follow the orange laugh marks as they appear on screen, and monitor his movements through the video playback feed on the upper right side of your screen. Use the invisible platforms revealed by the video playback, and maneuver over them until you reach the castle's balcony where you can find another strange Question Mark Block. Activate it to reveal Reclusa who flees west of the area after being discovered. |
| 47 | 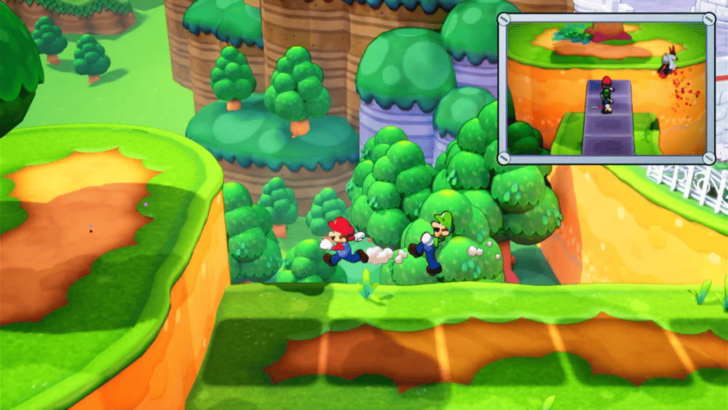 Head west of the Mushroom Kingdom and follow the orange laugh marks where they appear. Cross the invisible platforms toward the big tree, and activate another strange Question Mark Block to reveal Reclusa yet again! Much like clockwork, he flees northeast of the Kingdom. |
| 48 | 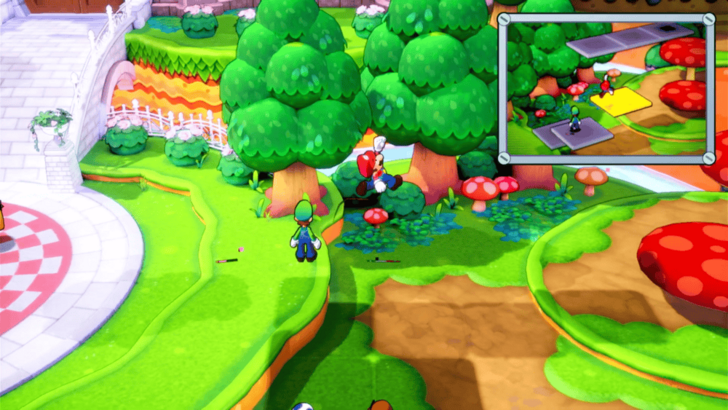 Head east from the plaza, and jump on the invisible platforms as they are revealed on the upper right corner of your screen. Activate the strange Question Mark Block at the end of the path to uncover Reclusa who finally flees toward the castle gates. Follow him there to be transported back into the Mushroom Kingdom. |
| 49 | 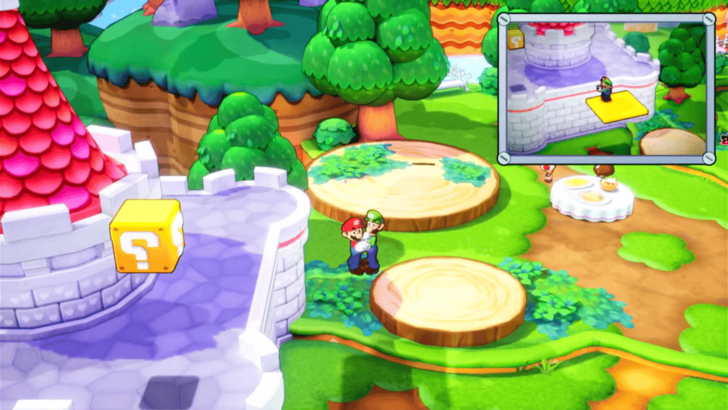 Follow the orange laugh mark toward the small castle to the west of the Kingdom, and use the invisible platforms shown in the video playback to reach its rooftop and activate the strange Question Mark Block there. Once again, discover Reclusa who flees northwest of the Kingdom. |
| 50 | 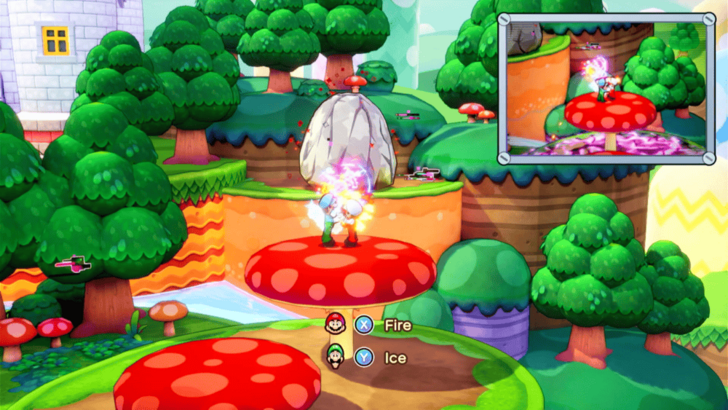 Monitor his movements, track his orange laugh marks to the east of the Kingdom, and follow him via the invisible platforms. Although, be careful this time as falling from the platforms will plunge you into a glohm pool below, and reset your position. Follow Reclusa to the end of the path where he hides himself under a boulder. use your Bro Bomb Bros. Move to destroy the large stone, finally reveal Reclusa for the final time, and watch as he flees into the castle after a small fit. Follow him there to put an end to this madness! |
| 51 | A few cutscenes will play in succession after which, Mario and Luigi successfully liberate themselves from the clutches of Reclusa's twisted illusion. Now back at the middle level of Soli-Tree, be sure to use the Save Block to your left before proceeding forward. |
| 52 | 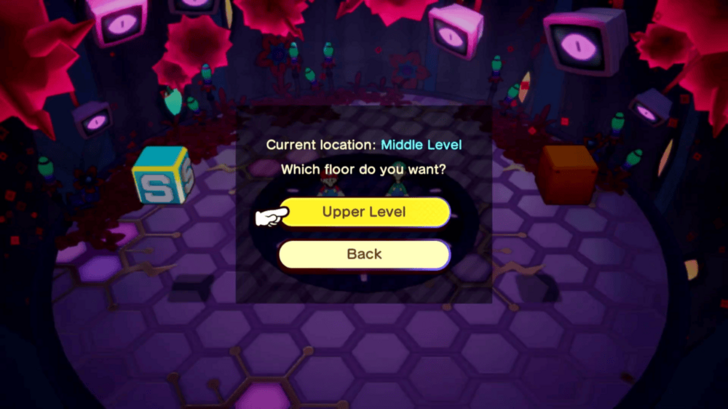 Ride the elevator to the Upper Level where you will be greeted by a horde of Reclusa's minions, and Reclusa himself. Several battles will commence, starting with a group of Seedlusa, then a Reclusiff, until the brothers are overwhelmed with enemies. Luckily, Bowser comes to the rescue and bombs all of the enemies harming Mario and Luigi. |
| 53 | Continue forward to the end of the Upper Level where you can find a Green Pipe Block that when activated, erects a Green Pipe from the Upper Level all the way to the Entrance. Also make use of the Save Block and Recovery Block posted beside the Green Pipe, as the toughest battle awaits! |
| 54 |
 Going past the archway will automatically initiate a long and arduous battle with Reclusa, so be sure you are geared up and prepared for this ultimate showdown! ★ Battle Tip! Beating Reclusa Reclusa has a total of three phases you will need to knock down. The first phase will have you speed down a track, dodging attacks and dishing some of your own against Reclusa. Hit him the hardest with your Bros. Attacks while he is stunned, and whittle down his health continuously. After his first form is defeated, he retreats into the Soli-Tree and turns into Weeping Reclusa with a different set of attacks. He will spawn Doom Blooms from the ground during this fight which you can pommel using AoE Bros. Attacks until they perish. Keep repeating this cycle until the brothers ride the Giant Plug once again. Upon reaching the top, you will be met with the Weeping Core, Reclusa's third, and final phase. Make sure to never use the same Bros. Attack thrice, and equip the Waitaminit Battle Plug on the brother with the strongest Power to ensure maximized damage output. ▶︎ How to Beat Reclusa |
| 55 |
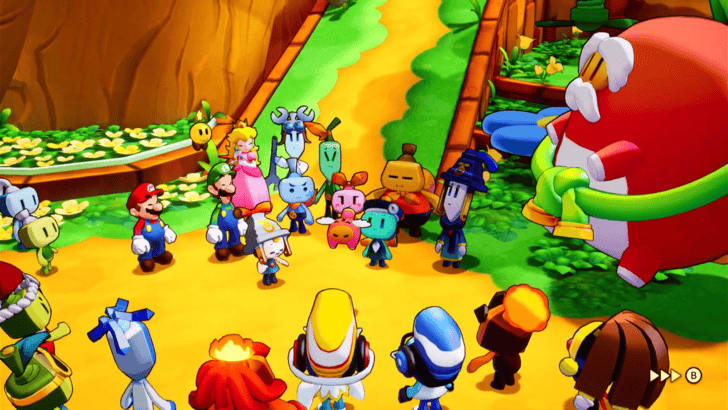 Several cutscenes will play upon Reclusa's defeat, where peace is restored to Concordia and Glohm is eradicated from the world. The brothers return with Connie and Cozzette to Shipshape Island where they are met with fanfare from all its residents. You may speak with everyone present and tie any loose ends, then sail to the center of the world to put this heartfelt tale of bonds, camaraderie, and Brothership to a close. |
Soli-Tree Puzzles
How to Open the Locked Gates
Place the Spherical Plug on the Pedestal and Activate with Fire and Ice Bros. Move

Once you reach the first save point inside the dungeon, you will find branching pathways that are locked behind gates.
To open one of these gates, pick up the black spherical plug and place it on one of the pedestals. If you placed it on the blue pedestal, use Luigi's ice ball to activate it. On the other hand, placing it on the red pedestal requires you to use Mario's fire ball.
Bosses in Soli-Tree
Reclusa
| Enemy | Details |
|---|---|
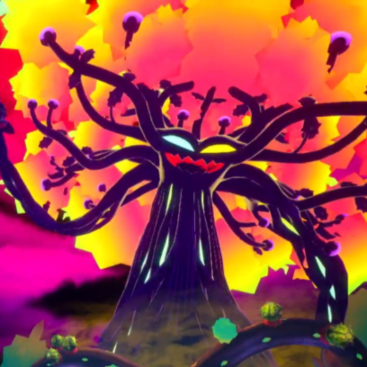 Reclusa Reclusa
|
First Encounter Level and Location: ・Level 45 ・Soli-Tree Best Option to Attack With: Jump |
Reclusa is the boss you will face at the end of Soli-Tree and is the final boss of the game.
Enemies in Soli-Tree
All Enemies Found in Soli-Tree
| Enemy | Enemy Tips |
|---|---|
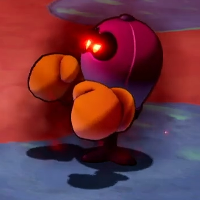 Glohm Palooka Glohm Palooka
|
During Palooka's attack where it gets in front of either Mario or Luigi, make sure to keep spamming your counterattack until it gets dazed and stops its attack. |
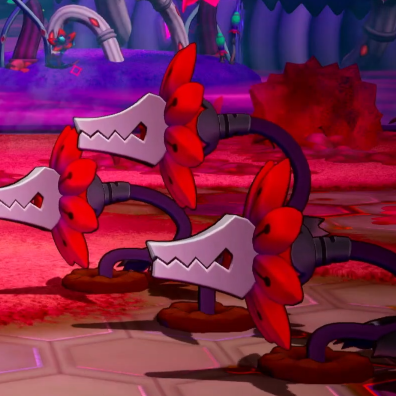 Doom Bloom Doom Bloom
|
Pay attention to all of Doom Bloom's pre-attack signals and dodge its attacks as it happens. All of its attacks can be countered, so take advantage of the ability to damage it through that. |
 Glohm Hammer Bro Glohm Hammer Bro
|
Glohm Hammer Bro will always get a POW and DEF debuff after attacking, so take advantage of this and initiate Bros. Attacks that can deal significant amounts of damage. |
 Weeping Trooper Weeping Trooper
|
Pay attention to the type of hands that Weeping Trooper has, as this determines what attack it does next. It will only cycle between three types of hands: amp jacks, two prongs, and electric rings. |
 Reclusiff Reclusiff
|
Only Jump attacks will work on Reclusiff as it hovers, though all of its attacks can be countered when timed properly. |
 Seedlusa Seedlusa
|
If undefeated in its seedling state, it will burrow itself on the ground and turn into a big flower. Make sure to eliminate it before that happens. |
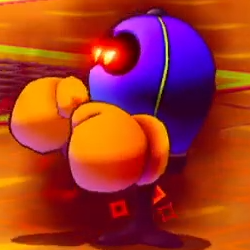 Glohm Palooka R Glohm Palooka R
|
When Glohm Palooka R winds up its attack, be careful not to press the A or B button too fast, as this may actually hinder your counter attack. Instead, you would want to rhythmically hold and release your hammer strike as fast as you can in order to deal enough damage and stop Glohm Palooka R. |
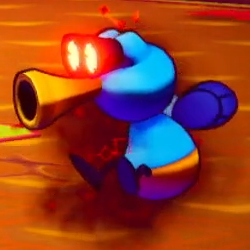 Glohm Foopfly R Glohm Foopfly R
|
Glohm Foopfly R's attacks will be faster than the regular Foopflys you have encountered thus far, so be sure to pay attention to its next attacks, and counterattack where possible. |
Soli-Tree Shops
No Item and Gear Shops
There are no item and gear shops in Soli-Tree. Make sure stock up on healing items and finalize your gear in Shipshape Island first before entering this island.
Mario and Luigi: Brothership Related Guides

List of All Islands and Islets
All Islands
| Lushgreen Sea Islands | |
|---|---|
| Great Lighthouse Island (Lushgreen Sea) | Rumbla Island |
| Twistee Island | Raynforst Island |
| Florall Island | |
| Color-Full Sea Islands | |
| Great Lighthouse Island (Color-Full Sea) | Desolatt Island |
| Merrygo Island | Lottacoins Island |
| Allsand Island | |
| Brrrning Sea Islands | |
| Great Lighthouse Island (Brrrning Sea) | Bulbfish Island |
| Heatfreeze Island | Skorcheen Island |
| Slippenglide Island | |
| Gulchrock Sea Islands | |
| Great Lighthouse Island (Gulchrock Sea) | Offandon Island |
| Wayaway Island | |
| Stormstar Sea Islands | |
| Conductor Island | Jellyfish Island |
| Fortress Zokket | Soli-Tree |
Author
Soli-Tree Walkthrough Guide
improvement survey
03/2026
improving Game8's site?

Your answers will help us to improve our website.
Note: Please be sure not to enter any kind of personal information into your response.

We hope you continue to make use of Game8.
Rankings
- We could not find the message board you were looking for.
Gaming News
Popular Games

Genshin Impact Walkthrough & Guides Wiki

Honkai: Star Rail Walkthrough & Guides Wiki

Umamusume: Pretty Derby Walkthrough & Guides Wiki

Pokemon Pokopia Walkthrough & Guides Wiki

Resident Evil Requiem (RE9) Walkthrough & Guides Wiki

Monster Hunter Wilds Walkthrough & Guides Wiki

Wuthering Waves Walkthrough & Guides Wiki

Arknights: Endfield Walkthrough & Guides Wiki

Pokemon FireRed and LeafGreen (FRLG) Walkthrough & Guides Wiki

Pokemon TCG Pocket (PTCGP) Strategies & Guides Wiki
Recommended Games

Diablo 4: Vessel of Hatred Walkthrough & Guides Wiki

Fire Emblem Heroes (FEH) Walkthrough & Guides Wiki

Yu-Gi-Oh! Master Duel Walkthrough & Guides Wiki

Super Smash Bros. Ultimate Walkthrough & Guides Wiki

Pokemon Brilliant Diamond and Shining Pearl (BDSP) Walkthrough & Guides Wiki

Elden Ring Shadow of the Erdtree Walkthrough & Guides Wiki

Monster Hunter World Walkthrough & Guides Wiki

The Legend of Zelda: Tears of the Kingdom Walkthrough & Guides Wiki

Persona 3 Reload Walkthrough & Guides Wiki

Cyberpunk 2077: Ultimate Edition Walkthrough & Guides Wiki
All rights reserved
© Nintendo. Games are property of their respective owners.
The copyrights of videos of games used in our content and other intellectual property rights belong to the provider of the game.
The contents we provide on this site were created personally by members of the Game8 editorial department.
We refuse the right to reuse or repost content taken without our permission such as data or images to other sites.





![Everwind Review [Early Access] | The Shaky First Step to A Very Long Journey](https://img.game8.co/4440226/ab079b1153298a042633dd1ef51e878e.png/thumb)

![Monster Hunter Stories 3 Review [First Impressions] | Simply Rejuvenating](https://img.game8.co/4438641/2a31b7702bd70e78ec8efd24661dacda.jpeg/thumb)


Title screen tip; when you are in the soli-tree, the title screen: A shows the soli-tree instead of the connected islands and B Reclusa will pop out of the screen, once from the right, then from the left and finally filling the screen in a jump scare from the bottom!