Story Walkthrough
★ Mario & Luigi: Brothership out now!
★ How to Unlock and Complete Every Challenge!
★ Pull off strong Bros. Attacks for maximum damage!
★ Best Gear | Best Battle Plugs | Rank-Up Bonuses
★ Power up with Best Battle Plug Combos.
★ Share your Hammer Rally high scores!
A walkthrough for the main story of Mario and Luigi: Brothership. Let us guide you through the main quests on your journey to reunite Concordia.
List of Contents
Lushgreen Sea Walkthrough
Prologue
| # | Step by Step Objectives |
|---|---|
| 1 | You'll start by controlling Mario. Move with the left analog stick and Jump with the A button. Explore the island north to come across your first battle encounter. |
| 2 | Learn the basics of combat by jumping on the Seedle's head with timed presses of the A button to deal damage. Also learn to dodge and counter by jumping at the right time. |
| 3 |
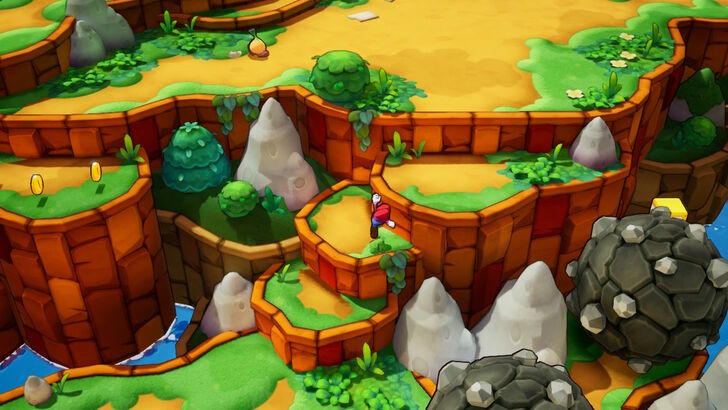 Continue to head east, jumping across gaps until a cutscene plays. You'll see visions of Luigi up ahead. Jump up the ledges north and make your way towards where you saw him. |
| 4 | Once you reach the northern tip of the islet, you'll spot Shipshape Island, a half-boat half-island vessel where Luigi is on board. After a short cutscene, you'll be reunited with Luigi and the adventure will start for real! |
Shipshape Island
| # | Step by Step Objectives |
|---|---|
| 1 |
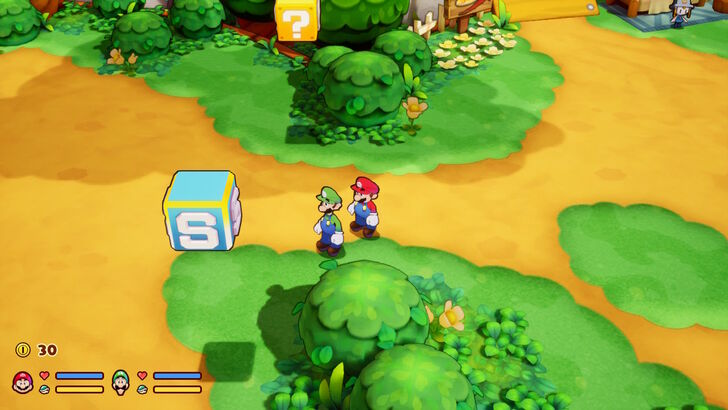 Head to the center of Shipshape Island to meet Connie and Snoutlet who will ask for the brothers' help on their journey to restore Concordia. After the brief dialogue, you can head west to find a Save Block for you to save the game. ▶︎ How to Save |
| 2 |
Follow the path north where Snoutlet was headed to learn about the basics of exploring the world. You'll also gain access to the different menus of the game, such as the Challenges, a list of in-game achievements that you can strive for to earn rewards. |
| * |
One of the Challenges is the Do It Yourself Challenge. It requires you to defeat 300 enemies without any equipment. If you're up to the challenge, we recommend taking off all your wear, gloves, and accessories now while you'll still deal with easier enemies, as it'll be harder to do this later on! ▶︎How to Unlock and Complete Every Challenge |
| 3 |
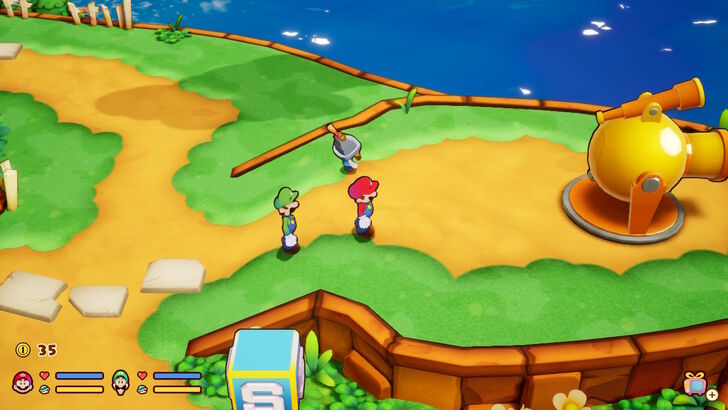 Continue east to find The Big Cannon, this large yellow contraption serves as both a lookout point, and a launch point as you explore different islands. Interact with the cannon to look for an Island to explore before launching yourself to it to start your adventure. First stop, Rumbla Island! |
Rumbla Island
| # | Step by Step Objectives |
|---|---|
| 1 |
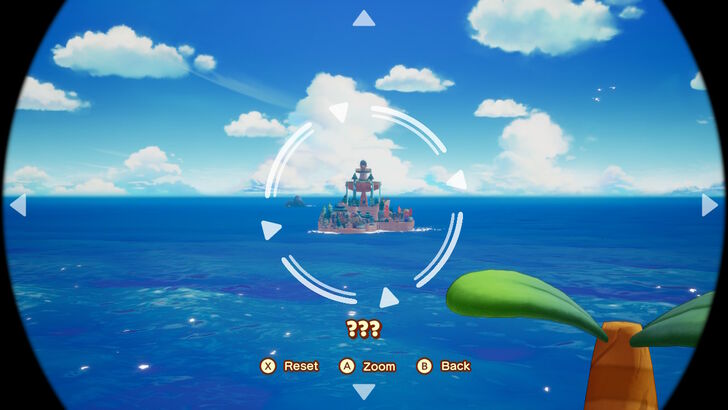 The core gameplay loop of Mario and Luigi: Brothership involves discovering new islands, exploring them to find their Lighthouse, and reconnecting it to Shipshape Island. Upon landing on Rumbla Island, you'll notice their lighthouse in the distance, precariously placed on a dish-shaped rock. After your conversation with the Rumbla local, make your way north to head to the lighthouse. ▶︎ How to Find Islands |
| * |
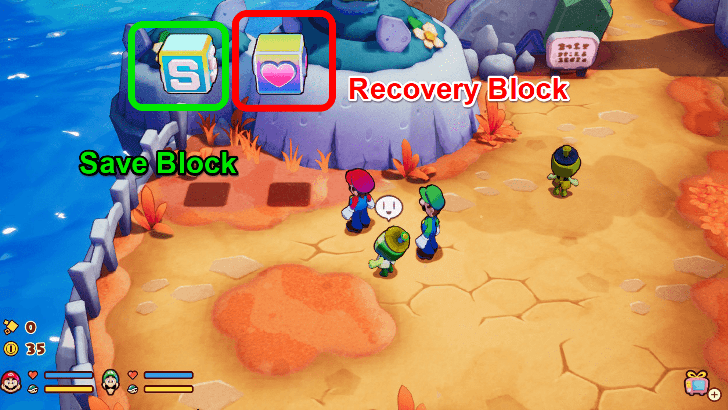 Take note of the Recovery Block on this shore. You may be at full health at the moment, but it will be important to return to these Recovery Blocks to restore HP and BP if you're having trouble with enemies. |
| 2 |
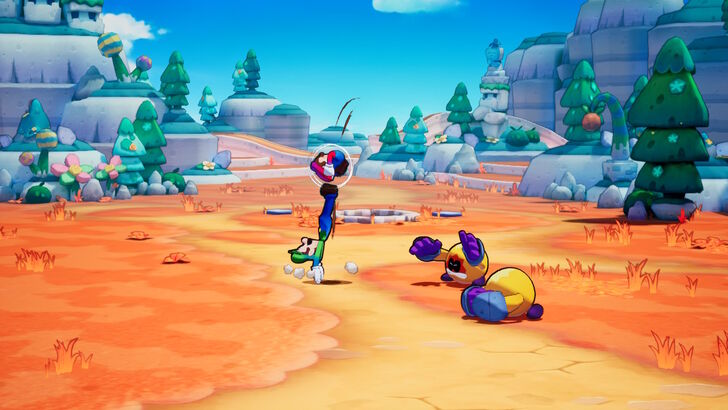 As you head north, you'll find some Guardarms bothering the locals. You'll engage in a battle and learn about Attack Combos and how to attack with Luigi. By pressing the action buttons for Mario and Luigi in sequence, you can execute an Attack Combo that will deal more damage than if you were to attack normally. Mastering Attack Combos is essential to excel in combat and to maximize your damage output. ▶︎ How to Do Attack Combos |
| * |
★ Battle Tip! Dealing with Guardarms On the offensive, Jump attacks will be servicable. Land your attack combos for maximum damage. On the defensive, you can dodge by jumping over them as they charge towards you. But if timed at the right moment, you can jump on their head to deal a counter blow! If you jump a bit too early, you'll land on their arms which will block any damage, and if you don't jump soon enough you'll probably get hit. ▶︎ Guardarm Dodge and Counter Strategies |
| 3 |
After defeating the Guardarms, the locals will thank you by gifting you with Mushrooms. These are one of the many consumable items that you can use in and out of battle. Mushrooms are used to recover a small amount of HP to either Mario or Luigi. ▶︎ List of Consumables |
| * |
 While you are bound to meet multiple NPCs, those with notable interactions will have a speech bubble above their heads. You'll find one nearby who frets over a withered Connectar Flower. These Connectar Flowers will remain withered until the island's lighthouse is reconnected with Shipshape Island. Return to them afterwards to gain access to new areas. |
| 4 |
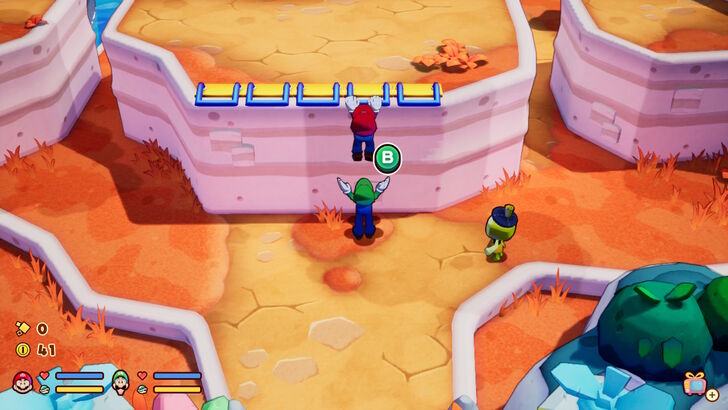 Continue north, to find some ledges that you'll need Luigi's help to climb. Once on the ledge, head west. |
| 5 |
You'll come across a lone Seedle who has not been alerted to your presence just yet. Jump on top of its head to learn about First Strikes which allow you to gain the upper hand before an encounter even starts.
▶︎ How to Do A First Strike |
| 6 |
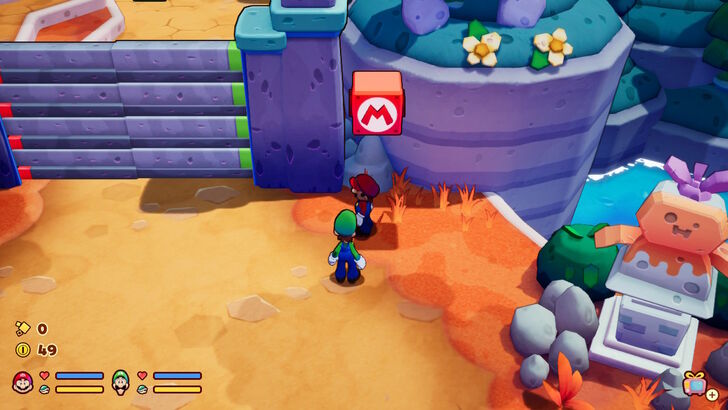 Continue along the path, jumping across ledges, picking up coins, hitting Question Blocks for small rewards, and getting used to the combat system by fighting the Seedles along your way until you come across a gate with a large red M block next to it. |
| 7 | Jump to hit the M Block with Mario, but this only opens up half of the bars of the gate. You'll find the L Block on the other side of the gate, but you'll need both to have free passage. What a pickle! |
| 8 |
The game will introduce the mechanic of Luigi Logic - short moments of brilliance from Luigi where he comes up with unique solutions. Press L to have Luigi leap between the gate's bars, and repeatedly press B as he squeezes through! Once he gets to the other side, he'll open up the rest of the gate to have both brothers reunite. |
| * |
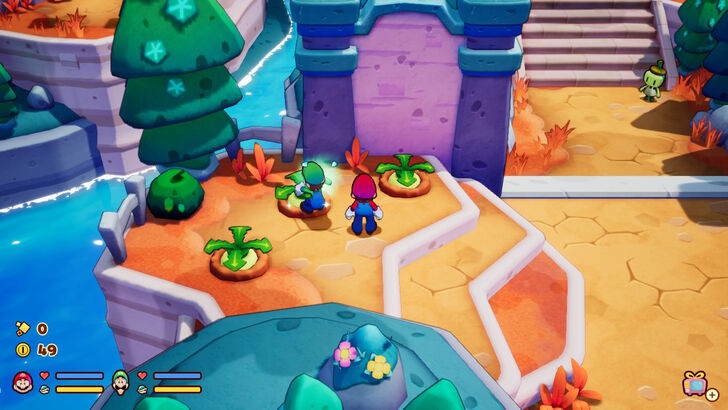 Commanding Luigi with L also frequently becomes an option, denoted by a green glow around his character. He'll eagerly help you collect Plug Radishes for coins, smash blocks, or chase after Spritebulbs. You can try this out with the nearby patch of Plug Radishes! |
| 9 |
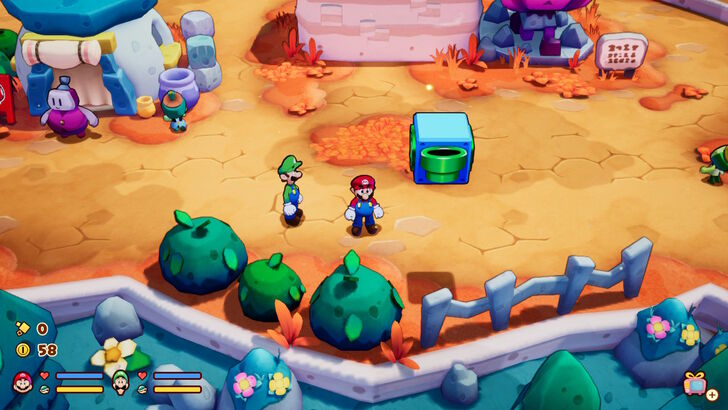 Continue north to arrive at Rumbla Island's Plaza. Here you'll find Item Shops to buy consumables, a Gear Shop with equipment for you to wear, and a Green Warp Pipe Block you can activate to create a shortcut back to the shore. We don't recommend buying anything for now, so that you can save up for something nicer, and if you're working on the Do It Yourself Challenge, you won't need any wear anyway. |
| 10 | Recover and Save at the nearby blocks before continuing even further north into the island. You'll again encounter more Guardarms terrorizing more locals. Take them out to get to know Willma. |
| 11 |
Willma is experiencing some back pain and would like some help getting home. Learn how to pick up objects to carry them around to their destinations. Carry Willma and her tool box back to her home just west of the area. |
| 12 |
Once you've gently set Willma down and placed her tool box on the nearby table, she'll open the path leading to the island's lighthouse. She'll also give you the Billdit Gloves and the Maykit Bangle. These gloves and accessories can be worn for additional stats and bonuses, in addition to your wear. If you are working towards the Do It Yourself Challenge, keep them unequipped for now. |
| 13 | Head towards the path that Willma has opened up for you. Ahead you'll find a trail of red and green coins. With Luigi's Logic, Mario and Luigi can collect the coins at the same time which you can treat as a fun little race. |
| 14 | At the end, there will also be a P Button that you can press that will spawn musical notes in a path. Collecting these notes in quick succession, without letting them despawn, will reward you with an item! In this case, you can receive Dirt-Cheap Wear. |
| 15 |
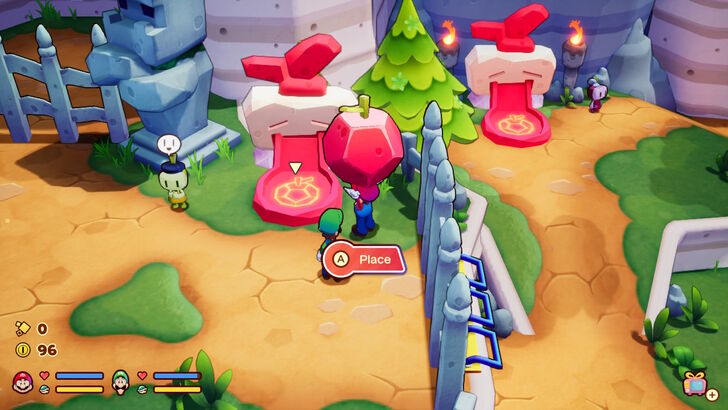 Jump up the next ledge, and you'll find the lighthouse looming before you. However, there's still yet another fence in your way. You'll have to carry the Apple Sculptures and place them onto their pedestals to create the path forward. The first of these Apple Sculptures will be just to the left of the fence, with its pedestal just to the right. You can even ask Luigi to carry and place it for you! Doing so will open the fence to the east section. |
| 16 |
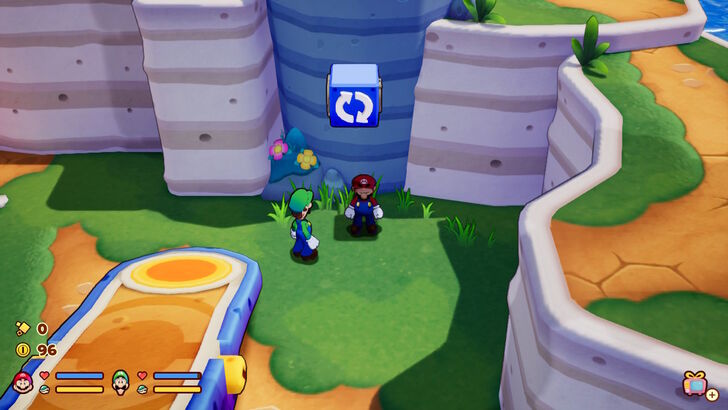 In the east section, you'll find a nearby blue block with two, white, spinning arrows on it, as well as a see-saw in the middle of the section. Hitting the Spin Block will cause the see-saw to rotate from a north-south orientation to a west-east orientation. This will inspire Luigi's Logic that allows you to command him to stay on one end of the see-saw, to keep it tipped at an angle. |
| 17 |
 With the see-saw in the west-east orientation, command Luigi to stand on the left side. This will let you run up and jump to the cliff to the east where this section's Apple Sculpture can be found. |
| 18 |
 Place the Apple Sculpture on the nearby pedestal to have some footholds appear on the right wall leading to the lighthouse. |
| * |
 This will launch Luigi onto the opposite ledge where he can grab a Nut from the nearby Question Block. |
| 19 |
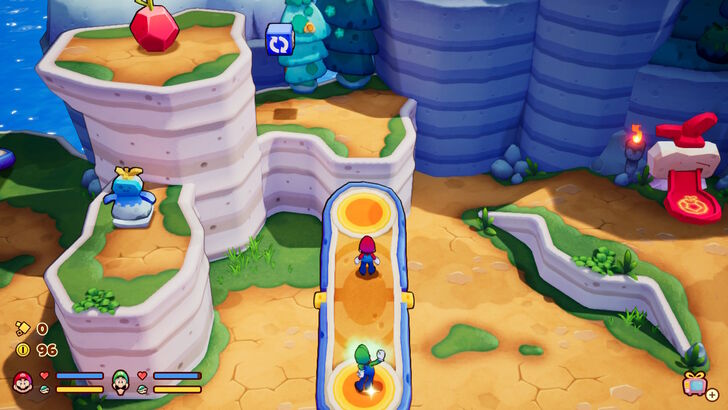 Once you're done with the section east of the lighthouse, head for the west section. You'll come across another see-saw in the north-south orientation. Have Luigi stand on the south end and Mario run up to the Spin Block. Jump to activate the Spin Block and rotate the see-saw into the east-west orientation. |
| 20 |
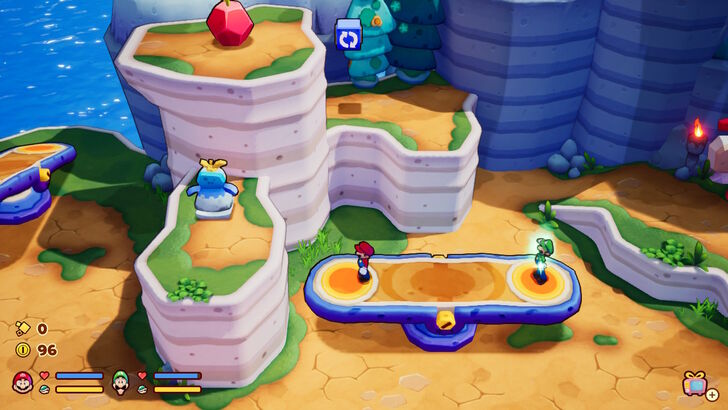 With this see-saw in the east-west orientation, have Luigi stand on the east end of the see saw. This will create a path for Mario to run up, jump to the left ledge, and carry the blue statue. |
| 21 | Have both brothers continue west, with Mario carrying the statue. You'll come across a second see-saw that is initially in the north-south orientation. Have Luigi stand on the north end of this see-saw. |
| 22 |
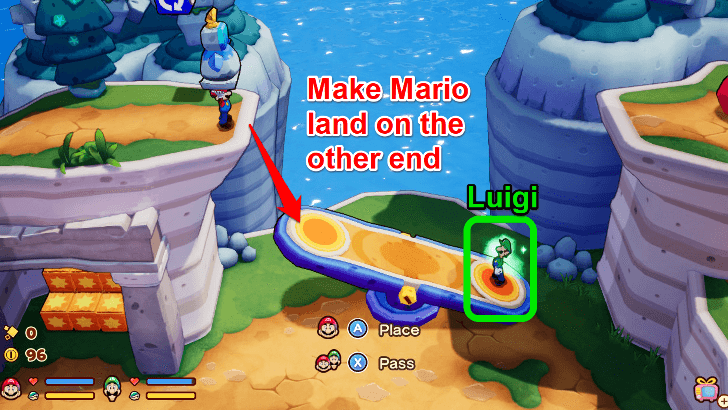 As Mario, carry the statue up the ramp to the left and follow the path to the top. Activate the Spin Block at the top of this cliff, to rotate the see-saw into the east-west orientation. Luigi should be standing on the east part of the see-saw, with the raised part closer to where Mario is. |
| 23 |
Carry the weight and drop onto the see-saw below. This will launch Luigi into the air. After a comically long wait, Luigi will land on the high ledge to the right, and will carry the last Apple Sculpture you need. |
| 24 |
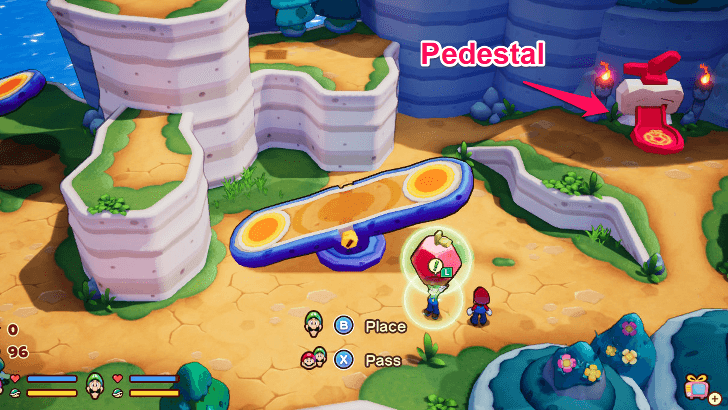 Return towards the lighthouse's fence with the Apple Sculpture in tow, and place it on the pedestal to have the remaining footholds appear on the left wall leading to the lighthouse. With both sets of footholds in place, the fence will open allowing you to continue onward. |
| 25 | As you approach the footholds, a group of four Guardarms will appear for battle. This is likely the biggest group you've had to contend with yet, so mind your timings and take them out. |
| 26 | With the enemies disposed of, make your ascent towards the lighthouse platform. Grab onto the lowest foothold, and press each brother's action button alternately to wall jump up. |
| 27 |
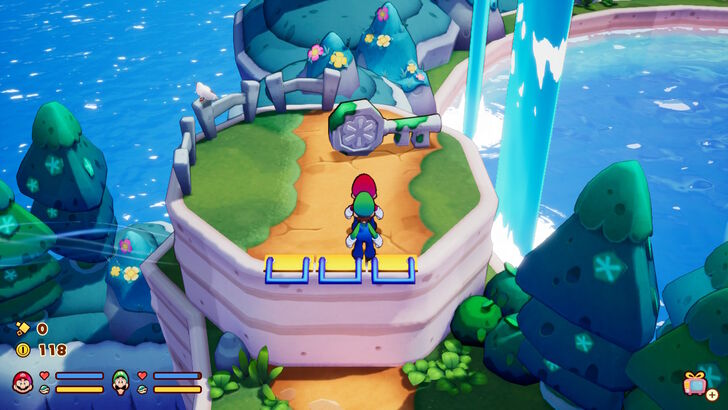 When you approach the lighthouse, you'll notice a keyhole. The key for it can be found on the ledges west. Climb up to pick it up for a cutscene to play. |
| 28 |
Once you regain control, climb up the steps and interact with the Lighthouse's Connectar Plug. This will trigger the island link that connects Rumbla Island back to Shipshape Island. Several cutscenes will play and you'll find yourself back on Shipshape Island. |
| * |
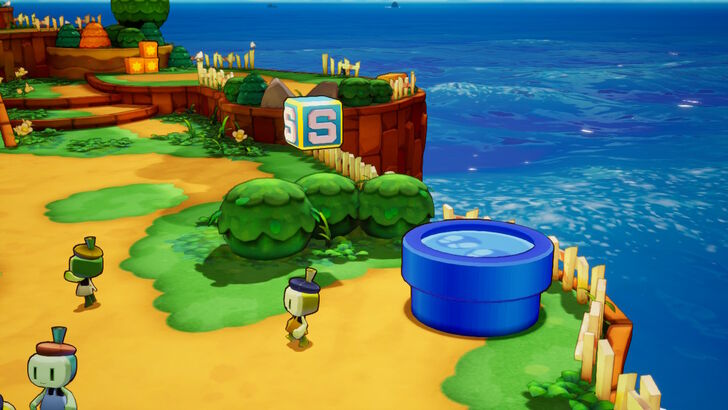 A pipe has appeared in Shipshape's Plaza. For every island you link to, you unlock a fast travel point to it that you can access from Shipshape Island. This will make it easier for you to return to islands you've visited before in case you want to explore newly opened up areas. ▶︎ Fast Travel Guide |
| 29 |
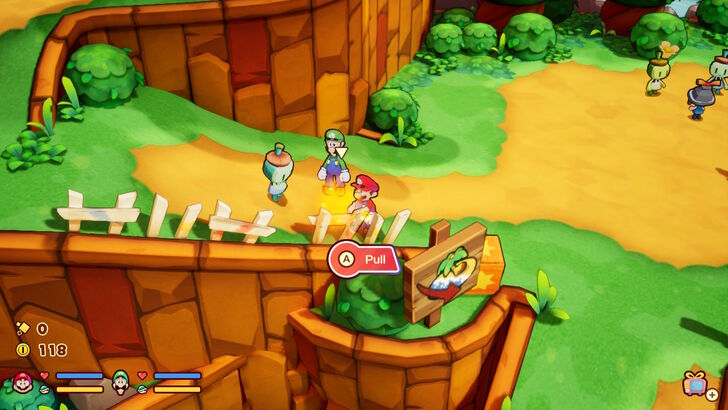 Head towards it, but not before noticing the Sprite Bulbs on the slope leading to the plaza. Collect these Sprite Bulbs to earn Lumenade. We recommend finding Sprite Bulbs and collecting Lumenade as you explore. These will later be used for creating Battle Plugs, helpful items for combat in the mid-to-late stages of the game. |
Linking Raynforst Island
| # | Step by Step Objectives |
|---|---|
| 1 |
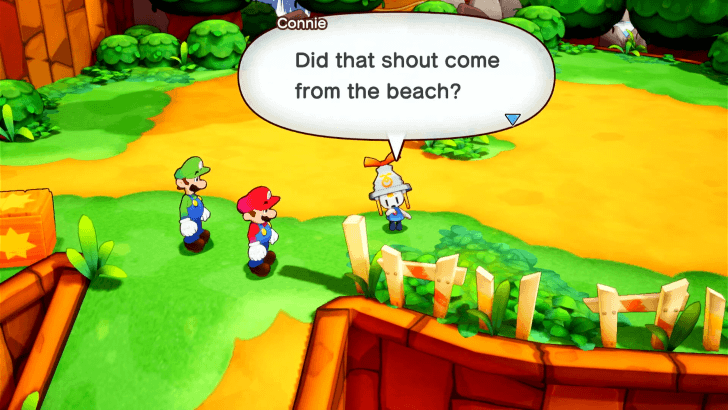 Back at Shipshape Island, a loud scream will be heard from the beach. Head down there and you'll find a purple capsule with a voice coming from within. Mario and Luigi will unsuccessfully try to open it, and come to the conclusion that they'll need a hammer. |
| 2 |
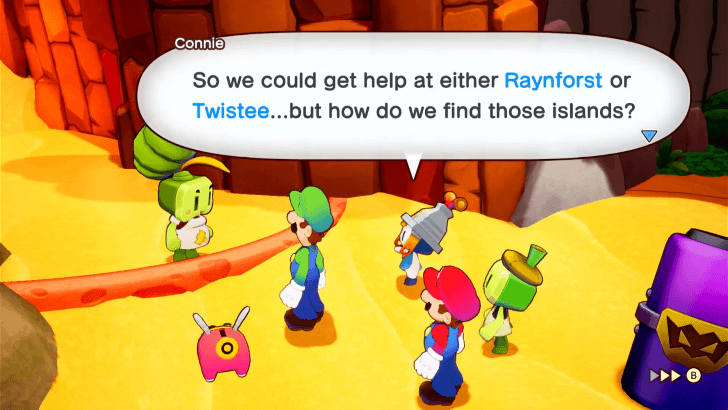 Willma will arrive and suggest that her kids could provide a hammer for the Bros. Her son, Billdit, can be found at Raynforst, while her daughter, Maykit, can be found at Twistee. You'll have to decide which of her children to help first, but either option will give you the hammer. The person in the capsule will offer an Ocean Map so that you can find the islands where they are located. ▶︎ Billdit or Maykit? Who Should You Save First? |
| 3 |
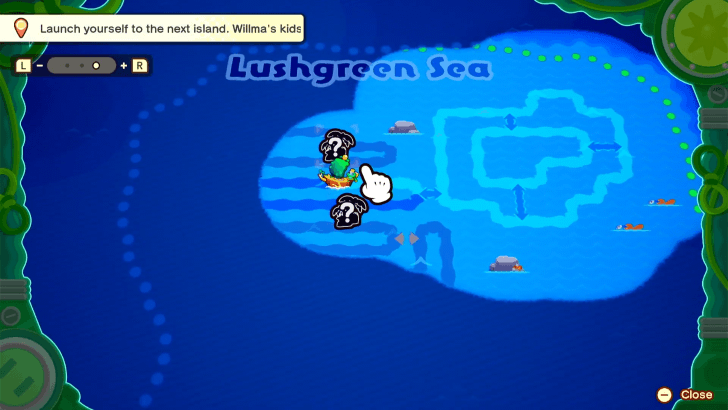 Use the Ocean Map to learn how to navigate between currents. This is also part of the core gameplay loop where you sail and look for the islands to relink. As the ship sails towards your selected currents, you can use the time to revisit previously linked islands. Take this time to revisit Rumbla Island and collect some Sprite Bulbs! |
| 4 |
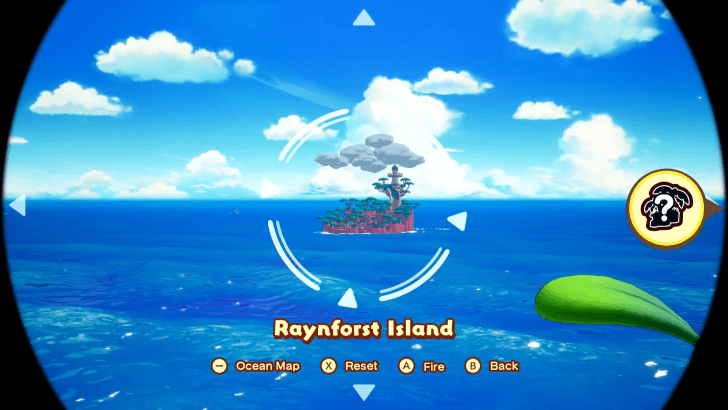 Once the currents have brought the ship within viewing distance of the islands, head to the Gold Cannon to launch yourself! We recommend heading to Raynforst Island first! This will later make Billdit's Workshop available for you to buy strong Gear from. |
| 5 |
 Upon arriving at Raynforst, head east past the Save Block and north to where some steps are. You'll find a stone cube that you can carry. Have Luigi pick it up. Once he does, have him come back down and continue east. |
| 6 |
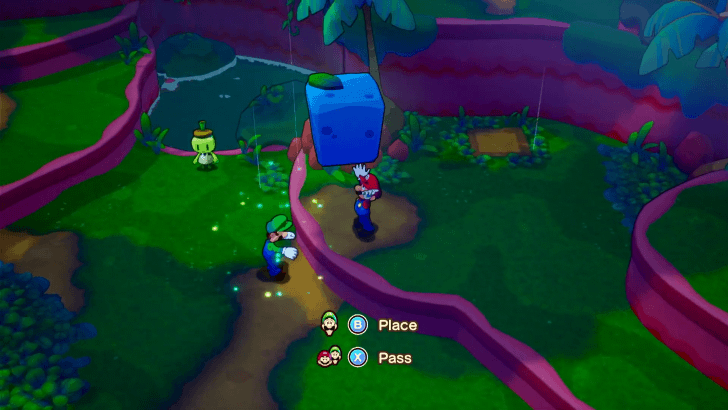 There will be a spot on a ledge just past the green NPC where you can place the block, however you'll discover that you're unable to jump while carrying an object. Have one brother be on top of the ledge, before passing the object with X. This is how you can carry objects to higher elevations. |
| 7 |
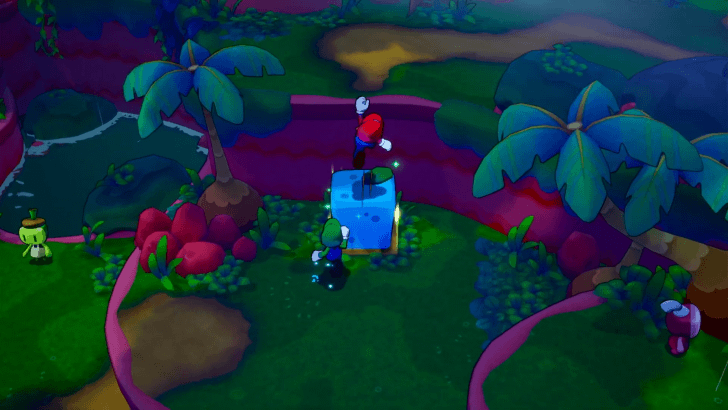 Place the stone cube on the dirt patch to create a platform you can jump on to get to the top of the ledge. |
| 8 |
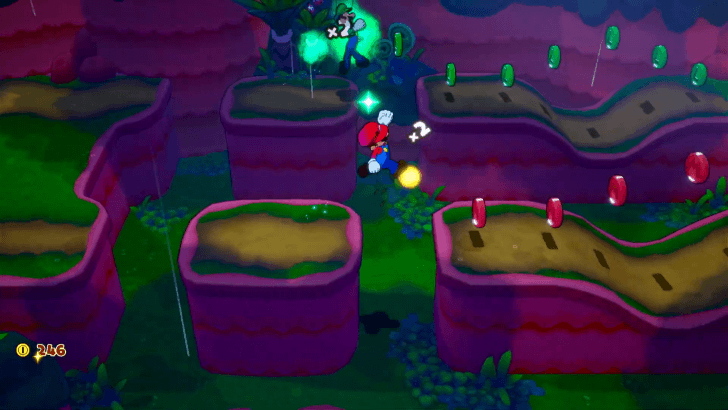 Head east and you'll find some red and green coins. Use Luigi Logic to have Luigi follow the trail of green coins, while you as Mario collect the red coins. Collecting the coins that match your color will give 2x as much! |
| 9 |
 Continuing east, you'll find a peddler who sells Items and Gear. Keep an eye out for these travelling merchants on islands that don't have settlements where shops can be found! There will also be a nearby patch of Plug Radishes you can harvest for coin. |
| * |
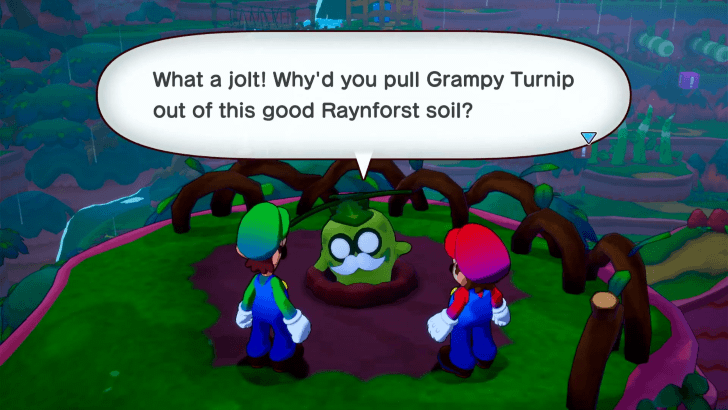 From the Peddler, you can take the path up a slope with a Turnip at the top. However, pulling it out will reveal that it is not a Plug Radish, but in fact, a Grampy Turnip! These odd fellows can be found across different islands of Concordia and will have harmless nuggets of wisdom that they are happy to share. If you find all 18 of them among the different islands, you'll get different rewards! ▶︎ All 18 Grampy Turnip Locations |
| 10 |
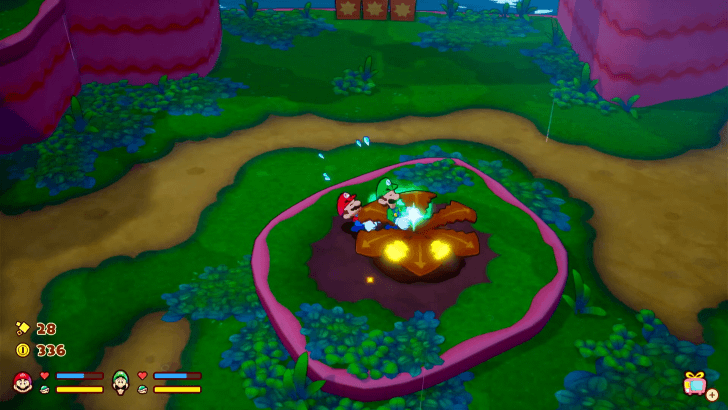 Back from the Peddler's location, head past the Turnip patch and continue north. There'll be a larger open area with a Golden Turnip for you to pull. This requires both Mario and Luigi to harvest, and when you do there will be red and green coins for you to collect! |
| 11 |
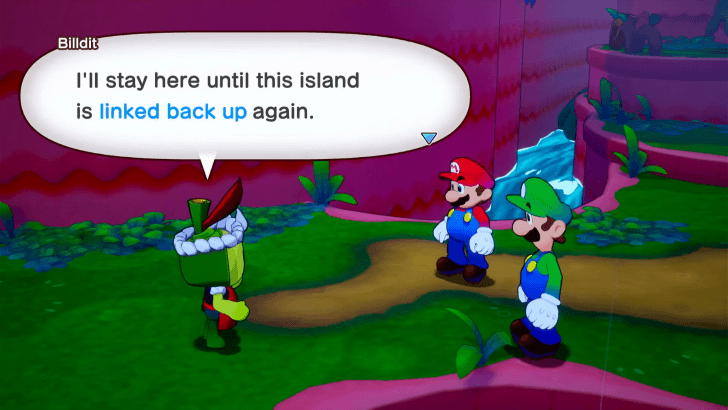 Continue west and you'll finally spot Billdit, a highly eager fellow in great contrast to this island's gloomy weather. He explains he's happy to make a hammer for you, but won't be able to unless the island is relinked. The lighthouse you'll need to relink the island is just up ahead, but there is currently a flower gate blocking the path. |
| 12 |
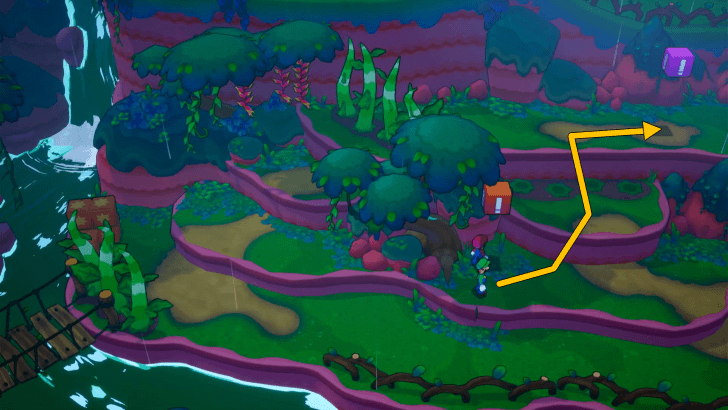 There are Exclamation Blocks nearby that control the growth of the roots and vines that block your way. Hit the Orange Exclamation Block to lower the roots on the nearby ledge, giving you close access to where the Purple Exclamation block is. |
| 13 |
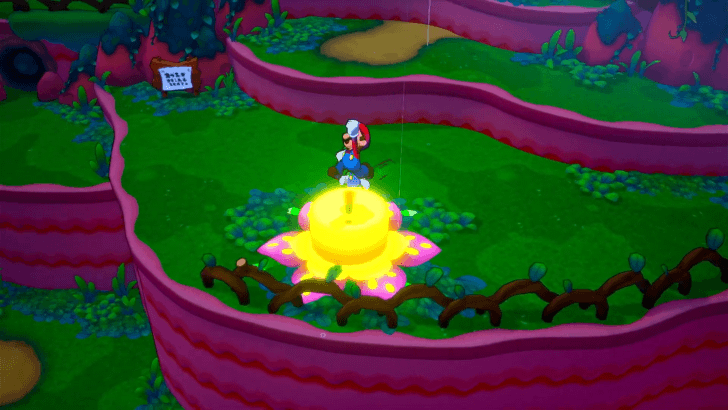 Hit the Purple Exclamation Block to retract the branches and open the path east. You'll see a bright yellow flower button. Have Mario and Luigi jump on it to activate a light on the flower gate. Also note that this is the first of the four lights that need to be lit. |
| 14 |
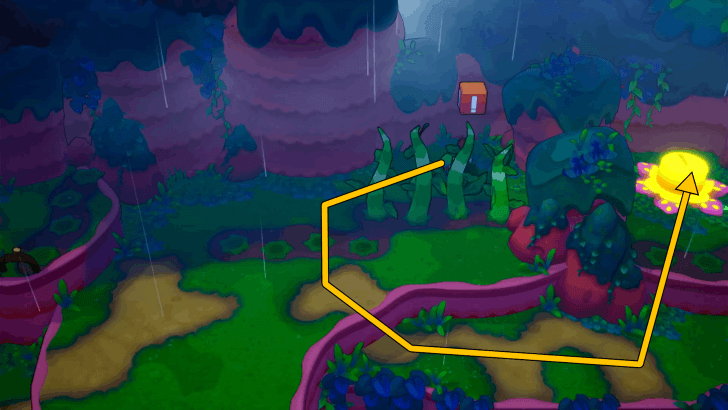 Hop up the ledges north and east to find the second flower light button. It's currently behind some overgrown roots, so hit the second Orange Exclamation Block nearby to gain access to it. |
| 15 |
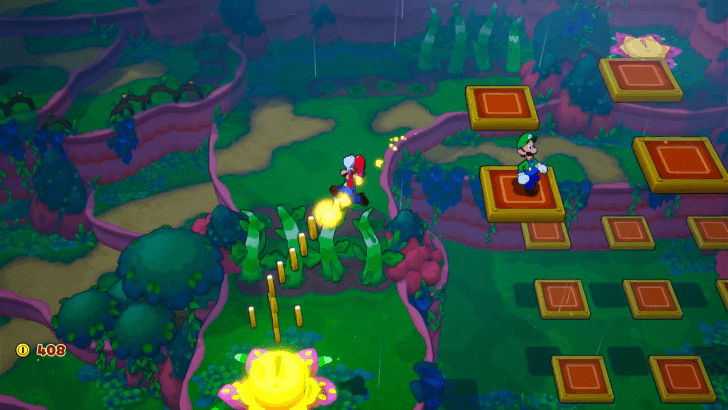 Just slightly south of the second flower light button, you'll find a floating green platform with an L on it. Command Luigi to jump on it with the L Button and a red platform with an M will appear. Control Mario to jump onto that platform. With every platform you jump on, more will appear. You'll have to correctly alternate and reach the assigned platforms to reach other sections. Seeing these platforms to their end will have you land on the third flower light button with a lot of coins earned along the way. |
| 16 |
 Circle back around to where the second Orange Exclamation Block is, and from there hop up the ledges west. You'll want to activate the Purple Exclamation Block to open the path that lets you drop down where the ledge bars are. |
| 17 |
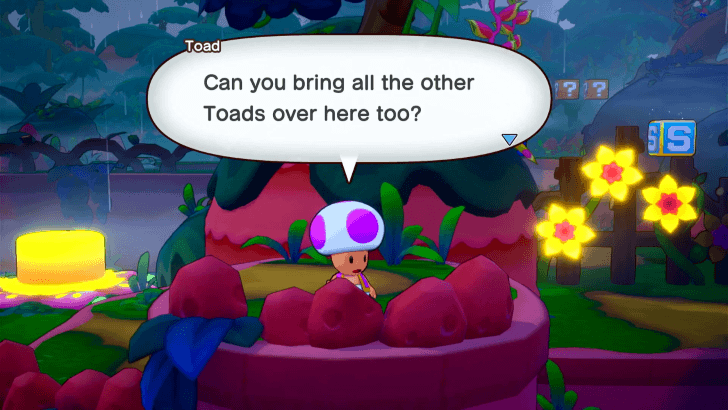 As you approach the bars, a Purple Toad will be found nearby who is happy to see you. This Toad will ask for your help to reunite with two other Toads in the area. |
| 18 |
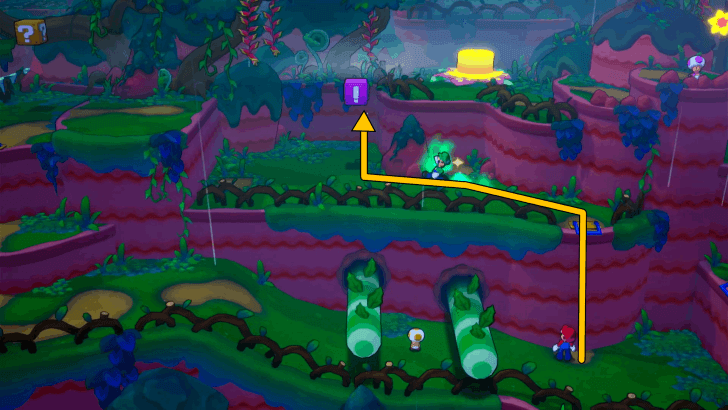 The first Toad to rescue is the Yellow one nearby. Use Luigi Logic to have Luigi reach the higher platform, where the Purple Exclamation Block is. Having him hit the block will free up the poor Yellow Toad. Speak with the Yellow Toad, then carry him, and toss him over to Luigi. |
| 19 |
 The second Toad to rescue is the Green one just past the bridge west of where you were. Speak with him then carry him back to Luigi. |
| 20 |
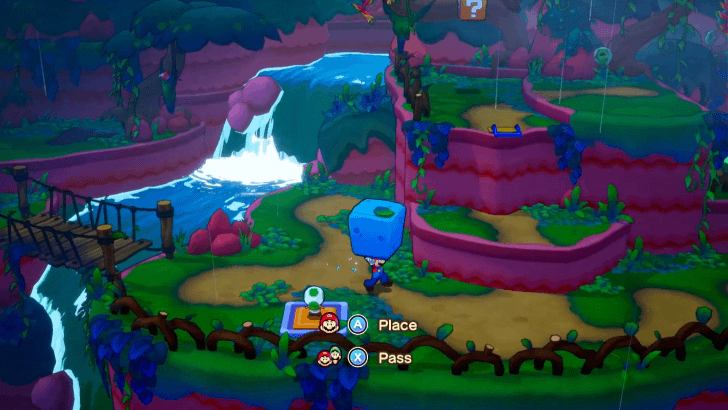 On the way back, place the Toad on the pressure plate to take out the stone cube from the fenced-off section. Put it to the side for now, then bring and toss the Green Toad to Luigi |
| 21 |
 Luigi will then ask for something that will help him up another section. Toss him the stone cube and toss back the Green Toad. |
| 22 |
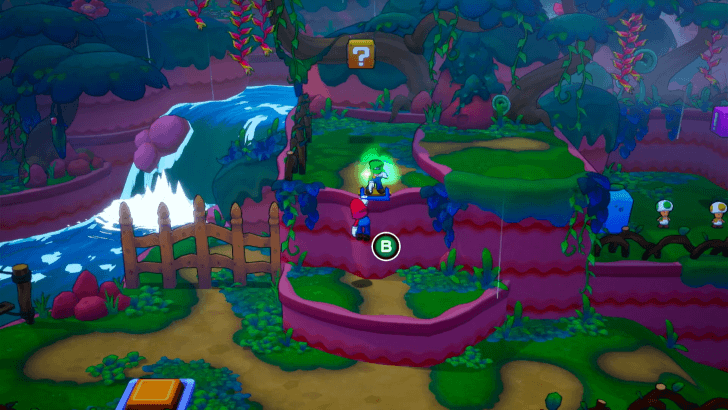 Luigi will then wait for you by the ledge bars to your left. Jump up to him and he'll lift you up. |
| 23 |
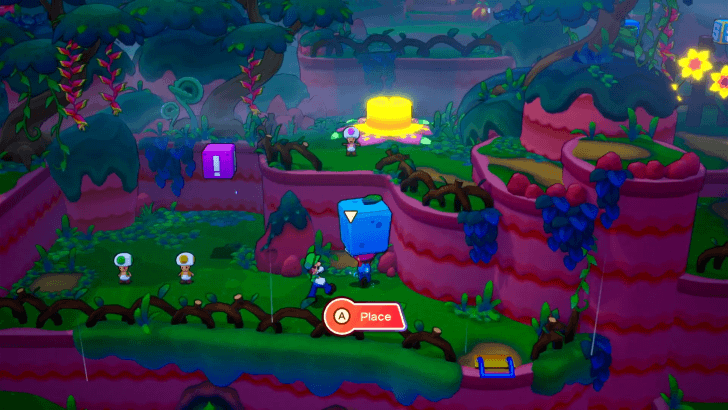 Finally, reunite the Toads by moving the stone cube near the ledge where the Purple Toad is. The Toads will rejoice and you'll have access to the 4th flower light button. Press the 4th flower light button and the gate to the lighthouse should now be opened up. |
| 24 |
With the gate down, you can now proceed forward. Billdit will arrive to give you some praise and reassure you that he will build a Hammer for you as soon as you relink the Island. So continue north, save along the way, and make your way to the lighthouse. |
| 25 |
 You'll again have to do some wall jumps to climb up the large-tree trunk, but once you reach the top, you can access the lighthouse's plug and relink it to Shipshape Island. |
| 26 |
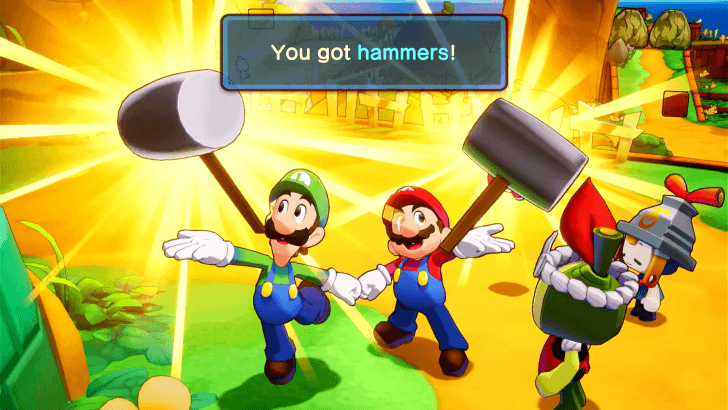 After a short cutscene, you'll be back on Shipshape with Billdit eager to build you your hammers! These hammers will now allow you to press buttons on walls, use hammers in combat, and smash open crates! And speaking of smashing things open, you can now free the person trapped in the purple capsule. Swing Mario's hammer with X three times to meet Arc, a skillful navigator of the seas! |
| 27 | Arc will ask to speak with you at the Shipshape Plaza so you can discuss how to find the Great Lighthouse Island, a crucial step in relinking all of Concordia. |
Linking Twistee Island
| # | Step by Step Objectives |
|---|---|
| 1 |
 Regardless of which of Willma's children you decide to find first, you can find Maykit on Twistee Island. Set sail to Twistee Island and use the Big Cannon on the right side of Shipshape Island to launch yourselves directly to the island. |
| 2 |
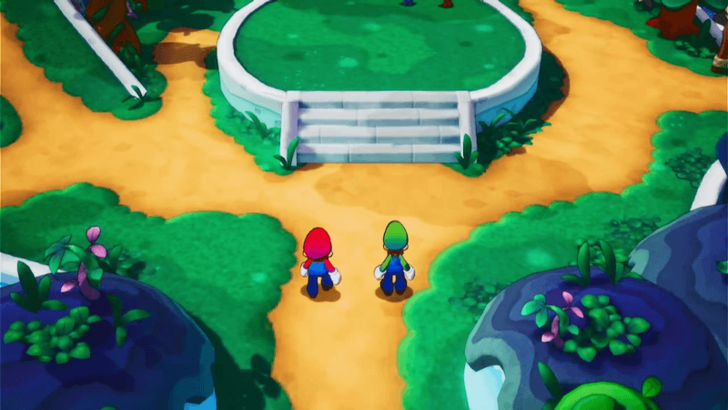 Upon landing at Twistee Island, head north to trigger a cutscene featuring Maykit by the Lighthouse. You'll have to restore the Twisten Sprout to reach both Maykit and the Lighthouse. |
| 3 |
 From there, proceed east to the Island Plaza, where you'll encounter a group of distressed Concordian Dancers. Emmit, one of the dancers, will ask for your help in finding MaxGlam Wax for Dyode. This wax will help the dancers in their performance and reviving the Twisten Sprout. |
| 4 |
 Start your search for the MaxGlam Wax by heading northeast from the plaza. You can talk to the Green Concordian wearing shades along the way to learn more about the island and its points of interest. Be prepared for battles along the way, as the forest will be teeming with enemies like Soreboars and Bumbleshoots. |
| 5 |
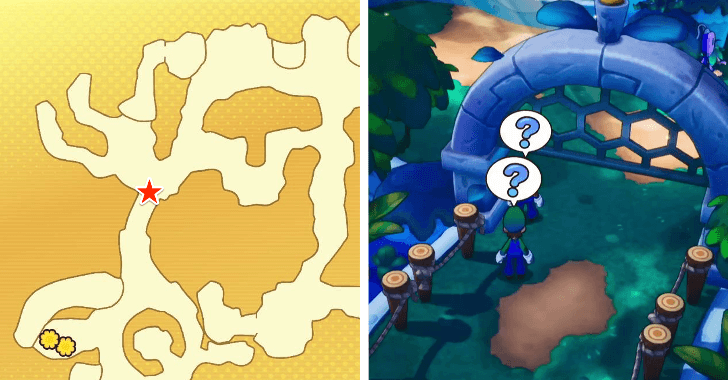 Continue north until you reach a stone archway, where you'll see a Purple Concordian stuck above high ground, needing your help. |
| 6 |
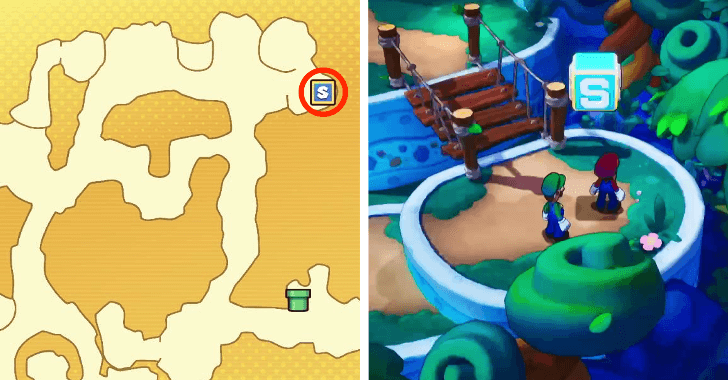 From the archway, head north and then east. Jump up the ledges on the right, where you'll find a Save Block. Be sure to save your progress before continuing! |
| 7 |
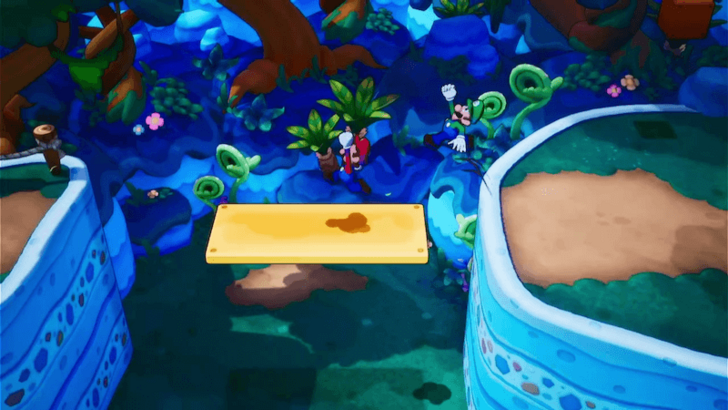 Cross the bridge and jump onto the moving yellow platform when it comes close. Carefully leap from one moving platform to the next until you reach the high ground on the other side. |
| 8 |
 Climb the blue-yellow ledge by pressing A, then use B to have Luigi catapult both of you above. Once you're up, jump down south and talk to Spiralia, the Purple Concordian. She will ask for your help in carrying her back to her shop, which is located southeast of your current position. |
| 9 |
With Spiralia in your hands, head to the stone archway near the Save Block and continue south. When traversing ledges, pass Spiralia to Luigi by pressing X, then let Mario jump up using A. Once Mario is up, pass Spiralia back to him so Luigi can jump over as well. Mind the pink bugs along the way, as you'll be forced to begin the escort again if they touch Spiralia. |
| 10 |
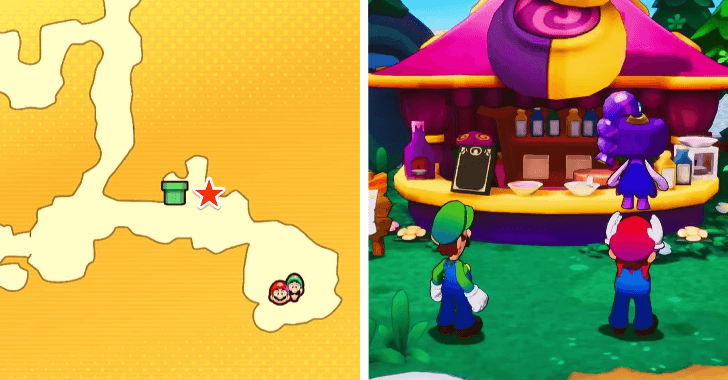 Turn right and drop her off safely in front of her shop. As a reward for helping her, Spiralia will give you the MaxGlam Wax. |
| 11 |
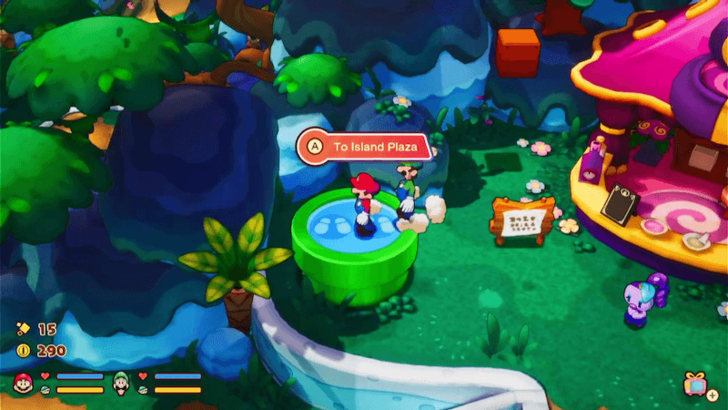 Jump up the Green Pipe Block next to Spiralia's Shop to create a Green Pipe connecting back to the Island Plaza. Use the Green Pipe to fast-travel to the plaza. |
| 12 |
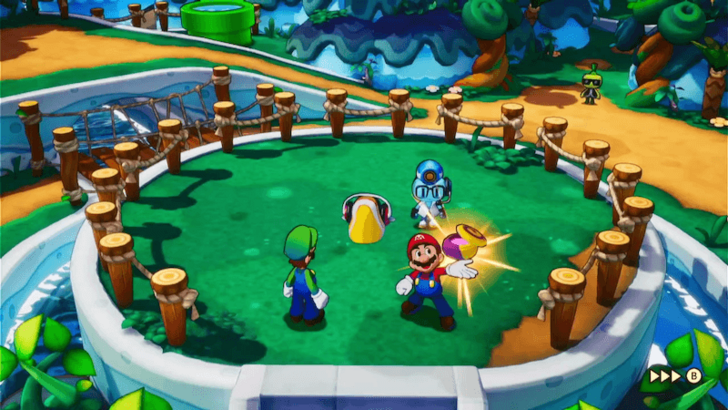 Return to Emmit and give him the MaxGlam Wax for Dyode. After a dance number by the duo, they’ll invite you to join in. |
| 13 |
Match the rhythm and press A, B, X, or Y to make Mario and Luigi perform the Brother Groove. The sequence follows this pattern: A, B, A, B, Y, X. Successfully completing the dance routine will revive the Twisten Sprout, creating a path to Maykit and the Lighthouse. |
| 14 |
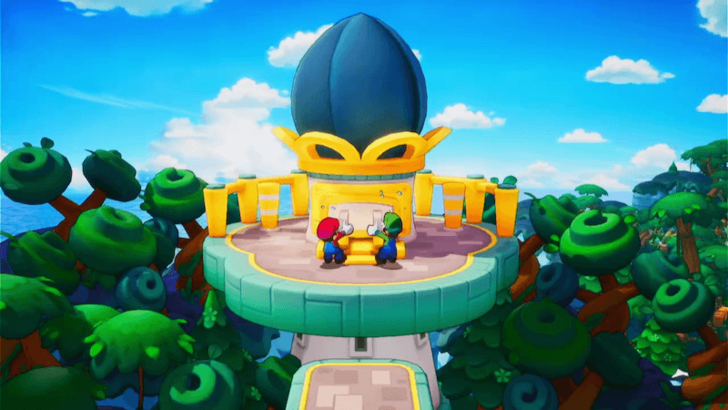 With the Twisten Sprout restored, head west and climb its leafy vines to the top. After a brief conversation with Maykit, jump up to the Lighthouse and press A to link Twistee Island back to Shipshape Island. |
| 15 |  After a lengthy cutscene, you will be returned to Shipshape Island. If you found Maykit first, she'll build the hammers for you. These hammers will allow you to press buttons on walls, use hammers in combat, and smash open crates. Otherwise, you've already found both of Willma's children and you move on to the next part of your adventure! |
Returning to Rumbla Island
| # | Step by Step Objectives |
|---|---|
| 1 |
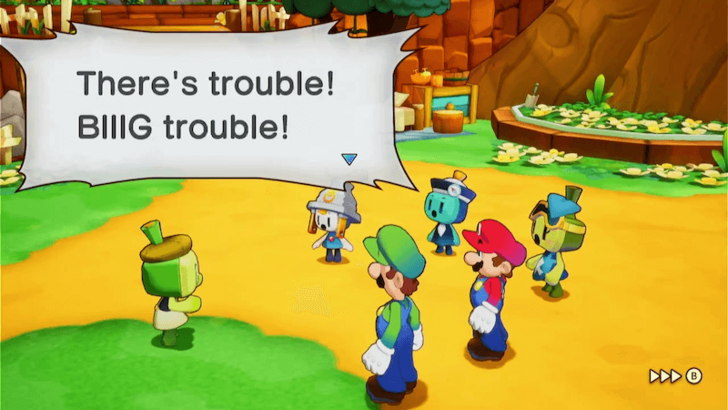 After finding both Billdit and Maykit, head to the center of Shipshape Island to speak with Connie and friends. During the conversation, you'll be alerted that the residents of Rumbla Island are in danger and need your help. |
| 2 |
 Before returning to Rumbla Island, make sure to stock up on consumables and equip your best gear, as this next section features tough enemy encounters and your first boss battle. Once you're ready, use the Blue Pipe to the south to travel to Rumbla Island. |
| 3 |
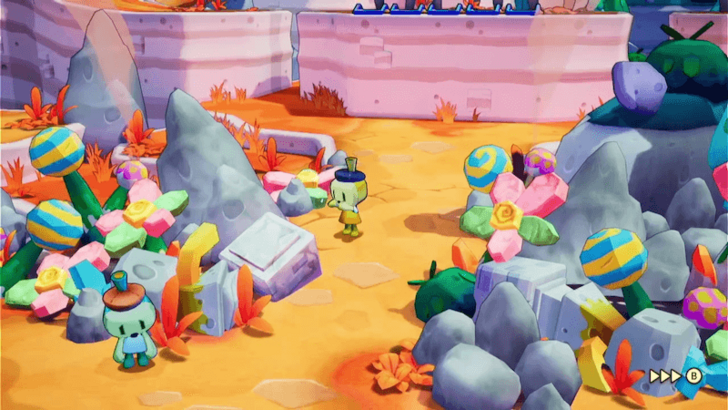 Upon arriving at Rumbla Island, a cutscene will show parts of the island in ruins following an attack. You’ll then be ambushed by Guardarms, initiating a battle. |
| 4 |
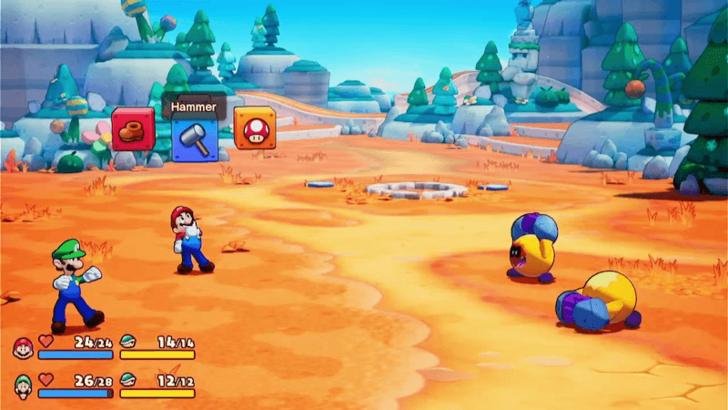 If a Guardarm's hands are in front of them, use Jump attacks. If their hands are shielding their head, go for Hammer attacks. During the Guardarm's turns, time your jump and Hammer swings carefully to counter their attacks. ▶ Guardarm Dodge and Counter Strategies |
| 5 |
 After defeating the Guardarms, use the Green Pipe northeast of the starting point to fast-travel to the Island Plaza. |
| 6 |
 At the Island Plaza, you’ll have another chance to buy consumables and upgrade your gear. Take time to prepare before continuing further! |
| 7 |
 From the Island, head north and turn right to find a wall with Red and Green buttons. Press L to have have Luigi smash the Green button, then press X to have Mario smash the Red button. This will lower the bridge, granting access to the eastern part of the island. |
| 8 |
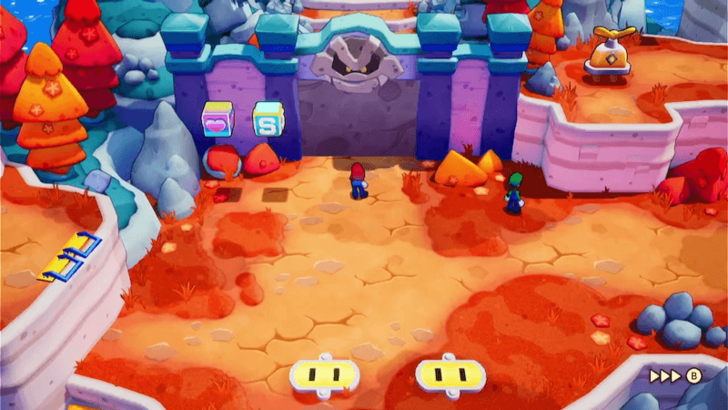 Proceed east to find a Boss Door that needs two Door Plugs to open. Be prepared for battles during your search, as enemies will be scattered throughout the area. |
| 9 |
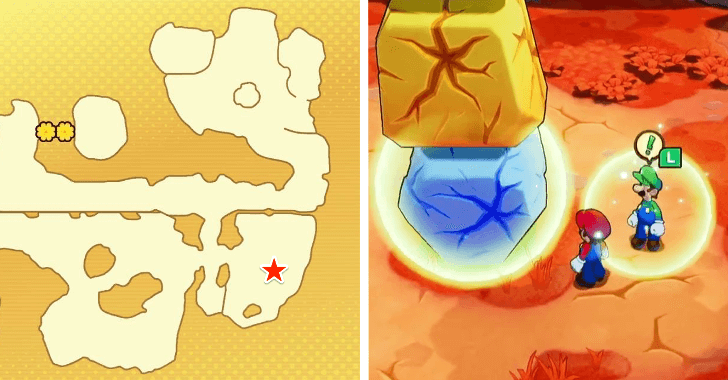 To find the Door Plugs, head east until you come across three colored rocks stacked on top of each other. Use your Hammer to break the rocks and pick up the Blue Boulder. |
| 10 |
 Place it on the designated spot in southwest part of the area to create a path to the high ground. |
| 11 |
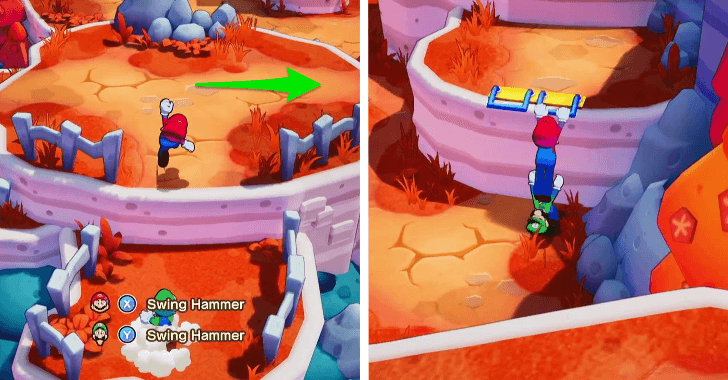 Once you’re on the high ground, head north and then turn right. Climb the blue-yellow ledge on the right by pressing A, then use B to have Luigi catapult both of you higher. |
| 12 |
Once you’re up, have Luigi jump onto the green L platform by pressing L. When the red M platform appears, have Mario jump onto it to create a new platform for Luigi. Continue alternating jumps in this manner until you reach another stack of colored rocks. |
| 13 |
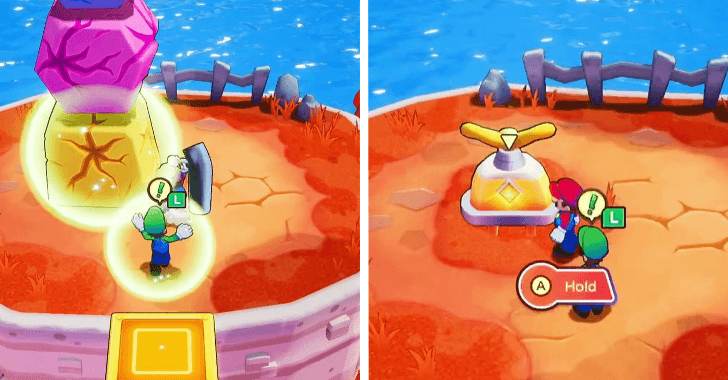 Break the rocks with your Hammer to obtain the Door Plug. Have Luigi pick it up by pressing L, and go back to the cliffs you came from. |
| 14 |
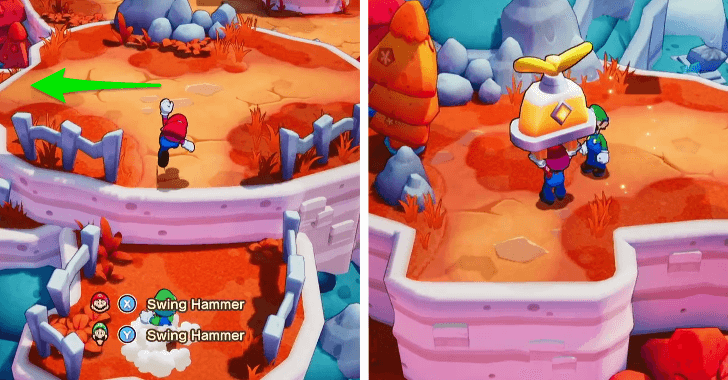 Back at the intersection on the high ground, head left. Break any rocks blocking your path until you reach the Door Plug. Pick it up, jump back down, and place both Door Plugs into their slots in front of the Boss Door to unlock it. |
| 15 |
 Before entering the Boss Area, jump onto the Recovery Block near the doorway to fully heal and prepare for the boss fight! |
| 16 |
 Enter the Boss Area and battle Gorumbla. Similar to Guardarms, if Gorumbla's hands are in front of them, use Jump attacks. If their hands are shielding their head, switch to Hammer attacks. Time your jump and Hammer swings carefully to counter Gorumbla's attacks. Read our guide below to learn how to beat Gorumbla efficiently. ▶ How to Beat Gorumbla |
| 17 |
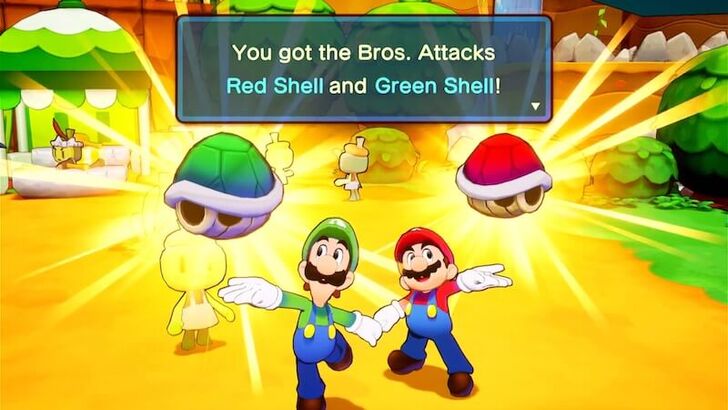 After defeating Gorumbla, a lenghty cutscene will play. Return to Shipshape Island after to receive your first Bros. Attacks: the Red Shell and Green Shell. Bros. Attacks allow Mario and Luigi to team up to perform powerful special moves. ▶ List of All Bros. Attacks |
| 18 | 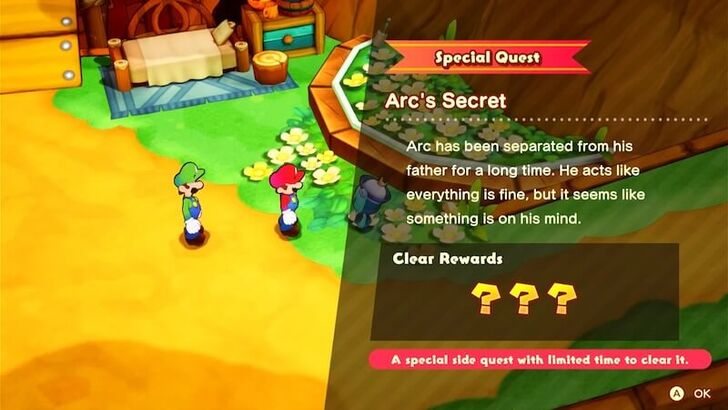 Before proceeding to the next island, you may want to do some Side Quests first. In particular, it’s recommended to do the limited-time Arc’s Secret quest before progressing the story. ▶ All Side Quest Locations |
Florall Island
| # | Step by Step Objectives |
|---|---|
| 1 | 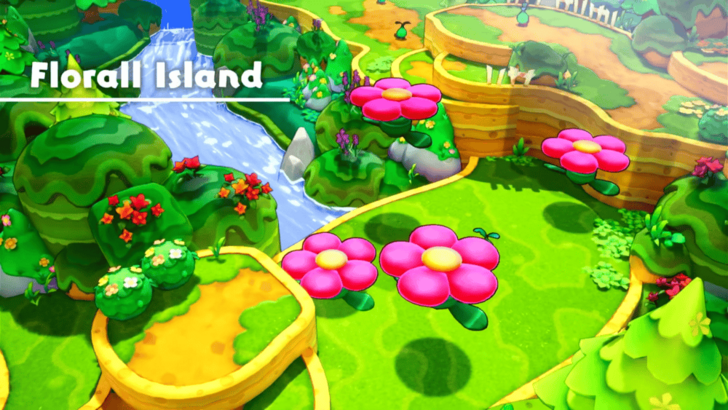 Once you’re ready for the next island, open your Ocean Map, and set sail for the newly opened current on the southeastern part of the Lushgreen Sea. Once you’re in range of the new island, head to the Big Cannon and fire Mario and Luigi onto Florall Island. |
| 2 | 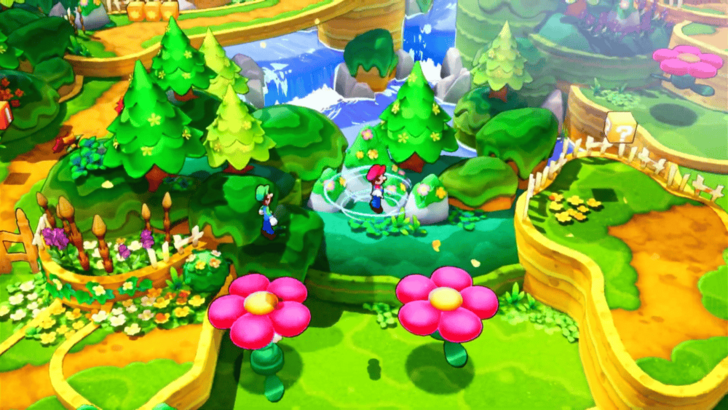 Follow the path going east, jumping on the large Bouncy Bloom flower platforms along the way, until you reach a pond with three unopened flower buds. |
| 3 |  The old man by the pond tells you that the buds will open when hit, and Luigi will use his Luigi Logic to let you play a rhythm mini-game to make the buds bloom. The blue flower nearby can shoot seed pods. Press the L shoulder button to make Luigi stand on the green square, and move Mario to make him step onto the red square to the right of the blue flower in order to start this mini-game. |
| 4 | Listen closely to the beat of the seed pods as they emerge. The lower-sounding red seed pods are those that need to be hit by Mario by pressing X. The higher-pitched, tambourine-laced green seed pods need to be hit by Luigi by pressing Y. Swing the correct hammer once the seed pod is aligned with the hat of the target brother, then follow the rhythm and tempo of the seed pods’ emergence. The pattern for this is:
|
| 5 | 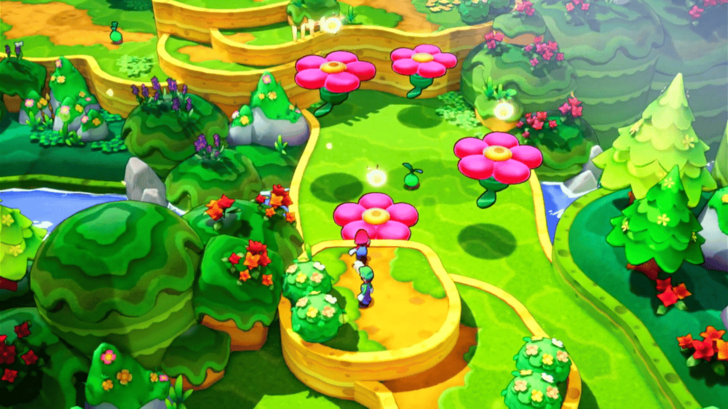 Once all the buds have bloomed, you can cross the flower bridge! There are some Plug Radishes to the left that you can uproot for coins. To proceed, go north. There’s a Sprite Bulb by the bushes before the Bouncy Blooms, which you can pull and collect as you jump on the flowers heading north. |
| 6 | 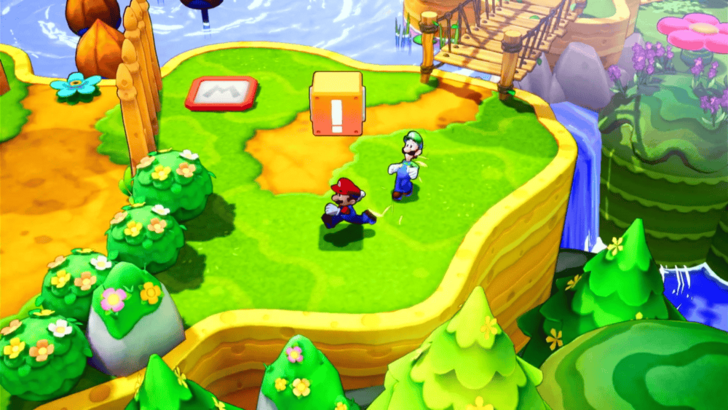 Keep following the path, battling or avoiding the Seedle R and Hydro Seedle enemies along the way, until you come accross an Exclamation (!) Block. Hit this to bring down the fence blocking the road. |
| 7 | 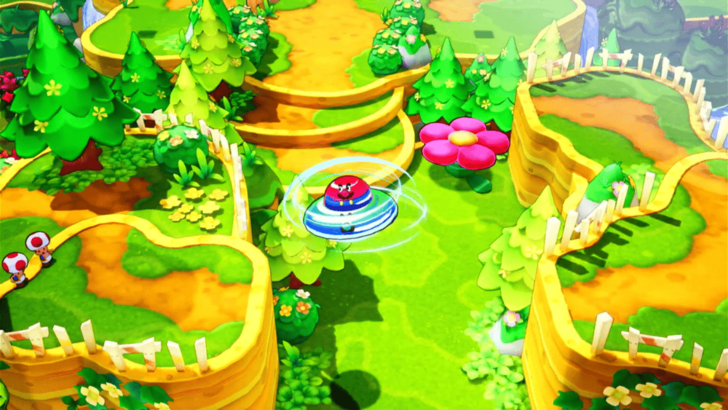 You need to find a way to the west side to bring down the other fence. Head south, and two Toads will appear on a cliff to the left. Go up the cliff to the right to find a way across. This is when you will learn the UFO Spin Bros. Move. Tilt the R Stick to the right, then press X to cross the gap to the left cliff and join the Toads. ▶ How to Unlock All Bros. Moves |
| 8 |  Continue down the path until you reach another wide gap. Use UFO Spin to get across to the right cliff. |
| 9 |  Go south until you reach a fence blocking the road. Hit the Exclamation Block to remove the fence and take the path to the left. This leads you back to the starting area. |
| 10 | 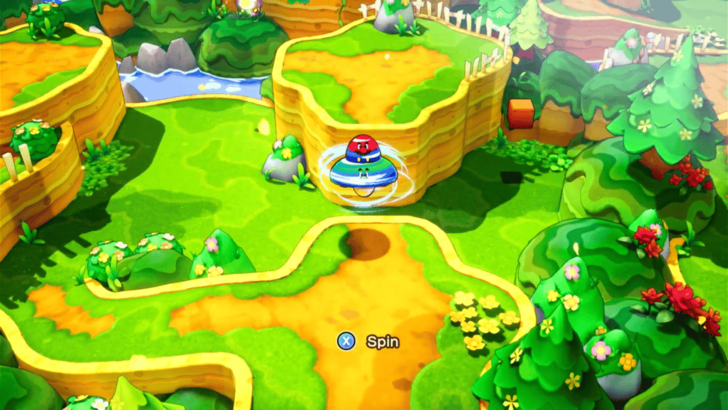 With UFO Spin in your arsenal, you can now take the path northwest. You may want to pull on some Sprite Bulbs at the base of the cliffs before floating to the platforms, since they may fly up to the higher platforms. Use UFO Spin to cross north to the isolated platform, then again to cross the gap to the west platform. |
| 11 | Time your next UFO spin to allow you to land on the yellow moving platform. You’ll want to press X when you see the platform start moving upward. Stop spinning once you see your shadow on top of the platform. Once you’re on this platform, wait until it moves south and stops. Then, use UFO Spin again to continue onto the path to the left. |
| 12 | You will be faced with another rhythm mini-game. Press the L shoulder button to have Luigi step on the green square, and move Mario to the red square to activate the mini-game. Just like before, listen closely to the rhythm. Have Mario hit the red-colored, low-pitched seed pods and Luigi hit the green-colored, high-pitched seed pods. The pattern for this is:
|
| 13 | 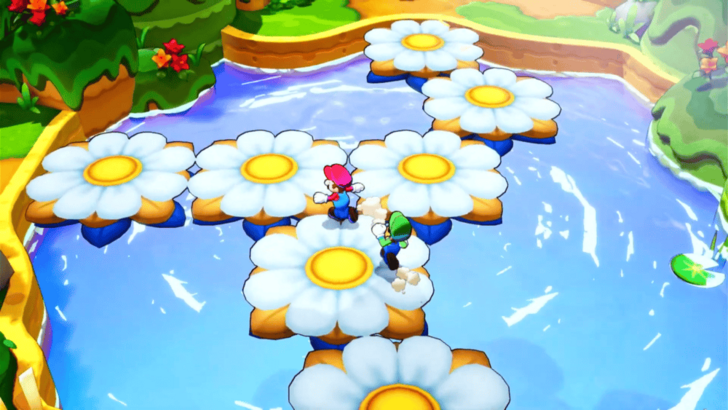 Once the flower bridge is fully bloomed, follow the path to the north to proceed. The path to the left contains some Sprite Bulbs, which you can pick up first if you would like. The north path contains a lot of moving platforms that you will have to carefully navigate. |
| 14 | Use UFO Spin to get onto the first moving platform. Float onto it when the platform stops right in front of the cliff you’re standing on. Wait until the platform moves to the right and stops, then use UFO Spin again to continue onto the path north. |
| 15 | You won’t have to use UFO Spin for the next two moving platforms. You can just jump normally. Of course, you’re free to keep using UFO Spin to traverse if it makes you more comfortable. Tilt the R Stick up if you want to separate the brothers, and wait for the vertical moving platform to approach your cliff. Jump onto this, and wait for it to move upward and reconnect with the horizontal moving platform. Either walk or jump onto this platform. |
| 16 | To get to the third platform that passes through a bunch of coins, ready your UFO Spin. Wait until the next platform is in view, then float towards it. Once this platform is on the right side, use UFO Spin again to reach the cliff on the right. |
| 17 | 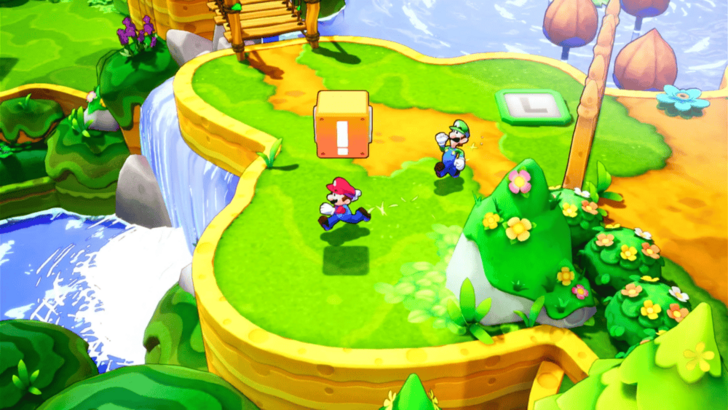 Hit the Exclamation Block to remove the final fence. You can now do the final rhythm mini-game on this island! |
| 18 | Like before, press L to have Luigi stay on the green square, then move Mario to the red square to start the mini-game. The sequences this time are longer, so pay close attention. The pattern for this is:
|
| 19 | 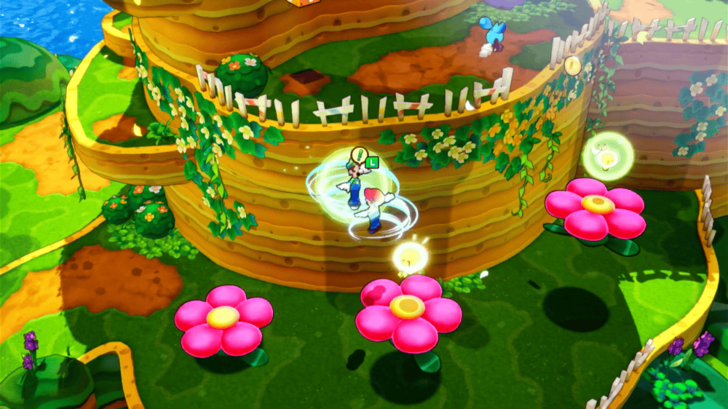 Cross the flower bridge, and you'll be at the base of the Lighthouse. Before jumping up onto the Bouncy Blooms, you may want to pull the Sprite Bulbs below them first. Collect the Sprite Bulbs as you jump on the flowers, and follow the path and Bouncy Blooms to reach the Lighthouse. Pull on the plug to connect Florall Island to Shipshape Island. |
| 20 | Back on Shipshape Island, Arc will tell you that you’re all ready to go to the Great Lighthouse Island, but you’ll need Connie to be able to restore the Great Lighthouse. |
Lushgreen Sea Great Lighthouse Island
| # | Step by Step Objectives |
|---|---|
| 1 |
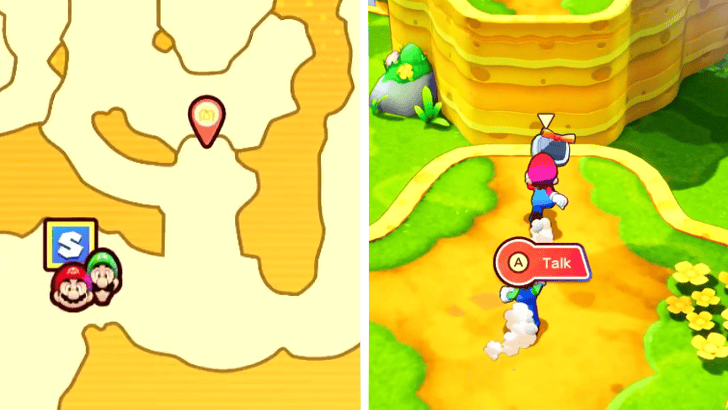 After Connie wanders off, follow her to Florall Island and converse with her. Severed ocean currents will be reconnected afterward, opening a path to the Lushgreen Sea Great Lighthouse, so return to Shipshape Island. Upon your return, Arc will notify you of the newly opened currents and encourage you to make preparations before leaving. |
| 2 |
 Afterward, the brothers will be met with two Toads that propose an upgrade for the ship. After agreeing to their proposal, you may now press the X Button while looking at the Ocean Map to enable Faster Sailing to help reach your destination in mere moments! |
| 3 |
 Another group introduces themselves to Mario and Luigi, and asks them for a chat. Follow them to the southern part of Shipshape Island, and speak with one of them. They will offer help as Advisers who you can speak to, if you would like to have the status of the brothers' Level and Gear checked, or gather information about a newly discovered island. Before heading to a new island, you can always come back to your Advisers on the same spot, to make sure you are fully prepared to face any challenges ahead! |
| 4 |
 After your delightful conversations, sail full speed head toward the Lushgreen Sea Great Lighthouse with the ship's new Faster Sailing mode. Discover the island through your telescope, and fire the Big Cannon once you have made your preparations. |
| 5 |
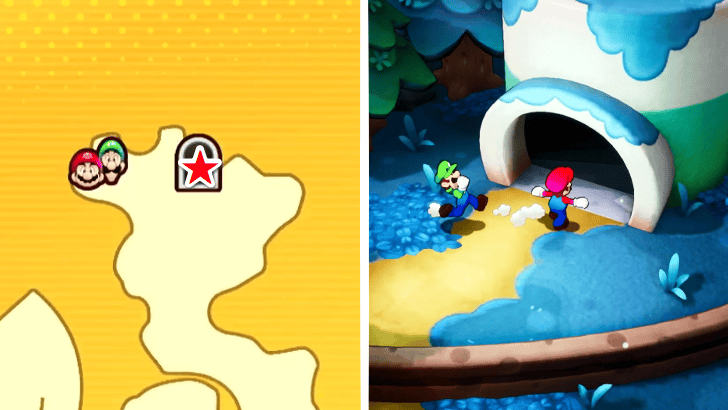 Upon landing on its shores, you may enter the Lighthouse through a small passage on the right side of the island, as the main entrance will be closed. Once inside the main area of Sublevel 1, walk toward the only open door to the south and walk through. |
| 6 |
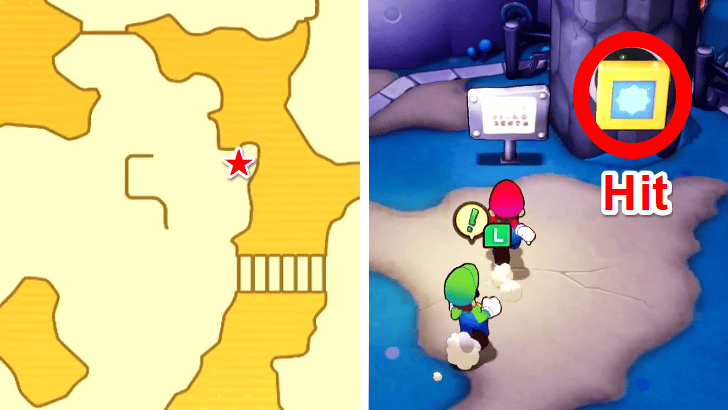 The area will be filled with enemies such as Capnaps and Spikelys, though wade your way through to the eastern part of the room where you can find a Button. Hit it as Mario or Luigi with either the X or Y Button on your controller to raise and activate all of the fans in the area. |
| 7 |
 Using the UFO Spin Bros. Move, you may choose to take an extra optional route to collect all coins, or directly navigate your way toward the platform with the raised staircase through the straightforward route. Once there, hit the M Button as Mario to lower the staircase and allow passage for Connie. |
| 8 |
 Proceed through the new doorway and head down the staircase to your left. This will lead you into Sublevel 2 where the entire group hears a loud growl in the distance. You will be approached by a Concordian named Dewey Fightem who warns you about the monster past the locked gate. It will now be up to the brothers to fell this beast, and relight the lighthouse with Connie. But first, they must unlock the gate by connecting two Power Plugs on the sockets in front of it. |
| * |
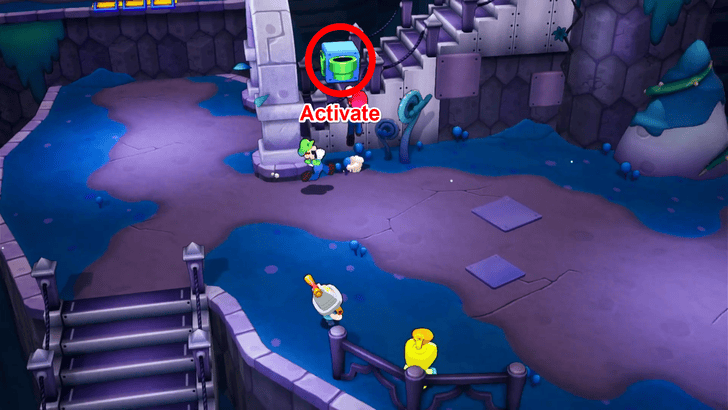 You may activate the green pipe block by the staircase next to the gate in order to erect a Green Pipe that connects Sublevel 2 to the Island's Shores for ease of travel. |
| 9 |
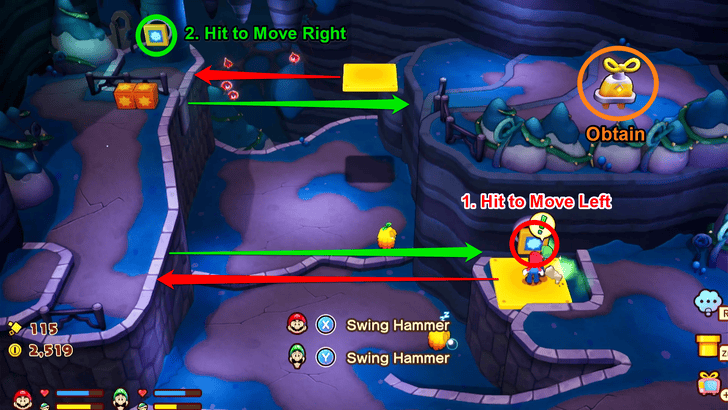 Head to the northern part of the area where you can find the first Power Plug. To reach it, hammer the first button which activates a moving platform that ferry you across a large gap. Repeat the same process on another moving platform, and collect the Power Plug from the other side. |
| 10 |
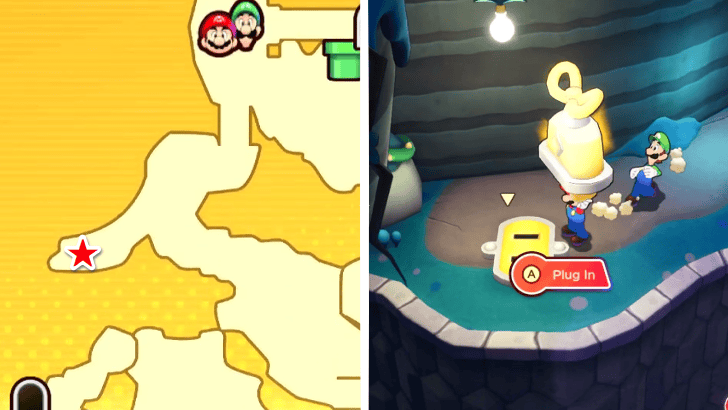 Jump down the small cliff while holding the Power Plug. Although instead of inserting it in one of the sockets in front of the locked main gate, head south of the area and insert it in a socket on the opposite path to a small locked gate, then pass through. |
| 11 |
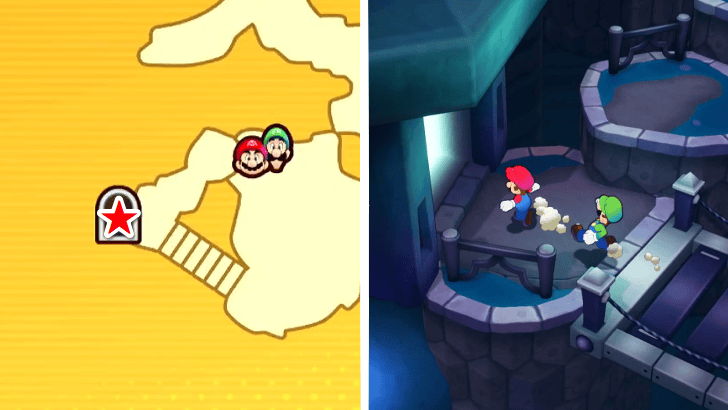 Walk down the staircase, turn left to pass through the archway, and head toward the open doorway past the bridge to enter a new area. |
| 12 |
Walk south of the area until you reach another button with moving platforms. Leave Luigi at the button by pressing the L Button on your controller. Press the Y Button to activate the platforms once, make Mario cross over to the next platform, then have Luigi hammer the button one final time to take Mario all the way toward the other side of the area. Once there, hammer the M Button on the wall as Mario to deploy a staircase for Luigi, and unlock the small gate, then pass through the newly opened route to return into the main area of Sublevel 2. |
| 13 |
You will get a clear path of where the next Power Plug is after crossing the doorway. Interact with the Exclamation Block at the bottom of the platform to open the gate, then leave Luigi at the button once more while Mario crosses the moving platforms. |
| 14 |
On the second portion of the moving platforms, Mario will have to time his jumps alongside Luigi's button activation. Carefully climb all of the moving platforms until you reach the Power Plug and hammer the M Button to deploy a staircase leading back down, and reuniting Mario with Luigi. |
| 15 |
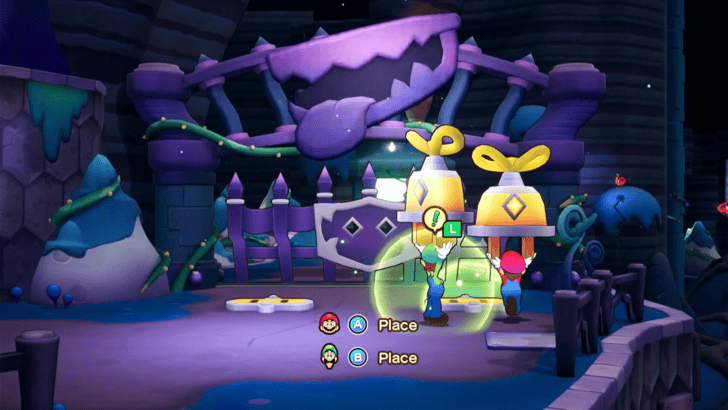 Pick up the second Power Plug from the socket you inserted it in earlier, and make your way toward the locked main gate with both Power Plugs. Insert them in their respective sockets to open the gate and proceed through. Do not forget to use the Save Block and Recovery Block found near the entrance to the final area, as there will be a big fight up ahead. |
| 16 |
 Stepping through the big gates, you will be greeted with the sight of a huge green monster accompanied by the Extension Corps. After a brief conversation, you will be left to battle Gobblick! ★ Battle Tip! Beating Gobblick Gobblick is a boss that can deal the Dizzy Status Ailment. With this in mind, we recommend stocking up on Refreshing Herbs to remove the debuffs in case they are applied. Stay cautious of Gobblick's attacks as they can deal significant damage to you, so take every opportunity to dodge and counterattack. ▶︎ How to Beat Gobblick |
| 17 |
 A cutscene will play after successfully defeating Gobblick. Head to the elevator at the far end of the room afterward to reach the Lighthouse's Top Floor. Head outdoors and watch as Connie relights the first Great Lighthouse on your long journey. As the cutscene concludes, the gang will be transported back to Shipshape Island where Arc notifies them that the ship is now sailing the Color-Full Sea. |
Color-Full Sea Walkthrough
Desolatt Island
| # | Step by Step Objectives |
|---|---|
| 1 |
 After newly unlocking the currents to the Color-Full Sea and discovering its Great Lighthouse, Arc suggests finding and relinking a new island that might hold the key to breaching its steel walls. |
| 2 |
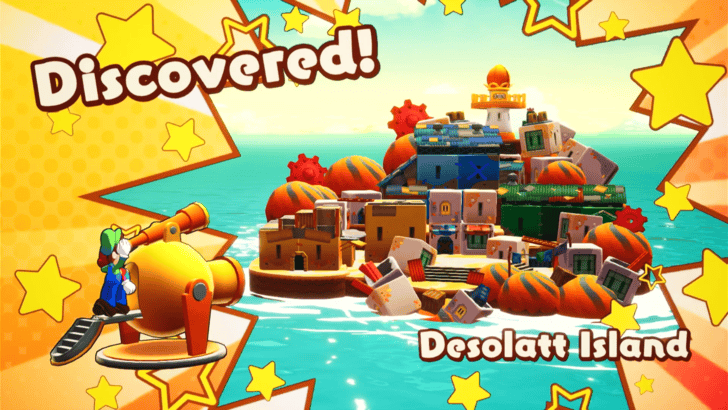 Sail onward until you discover a drifting island on your Ocean Map, and use the telescope to reveal Desolatt Island! Once you've ensured both brothers are well-equipped with suitable gear, set your course, fire away toward the island, and land on its sandy shores. |
| 3 |
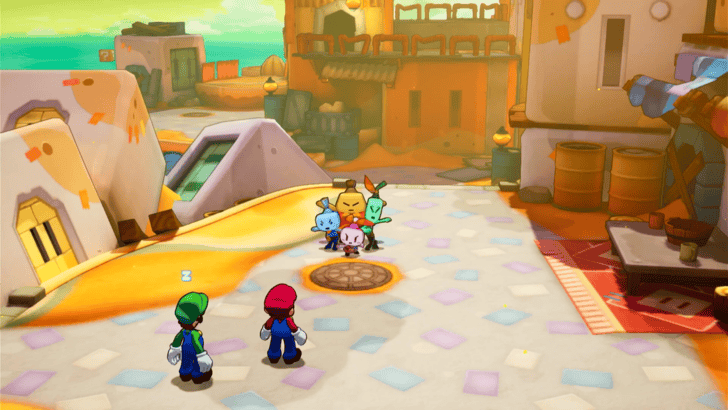 As Mario and Luigi walk toward the Island's plaza, they will be stopped by four children who introduce themselves as IDLE. While they argue about their introduction, Snaptors holding captives fly overhead to the lighthouse. After revealing that the brothers mean to relink Desolatt Island back to Shipshape Island, IDLE proposes a game of hide-and-seek to test Mario and Luigi's capabilities. |
| * |
 If you are having trouble looking for the IDLE kids, you may approach one of the Concordians on top of on of the buildings with a speech bubble. They will cite hints on three kids' whereabouts: ・Loog is inside a blue building north from where you currently are. ・Dulles usually plays in the green building northeast. ・Ellow is in the yellow building to the west of the island. |
| 4 |
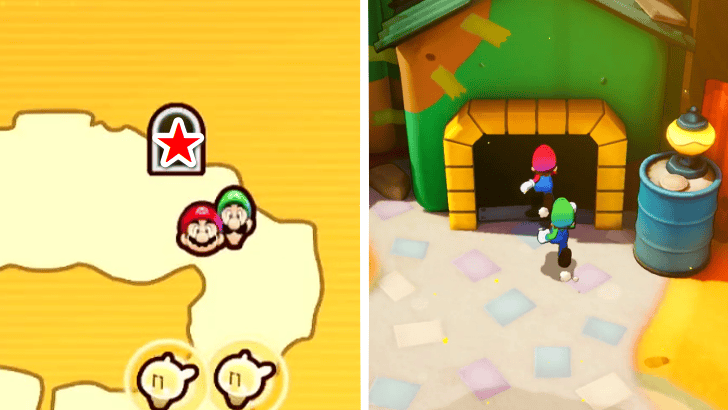 Head inside the green house Northeast of Desolatt Island where you can find Dulles. Although to reach him, you must navigate your way through the hole-trodden interiors of the building. |
| 5 |
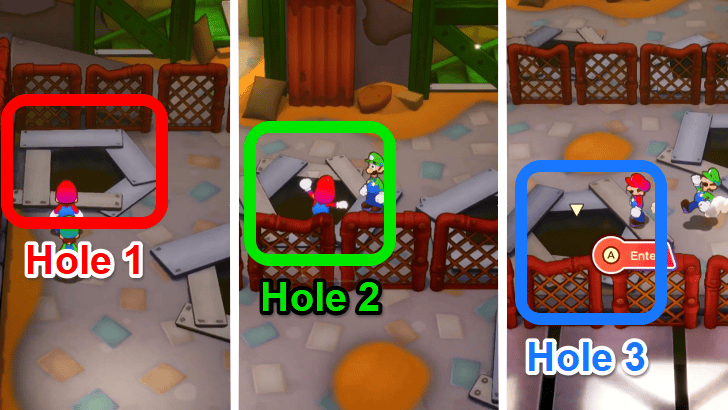 Climb up the green stairs into the second floor and jump down the leftmost hole to lead you back into the first floor, then climb up the green stairs again. Back on the second floor, move forward to a new set of holes and jump down the one on the left. Climb the stairs again one last time, move forward to third pair of holes, and jump down the hole on the far left to reach Dulles. During your conversation, he will give you clues on other IDLE members' whereabouts and set you on your way to find them. |
| 6 |
 Head to the western part of the island to discover Ellow stuck through a doorway in one of the buildings. To help him out of his predicament, enter the yellow building next to an unbloomed connectar flower. |
| 7 |
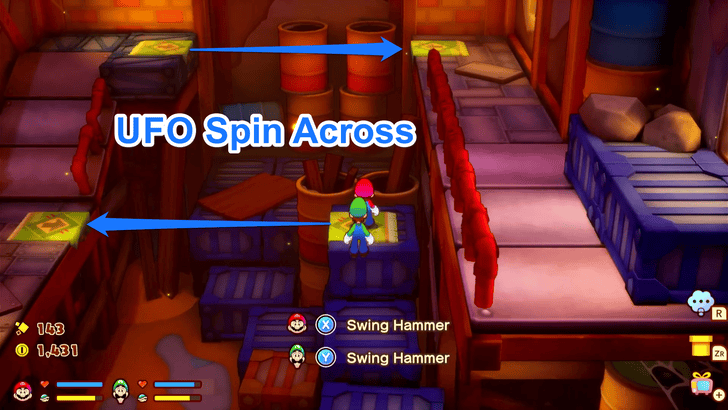 Inside, you will find platforms with green squares on the floor. Use the UFO Spin Bros. Move to cross between the gaps and proceed to the building's rooftop. |
| 8 |
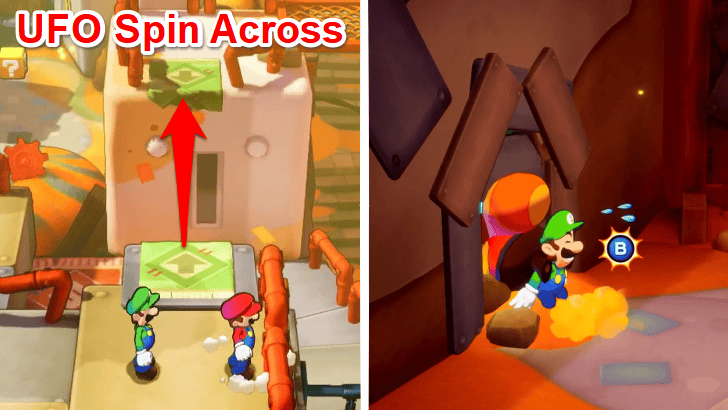 Once more, use your UFO Spin Bros. Move to cross another gap, and walk into the yellow building that Ellow is stuck in via the rooftop. Jump to the first floor where Luigi uses his Luigi Logic to push Ellow out of the doorway, successfully freeing him. With Ellow finally liberated, he points you to the direction of Loog, inside the blue building north of Desolatt Island. |
| 9 |
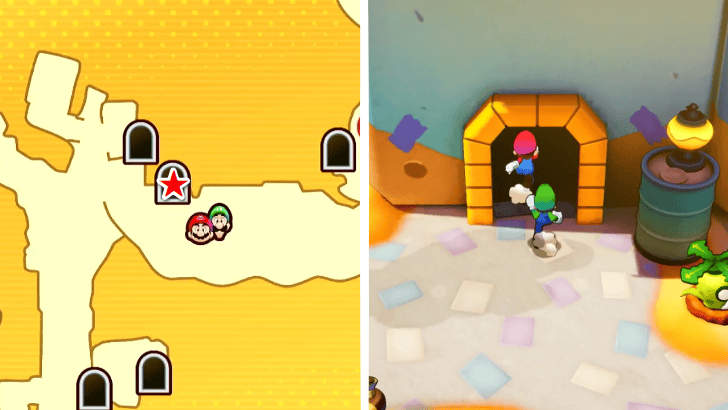 Head north of Desolatt Island and enter the blue building where you can find a Grampy Turnip planted by the doorway. |
| 10 |
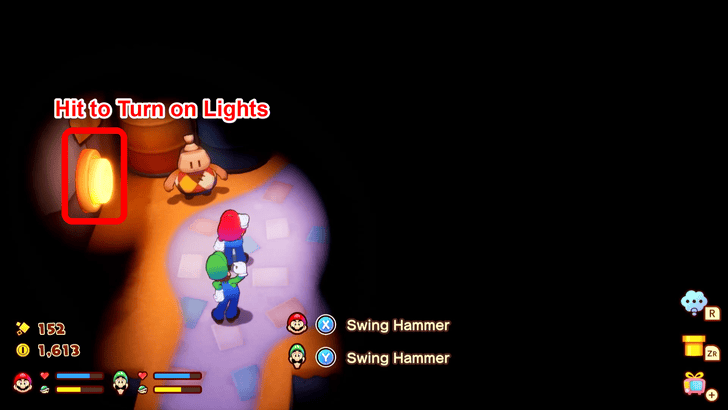 The area inside the building is dark, with only a light switch to your left illuminating a small patch of the room. Hit it with your hammer to open the lights, and navigate your way to the right side of the building. Do note that the lights only stay on for a limited number of time before turning back off. In which case, you must find another light switch to keep the area illuminated. |
| 11 |
 With the lights on, hop on every blue crate and use your UFO Spin Bros. Move to cross wide gaps until you reach Loog who is standing by the doorway to the right side of the room. After finding and speaking to him, he will lead you outside, where all members of IDLE are gathered. |
| 12 |
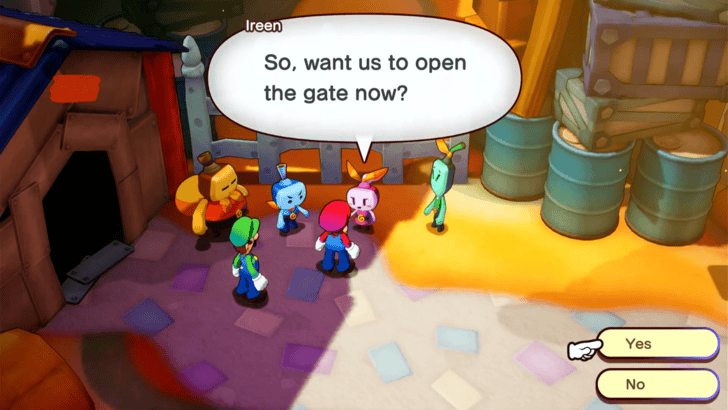 All IDLE members open the gate to a path that leads directly to the island's lighthouse. Be sure to hit the Save Block and Recovery Block on your way to the lighthouse, as there will be a boss fight soon after. |
| 13 |
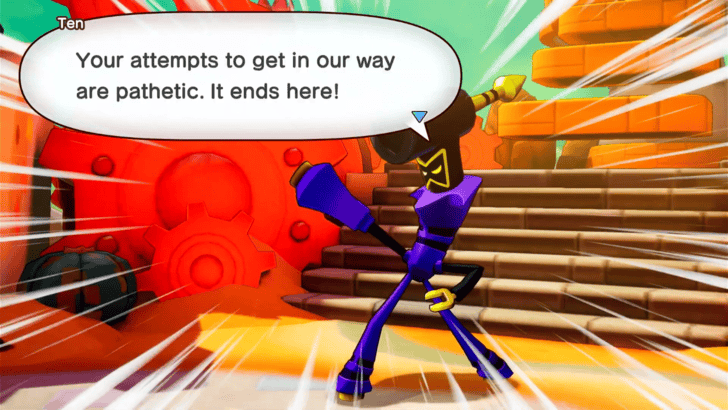 Upon reaching the lighthouse, you will be greeted by none other than Zokket and the Extension Corps. Ten steps in to derail your plans, proceeding into the island's major Boss Fight. ★ Battle Tip! Beating Ten When Ten summons mirrors on the battlefield which bounce electric balls, focus on which colored mirror the balls hit last to determine which brother needs to counterattack. Red is for Mario and Green is for Luigi. If Snaptors appear on the battlefield, pay them no mind and instead focus all of your attacks on Ten, as he resummons the Snaptors eitherway if one of them is eliminated. ▶︎ How to Beat Ten |
| 14 |
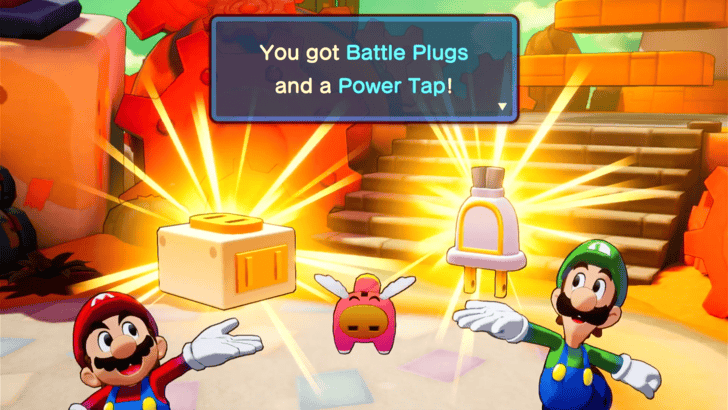 After defeating Ten for the first time, he drops a Power Tap and Battle Plug. Upon discovering this, he returns once more to try and reclaim it from the brothers, though this only serves as a demonstration to the power of the Kaboom Attack Battle Plug, and he retreats immediately upon getting hit. |
| 15 |
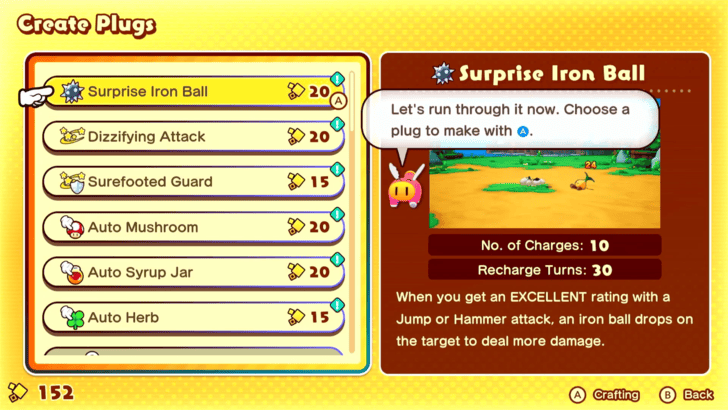 Snoutlet will introduce the concept of Battle Plugs which can be crafted with the use of all Sprite Bulbs you collect while exploring. You can pick whichever on you would like to craft, although we recommend the Surprise Iron Ball or Dizzifying Attack first, depending on how much Lumenade you have available. ▶︎ Best Battle Plugs to Buy First |
| 16 |
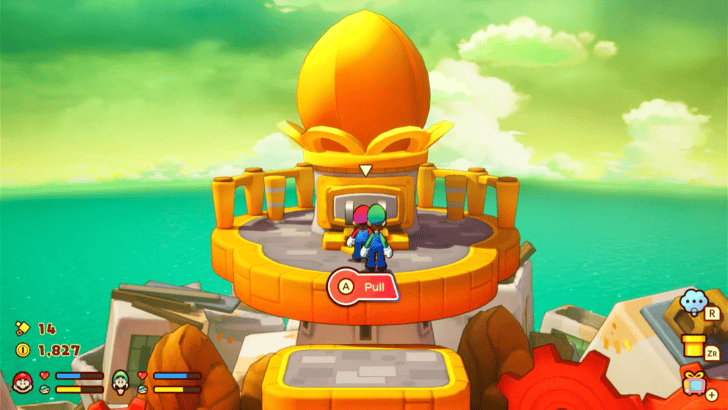 After following Snoutlet's tutorial on Battle Plugs, head toward the lighthouse and relink Desolatt Island! A cutscene will play afterward, and you will be transported back to Shipshape Island. |
Merrygo Island
| # | Step by Step Objectives |
|---|---|
| 1 |
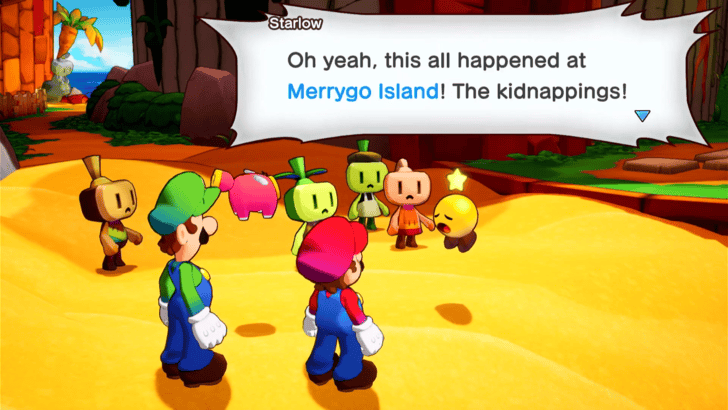 Back on Shipshape Island, IDLE hops onboard and introduces themselevs to Connie alongside Mario and Luigi. As the conversation progresses, a commotion can be heard from Shipshape Island's shores. Checking to see what it is, the brothers find Starlow who is in hysterics about a kidnapping involving Princess Peach. After Starlow pours her heart out, a connection is made to separated currents on the Ocean Map. |
| 2 |
 Head to the right side of the newly connected current, then keep sailing downward until you find a drifting island. Peer into the telescope to discover Merrygo Island and fire away toward it once you are ready! |
| 3 |
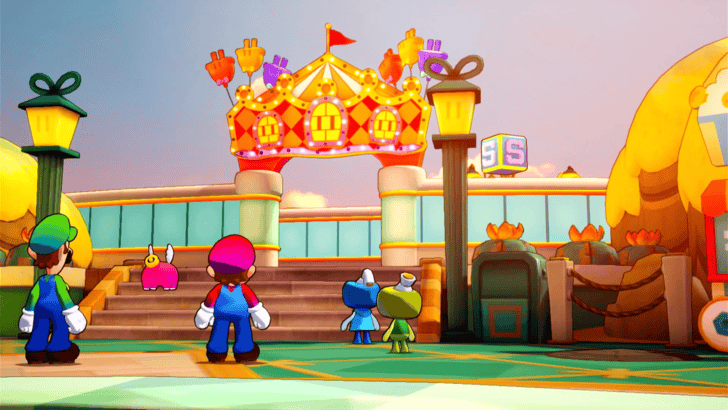 After landing in Merrygo Island, you will be greeted by two Concordians who point you toward the maze behind them in search of Princess Peach. They warn you about the kidnappings and enemies you might encounter in the maze, then send you on your way. |
| * |
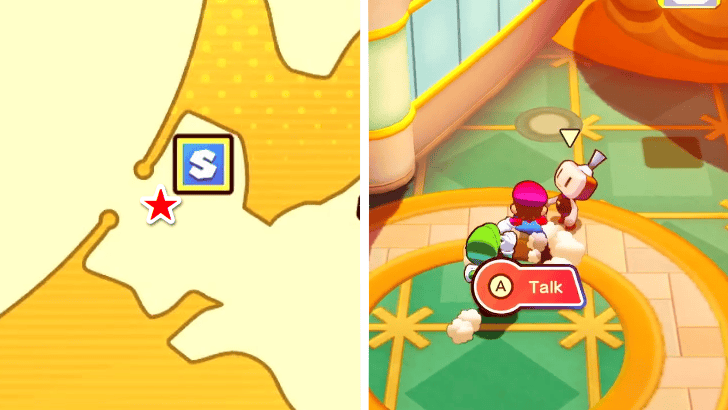 Speak with the Busybody by the maze's entrance to get a breakdown of where you should be headed to check on Princess Peach's whereabouts. They mark the Central Lookout Plaza at the center of the maze, a Secondary Lookout Tower, and the Maze's Exit while getting an aerial view of the maze. To make finding your way around easier, you may also follow the entryways with Red Flags on their pillars scattered around the maze. |
| 4 |
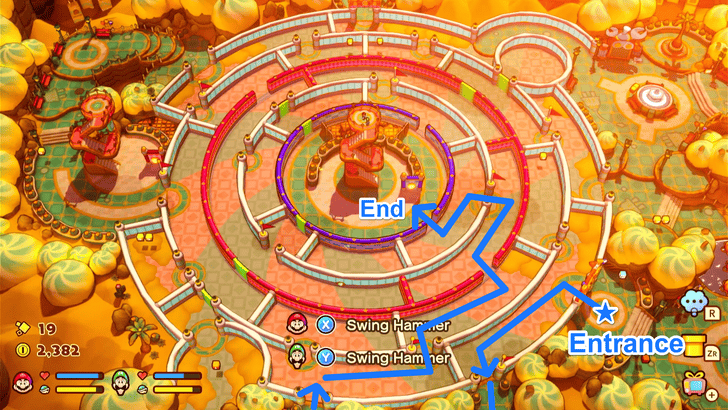 Enter the maze and head left to pass through the only open archway. Continue along the exterior path before re-entering the maze, staying vigilant through all of the Krodes and Snaptors patrolling the area. Move toward the farthest-right opening, then proceed through each available slot until you reach the Central Lookout Plaza. |
| 5 |
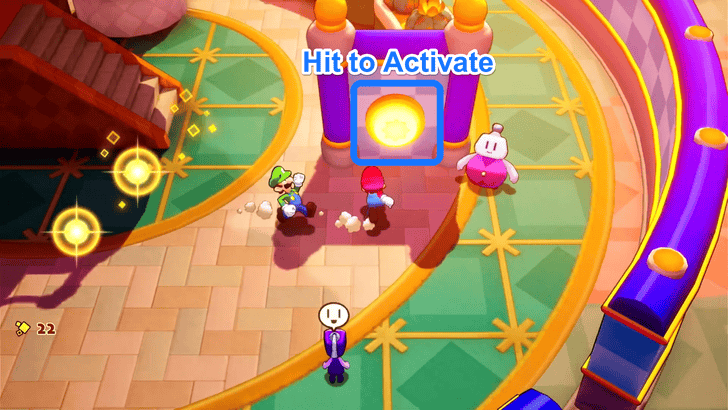 Hit the Button at the bottom of the tower to trigger Luigi's Luigi Logic, allowing him to be left behind and hit the button while Mario ascends the tower to get a wider view of the entire maze. |
| 6 |
 Have Luigi hit the button only once by pressing the Y Button to open a path toward the Secondary Lookout Tower, and head toward it. Pass through the northwestern opening, and keep moving forward until you reach the open slot to your left, then keep moing forward until you reach the Secondary Lookout Tower. |
| 7 |
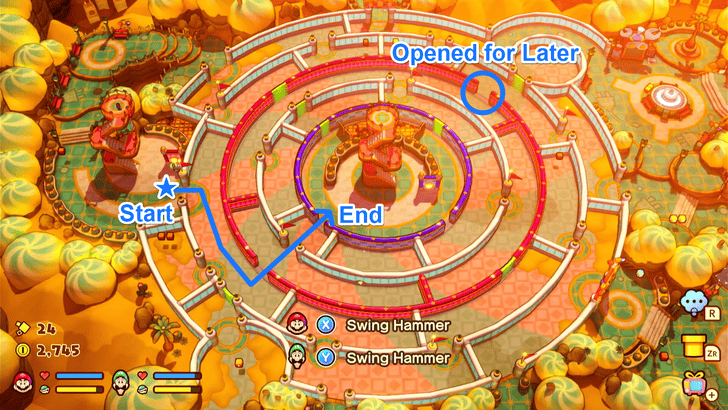 Once there, you will get a cutscene that misleads you into thinking Princess Peach was in the area, but is instead Birdo. Continue to the lookout tower where Luigi is left once more at the button while Mario ascends to scout the area. Make Luigi hit the button once to spin the outer ring which opens a new path back to the Central Lookout Plaza, and position an opening leading to the Maze's Exit. Head back to the Central Lookout Plaza by re-entering the maze and moving forward through all the consecutive open slots. |
| 8 |
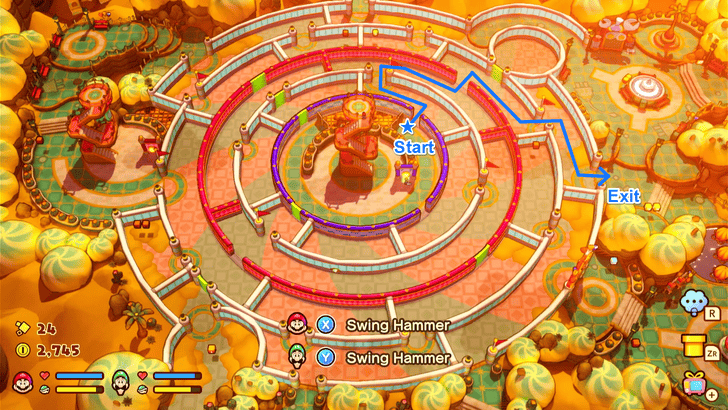 Once there, repeat the same process of leaving Luigi by the button, while Mario climbs the tower and scopes the area. Make Luigi hit the button only once to move the inner ring, and successfully pave a straightforward path to the Maze's Exit. Proceed through the northeastern opening and navigate all available slots until you successfully reach the exit. |
| 9 |
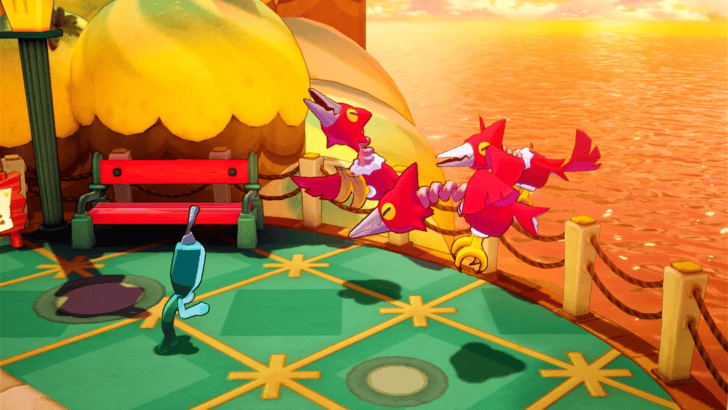 Explore the area until a cutscene triggers, revealing a Concordian being threatened by Snaptors. Defeat them in battle, after which Technikki introduces herself and directs you to Princess Peach’s location at Merrygo Island’s lighthouse. |
| 10 |
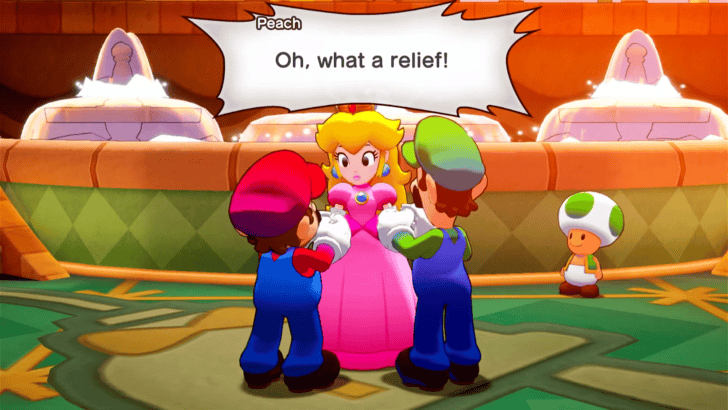 Re-enter the maze through the northern opening near the exit and proceed until you reach the only opening on the right. A cutscene will play, reuniting Princess Peach with Mario and Luigi, where they bring her up to speed on their quest. After the cutscene, ascend the lighthouse to relink Merrygo Island. Upon returning to Shipshape Island, Princess Peach reunites with Starlow and devises a plan to locate Zokket’s detention site for his kidnapped victims. |
Lottacoins Island
| # | Step by Step Objectives |
|---|---|
| 1 |
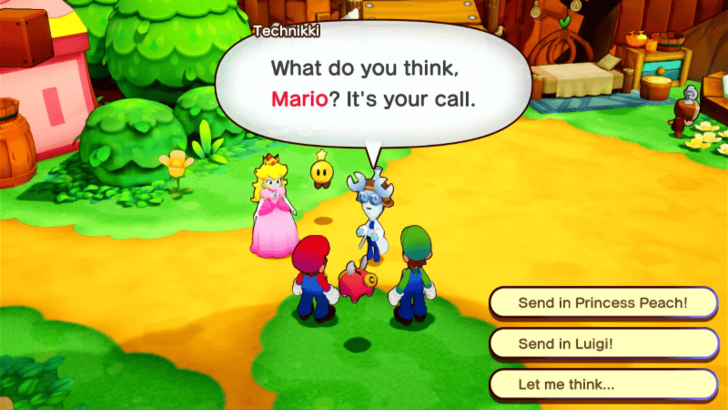 Before heading to Lottacoins Island, you must decide who to send in as a decoy to be kidnapped and gather intel from the inside. You can choose either Luigi or Princess Peach. Choosing Luigi will provide more detailed information about the island’s activities, but he won’t be available as a battle partner during your time there. On the other hand, choosing Peach will yield less intel but ensures you’ll have a partner for every battle. ★ Helpful Tip: It’s recommended to send Princess Peach as the bait, as having Luigi as your battle partner greatly improves your chances in combat on the island. ▶ Peach or Luigi? Who Should You Send to Investigate? |
| 2 |
 Upon arriving on Lottacoins Island, you'll receive a call from the person you chose as the decoy. They will inform you of their current location, which is inside the large building nearby. Shortly after, the IDLE team will approach, offering their assistance in locating your chosen decoy. |
| 3 |
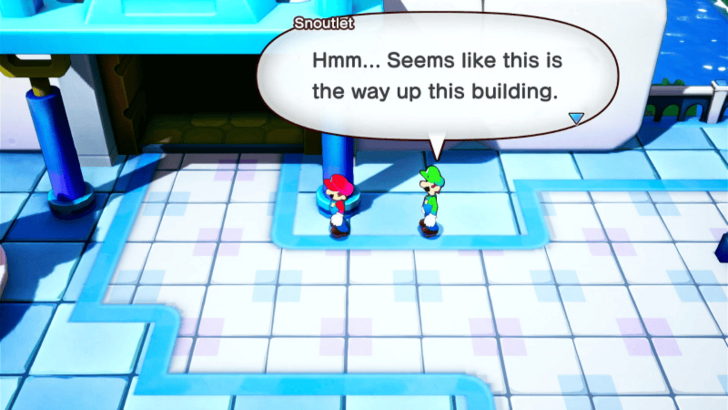 The entrance to the large building where your chosen comrade is held is located on the far left side of the map. On your way there, you'll pass by a shop. Be sure to stock up on essential supplies, including Gloves, Boots, Accessories, and Items, to prepare for the enemies ahead. ▶ List of Enemies in Lottacoins Island |
| 4 |
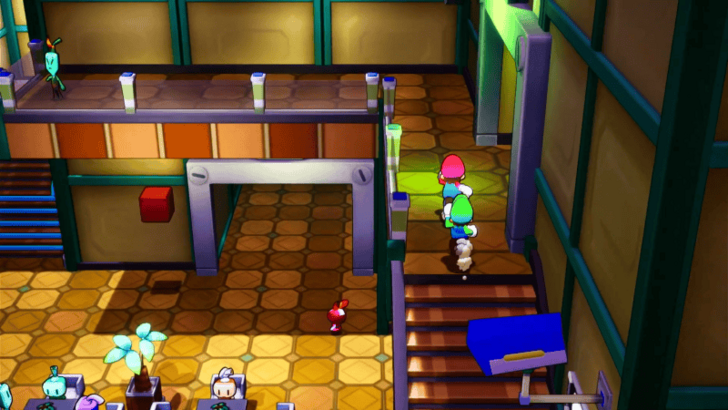 Upon entering the building, you'll notice the straight-ahead passage is blocked, and the nearby entrance to the right requires a password. Ignore these for now and head upstairs. Enter the doorway there, a stationed guard will stop you and demand you leave. Return to the previous room, where the IDLE team will meet you and help you cross the bridge the guard was protecting. Once past, you'll enter a room containing the passcode for the door. Be prepared to face enemies in this area, stay alert and ready for combat. |
| 5 |
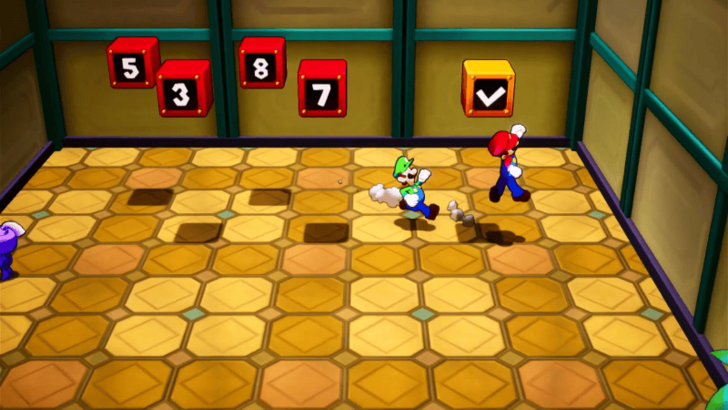 Once you cross the bridge and enter the room, interact with the intercom on the table. A Spike Zok Trooper will provide two of the four digits needed for the password. To find the remaining numbers, speak to the receptionist and one of the strangers on the ground floor. If you want to skip the search and save time, the correct password for the puzzle is: 5387. ▶ All Puzzles in Lottacoins Island |
| 6 |
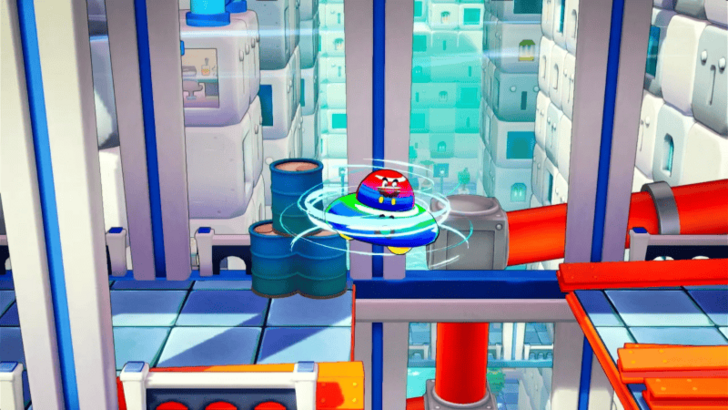 Once the blocked entrance is unlocked, proceed up the stairs to the 4th floor, where either Luigi or Princess Peach is being held. Be prepared for battles along the way, as enemies will attempt to block your progress. At the final bridge in the room, you'll encounter a gap. If Luigi is with you, you can cross it using a Bros. Move. However, if you chose to send Luigi as the decoy, you will switch to controlling him from this point onward to navigate the situation. |
| 7 |
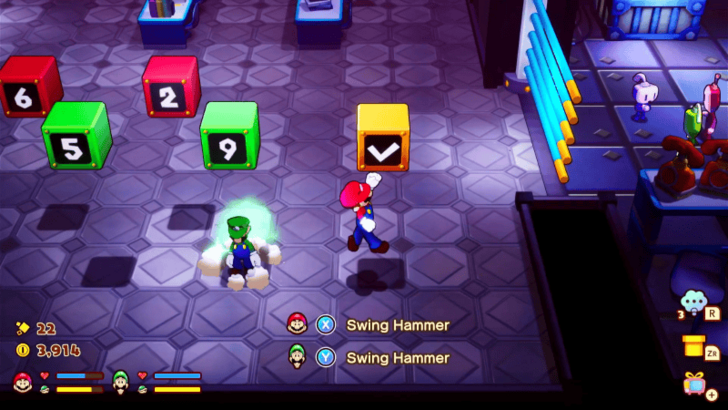 Upon reaching the next area, you’ll encounter another puzzle that requires entering a password to unlock the jail cell. To get started, approach the cell and talk to Princess Peach. One of the prisoners will then provide clues about where to find each number for the password. Note that if you chose to sacrifice Luigi, this puzzle can only be attempted once Luigi has rejoined your team. ★ Helpful Tip: If you want to skip the search and save time, the correct password for the puzzle is: 6529. ▶ All Puzzles in Lottacoins Island |
| * |
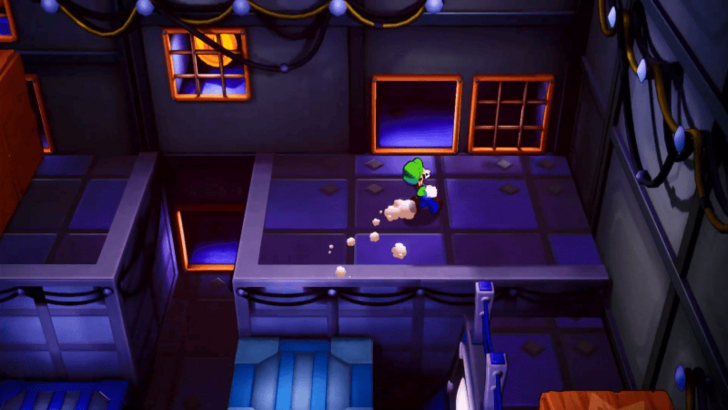 If you’re controlling Luigi because he was chosen as the decoy, start by finding a way to exit the cell. Use your hammer to smash the boxes in the room, revealing holes you can crawl through. These will lead you to an exit, eventually bringing you to the other side of the bridge where Mario is waiting. Since neither of you can cross the broken bridge, you’ll both jump down to the lower floor. From this point onward, Luigi and Mario will be reunited and work together in getting the Jail Cell Password. |
| 8 |
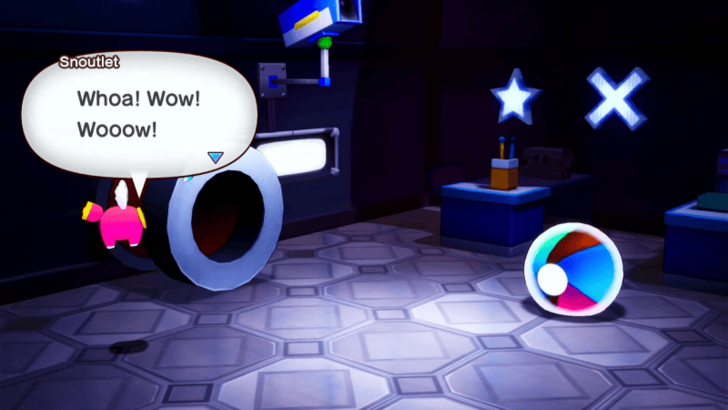 After freeing the prisoners, locate a large open pipe near the room’s entrance, where you initially came in. Interact with it to learn the new Bros. Move, the Bros Ball. This move allows you to enter and navigate the pipes scattered across Lottacoins Island. Enter this pipe to return back to the main floor. ▶ How to Unlock All Bros. Moves |
| 9 |
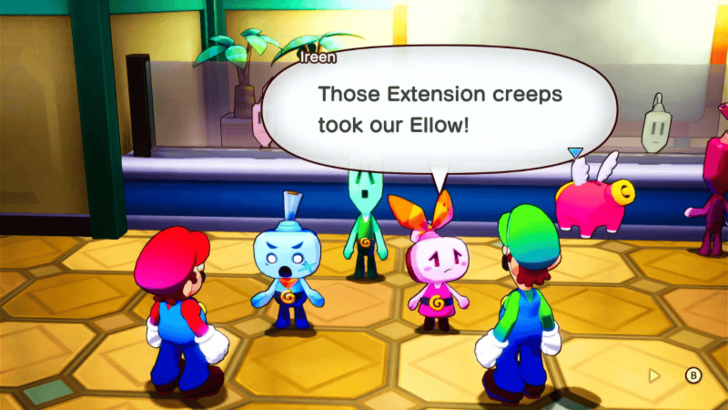 Upon returning to the main floor via the pipes, you will have to get to the 4th Floor again and talk to the freed prisoners, they will thank you and will be on their way. Head back over to the main floor and talk to the IDLE Team located in the lobby. You will find out that Ellow, one of their members, was taken by the Extension Corps. |
| 10 |
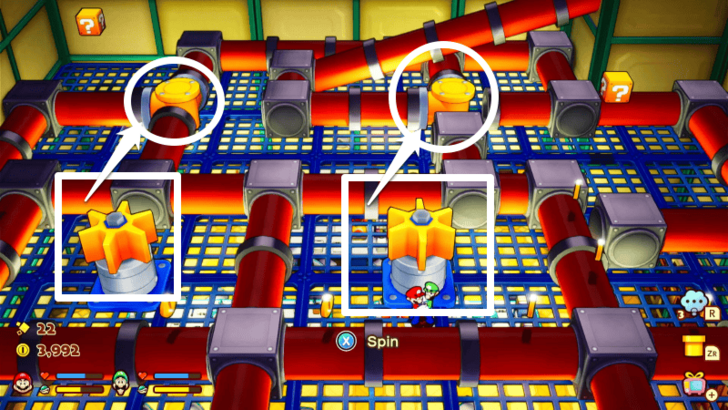 After speaking with the IDLE team, return to the 4th floor and locate the large pipe near the entrance to the bridge with a gap. Use the Bros. Ball move to enter the pipe, leading you to a new room. In this room, you'll need to perform the UFO Spin Bros. Move on the two nearby valves to adjust the adjacent pipes, aligning them to open the exit. Use the image above as a guide. Once everything is aligned, use the Bros. Ball move again to enter the pipe and head upward. |
| 11 |
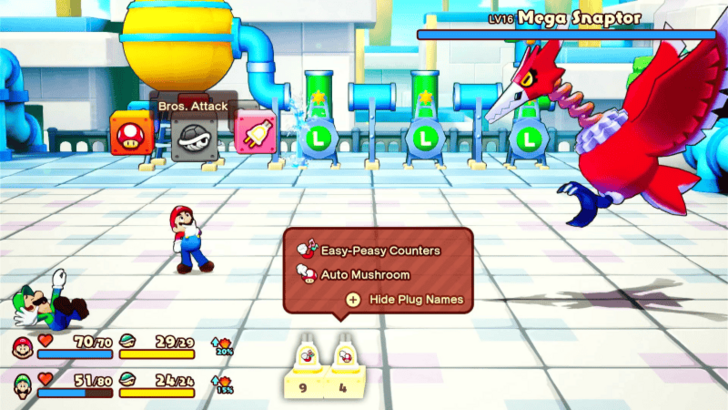 Upon reaching the next area, you will encounter a Save Block, a Recovery Block, and a Tunnel Block. It’s highly recommended to use both the Save Block and the Recovery Block to restore your health and save your progress, as this is the location of the boss battle for Lottacoins Island. Additionally, you can use the Tunnel Block to return to the shops and replenish your item stock. At the end of the area, you’ll find the Extension Corps, with Ellow being held captive. After speaking with them, you’ll face the Mega Snaptor Boss. Defeat it and rescue Ellow. ▶ How to Beat Mega Snaptor |
| 12 |
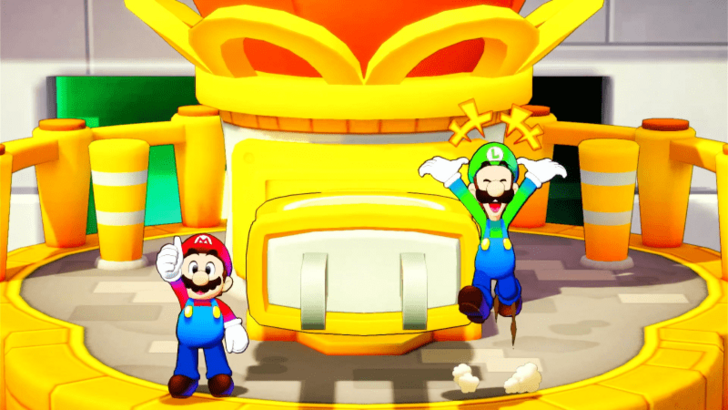 After defeating Mega Snaptor, the Extension Corps will flee. Use your Bros. Ball move once again to enter the pipe ahead, which will lead you to the lighthouse on Lottacoins Island. Once inside, pull the plug to complete your mission and finish Lottacoins Island. |
Allsand Island
| # | Step by Step Objectives |
|---|---|
| 1 |
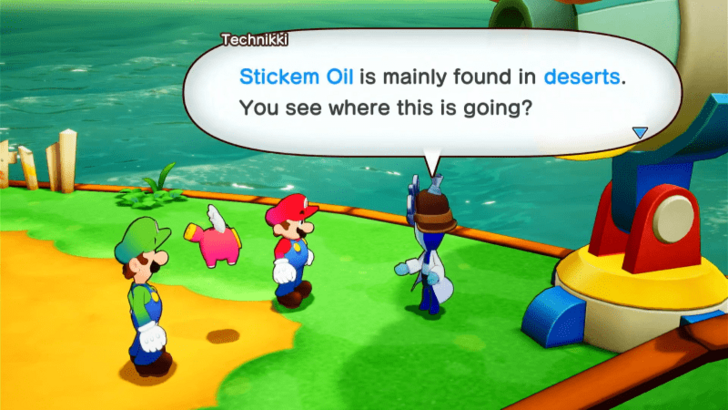 After completing Lottacoins Island and heading back to Shipshape, Technikki will require you to obtain Stickem Oil so that the cannon will have fuel to destroy the walls of the Great Lighthouse Island in Color-Full Sea. Set your course to the newly opened route to visit Allsand Island. ▶ Lottacoins Island Walkthrough Guide |
| * |
 Additionally, you will unlock the Fishing feature after finishing Lottacoins Island. While waiting for your ship to sail to Allsand Island, you can try fishing at the spot located just below the cannon. ▶ How to Fish |
| 2 |
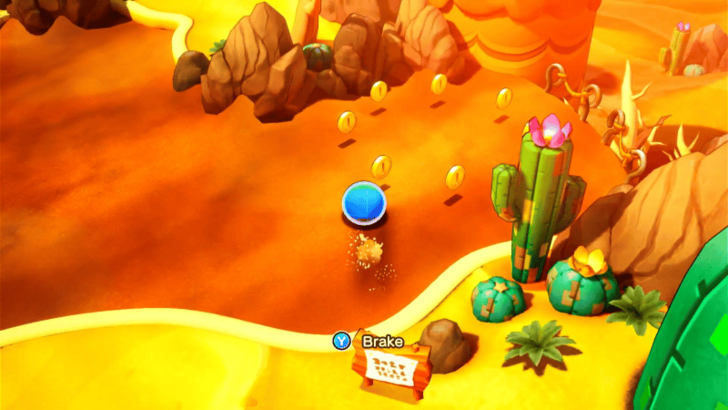 Upon arriving at Allsand Island, head north immediately until you reach the quicksand area. You won't be able to pass through these quicksand areas scattered across Allsand Island by walking or jumping, so you'll need to use your Bros. Ball Bros Move to navigate through them. |
| 3 |
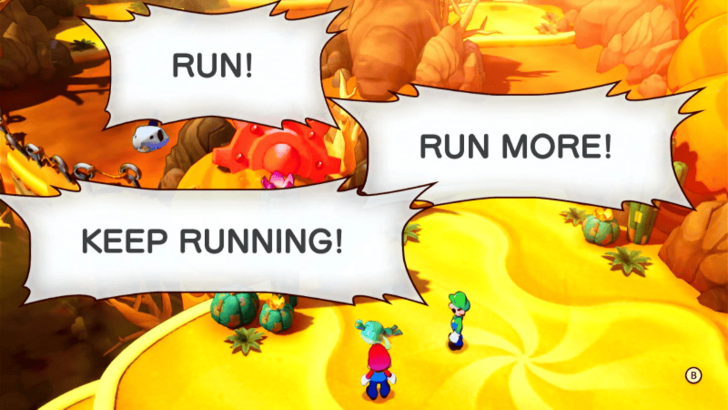 Upon reaching the next area, you will come across a person lying on the desert, he will mention that there are very strong shark enemies swimming in the quicksands moving forward and that you need to watch out. It is best that you stay away from these Sharkbone enemies as they are at Level 40 and can knock you out with one attack. If you ever encounter them in battle, make sure to escape immediately to avoid their attacks. ★ Helpful Tip: To avoid being hit by Sharkbones in the overworld, roll sideways to dodge, as they are set to follow a straight path and won't be able to turn to reach you. |
| 4 |
 Head to the island farthest to the left while avoiding the Sharkbones. Be sure to jump on the blocks along the way to collect coins. In this area, you'll find the Shop, a Save Block, and a Tunnel Block. Take the opportunity to save your game here and stock up on items and equipment at the shop to prepare for the challenges ahead. |
| 5 |
 Using the nearby Oasis as a midpoint, turn right and continue until you reach another quicksand area. Use your Bros. Ball move to navigate through the quicksand, then head to the second island on the right. There, you'll find a button that opens the gate adjacent to the island. |
| 6 |
Press the L Button to have Luigi step on the floor switch, which will open the gate on the other side. Then, jump on the blue platforms to reach the newly opened gate. Head right and climb up the ledges. Use the Hammer to destroy the boulders blocking your path, and pick up the green block above. Have Mario drop below while holding the block. Then, move Luigi off the floor switch and place the green block onto the switch to solve the puzzle and proceed. |
| 7 |
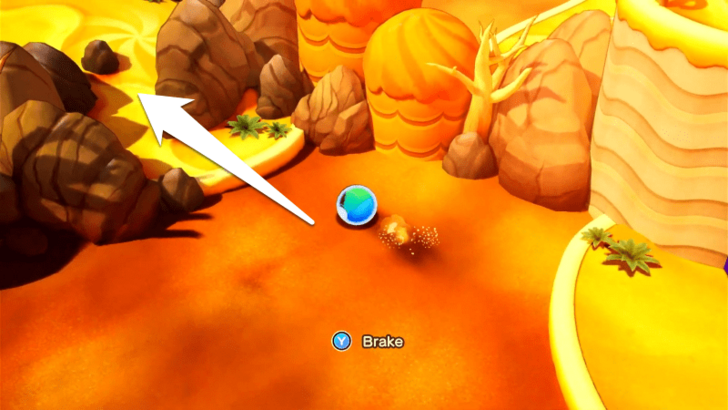 After passing through the gate, head north while battling Shower Fishes and Invizilizard Rs. In the next area, you'll find the location of the Stickem Oil, but it’s guarded by a dangerous school of Sharkbones and jumping across the platforms won’t help, as the Sharkbones will destroy them, leaving you vulnerable and in serious trouble. |
| 8 |
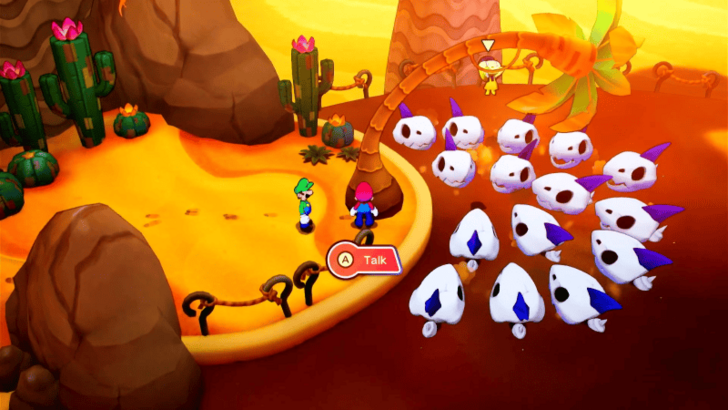 To bypass this, roll over to the leftmost island in the area. There, you'll find an NPC clinging to a tree for dear life, surrounded by Sharkbones. Speak to him, and a cutscene will play where he flips over to save himself. |
| 9 |
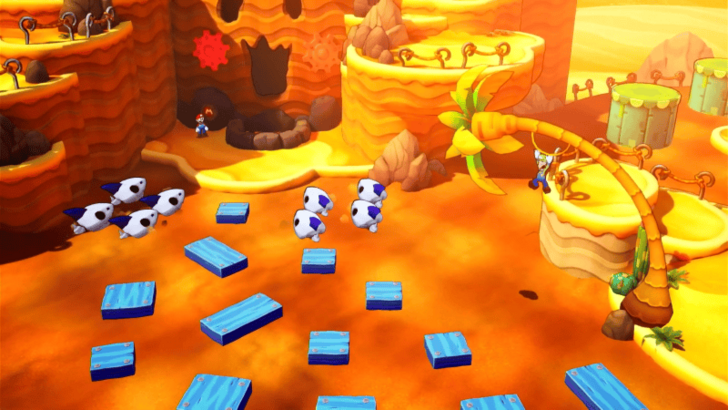 After the cutscene, return to the island near the Sharkbones. Interact with the nearby tree and press the L Button to have Luigi jump up and hang on it, distracting the Sharkbones so you can safely proceed. ★ Helpful Tip: Note that Luigi's distraction has a time limit, so you’ll need to jump across the blue platforms quickly to reach the Stickem Oil before the Sharkbones regain their focus. |
| 10 |
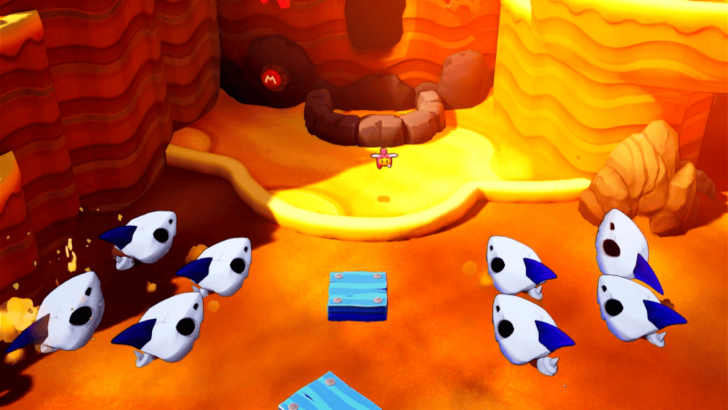 Upon reaching the island guarded by the Sharkbones, use your Hammer to hit the nearby button and get some Stickem Oil. |
| 11 |
 Reunite with Luigi and proceed to the island where the Lighthouse is located. Climb to the top and pull the plug to finish Allsand Island and return to Shipshape, completing this area. |
Color-Full Sea Great Lighthouse Island
| # | Step by Step Objectives |
|---|---|
| 1 |
 Head to the current where Color-Full Sea's Great Lighthouse resides in, and look at it through the telescope. Afterward, a cutscene will play featuring all of IDLE's members volunteering to steer the rocket at their own peril. After the rocket successfully penetrates through the steel walls, follow suit by peering into the telescope once more and firing toward the Great Lighthouse. |
| 2 |
The entrance to the Great Lighthouse is locked, and the brothers will have to find an alternative way in. To do that, head toward the right side of the Great Lighthouse from the entrance, and use the Bro Ball Bros. Move to pass into the pipes and navigate your way until you reach the exit with an M Button on the left side of the wall. Hammer the button as Mario by pressing the X Button on your controller to open the gate, and let Connie through. |
| 3 |
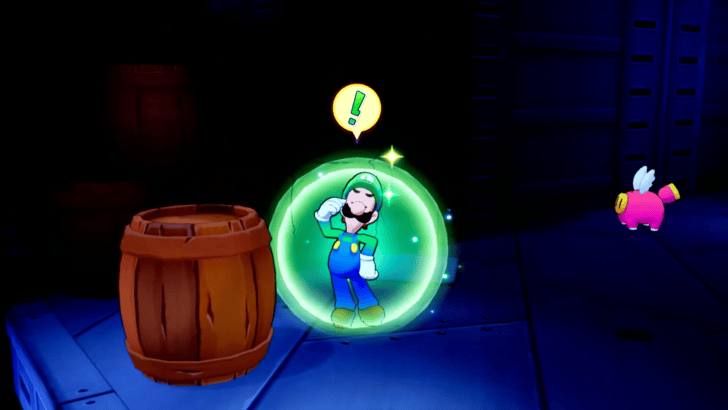 Once inside the Great Lighthouse, walk toward the southern door to enter the next part of Sublevel 1. The area will be filled with Concordians on the lookout, and after getting caught once, Luigi uses his Luigi Logic to devise a way on bypassing them all. Press the L Button to make Luigi hide in the barrel. While inside, Luigi will automatically place himself where needed, and move in proximity to Mario. |
| 4 |
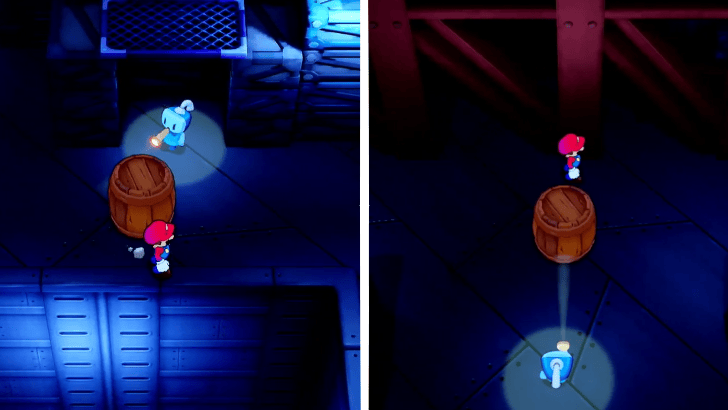 On the first part, allow Luigi to place himself in front of the first guard, and block their field of view so Mario can pass through. Alternatively, you can also step over Luigi and use him to reach the raised platform behind the guard, then jump down after passing them by. Near the second guard, Luigi will automatically place himself in front of them to allow Mario undetected passage. |
| 5 |
 In the next area, place Luigi by the raised platform, and use him as a means to climb it. Proceed forward and wait for Luigi to bypass the guards, then use him once more as a platform to step onto the orange button which opens the gate leading into the conveyor room. |
| 6 |
 Head east and clear the crates blocking access to the jump bar to the raised doorway, then walk through afterward. In the new room, destroy the crates on the moving conveyor belt until a staircase leading to the raised platform is created. Once on top, interact with the Exclamation Block to open a gate back in the main area of Sublevel 1. |
| 7 |
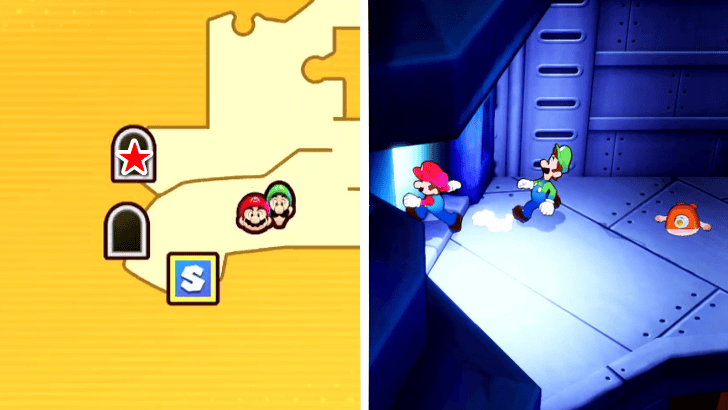 Afterward, exit through the door in the northern part of the room to find yourself back in the conveyor room. Cut through the second door in the west, next to a conveyor belt with a collapsed Concordian, then have Mario hit the M Button on the wall to deploy a staircase leading down to the main area. |
| 8 |
 Head through the newly opened staircase with Connie to find yourselves in Sublevel 2. To progress the area, you will need to open the northern gate by inserting plugs into the sockets in front of the gate. You may also hit the pipe block beside the gate in order to erect a green pipe going to and from Sublevel 2 and the Island's Shores. |
| 9 |
 Head east, down to a door leading into a warehouse. The inside will be filled with enemies such as the Spike Zok Trooper and Helmet Zok Trooper, though you can choose to bypass them and head straight for the door located north of the room. |
| 10 |
 In this room, you will encounter another conveyor belt with destructible crates. Use your hammer to break the crates, similar to the previous room, and arrange the metal crates to form a staircase leading to the raised platform on your right. |
| 11 |
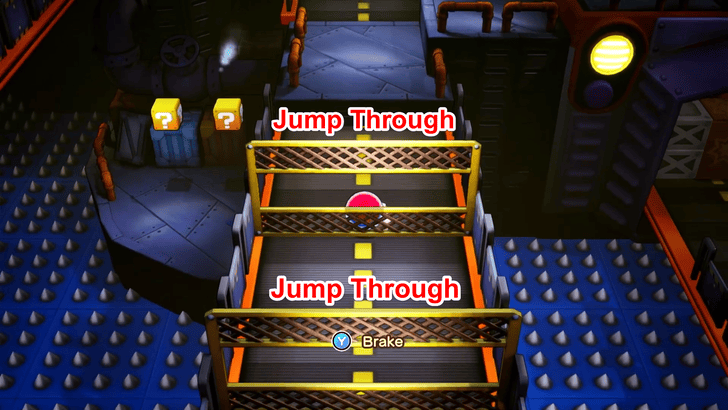 On the second conveyor belt, use the Ball Bro Bros. Move to jump through the metal nets and proceed to your left. |
| 12 |
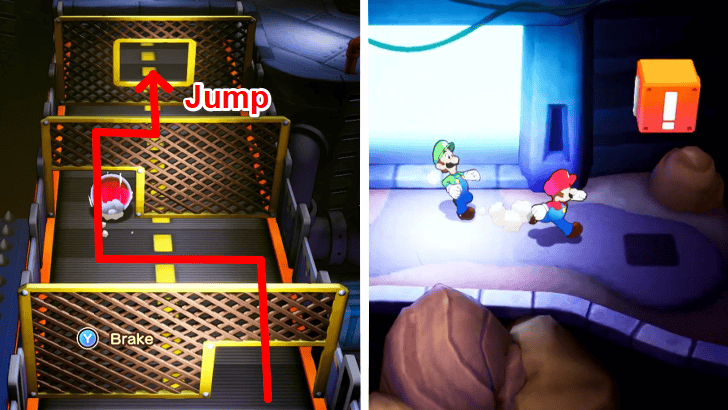 Ignore the doorway, and instead hop on the third conveyor belt with Ball Bro active, and pass through the metal nets once more. Continue to your left and pass through the doorway to interact with an Exclamation Block which opens the gate back into Sublevel 2's main area. |
| 13 |
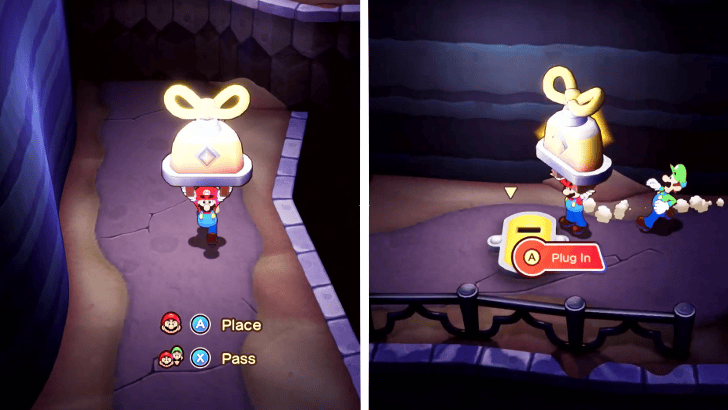 Re-enter the room and exit through the southwestern doorway, collecting the Power Plug as you leave. Return to the main area, but instead of placing the plug in one of the sockets in front of the gate, proceed to the closed gate on the west. Place the plug into the socket to unlock it, and descend the stairs to access a new section. |
| 14 |
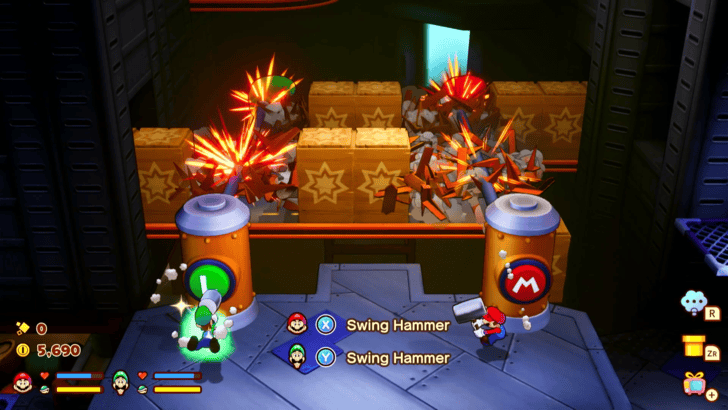 Keep walking east until you reach two punching machines. Position Mario and Luigi in front of the M and L Buttons respectively, and press the Y Button and X Button to activate the machine and destroy the wooden crates as they pass by. This will create a clear pathway toward the northern door, which the brothers can jump their way toward. |
| 15 |
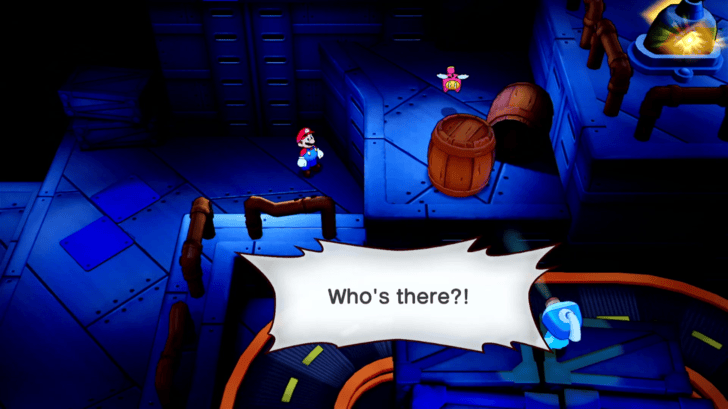 There will be nothing but enemies in the next room, so keep going east into the next area after either defeating or bypassing all of them. The new area will be heavily patrolled by guards, and Luigi suggests hiding inside a barrel once more to aid in Mario's stealthy maneuvering. This time, however, the main action for Luigi will be to time his Jump with the B Button to distract guards and allow Mario to slip past them, while he travels around the spinning conveyor belt. |
| * |
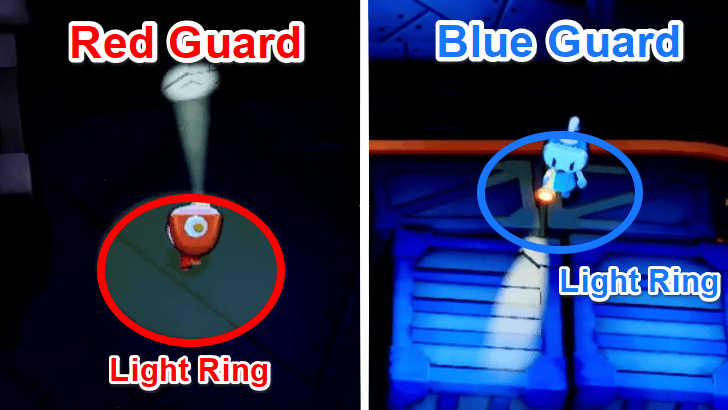 Red Guards have an active patrol pattern and will remain mobile. Blue Guards on the other hand, will remain stationary, and will only move away if distracted. Both types of guards also have light rings around them, which means you will be detected if you get too close and step inside their boundaries. Be sure to keep this in mind as you navigate your way through! |
| 16 |
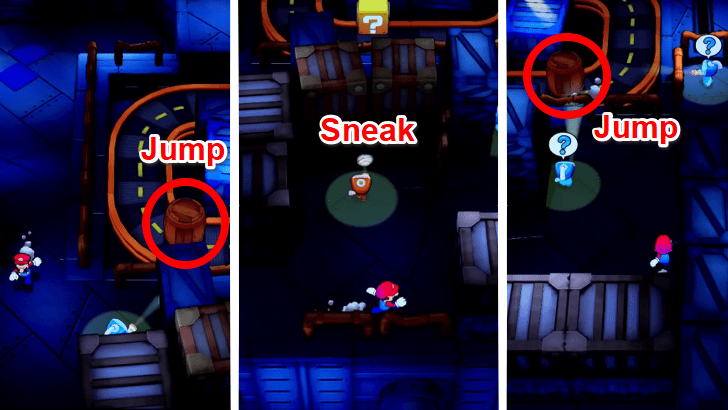 Sneak through the first Blue Guard by pressing the B Button to make Luigi jump as he passes near them on the conveyor belt. Next, bypass the Red Guard by waiting for them to turn their back, and slip through. Make sure you do not get caught in its torchlight by staying in the corners as they turns around. On the next two Blue Guards, wait for Luigi to pass by in front of them, and make him jump once more. This will distract the guards' attention for some time, allowing Mario to slip through undetected. After which, Luigi will switch to the next conveyor belt. |
| 17 |
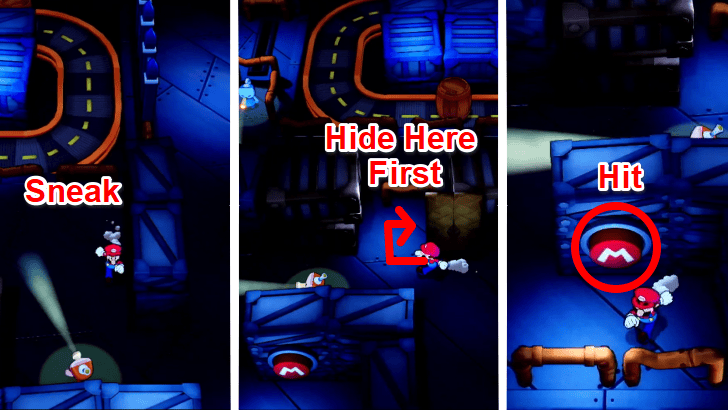 On the next area, bypass the first Red guard by slipping through as they turn their back. To pass through the second Red guard, follow them closely behind and hide behind one of the nooks until they turn back around. As they walk back, emerge from the nook and move forward toward the M Button and hit it by pressing the X Button on your controller. This unlocks the gate by the second conveyor belt, and allow Luigi to pass through. Make your way back by following the same cautionary steps, and reunite with Luigi. |
| 18 |
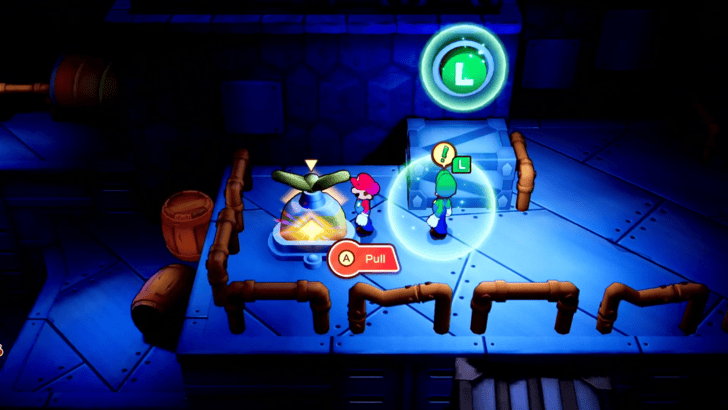 Jump up the platform and pass through the archway on your left. Pull the Power Plug from the socket, then allow Luigi to hit the L Button and deploy a staircase leading back into the main area of Sublevel 2. |
| 19 |
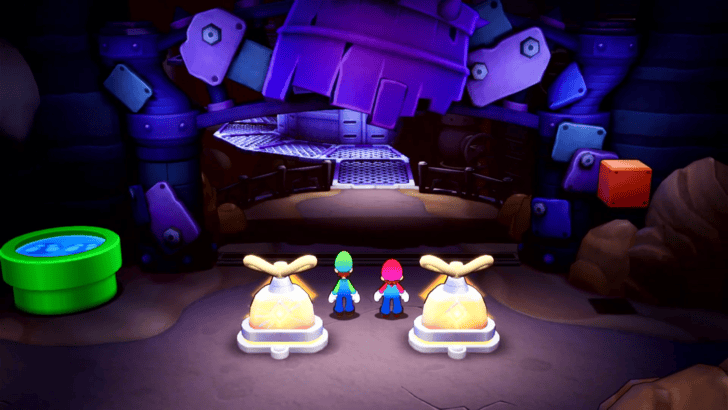 Insert the plug you just collected in one of the sockets located by the locked main gate, then retrieve the first plug from the western gate, and insert it in the remaining empty socket. This will open a pathway leading you to a deeper part of the Lighthouse. Do not forget to use the Save Block and Recovery Block when you pass them by, as you are walking toward the area's final boss. |
| 20 |
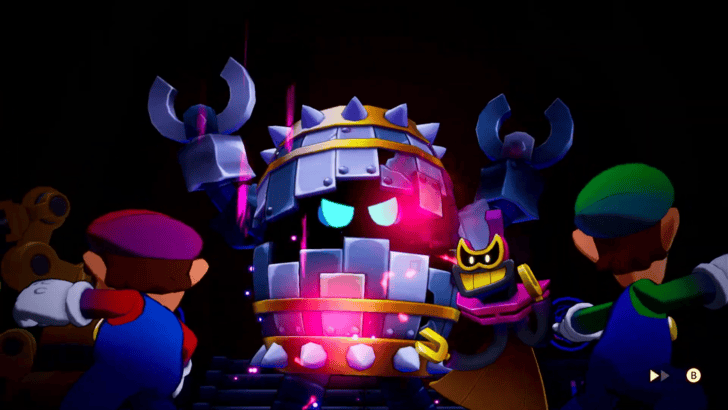 After heading through the only doorway moving forward, you will be greeted with a cutscene containing Zokket and the Extension Corps once more. And this time, they leave you to battle with one of their creations: Sharpcask. ★ Battle Tip! Beating Sharpcask For this battle in particular, we recommend equipping the Anti-Spike Specialist Battle Plug if you have it available, as it allows Mario and Luigi to deal extra damage to spiked enemies. ▶︎ How to Beat Sharpcask |
| 21 |
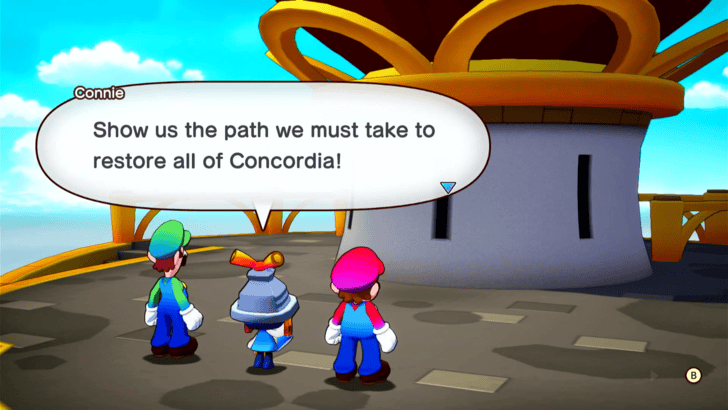 Once you emerge victorious from the battle, walk toward the elevator at the far end of the room, and ride up to the Top Floor. Once there, exit toward the Lighthouse's flower bulb, and watch a cutscene where Connie relights the Great Lighthouse. Afterward, several cutscenes will unfold that transitions Mario and Luigi back in Shipshape Island, sailing through the Brrrning Sea. |
Brrrning Sea Walkthrough
Bulbfish Island
| # | Step by Step Objectives |
|---|---|
| 1 |
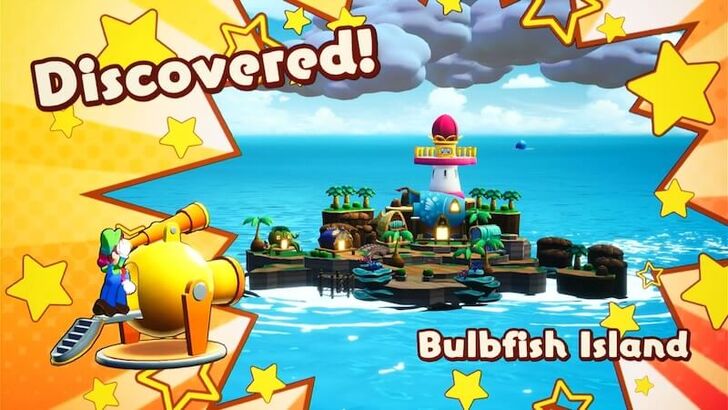 Set sail to Bulbfish Island, and use the Big Cannon on the right side of Shipshape Island to launch yourselves directly to the island. |
| 2 |
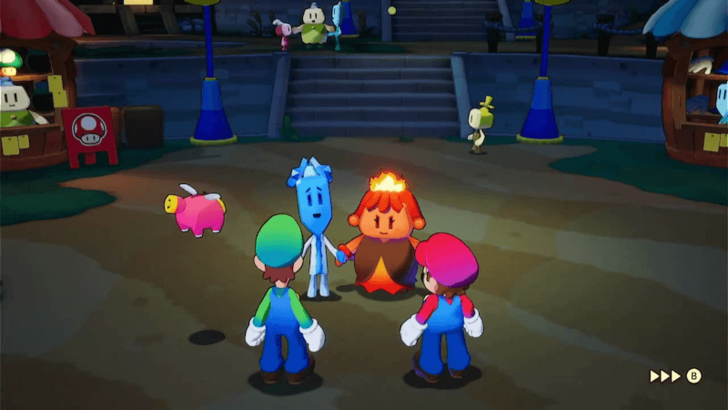 Upon landing at Bulbfish Island, head north to trigger a cutscene featuring an exchange between Chilliam and Burnadette, a couple who ran away from their home islands. |
| 3 |
 After speaking with the couple, continue north past the Shops to watch another cutscene. The residents are complaining about the mysterious disappearance of the Bulbfish-eggs. |
| 4 |
 Enter the Chief's House where you’ll meet Leyden and his Assistant. They'll ask for your help in recovering the missing Bulbfish-eggs. In return, they'll grant you access to the Lighthouse. |
| 5 |
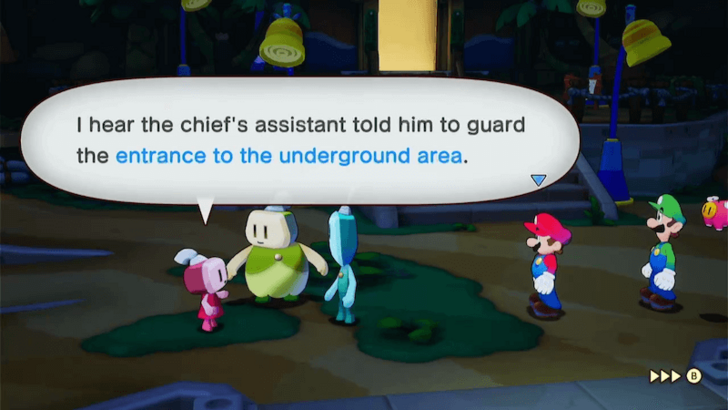 Talk to the Gossiping Concordians gathered just outside of the Chief's House. You'll learn that there is a guarded Underground area on the island's eastern side. |
| 6 |
 Make your way to the western part of the island and look for a wall button. Press X to hit the button, activating the streetlights across the island. This will also wake up the Guard stationed at the Underground entrance. |
| 7 |
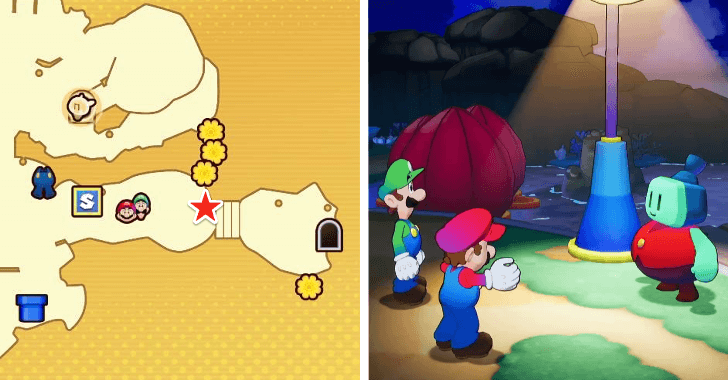 Approach the Guard. He’ll require you to pass his quiz in order to allow entry in the Underground. |
| 8 |
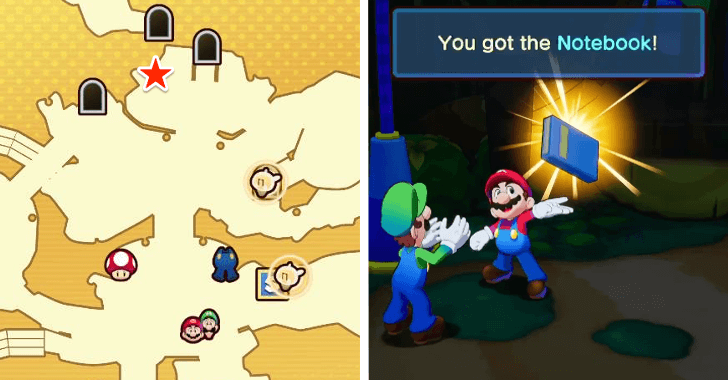 You could speak to the island residents to find answers to the first two questions. However, for the final question, you’ll need to retrieve the Guard's Notebook. Look for it near the unlit streetlight next to the Chief's House. |
| 9 |
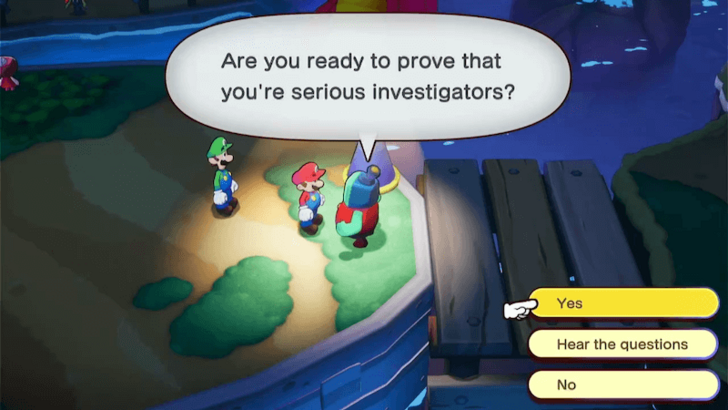 Return to the Guard and take his quiz. To save you some time, we've already listed the correct answers below: Question #1: Who is the most suspected? Answer #1: Strange couple. Question #2: What is NOT a major rule of Bulbfish Island? Answer #2: Be single-minded and focused. For the final question, simply hand over the Guard’s Notebook. With all answers correct, the Guard will grant you passage to the Underground. |
| 10 |
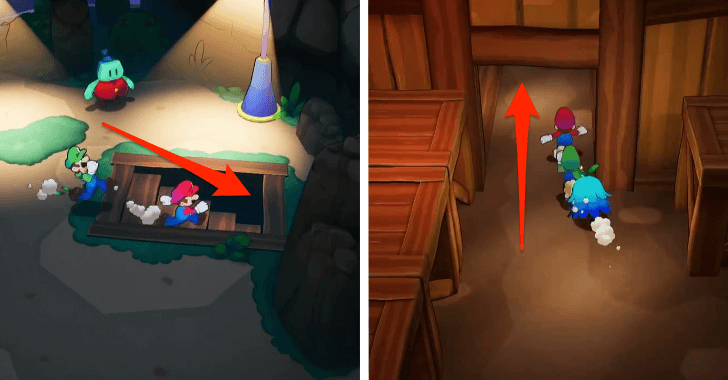 Enter the Underground and head north, then continue north again to reach the Jail Cells. Be prepared for battles along the way, as the Underground will be teeming with enemies like Capnap Rs and Foopflies. |
| 11 |
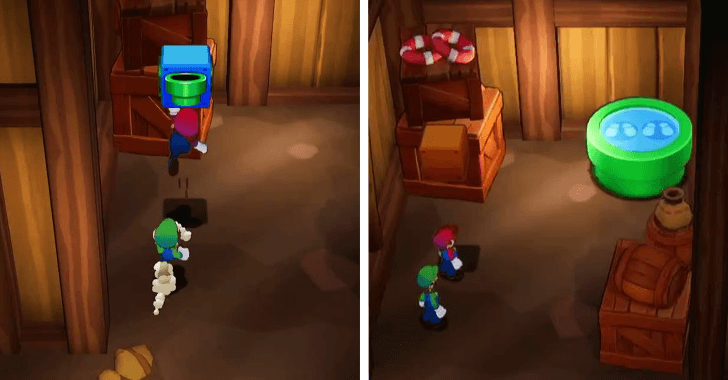 Jump up the Green Pipe Block between the Jail Cells to create a Green Pipe connecting back to the Underground Entrance. This shortcut will come in handy later in the story. |
| 12 |
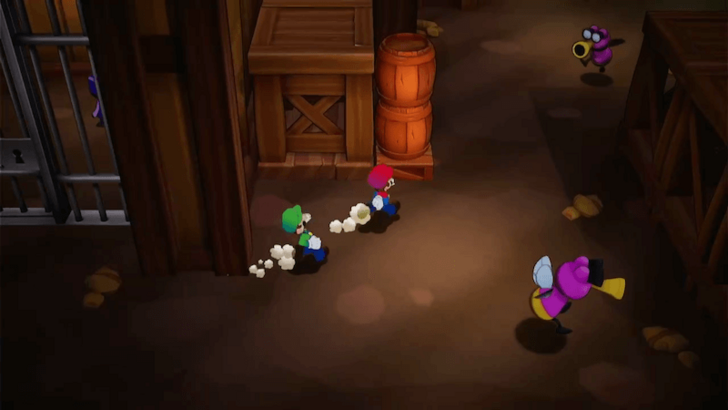 From the Jail Cells, head northeast, then turn south. Jump onto the wooden crate to reach the upper level. |
| 13 |
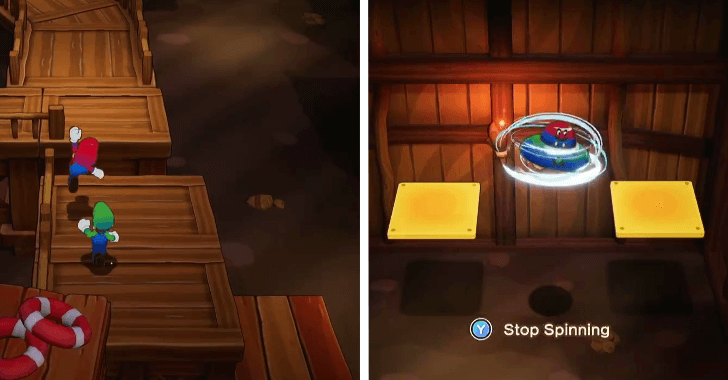 Head north and jump onto the moving yellow platform. Use UFO Spin to cross to the next moving platform and make your way to the other side. |
| 14 |
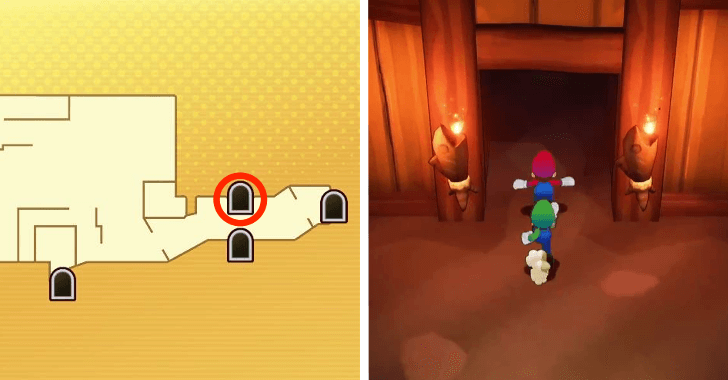 Once across, jump down and enter the Assistant's Office to the north. |
| 15 |
 Inside the Assistant's Office, interact with the Note on the table and the Daily Journal above the wooden crates. |
| 16 |
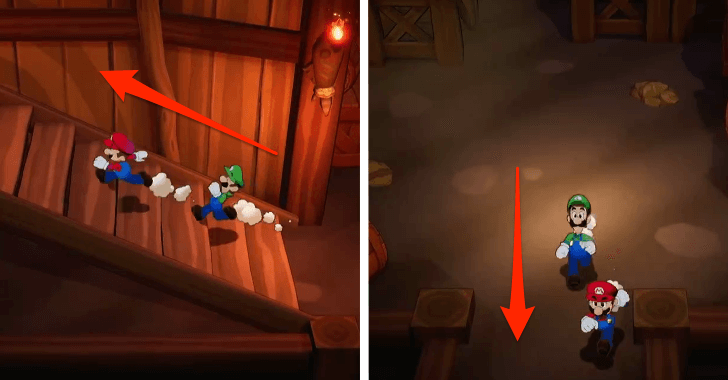 Enter the doorway located south of the Assistant's Office and turn left to move on to the next area. Continue heading south, then turn left again to exit the Underground. |
| 17 |
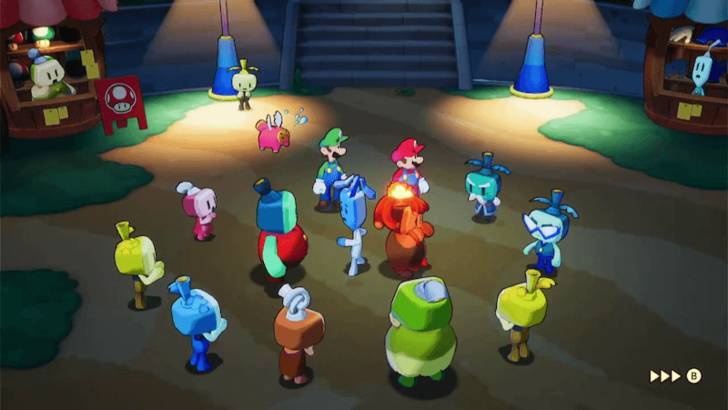 After a lengthy cutscene, leave your room to trigger another cutscene where Chilliam and Burnadette are arrested for the missing Bulbfish-eggs. |
| 18 |
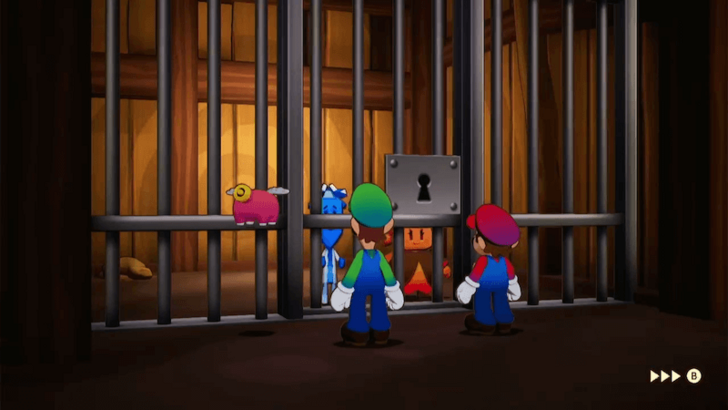 Head back to the Underground and use the Green Pipe to fast-travel to the Jail Cells. Speak to the couple in the cell to the left of the Green Pipe. You'll need to get the Key to access the locked gates in the Underground. |
| 19 | Exit the Underground and talk to the Guard by the bridge. He’ll only hand over his Key if you gather information from his younger brother. |
| 20 | To proceed, return to the wall button on the western side of the island. Press X to hit the button and turn off the streetlights. |
| 21 |
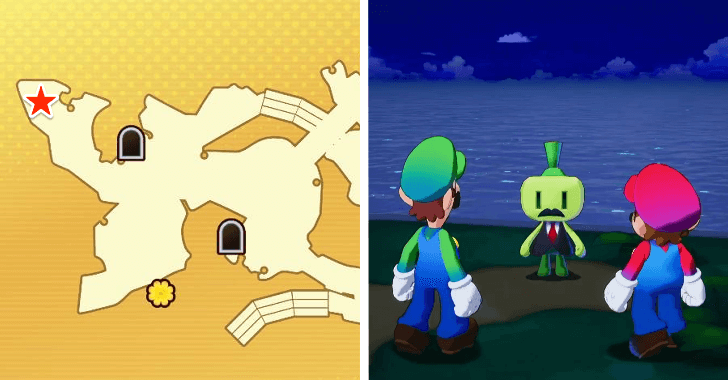 With the lights off, speak to the Secret Snatcher hiding behind the streetlight just north of the wall button. Offer him the Incident Report in exchange for information, and ask him about the guard’s little brother. He will direct you to the Anglerfish Restaurant on this side of the island. |
| 22 |
 Enter the Anglerfish Restaurant and look for the Guard’s younger brother, a Teal Concordian wearing a green shirt. Use the UFO Spin to cross the gap above and reach him. |
| 23 | The younger brother will ask you a question before providing the information. When he asks who is the only person on the island who wears spectacles, select Leyden’s Assistant. |
| 24 |
 After answering correctly, report back to the Guard by the bridge. Following a cutscene, you will have the Key to the Underground. |
| 25 |
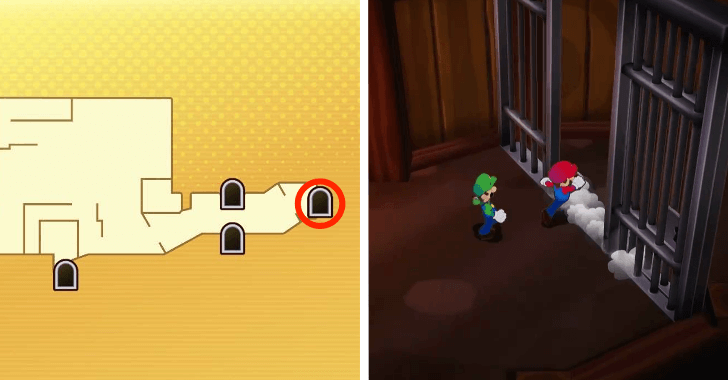 Enter the Underground once again and open the locked gate next to the Assistant's Office. |
| 26 |
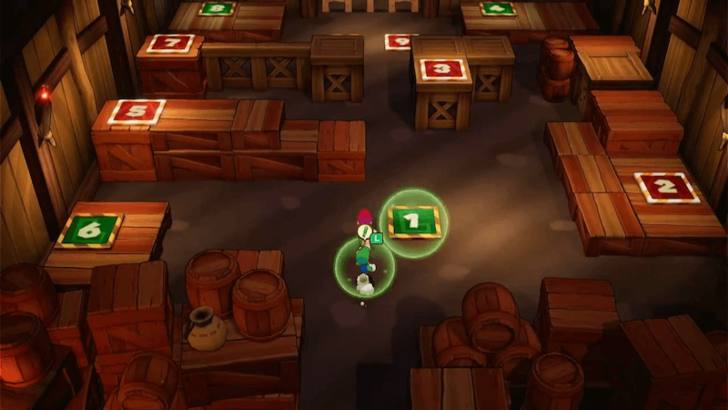 Proceed to the next area, where you'll have to solve a color puzzle. The brothers must step on square platforms in the correct numerical order, matching their colors—Red for Mario and Green for Luigi. |
| 27 |
Start by moving to the Green 1 platform and pressing L for Luigi to step on it. Next, move Mario to Red 2 and 3 to continue the sequence. When Luigi steps on Green 4, quickly have Mario rush to Red 5. As Luigi runs toward Green 6, move Mario to Red 7. Wait for Luigi to step on Green 8 before proceeding to Red 9. Luigi will complete the puzzle by stepping on Green 10, lowering the gate. |
| 28 |
 Head into the room to the north to trigger a cutscene, after which you’ll face a battle with Zokkarang Troopers. Zokkarang Trooper's boomerang attacks lowers your defense once it hits you, so time your jumps accordingly to avoid it. |
| 29 |
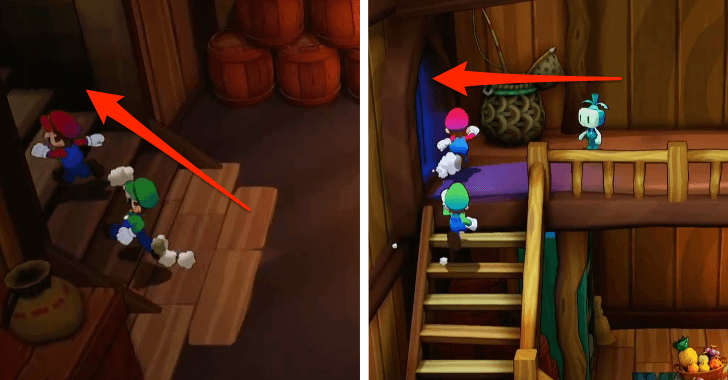 After the battle, chase Leyden’s Assistant to the Lighthouse! Head to the now-accessible mezzanine floor in the Chief’s House and enter the door on the left. |
| 30 |
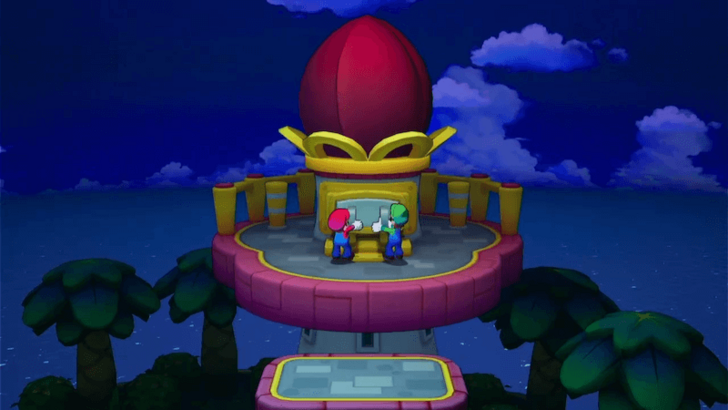 Confront the Assistant by the Lighthouse. After he and Leyden make up, head to the top of the Lighthouse and press A to link Bulbfish Island back to Shipshape Island. You'll then return to Shipshape Island and move on to the next part of your adventure! |
Heatfreeze Island
| # | Step by Step Objectives |
|---|---|
| 1 |
 After finishing Bulbfish Island and returning to Shipshape, you’ll be visited by Burnadette and Chilliam. They’ll ask for your help in resolving the long-standing feud between the villages on Heatfreeze Island. Head to the newly opened route and set sail for Heatfreeze Island. ▶ Bulbfish Island Location Guide |
| 2 |
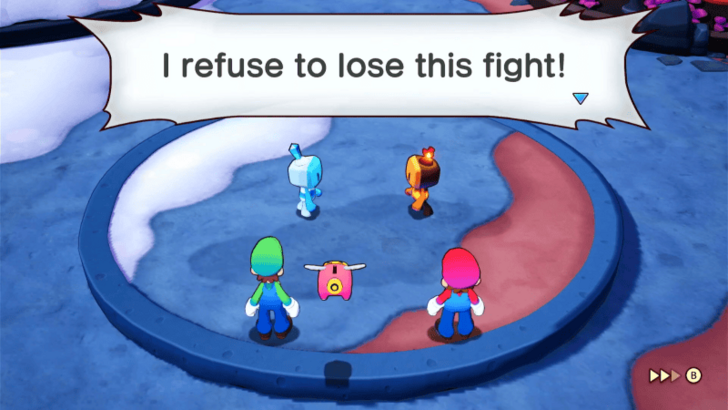 Upon arriving at Heatfreeze Island, head left and proceed until you encounter two people arguing. After the cutscene, you’ll come across a mob blocking the path to the Lighthouse. They’ll ask you to try the specialty dishes from both villages and decide which one is better. Freezin Village is located on the left side of the map and is known for its Potato Gelato, while Boilin Village is on the right side and is famous for its Hottato Stew. Both locations will be marked on your map. |
| 3 |
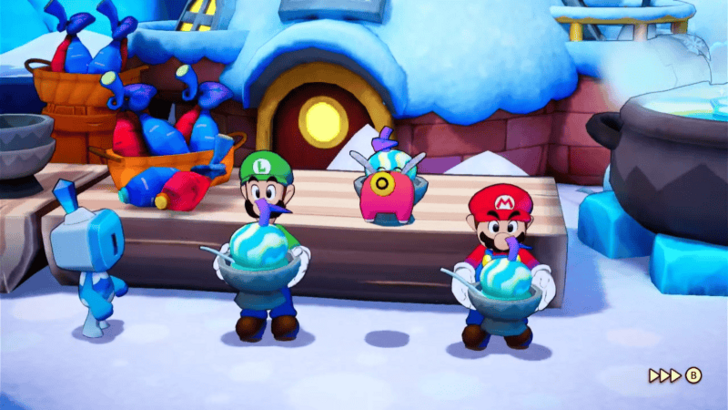 First, head to Freezin Village to try their Potato Gelato. Go west from your current location to reach the village. Once inside, head upward and follow the signs pointing to the location of the stall selling Potato Gelato and try their specialty dish. |
| 4 |
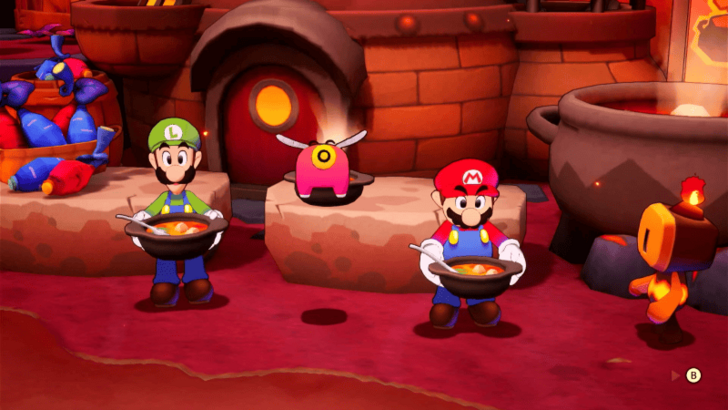 Next, visit Boilin Village to sample their Hottato Stew. Head east on the map to reach the village. Once there, climb to the top, following the signs pointing to the stall serving Hottato Stew to try their famous dish. |
| 5 |
 After tasting both dishes, head back to the villagers and talk to them about the dishes, after the brief cutscene, they will eventually leave and the path to the Lighthouse is unblocked. |
| 6 |
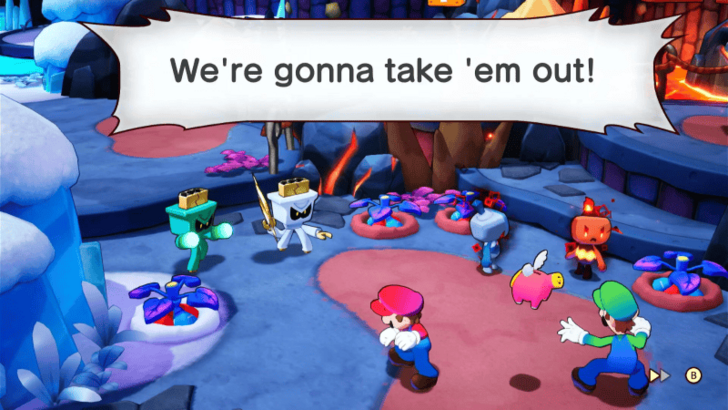 Proceed forward until you encounter two new people arguing. After a brief cutscene, you’ll be ambushed by a group of Ring Zok Troopers and Zokkarang Troopers. Be prepared for a fight! |
| 7 |
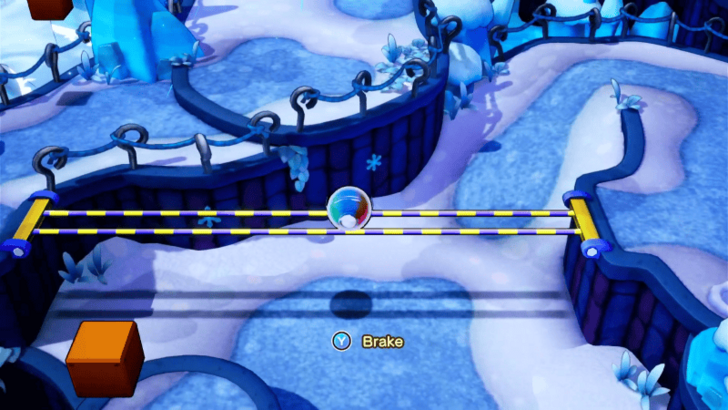 After the battle, continue heading west, defeating Iceads and Magmads along the way. When you reach the narrow bridge with two poles, use your Bro Ball Bros Move to safely cross to the other side. |
| 8 |
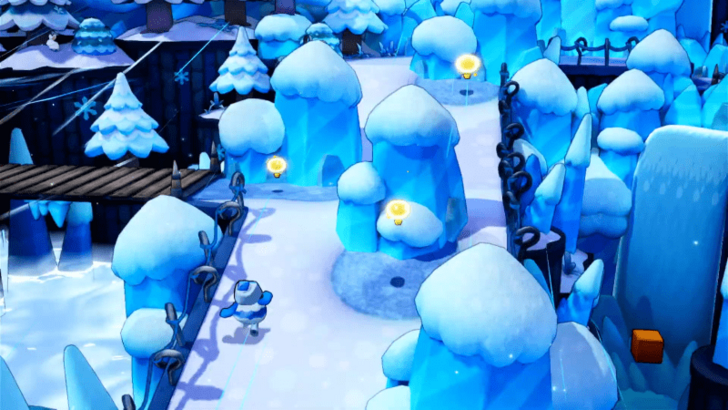 From here on, you’ll face a blizzard storm that will make it difficult to run uphill, as the strong winds will push you back whenever you try to climb. Head uphill until you reach an area to the left where the blizzard doesn’t reach. ★ Helpful Tip: The blizzard stops occasionally, so take advantage of these breaks to move forward. Use the nearby rock formations as checkpoints as you climb higher. |
| 9 |
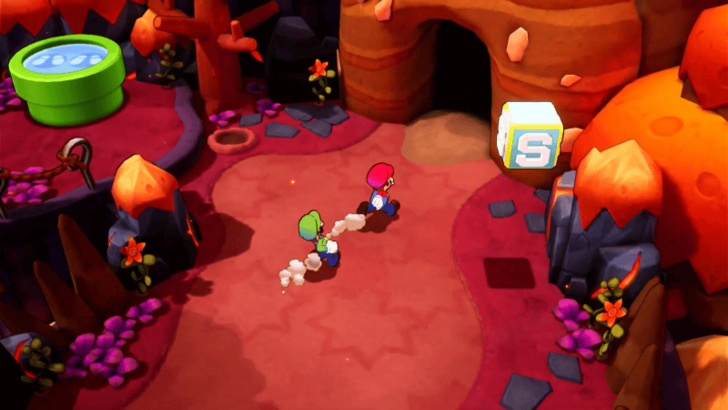 Continue heading left until you reach a raised bridge. Locate the button beside it and have Mario use his hammer to lower the bridge. After crossing, you’ll come across a cave opening with a Save Block and a Tunnel Block nearby. It’s a good idea to save your game now, as you’ll be facing more enemies ahead. |
| 10 |
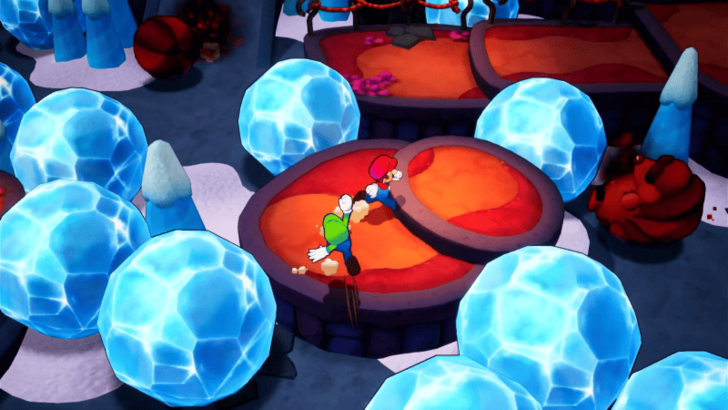 Once inside the cave, speak to the statue nearby. It will provide a hint on how to solve the cave's mystery. Continue forward, defeating enemies along the way, until you come across a couple of huge ice balls blocking your path, along with a few Glohm Curlups as enemies. ★ Helpful Tip: Your hammer won't be effective against the huge ice balls. Instead, you'll need to jump over them to reach the other side. |
| 11 |
 Head to the location of the big boulder blocking the lava flow past the huge ice balls. Use your hammer to hit the boulder, clearing the path and filling the area with lava. |
| 12 |
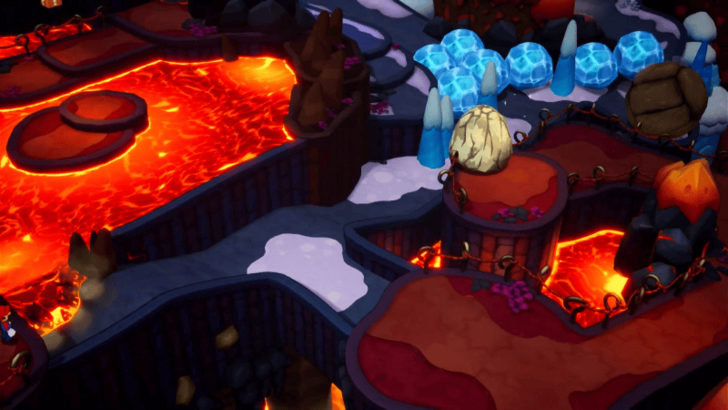 Exit the lava-filled area and head downward. Locate the rock boulder and hit it again to send it crashing down, destroying the huge ice balls blocking your path. Continue moving forward, and you'll eventually reach another area where the blizzard storm is waiting. |
| 13 |
 Continue heading upwards, using the ice balls as checkpoints when the storm temporarily stops. Be cautious of the spikes, though, as you can be pushed back and fall into the spike-filled holes. Eventually, you’ll come across a gargantuan ice boulder blocking your path. Hit the two smaller boulders on either side with your hammer to release the larger one. This will cause the massive boulder to fall, dissolving all the lava in the area. |
| 14 |
 Head down the newly opened path and exit the cave. To reach the Lighthouse, use your UFO Spin Bros Move to travel from platform to platform, carefully navigating your way until you reach the area of the Lighthouse. |
| 15 |
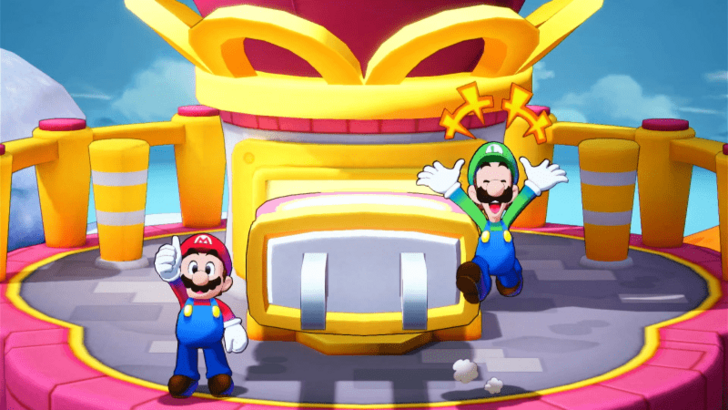 Upon reaching the Lighthouse, climb to the top and pull the plug to complete your mission and finish your journey on Heatfreeze Island. |
Skorcheen Island
| # | Step by Step Objectives |
|---|---|
| 1 |
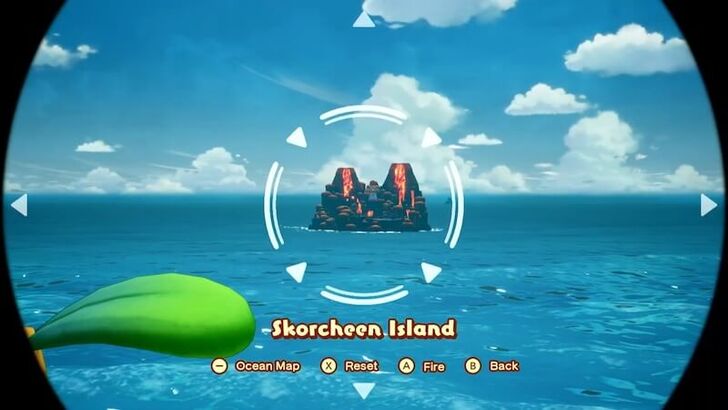 After completing Heatfreeze Island and returning to Shipshape, you’ll face a choice: either cure Chilliam by heading to Slippenglide Island or pursue the Extension Corps by setting sail for Skorcheen Island. Both choices lead to the same story outcome. If you decide to go after the Extension Crops first, set sail to Skorcheen Island southwest of the Heatfreeze current, and use the Big Cannon to launch yourselves directly to the island. ▶ Cure Chilliam or Pursue Extension Corps? |
| 2 |
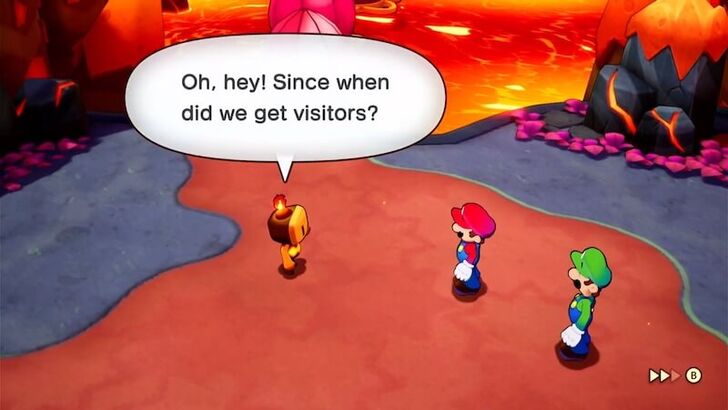 Upon landing at Skorcheen Island, you will be greeted by an Orange Concordian. You'll first need to look for the Chief, who can help you locate Dr. Vulko. |
| 3 |
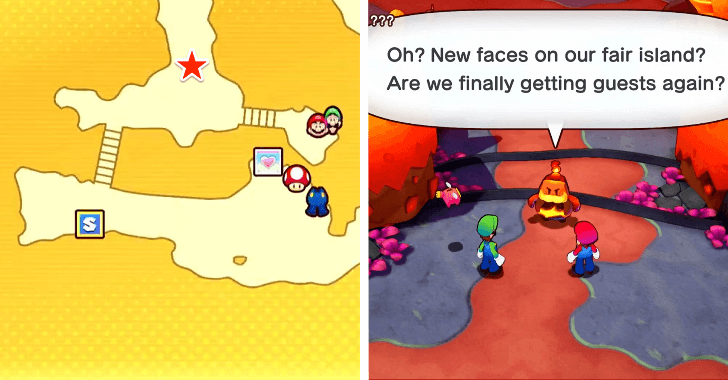 Head west from the Island Plaza, then cross the bridge to the north. You'll find the Chief near the steps. Talking to him will trigger a cutscene. |
| 4 |
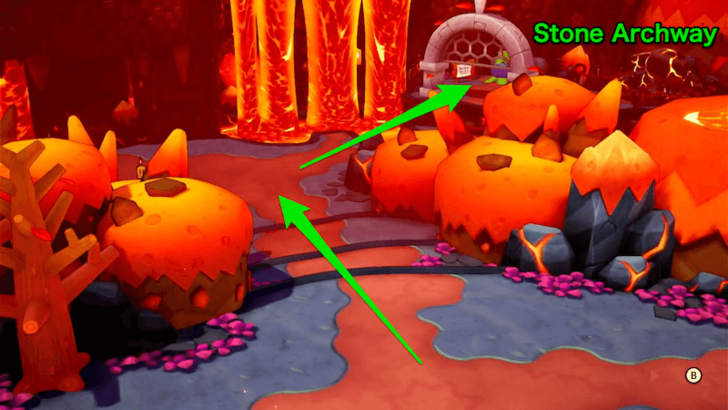 From the village, go north and then turn right to enter the stone archway. |
| 5 |
 Press A to pick up the Bomb Bud near the sign and quickly place it on the rubble before it explodes. This will clear the path to the next area. |
| 6 |
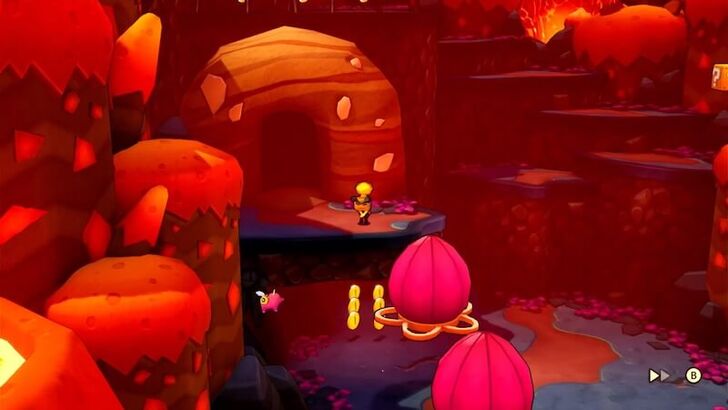 Continue east and then head north through another stone archway to watch a cutscene featuring Dr. Vulko on a ledge. |
| 7 |
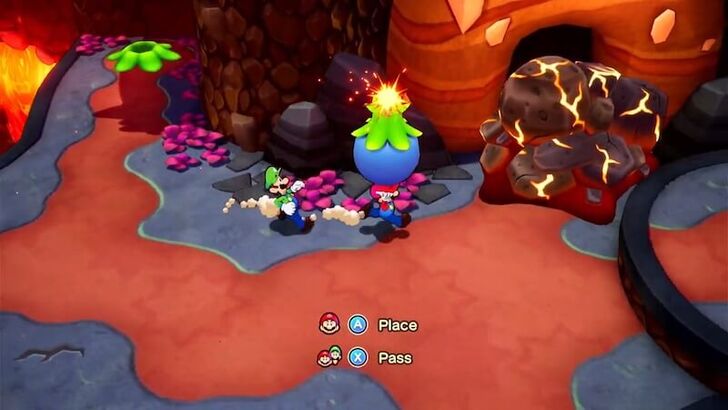 Return to the village intersection and head west. In the upper-right corner, grab another Bomb Bud and place it on the rubble blocking the Cave entrance. |
| 8 |
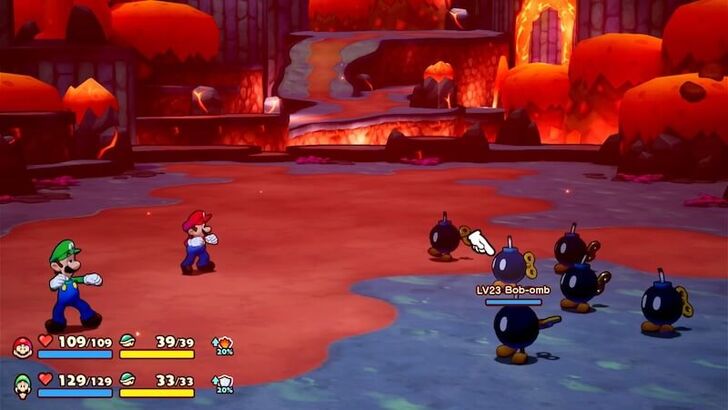 Approach the Cave entrance, where you'll come across a group of Bob-ombs, initiating a battle. ★ Battle Tip! Dealing with Bob-ombs Watch out for Bob-omb's self-destruction timer as it will explode once it reaches zero and will damage either Mario or Luigi. Take it down before it explodes. |
| 9 |
 After the battle, enter the Cave and head north until you reach the lava fountains. Be prepared for battles along the way, as enemies like Glohm Magmads and Palookas are scattered throughout the area. |
| 10 |
At the lava fountains, Luigi will have a Luigi Logic moment and learn the UFO Vacuum Bros. Move. This ability allows the brothers to suck up objects while using UFO Spin. To cross the lava fountains, use UFO Spin and press X to suck up the metal platform from the ground. Use it as a shield to safely traverse the lava fountains. |
| 11 |
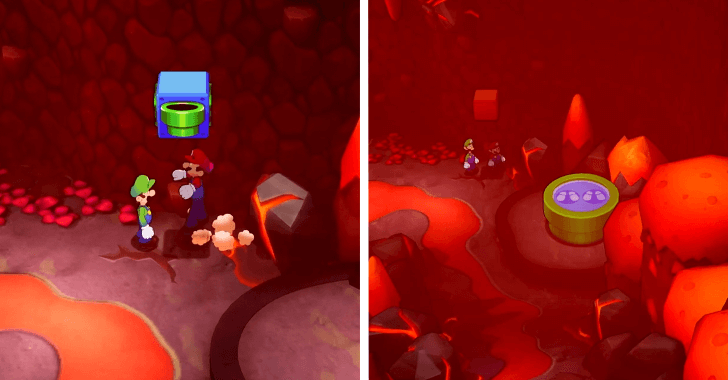 Once across, continue east and follow the trail down south to find a Green Pipe Block up north. Jump up the Block to create a Green Pipe that connects back to the Cave entrance. |
| 12 |
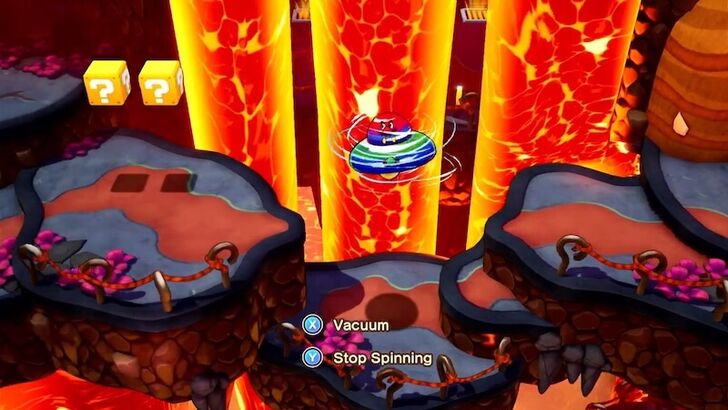 Head south to exit the Cave. From there, go west and use UFO Spin to traverse obstacles. Be cautious of Piranha Plants as you make your way forward. |
| 13 |
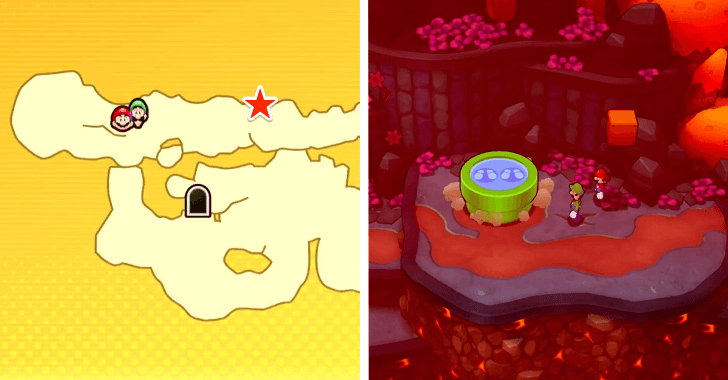 Follow the trail until you come across another Green Pipe Block. Jumping up the Block will create a Green Pipe, providing a convenient shortcut back to the southern part of Skorcheen Island and allowing you to bypass the first Cave entirely. |
| 14 |
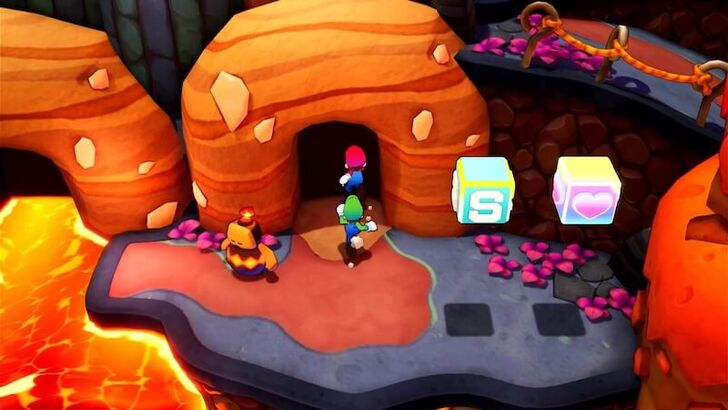 Continue east until you reach another Cave entrance located near a Save Block and a Recovery Block. Take a moment to save your progress and heal Mario and Luigi before entering the Cave. |
| 15 |
 Enter the Cave and head north, then turn right and continue north again. |
| 16 |
Cross the bridge and proceed to the Bomb Bud up north. When Mario picks up the Bomb Bud, quickly pass it to Luigi by pressing X. Have Mario jump onto the ledge, pass the Bomb Bud back to him, and place it on the rubble to the left before it explodes. |
| 17 |
After clearing the rubble, pick up another Bomb Bud below and repeat the same strategy to place it on the rubble further south. This will roll a large rock into place, blocking the lava flow and opening up new areas in the Cave. |
| 18 |
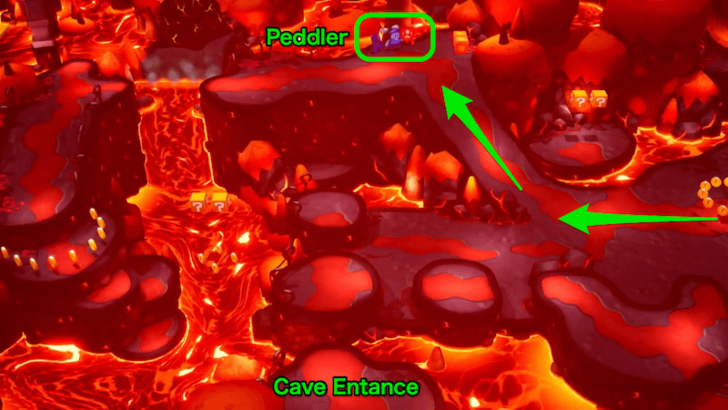 Return to the intersection near the Cave entrance and head north. When you reach the Peddler, consider purchasing consumables and upgrading your gear to prepare for the remainder of your journey. |
| 19 |
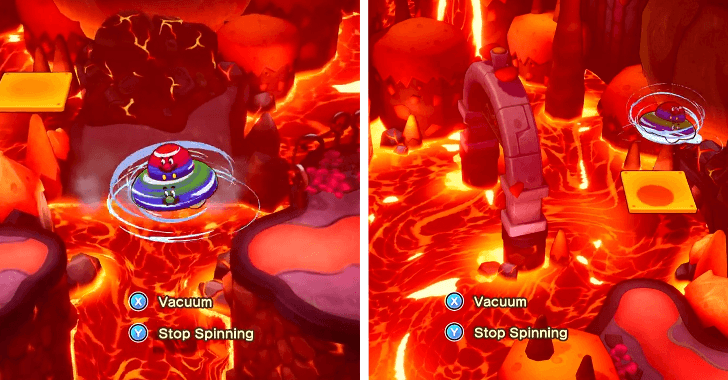 Use UFO Spin to cross the chasm, then use it again to reach the moving yellow platform to the north and make your way to the other side. |
| 20 |
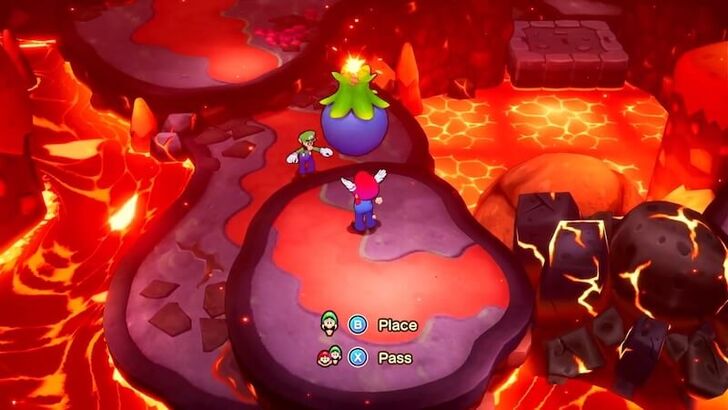 Head southwest and you’ll spot another Bomb Bud and rubble further south. Utilize the same passing strategy to clear the rubble. This will raise a stone platform, creating a shortcut to the moving yellow platform. |
| 21 |
Timing is key for this next part. Wait beside the Bomb Bud until the moving yellow platform heads left. Pick up the Bomb Bud and move toward the platform, placing it on top just as it begins moving right. The Bomb Bud will explode at the perfect moment, clearing the rubble. |
| 22 |
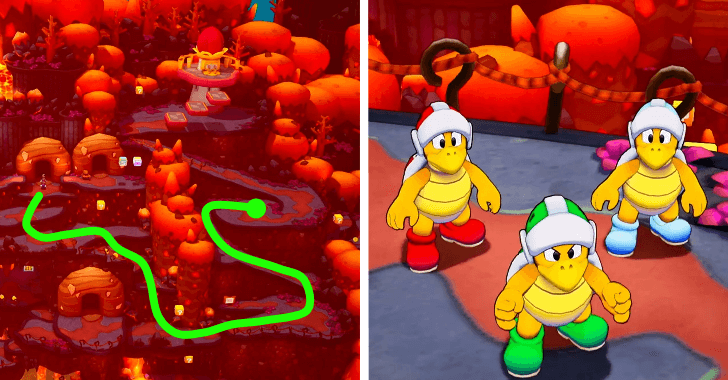 Leave the Cave and jump down to the first Cave's exit. Turn right and follow the trail upward until you encounter the Koopa Bros.—Fire Bro, Ice Bro, and Hammer Bro. |
| 23 |
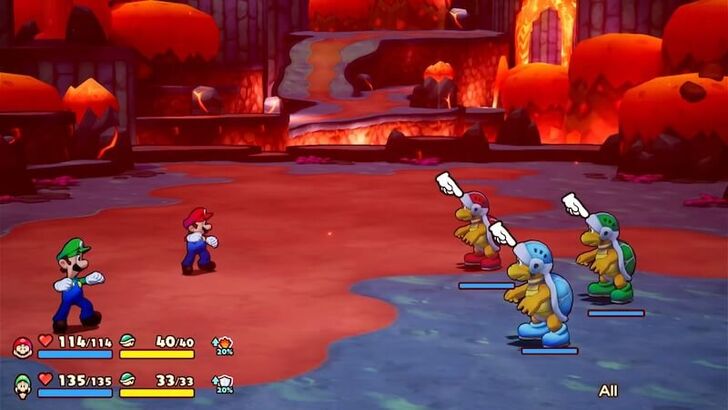 Defeat the Koopa Bros. in battle to gain access to the Lighthouse. Make sure to carefully dodge the Koopa Bro's attacks, especially those from the Fire and Ice Bros, as their attacks can inflict elemental status ailments. For a countermeasure, stock up on Refreshing Herbs! ▶ How to Cure Status Ailments |
| 24 |
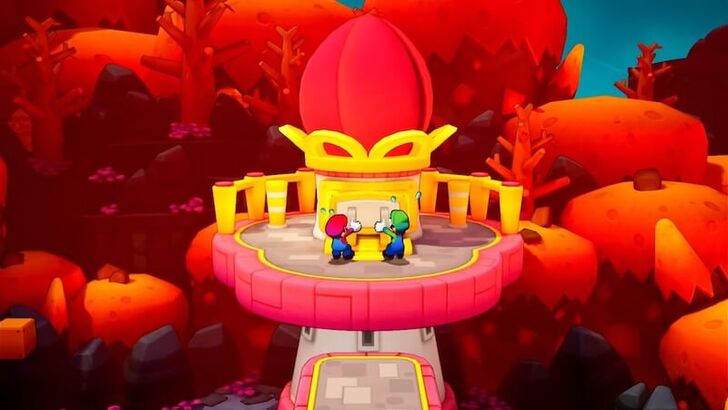 After battling the Koopa Bros., climb to the top of the Lighthouse and press A to link Skorcheen Island back to Shipshape Island. After a lengthy cutscene, you will be returned to Shipshape Island! |
Slippenglide Island
| # | Step by Step Objectives |
|---|---|
| 1 |
 Once you decide to go to Slippenglide Island to cure Chilliam, either before or after going through Skorcheen, navigate to the current at the top of Brrning Sea to reach Slippenglide Island. Use the Big Cannon to launch Mario and Luigi to this island once you’re in range. ▶ Cure Chilliam or Pursue Extension Corps? |
| 2 |
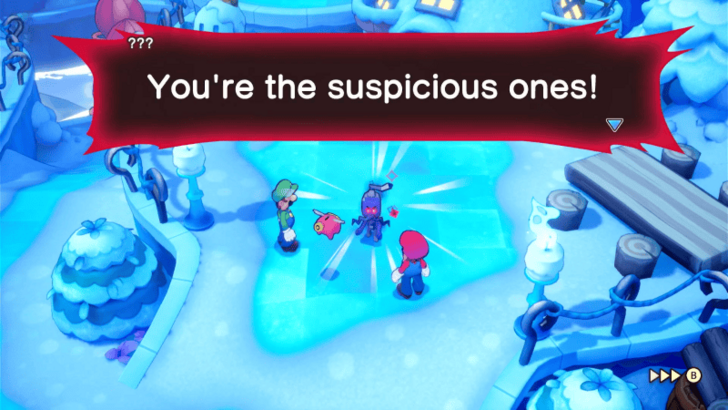 Upon arriving at Slippenglide Island, head to your left and continue the path until you reach the area where Chilliam's Dad is. He will call you out and start a brief cutscene, after this, another NPC will talk to you about how the Island is infested with Glohm. |
| 3 |
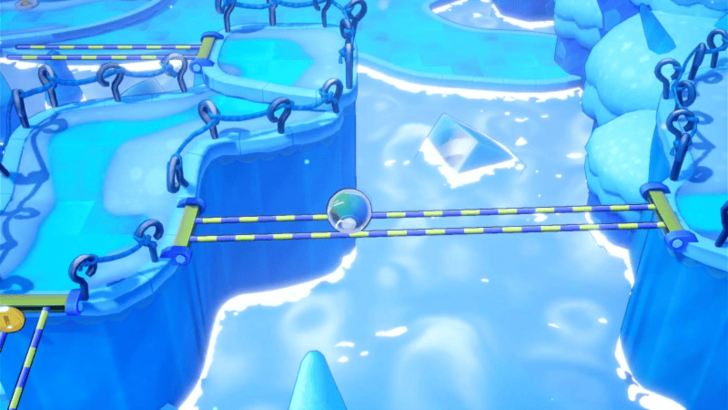 Head over to the narrow bridge supported by two pipes and use your Bro Ball Bros Move by tilting right analog stick down to safely cross to the other side. ★ Helpful Tip: Slippenglide Island will be filled with these narrow bridges, so be sure to keep using the Bro Ball Bros Move whenever you encounter them. Additionally, if a bridge is broken, you can press B and jump while in Bro Ball form to get to the other side. |
| 4 |
 Traverse the narrow bridges ahead and land on the ice below. Once on the ice, jump onto the nearby ice platforms and step on each one, moving carefully until you reach the island on the other side. ★ Helpful Tip: Be mindful that each ice platform can only be stepped on twice. After you step on it, it will crack, and if you step on it again, you’ll fall into the water. Use the image above as a guide on how to safely traverse the ice platforms. |
| 5 |
 Turn left and follow the path, battling Drillby Rs and Spikes along the way, until you reach Ten's lair. After a brief cutscene, Ten will retreat and flee. Help Dulles, who is passed out to the right, and then follow the path where Ten escaped. Be sure to use the Save Block nearby to save your progress before moving forward. |
| 6 |
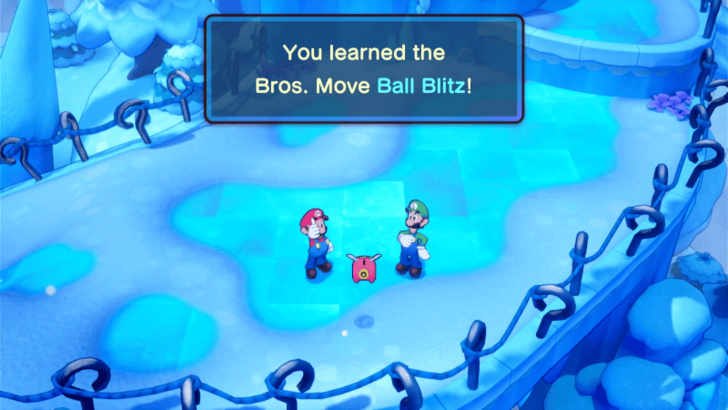 Proceed forward until you encounter a blizzard storm blocking your way, pushing you downhill whenever you attempt to go up. Snoutlet will appear and inform you that while the Bro Ball Bros Move can help, it won’t be enough to overcome the storm. You will then acquire an upgraded version of your move, the Ball Blitz. Use this new ability to power through the storm and tread uphill, ignoring its force. ▶How to Unlock All Bros. Moves |
| 7 |
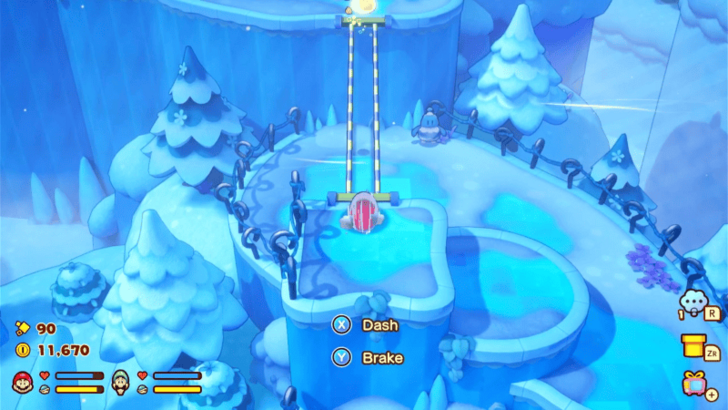 Continue ascending the mountain until you reach the moving bridge. Use your newly learned Ball Blitz move to accelerate across the bridge and safely reach the other side. |
| 8 |
 Once you cross the bridge, Ten will be waiting for you. Approach him to trigger a brief cutscene. Afterward, you’ll be redirected to his lab, where you’ll need to investigate everything you can about the Glohm and the experiments conducted there. Once you’ve finished your investigation, head outside and reconvene with the gang. |
| 9 |
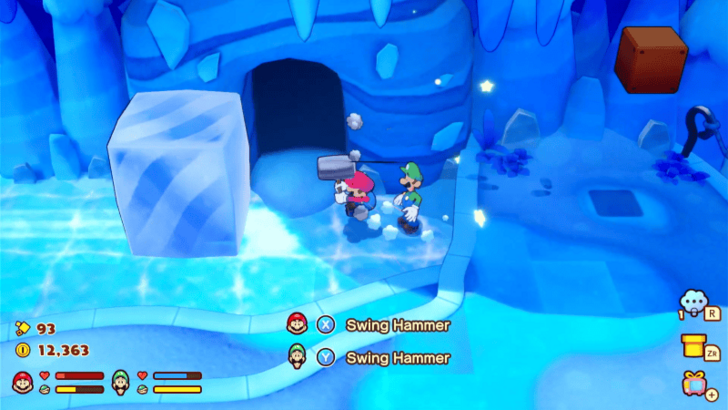 Head right from the lab until you encounter another blizzard storm. Use your Ball Blitz move to power through and reach the end of the storm. There, you’ll find an Ice Block covering a cave entrance. Use your hammer to push the Ice Block away, then proceed inside the cave. |
| 10 |
 Inside the cave, you’ll need to locate three ice blocks and push them into the water on the left to form a makeshift bridge for exiting the cave. Refer to the image above for the locations of the ice blocks. Push each block carefully so they fall through the floor and into the water one by one. ★ Helpful Tip: Use your hammer to push the ice blocks. Additionally, you can examine the sign near the entrance for a bird's eye view of the ice block puzzle. |
| 11 |
 After exiting the cave, you’ll come across a Recovery Block, a Save Block, and a Tunnel Block. Make use of these, as the next area will feature a back-to-back battle against the Goomba Army and the Koopa Troopa Army. ★ Helpful Tip: Focus on using multi-hit Bros Attacks to target multiple enemies at once, as defeating one enemy will only cause another to spawn. Keep your strategy focused on clearing groups efficiently! ▶ List of All Bros. Attacks |
| 12 |
 After successfully defeating both batches of Goombas and Koopa Troopas, a brief cutscene with Bowser Jr. will play. However, you won’t battle him, as he will flee the area. With the enemies cleared, proceed to pull the plug on Slippenglide Island to complete your mission. Once done, return to Shipshape Island to report back. |
| 13 |
 Upon returning to Shipshape Island, Burnadette and Chilliam will be reunited. They will plan on holding their wedding in Heatfreeze Island, but they are missing some ingredients for them to hold it right away. You will be tasked to get a Cake from either Slippenglide Island or Lottacoins Island and a Flower Crown from Florall Island or Raynforst Island. ★ Helpful Tip: For the best results, it’s recommended to choose the Cake from Slippenglide Island and the Flower Crown from Florall Island. ▶ Which Flower Crown and Cake to Get for the Wedding? |
| 14 |
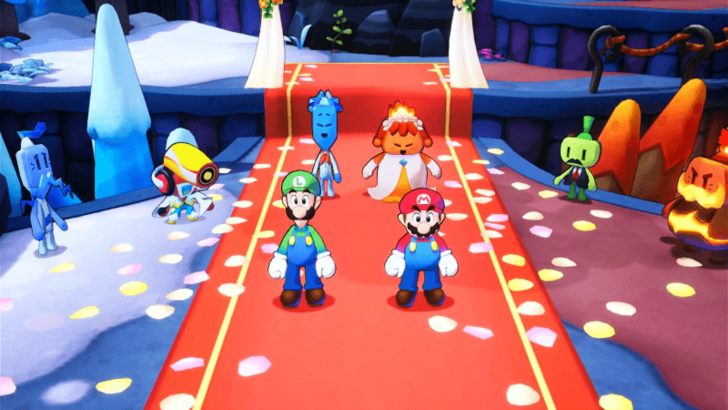 Once you get the Cake and the Flower Crown for the wedding, head to Heatfreeze Island to attend the wedding ceremony between Chilliam and Burnadette.! |
Brrrning Sea Great Lighthouse Island
| # | Step by Step Objectives |
|---|---|
| 1 |
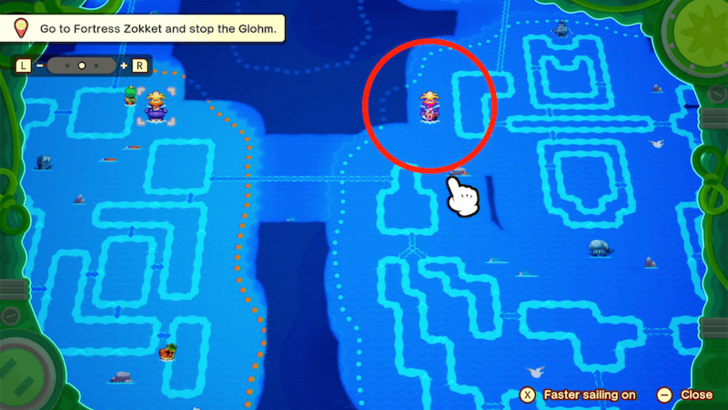 After Chilliam and Burnadette's wedding, a new current unlocks leading you to the Brrrning Sea's Great Lighthouse. Sail your way over to the current, discover the Great Lighthouse through the telescope, and fire the brothers away to its shores! |
| 2 |  Upon landing in the freezing and broiling landscape, walk directly through its open entrance. Unfortunately, Zokket's minions will notice the group's arrival and separate Connie from the brothers, leading them to different areas in the Lighthouse. In Sublevel 1 where the brothers are locked in, they must find a way out and rescue Connie. Head down the stairs to watch a cutscene which emphasizes your main objective within the area. |
| 3 |
Proceed to your left where you will be met with an area patrolled by 4 Red Guards your objective will be to reach the M Button past the guards, so be sure to sneak your way across while looking out for their patrol patterns. 3 Red Guards move in sync with each other, each walking toward a corner of the square, stopping, then continuing on their path around the area. 1 Red Guard will be continuously patrolling the perimeter of the area, which can become a chokepoint if their paths coincide with one of the other 3 Red Guards, so stay vigilant on their movements. |
| 4 |
After successfully passing them by, move through the underpassage and make your way toward the M Button. Hammer it as Mario with the X Button to open the gate to a new area while closing the gate on your current area. To conquer the new area, make Luigi disguise himself under the barrel by pressing the L Button much like previous cases where stealth is involved, Luigi will automatically place himself where needed. |
| 5 |
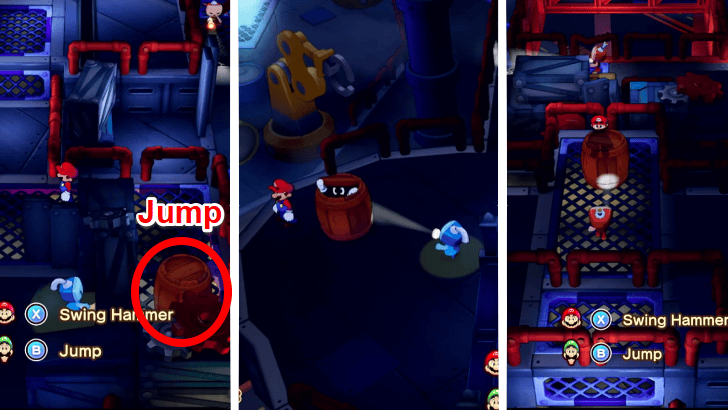 Move forward and wait for Luigi to place himself behind the First Blue Guard. Once there, press the B Button to make Luigi jump and distract the guard, allowing Mario to pass through. On the Second Blue Guard, wait for Luigi to align himself in front of their torchlight to allow Mario an undetected passage. On the Last Red Guard, wait until they turn their back and immediately run toward the only open space in the area with Luigi. Wait for the Red Guard to walk back and examine the area while hiding behind Luigi, then slip away as they walk past. |
| 6 |
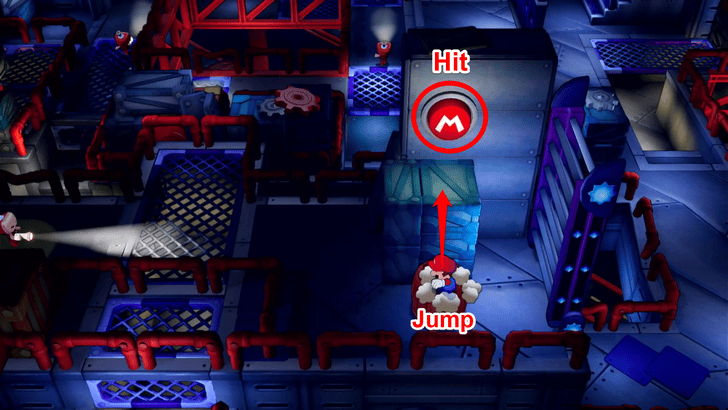 Jump on top of Luigi's barrel to climb on top of the crates where Mario can hammer the M Button to deploy a staircase exiting your current location, and opening the gate to the next area. |
| 7 |
 After heading to the newly unlocked area with Luigi, allow him to place himself in front of the metal crates, and jump over to bypass the First Blue Guard and First Red Guard. To sneak past the Second Blue Guard, let Luigi place himself next to another metal crate and jump over him, to the other side, and evade the Second Red Guard as they patrol the area. |
| 8 |
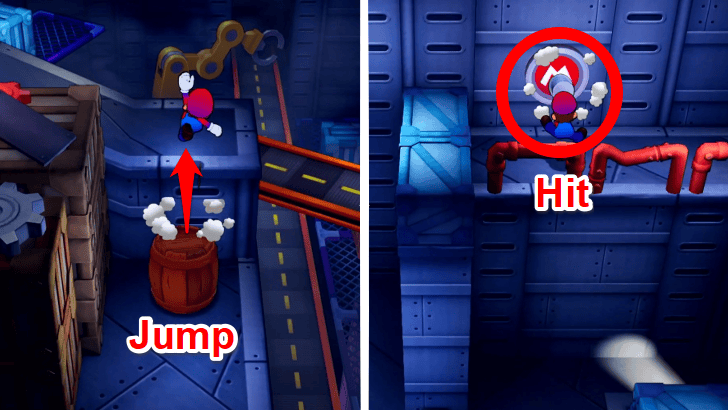 Finally, wait for Luigi to place himself up against the raised platform, use him to climb over, and keep going left until you reach the M Button. Hitting it as Mario will successfully open the gate to Sublevel 1, allowing you access into the main area to find Connie. |
| 9 |
 Head toward the northern door in the main area, which will lead you into a new room. There are Ring Zok Troopers patrolling the halls, so exercise caution! By continuing down the straightforward path, you will come across a Concordian who tells you of Connie's whereabouts. After proceeding further up the ramp, you will be forced into a battle with Ring Zok Troopers and Zokkarang Troopers. Emerge victorious from the battle to be reunited with Connie! |
| 10 |
 Head back to the main area with Connie in tow and ride the elevator. As the elevator can only go down, choose Sublevel 2 and watch as you descend. In the new area, you will be met with a big locked gate; this time with three sockets needed to be plugged in order to open the gate. |
| 11 |
 Walk through the southern doorway in Sublevel 2's main area, and end up in a new room. The place will not have anything notable inside it except for enemies that loiter around, so be sure to either bypass them or defeat them in battle, and cut through the door on the western side of the area. |
| 12 |
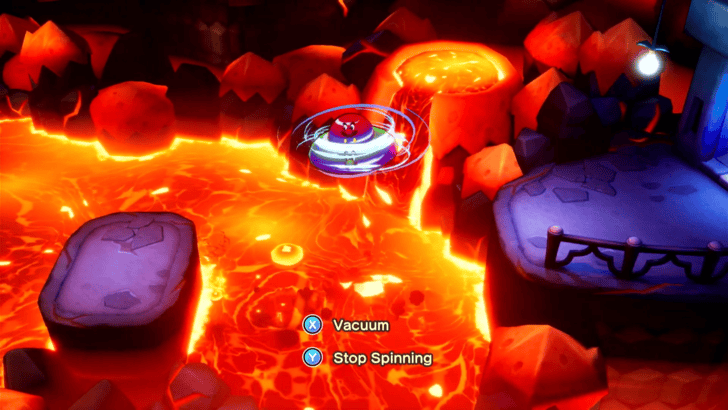 In this new location, use your UFO Spin Bros. Move to fly across the magma and land on the raised flat surface in between. Be careful when flying across, as the magma can shoot up into a pillar and halt the brothers' flight. |
| 13 |
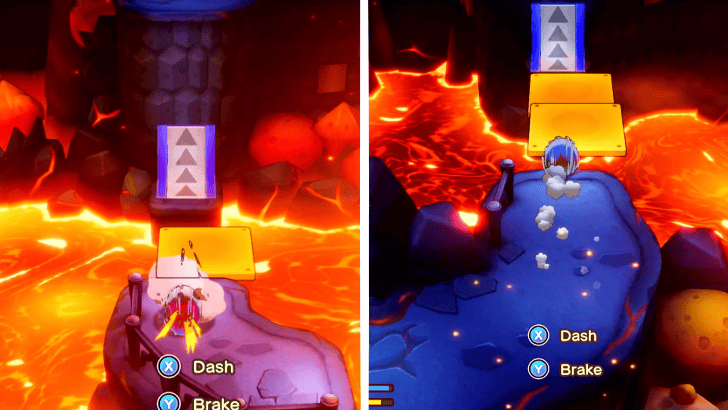 After reaching the end, use your Blitz Ball Bros. Move and dash up when the moving platform aligns with the ramp to boost yourself up on the cliff. Head to your right, and perform another Blitz Ball Bros. Move to dash on the ramp as the two floating platforms align perfectly. This will lead you toward a doorway connecting back to the main area of Sublevel 2. Once there, hit the M Button as Mario to open the gate, collect the Power Plug, and insert it into one of the three sockets in front of the large gate. |
| 14 |
 Walk back to the southern room, and enter the doorway on the east side of the area. Interact with the Blue Exclamation Block to open the gate, then make your way toward the Orange Exclamation Block to summon movable debris. |
| 15 |
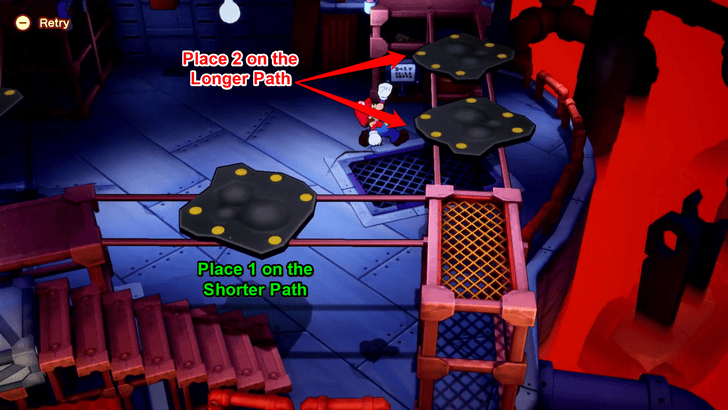 Use your UFO Vacuum Bros. Move to position all of the movable debris in areas where Mario can jump by his lonesome. Place two debris on the longest path leading to the locked gate, then place only one metal debris on the middle path. Leave Luigi on the L Button to hold the gate open, then venture through the path you created as Mario to activate the Second Blue Exclamation Block which opens two gates within the room, the southwestern gate in the main area, and deploys a staircase for Luigi. |
| 16 | 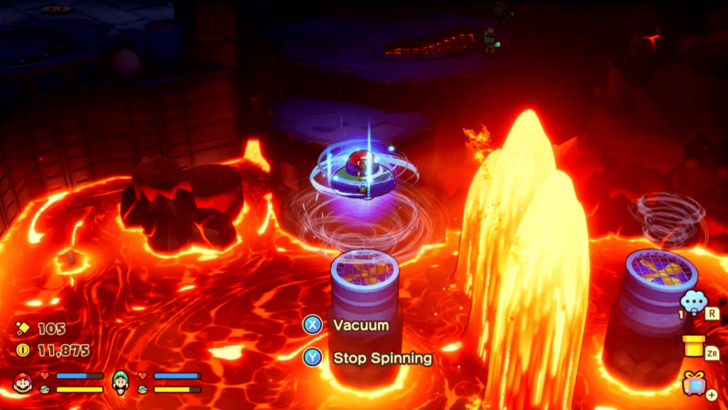 After reuniting with Luigi and returning to the main area, use your UFO Spin Bros. Move to cross over the Magma while stopping at the raised fans to recover air time. After successfully reaching the other side, collect the Second Power Plug and jump down to the left to insert it into one of the three sockets in front of the locked gate. |
| 17 |
With the southwestern gate now open, pass through to find a small area full of bubbling lava. Cross over toward the far eastern side, where you can find a fruit bomb. Pick it up, pass it between Mario and Luigi to safely place it in front of the rubble blocking a huge magma jet. Afterward, the magma shoots up, and melts all of the ice balls on the main area of Sublevel 1, allowing you access to the other parts of the Lighthouse. |
| 18 | 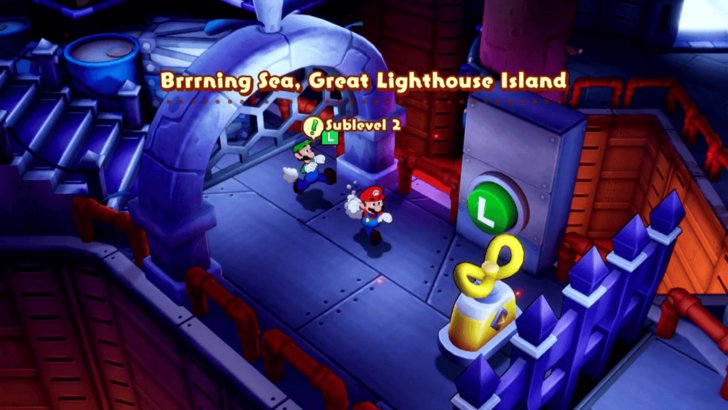 Return to the elevator, ride it to Sublevel 1, and head down the path on the left. Follow the path until you reach a staircase leading back down to Sublevel 2, and in front of the Third Power Plug. Have Luigi hit the L Button on the wall to open the gate, collect the Power Plug, and insert it into the last empty socket to open the large gate. |
| 19 | 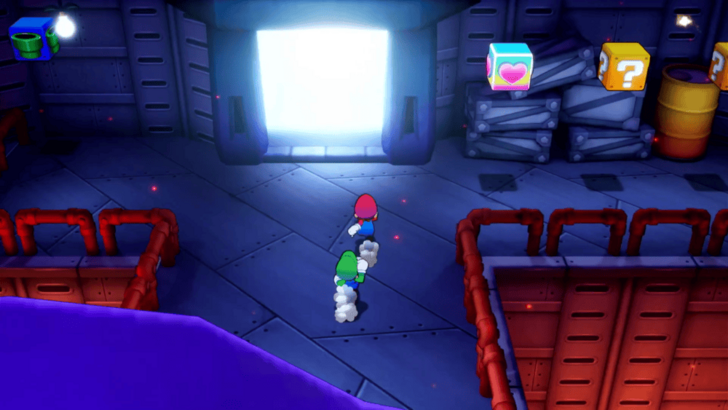 Proceed toward the open doorway at the end of the hall. Remember to use the Recovery Block on the right side of the door, the Save Block by the gate, and activate the Green Pipe Block on the left to create a passageway from Sublevel 2 to the Island's Entrance. |
| 20 | 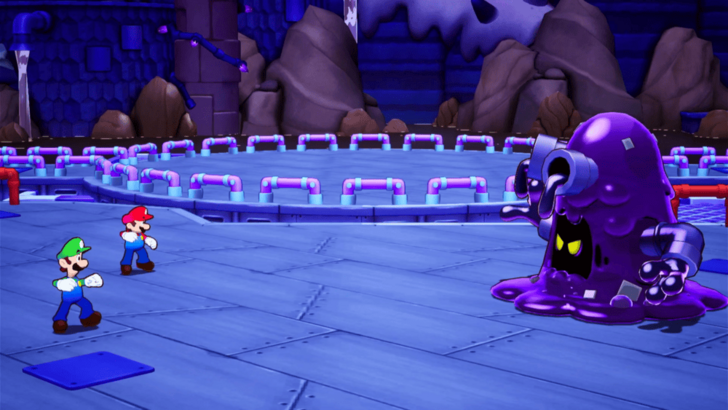 Upon entering, you will be met once again with the Extension Corps in conversation with Zokket who is scolding them for their incompetence. Afterward, Shun will be presenting his own creation to battle the brothers: Pipegunk! ★ Battle Tip! Beating Pipegunk After using Luigi Logic and taking control of Shun's button, always choose the element opposite to Pipegunk's current one, in order to deal heavy damage. For example, if Pipegunk is covered in ice, switch to the magma area. ▶︎ How to Beat Pipegunk |
| 21 |  Shun will drop another Power Tap as he scurries off. Afterward, head to Sublevel 2's main area, talk to Connie, and finally ride the elevator to the Top Floor, where Connie relights the Lighthouse. On your return to Shipshape Island, some connected islands suffer a disconnect upon Bowser's attempt to take over the world! |
Gulchrock Sea Walkthrough
Offandon Island
| # | Step by Step Objectives |
|---|---|
| 1 |
 After finishing the Great Lighthouse Island of Brrrning Sea and returning to Shipshape, you’ll be witnessing a battle between the Zok Trooper Army and Bowser's Minions. After a brief cutscene, you'll be thrown off of Shipshape Island and you'll eventually drift off into an unfamiliar island. ▶ Brrrning Great Lighthouse Island Location Guide |
| 2 |
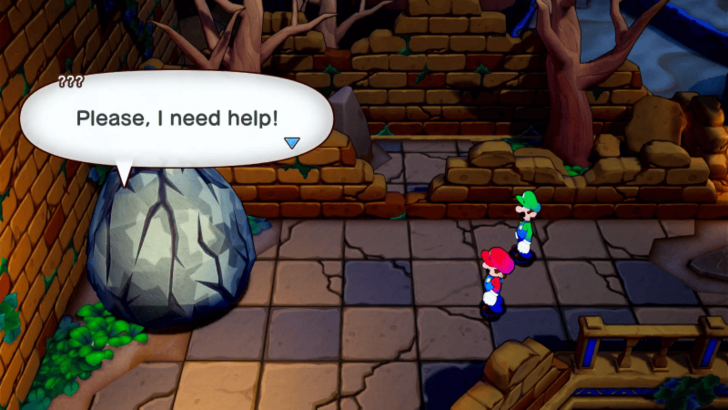 Head north to find a Shop, a Recovery Block, and a Save Block. Use them as needed, and don’t forget to save your game. Continue along the curved path until you hear someone calling for help, triggering a cutscene. Break the boulder with your hammer to set Buddy free. He’ll inform you that you’ve landed on Offandon Island. |
| 3 |
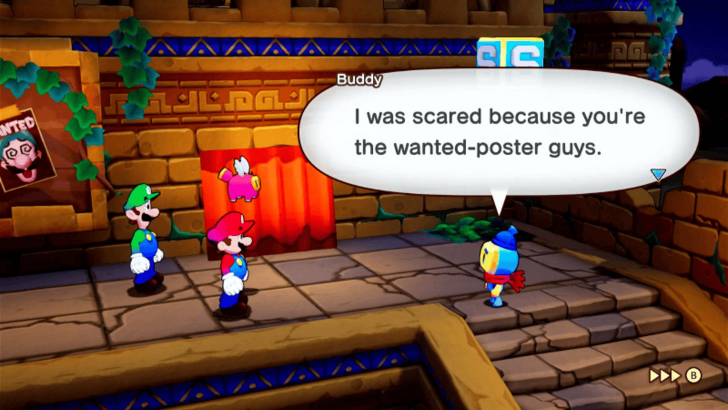 After the cutscene, Buddy will run away. Follow him and give chase until you come across a group of people discussing Mario and Luigi, noting that they are now wanted. Buddy will then escort you to a secret path leading to the lighthouse. Transform into your Ball Blitz Bros. Move and navigate through the tunnel. |
| 4 |
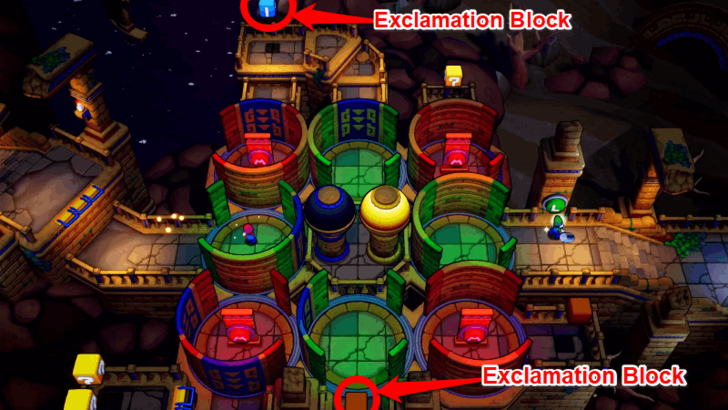 Continue through the path, battling Miltons as you climb toward the top, until you reach the Rotating Wall Puzzle. To solve it, have Luigi press the green L button located at the left corner of the bridge. This rotates the walls, giving access to the orange exclamation block at the bottom. After activating it, head to the top-right and press the red M button to unlock the blue exclamation block. Activating the blue block lowers parts of the rotating walls, allowing Luigi to reunite with Mario and cross to the opposite side of the bridge. |
| 5 |
 After exiting the puzzle, proceed onward, battling Goombas, Koopa Troopas, and Miltons along the way. ★ Helpful Tip: Keep moving left, as enemies will catch up to you if you attempt to backtrack or head right. |
| 6 |
 Proceed through the path on the left until you arrive at the Lighthouse area. After a brief cutscene, unplug the socket from the Lighthouse to complete Offandon Island. You can return to Shipshape Island afterwards. |
| 7 |
 Upon returning to Shipshape Island, you’ll discover that the island has been slightly destroyed. After speaking with Connie, she will inform you that Twistee Island and Heatfreeze Island have been dislodged from the connectar and need to be relinked. These islands will be your next destinations, so it is time to visit them to restore the connections. |
Relinking Twistee Island
| # | Step by Step Objectives |
|---|---|
| 1 |
 With Twistee Island separated from Shipshape Island, you'll need to return to the island to link it back. Set sail to the southern part of Gulchrock Sea to find Twistee Island drifitng in a current. Once Shipshape Island is near, use the Big Cannon to launch yourselves directly to the island. |
| 2 |
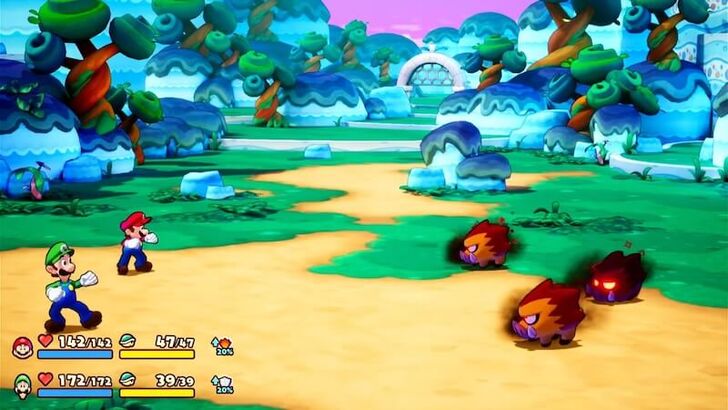 Upon your return, a Green Concordian will call for your help fending off Glohm Soreboars, initiating a battle. Be cautious when battling Glohm Enemies, as their attacks can inflict the Glohm status ailment. Use an Ampberry to cure yourself from the ailment or take a 50% chance with a Refreshing Herb. ▶ How to Cure Status Ailments |
| 3 |
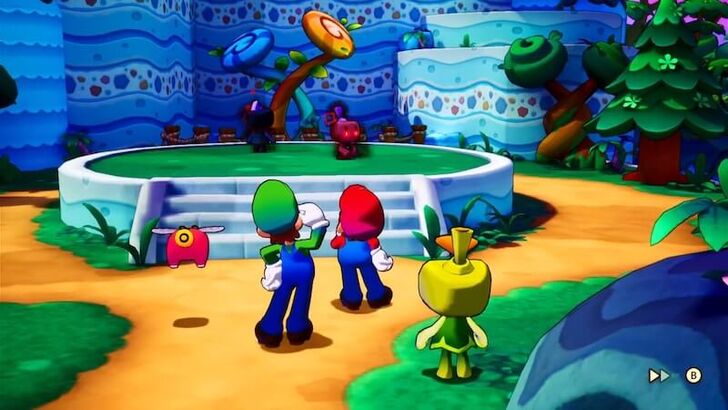 After defeating the Glohm Soreboars, a lengthy cutscene will play, revealing that the island residents are under attack by Glohm Enemies and the Twisten Sprout has shrunk once again! |
| 4 |
 Head east to the Island Plaza, where you'll engage in another battle with Glohm Soreboars. Defeat the enemies to proceed. |
| 5 |
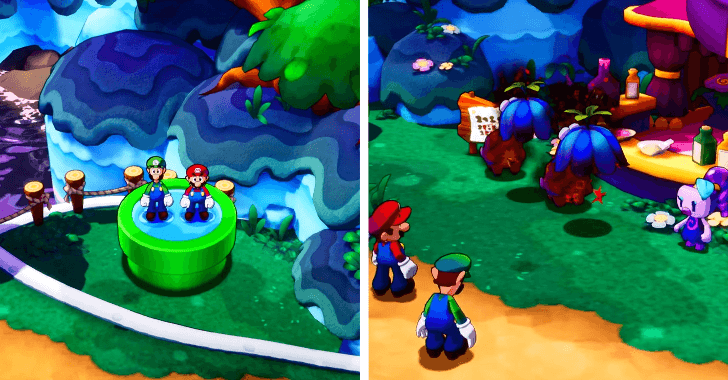 Use the Green Pipe in the plaza to fast-travel to Spiralia's Shop. You'll then find Spiralia being pestered by Glohm Enemies, triggering a battle against them. |
| 6 |
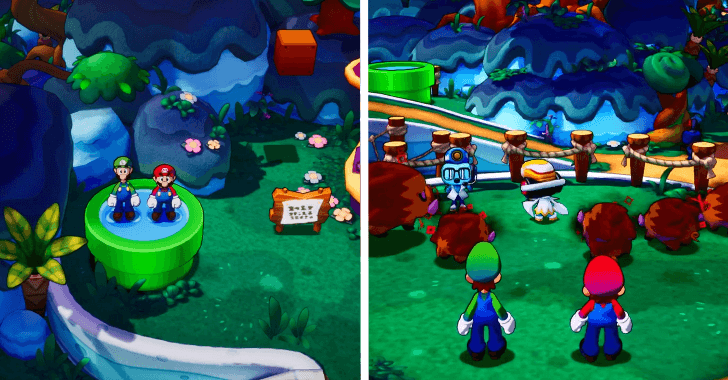 After helping Spiralia, use the Green Pipe next to her shop to return to the Island Plaza. Head to the stage, where Emmit and Dyode are surrounded by Glohm Soreboars. Defeat them in battle to save the dancers! |
| 7 |
Emmit and Dyode will ask you to perform a dance routine once again. As before, match the rhythm and press A, B, X, or Y to make Mario and Luigi perform the Brother Groove. The sequence follows this pattern: A, B, A, B, Y, X, A, B, A, B, Y, X, A, B, A, B, A, B, A, B, X. |
| 8 |
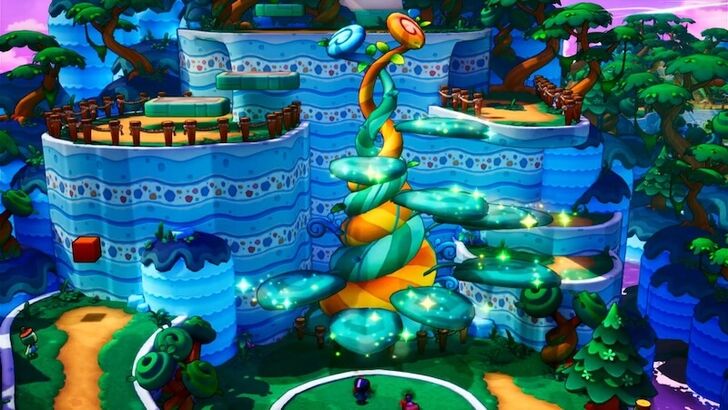 Completing the dance routine will revive the Twisten Sprout once again. Head west and climb its leafy vines to the top. |
| 9 |
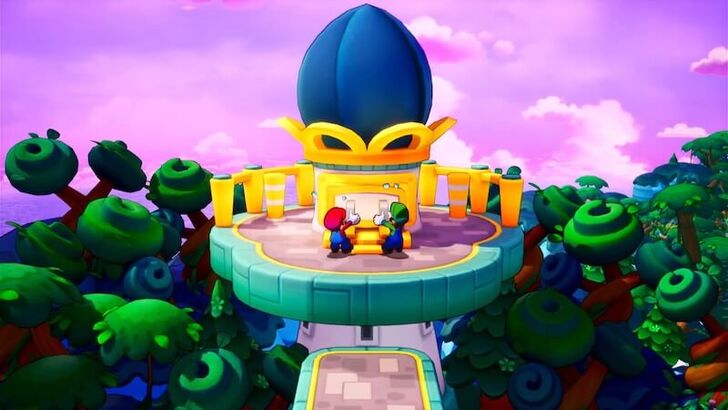 Jump up to the Lighthouse and press A to relink Twistee Island back to Shipshape Island. After a lengthy cutscene, you will be returned to Shipshape Island and move on to the next part of your adventure! |
Relinking Heatfreeze Island
| # | Step by Step Objectives |
|---|---|
| 1 |
 After completing Offandon Island and returning to Shipshape, you’ll discover that the island has been slightly destroyed. After speaking with Connie, she will inform you that Twistee Island and Heatfreeze Island have been dislodged from the connectar and need to be relinked. After reconnecting Twistee Island, your next destination will be to revisit Heatfreeze Island and relink it. The island can be found drifting at the top of Gulchrock Sea, so set sail in that direction. ▶ Offandon Island Walkthrough Guide |
| 2 |
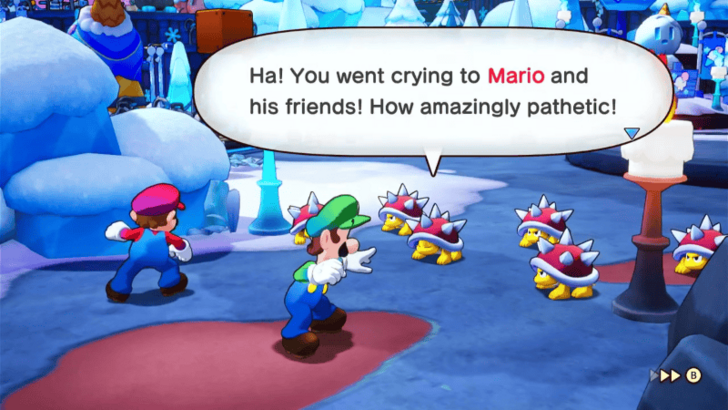 Upon landing on the island, you will immediately fight a group of Spiny enemies, prepare to fight. ★ Helpful Tip: Consider heading to a shop nearby to replenish your items as there will be a lot of enemies moving forward. |
| 3 |
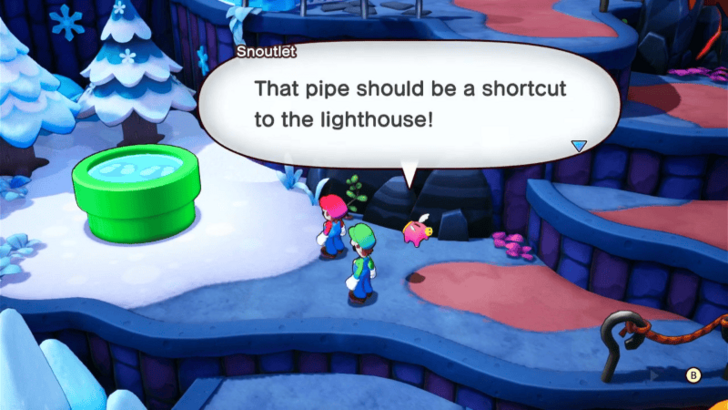 Head north towards the tunnel that leads to the cave entrance. Once you exit the tunnel, before entering the cave, be sure to save your game using the nearby Save Block as you'll be battling immediately once you enter the cave. |
| 4 |
 Upon entering the cave, you will be ambushed by a group of Bob-ombs. Prepare for battle. After defeating the Bob-ombs, a new path will be formed by their explosions. Head toward it to continue your journey. ★ Helpful Tip: After defeating the Bob-omb army, you'll receive an Anti-Army Specialist plug. Equip it immediately, as you will be facing more hordes of Bowser’s army as you progress. |
| 5 |
 Head down the newly found path, battling Dry Bones and other enemies along the way, until you reach the talking statues. Choose to hear their request, and you’ll receive an Ice Flower and a Fire Flower, while also learning the Fire & Ice Bros. Move. Use this newly acquired Bros. Move to have Mario thaw out the large ice balls blocking the path and Luigi disperse the lava floors, allowing you to reach the exit of the cave. ★ Helpful Tip: You will also encounter water geysers near the exit of the cave. Use your Fire & Ice Bros. Move as the geysers move up and down. You can freeze them, forming makeshift stairs, enabling you to reach the exit of the cave. |
| 6 |
 Head out of the cave and make your way to the Lighthouse area of Heatfreeze Island. Climb up the stairs and unplug the socket to finally reconnect the island. |
Offandon Island Second Visit
| # | Step by Step Objectives |
|---|---|
| 1 |
 After successfully relinking both Heatfreeze and Twistee Island, your next objective is to gather a substantial supply of Ampberries. These essential resources are required to restore the islands to their former glories. Ampberries can be found on Wayaway Island, but to access them, you’ll first need to make your way through Offandon Island. Furthermore, you’ll need to return to Offandon Island to uncover what Bowser and his minions are plotting. To avoid suspicion, you must disguise yourself before heading back to conduct your investigation. You can save time traveling to Offandon by sea by using the Tunnel near the Save Block on Shipshape Island. This allows you to select your destination island directly. |
| 2 |
 When you arrive back at Offandon, head to the plaza in the center of the map. This is where Bowser, his minions, and some villagers were discussing Mario and Luigi being wanted during your first visit to the island. They will still be gathered there, but this time, you can safely approach by wearing the disguises, allowing you to explore the area that was off-limits before. |
| 3 |
 After donning your disguises and entering the plaza, you’ll encounter two Goombas who will try to interrogate you. You’ll also meet Bowser and his minions as Bowser discusses his plans and what lies ahead for him and the Zokket army. Following this brief cutscene, a pipe will appear near the entrance of the plaza, which leads you back to the main pipe leading to Shipshape. |
| 4 |
 Head south from the plaza and overhear two Koopa Troopas talking about a path to Wayaway Island found in an islet with three trees. |
| 5 |
 Head back into the plaza where you will be stopped again by Bowser's minions, unfortunately your cover will be blown here and you will be sent into jail. |
| 6 |
 From the jail cell, examine the wall to your right and attempt to interact with it using your hammer, though this will prove ineffective. Next, examine the small rock to your left, but nothing will happen. After trying all possible ways to escape, a brief cutscene will trigger where Mario and Luigi shout for help. This prompts Buddy, your former ally, to come to your aid and free you from the cell. |
| 7 |
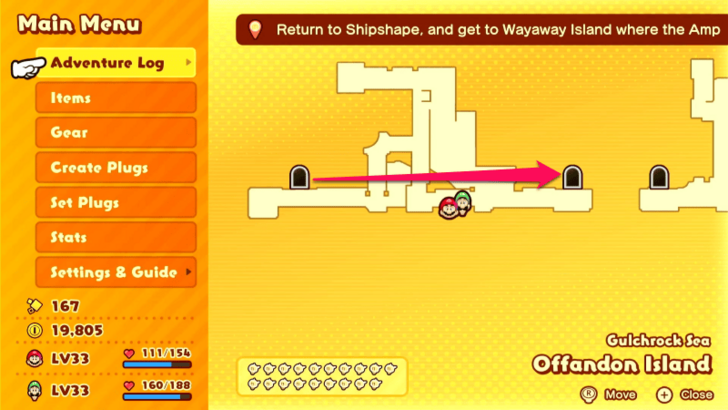 Head right and interact with the nearby cells to free another prisoner, then check the adjacent cell to collect a Max Mushroom. Once done, continue heading right and climb the stairs to exit the jail. After escaping, you'll find yourself in a completely new area of Offandon. Make your way to the rightmost part of this area, battling Bowser's Minions like Koopa Troopas and Goombas along the way, until you reach another cave entrance. |
| 8 |
 Inside the cave, the environment will be mostly dark, with Mario and Luigi illuminated by spotlights as they move. Some wall-mounted light fixtures provide limited visibility, while Watchers patrol the area with flashlights that you'll need to avoid. To navigate the pipes, you’ll need to utilize the Blitz Ball Bros. Move. Follow the path carefully, evading Watchers until you reach a stopping point where the connecting pipes come to an abrupt end. ★ Helpful Tip: Do your best not to be spotted by the watchers as this will lead you restarting from the current area. |
| 9 |
 To progress, you'll need to realign the middle pipe by locating and activating M buttons mounted on the walls throughout the area. Some of these buttons are hidden behind crates, so use your hammer to smash them and reveal the buttons. Keep hitting the buttons to adjust the pipe until it is properly aligned. Once the path is clear, follow it to the cave's exit and proceed outside. |
| 10 |
 Once you exit the cave, you'll find yourself back on familiar ground in Offandon. Head north until you reach a bridge. To lower it, smash the M button with Mario's hammer. However, be cautious, as after pressing the button, you'll be ambushed by a large group of Bowser's minions. Prepare for battle. |
| 11 | After the battle, a brief cutscene will trigger featuring Buddy and Bowser Jr. Once it's over, you'll return to the first area where you initially entered Offandon Island via the pipe. Take the time to save your game, then use the nearby Recovery Block to restore your health. Once you're prepared, head back to Shipshape Island via the pipe. |
| 12 |
 Once you return to Shipshape, report your findings to Connie and share the details of what you discovered while re-exploring Offandon Island. Your next task will be to locate the Islet with three trees, as this will lead you to Wayaway Island. ▶ Wayaway Island Walkthrough Guide |
Wayaway Island
| # | Step by Step Objectives |
|---|---|
| 1 | 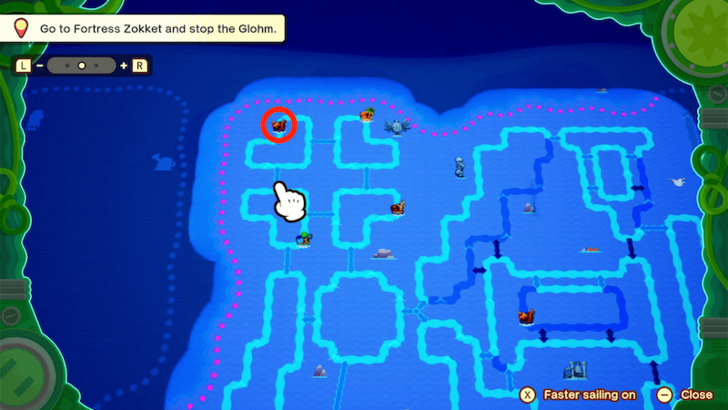 The islet with three trees refers to Meeger Islet, but you can’t get to the spot with three trees by going straight here. Where you need to go first is Mynor Islet. This is the islet located on the upper left corner of Gulchrock Sea. Select this upper left current in your Ocean Map, then launch Mario and Luigi here. ▶ List of All Islets |
| 2 |  Head right until you see a green warp pipe. Use this warp pipe to get to Paquette Islet. |
| 3 |  Once you emerge in Paquette Islet, take the south green warp pipe that leads to Meeger Islet. This will bring you right to the spot with three trees. |
| 4 | 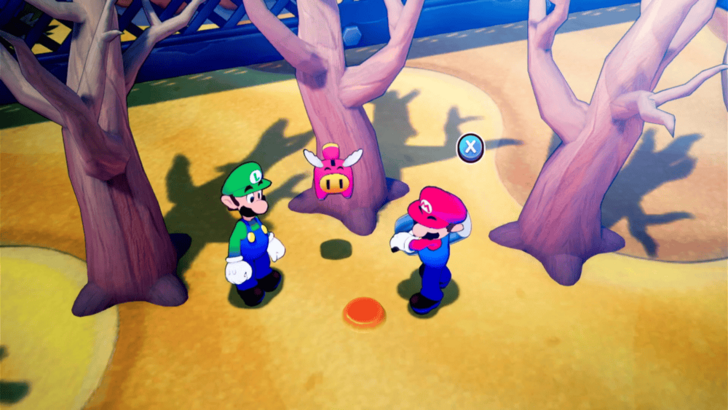 Investigate the strange bump in the middle of the trees, then when prompted, use X for Mario to hammer this bump. This will bring up another green warp pipe to the south of the trees. Use this warp pipe to get to Wayaway Island. |
| 5 |  Before entering Bowser’s Castle, you can buy items from the Peddler. There will be a lot of enemies in the castle, no Recovery Block until before the boss room, and a difficult boss battle at the end, so you’ll need to be prepared. Hit the Green Warp Pipe Block beside the Save Block to activate a fast travel point from here to Mynor Islet. This will help you return to this island in the future. |
| 6 |  Once you’re ready, head up the bridge. Buddy will appear near the entrance, hoping to find Junior within, and enter the castle. Follow him inside. |
| 7 | 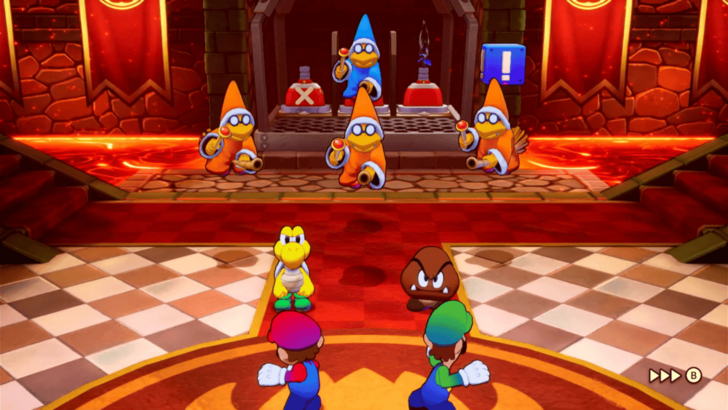 You will be shown a cutscene demonstrating how to use the elevator inside, but Bowser’s minions will spot Mario and Luigi, throwing you into a battle. You need to fight three Goombas, a Koopa Troopa, and two Magikoopas. ★ Battle Tip! Bowser’s Minions Prioritize getting rid of the Magikoopas first, since their attacks are more difficult to deal with, and make sure to counter the Koopa Troopa since it can cause Dizziness. You can also target all of them at once by using multi-target Bros. Attacks that can hit flying enemies such as Bomb Derby and Yoo Who Cannon. ▶ List of All Bros. Attacks |
| 8 | 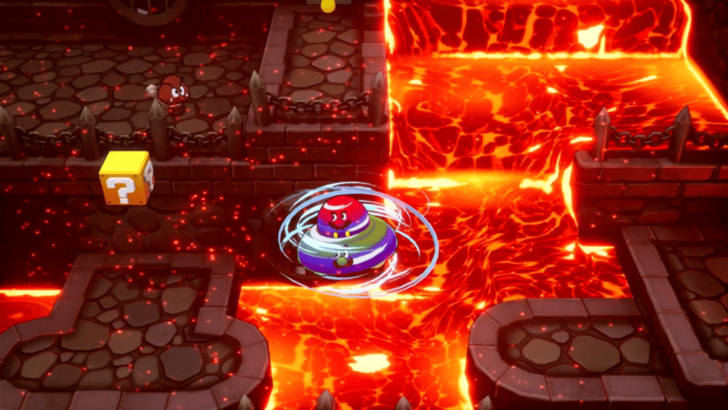 Now that the castle is flowing with lava, most pathways have been blocked. To turn off the lava flow blocking the elevator, you need to get to that lever on the second floor. Follow the pathway going left, and use your UFO Spin Bros. Move to cross the platforms. |
| 9 | 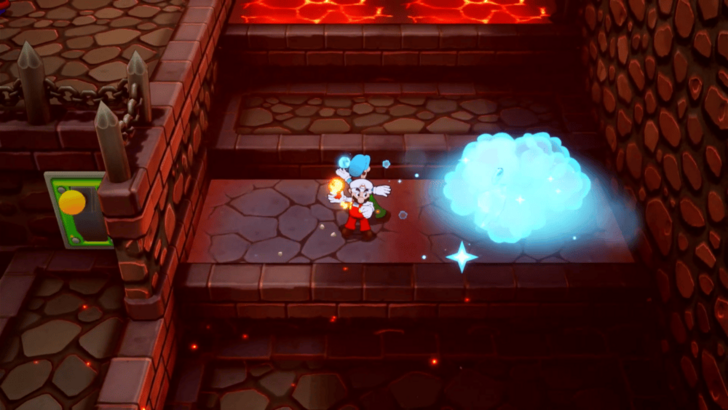 Interact with the lever to stop the lava river in this room. This still leaves some spots with lava, but you can neutralize them by activating the Fire and Ice Bros. Move and using Luigi’s ice. Once you’ve cleared a path, proceed onward. ▶ How to Unlock All Bros. Moves |
| 10 | 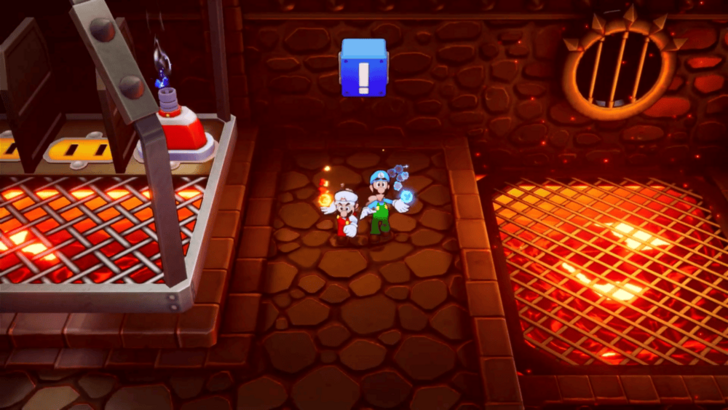 Hit the blue Exclamation Block to bring down the elevator. Then, use Mario’s fire from the Fire and Ice Bros. Move to ignite the burner plug on the elevator. This should take you one floor up. |
| 11 |  Grab another burner plug from this floor, and place it in a socket on the elevator. Stay on the second floor platform, and extinguish the ignited plug in the elevator so that you can jump onto the top of the elevator. |
| 12 |  From the top of the elevator, jump onto the pathway with an arrow. Follow the path heading right, collecting coins along the way. A third burner plug can be found at the end. Pick up this plug, and bring it back to the elevator to fill in the last socket. |
| 13 |  Use your Fire and Ice Bros. Move, and ignite two plugs using Mario’s fire to reach the third floor of this room. This floor has some blocks you can hit for coins and items. Go back to the elevator, and ignite the last plug in order to reach the top floor of this area. |
| 14 | 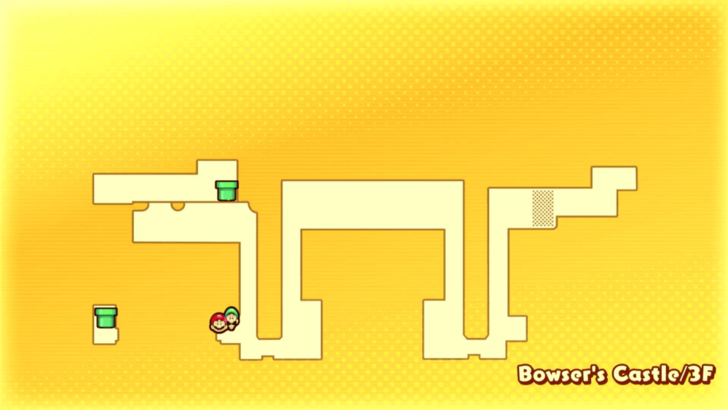 Follow the path eastward. There will be a Green Pipe Block that you can activate along the way, right next to a Save Block. Proceed into the main hall, and keep following the path to the room on the right. There will be several enemies that you can either fight or avoid along the way. |
| 15 | 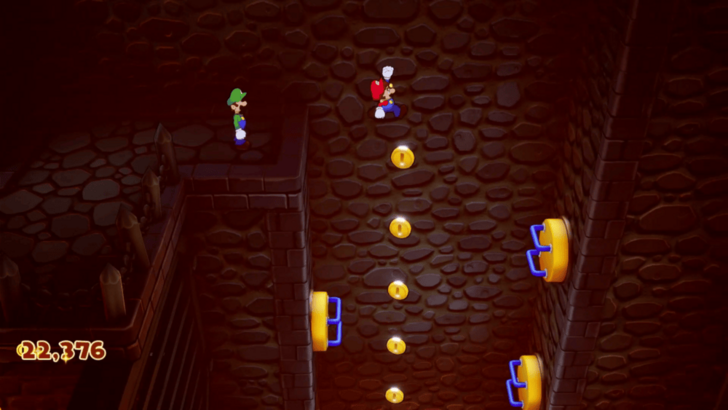 At the end of the path, drop down all the way to the bottom. Though if you don’t mind a detour, there are some item blocks you can get if you climb up to the middle floor on the right side of the room. Head left from the bottom floor to continue on. Keep following the path past the elevator, going counter-clockwise. |
| 16 | 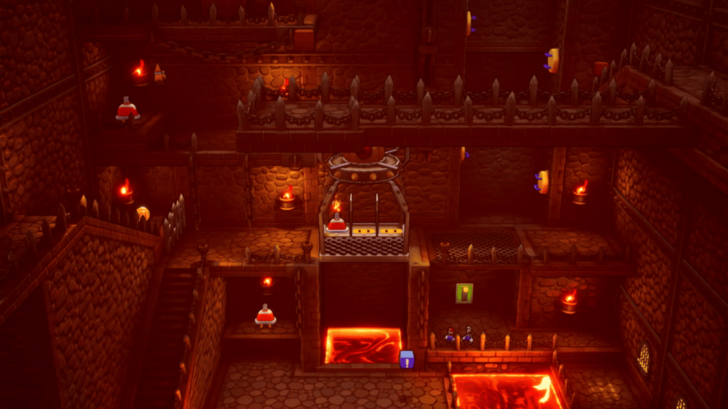 Use the UFO Spin Bros. Move to cross the large gap in the path, and then keep walking until you reach a yellow-green lever. Interact with this lever to staunch the lava flow in this room. |
| 17 |  Head back to the elevator. You can either use Luigi’s ice from your Fire and Ice Bros. Move to extinguish the flaming plug in the elevator and bring you down a floor or jump down to the lower floor and hit the blue Exclamation Block to bring down the elevator. Once the elevator is down, pick up the burner plug on the left side and plug it into the elevator. Ignite both plugs using Mario’s fire from the Fire and Ice Bros. Move to go up two floors. |
| 18 | 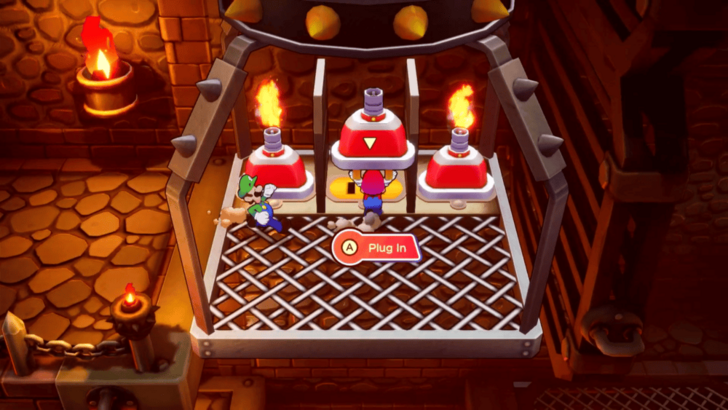 Defeat the enemy guarding the third plug on this floor, then take the plug and place it into the elevator. Ignite this plug as well in order to reach the higher floor. |
| 19 |  Hit the Exclamation Block hovering over the platform in order to bring down the gate two floors down. Extinguish two flames from the elevator using Luigi’s Ice in order to reach this newly opened, coin-filled path. |
| 20 | 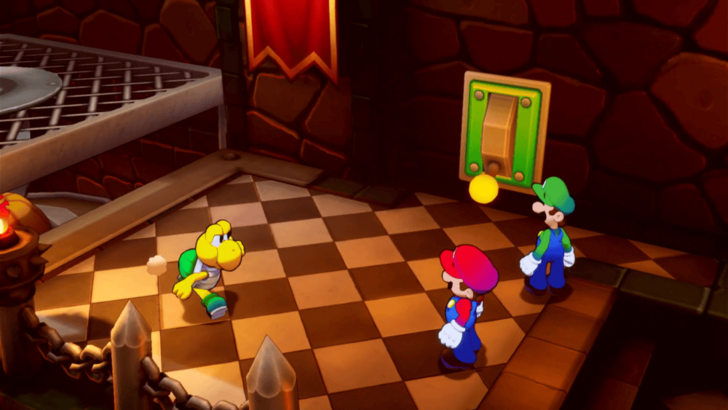 Follow this path to go back into the main hall. The lever that will stop this room’s lava flow is in reach, but you will be stopped by the Koopa Troopa assigned to guard it. Defeat the poor Koopa Troopa in an easy battle, then raise the lever. |
| 21 | 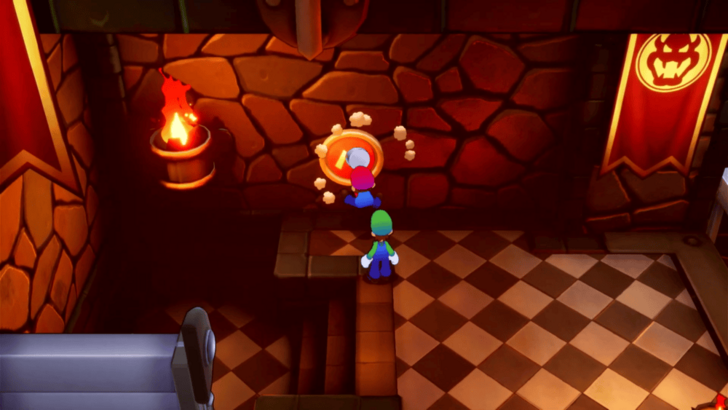 Keep going left until you see an M button on the wall. Use Mario’s hammer to activate it, and bring down a set of stairs. |
| 22 | 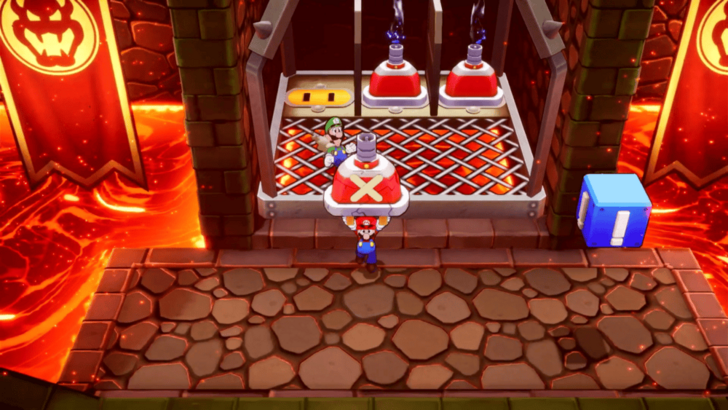 Go down to the ground floor and into the elevator. One of the burner plugs in the elevator is broken, so take out this plug marked with an X. You can just place it on the floor outside the elevator. Go to one of the other elevators in either the left or right room in order to get a replacement for the broken plug. The left room might be more convenient, since it doesn’t require you to pass around the plug. |
| 23 |  Take out a working burner plug from an elevator, and carry it back to the main hall. Before you can leave the room, however, you will be stopped by another Koopa Troopa. Defeat Bowser’s minions, and then plug in the working burner plug into the central elevator. |
| 24 |  Igniting two of the burner plugs will take you to a floor with an Exclamation Block that removes the fence blocking the right room on the ground floor. Igniting three plugs will take you up to the entrance of Bowser’s room. Before facing Bowser, make sure to activate the Green Pipe Block, save your progress, and heal using the Recovery Block. You can fight more of Bowser’s minions on this floor in case you want to try to level up before the boss fight. Once you’re ready, enter the boss room to face Bowser. |
| 25 |  ★ Battle Tip! Beating Bowser Bowser can use his minions to wear down Mario and Luigi. Try your best to counter their attacks, and use multi-target Bros. Attacks to help get rid of them while also targetting Bowser. Having the Anti-Army Specialist plug equipped along with the Kaboom Attack plug can also help you get rid of these pesky enemies. ▶ How to Beat Bowser |
| 26 |  Upon defeating Bowser, the Extension Corps will kidnap Bowser Jr. Follow them through the north archway. A cutscene will play out where Buddy tries to help Junior but gets Glohmed instead. Luckily, Ampberries are in good supply here. |
| 27 |  You learn from the Goombas looking after Buddy that the Ampberries are being kept in the room to the right of Bowser’s throne room. Go back to Bowser’s throne room, and enter this room on the right to start a cutscene and unlock a new ocean current. The Ampberries will be automatically transported to Shipshape, so there’s no need for you to do anything further here. Exit the room and Bowser’s throne room, and take the green pipe back to the castle entrance. |
| 28 |  Exit the castle, then take the green pipe near the Peddler to Mynor Islet. From here, use the cannon to launch Mario and Luigi back onto Shipshape Island. Go to the group in the plaza of Shipshape Island to drop off the Ampberries. After a long cutscene, you will be given the Auto Ampberry and Anti-Zokket Specialist plugs. You will then be able to travel to the Gulchrock Sea Great Lighthouse. |
Gulchrock Sea Great Lighthouse Island
| # | Step by Step Objectives |
|---|---|
| 1 |
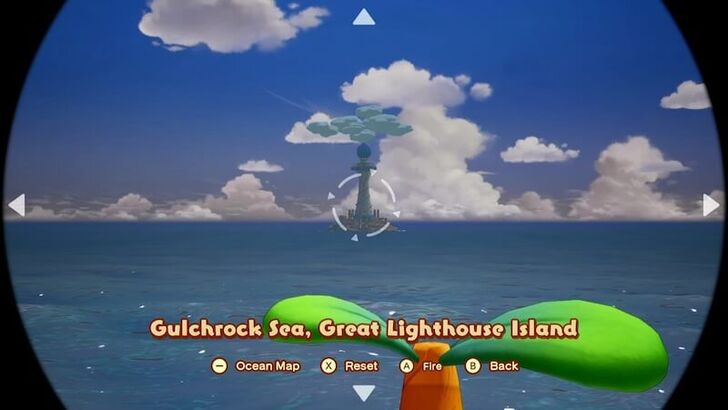 Set sail to Gulchrock Great Lighthouse Island and use the Big Cannon to launch yourselves directly to the island. |
| 2 |
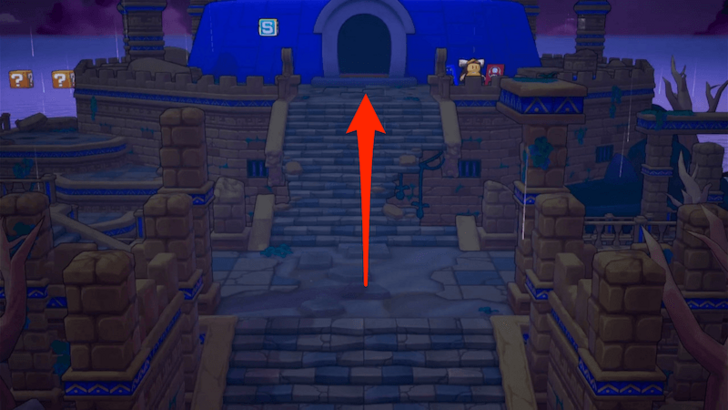 Upon landing at the island, head north and enter the Great Lighthouse. |
| 3 |
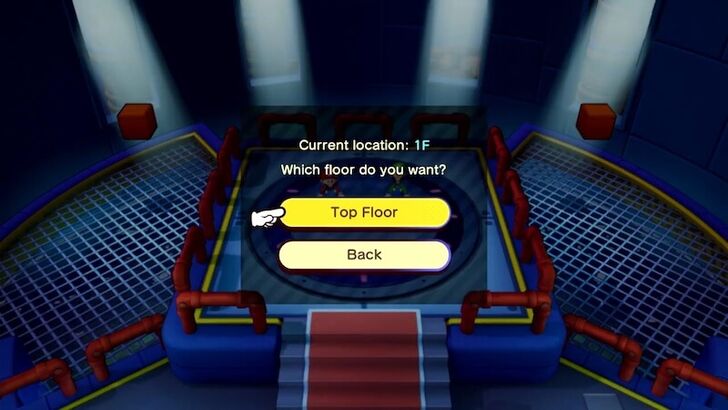 Interact with the Elevator in the center and select the Top Floor. |
| 4 |
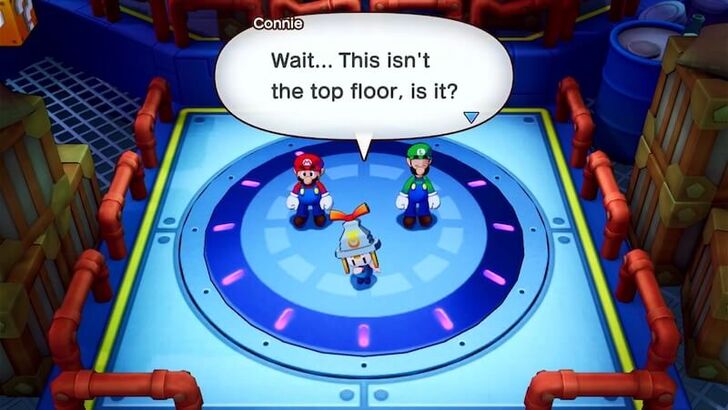 You’ll initially be taken to 2F, where the area is teeming with Spike Zok Troopers and Ring Zok Troopers. You can battle the Zok Troopers for XP and breaking crates to collect Gold Coins and consumables. Once you're done, use the Elevator again to take you to the Top Floor. |
| 5 |
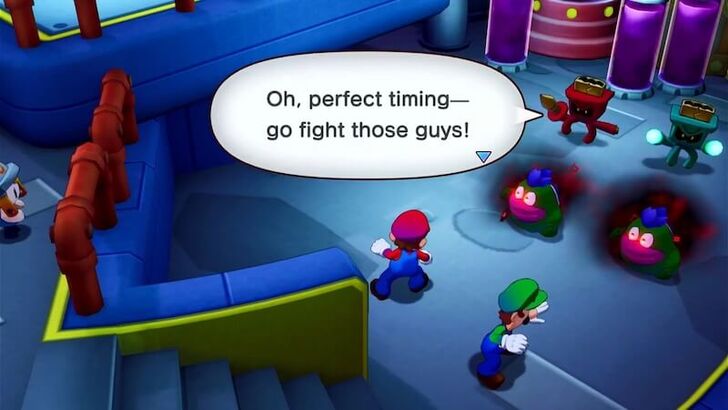 The Elevator will then take you to 3F, but you’ll be ambushed by Zok Troopers and Glohm Spikes. Defeat them in battle to continue onward. |
| 6 |
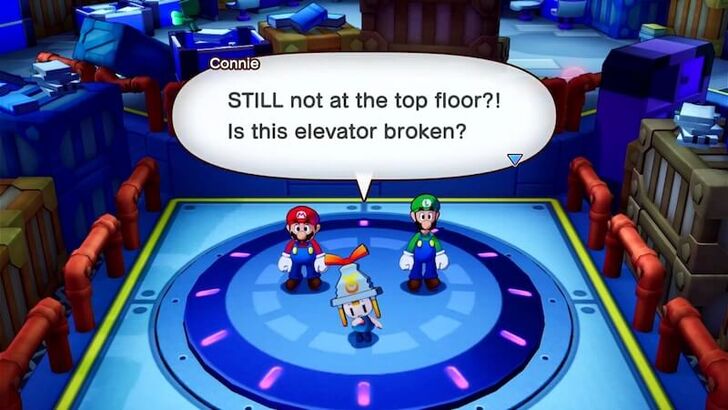 After surviving the ambush, interact with the Elevator again to the Top Floor. However, you will be taken to 4F instead. Battle the enemies for XP and use the Elevator again to the Top Floor. |
| 7 |
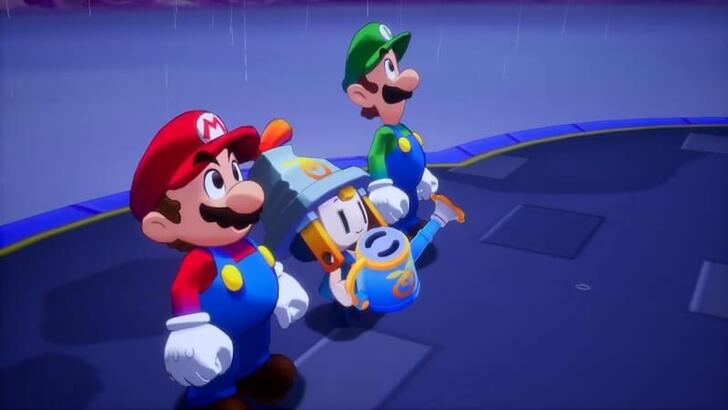 Now on the Top Floor, head south to exit the area. Make your way to the upper deck and approach the center to trigger a cutscene where Connie relights the Great Lighthouse. After a lengthy cutscene, you will be returned to Shipshape Island and move on to the next part of your adventure! |
Stormstar Sea Walkthrough
Fortress Zokket
| # | Step by Step Objectives |
|---|---|
| 1 |
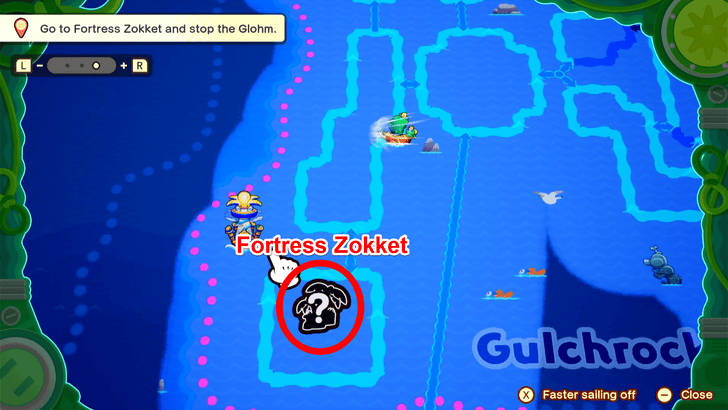 After relighting Gulchrock Sea's Great Lighthouse, a new current unlocks in the Gulchrock Sea that will lead ShipShape Island to Fortress Zokket's location. Upon discovering it through the telescope, fire away toward the fortress once you are comfortable with your gear and collection of items. |
| 2 |
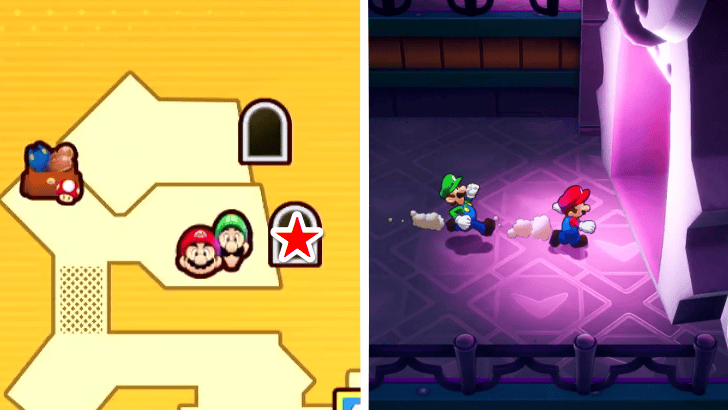 The brothers will find themselves on the exterior of Fortress Zokket's Second Floor. Head toward the doorway east of the area, across from the travelling merchant, and find yourself inside the 2F Main Area. The main area features no notable items, but to the east, you will find a raised stairway that cannot be unlocked at this time. Exercise caution as enemies like Jet Zok Troopers and Spike Zok Troopers patrol the vicinity. |
| 3 |
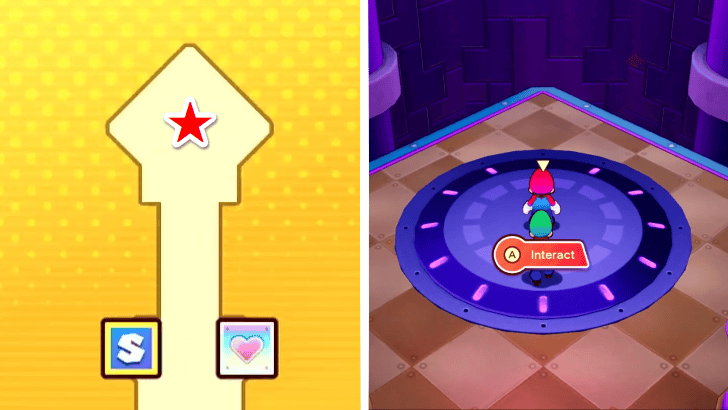 Go past the main archway and head north toward the elevator after utilizing the Save Block and Recovery Block on the way. Once there, the brothers will be greeted with the sight of the Extension Corps and Zokket, standing around Bowser. |
| 4 |
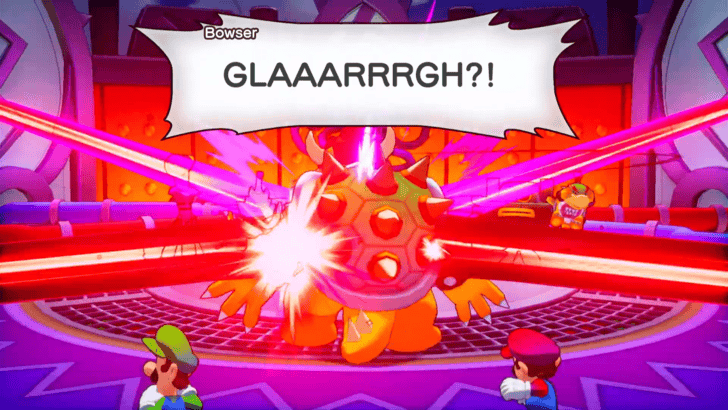 As Bowser fights for his son's freedom in the clutches of the Extension Corps, he is hit by the Glohmatic Quad-Ray and turns into Glohm Bowser! The brothers will now be forced to knock him back to his senses and fight their way through their frenzied foe! ★ Battle Tip! Beating Glohm Bowser The most efficient way to defeat Glohm Bowser would be to attack him while he is stunned. During this period of time, utilize the cannon ship that Bowser's Shy Guys are riding via Luigi Logic, and hit Bowser as much as possible while dodging his aerial attacks. ▶︎ How to Beat Glohm Bowser |
| 5 |
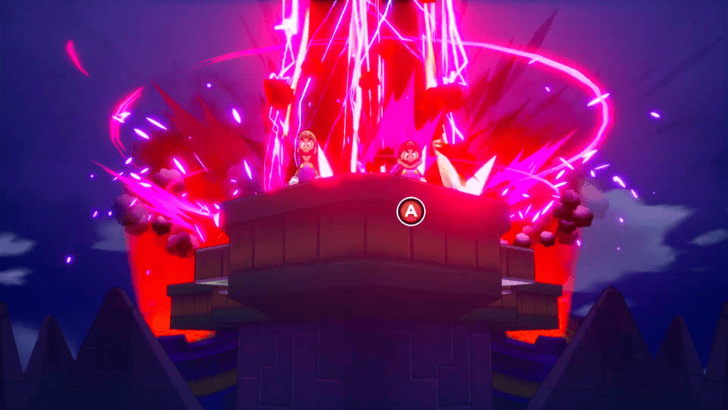 After defeating Bowser, Zokket points the Glohmatic Quad-Ray toward the brothers, and chases them through the Top Floor of Fortress Zokket. Keep running straight and don't look back, then press the A and B Button when prompted to let Mario and Luigi jump off of the fortress. When they wake, they will find themselves in a curiously mysterious island. |
Conductor Island
| # | Step by Step Objectives |
|---|---|
| 1 |
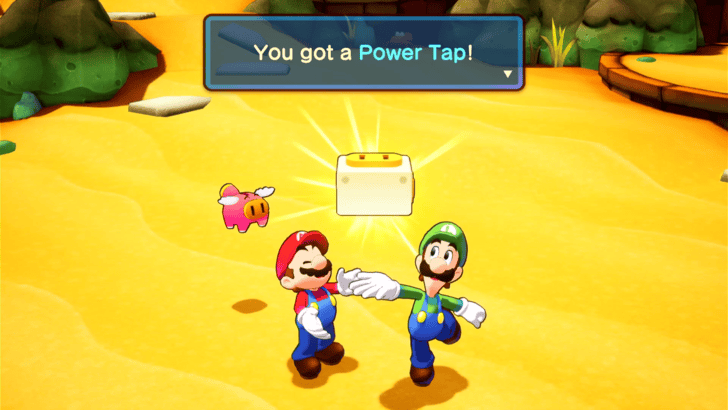 After the brothers jump off of Fortress Zokket, they land in a very familiar beach with a new Power Tap in hand. Explore around the new island to find out where you landed! |
| 2 |
 Follow the path east of the island until you come across Snoutlet viewing a big boulder blocking the way forward. You will come across a cutscene where the brothers will be hinted at by a mysterious voice to activate their Fire & Ice Bros. Move, and ultimately learn the Bro Bomb Bros. Move! ▶︎ How to Unlock All Bros. Moves |
| * |
To perform the Bros Bomb Bros. Move, flick your Right Joystick to the left and select the Fire & Ice Bros. Move first. Then, position yourself in front of a target, hold the X Button, and release once a big ball of fire and ice forms in front of Mario and Luigi. |
| 3 |
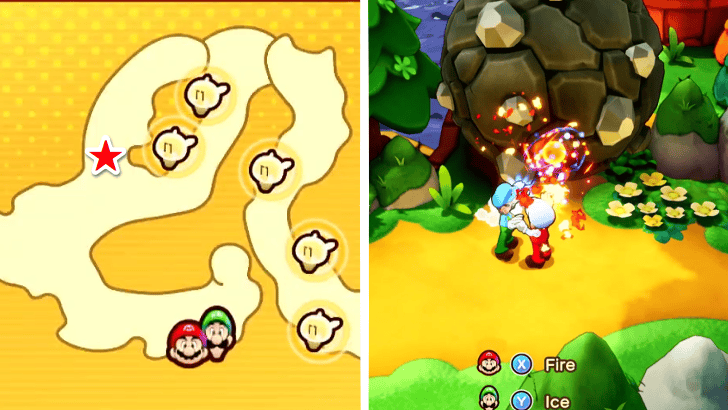 Head northeast of the island and destroy the large boulder adjacent to two Question Mark Blocks. Upon doing so, the mysterious voice speaks once more to reveal that it was they who summoned the brothers to Concordia. |
| 4 |
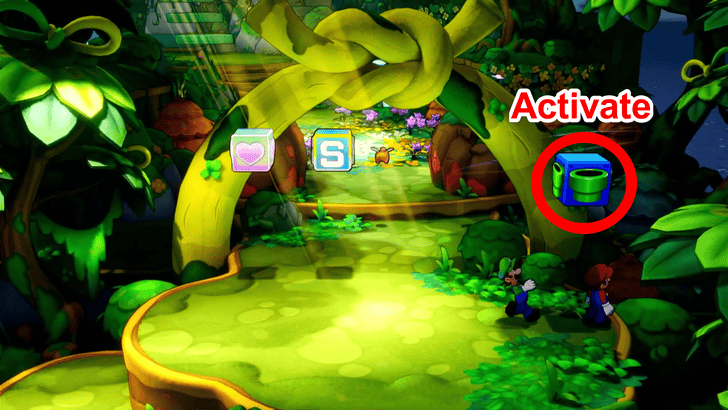 Continue on the straightforward path leading to the very east of the island, destroying all the large boulders along the way, until the mysterious voice speaks once more. Move forward after the brief speech, and activate the Green Pipe Block on your right to enable a faster route from your location toward the island's beach. Do not forget to use the Save Block and Recovery Block too, as a challenge awaits up ahead! |
| 5 |
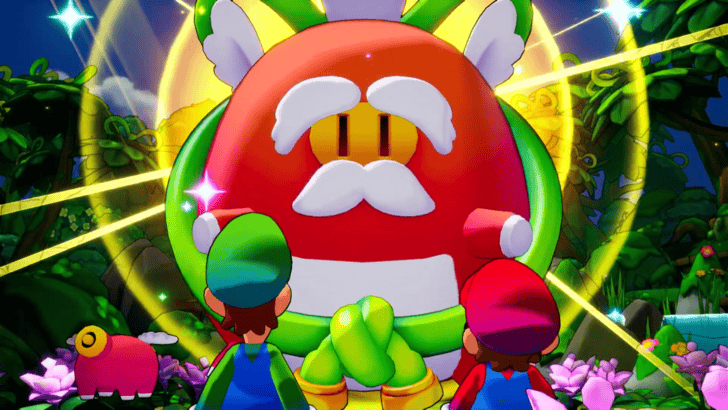 Upon moving forward, a cutscene plays where the voice is revealed to be the Great Conductor, and Snoutlet admits that they are, in fact, the Great Conductor's Assistant! A series of cutscenes will play in order, revealing much of Zokket's origins and plans, and ends with the Great Conductor challenging Mario and Luigi to a test of their bond. |
| 6 |
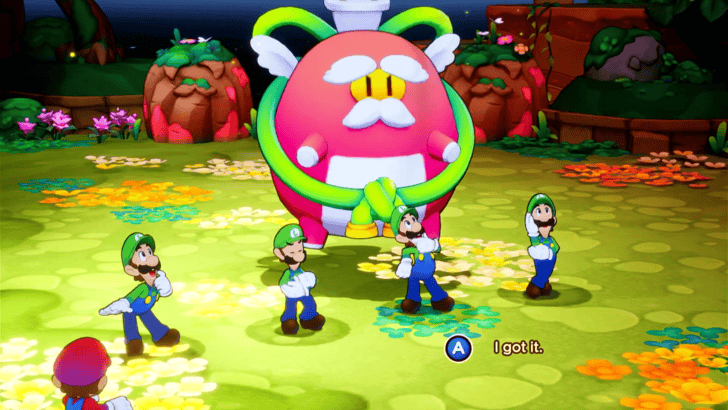 ★ Battle Tip! Beating the Great Conductor During the first phase, use Red Shell or Green Shell when the Great Conudctor asks for an Excellent Bros. Attack, as these are the easiest to perform, and require minimal BP to execute. This strategy ensures you conserve BP for the second phase, where the Great Conductor demands demonstrations of all Bros. Attacks. If you are having trouble executing Excellent Bros. Attacks during the second phase of the challenge, feel free to switch your combat difficulty to Cakewalk, which will allow the Great Conductor to approve of the brothers' bond after seeing them perform only two different Bros. Attacks. ▶︎ How to Beat Great Conductor |
| 7 |
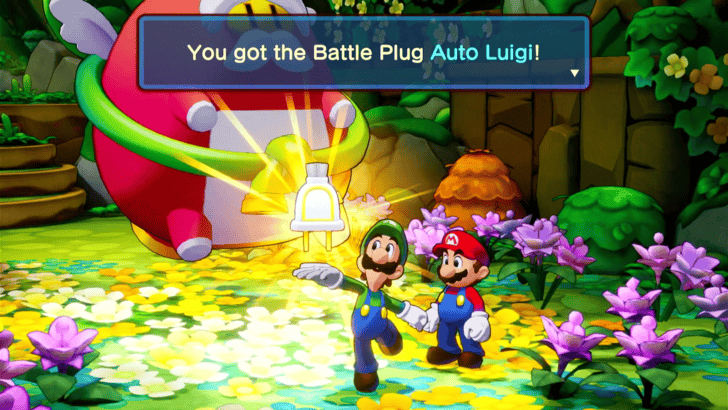 After successfully passing the Great Conductor's test, he will award you with the Auto Luigi Battle Plug which allows Luigi to do an extra action before ending his turn. |
| 8 |
 Proceed north toward the lighthouse and relink Conductor Island! The brothers will be transported back to Shipshape Island after the cutscene, where Connie happily greets Mario and Luigi upon their return. In the distance, a new obstacle emerges, as Fortress Zokket summons a ring of glohmed thorns that isolates itself from the rest of Concordia. |
Jellyfish Island
| # | Step by Step Objectives |
|---|---|
| 1 |
 On Shipshape Island, speak with Technikki about how to bypass Fortress Zokket's heightened defenses. Learn about an inventor called Adaphne from Dr. Vulko as he joins the conversation, and locate Jellyfish Island upon Arc's suggestion! |
| 2 |
 Find Jellyfish Island drifting on the northern currents of the Stormstar Sea and discover it through the telescope. Once you are prepared, launch the brothers toward the ritzy shores of the island! |
| 3 |
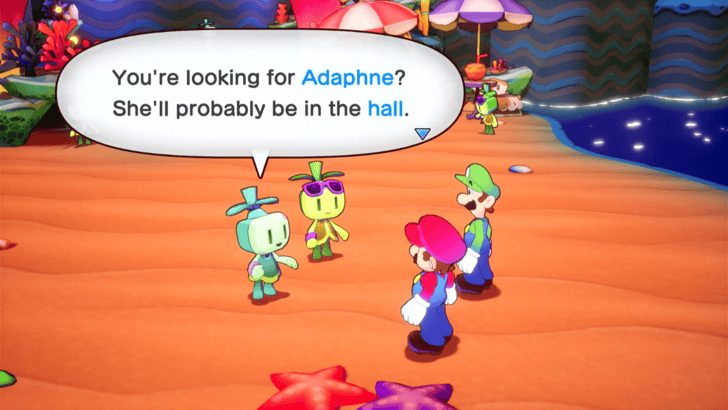 Upon your arrival, you will be greeted by two Concordians who say that Adaphne can be found in the island's Hall. Although to gain entry, the brothers must be in possession of tickets issued by the owner. |
| 4 |
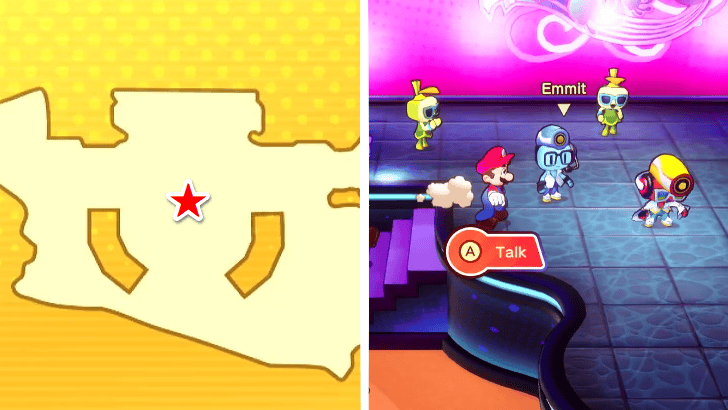 Head west of the Island where you can find a performance in full swing. Walk up the stage, speak with Dyode and Emitt, and agree to dance with Dyode. After successfully completing a small rhythm minigame without missing any notes, the brothers will be rewarded with Club Dyode Tickets, which will grant them access to the hall. |
| * |
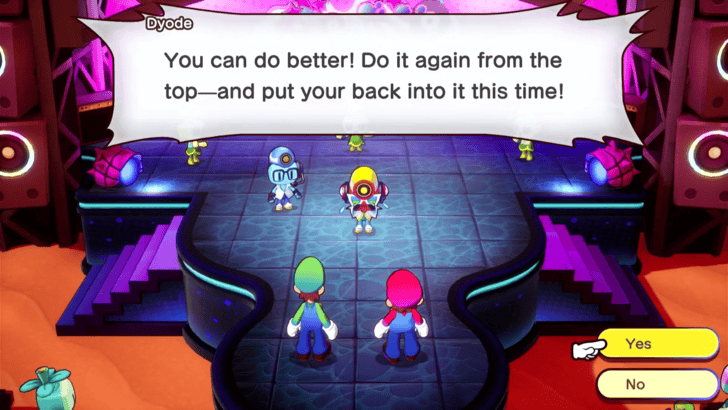 If you are unable to hit all notes with an Excellent rating, do not worry as you are given a chance to retry! If you are still struggling to complete the rhythm minigame, you may choose to lower its requirement ceiling upon retrying once more. |
| 5 |
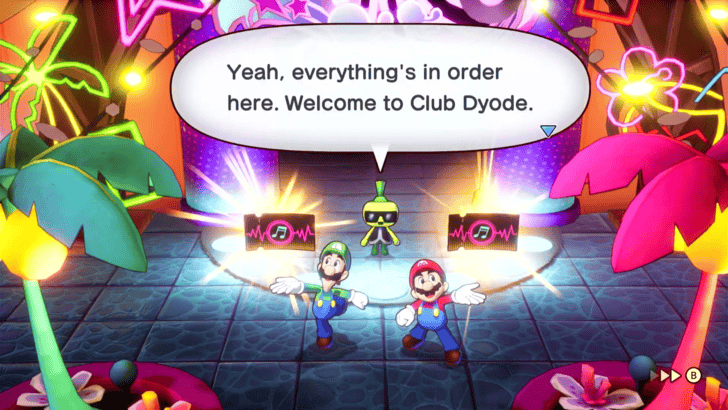 Head over to Club Dyode's entrance at the island's upper area, and show your tickets to the bouncer posted out front. He will finally let the brothers in, and the hunt for Adaphne continues! |
| 6 |
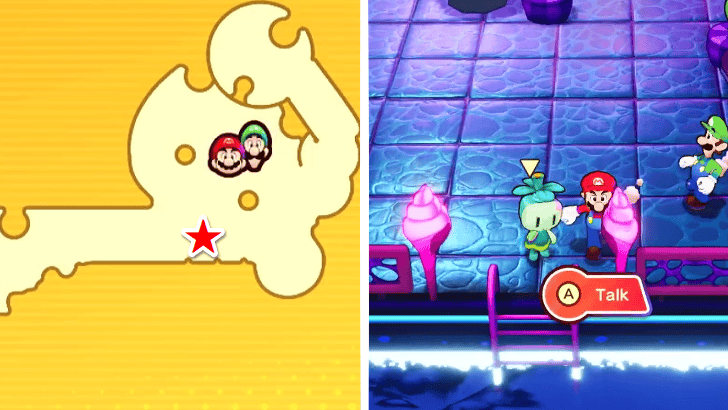 Once inside the club, descend the walkway on the west side of the club, and head toward the pool area on your right. Speak with the green Concordian posted by the pool's staircase, and find Adaphne floating on the pool while taking a nap. The green Concordian shares their gripe with the brothers and hints at diving into the water to jolt Adaphne awake, then sends them on their way. |
| 7 |
 With that information, return to the club's Upper Level and speak with the Concordian to the right of the entrance, overlooking the pool underneath. They will tell you about the want to dive, although they are discouraged to do so without a Floaty Ring. |
| 8 |
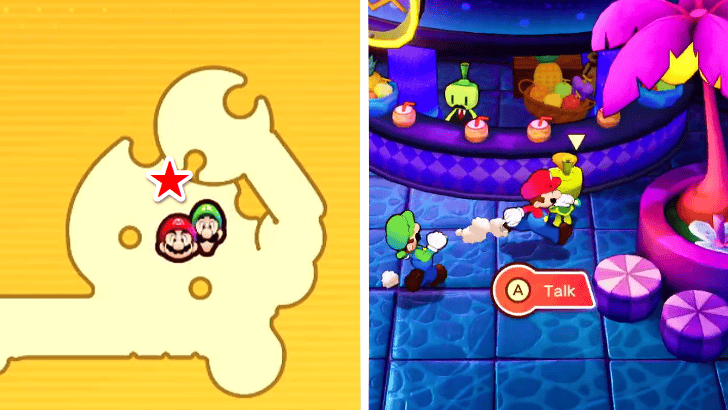 Make your way back to the Lower Level and speak to a Yellow-Green Concordian by the pool bar. Agree to listen to their woes, validate them as they rant about Adaphne, and they will return to their post renting Floaty Rings out to guests. After your conversation, meet up with them beside the row of pool benches, and they will hand over a free Floaty Ring to the brothers as a token of gratitude. |
| 9 |
 Return to the diver at the Upper Level and hand over the Floaty Ring to them. A cutscene will play where they jump into the pool and eject Adaphne from her own floaty ring, and stylishly lands upon waking up. |
| 10 |
 Head down to the Lower Level once more and speak with Adaphne. The brothers will follow her back to the club's Upper Level where she demands a Jellyfish Pizza be made by Mario and Luigi. Once you are up for the challenge, talk to Adaphne once more to initiate the pizza-making! |
| * |
 You can talk to the bodyguard stationed besdide Adaphne at any time to ask for pointers on how to make Jellyfish Pizza. He will tell you about the Crust Creation, Toppings, and lay down some Tips and Tricks to help you create the best Jellyfish Pizza there is! |
| 11 |
Mario and Luigi must make 4 pizzas within a 50-second time limit. First, start by picking up the dough as it arrives on the conveyor belt by pressing the A Button. Repeatedly hit the X Button to stretch out the dough, and it will automatically be placed on the table once it is big enough. For the toppings, repeately press the B Button to throw all of the ingredients on the dough. The pizza will be whisked away to get baked once it is completed, and the process repeats itself until all 4 pizzas are made. |
| 12 |
For her last request, Adaphne requests a Mega Jellyfish Pizza. The brothers will only be given 30 seconds to complete it, although the process will remain similar to how the previous 4 pizzas were created. This time, however, Mario and Luigi will take turns in filling the pizza with toppings. On Luigi's turn, repeatedly hit the B Button, and do the same with the A Button on Mario's turn. As the pizza nears its completion, repeatedly spam both A and B Buttons together until all toppings fill the pizza! |
| 13 |
 After successfully and diligently fulfilling Adaphne's request, the elevator to the club's Rooftop will be repaired, granting access to the island's lighthouse. Ride the elevator to the Rooftop and ascend the lighthouse to relink Jellyfish Island! |
| 14 |
 Back on Shipshape Island, a commotion stirs as Adaphne and Technikki face off with their proposals to pass through Fortress Zokket's barrier. It will now be up to the brothers to decide on which invetion they would like to take on: Technikki's plan to take to the air, or Adaphne's proposal to dive beneath the waves. ▶︎ Technikki or Adaphne? |
Return to Fortress Zokket
| # | Step by Step Objectives |
|---|---|
| 1 |
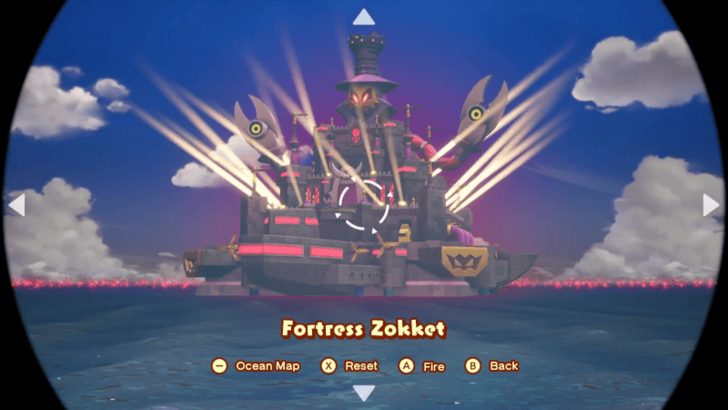 After obtaining the necessary Ship Part from Bowser's Castle and returning to Shipshape, have it repaired with the help of either Technikki or Adaphne. Once your ship is fixed, you’ll be ready to head back to Fortress Zokket and confront Zokket himself. ★ Helpful Tip: It is best to prepare before returning to Fortress Zokket a second time, this includes stocking up on your items, and having the best equipment before heading into the final battle. ▶ Technikki or Adaphne? Which Engine Should You Choose? |
| 2 |
 Upon arriving at Fortress Zokket, you can use the nearby Save Block to save your game, then enter the big door using your Fire and Ice Bros. Move charged attack. |
| 3 |
 In the next area, you'll need to use all your Bros. Moves to navigate the obstacles. Use the Bro Ball Bros. Move to bypass rotating spike traps and the UFO Spin Move to cross gaps. Continue employing these techniques as needed until you reach the next section. |
| 4 |
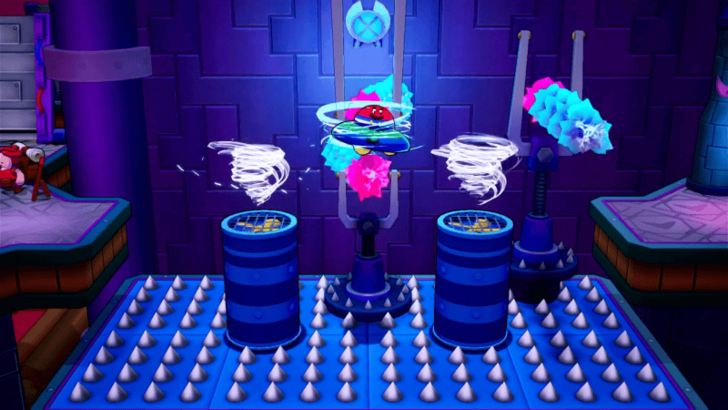 Upon entering the next area, immediately use a charged Ball Blitz move to swiftly bypass the fast-spinning spike traps. Shortly after, you’ll come across a shop, take this opportunity to restock your items before moving on. Once ready, proceed forward and use your UFO Spin move to cross the gap ahead. Continue heading straight to reach the next area. |
| 5 |
 Break the boxes blocking your path and continue forward, battling enemies along the way. Once you've cleared the crate-filled path, look for the entrance to the next area, which you'll find to the south. |
| 6 |
 Upon entering the next area, head north and you'll come across another path blocked by crates. Destroy the crates to clear your way and continue along the path. Keep moving forward until you reach the next entrance. |
| 7 |
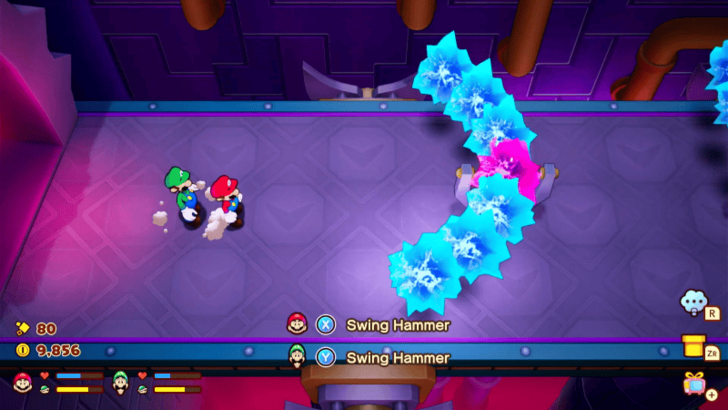 The next area is straightforward. Avoid the rotating curved spike traps as you move forward. Head up the stairs at the end of the path to reach the 2F of Fortress Zokket. |
| 8 |
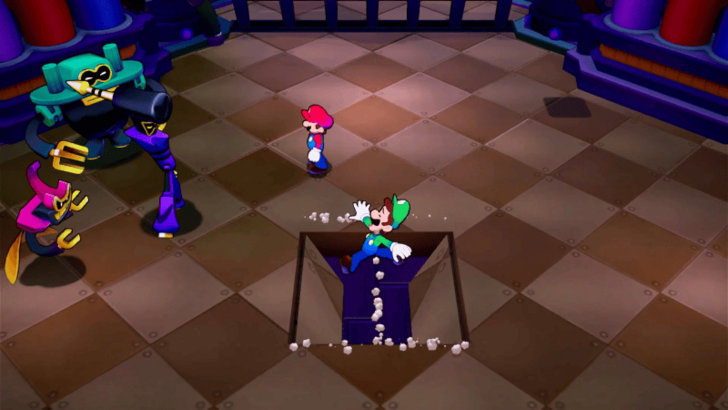 Upon reaching the 2F, your next objective is to head toward the middle of the map. Follow the path, battling enemies along the way, until you reach the center. Here, you'll spot a Save Block and a Recovery Block—but before you can access them, Ten and his gang will block your path. After a brief cutscene, Luigi will fall through a trap hole created by Ten and his friends, leaving Mario behind. ★ Helpful Tip: This area is populated with Glohmed Zok Trooper enemies, which are significantly stronger than their original counterparts. Prepare for tougher battles as you navigate through this section. |
| 9 |
 From this point, you'll take control of Luigi. After Luigi wakes up, you will notice a Save Block nearby, you can use this to save your game progress. Then, proceed to the next area while avoiding the electric traps by jumping over them. ★ Helpful Tip: Since you will be alone from here on, it's best to avoid engaging in battles until you rendezvous with Mario. |
| 10 |
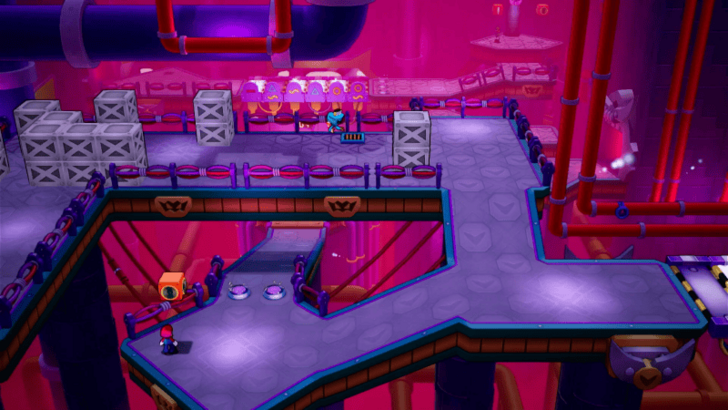 Upon arriving in the next area, you'll encounter a dead end. Head north and locate the Transmitter Block to switch control back to Mario. Once you’ve switched to Mario, backtrack to the previous area and spot Luigi in the distance, though too far to reach. Head south to find another Transmitter Block. Activating it will remove the blockade, clearing the way to both Luigi's location and Mario's path forward. |
| 11 |
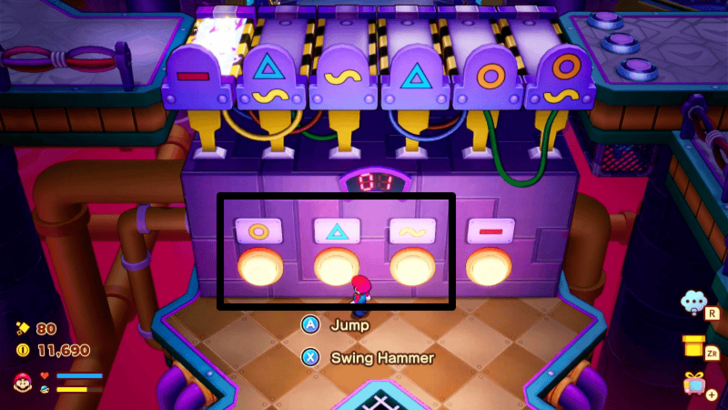 Have Mario proceed down the newly opened path, where you’ll encounter a machine with several buttons, each marked with a sign. This machine controls the electrified bridge Luigi needs to cross. Hit the first three of the buttons on the machine with your hammer, in any order, to deactivate the electricity on most of the bridge steps. After this, head back to the previous area and hit the Transmitter Block to change control to Luigi ★ Helpful Tip: Avoid hitting all the buttons, as you’re limited to three moves before the system resets! |
| 12 |
 Luigi can now freely cross the bridge, but remember to jump on the last step as the electricity was not removed in here. Then, proceed to the next area. Ignore the Exclamation Block for now, and hit the Transmitter Block to switch to controlling Mario. |
| 13 |  Have Mario follow the only available path, moving from room until he ends up at another electric bridge puzzle. Go to the right side of the puzzle first, by the large, green punching glove, and hammer the boxes at the base of the metal crates blocking the glove’s path. Go to the Transmitter Block to the left of this section to switch over to Luigi. |
| 14 | As Luigi, go down the path until you reach the green punching glove. Hit it with your hammer to make a block fall down into Mario’s area, then return to the Transmitter Block. Switch the controls over to Mario again. |
| 15 | 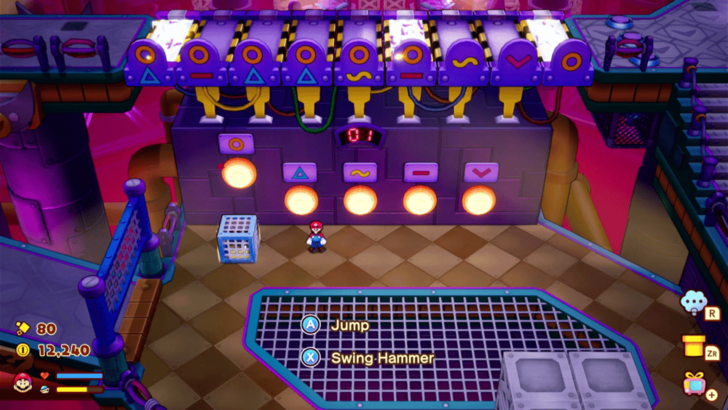 As Mario, pick up the block that was just dropped, and bring it in front of the button with the yellow circle. Hammer at the first, second, third, and last buttons (orange circle, blue triangle, yellow squiggle, and pink V) to allow Luigi to pass through. Go back to the Transmitter Block and swap over to Luigi. |
| 16 | As Luigi, hit the Exclamation Block to open up the gate to your left. Jump over any electrified sections, and make your way across. Continue along the path, and Mario and Luigi will be reunited. |
| 17 | 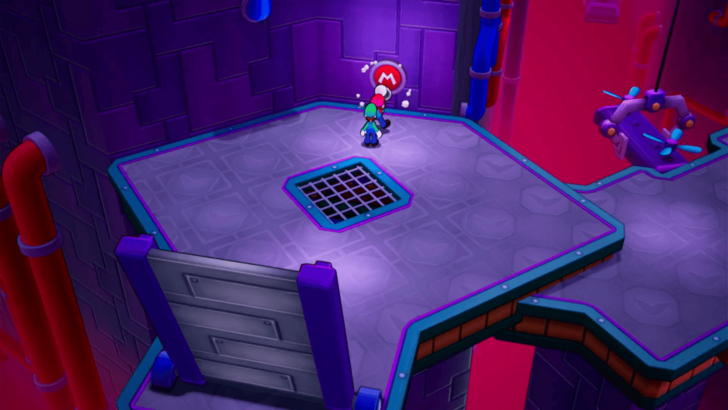 Follow the path northwest until you reach an M button on the wall. Have Mario hit this button with his hammer to bring down the bridge. Upon crossing the bridge, a Peddler will arrive. Make sure to buy everything you need from him and use the Recovery and Save Blocks as you approach this last stretch of Fortress Zokket. |
| 18 |
 Once you’re ready, continue onward and face the Extension Corps in a boss battle. ▶ How to Beat the Extension Corps |
| 19 |  After defeating the Extension Corps, head up the path and activate the Green Warp Pipe. Use this pipe to get to the 2F of Fortress Zokket. Head north, and make use of the Save Block and Recovery Block before going up the elevator and facing Zokket. ▶ How to Beat Zokket |
Getting Bond Energy
| # | Step by Step Objectives |
|---|---|
| 1 |  Back on Shipshape from Fortress Zokket, Connie will be taking care of Cozette. Talk to her at the plaza to progress the story. Cozette will give her Bonding Can, which can free Concordia from Reclusa’s control through the power of Bonds. Connie and Cozette’s Bond will fill the center of the Bonding Can. Now, you just need to find six more Bonds to fill it completely. |
| 2 | 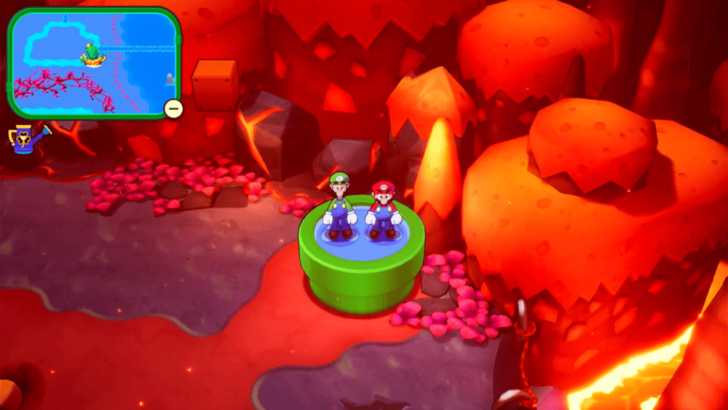 The next Bond energy you need to collect will come from Chilliam and Burnadette. They can be found on Skorcheen Island. Use the green warp pipe in the island plaza to fast travel to the northeastern cave, then head south from the warp pipe to exit the cave. Chilliam and Burnadette can be found just outside the cave, past the save point. |
| 3 | 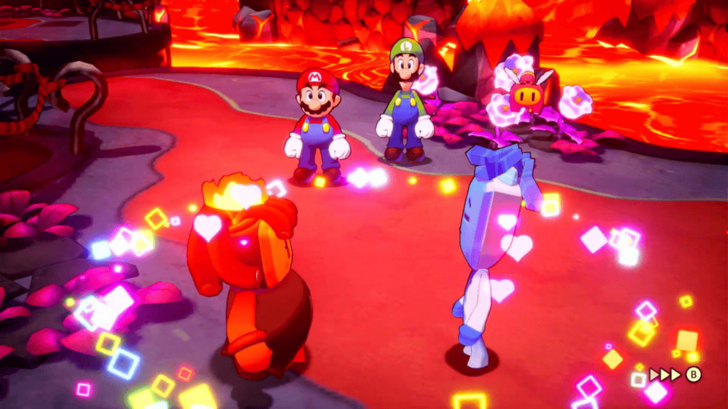 Approach them to start a cutscene. Once the cutscene ends, you’ll automatically get the Bond energy of Burnadette and Chilliam, and they will give Luigi the Max-Min Vortex Bros. Attack. |
| 4 |  Use your Return Pipe to get back to Shipshape Island and tell Connie and Cozette about this development. You will then be given the option to either find the IDLE kids or go to Willma and her family at Rumbla Island. It doesn’t appear to matter where you choose to go first. ★ Helpful Tip: The Cozette’s Decision side quest will also become available at this point. Since this is a limited-time quest, it is recommended to do this first before continuing with the main story. |
| 5 |  To get the Bond energy from the IDLE crew, you will also need to rescue Peach and Starlow. They can be found surrounded by Glohmed enemies on Shrimpee Islet in the isolated current on the east side of Stormstar Sea. Battle your way through to rescue them, then return to Shipshape Island. ▶ List of All Islands and Islets |
| 6 |  Ireen, Elow, and Dulles of the IDLE crew can be found on Mykroh Islet, which is on the isolated current on the north side of Stormstar Sea. They will also be surrounded by Glohmed enemies, so defeat the enemies, and bring back the IDLE kids to Shipshape Island. Once all IDLE members as well as Peach and Starlow are on Shipshape Island, you can collect their Bond energy to fill another half section of the Bonding Can. |
| 7 |  Go to Willma’s house located on the northwest part of Rumbla Island to find her with her two kids. To get to her house, travel north until you reach the Rumbla Island plaza. Then, continue north, past the Save Block and Recovery Block, and take the first left turn. Follow the path until you reach her house. |
| 8 |  You’ll find Willma feeling down, with Billdit and Maykit unsure of how to cheer her up. Willma be startled by some Concordians shouting about Gorumbla. A Glohm-afflicted Gorumbla will then appear and start a battle with Mario and Luigi. ★ Battle Tip! Beating Glohm Gorumbla Glohm Gorumbla is mostly similar to the regular Gorumbla you faced early on in the game, only this time, he can occasionally counterattack and inflict the Dizzy status ailment. He can also inflict the Glohm status ailment onto Mario and Luigi, so make sure you have Ampberries available. ▶ How to Beat Glohm Gorumbla |
| 9 |  After defeating Glohm Gorumbla, he’ll turn back into his normal, un-Glohmed state. Then, you will be able to collect the Bond energy of Willma, Maykit, Billdit, and Gorumbla. Return to Shipshape Island and talk to Connie for information on the Bonds you’ve collected and which Bonds you can collect next. |
| 10 | Another Bond you can add to your watering can is the Bond between Emmit and Dyode at Twistee Island. Talk to them at the Twistee Island plaza’s center stage, and they’ll ask Mario and Luigi to dance one more time. If you’re having trouble keeping up with the beat, you can select the easier difficulty when prompted after a failed attempt. |
| 11 | After successfully performing the dance, Dyode, with Emmit in tow, will run off to Merrygo Island. Use the Return Pipe to follow them there. Emmit and Dyode will be at the center of the maze. Enter the maze, and follow the flags to help navigate through it until you reach the center lookout point. You will then be asked to perform another dance minigame at this high lookout point. |
| 12 | The next and final stage of the tour will be on Jellyfish Island. Head to the stage found northwest of the blue entrance pipe, and complete the final dance minigame. You will get the Bond energy of Dyode and Emmit after you successfully do the World Groove. Return to Shipshape Island to figure out where else to get Bond power. |
| 13 |  Your next target will be Buddy and Bowser Jr. Head to Offandon Island, then make your way to the plaza to find Buddy asking for help. Bowser Jr. will be further inside the plaza, cornered by a Glohm-afflicted group of Bowser’s minions. Defeat the enemies to rescue Bowser Jr. and obtain the Bond energy between him and Buddy. |
| 14 |
Report back to Shipshape Island. There’s only one Bond left to collect in order to fill the watering can. Connie will head to Conductor Island and ask the Great Conductor for help.
Use the blue warp pipe to travel to Conductor Island, then use the green warp pipe beside the Peddler to fast travel to the Great Conductor’s area near the lighthouse. After talking to the Great Conductor, you’ll be given the Conductor Connector Bros. Attack, and a hint that you should find the Extension Corps as the last Bond. |
| 15 | 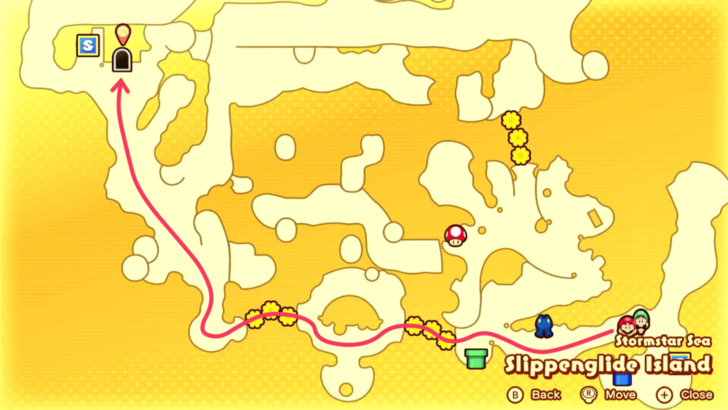 Head to Slippenglide Island to find the Extension Corps. Upon arriving, you’ll encounter Ecks, then he’ll ask you to meet the rest of the group at their research lab. The lab is located on the northwestern side of Slippenglide Island. From your starting location, travel west, across two Connectar Flower bridges, and up the path. Enter the lab and watch the cutscene to obtain the Bond energy of the Extension Corps. |
| 16 | Return to Shipshape Island with your full Bonding Can, and get ready to take on the Soli-Tree for the final battle with Reclusa! |
Soli-Tree
| # | Step by Step Objectives |
|---|---|
| 1 |
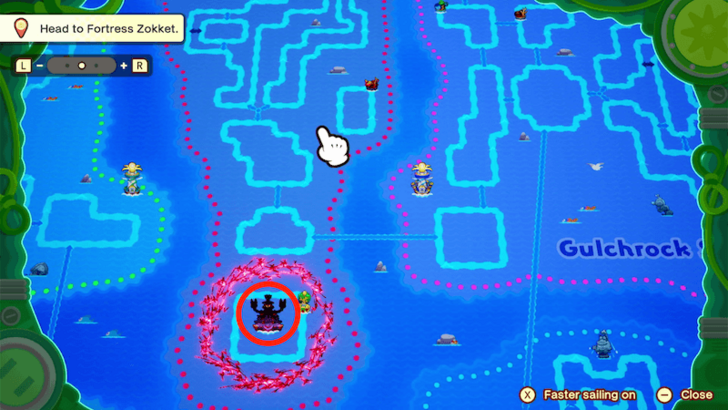 After collecting all of your allies' bonds into the watering can, head over to Soli-Tree in the same location where Fortress Zokket used to be on the ocean map, and use the ship's fast-travel function to hop onto its current. Peer through the telescope to view the imposing fortress, triggering a cutscene where everyone you have met during your journey sends Mario and Luigi off on their final quest. Connie sprinkles them with the Power of Bonds, and the brothers launch themselves toward Soli-Tree! |
| 2 |
 Upon landing, an imposing blockade of breathing Glohm Flowers blocks Mario and Luigi's entrance. Connie encourages them to use the Power of Bonds and activate the Bomb Bros. Bros. Move by holding and releasing the X Button when prompted. |
| 3 |
 Proceed into Soli-Tree, where Mario and Luigi find it overrun by a mysterious Glohm Flower producing Glohm Seeds that slowly trickle down in the Lower Level. When touched, these seeds knock out either Mario or Luigi, sending them to a distant part of the area, and forcing either brother to be alone for a short while until they are able to retrieve the other. Head to the west side of the Lower Level afte Luigi is touched by one of these seeds, and wake him up. Be sure to evade or flee from the Glohm Hammer Bros patrolling the area, as we do not recommend facing them alone. |
| * |
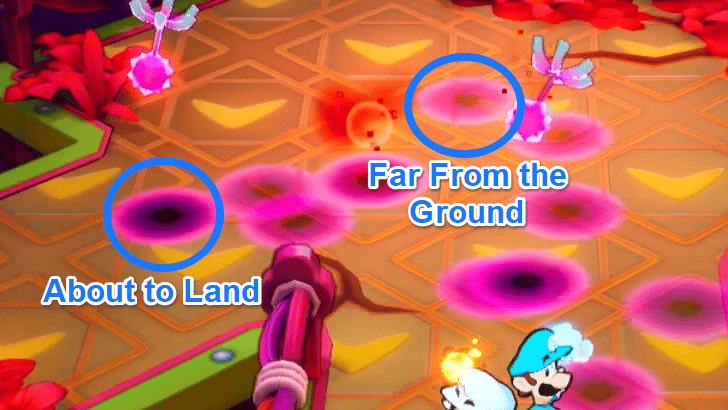 As the Glohm Seeds descend, the color of their shadow changes. When they are further from the ground, their shadow is a lighter color, and gets progressively darker as they near the ground. Pay attention to this and time your movements around the area to avoid getting hit! |
| 4 |
 Now with Luigi back in the party, make your way to the eastern side of the map while dodging the Glohm Seeds, and destroy the Glohm Flower using the Bros Bomb Bros. Move. Continue onward to the only doorway at the far eastern side of the area, where the brothers find themselves in the main area of the Lower Level. |
| * |
 Be sure to activate the Green Pipe Block by the entrance of the Lower Level's main area. This will create faster transit from the Lower Level to Soli-Tree's entrance. |
| 5 |
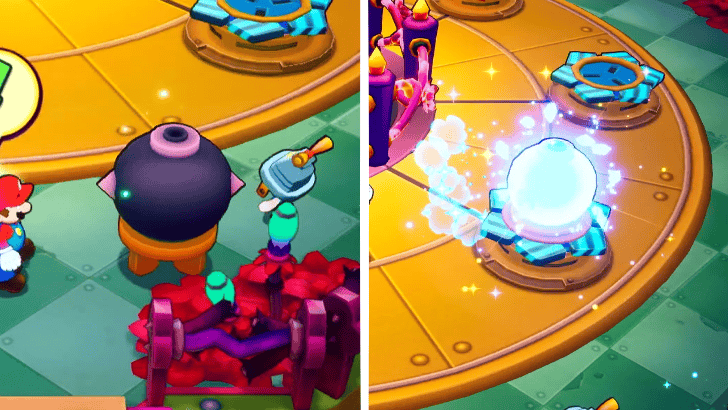 In the main area, there will be 7 locked gates, with 8 blue and red sockets around the floor that each correspond to an element. Pick up the first Bomb Plug available on the right side of the entryway, and place it on whichever socket you would like. Activate the Fire & Ice Bros. Move and use it to strike the Bomb Plugs according to their socket's color: press the X Button to hit red sockets with fire balls and the Y Button to strike blue sockets with ice balls. Once done, the gate to the northern doorway will open, allowing you to proceed through and face the trials inside. |
| 6 |
 Upon entering, an overview of the northern room will be shown and lead your sights to another Glohm Flower that spits out Glohm Seeds. Your objective will be to follow the straightforward path toward the Glohm Flower, destroy it with your Bro Bomb Bros. Move, and retrieve the Bomb Plug afterward. The obstacles preventing you from reaching the room’s goal include descending Glohm Seeds that knock out either brother upon contact, and enemies like Reclusiff, Weeping Trooper, and Glohm Palooka R, which roam the area. |
| * |
 The primary challenge in this room are the Glohm Seeds, which create a significant disadvantage by reducing your party to one member if touched. Given this, we recommend navigating the area while either in the Fire & Ice or Bro Ball Bros. Move form, which effectively allows Luigi to travel in sync with Mario, and lessens the probability of having either brother be touched by the seeds. |
| 7 |
 At the end of the path, instruct Luigi to hit the L Button by pressing the L Button on your controller to deploy a staircase. Afterward, proceed to the west and destroy the big Glohm Flower with the Bro Bomb Bros. Move, then use UFO Spin to fly across and retrieve the Bomb Plug. Ascend the staircase you deployed earlier and head back through the same doorway into the main area, and place the Bomb Plug you collected into any socket of your choice. Upon activating it, three gates to the west, east, and southeast will open. |
| 8 | 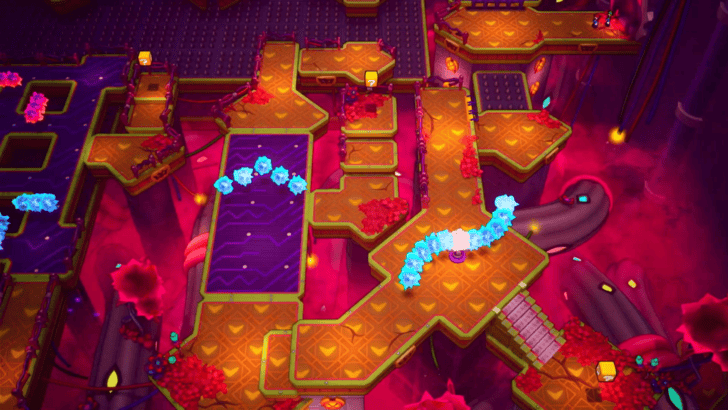 You may choose whichever doorway you would like to explore as the order in which you tackle them has no bearing, although we recommend passing through the western doorway first. Cross the gap using your UFO Spin Bros. Move, and enter through the open doorway. Upon entering, you will gain another overview of the area, which breaks down the obstacle course you will have to pass through in order to get the Bomb Plug. |
| 9 |
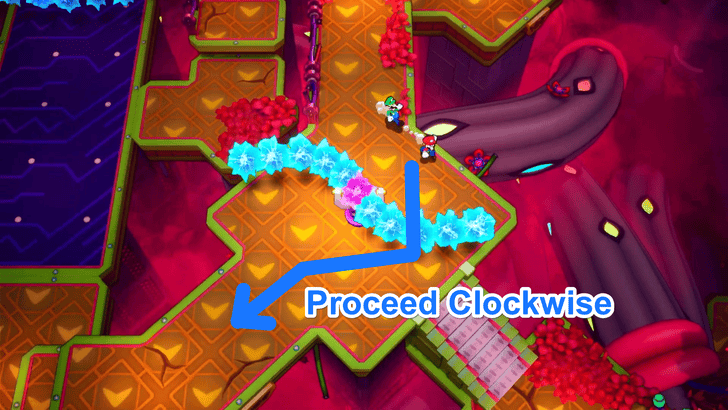 First, proceed south and cross the gap with your UFO Spin Bros. Move. On the first spinning electric balls, wait until a safe gap opens, then move in a clockwise direction until you reach the other side safely. |
| 10 |
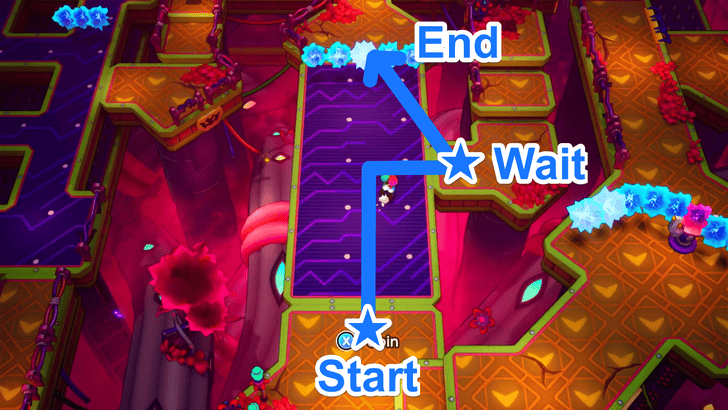 The next area features a row of electric balls moving back and forth on a blue track. When the balls pause at the upper section, seize the opportunity to dash to the safe zone on your right. Wait until the electricity moves downward, then quickly sprint forward to proceed to the next set of obstacles. |
| 11 |
 In this area, you will need to constantly be on the move with your UFO Spin Bros. Move active, and land on every platform to reach the other side. Align your movement with the concave side of the spinning electric balls’ arch to maintain a safe position, and adjust your pace as needed to stay in sync with the spinning electricity while avoiding being hit. |
| 12 |
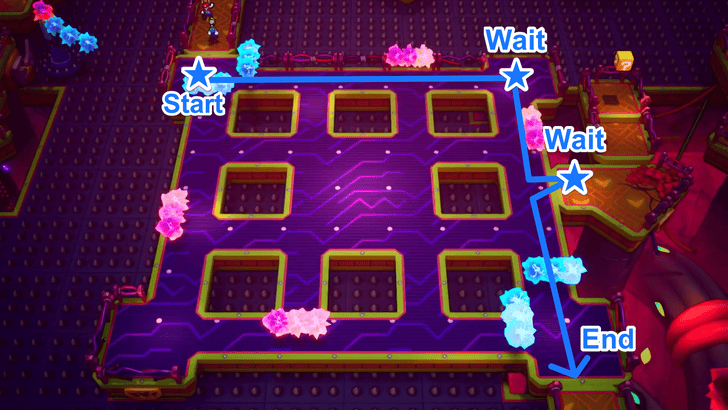 Proceed to the next area afterward, where you will be greeted by a square-shaped platform with moving clusters of electricity across the area. The blue beams moves slowly back and forth to cover the four corners of the square, while pink beams move rapidly across all four sides. Move to the upper right corner as the blue beams expand from it, and dodge the pink beams as they zoom across. Next, move to the middle-right platform as the blue beams expand away from the upper right corner, then move toward the lower-right corner to exit the area, as the blue beams move toward the upper-right corner. |
| 13 |
 The next area is split into two parts which require you to use your UFO Spin Bros. Move: the first part will be a repeat of the obstacle in step 11, so keep moving in sync with the spinning electricity's concave side to prevent getting hit. The second part will need you to cross two platforms as two beams of electricity spin clockwise in different intervals. Time your spins correctly when the beams are facing away to succesfully reach the other side. |
| 14 |
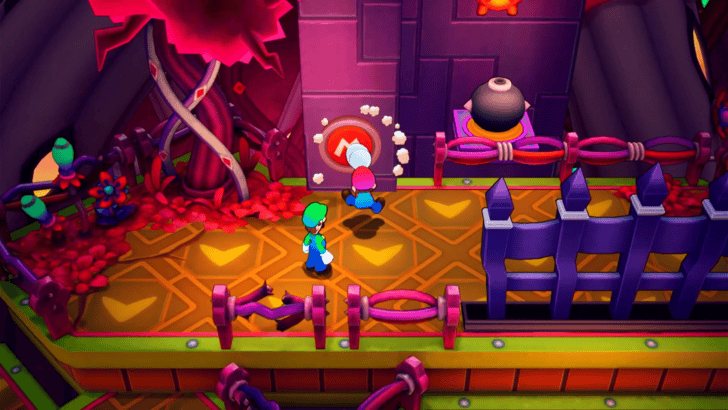 After landing safely on the large platform, hit the M Button as Mario with the X Button on your controller to activate the conveyor belt that delivers the Bomb Plug to the eastern side of the room. Follow its movements by crossing the final set of obstacles to get to the other side. |
| 15 |
 Use your UFO Spin Bros. Move to fly across the large gap. Make use of the raised fans to restore airtime and stay in flight while avoiding the beams of light that block your path, until you reach the other side. |
| 16 |
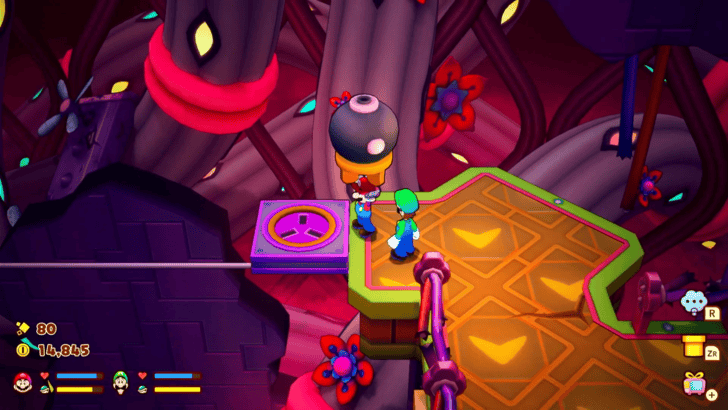 Collect the Bomb Plug from its container to unlock the gate leading back to the room’s entrance. Exit into the Lower Level’s main area and insert the Bomb Plug into a socket of your choice, then activate it with the matching element. You may now proceed to any room of your choice, but we recommend tackling the eastern room next. |
| 17 |
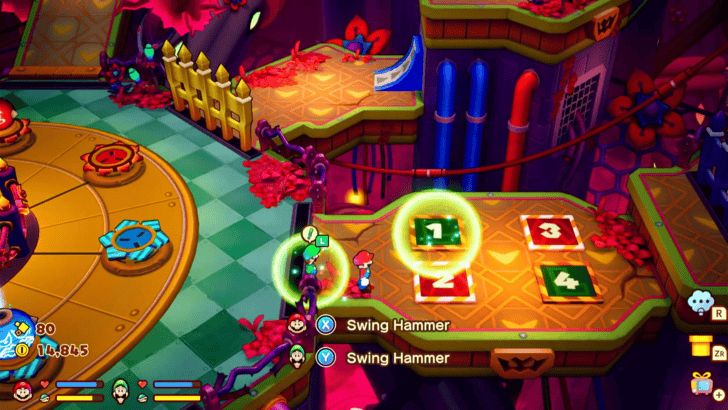 Unlock the inner gate to the eastern doorway by stepping on the numbered squares in sequential order, and by color. Instruct Luigi to step on the number 1, then as Mario, run to the numbers 3 and 4. The gate will unlock after Luigi steps on the number 4, allowing you to proceed into the room. |
| 18 |
 The goal in this room will be to step on all numbers 1 through 25 in sequential order to unlock the gate that keeps the Bomb Plug. However, make sure that either brother does not activate a number earlier than the intended sequence. For this puzzle, Mario is required to step on all even numbers, while Luigi steps on all odd numbers. The biggest challenge will be to plan your route faster than Luigi, as he automatically runs to the next button, which may cause him to activate them too early. To prevent this, always stay ahead of Luigi and move to the next red number immediately after activating the most recent one. |
| 19 |
 After successfully claiming the Bomb Plug, head back to the main area and insert it once more into a socket of your choice, then activate it with its designated element. Head into the southeastern room, and gain another overview of the challenges ahead. |
| 20 |
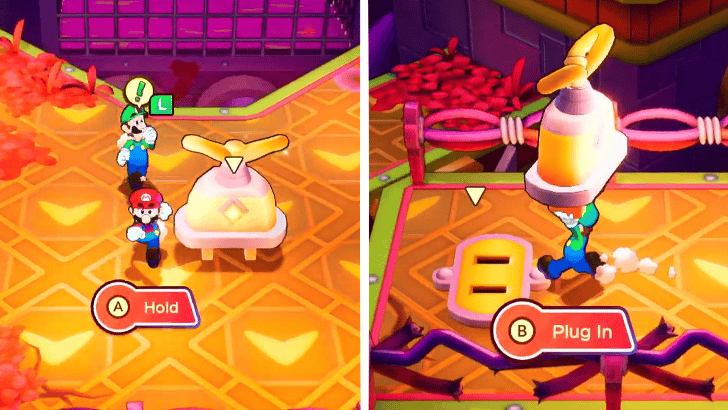 Similar to the northern room, the southeastern room features a straightforward path leading to the Bomb Plug, but it is heavily obstructed by descending Glohm Seeds, and enemies like Reclusiff, Weeping Trooper, and Seedlusa. Navigate safely toward the Power Plug at the southern part of the room, pick it up, and continue forward. Plug it into the socket at the end of the path to open a gate obstructing an M Button. |
| 21 |
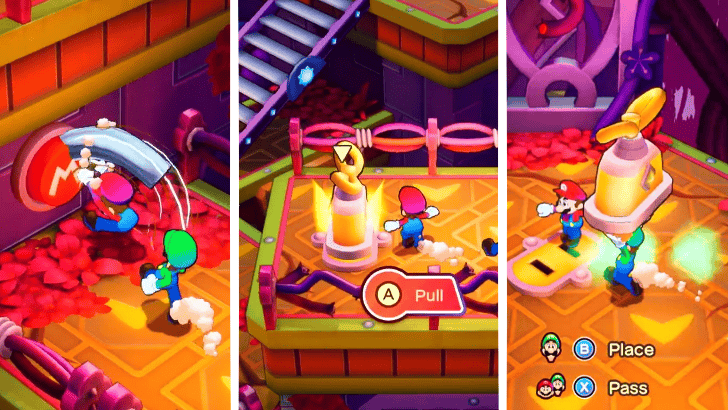 Hit the M Button with Mario to deploy a staircase, and maneuver back to the previous socket to retrieve your only Power Plug. Ascend the staircase you opened and continue forward. Insert the Power Plug into the socket at the end of the path to unlock the gate leading into the next area, and the room's entrance. |
| 22 |
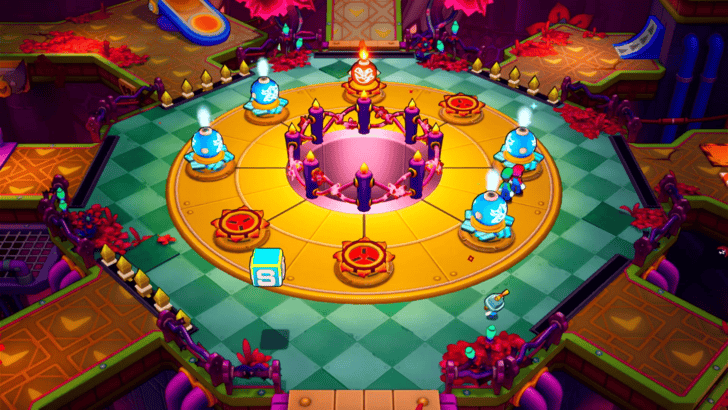 Collect the Bomb Plug from the other side, and exit back into the main area. Place it in any socket available, activate it with the corresponding element, and watch as the southwestern, northwestern, and northeastern gates open. |
| 23 |
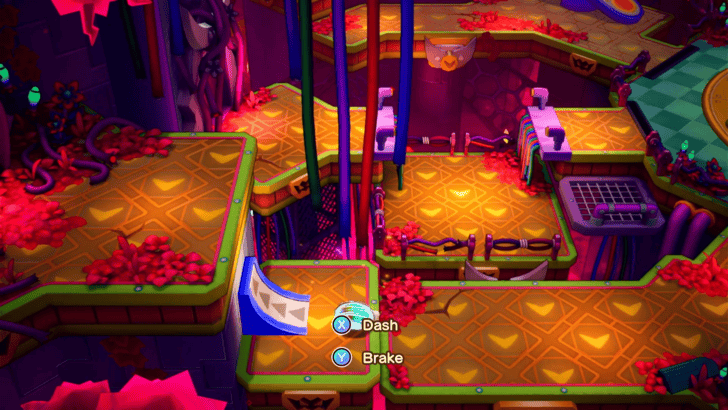 Once more, you may enter all rooms in the order of your choice, though we recommend starting with the southwestern room. Perform a Ball Blitz Bros. Move by holding and releasing the X Button to reach the high platform, and proceed toward the doorway. |
| 24 |
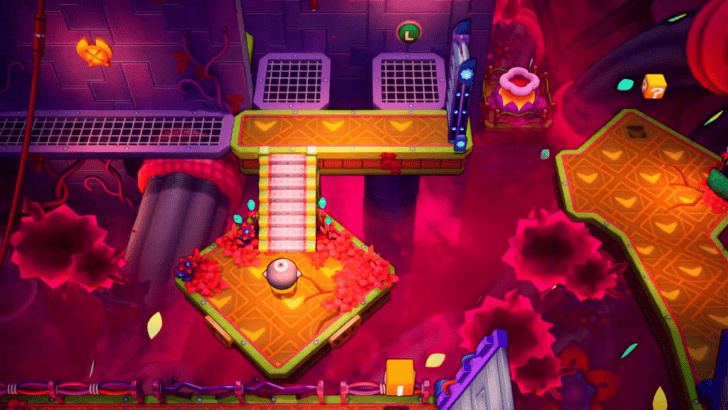 An overview of the area reveals another room filled with descending Glohm Seeds, and a familiar parade of enemies: Weeping Trooper, Seedlusa, and Glohm Foopfly R. Your main goal in this room would be to retrieve the Bomb Plug and destroy the Glohm Flower at the western side of the room to exit. |
| 25 |
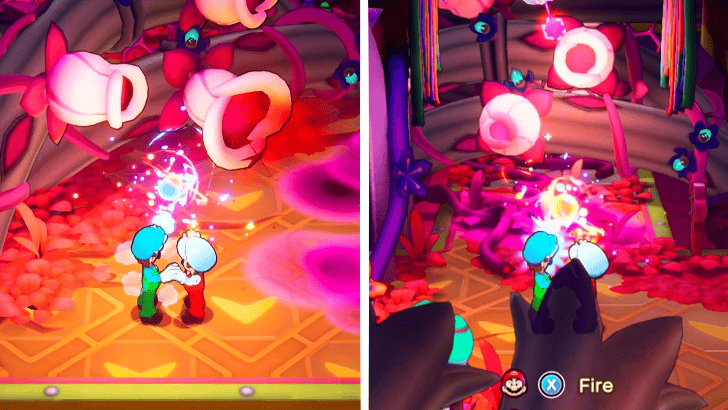 Head south and keep moving forward until you see an entanglement of vines with Glohm Flowers. Destroy it with your Bro Bomb Bros. Move, destroy the next Glohm Flower wall using the same move, and proceed forward. Do note that bigger Glohm Seeds will cascade onto the floor, so always stay cautious when maneuvering around the area! |
| 26 |
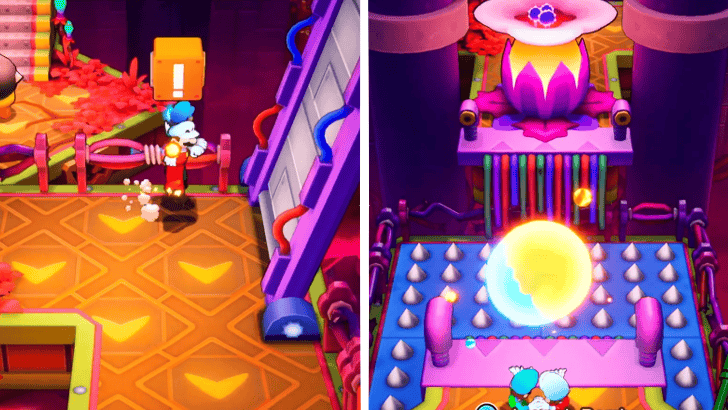 Activate the Orange Exclamation Block in front of the raised bridge to lower it for later, and proceed south. Keep going forward until you are face to face with the big Glohm Flower, and destroy it with your Bros Bomb Bros. Move, then use UFO Spin to cross to the other side. |
| 27 |
 Move forward and collect the Bomb Plug at the end of your path, then hit the L Button as Luigi to lower the staircase leading back to the room's entrance. Exit the room and insert the Bomb Plug into any socket of your choice, activate it using the correct element, then proceed to the northeastern room. |
| 28 |
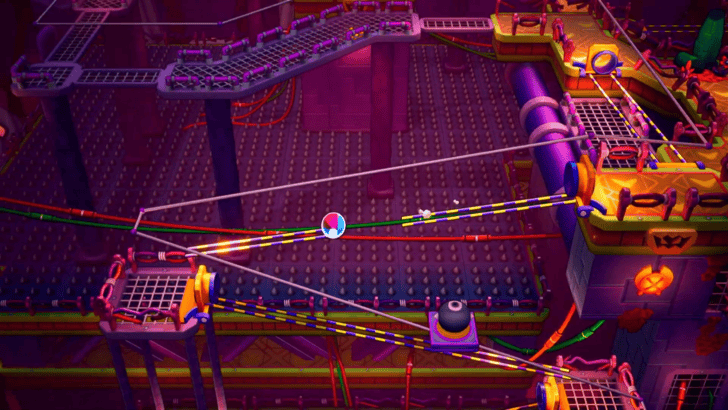 Use your Blitz Ball Bros. Move twice to dash upward to the highest platform, and enter the room. The challenge in this area is very straightforward: reach the end of the track within the same time as the Bomb Plug as it travels through the conveyor, and collect it once it reaches its stop. Be sure to keep using your Blitz Ball Bros. Move to catch up with the Bomb Plug as it moves, as it will only stay in its stop for a few seconds before restarting its position to the start of the track. After successfully retrieving the Bomb Plug, head back to the main area and insert it into any socket, then activate it via its corresponding element. Afterward, make your way to the northwestern room. |
| 29 |
 Through the northwestern gate, instruct Luigi to stand on one end of the seesaw by pressing the L Button, then activate the Orange Exclamation Block to open a smaller gate. Reunite with Luigi and ascend toward the doorway on the highest platform. |
| 30 | An overview of the room reveals a series of seesaws leading up to the Bomb Plug placed on a high pillar within the room. The goal will be to interact with all of the Exclamation Blocks within the room to lower the Bomb Plug from its pedestal by traversing platforms via the seesaws in the room. |
| 31 |
 In the first set of seesaws, allow Luigi to stand on the right side of seesaw 1. Jump onto the platform and align yourself over seesaw 2. Instruct Luigi to stand on the right of seesaw 2, then jump down to propel him upward on a floating platform. As Luigi, press the B Button to activate the Pink Exclamation Block to lower the Bomb Plug one level from its original position, and open the gate to the next area. |
| 32 |
 In the next location, head toward the M Button next to the seesaw, and hammer it as Mario to activate a bunch of moving platforms. Instruct Luigi to stand on the left side of the seesaw, ride the moving platforms up, jump down the gap, and hammer another M Button to activate an ascending platform. Jump down on the side of the seesaw opposite of Luigi to boost him across the gate, and activate the Orange Exclamation Block to unlock the gate. Proceed up the staircase on the southeast and activate the Pink Exclamation Block at the end of the path to lower the Bomb Plug another level. |
| * |
 Optionally, you can proceed west from the opened gate and uproot the turnips planted. If you destroy the crates further to your left, it will lead you into a secret room filled with 8 Grampy Turnips! ▶︎ All 18 Grampy Turnip Locations |
| 33 | Continue up the staircase leading north, and head to your left. Instruct Luigi to stand on the orange button on the floor to hold the gate open, and proceed forward. Ride the moving platform to the upper level, where multiple seesaws await. |
| 34 |
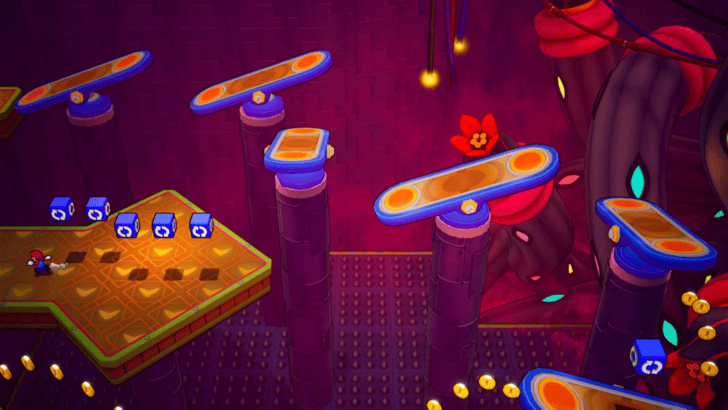 Activate each Blue Rotate Cube to position all 5 seesaws until it looks like the image shown above. Use them as a path to guide you to the 6th seesaw and collect coins along the way. |
| 35 |
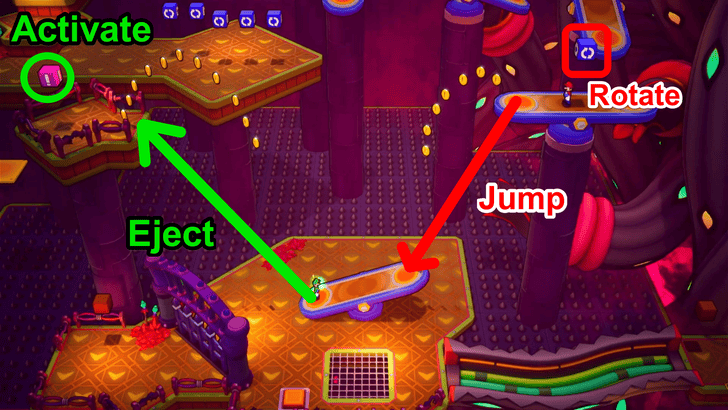 On the 6th seesaw, instruct Luigi to stand on one end of the seesaw below, and activate the Blue Rotate Block to position him on the left, opposite to where Mario is facing. Jump down to propel Luigi upward on a raised platform, and activate the Pink Exclamation Block by pressing the B Button to lower the Bomb Plug another level. |
| 36 |
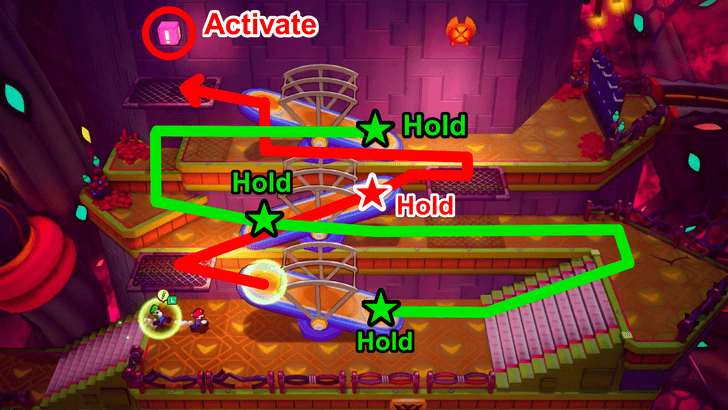 Exit the area and pass through an archway to your right to reach the next set of seesaws. Place Mario and Luigi accordingly, allowing both of them to balance every seesaw until Mario reaches the Pink Exclamation Point Block. Upon activating it, a gate leading east opens, and the Bomb Plug goes down a level once more. |
| 37 |  Proceed through the newly opened gateway. There is a hidden room to the right containing a lot of coins and Item Blocks if you want to make a short detour. Once you’re ready to proceed, use your Blitz Ball Bros. Move on the ramps thrice until you reach the upper level. Once there, activate the Green Pipe Block to create an easier route from your location and the entrance of the room. |
| 38 | 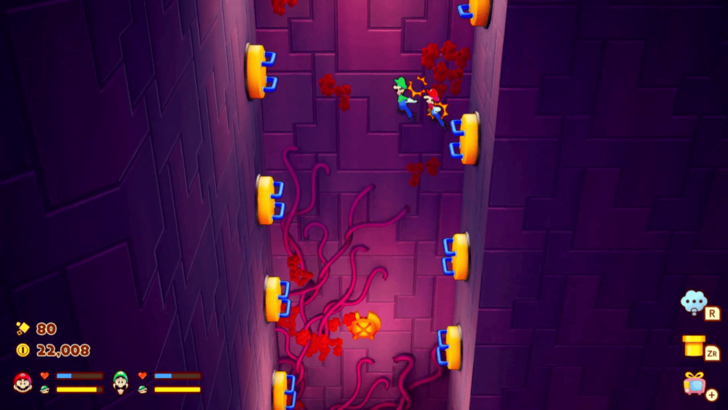 On the last seesaw, take Luigi to the back of the room where you can see bars mounted on the wall. Climb upward in an alternating motion by pressing the A and B Buttons as you ascend. |
| 39 |  Once at the top, instruct Luigi to stand on one side of the seesaw below, rotating him if necessary to make sure that he’s on the top side of the seesaw, then jump down to send him flying onto an upper platform. Have Luigi activate the Pink Exclamation Button to completely lower the Bomb Plug. Use the Green Pipe you activated earlier to travel to the Seesaw Area Entry. |
| 40 |  Claim the last Bomb Plug from its location, and exit the room. Insert it into the last available socket in the main area, and activate it with the corresponding element using the Fire and Ice Bros. Move. Once that is done, an elevator will spawn in the middle of the activated Bomb Plugs and allow you to access the Middle Level. |
| 41 | Once you arrive, proceed forward to view a cutscene where Connie finds Miss Cozette, and the brothers proceed forward on their own to stop Reclusa by themselves. Although as they press on, it seems as though they are transported to a different location with lush environs. |
| 42 | 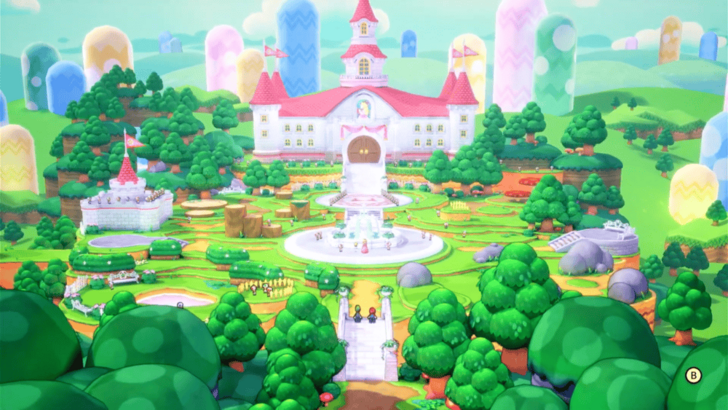 Proceed the new area and move forward to discover that the brothers have been transported back to the Mushroom Kingdom! Speak with Princess Peach by the fountain, where she and the toads will greet Mario and Luigi upon their return. You are free to explore the area as you please, and gain the chance to collect a lot of coins, then speak with the princess once more by the castle's entrance. |
| 43 | 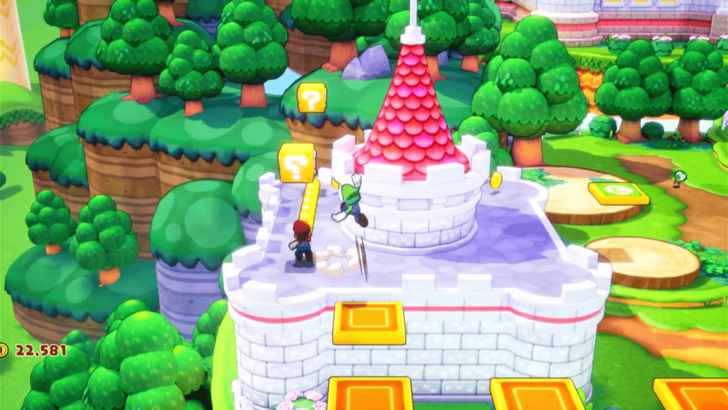 Past the castle entrance, the princess prepares a small course for you to complete. Humor her by playing through the course, though stop to activate a strange Question Mark Block. Upon doing so, the block convulses and opens up a smoke of Glohm. Regardless, press on and activate the Orange Exclamation Block at the end of the course. |
| 44 | 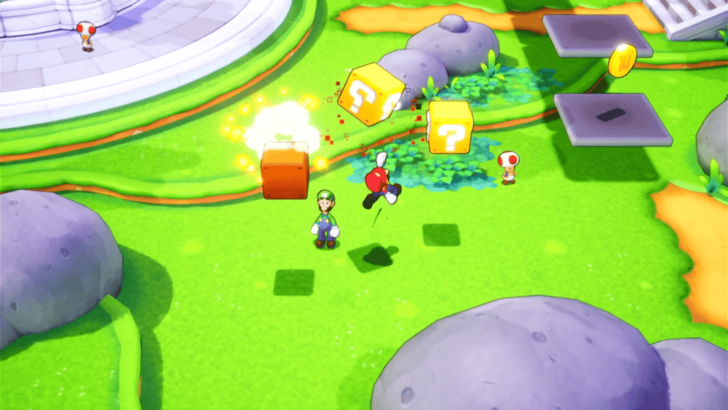 Afterward, the princess assigns another course for you to complete. Once more, progress through the course and collect all coins, but activate another strange Question Mark Block. It will topple over and convulse, convulse, revealing Reclusa who flies off upon being discovered. Complete the course anyway, and activate the Orange Exclamation Block at the end. After returning to the Princess and being praised once more, the gates to the castle behind her open, urging you to pass through them. |
| 45 | Going through the gates teleports you back to the Mushroom Kingdom's entrance, though this time, there seems to be a party involving Bowser in attendance! Lakitu flies into the scene with a camera that live broadcasts the event, which appears on a small playback feed at the upper right side of the screen. |
| 46 | 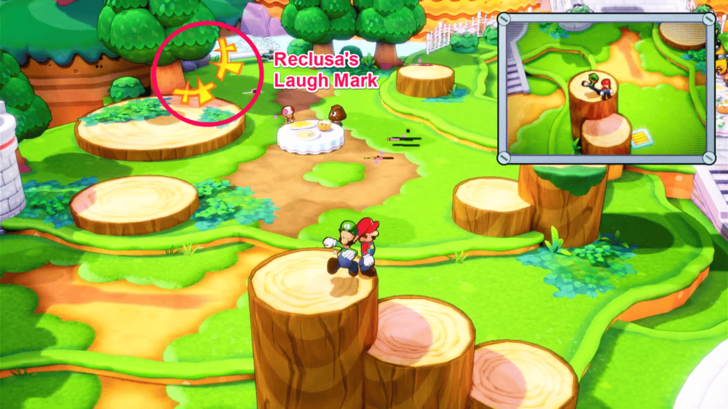 Find a way out of the uncanny domain by chasing Reclusa around. Follow the orange laugh marks as they appear on screen, and monitor his movements through the video playback feed on the upper right side of your screen. Use the invisible platforms revealed by the video playback, and maneuver over them until you reach the castle's balcony where you can find another strange Question Mark Block. Activate it to reveal Reclusa who flees west of the area after being discovered. |
| 47 | 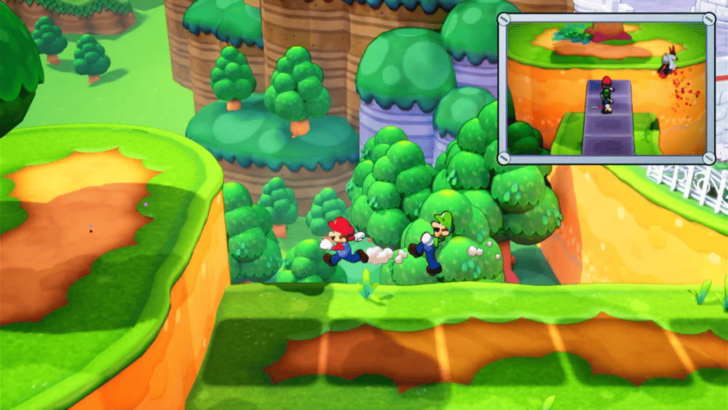 Head west of the Mushroom Kingdom and follow the orange laugh marks where they appear. Cross the invisible platforms toward the big tree, and activate another strange Question Mark Block to reveal Reclusa yet again! Much like clockwork, he flees northeast of the Kingdom. |
| 48 | 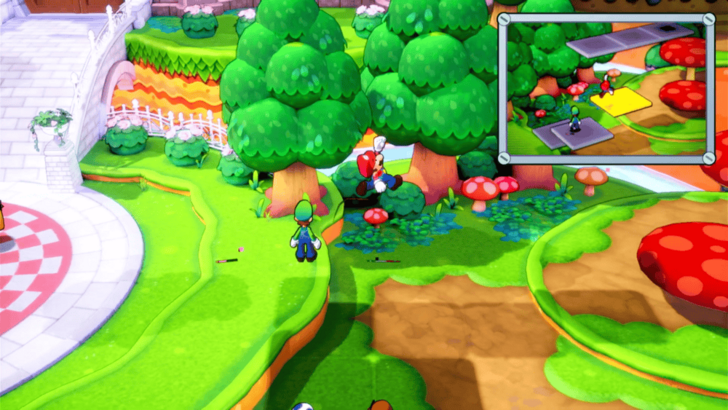 Head east from the plaza, and jump on the invisible platforms as they are revealed on the upper right corner of your screen. Activate the strange Question Mark Block at the end of the path to uncover Reclusa who finally flees toward the castle gates. Follow him there to be transported back into the Mushroom Kingdom. |
| 49 | 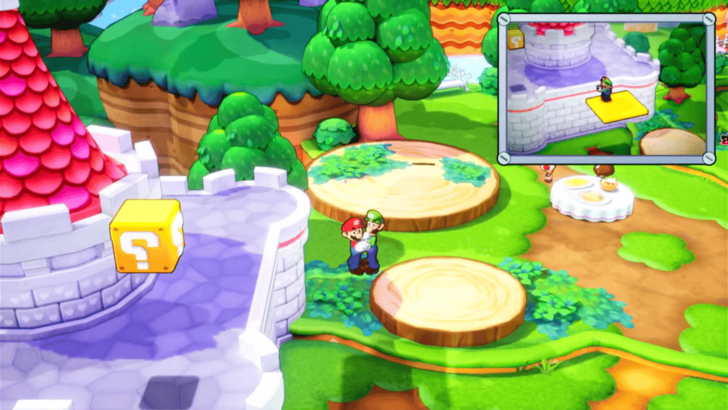 Follow the orange laugh mark toward the small castle to the west of the Kingdom, and use the invisible platforms shown in the video playback to reach its rooftop and activate the strange Question Mark Block there. Once again, discover Reclusa who flees northwest of the Kingdom. |
| 50 | 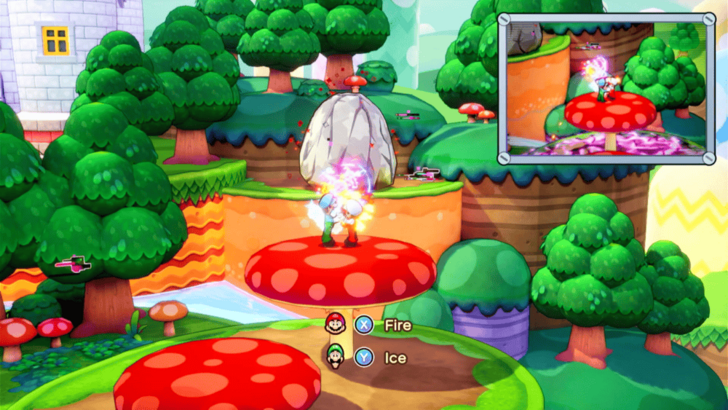 Monitor his movements, track his orange laugh marks to the east of the Kingdom, and follow him via the invisible platforms. Although, be careful this time as falling from the platforms will plunge you into a glohm pool below, and reset your position. Follow Reclusa to the end of the path where he hides himself under a boulder. use your Bro Bomb Bros. Move to destroy the large stone, finally reveal Reclusa for the final time, and watch as he flees into the castle after a small fit. Follow him there to put an end to this madness! |
| 51 | A few cutscenes will play in succession after which, Mario and Luigi successfully liberate themselves from the clutches of Reclusa's twisted illusion. Now back at the middle level of Soli-Tree, be sure to use the Save Block to your left before proceeding forward. |
| 52 | 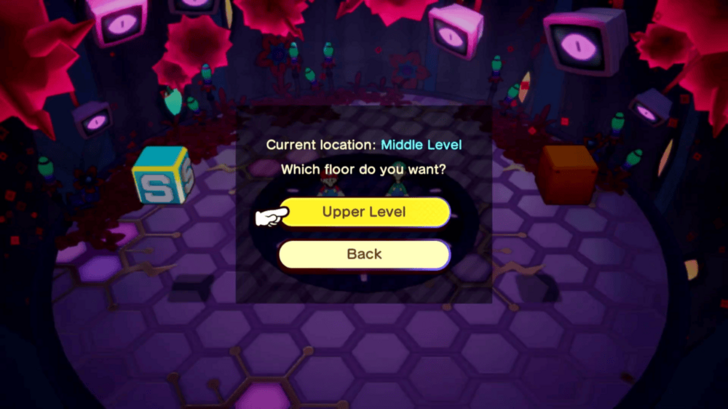 Ride the elevator to the Upper Level where you will be greeted by a horde of Reclusa's minions, and Reclusa himself. Several battles will commence, starting with a group of Seedlusa, then a Reclusiff, until the brothers are overwhelmed with enemies. Luckily, Bowser comes to the rescue and bombs all of the enemies harming Mario and Luigi. |
| 53 | Continue forward to the end of the Upper Level where you can find a Green Pipe Block that when activated, erects a Green Pipe from the Upper Level all the way to the Entrance. Also make use of the Save Block and Recovery Block posted beside the Green Pipe, as the toughest battle awaits! |
| 54 |
 Going past the archway will automatically initiate a long and arduous battle with Reclusa, so be sure you are geared up and prepared for this ultimate showdown! ★ Battle Tip! Beating Reclusa Reclusa has a total of three phases you will need to knock down. The first phase will have you speed down a track, dodging attacks and dishing some of your own against Reclusa. Hit him the hardest with your Bros. Attacks while he is stunned, and whittle down his health continuously. After his first form is defeated, he retreats into the Soli-Tree and turns into Weeping Reclusa with a different set of attacks. He will spawn Doom Blooms from the ground during this fight which you can pommel using AoE Bros. Attacks until they perish. Keep repeating this cycle until the brothers ride the Giant Plug once again. Upon reaching the top, you will be met with the Weeping Core, Reclusa's third, and final phase. Make sure to never use the same Bros. Attack thrice, and equip the Waitaminit Battle Plug on the brother with the strongest Power to ensure maximized damage output. ▶︎ How to Beat Reclusa |
| 55 |
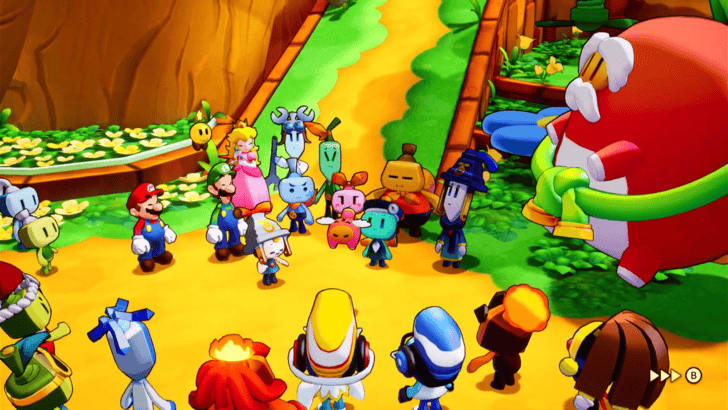 Several cutscenes will play upon Reclusa's defeat, where peace is restored to Concordia and Glohm is eradicated from the world. The brothers return with Connie and Cozzette to Shipshape Island where they are met with fanfare from all its residents. You may speak with everyone present and tie any loose ends, then sail to the center of the world to put this heartfelt tale of bonds, camaraderie, and Brothership to a close. |
Mario & Luigi: Brothership Related Guides

Mario & Luigi: Brothership Guides and Wiki
| Mario and Luigi: Brothership Guides | |
|---|---|
 Walkthrough Walkthrough |
 Side Quests Side Quests |
 Tips and Tricks Tips and Tricks |
 Islands Islands |
 Bosses Bosses |
 Enemies Enemies |
 Gear Gear |
 Items Items |
 Bros. Attacks Bros. Attacks |
 Battle Plugs Battle Plugs |
 News and Game Info News and Game Info |
|
Comment
Author
Story Walkthrough
improvement survey
03/2026
improving Game8's site?

Your answers will help us to improve our website.
Note: Please be sure not to enter any kind of personal information into your response.

We hope you continue to make use of Game8.
Rankings
- We could not find the message board you were looking for.
Gaming News
Popular Games

Genshin Impact Walkthrough & Guides Wiki

Honkai: Star Rail Walkthrough & Guides Wiki

Umamusume: Pretty Derby Walkthrough & Guides Wiki

Pokemon Pokopia Walkthrough & Guides Wiki

Resident Evil Requiem (RE9) Walkthrough & Guides Wiki

Monster Hunter Wilds Walkthrough & Guides Wiki

Wuthering Waves Walkthrough & Guides Wiki

Arknights: Endfield Walkthrough & Guides Wiki

Pokemon FireRed and LeafGreen (FRLG) Walkthrough & Guides Wiki

Pokemon TCG Pocket (PTCGP) Strategies & Guides Wiki
Recommended Games

Diablo 4: Vessel of Hatred Walkthrough & Guides Wiki

Fire Emblem Heroes (FEH) Walkthrough & Guides Wiki

Yu-Gi-Oh! Master Duel Walkthrough & Guides Wiki

Super Smash Bros. Ultimate Walkthrough & Guides Wiki

Pokemon Brilliant Diamond and Shining Pearl (BDSP) Walkthrough & Guides Wiki

Elden Ring Shadow of the Erdtree Walkthrough & Guides Wiki

Monster Hunter World Walkthrough & Guides Wiki

The Legend of Zelda: Tears of the Kingdom Walkthrough & Guides Wiki

Persona 3 Reload Walkthrough & Guides Wiki

Cyberpunk 2077: Ultimate Edition Walkthrough & Guides Wiki
All rights reserved
© Nintendo. Games are property of their respective owners.
The copyrights of videos of games used in our content and other intellectual property rights belong to the provider of the game.
The contents we provide on this site were created personally by members of the Game8 editorial department.
We refuse the right to reuse or repost content taken without our permission such as data or images to other sites.





![Everwind Review [Early Access] | The Shaky First Step to A Very Long Journey](https://img.game8.co/4440226/ab079b1153298a042633dd1ef51e878e.png/thumb)

![Monster Hunter Stories 3 Review [First Impressions] | Simply Rejuvenating](https://img.game8.co/4438641/2a31b7702bd70e78ec8efd24661dacda.jpeg/thumb)


