Brrrning Great Lighthouse Island Walkthrough Guide
★ Mario & Luigi: Brothership out now!
★ How to Unlock and Complete Every Challenge!
★ Pull off strong Bros. Attacks for maximum damage!
★ Best Gear | Best Battle Plugs | Rank-Up Bonuses
★ Power up with Best Battle Plug Combos.
★ Share your Hammer Rally high scores!
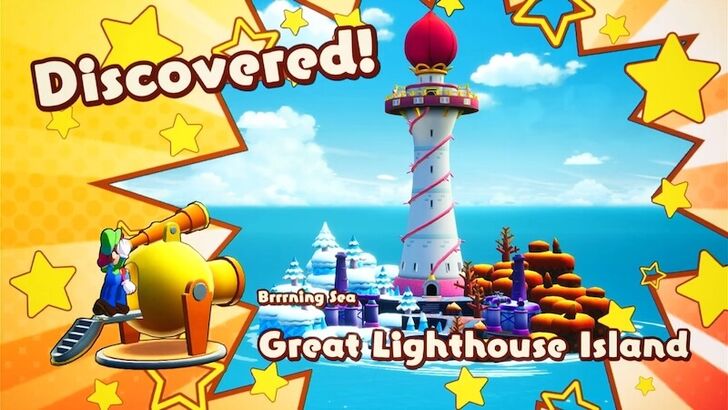
Brrrning Great Lighthouse Island is an Island located at Brrrning Sea in Mario & Luigi: Brothership. See a map of Brrrning Great Lighthouse Island, its location in Concordia, and how to unlock it.
List of Contents
Brrrning Great Lighthouse Island Map and Location
Brrrning Great Lighthouse Island Map
| Icon | How to Use |
|---|---|
 | Show Names This button reveals the Name of every icon currently shown. |
 | Show Pins This button will toggle between showing and hiding all the pins that you have already marked as acquired. |
 | Fullscreen This button will change the map display to fill the screen. |
 | Search Mode Toggle This button will display a search bar which you can use to search for an individual pin by its name. |
 | Icon Mode Toggle In Search Mode, this button will toggle you back to Icon Mode, removing the search bar and displaying the icons again. |
 | All Pins This button is shown along with the Icons on the right when there are over 6 types of pins. Click it for a full selection of all available pin types. |
 | Counter Tracks the number of pins you have of a certain type. The pin type shown is set to the page and currently cannot be changed; however, all pin type counters can be viewed by clicking the checklist icon on the right side. |
| View All Counters This icon is found on the right side of the Counter. When a map has more than one pin type, click this icon to see Counters for all pin types. |
List of All Islands and Islets
Brrrning Great Lighthouse Island Location
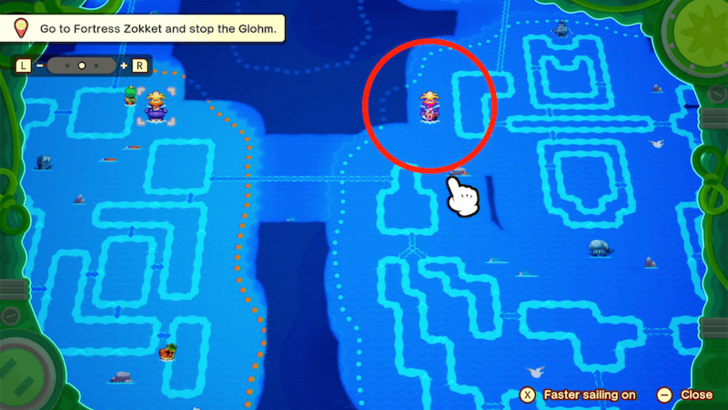
Follows the blue dotted line around Brrrrning Sea.
Brrrning Great Lighthouse Island Grampy Turnip Location
No Grampy Turnip in This Location
| There is no Grampy Turnip that you can find in this island. |
All 18 Grampy Turnip Locations
Brrrning Great Lighthouse Island Item Locations
| There doesn't appear to be any notable items to be found in this Great Lighthouse Island. |
Brrrning Great Lighthouse Walkthrough
| # | Step by Step Objectives |
|---|---|
| 1 |
 After Chilliam and Burnadette's wedding, a new current unlocks leading you to the Brrrning Sea's Great Lighthouse. Sail your way over to the current, discover the Great Lighthouse through the telescope, and fire the brothers away to its shores! |
| 2 |  Upon landing in the freezing and broiling landscape, walk directly through its open entrance. Unfortunately, Zokket's minions will notice the group's arrival and separate Connie from the brothers, leading them to different areas in the Lighthouse. In Sublevel 1 where the brothers are locked in, they must find a way out and rescue Connie. Head down the stairs to watch a cutscene which emphasizes your main objective within the area. |
| 3 |
Proceed to your left where you will be met with an area patrolled by 4 Red Guards your objective will be to reach the M Button past the guards, so be sure to sneak your way across while looking out for their patrol patterns. 3 Red Guards move in sync with each other, each walking toward a corner of the square, stopping, then continuing on their path around the area. 1 Red Guard will be continuously patrolling the perimeter of the area, which can become a chokepoint if their paths coincide with one of the other 3 Red Guards, so stay vigilant on their movements. |
| 4 |
After successfully passing them by, move through the underpassage and make your way toward the M Button. Hammer it as Mario with the X Button to open the gate to a new area while closing the gate on your current area. To conquer the new area, make Luigi disguise himself under the barrel by pressing the L Button much like previous cases where stealth is involved, Luigi will automatically place himself where needed. |
| 5 |
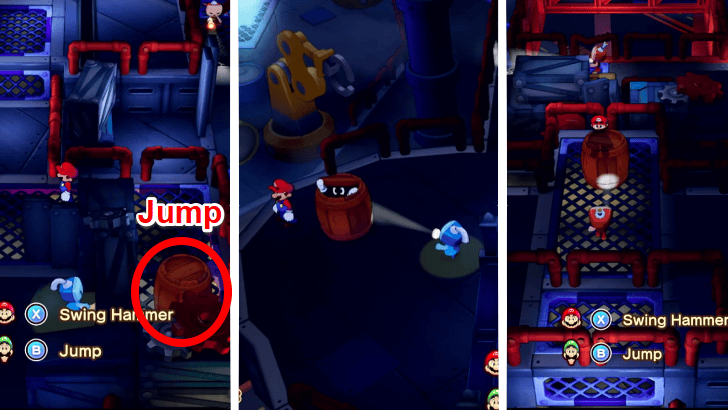 Move forward and wait for Luigi to place himself behind the First Blue Guard. Once there, press the B Button to make Luigi jump and distract the guard, allowing Mario to pass through. On the Second Blue Guard, wait for Luigi to align himself in front of their torchlight to allow Mario an undetected passage. On the Last Red Guard, wait until they turn their back and immediately run toward the only open space in the area with Luigi. Wait for the Red Guard to walk back and examine the area while hiding behind Luigi, then slip away as they walk past. |
| 6 |
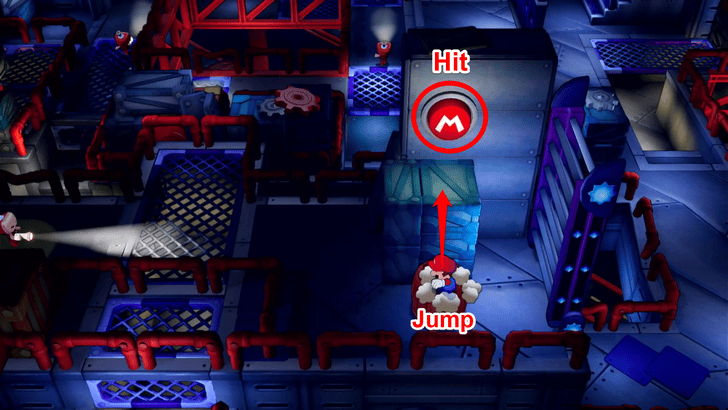 Jump on top of Luigi's barrel to climb on top of the crates where Mario can hammer the M Button to deploy a staircase exiting your current location, and opening the gate to the next area. |
| 7 |
 After heading to the newly unlocked area with Luigi, allow him to place himself in front of the metal crates, and jump over to bypass the First Blue Guard and First Red Guard. To sneak past the Second Blue Guard, let Luigi place himself next to another metal crate and jump over him, to the other side, and evade the Second Red Guard as they patrol the area. |
| 8 |
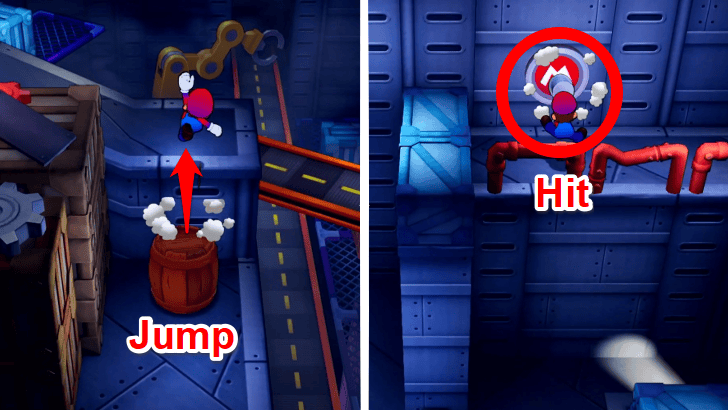 Finally, wait for Luigi to place himself up against the raised platform, use him to climb over, and keep going left until you reach the M Button. Hitting it as Mario will successfully open the gate to Sublevel 1, allowing you access into the main area to find Connie. |
| 9 |
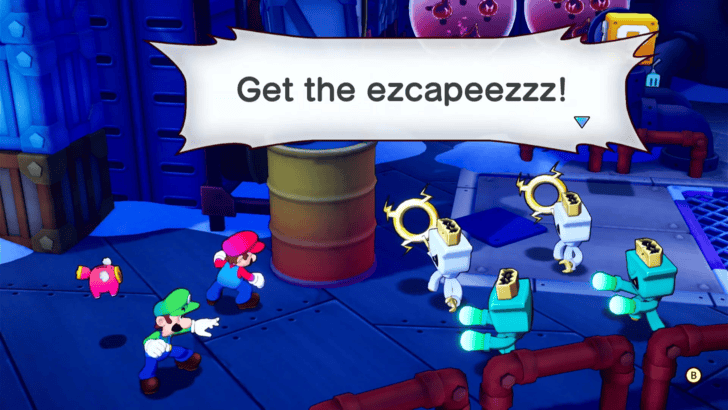 Head toward the northern door in the main area, which will lead you into a new room. There are Ring Zok Troopers patrolling the halls, so exercise caution! By continuing down the straightforward path, you will come across a Concordian who tells you of Connie's whereabouts. After proceeding further up the ramp, you will be forced into a battle with Ring Zok Troopers and Zokkarang Troopers. Emerge victorious from the battle to be reunited with Connie! |
| 10 |
 Head back to the main area with Connie in tow and ride the elevator. As the elevator can only go down, choose Sublevel 2 and watch as you descend. In the new area, you will be met with a big locked gate; this time with three sockets needed to be plugged in order to open the gate. |
| 11 |
 Walk through the southern doorway in Sublevel 2's main area, and end up in a new room. The place will not have anything notable inside it except for enemies that loiter around, so be sure to either bypass them or defeat them in battle, and cut through the door on the western side of the area. |
| 12 |
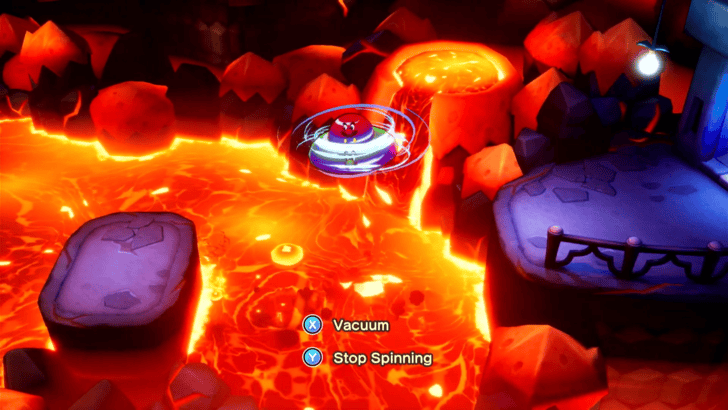 In this new location, use your UFO Spin Bros. Move to fly across the magma and land on the raised flat surface in between. Be careful when flying across, as the magma can shoot up into a pillar and halt the brothers' flight. |
| 13 |
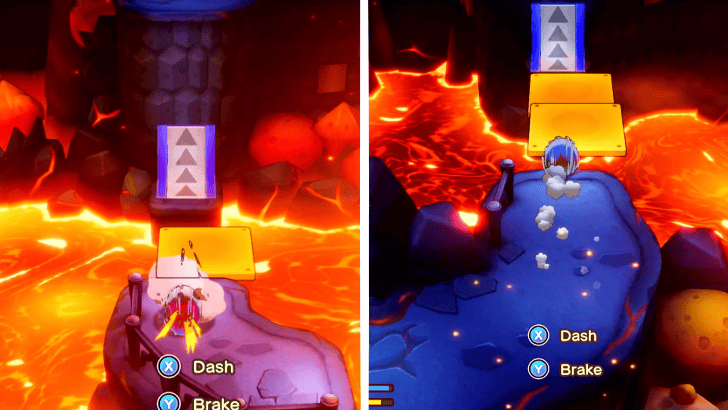 After reaching the end, use your Blitz Ball Bros. Move and dash up when the moving platform aligns with the ramp to boost yourself up on the cliff. Head to your right, and perform another Blitz Ball Bros. Move to dash on the ramp as the two floating platforms align perfectly. This will lead you toward a doorway connecting back to the main area of Sublevel 2. Once there, hit the M Button as Mario to open the gate, collect the Power Plug, and insert it into one of the three sockets in front of the large gate. |
| 14 |
 Walk back to the southern room, and enter the doorway on the east side of the area. Interact with the Blue Exclamation Block to open the gate, then make your way toward the Orange Exclamation Block to summon movable debris. |
| 15 |
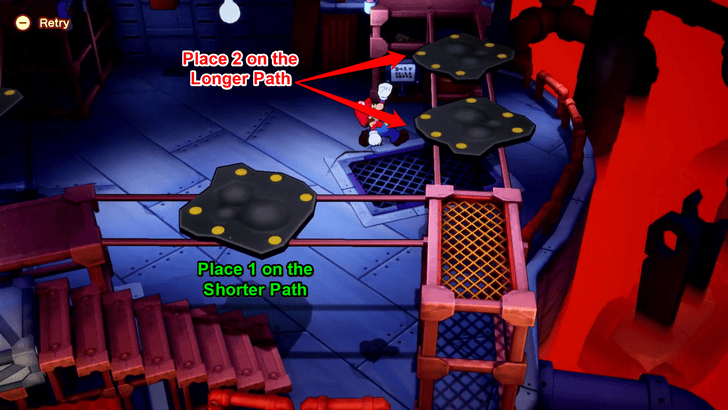 Use your UFO Vacuum Bros. Move to position all of the movable debris in areas where Mario can jump by his lonesome. Place two debris on the longest path leading to the locked gate, then place only one metal debris on the middle path. Leave Luigi on the L Button to hold the gate open, then venture through the path you created as Mario to activate the Second Blue Exclamation Block which opens two gates within the room, the southwestern gate in the main area, and deploys a staircase for Luigi. |
| 16 | 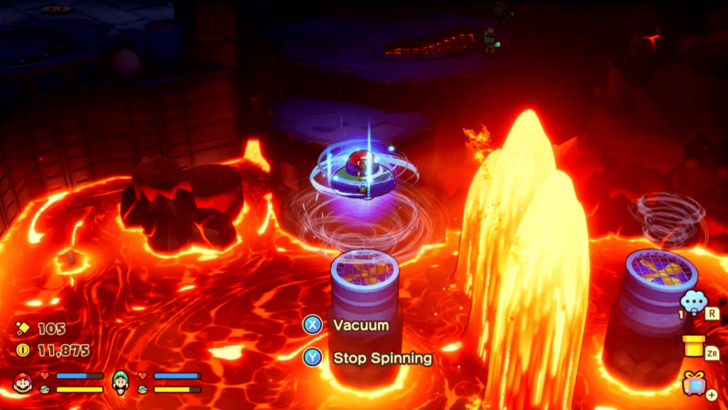 After reuniting with Luigi and returning to the main area, use your UFO Spin Bros. Move to cross over the Magma while stopping at the raised fans to recover air time. After successfully reaching the other side, collect the Second Power Plug and jump down to the left to insert it into one of the three sockets in front of the locked gate. |
| 17 |
With the southwestern gate now open, pass through to find a small area full of bubbling lava. Cross over toward the far eastern side, where you can find a fruit bomb. Pick it up, pass it between Mario and Luigi to safely place it in front of the rubble blocking a huge magma jet. Afterward, the magma shoots up, and melts all of the ice balls on the main area of Sublevel 1, allowing you access to the other parts of the Lighthouse. |
| 18 | 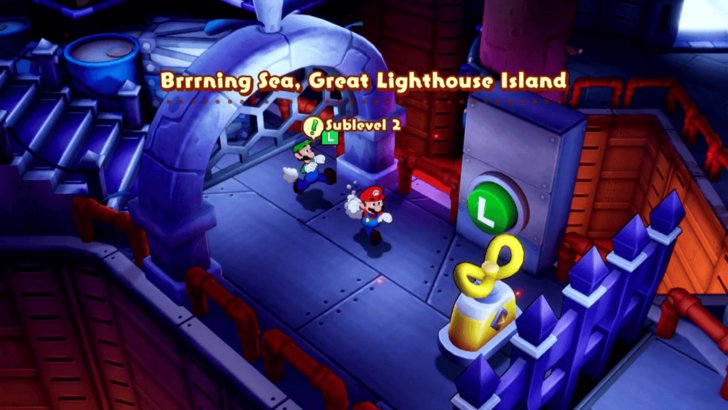 Return to the elevator, ride it to Sublevel 1, and head down the path on the left. Follow the path until you reach a staircase leading back down to Sublevel 2, and in front of the Third Power Plug. Have Luigi hit the L Button on the wall to open the gate, collect the Power Plug, and insert it into the last empty socket to open the large gate. |
| 19 | 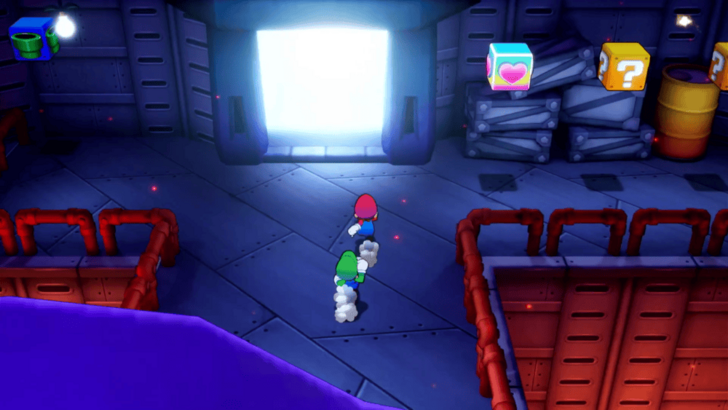 Proceed toward the open doorway at the end of the hall. Remember to use the Recovery Block on the right side of the door, the Save Block by the gate, and activate the Green Pipe Block on the left to create a passageway from Sublevel 2 to the Island's Entrance. |
| 20 | 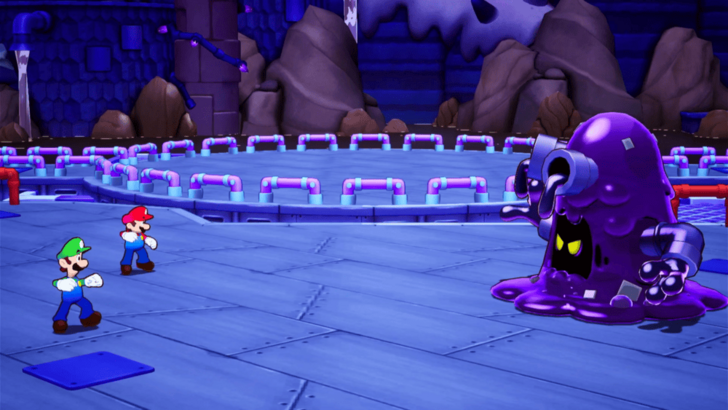 Upon entering, you will be met once again with the Extension Corps in conversation with Zokket who is scolding them for their incompetence. Afterward, Shun will be presenting his own creation to battle the brothers: Pipegunk! ★ Battle Tip! Beating Pipegunk After using Luigi Logic and taking control of Shun's button, always choose the element opposite to Pipegunk's current one, in order to deal heavy damage. For example, if Pipegunk is covered in ice, switch to the magma area. ▶︎ How to Beat Pipegunk |
| 21 | 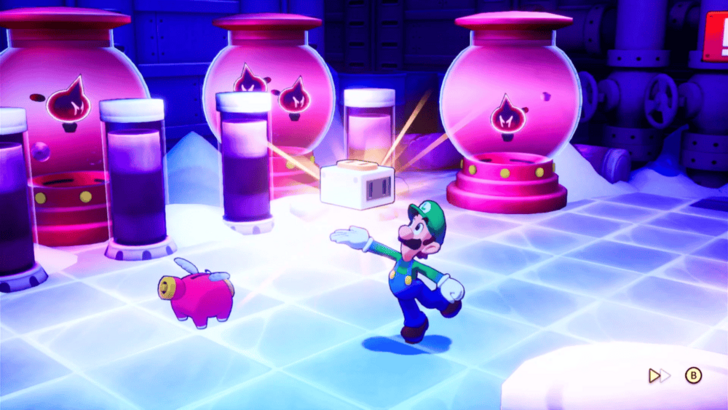 Shun will drop another Power Tap as he scurries off. Afterward, head to Sublevel 2's main area, talk to Connie, and finally ride the elevator to the Top Floor, where Connie relights the Lighthouse. On your return to Shipshape Island, some connected islands suffer a disconnect upon Bowser's attempt to take over the world! |
Brrrning Great Lighthouse Island Puzzles
How to Solve the Plug Puzzle
Place the Plugs on the Sockets
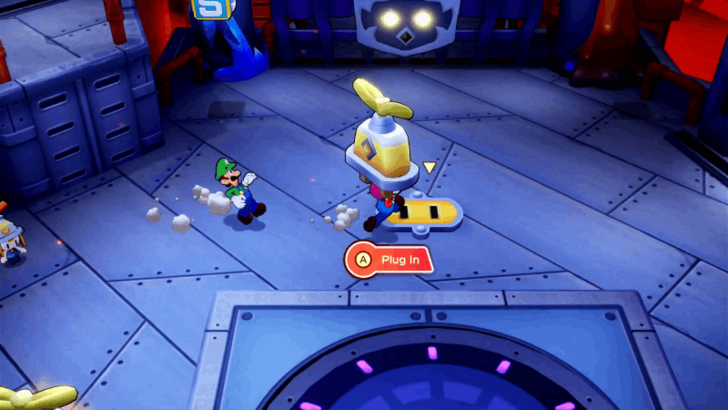
The puzzle inside the lighthouse requires you to place three plugs on the sockets. This requires you to explore the lighthouse entirely to reach the boss arena and enter the top floor.
Bosses in Brrrning Great Lighthouse Island
Pipegunk
| Enemy | Details |
|---|---|
 Pipegunk Pipegunk
|
First Encounter Level and Location: ・Level 27 ・Brrrning Sea, Great Lighthouse Island Best Option to Attack With: Either Hammer or Jump Attacks |
Pipegunk is the boss that you will encounter as part of the main story in the Brrrning Great Lighthouse Island.
Glohm Pipegunk
| Enemy | Details |
|---|---|
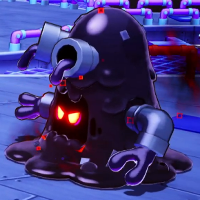 Glohm Pipegunk Glohm Pipegunk
|
First Encounter Level and Location: ・Level 43 ・Brrrning Sea, Great Lighthouse Island Best Option to Attack With: Either Hammer or Jump Attacks |
Glohm Pipegunk is an optional boss encountered at the end of Brrrning Sea, Great Lighthouse Island after you completed the island.
Defeating it completes the Glohm Pipegunk Side Quest.
Enemies in Brrrning Great Lighthouse Island
All Enemies Found in Brrrning Great Lighthouse Island
| Enemy | Enemy Tips |
|---|---|
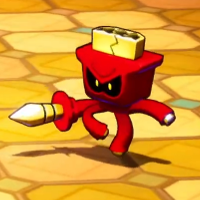 Spike Zok Trooper Spike Zok Trooper
|
You’ll know Spike Zok Trooper is done taunting when its spike starts to glow. This is your cue to use your hammer to counter, as it will attack shortly after. |
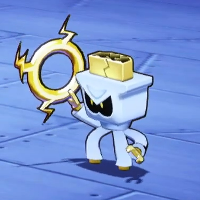 Zokkarang Trooper Zokkarang Trooper
|
Zokkarang Trooper's boomerang attack lowers your defense once it hits you so time your jumps accordingly to avoid it. |
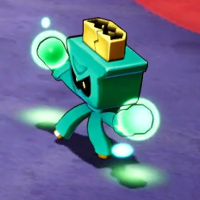 Ring Zok Trooper Ring Zok Trooper
|
Ring Zok Trooper's Ring Laser attack reduces your Power if it hits, so aim to hit the solid part of the laser to stop it from reaching you. |
Brrrning Great Lighthouse Island Shops
Item and Gear Shop
| Map Image | Overworld Image |
|---|---|
 |
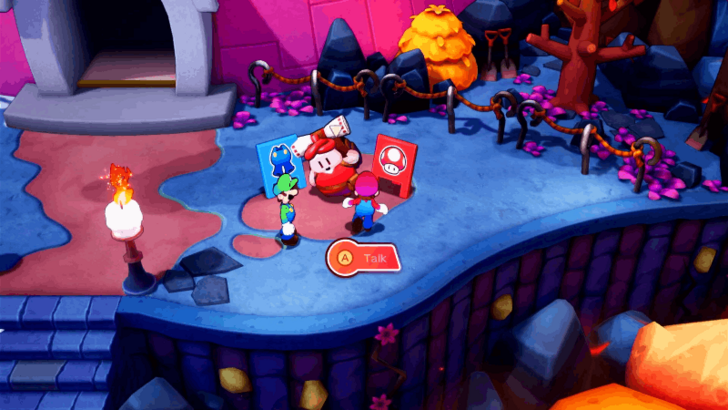 |
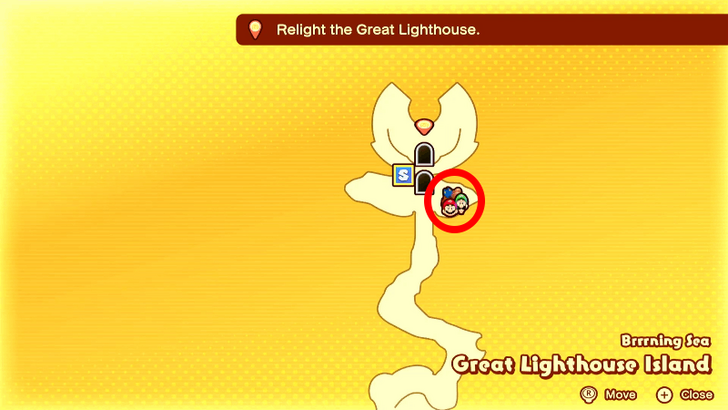
The item and gear shop is located just on the right side of the entrance of the lighthouse.
Items Sold
| Item | Price |
|---|---|
|
|
10 |
|
|
30 |
|
|
100 |
|
|
50 |
|
|
400 |
|
|
20 |
|
|
20 |
|
|
60 |
|
|
200 |
|
|
30 |
|
|
100 |
|
|
300 |
|
|
5 |
Gear Sold
| Gear | Price |
|---|---|
|
|
1,200 |
|
|
1,600 |
|
|
2000 |
|
|
1,600 |
|
|
1,200 |
|
|
2000 |
|
|
1,300 |
|
|
920 |
|
|
1600 |
Mario and Luigi: Brothership Related Guides

List of All Islands and Islets
All Islands
| Lushgreen Sea Islands | |
|---|---|
| Great Lighthouse Island (Lushgreen Sea) | Rumbla Island |
| Twistee Island | Raynforst Island |
| Florall Island | |
| Color-Full Sea Islands | |
| Great Lighthouse Island (Color-Full Sea) | Desolatt Island |
| Merrygo Island | Lottacoins Island |
| Allsand Island | |
| Brrrning Sea Islands | |
| Great Lighthouse Island (Brrrning Sea) | Bulbfish Island |
| Heatfreeze Island | Skorcheen Island |
| Slippenglide Island | |
| Gulchrock Sea Islands | |
| Great Lighthouse Island (Gulchrock Sea) | Offandon Island |
| Wayaway Island | |
| Stormstar Sea Islands | |
| Conductor Island | Jellyfish Island |
| Fortress Zokket | Soli-Tree |
Comment
Author
Brrrning Great Lighthouse Island Walkthrough Guide
improvement survey
03/2026
improving Game8's site?

Your answers will help us to improve our website.
Note: Please be sure not to enter any kind of personal information into your response.

We hope you continue to make use of Game8.
Rankings
- We could not find the message board you were looking for.
Gaming News
Popular Games

Genshin Impact Walkthrough & Guides Wiki

Honkai: Star Rail Walkthrough & Guides Wiki

Umamusume: Pretty Derby Walkthrough & Guides Wiki

Pokemon Pokopia Walkthrough & Guides Wiki

Resident Evil Requiem (RE9) Walkthrough & Guides Wiki

Monster Hunter Wilds Walkthrough & Guides Wiki

Wuthering Waves Walkthrough & Guides Wiki

Arknights: Endfield Walkthrough & Guides Wiki

Pokemon FireRed and LeafGreen (FRLG) Walkthrough & Guides Wiki

Pokemon TCG Pocket (PTCGP) Strategies & Guides Wiki
Recommended Games

Diablo 4: Vessel of Hatred Walkthrough & Guides Wiki

Fire Emblem Heroes (FEH) Walkthrough & Guides Wiki

Yu-Gi-Oh! Master Duel Walkthrough & Guides Wiki

Super Smash Bros. Ultimate Walkthrough & Guides Wiki

Pokemon Brilliant Diamond and Shining Pearl (BDSP) Walkthrough & Guides Wiki

Elden Ring Shadow of the Erdtree Walkthrough & Guides Wiki

Monster Hunter World Walkthrough & Guides Wiki

The Legend of Zelda: Tears of the Kingdom Walkthrough & Guides Wiki

Persona 3 Reload Walkthrough & Guides Wiki

Cyberpunk 2077: Ultimate Edition Walkthrough & Guides Wiki
All rights reserved
© Nintendo. Games are property of their respective owners.
The copyrights of videos of games used in our content and other intellectual property rights belong to the provider of the game.
The contents we provide on this site were created personally by members of the Game8 editorial department.
We refuse the right to reuse or repost content taken without our permission such as data or images to other sites.





![Everwind Review [Early Access] | The Shaky First Step to A Very Long Journey](https://img.game8.co/4440226/ab079b1153298a042633dd1ef51e878e.png/thumb)

![Monster Hunter Stories 3 Review [First Impressions] | Simply Rejuvenating](https://img.game8.co/4438641/2a31b7702bd70e78ec8efd24661dacda.jpeg/thumb)


