Merrygo Island Walkthrough Guide
★ Mario & Luigi: Brothership out now!
★ How to Unlock and Complete Every Challenge!
★ Pull off strong Bros. Attacks for maximum damage!
★ Best Gear | Best Battle Plugs | Rank-Up Bonuses
★ Power up with Best Battle Plug Combos.
★ Share your Hammer Rally high scores!
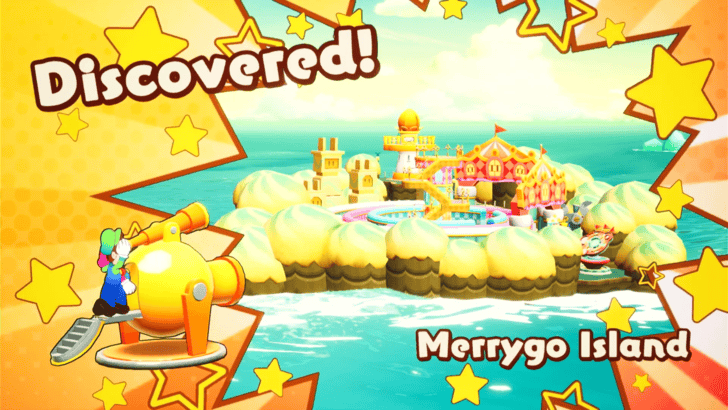
Merrygo Island is an Island located at Color-Full Sea in Mario & Luigi: Brothership. See a map of Merrygo Island, its location in Concordia, and how to unlock it.
List of Contents
Merrygo Island Map and Location
Merrygo Island Map
| Icon | How to Use |
|---|---|
 | Show Names This button reveals the Name of every icon currently shown. |
 | Show Pins This button will toggle between showing and hiding all the pins that you have already marked as acquired. |
 | Fullscreen This button will change the map display to fill the screen. |
 | Search Mode Toggle This button will display a search bar which you can use to search for an individual pin by its name. |
 | Icon Mode Toggle In Search Mode, this button will toggle you back to Icon Mode, removing the search bar and displaying the icons again. |
 | All Pins This button is shown along with the Icons on the right when there are over 6 types of pins. Click it for a full selection of all available pin types. |
 | Counter Tracks the number of pins you have of a certain type. The pin type shown is set to the page and currently cannot be changed; however, all pin type counters can be viewed by clicking the checklist icon on the right side. |
| View All Counters This icon is found on the right side of the Counter. When a map has more than one pin type, click this icon to see Counters for all pin types. |
List of All Islands and Islets
Merrygo Island Location

Merrygo Island can be found near the lower current at the bottom of Color-Full Sea.
Merrygo Island Grampy Turnip Location
No Grampy Turnip In This Location
| There is no Grampy Turnip in Merrygo Island. |
All 18 Grampy Turnip Locations
Merrygo Island Item Locations
No Notable Items
| There are no notable items in Merrygo Island. |
Merrygo Island Walkthrough
| # | Step by Step Objectives |
|---|---|
| 1 |
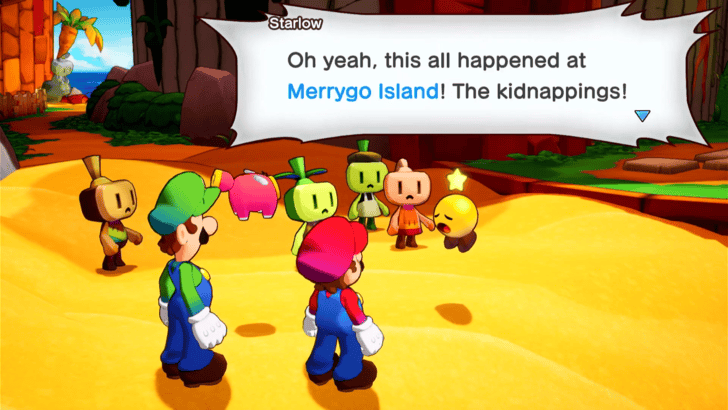 Back on Shipshape Island, IDLE hops onboard and introduces themselevs to Connie alongside Mario and Luigi. As the conversation progresses, a commotion can be heard from Shipshape Island's shores. Checking to see what it is, the brothers find Starlow who is in hysterics about a kidnapping involving Princess Peach. After Starlow pours her heart out, a connection is made to separated currents on the Ocean Map. |
| 2 |
 Head to the right side of the newly connected current, then keep sailing downward until you find a drifting island. Peer into the telescope to discover Merrygo Island and fire away toward it once you are ready! |
| 3 |
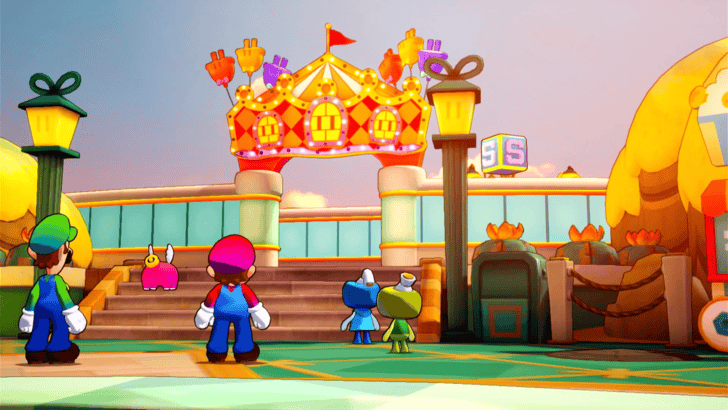 After landing in Merrygo Island, you will be greeted by two Concordians who point you toward the maze behind them in search of Princess Peach. They warn you about the kidnappings and enemies you might encounter in the maze, then send you on your way. |
| * |
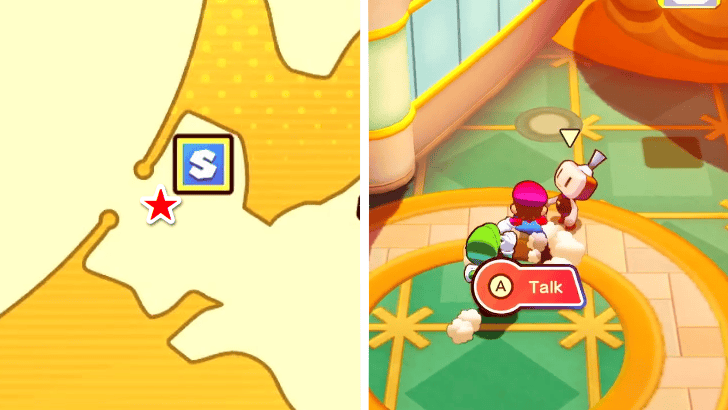 Speak with the Busybody by the maze's entrance to get a breakdown of where you should be headed to check on Princess Peach's whereabouts. They mark the Central Lookout Plaza at the center of the maze, a Secondary Lookout Tower, and the Maze's Exit while getting an aerial view of the maze. To make finding your way around easier, you may also follow the entryways with Red Flags on their pillars scattered around the maze. |
| 4 |
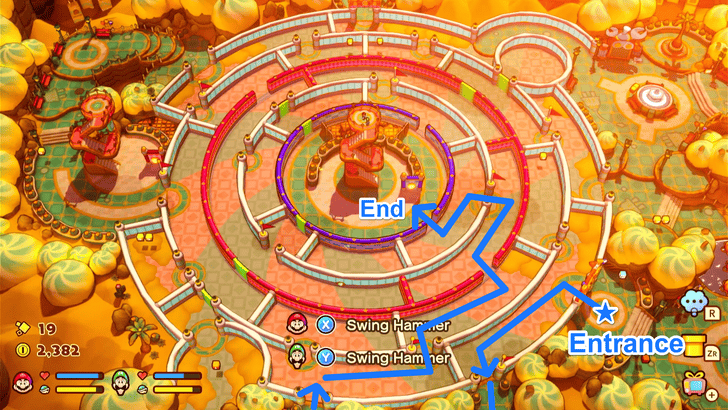 Enter the maze and head left to pass through the only open archway. Continue along the exterior path before re-entering the maze, staying vigilant through all of the Krodes and Snaptors patrolling the area. Move toward the farthest-right opening, then proceed through each available slot until you reach the Central Lookout Plaza. |
| 5 |
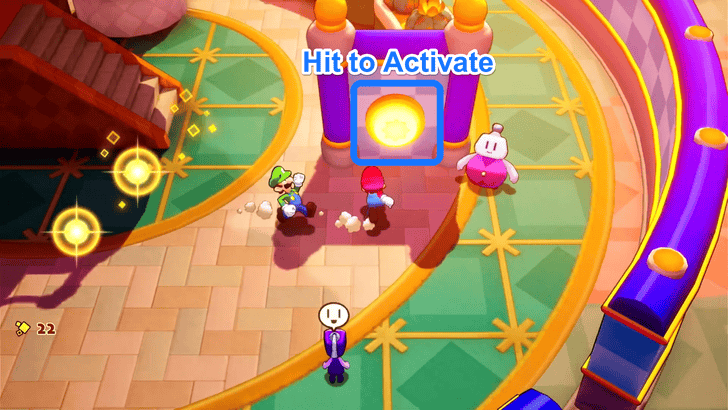 Hit the Button at the bottom of the tower to trigger Luigi's Luigi Logic, allowing him to be left behind and hit the button while Mario ascends the tower to get a wider view of the entire maze. |
| 6 |
 Have Luigi hit the button only once by pressing the Y Button to open a path toward the Secondary Lookout Tower, and head toward it. Pass through the northwestern opening, and keep moving forward until you reach the open slot to your left, then keep moing forward until you reach the Secondary Lookout Tower. |
| 7 |
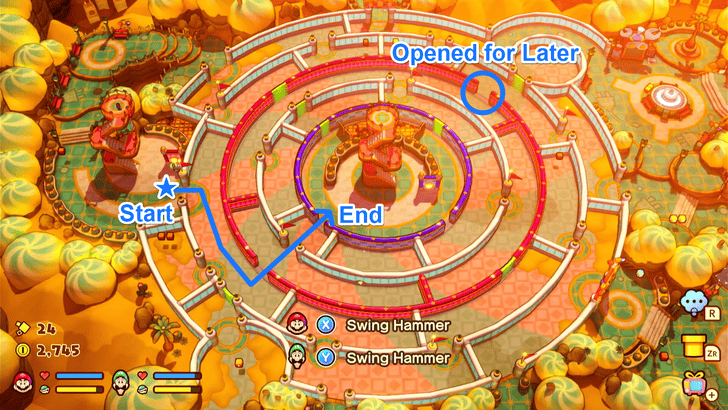 Once there, you will get a cutscene that misleads you into thinking Princess Peach was in the area, but is instead Birdo. Continue to the lookout tower where Luigi is left once more at the button while Mario ascends to scout the area. Make Luigi hit the button once to spin the outer ring which opens a new path back to the Central Lookout Plaza, and position an opening leading to the Maze's Exit. Head back to the Central Lookout Plaza by re-entering the maze and moving forward through all the consecutive open slots. |
| 8 |
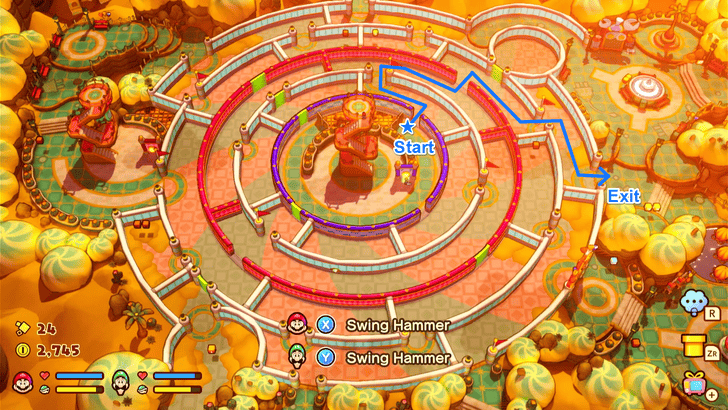 Once there, repeat the same process of leaving Luigi by the button, while Mario climbs the tower and scopes the area. Make Luigi hit the button only once to move the inner ring, and successfully pave a straightforward path to the Maze's Exit. Proceed through the northeastern opening and navigate all available slots until you successfully reach the exit. |
| 9 |
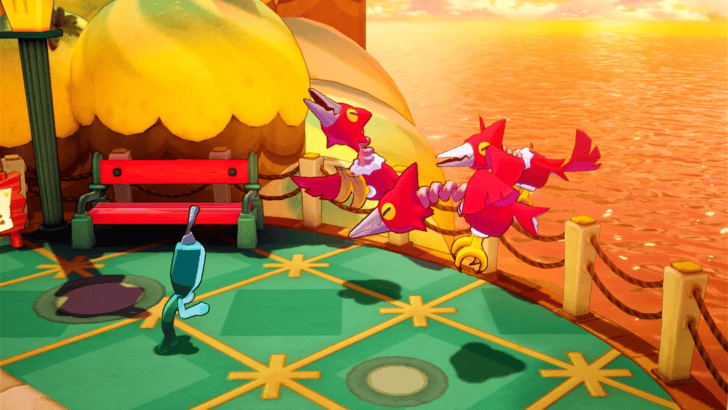 Explore the area until a cutscene triggers, revealing a Concordian being threatened by Snaptors. Defeat them in battle, after which Technikki introduces herself and directs you to Princess Peach’s location at Merrygo Island’s lighthouse. |
| 10 |
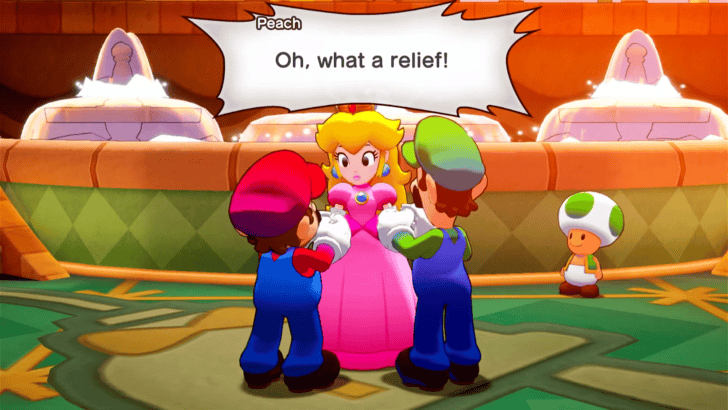 Re-enter the maze through the northern opening near the exit and proceed until you reach the only opening on the right. A cutscene will play, reuniting Princess Peach with Mario and Luigi, where they bring her up to speed on their quest. After the cutscene, ascend the lighthouse to relink Merrygo Island. Upon returning to Shipshape Island, Princess Peach reunites with Starlow and devises a plan to locate Zokket’s detention site for his kidnapped victims. |
Merrygo Island Puzzles
How to Change the Maze Path
Have Luigi Hit the Switch
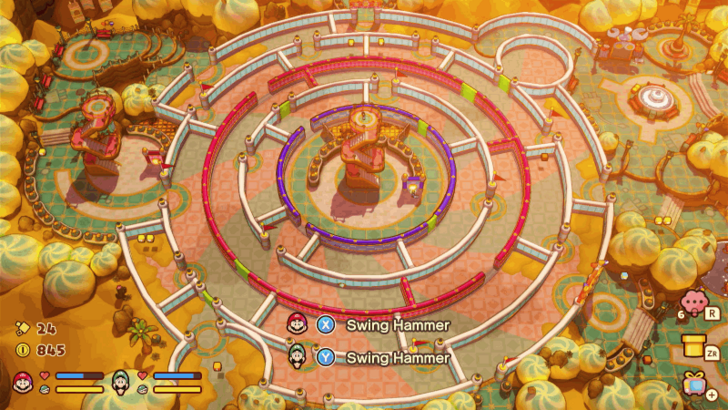
When you reach the center of the maze, have Luigi move towards the yellow switch and have Mario climb the tower in the middle to see a bird's eye view of the maze.
Press the Y Button to change the maze path around to reach the leftmost area of the maze.
How to Make the Flowers Bloom
Pull the Connectar Plug of the Island
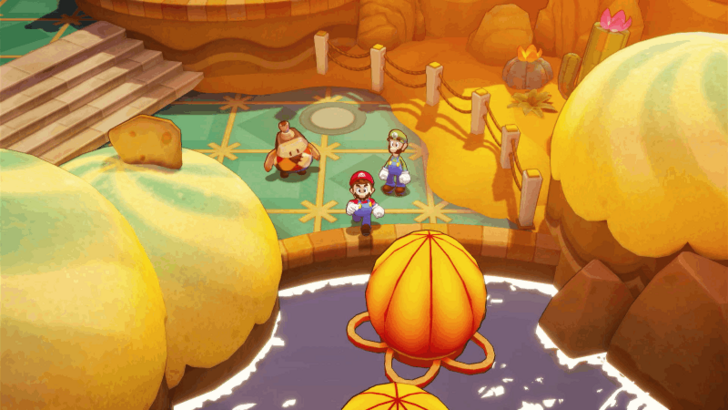
When you first visit the island, you may come across paths that are inaccessible.
To solve this, you need to pull the connectar plug of the island. This causes flowers to bloom and allow you to cross them to reach the inaccessible areas.
Enemies in Merrygo Island
All Enemies Found in Merrygo Island
| Enemy | Enemy Tips |
|---|---|
 Snaptor Snaptor
|
When Snaptor swoops down and drops either Mario or Luigi, causing them to roll toward the other, time your jump carefully to dodge. An accidental stomp will inflict extra damage on them. |
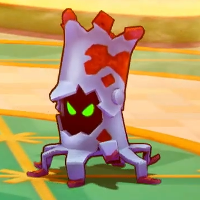 Krode Krode
|
Krode will spin twice first before hurling the ball and chain, this is a good visual cue to prepare when to dodge. Also take note that the direction of the spin will determine who Krode will target. |
 Big Spikely Big Spikely
|
Big Spikely jumps a random number of times before launching its spike attack, so keep an eye on its movements and time your hammer strikes carefully. |
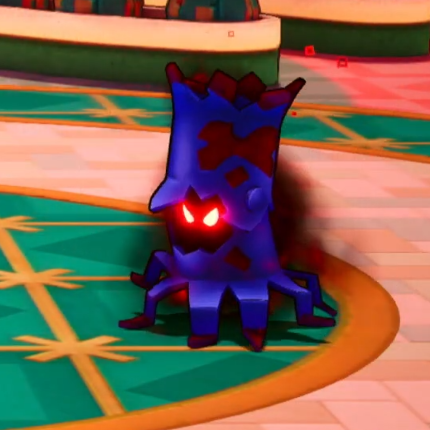 Glohm Krode Glohm Krode
|
The Glohmed version of a Krode can gain a Power boost whenever it gets attacked. |
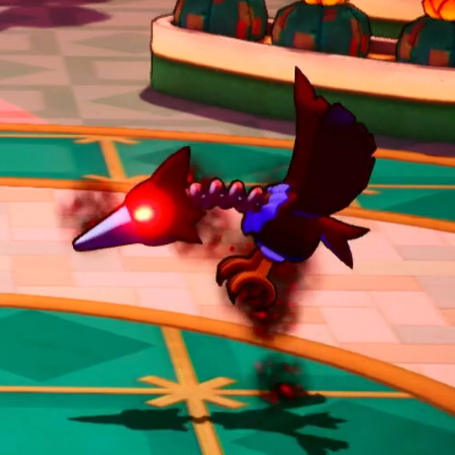 Glohm Snaptor Glohm Snaptor
|
The Glohmed version can conjure a shield that will block the next hit it receives. |
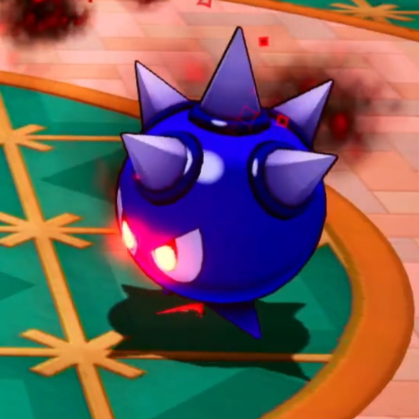 Big Glohm Spikely Big Glohm Spikely
|
The Glohmed version moves faster than normal, so make sure to time your dodges and counterattacks carefully. |
Merrygo Island Shops
Item and Gear Shop
| Map Image | Overworld Image |
|---|---|
 |
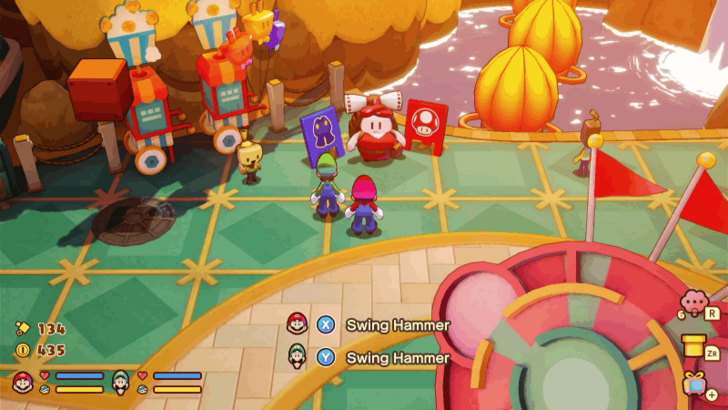 |
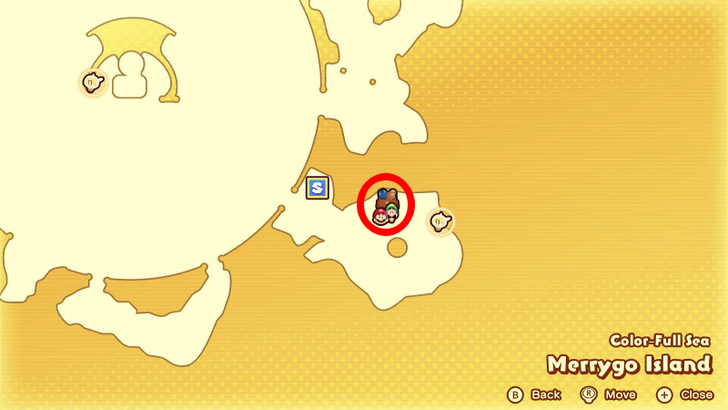
The item and gear shop is located at the bottom-right corner of the island near the starting location.
Items Sold
| Item | Price |
|---|---|
|
|
10 |
|
|
30 |
|
|
50 |
|
|
20 |
|
|
20 |
|
|
60 |
|
|
30 |
|
|
100 |
|
|
5 |
Gear Sold
| Gear | Price |
|---|---|
|
|
300 |
|
|
540 |
|
|
640 |
|
|
300 |
|
|
540 |
|
|
640 |
|
|
240 |
|
|
420 |
|
|
520 |
Mario and Luigi: Brothership Related Guides

List of All Islands and Islets
All Islands
| Lushgreen Sea Islands | |
|---|---|
| Great Lighthouse Island (Lushgreen Sea) | Rumbla Island |
| Twistee Island | Raynforst Island |
| Florall Island | |
| Color-Full Sea Islands | |
| Great Lighthouse Island (Color-Full Sea) | Desolatt Island |
| Merrygo Island | Lottacoins Island |
| Allsand Island | |
| Brrrning Sea Islands | |
| Great Lighthouse Island (Brrrning Sea) | Bulbfish Island |
| Heatfreeze Island | Skorcheen Island |
| Slippenglide Island | |
| Gulchrock Sea Islands | |
| Great Lighthouse Island (Gulchrock Sea) | Offandon Island |
| Wayaway Island | |
| Stormstar Sea Islands | |
| Conductor Island | Jellyfish Island |
| Fortress Zokket | Soli-Tree |
Comment
Author
Merrygo Island Walkthrough Guide
improvement survey
03/2026
improving Game8's site?

Your answers will help us to improve our website.
Note: Please be sure not to enter any kind of personal information into your response.

We hope you continue to make use of Game8.
Rankings
- We could not find the message board you were looking for.
Gaming News
Popular Games

Genshin Impact Walkthrough & Guides Wiki

Honkai: Star Rail Walkthrough & Guides Wiki

Umamusume: Pretty Derby Walkthrough & Guides Wiki

Pokemon Pokopia Walkthrough & Guides Wiki

Resident Evil Requiem (RE9) Walkthrough & Guides Wiki

Monster Hunter Wilds Walkthrough & Guides Wiki

Wuthering Waves Walkthrough & Guides Wiki

Arknights: Endfield Walkthrough & Guides Wiki

Pokemon FireRed and LeafGreen (FRLG) Walkthrough & Guides Wiki

Pokemon TCG Pocket (PTCGP) Strategies & Guides Wiki
Recommended Games

Diablo 4: Vessel of Hatred Walkthrough & Guides Wiki

Fire Emblem Heroes (FEH) Walkthrough & Guides Wiki

Yu-Gi-Oh! Master Duel Walkthrough & Guides Wiki

Super Smash Bros. Ultimate Walkthrough & Guides Wiki

Pokemon Brilliant Diamond and Shining Pearl (BDSP) Walkthrough & Guides Wiki

Elden Ring Shadow of the Erdtree Walkthrough & Guides Wiki

Monster Hunter World Walkthrough & Guides Wiki

The Legend of Zelda: Tears of the Kingdom Walkthrough & Guides Wiki

Persona 3 Reload Walkthrough & Guides Wiki

Cyberpunk 2077: Ultimate Edition Walkthrough & Guides Wiki
All rights reserved
© Nintendo. Games are property of their respective owners.
The copyrights of videos of games used in our content and other intellectual property rights belong to the provider of the game.
The contents we provide on this site were created personally by members of the Game8 editorial department.
We refuse the right to reuse or repost content taken without our permission such as data or images to other sites.




![Everwind Review [Early Access] | The Shaky First Step to A Very Long Journey](https://img.game8.co/4440226/ab079b1153298a042633dd1ef51e878e.png/thumb)

![Monster Hunter Stories 3 Review [First Impressions] | Simply Rejuvenating](https://img.game8.co/4438641/2a31b7702bd70e78ec8efd24661dacda.jpeg/thumb)


