Wayaway Island Walkthrough Guide
★ Mario & Luigi: Brothership out now!
★ How to Unlock and Complete Every Challenge!
★ Pull off strong Bros. Attacks for maximum damage!
★ Best Gear | Best Battle Plugs | Rank-Up Bonuses
★ Power up with Best Battle Plug Combos.
★ Share your Hammer Rally high scores!
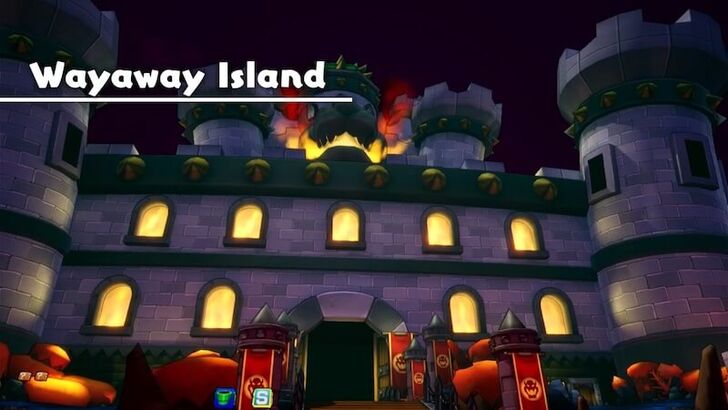
Wayaway Island is an Island located at Gulchrock Sea in Mario & Luigi: Brothership. See a map of Wayaway Island, its location in Concordia, and how to unlock it.
List of Contents
Wayaway Island Map and Location
Wayaway Island Map
| Icon | How to Use |
|---|---|
 | Show Names This button reveals the Name of every icon currently shown. |
 | Show Pins This button will toggle between showing and hiding all the pins that you have already marked as acquired. |
 | Fullscreen This button will change the map display to fill the screen. |
 | Search Mode Toggle This button will display a search bar which you can use to search for an individual pin by its name. |
 | Icon Mode Toggle In Search Mode, this button will toggle you back to Icon Mode, removing the search bar and displaying the icons again. |
 | All Pins This button is shown along with the Icons on the right when there are over 6 types of pins. Click it for a full selection of all available pin types. |
 | Counter Tracks the number of pins you have of a certain type. The pin type shown is set to the page and currently cannot be changed; however, all pin type counters can be viewed by clicking the checklist icon on the right side. |
| View All Counters This icon is found on the right side of the Counter. When a map has more than one pin type, click this icon to see Counters for all pin types. |
List of All Islands and Islets
Wayaway Island Location
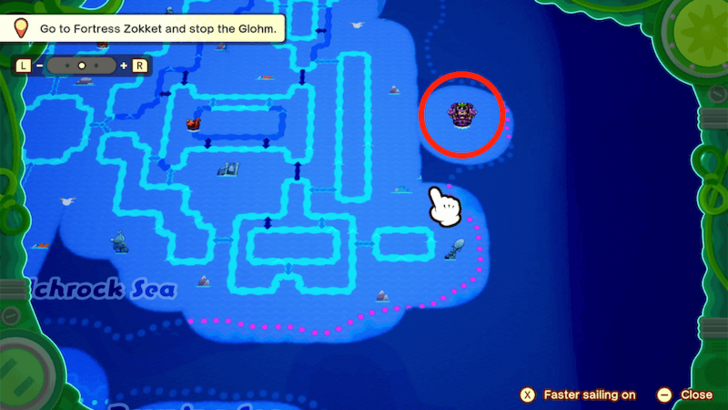
Wayaway Island can be found at the right corner of Gulchrock Sea.
Wayaway Island Grampy Turnip Location
No Grampy Turnip in This Location
| There is no Grampy Turnip that you can find in this island. |
All 18 Grampy Turnip Locations
Wayaway Island Item Locations
| There doesn't appear to be any notable items to be found in Wayaway Island. Let us know in the comments if you found beans, or pieces of gear. |
Wayaway Island Walkthrough
| # | Step by Step Objectives |
|---|---|
| 1 | 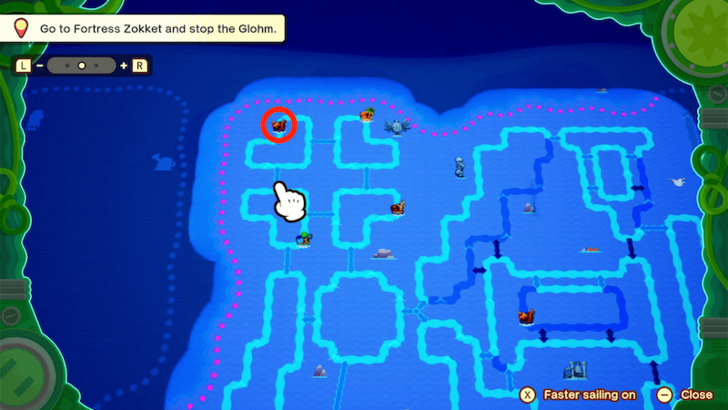 You’ll need to find a way to Wayaway Island by going to an islet with three trees on it. The islet this refers to is Meeger Islet, but you can’t get to the spot with three trees by going straight here. Where you need to go first is Mynor Islet. This is the islet located on the upper left corner of Gulchrock Sea. Select this upper left current in your Ocean Map, then launch Mario and Luigi here. ▶ List of All Islets |
| 2 |  Head right until you see a green warp pipe. Use this warp pipe to get to Paquette Islet. |
| 3 |  Once you emerge in Paquette Islet, take the south green warp pipe that leads to Meeger Islet. This will bring you right to the spot with three trees. |
| 4 | 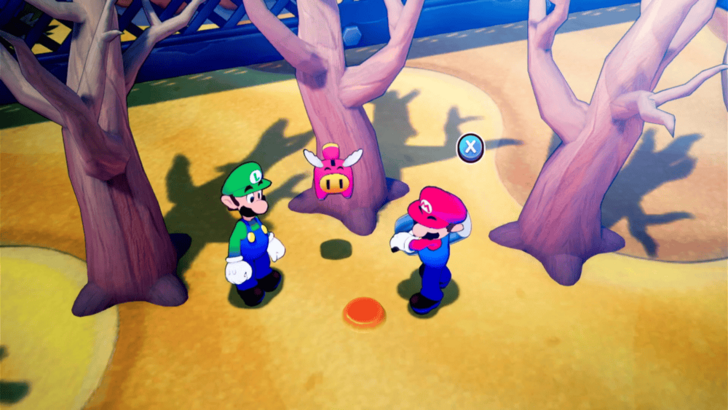 Investigate the strange bump in the middle of the trees, then when prompted, use X for Mario to hammer this bump. This will bring up another green warp pipe to the south of the trees. Use this warp pipe to get to Wayaway Island. |
| 5 |  Before entering Bowser’s Castle, you can buy items from the Peddler. There will be a lot of enemies in the castle, no Recovery Block until before the boss room, and a difficult boss battle at the end, so you’ll need to be prepared. Hit the Green Warp Pipe Block beside the Save Block to activate a fast travel point from here to Mynor Islet. This will help you return to this island in the future. |
| 6 | 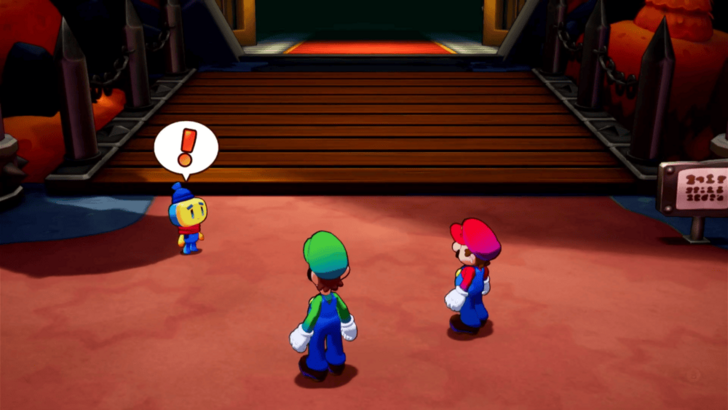 Once you’re ready, head up the bridge. Buddy will appear near the entrance, hoping to find Junior within, and enter the castle. Follow him inside. |
| 7 | 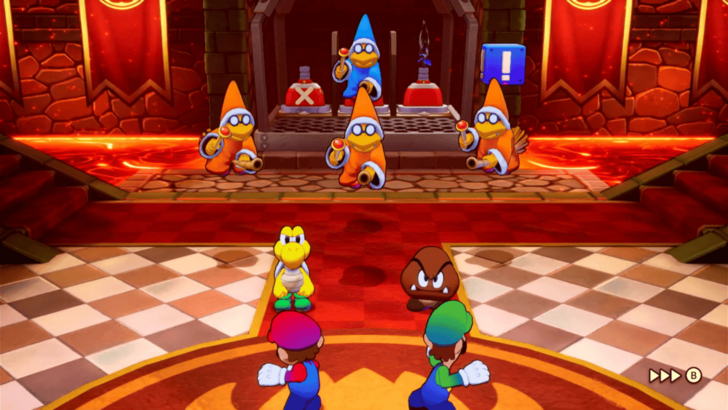 You will be shown a cutscene demonstrating how to use the elevator inside, but Bowser’s minions will spot Mario and Luigi, throwing you into a battle. You need to fight three Goombas, a Koopa Troopa, and two Magikoopas. ★ Battle Tip! Bowser’s Minions Prioritize getting rid of the Magikoopas first, since their attacks are more difficult to deal with, and make sure to counter the Koopa Troopa since it can cause Dizziness. You can also target all of them at once by using multi-target Bros. Attacks that can hit flying enemies such as Bomb Derby and Yoo Who Cannon. ▶ List of All Bros. Attacks |
| 8 | 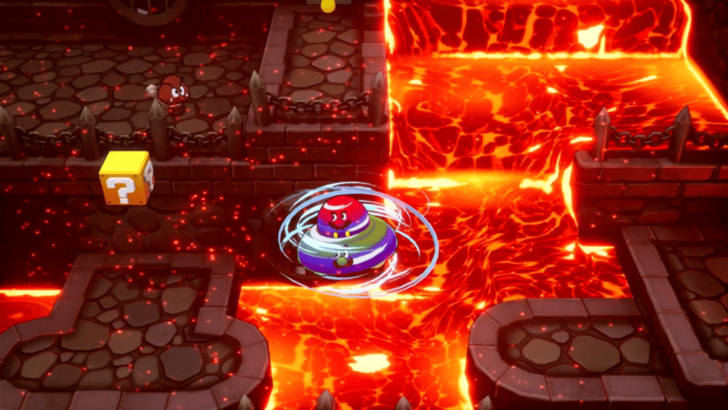 Now that the castle is flowing with lava, most pathways have been blocked. To turn off the lava flow blocking the elevator, you need to get to that lever on the second floor. Follow the pathway going left, and use your UFO Spin Bros. Move to cross the platforms. |
| 9 | 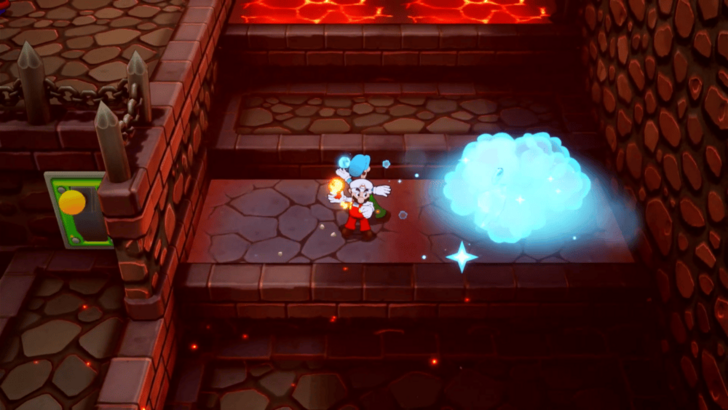 Interact with the lever to stop the lava river in this room. This still leaves some spots with lava, but you can neutralize them by activating the Fire and Ice Bros. Move and using Luigi’s ice. Once you’ve cleared a path, proceed onward. ▶ How to Unlock All Bros. Moves |
| 10 | 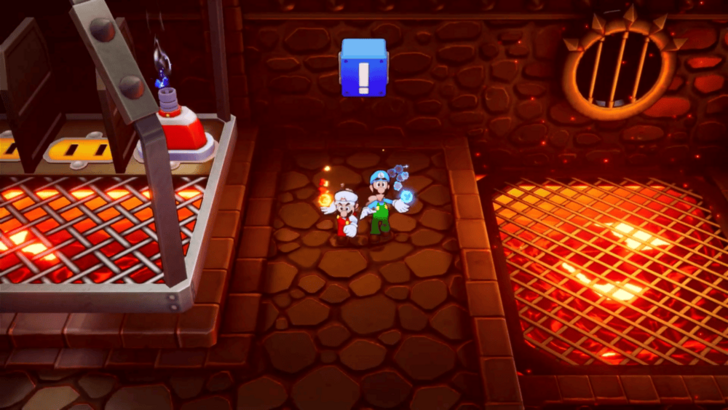 Hit the blue Exclamation Block to bring down the elevator. Then, use Mario’s fire from the Fire and Ice Bros. Move to ignite the burner plug on the elevator. This should take you one floor up. |
| 11 |  Grab another burner plug from this floor, and place it in a socket on the elevator. Stay on the second floor platform, and extinguish the ignited plug in the elevator so that you can jump onto the top of the elevator. |
| 12 |  From the top of the elevator, jump onto the pathway with an arrow. Follow the path heading right, collecting coins along the way. A third burner plug can be found at the end. Pick up this plug, and bring it back to the elevator to fill in the last socket. |
| 13 |  Use your Fire and Ice Bros. Move, and ignite two plugs using Mario’s fire to reach the third floor of this room. This floor has some blocks you can hit for coins and items. Go back to the elevator, and ignite the last plug in order to reach the top floor of this area. |
| 14 | 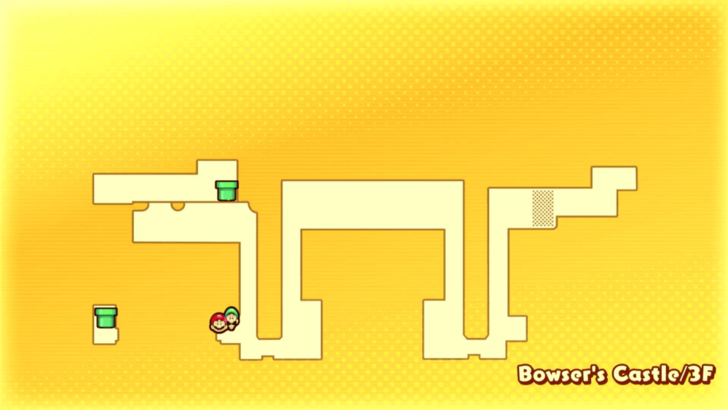 Follow the path eastward. There will be a Green Pipe Block that you can activate along the way, right next to a Save Block. Proceed into the main hall, and keep following the path to the room on the right. There will be several enemies that you can either fight or avoid along the way. |
| 15 | 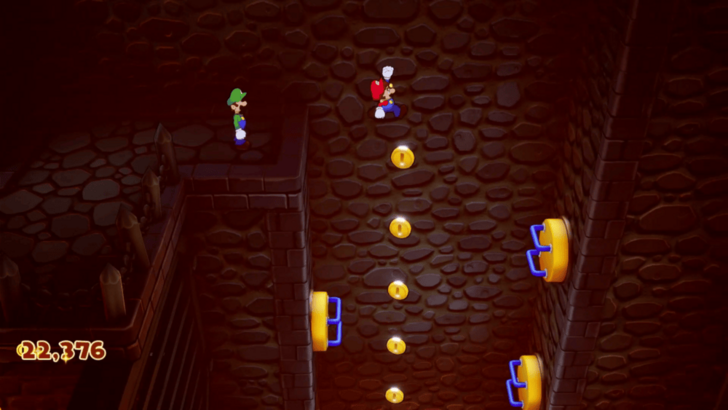 At the end of the path, drop down all the way to the bottom. Though if you don’t mind a detour, there are some item blocks you can get if you climb up to the middle floor on the right side of the room. Head left from the bottom floor to continue on. Keep following the path past the elevator, going counter-clockwise. |
| 16 | 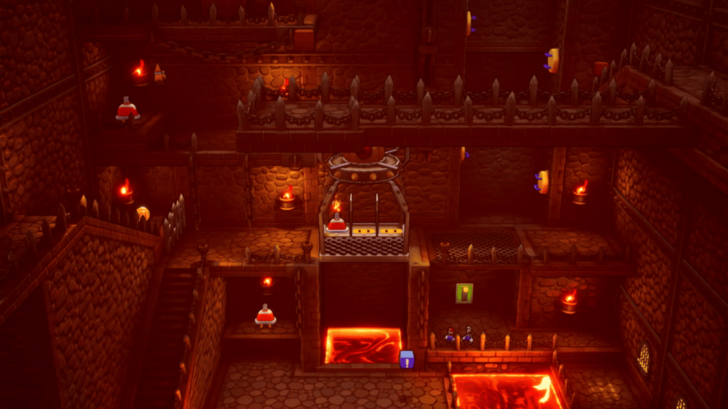 Use the UFO Spin Bros. Move to cross the large gap in the path, and then keep walking until you reach a yellow-green lever. Interact with this lever to staunch the lava flow in this room. |
| 17 |  Head back to the elevator. You can either use Luigi’s ice from your Fire and Ice Bros. Move to extinguish the flaming plug in the elevator and bring you down a floor or jump down to the lower floor and hit the blue Exclamation Block to bring down the elevator. Once the elevator is down, pick up the burner plug on the left side and plug it into the elevator. Ignite both plugs using Mario’s fire from the Fire and Ice Bros. Move to go up two floors. |
| 18 | 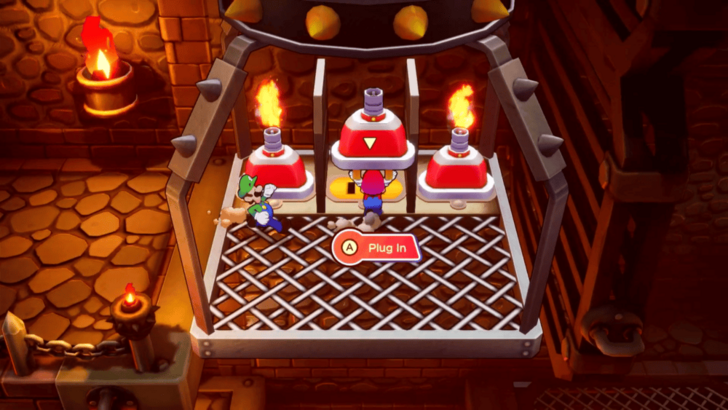 Defeat the enemy guarding the third plug on this floor, then take the plug and place it into the elevator. Ignite this plug as well in order to reach the higher floor. |
| 19 | 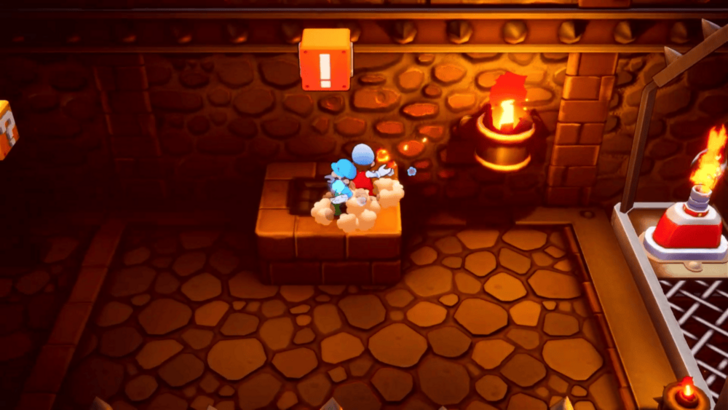 Hit the Exclamation Block hovering over the platform in order to bring down the gate two floors down. Extinguish two flames from the elevator using Luigi’s Ice in order to reach this newly opened, coin-filled path. |
| 20 | 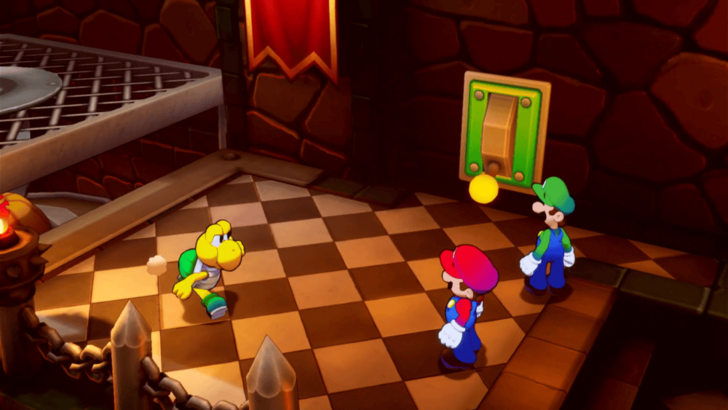 Follow this path to go back into the main hall. The lever that will stop this room’s lava flow is in reach, but you will be stopped by the Koopa Troopa assigned to guard it. Defeat the poor Koopa Troopa in an easy battle, then raise the lever. |
| 21 | 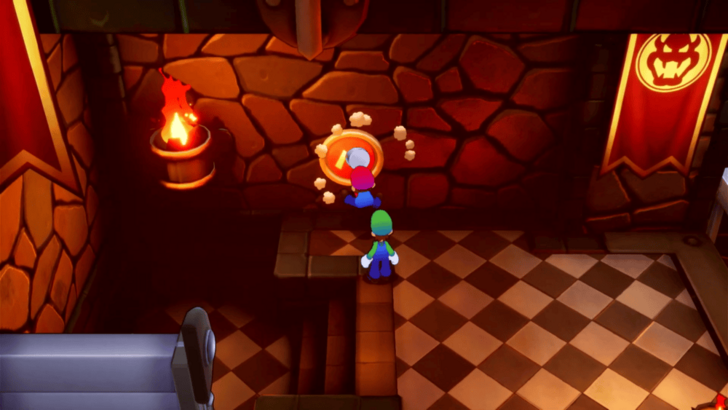 Keep going left until you see an M button on the wall. Use Mario’s hammer to activate it, and bring down a set of stairs. |
| 22 | 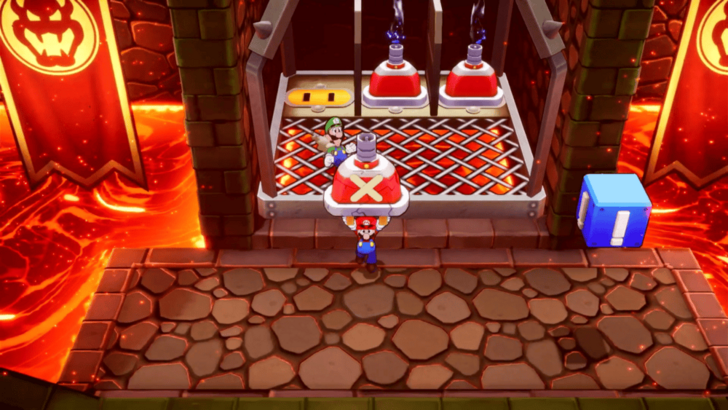 Go down to the ground floor and into the elevator. One of the burner plugs in the elevator is broken, so take out this plug marked with an X. You can just place it on the floor outside the elevator. Go to one of the other elevators in either the left or right room in order to get a replacement for the broken plug. The left room might be more convenient, since it doesn’t require you to pass around the plug. |
| 23 | 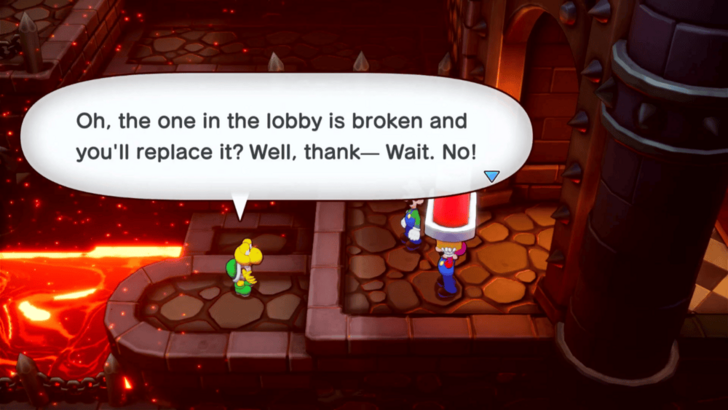 Take out a working burner plug from an elevator, and carry it back to the main hall. Before you can leave the room, however, you will be stopped by another Koopa Troopa. Defeat Bowser’s minions, and then plug in the working burner plug into the central elevator. |
| 24 |  Igniting two of the burner plugs will take you to a floor with an Exclamation Block that removes the fence blocking the right room on the ground floor. Igniting three plugs will take you up to the entrance of Bowser’s room. Before facing Bowser, make sure to activate the Green Pipe Block, save your progress, and heal using the Recovery Block. You can fight more of Bowser’s minions on this floor in case you want to try to level up before the boss fight. Once you’re ready, enter the boss room to face Bowser. |
| 25 |  ★ Battle Tip! Beating Bowser Bowser can use his minions to wear down Mario and Luigi. Try your best to counter their attacks, and use multi-target Bros. Attacks to help get rid of them while also targetting Bowser. Having the Anti-Army Specialist plug equipped along with the Kaboom Attack plug can also help you get rid of these pesky enemies. ▶ How to Beat Bowser |
| 26 | 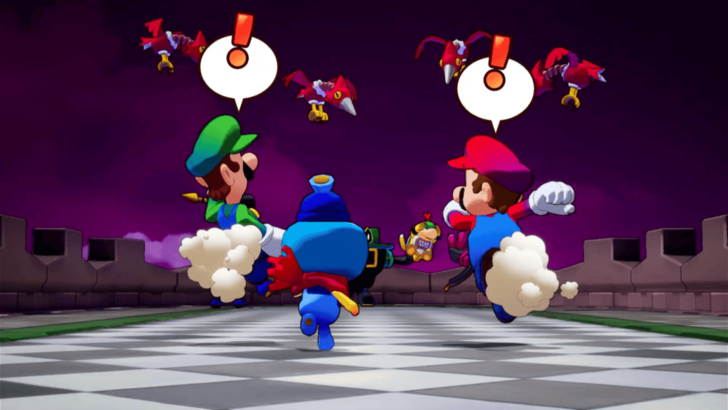 Upon defeating Bowser, the Extension Corps will kidnap Bowser Jr. Follow them through the north archway. A cutscene will play out where Buddy tries to help Junior but gets Glohmed instead. Luckily, Ampberries are in good supply here. |
| 27 |  You learn from the Goombas looking after Buddy that the Ampberries are being kept in the room to the right of Bowser’s throne room. Go back to Bowser’s throne room, and enter this room on the right to start a cutscene and unlock a new ocean current. The Ampberries will be automatically transported to Shipshape, so there’s no need for you to do anything further here. Exit the room and Bowser’s throne room, and take the green pipe back to the castle entrance. |
| 28 | 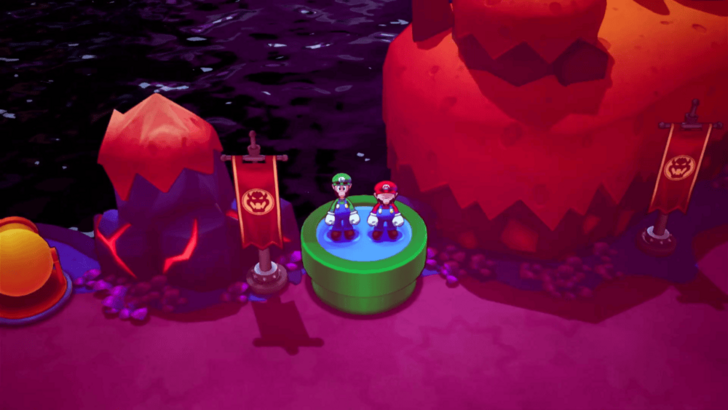 Exit the castle, then take the green pipe near the Peddler to Mynor Islet. From here, use the cannon to launch Mario and Luigi back onto Shipshape Island. Go to the group in the plaza of Shipshape Island to drop off the Ampberries. After a long cutscene, you will be given the Auto Ampberry and Anti-Zokket Specialist plugs. You will then be able to travel to the Gulchrock Sea Great Lighthouse. |
Wayaway Island Puzzles
How to Activate the Plugs
Use Fire and Ice Bros. Move
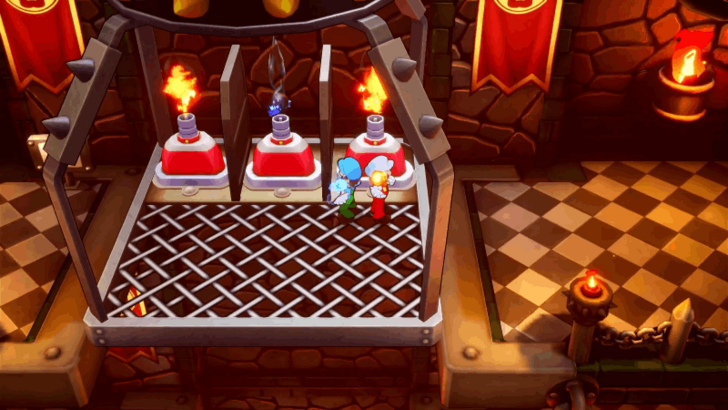
The sockets inside Bowser's Castle require you to use the Fire and Ice Bros. Move to move the makeshift elevator.
Putting more fires in the sockets allows the elevator to move up while putting it out causes it to move down one floor.
Bosses in Wayaway Island
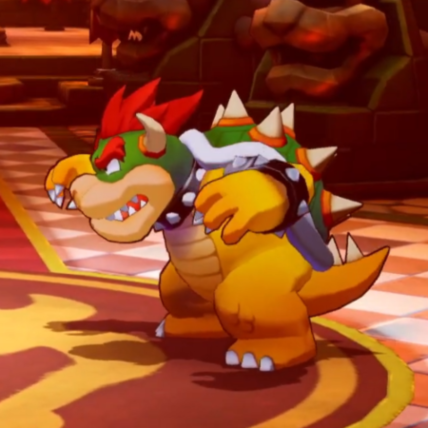
Bowser
| Enemy | Details |
|---|---|
 Bowser Bowser
|
First Encounter Level and Location: ・Level 33 ・Wayaway Island Best Option to Attack With: Either Hammer or Jump Attacks |
Bowser is the boss that you encounter as part of the main story in Wayaway Island.
Enemies in Wayaway Island
All Enemies Found in Wayaway Island
| Enemy | Enemy Tips |
|---|---|
 Fire Bro Fire Bro
|
Make sure to carefully dodge Fire Bro's attacks as its burn status ailment can shave a lot off your health. For a countermeasure, stock up on Refreshing Herbs! |
 Ice Bro Ice Bro
|
Be careful not to get hit by Ice Bro's big ice ball, as this can freeze either Mario and Luigi, leaving them vulberable to an attack. Always be sharp with your counterattacks, or keep a stock of Refreshing Herbs! |
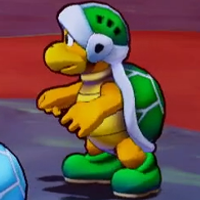 Hammer Bro Hammer Bro
|
In a team with Fire Bro and Ice Bro, make sure that Hammer Bro is dealt with first, as they play a crucial role in one of the coordinated attacks. |
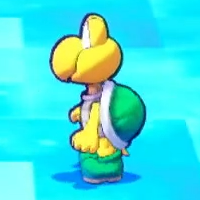 Koopa Troopa Koopa Troopa
|
If a Koopa Troopa has wings, only use Jump attacks. If it is a regular Koopa Troopa, you can use either Jump or Hammer attacks. |
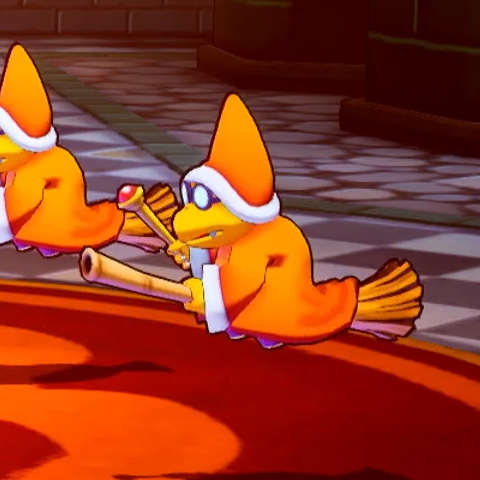 Magikoopa Magikoopa
|
Magikoopa's orbs attack have an indicator on whether it will hit Mario or Luigi, pay close attention to the colors. |
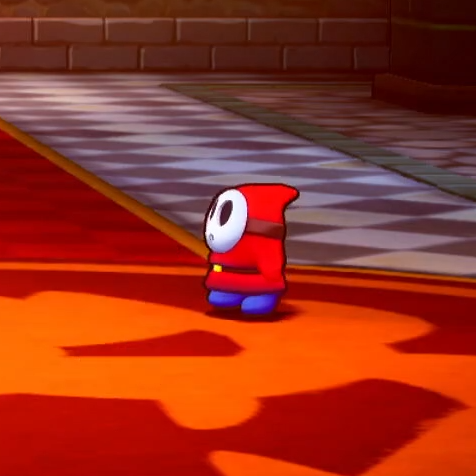 Shy Guy Shy Guy
|
During Shy Guy's gift box attack, you have the chance to get coins by jumping into the box that contains it. |
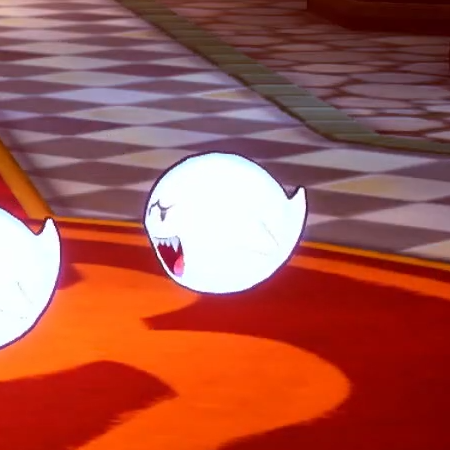 Boo Boo
|
During Boo's multiple Boo attack, not every Boo will hit you as the real can only do damage, focus your eyes on the real Glohm Boo and attack it. |
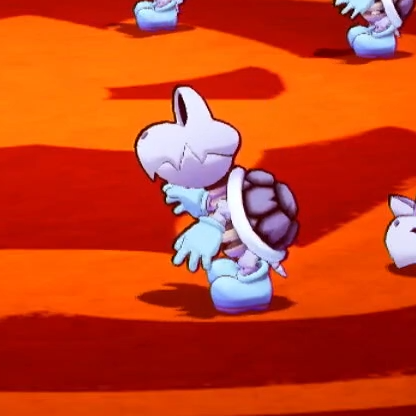 Dry Bones Dry Bones
|
When Dry Bones deconstructs itself and lies on the floor after reducing its HP to 0, make sure to use a jump attack on it to fully eliminate them. |
 Glohm Shy Guy Glohm Shy Guy
|
During Glohm Shy Guy's gift box attack, you have the chance to get coins by jumping into the box that contains it. |
 Glohm Koopa Troopa Glohm Koopa Troopa
|
If a Glohm Koopa Troopa has wings, use Jump attacks, and if it's a regular Koopa Troopa, you can use either Jump or Hammer attacks. |
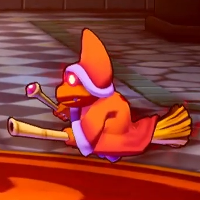 Glohm Magikoopa Glohm Magikoopa
|
Glohm Magikoopa's orbs attack have an indicator on whether it will hit Mario or Luigi, pay close attention to the colors. |
 Glohm Boo Glohm Boo
|
During Glohm Boo's multiple Boo attack, not every Boo will hit you as the real can only do damage, focus your eyes on the real Glohm Boo and attack it. |
 Glohm Hammer Bro Glohm Hammer Bro
|
Glohm Hammer Bro will always get a POW and DEF debuff after attacking, so take advantage of this and initiate Bros. Attacks that can deal significant amounts of damage. |
 Glohm Goomba Glohm Goomba
|
Creates copies of itself and shuffles position with them. Defeat the real Glohm Goomba to win the battle! |
Wayaway Island Shops
Item and Gear Shop
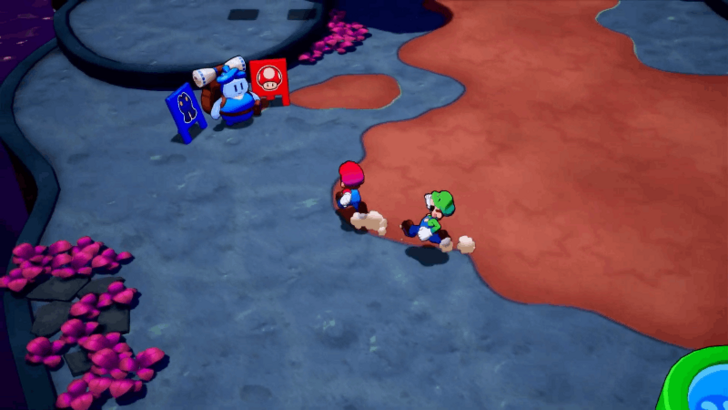
The item and gear shop is located beside the first save block in Wayaway Island.
Items Sold
| Item | Price |
|---|---|
|
|
10 |
|
|
30 |
|
|
100 |
|
|
300 |
|
|
50 |
|
|
400 |
|
|
20 |
|
|
20 |
|
|
60 |
|
|
200 |
|
|
600 |
|
|
30 |
|
|
100 |
|
|
300 |
|
|
800 |
|
|
5 |
Gear Sold
| Gear | Price |
|---|---|
|
|
2,300 |
|
|
3,100 |
|
|
3700 |
|
|
2,300 |
|
|
3,100 |
|
|
3700 |
|
|
1,800 |
|
|
2,500 |
|
|
3000 |
Mario and Luigi: Brothership Related Guides

List of All Islands and Islets
All Islands
| Lushgreen Sea Islands | |
|---|---|
| Great Lighthouse Island (Lushgreen Sea) | Rumbla Island |
| Twistee Island | Raynforst Island |
| Florall Island | |
| Color-Full Sea Islands | |
| Great Lighthouse Island (Color-Full Sea) | Desolatt Island |
| Merrygo Island | Lottacoins Island |
| Allsand Island | |
| Brrrning Sea Islands | |
| Great Lighthouse Island (Brrrning Sea) | Bulbfish Island |
| Heatfreeze Island | Skorcheen Island |
| Slippenglide Island | |
| Gulchrock Sea Islands | |
| Great Lighthouse Island (Gulchrock Sea) | Offandon Island |
| Wayaway Island | |
| Stormstar Sea Islands | |
| Conductor Island | Jellyfish Island |
| Fortress Zokket | Soli-Tree |
Author
Wayaway Island Walkthrough Guide
improvement survey
03/2026
improving Game8's site?

Your answers will help us to improve our website.
Note: Please be sure not to enter any kind of personal information into your response.

We hope you continue to make use of Game8.
Rankings
- We could not find the message board you were looking for.
Gaming News
Popular Games

Genshin Impact Walkthrough & Guides Wiki

Honkai: Star Rail Walkthrough & Guides Wiki

Umamusume: Pretty Derby Walkthrough & Guides Wiki

Pokemon Pokopia Walkthrough & Guides Wiki

Resident Evil Requiem (RE9) Walkthrough & Guides Wiki

Monster Hunter Wilds Walkthrough & Guides Wiki

Wuthering Waves Walkthrough & Guides Wiki

Arknights: Endfield Walkthrough & Guides Wiki

Pokemon FireRed and LeafGreen (FRLG) Walkthrough & Guides Wiki

Pokemon TCG Pocket (PTCGP) Strategies & Guides Wiki
Recommended Games

Diablo 4: Vessel of Hatred Walkthrough & Guides Wiki

Fire Emblem Heroes (FEH) Walkthrough & Guides Wiki

Yu-Gi-Oh! Master Duel Walkthrough & Guides Wiki

Super Smash Bros. Ultimate Walkthrough & Guides Wiki

Pokemon Brilliant Diamond and Shining Pearl (BDSP) Walkthrough & Guides Wiki

Elden Ring Shadow of the Erdtree Walkthrough & Guides Wiki

Monster Hunter World Walkthrough & Guides Wiki

The Legend of Zelda: Tears of the Kingdom Walkthrough & Guides Wiki

Persona 3 Reload Walkthrough & Guides Wiki

Cyberpunk 2077: Ultimate Edition Walkthrough & Guides Wiki
All rights reserved
© Nintendo. Games are property of their respective owners.
The copyrights of videos of games used in our content and other intellectual property rights belong to the provider of the game.
The contents we provide on this site were created personally by members of the Game8 editorial department.
We refuse the right to reuse or repost content taken without our permission such as data or images to other sites.





![Everwind Review [Early Access] | The Shaky First Step to A Very Long Journey](https://img.game8.co/4440226/ab079b1153298a042633dd1ef51e878e.png/thumb)

![Monster Hunter Stories 3 Review [First Impressions] | Simply Rejuvenating](https://img.game8.co/4438641/2a31b7702bd70e78ec8efd24661dacda.jpeg/thumb)


Notable item: After going through the pipe you got from the pipe block in castle 3F and following the coin trail all the way to the ?-block at the dead end, there is a Lucky HP Bangle.