Raynforst Island Walkthrough Guide
★ Mario & Luigi: Brothership out now!
★ How to Unlock and Complete Every Challenge!
★ Pull off strong Bros. Attacks for maximum damage!
★ Best Gear | Best Battle Plugs | Rank-Up Bonuses
★ Power up with Best Battle Plug Combos.
★ Share your Hammer Rally high scores!

Raynforst Island is an Island located at Lushgreen Sea in Mario & Luigi: Brothership. See a map of Raynforst Island, walkthrough, its location in Concordia, and how to unlock it.
List of Contents
Raynforst Island Map and Location
Raynforst Island Map
| Icon | How to Use |
|---|---|
 | Show Names This button reveals the Name of every icon currently shown. |
 | Show Pins This button will toggle between showing and hiding all the pins that you have already marked as acquired. |
 | Fullscreen This button will change the map display to fill the screen. |
 | Search Mode Toggle This button will display a search bar which you can use to search for an individual pin by its name. |
 | Icon Mode Toggle In Search Mode, this button will toggle you back to Icon Mode, removing the search bar and displaying the icons again. |
 | All Pins This button is shown along with the Icons on the right when there are over 6 types of pins. Click it for a full selection of all available pin types. |
 | Counter Tracks the number of pins you have of a certain type. The pin type shown is set to the page and currently cannot be changed; however, all pin type counters can be viewed by clicking the checklist icon on the right side. |
| View All Counters This icon is found on the right side of the Counter. When a map has more than one pin type, click this icon to see Counters for all pin types. |
List of All Islands and Islets
Raynforst Island Location
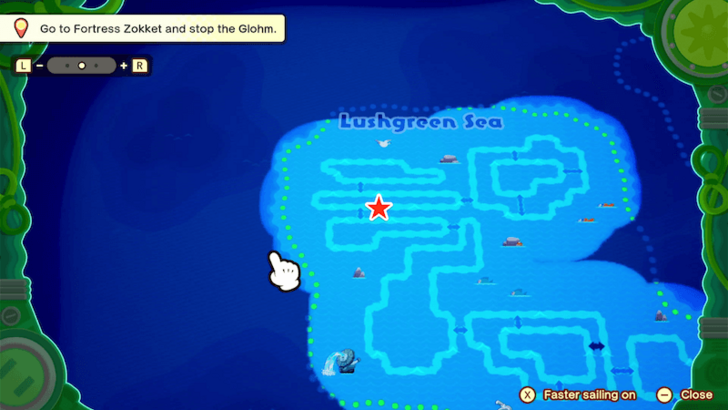
Raynforst Island can be found between two currents in the upper-left corner of Lushgreen Sea.
Raynforst Island Grampy Turnip Location
On Top of a Slop West of the Island
| Map Image | Overworld Image |
|---|---|
 |
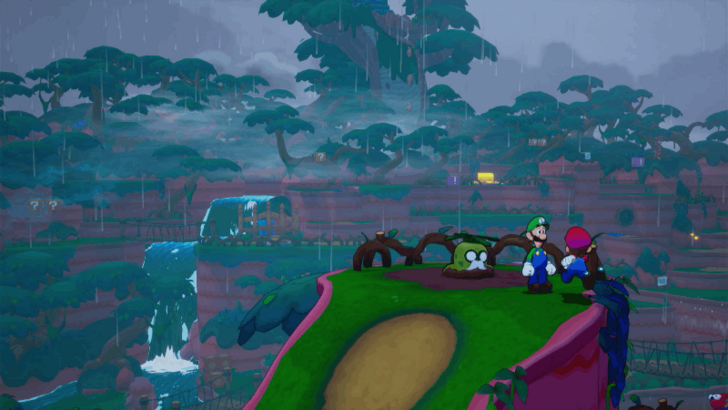 |
You can find Grampy Turnip on top of the high area west of the item shop in Raynforst Island.
All 18 Grampy Turnip Locations
Raynforst Island Item Locations
HP Gloves
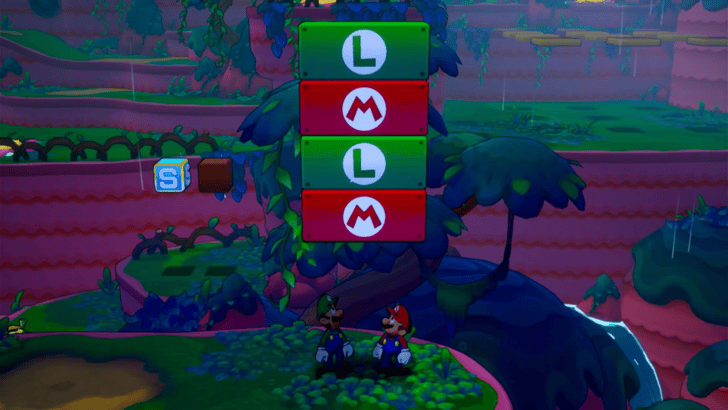
There is a question mark block that contains the HP Gloves when you complete a short minigame where you hit the blocks to match the corresponding character.
The block is located on the right side of the second save block at the eastern side of Raynforst Island.
Raynforst Island Walkthrough
| # | Step by Step Objectives |
|---|---|
| 1 |
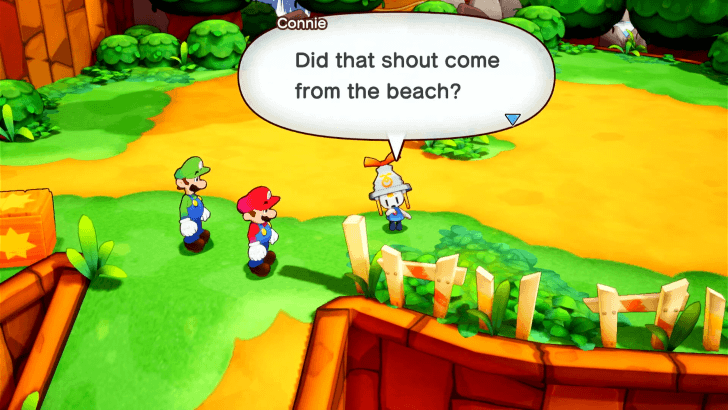 Back at Shipshape Island, a loud scream will be heard from the beach. Head down there and you'll find a purple capsule with a voice coming from within. Mario and Luigi will unsuccessfully try to open it, and come to the conclusion that they'll need a hammer. |
| 2 |
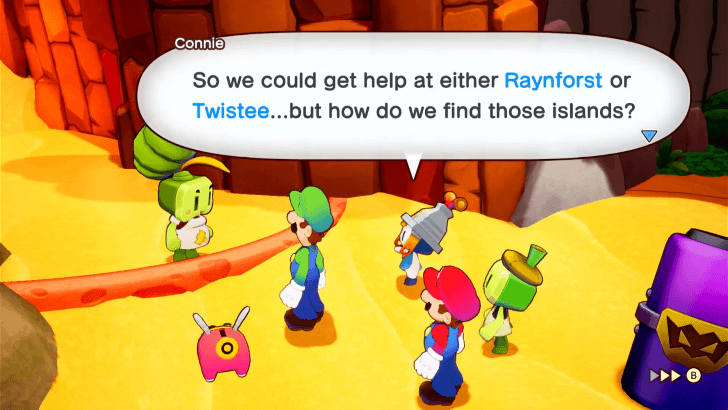 Willma will arrive and suggest that her kids could provide a hammer for the Bros. Her son, Billdit, can be found at Raynforst, while her daughter, Maykit, can be found at Twistee. You'll have to decide which of her children to help first, but either option will give you the hammer. The person in the capsule will offer an Ocean Map so that you can find the islands where they are located. ▶︎ Billdit or Maykit? Who Should You Save First? |
| 3 |
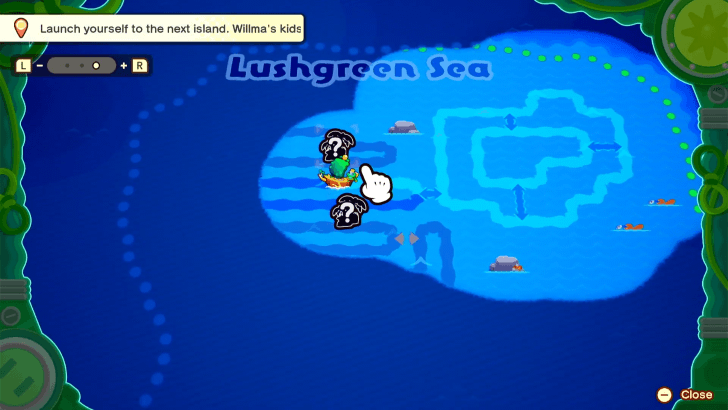 Use the Ocean Map to learn how to navigate between currents. This is also part of the core gameplay loop where you sail and look for the islands to relink. As the ship sails towards your selected currents, you can use the time to revisit previously linked islands. Take this time to revisit Rumbla Island and collect some Sprite Bulbs! |
| 4 |
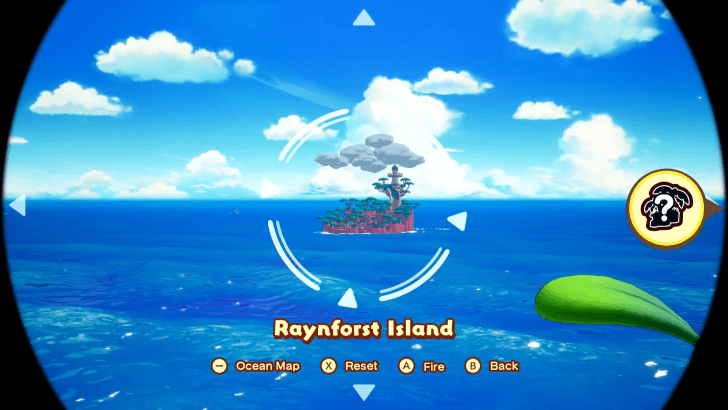 Once the currents have brought the ship within viewing distance of the islands, head to the Gold Cannon to launch yourself! We recommend heading to Raynforst Island first! This will later make Billdit's Workshop available for you to buy strong Gear from. |
| 5 |
 Upon arriving at Raynforst, head east past the Save Block and north to where some steps are. You'll find a stone cube that you can carry. Have Luigi pick it up. Once he does, have him come back down and continue east. |
| 6 |
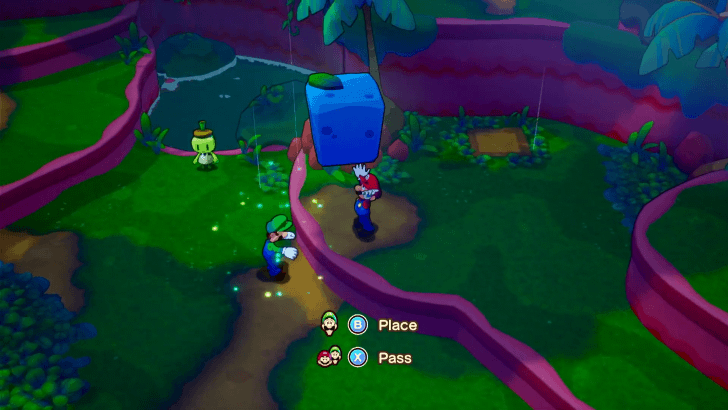 There will be a spot on a ledge just past the green NPC where you can place the block, however you'll discover that you're unable to jump while carrying an object. Have one brother be on top of the ledge, before passing the object with X. This is how you can carry objects to higher elevations. |
| 7 |
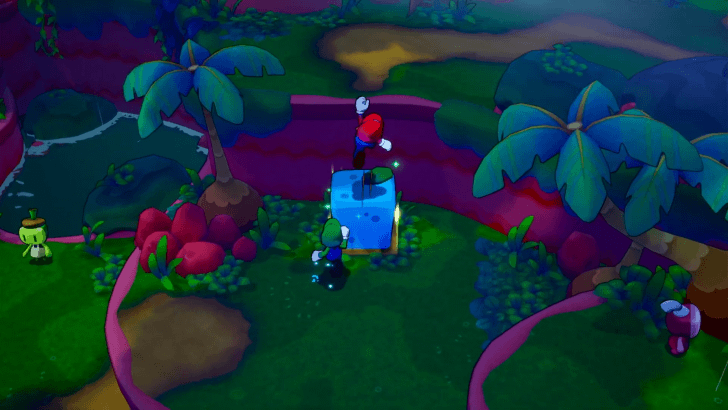 Place the stone cube on the dirt patch to create a platform you can jump on to get to the top of the ledge. |
| 8 |
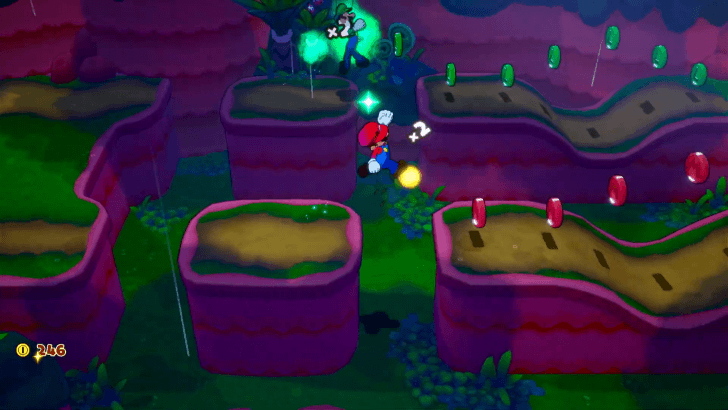 Head east and you'll find some red and green coins. Use Luigi Logic to have Luigi follow the trail of green coins, while you as Mario collect the red coins. Collecting the coins that match your color will give 2x as much! |
| 9 |
 Continuing east, you'll find a peddler who sells Items and Gear. Keep an eye out for these travelling merchants on islands that don't have settlements where shops can be found! There will also be a nearby patch of Turnip Plugs you can harvest for coin. |
| * |
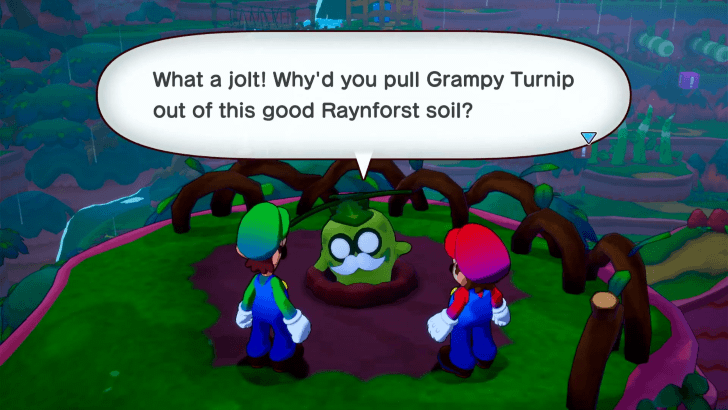 From the Peddler, you can take the path up a slope with a Turnip at the top. However, pulling it out will reveal that it is not a Turnip Plug, but in fact, a Grampy Turnip! These odd fellows can be found across different islands of Concordia and will have harmless nuggets of wisdom that they are happy to share. If you find all 18 of them among the different islands, you'll get different rewards! ▶︎ All 18 Grampy Turnip Locations |
| 10 |
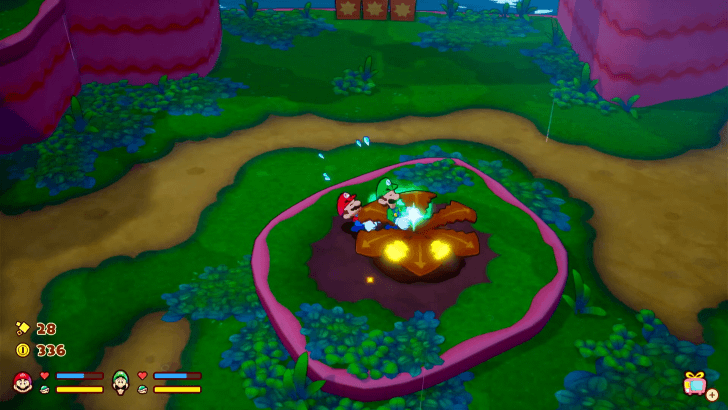 Back from the Peddler's location, head past the Turnip patch and continue north. There'll be a larger open area with a Golden Turnip for you to pull. This requires both Mario and Luigi to harvest, and when you do there will be red and green coins for you to collect! |
| 11 |
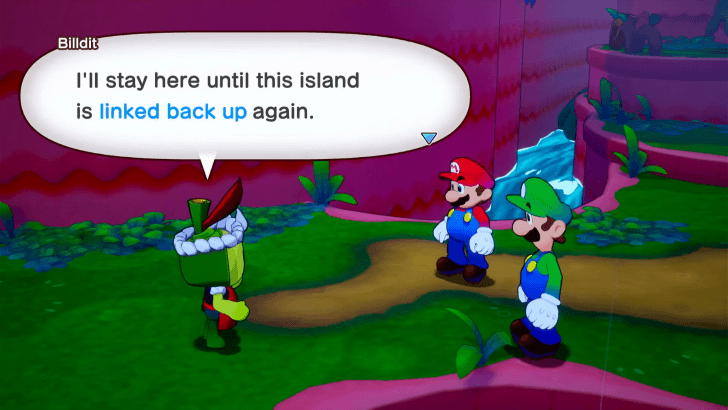 Continue west and you'll finally spot Billdit, a highly eager fellow in great contrast to this island's gloomy weather. He explains he's happy to make a hammer for you, but won't be able to unless the island is relinked. The lighthouse you'll need to relink the island is just up ahead, but there is currently a flower gate blocking the path. |
| 12 |
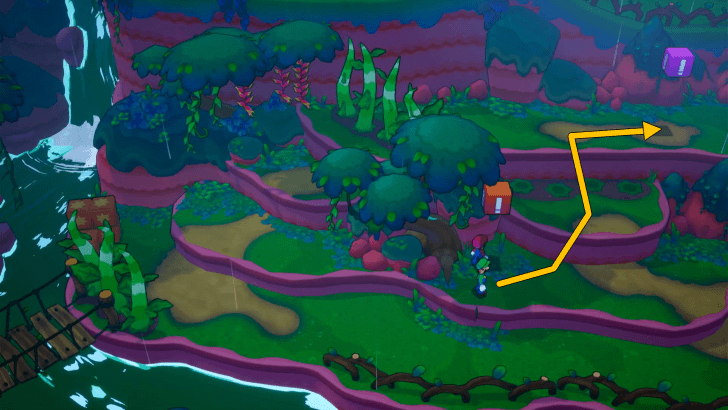 There are Exclamation Blocks nearby that control the growth of the roots and vines that block your way. Hit the Orange Exclamation Block to lower the roots on the nearby ledge, giving you close access to where the Purple Exclamation block is. |
| 13 |
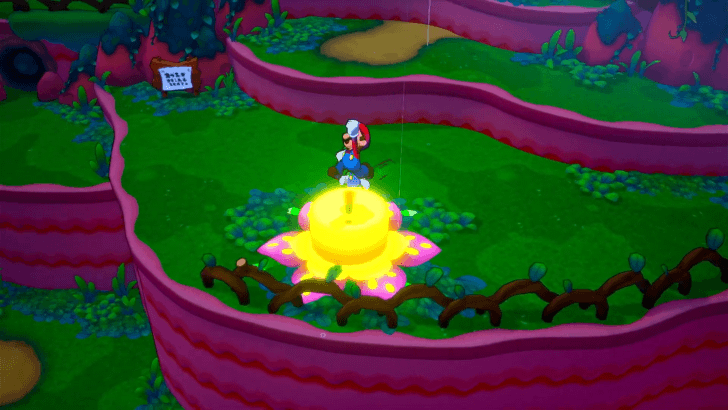 Hit the Purple Exclamation Block to retract the branches and open the path east. You'll see a bright yellow flower button. Have Mario and Luigi jump on it to activate a light on the flower gate. Also note that this is the first of the four lights that need to be lit. |
| 14 |
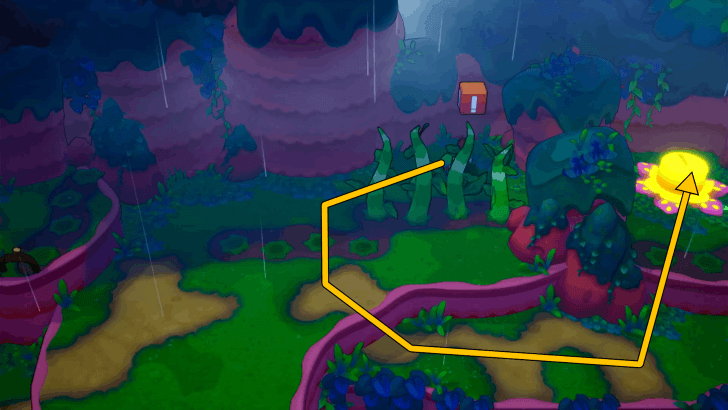 Hop up the ledges north and east to find the second flower light button. It's currently behind some overgrown roots, so hit the second Orange Exclamation Block nearby to gain access to it. |
| 15 |
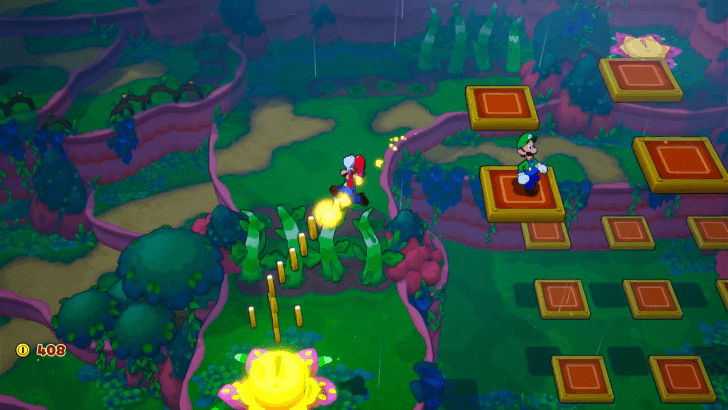 Just slightly south of the second flower light button, you'll find a floating green platform with an L on it. Command Luigi to jump on it with the L Button and a red platform with an M will appear. Control Mario to jump onto that platform. With every platform you jump on, more will appear. You'll have to correctly alternate and reach the assigned platforms to reach other sections. Seeing these platforms to their end will have you land on the third flower light button with a lot of coins earned along the way. |
| 16 |
 Circle back around to where the second Orange Exclamation Block is, and from there hop up the ledges west. You'll want to activate the Purple Exclamation Block to open the path that lets you drop down where the ledge bars are. |
| 17 |
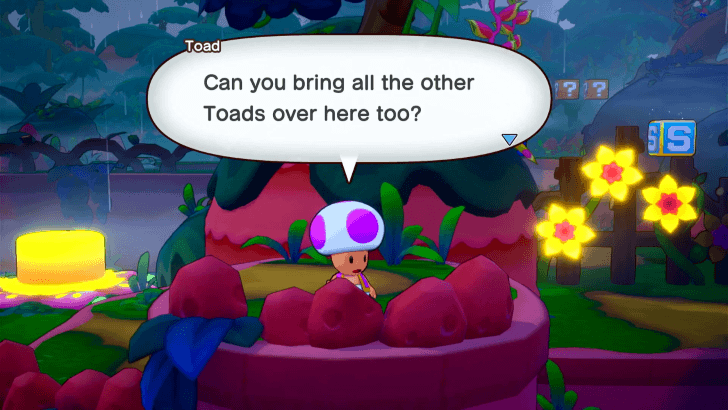 As you approach the bars, a Purple Toad will be found nearby who is happy to see you. This Toad will ask for your help to reunite with two other Toads in the area. |
| 18 |
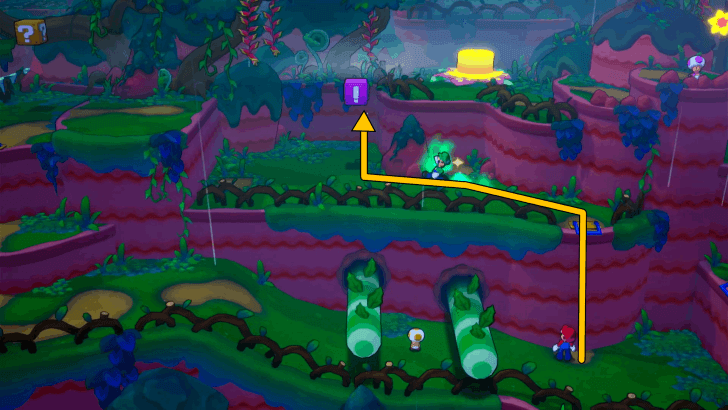 The first Toad to rescue is the Yellow one nearby. Use Luigi Logic to have Luigi reach the higher platform, where the Purple Exclamation Block is. Having him hit the block will free up the poor Yellow Toad. Speak with the Yellow Toad, then carry him, and toss him over to Luigi. |
| 19 |
 The second Toad to rescue is the Green one just past the bridge west of where you were. Speak with him then carry him back to Luigi. |
| 20 |
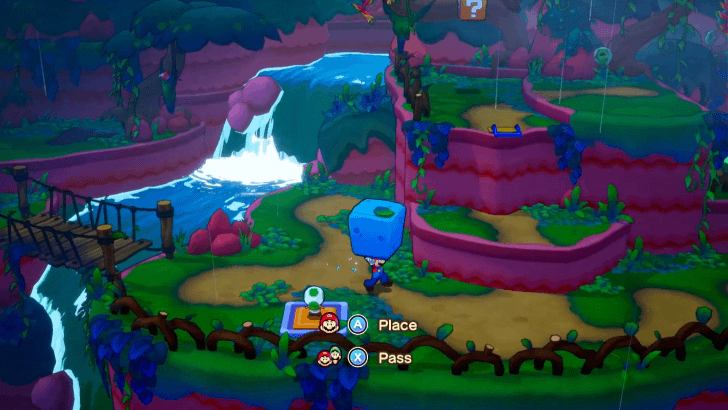 On the way back, place the Toad on the pressure plate to take out the stone cube from the fenced-off section. Put it to the side for now, then bring and toss the Green Toad to Luigi |
| 21 |
 Luigi will then ask for something that will help him up another section. Toss him the stone cube and toss back the Green Toad. |
| 22 |
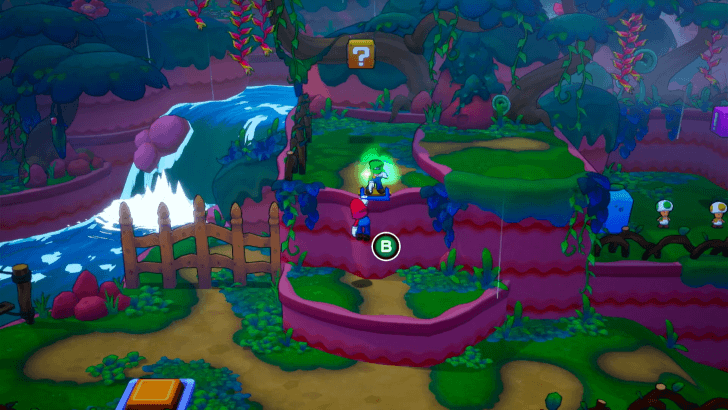 Luigi will then wait for you by the ledge bars to your left. Jump up to him and he'll lift you up. |
| 23 |
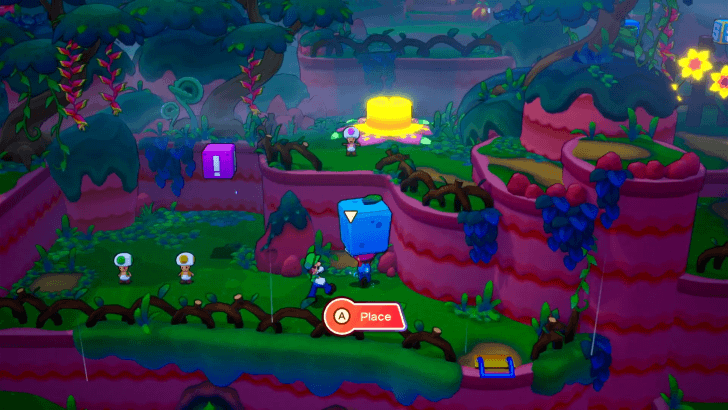 Finally, reunite the Toads by moving the stone cube near the ledge where the Purple Toad is. The Toads will rejoice and you'll have access to the 4th flower light button. Press the 4th flower light button and the gate to the lighthouse should now be opened up. |
| 24 |
With the gate down, you can now proceed forward. Billdit will arrive to give you some praise and reassure you that he will build a Hammer for you as soon as you relink the Island. So continue north, save along the way, and make your way to the lighthouse. |
| 25 |
 You'll again have to do some wall jumps to climb up the large-tree trunk, but once you reach the top, you can access the lighthouse's plug and relink it to Shipshape Island. |
| 26 |
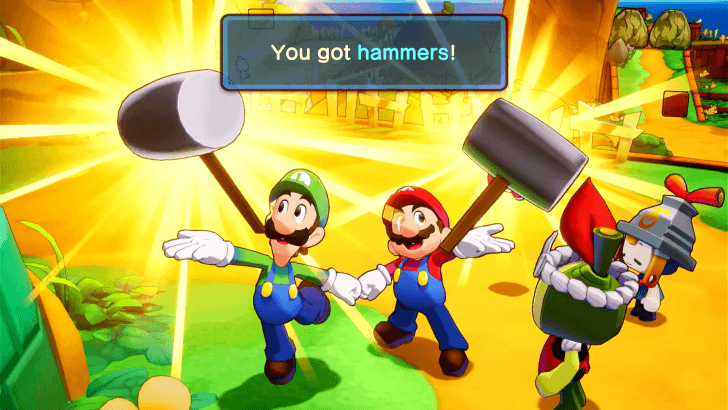 After a short cutscene, you'll be back on Shipshape with Billdit eager to build you your hammers! These hammers will now allow you to press buttons on walls, use hammers in combat, and smash open crates! And speaking of smashing things open, you can now free the person trapped in the purple capsule. Swing Mario's hammer with X three times to meet Arc, a skillful navigator of the seas! |
| 27 | Arc will ask to speak with you at the Shipshape Plaza so you can discuss how to find the Great Lighthouse Island, a crucial step in relinking all of Concordia. |
Raynforst Island Puzzles
How to Make the Flowers Bloom
Pull the Connectar Plug of the Island
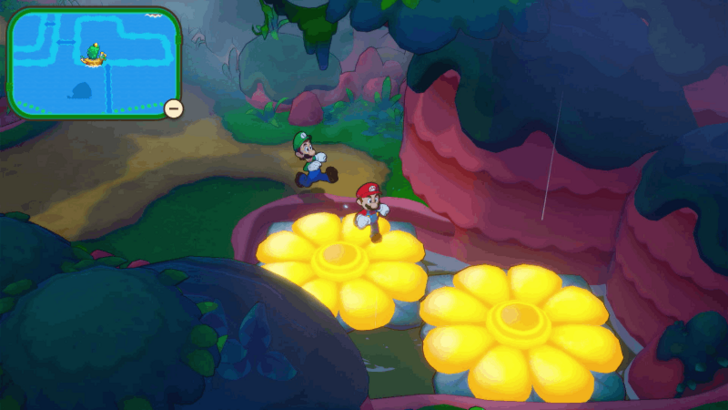
When you first visit the island, you may come across paths that are inaccessible.
To solve this, you need to pull the connectar plug of the island. This causes flowers to bloom and allow you to cross them to reach the inaccessible areas.
Enemies in Raynforst Island
All Enemies Found in Raynforst Island
| Enemy | Enemy Tips |
|---|---|
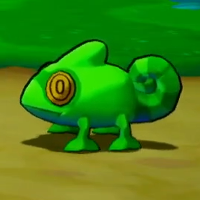 Invizilizard Invizilizard
|
Invizilizard can attack while invisible, listen to its footsteps for auditory cues so you'll know when to jump. |
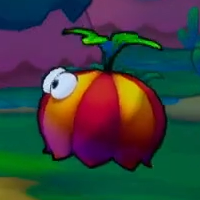 Parashoot Parashoot
|
Parashoot has two similar attacks that can throw off your jump timing. If it attacks quickly with a fake sweep, it will follow up with a forward spinning dash. When it hovers slowly above your head, it's preparing for a full sweep attack. |
Raynforst Island Shops
Item and Gear Shop
| Map Image | Overworld Image |
|---|---|
 |
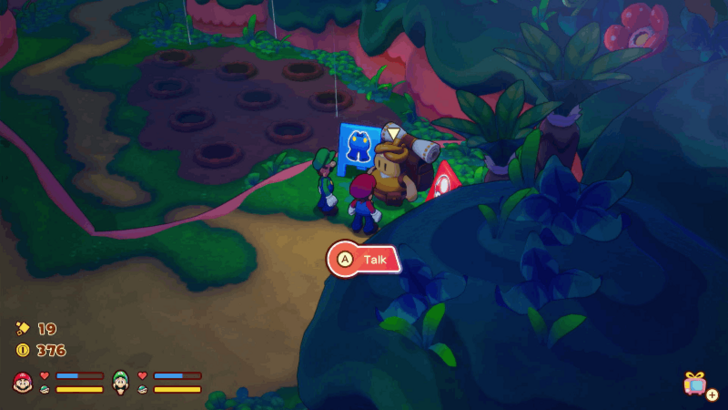 |
The item and gear shop is located at the lower-right side of Raynforst Island.
Items Sold
| Item | Price |
|---|---|
|
|
10 |
|
|
50 |
|
|
20 |
|
|
20 |
|
|
30 |
|
|
5 |
Gear Sold
| Gear | Price |
|---|---|
|
|
20 |
|
|
160 |
|
|
60 |
|
|
160 |
|
|
60 |
|
|
120 |
Mario and Luigi: Brothership Related Guides

List of All Islands and Islets
All Islands
| Lushgreen Sea Islands | |
|---|---|
| Great Lighthouse Island (Lushgreen Sea) | Rumbla Island |
| Twistee Island | Raynforst Island |
| Florall Island | |
| Color-Full Sea Islands | |
| Great Lighthouse Island (Color-Full Sea) | Desolatt Island |
| Merrygo Island | Lottacoins Island |
| Allsand Island | |
| Brrrning Sea Islands | |
| Great Lighthouse Island (Brrrning Sea) | Bulbfish Island |
| Heatfreeze Island | Skorcheen Island |
| Slippenglide Island | |
| Gulchrock Sea Islands | |
| Great Lighthouse Island (Gulchrock Sea) | Offandon Island |
| Wayaway Island | |
| Stormstar Sea Islands | |
| Conductor Island | Jellyfish Island |
| Fortress Zokket | Soli-Tree |
Author
Raynforst Island Walkthrough Guide
improvement survey
03/2026
improving Game8's site?

Your answers will help us to improve our website.
Note: Please be sure not to enter any kind of personal information into your response.

We hope you continue to make use of Game8.
Rankings
- We could not find the message board you were looking for.
Gaming News
Popular Games

Genshin Impact Walkthrough & Guides Wiki

Honkai: Star Rail Walkthrough & Guides Wiki

Umamusume: Pretty Derby Walkthrough & Guides Wiki

Pokemon Pokopia Walkthrough & Guides Wiki

Resident Evil Requiem (RE9) Walkthrough & Guides Wiki

Monster Hunter Wilds Walkthrough & Guides Wiki

Wuthering Waves Walkthrough & Guides Wiki

Arknights: Endfield Walkthrough & Guides Wiki

Pokemon FireRed and LeafGreen (FRLG) Walkthrough & Guides Wiki

Pokemon TCG Pocket (PTCGP) Strategies & Guides Wiki
Recommended Games

Diablo 4: Vessel of Hatred Walkthrough & Guides Wiki

Fire Emblem Heroes (FEH) Walkthrough & Guides Wiki

Yu-Gi-Oh! Master Duel Walkthrough & Guides Wiki

Super Smash Bros. Ultimate Walkthrough & Guides Wiki

Pokemon Brilliant Diamond and Shining Pearl (BDSP) Walkthrough & Guides Wiki

Elden Ring Shadow of the Erdtree Walkthrough & Guides Wiki

Monster Hunter World Walkthrough & Guides Wiki

The Legend of Zelda: Tears of the Kingdom Walkthrough & Guides Wiki

Persona 3 Reload Walkthrough & Guides Wiki

Cyberpunk 2077: Ultimate Edition Walkthrough & Guides Wiki
All rights reserved
© Nintendo. Games are property of their respective owners.
The copyrights of videos of games used in our content and other intellectual property rights belong to the provider of the game.
The contents we provide on this site were created personally by members of the Game8 editorial department.
We refuse the right to reuse or repost content taken without our permission such as data or images to other sites.





![Everwind Review [Early Access] | The Shaky First Step to A Very Long Journey](https://img.game8.co/4440226/ab079b1153298a042633dd1ef51e878e.png/thumb)

![Monster Hunter Stories 3 Review [First Impressions] | Simply Rejuvenating](https://img.game8.co/4438641/2a31b7702bd70e78ec8efd24661dacda.jpeg/thumb)


below to the right of grampy turnip is a nut invisible block