Rumbla Island Walkthrough Guide
★ Mario & Luigi: Brothership out now!
★ How to Unlock and Complete Every Challenge!
★ Pull off strong Bros. Attacks for maximum damage!
★ Best Gear | Best Battle Plugs | Rank-Up Bonuses
★ Power up with Best Battle Plug Combos.
★ Share your Hammer Rally high scores!
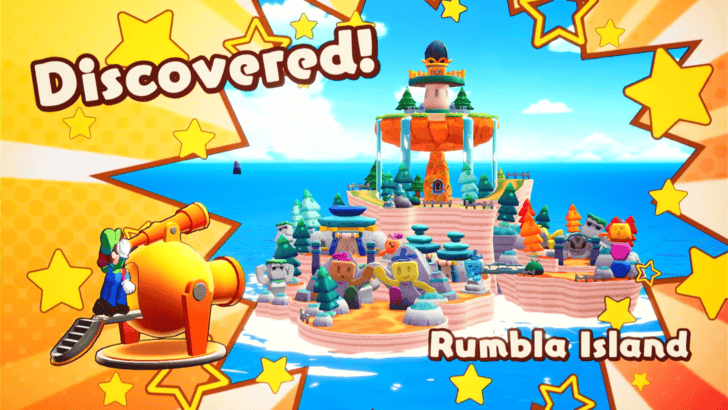
Rumbla Island is an Island located at Lushgreen Sea in Mario & Luigi: Brothership. See a map of Rumbla Island, walkthrough, its location in Concordia, and how to unlock it.
List of Contents
Rumbla Island Map and Location
Rumbla Island Map
| Icon | How to Use |
|---|---|
 | Show Names This button reveals the Name of every icon currently shown. |
 | Show Pins This button will toggle between showing and hiding all the pins that you have already marked as acquired. |
 | Fullscreen This button will change the map display to fill the screen. |
 | Search Mode Toggle This button will display a search bar which you can use to search for an individual pin by its name. |
 | Icon Mode Toggle In Search Mode, this button will toggle you back to Icon Mode, removing the search bar and displaying the icons again. |
 | All Pins This button is shown along with the Icons on the right when there are over 6 types of pins. Click it for a full selection of all available pin types. |
 | Counter Tracks the number of pins you have of a certain type. The pin type shown is set to the page and currently cannot be changed; however, all pin type counters can be viewed by clicking the checklist icon on the right side. |
| View All Counters This icon is found on the right side of the Counter. When a map has more than one pin type, click this icon to see Counters for all pin types. |
List of All Islands and Islets
Rumbla Island Location
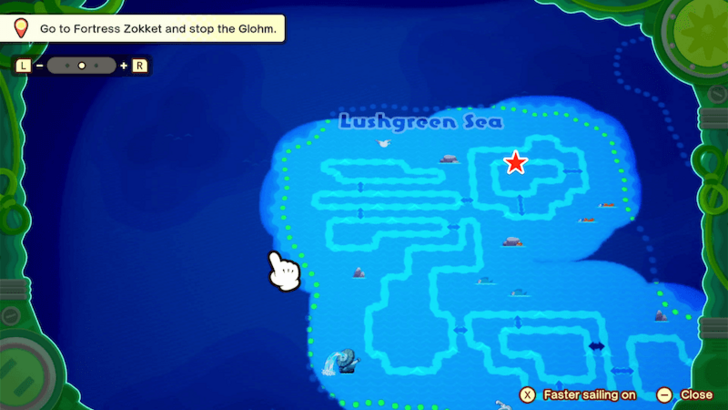
Rumbla Island can be found near the small current at the top-right corner of Lushgreen Sea.
Rumbla Island Grampy Turnip Location
No Grampy Turnip In This Location
| There is no Grampy Turnip in Rumbla Island. |
All 18 Grampy Turnip Locations
Rumbla Island Item Locations
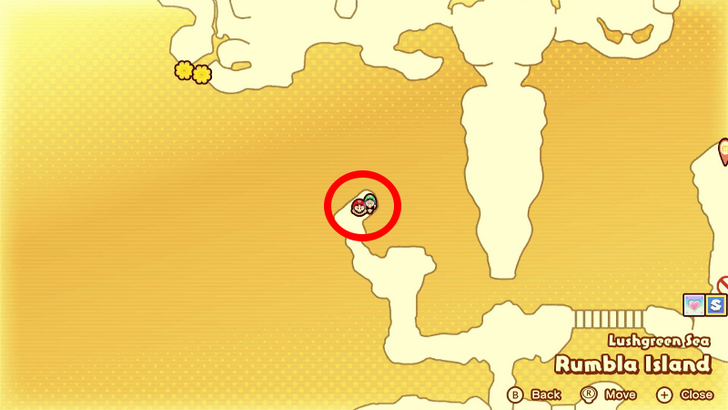
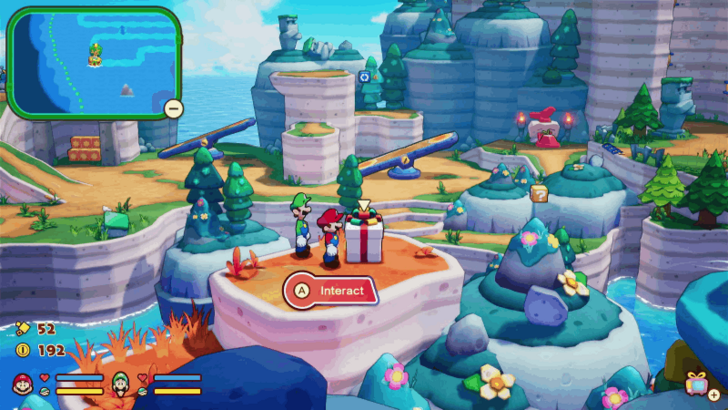
So-So Boots
| Map Image | Overworld Image |
|---|---|
 |
|
Start from the second save point at the middlemost area of the island. Head north until you reach two paths on the west and east. Head west and climb up the ledges.
Once you reach the top of the ledge, use the Hammer to destroy the boulders and open the gift box to get the So-So Boots.
Rumbla Island Walkthrough
Rumbla Island First Visit
| # | Step by Step Objectives |
|---|---|
| 1 |
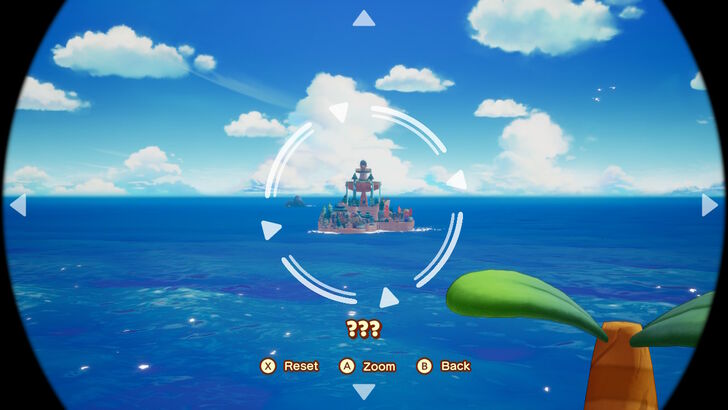 The core gameplay loop of Mario and Luigi: Brothership involves discovering new islands, exploring them to find their Lighthouse, and reconnecting it to Shipshape Island. Upon landing on Rumbla Island, you'll notice their lighthouse in the distance, precariously placed on a dish-shaped rock. After your conversation with the Rumbla local, make your way north to head to the lighthouse. ▶︎ How to Find Islands |
| * |
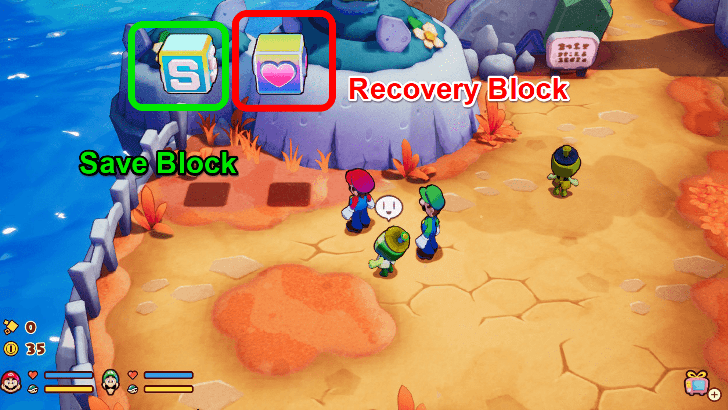 Take note of the Recovery Block on this shore. You may be at full health at the moment, but it will be important to return to these Recovery Blocks to restore HP and BP if you're having trouble with enemies. |
| 2 |
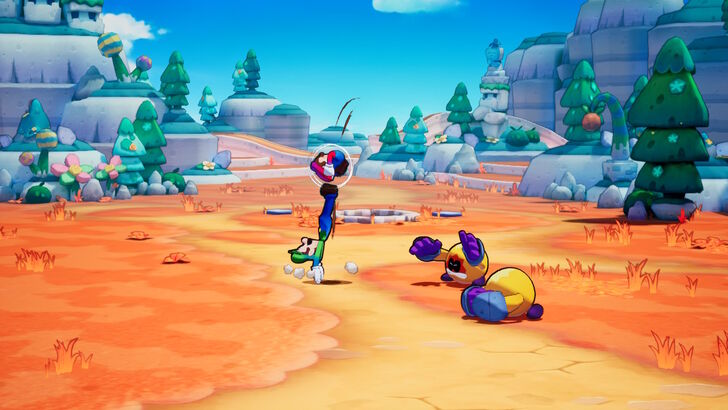 As you head north, you'll find some Guardarms bothering the locals. You'll engage in a battle and learn about Attack Combos and how to attack with Luigi. By pressing the action buttons for Mario and Luigi in sequence, you can execute an Attack Combo that will deal more damage than if you were to attack normally. Mastering Attack Combos is essential to excel in combat and to maximize your damage output. ▶︎ How to Do Attack Combos |
| * |
★ Battle Tip! Dealing with Guardarms On the offensive, Jump attacks will be servicable. Land your attack combos for maximum damage. On the defensive, you can dodge by jumping over them as they charge towards you. But if timed at the right moment, you can jump on their head to deal a counter blow! If you jump a bit too early, you'll land on their arms which will block any damage, and if you don't jump soon enough you'll probably get hit. |
| 3 |
After defeating the Guardarms, the locals will thank you by gifting you with Mushrooms. These are one of the many consumable items that you can use in and out of battle. Mushrooms are used to recover a small amount of HP to either Mario or Luigi. ▶︎ List of Consumables |
| * |
 While you are bound to meet multiple NPCs, those with notable interactions will have a speech bubble above their heads. You'll find one nearby who frets over a withered Connectar Flower. These Connectar Flowers will remain withered until the island's lighthouse is reconnected with Shipshape Island. Return to them afterwards to gain access to new areas. |
| 4 |
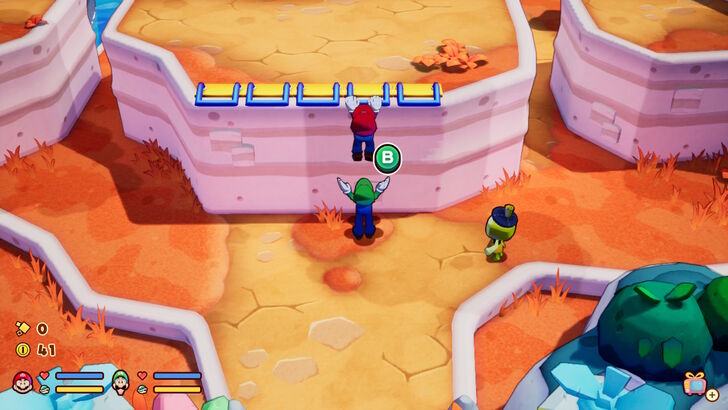 Continue north, to find some ledges that you'll need Luigi's help to climb. Once on the ledge, head west. |
| 5 |
You'll come across a lone Seedle who has not been alerted to your presence just yet. Jump on top of its head to learn about First Strikes which allow you to gain the upper hand before an encounter even starts.
▶︎ How to Do A First Strike |
| 6 |
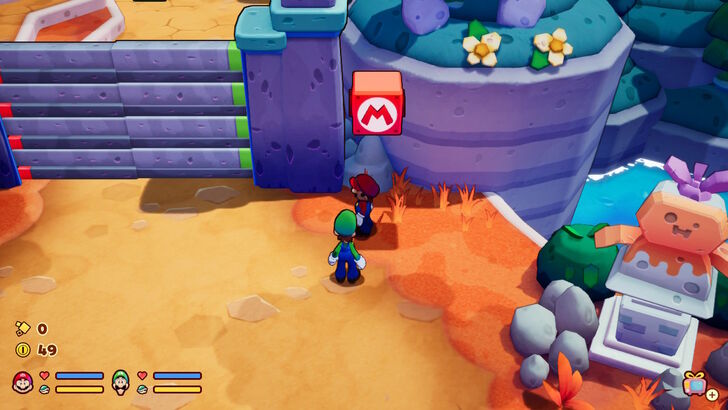 Continue along the path, jumping across ledges, picking up coins, hitting Question Blocks for small rewards, and getting used to the combat system by fighting the Seedles along your way until you come across a gate with a large red M block next to it. |
| 7 | Jump to hit the M Block with Mario, but this only opens up half of the bars of the gate. You'll find the L Block on the other side of the gate, but you'll need both to have free passage. What a pickle! |
| 8 |
The game will introduce the mechanic of Luigi Logic - short moments of brilliance from Luigi where he comes up with unique solutions. Press L to have Luigi leap between the gate's bars, and repeatedly press B as he squeezes through! Once he gets to the other side, he'll open up the rest of the gate to have both brothers reunite. |
| * |
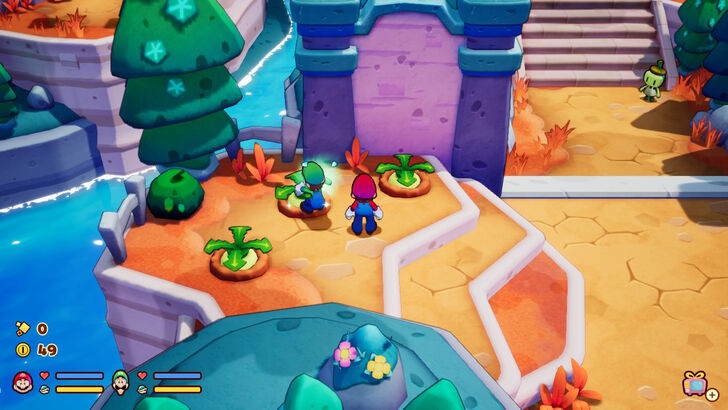 Commanding Luigi with L also frequently becomes an option, denoted by a green glow around his character. He'll eagerly help you collect Plug Radishes for coins, smash blocks, or chase after Spritebulbs. You can try this out with the nearby patch of Plug Radishes! |
| 9 |
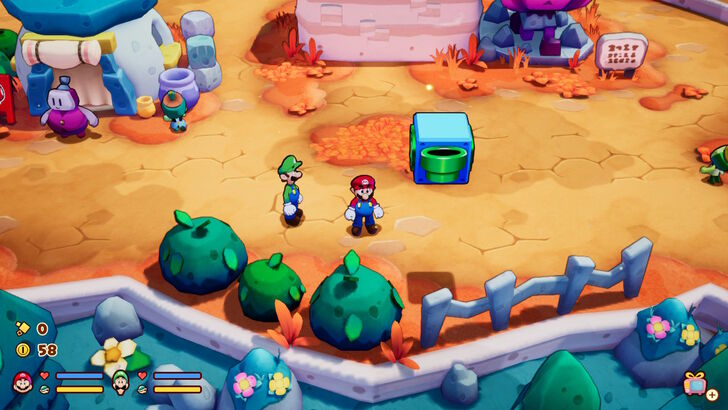 Continue north to arrive at Rumbla Island's Plaza. Here you'll find Item Shops to buy consumables, a Gear Shop with equipment for you to wear, and a Green Warp Pipe Block you can activate to create a shortcut back to the shore. We don't recommend buying anything for now, so that you can save up for something nicer, and if you're working on the Do It Yourself Challenge, you won't need any wear anyway. |
| 10 | Recover and Save at the nearby blocks before continuing even further north into the island. You'll again encounter more Guardarms terrorizing more locals. Take them out to get to know Willma. |
| 11 |
Willma is experiencing some back pain and would like some help getting home. Learn how to pick up objects to carry them around to their destinations. Carry Willma and her tool box back to her home just west of the area. |
| 12 |
Once you've gently set Willma down and placed her tool box on the nearby table, she'll open the path leading to the island's lighthouse. She'll also give you the Billdit Gloves and the Maykit Bangle. These gloves and accessories can be worn for additional stats and bonuses, in addition to your wear. If you are working towards the Do It Yourself Challenge, keep them unequipped for now. |
| 13 | Head towards the path that Willma has opened up for you. Ahead you'll find a trail of red and green coins. With Luigi's Logic, Mario and Luigi can collect the coins at the same time which you can treat as a fun little race. |
| 14 | At the end, there will also be a P Button that you can press that will spawn musical notes in a path. Collecting these notes in quick succession, without letting them despawn, will reward you with an item! In this case, you can receive Dirt-Cheap Wear. |
| 15 |
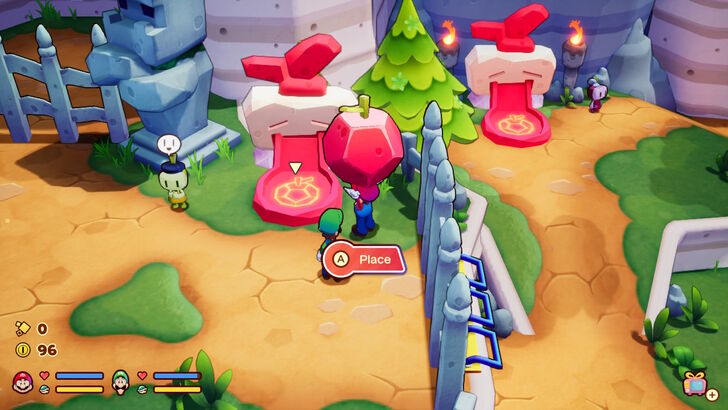 Jump up the next ledge, and you'll find the lighthouse looming before you. However, there's still yet another fence in your way. You'll have to carry the Apple Sculptures and place them onto their pedestals to create the path forward. The first of these Apple Sculptures will be just to the left of the fence, with its pedestal just to the right. You can even ask Luigi to carry and place it for you! Doing so will open the fence to the east section. |
| 16 |
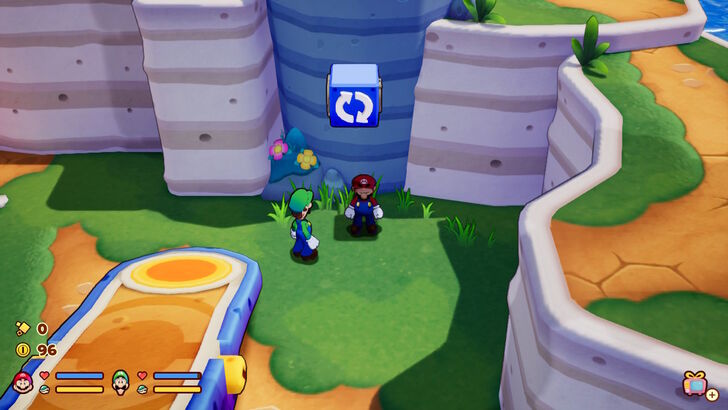 In the east section, you'll find a nearby blue block with two, white, spinning arrows on it, as well as a see-saw in the middle of the section. Hitting the Spin Block will cause the see-saw to rotate from a north-south orientation to a west-east orientation. This will inspire Luigi's Logic that allows you to command him to stay on one end of the see-saw, to keep it tipped at an angle. |
| 17 |
 With the see-saw in the west-east orientation, command Luigi to stand on the left side. This will let you run up and jump to the cliff to the east where this section's Apple Sculpture can be found. |
| 18 |
 Place the Apple Sculpture on the nearby pedestal to have some footholds appear on the right wall leading to the lighthouse. |
| * |
 This will launch Luigi onto the opposite ledge where he can grab a Nut from the nearby Question Block. |
| 19 |
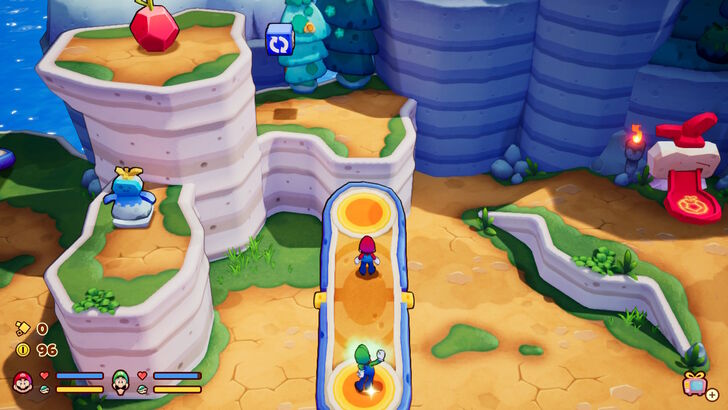 Once you're done with the section east of the lighthouse, head for the west section. You'll come across another see-saw in the north-south orientation. Have Luigi stand on the south end and Mario run up to the Spin Block. Jump to activate the Spin Block and rotate the see-saw into the east-west orientation. |
| 20 |
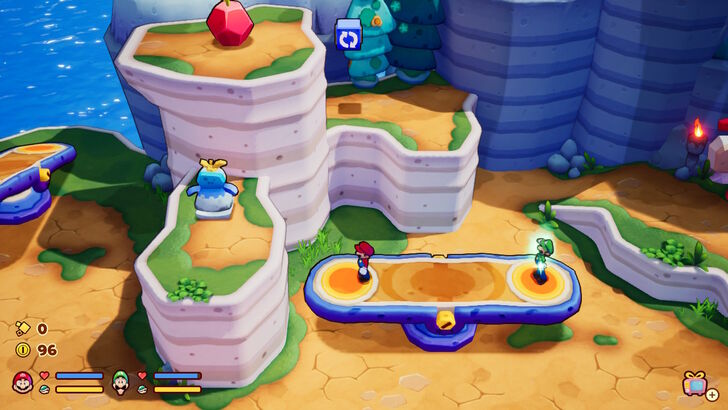 With this see-saw in the east-west orientation, have Luigi stand on the east end of the see saw. This will create a path for Mario to run up, jump to the left ledge, and carry the blue statue. |
| 21 | Have both brothers continue west, with Mario carrying the statue. You'll come across a second see-saw that is initially in the north-south orientation. Have Luigi stand on the north end of this see-saw. |
| 22 |
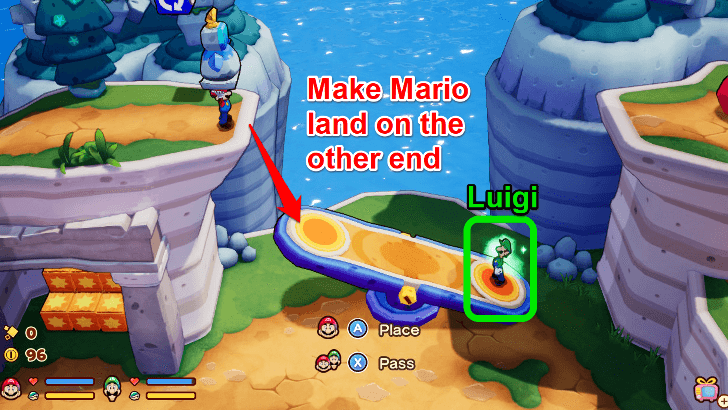 As Mario, carry the statue up the ramp to the left and follow the path to the top. Activate the Spin Block at the top of this cliff, to rotate the see-saw into the east-west orientation. Luigi should be standing on the east part of the see-saw, with the raised part closer to where Mario is. |
| 23 |
Carry the weight and drop onto the see-saw below. This will launch Luigi into the air. After a comically long wait, Luigi will land on the high ledge to the right, and will carry the last Apple Sculpture you need. |
| 24 |
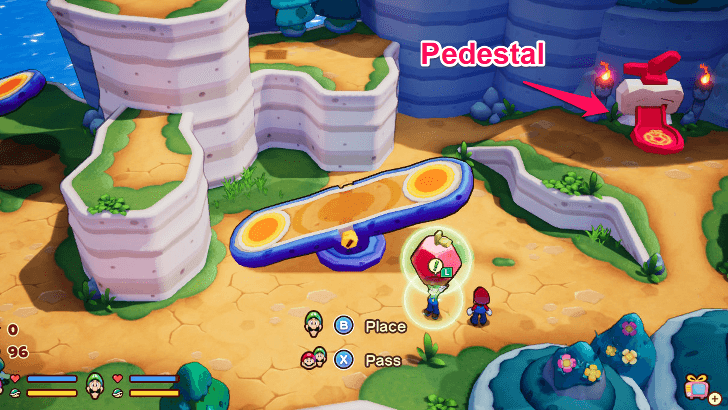 Return towards the lighthouse's fence with the Apple Sculpture in tow, and place it on the pedestal to have the remaining footholds appear on the left wall leading to the lighthouse. With both sets of footholds in place, the fence will open allowing you to continue onward. |
| 25 | As you approach the footholds, a group of four Guardarms will appear for battle. This is likely the biggest group you've had to contend with yet, so mind your timings and take them out. |
| 26 | With the enemies disposed of, make your ascent towards the lighthouse platform. Grab onto the lowest foothold, and press each brother's action button alternately to wall jump up. |
| 27 |
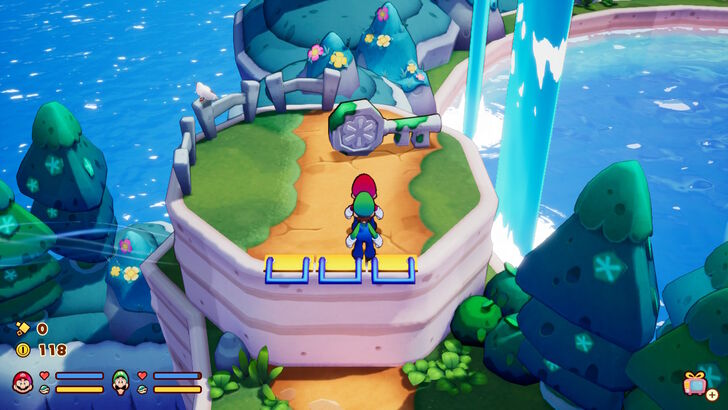 When you approach the lighthouse, you'll notice a keyhole. The key for it can be found on the ledges west. Climb up to pick it up for a cutscene to play. |
| 28 |
Once you regain control, climb up the steps and interact with the Lighthouse's Connectar Plug. This will trigger the island link that connects Rumbla Island back to Shipshape Island. Several cutscenes will play and you'll find yourself back on Shipshape Island. |
| * |
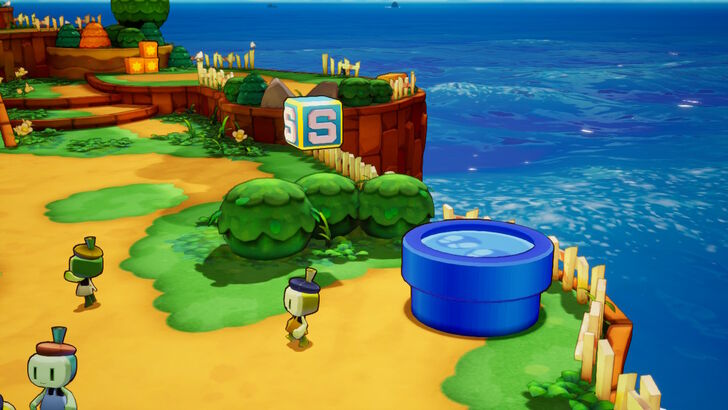 A pipe has appeared in Shipshape's Plaza. For every island you link to, you unlock a fast travel point to it that you can access from Shipshape Island. This will make it easier for you to return to islands you've visited before in case you want to explore newly opened up areas. ▶︎ Fast Travel Guide |
| 29 |
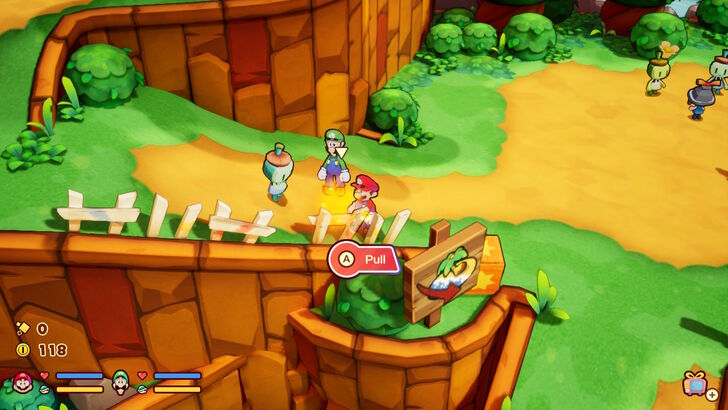 Head towards it, but not before noticing the Sprite Bulbs on the slope leading to the plaza. Collect these Sprite Bulbs to earn Lumenade. We recommend finding Sprite Bulbs and collecting Lumenade as you explore. These will later be used for creating Battle Plugs, helpful items for combat in the mid-to-late stages of the game. |
Returning to Rumbla Island
| # | Step by Step Objectives |
|---|---|
| 1 |
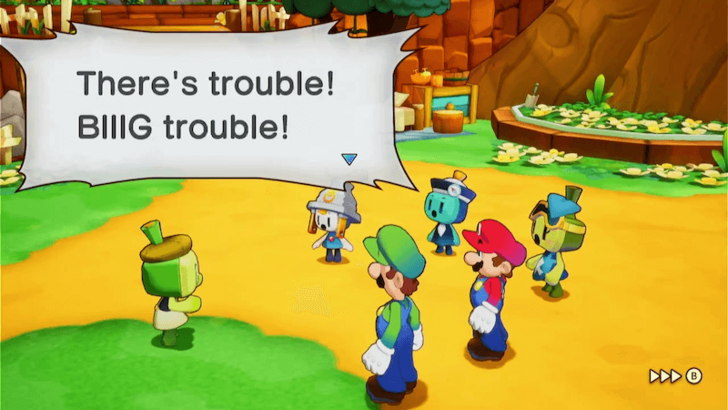 After finding both Billdit and Maykit, head to the center of Shipshape Island to speak with Connie and friends. During the conversation, you'll be alerted that the residents of Rumbla Island are in danger and need your help. |
| 2 |
 Before returning to Rumbla Island, make sure to stock up on consumables and equip your best gear, as this next section features tough enemy encounters and your first boss battle. Once you're ready, use the Blue Pipe to the south to travel to Rumbla Island. |
| 3 |
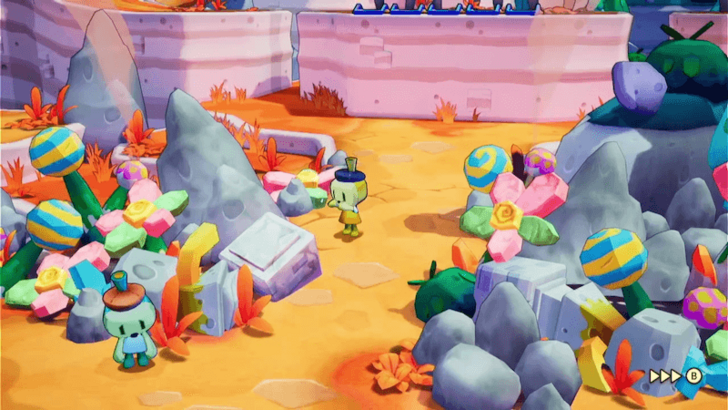 Upon arriving at Rumbla Island, a cutscene will show parts of the island in ruins following an attack. You’ll then be ambushed by Guardarms, initiating a battle. |
| 4 |
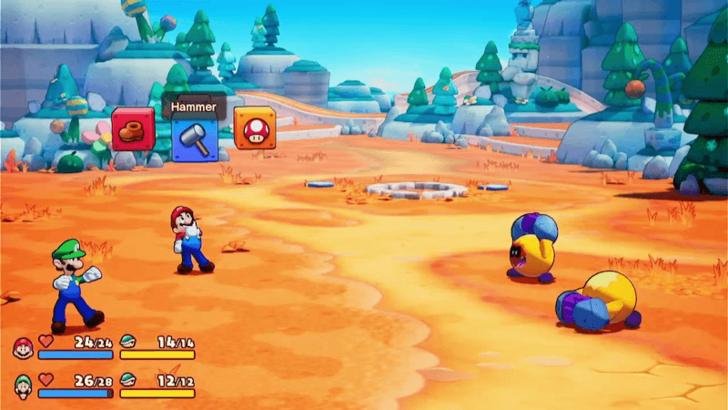 If a Guardarm's hands are in front of them, use Jump attacks. If their hands are shielding their head, go for Hammer attacks. During the Guardarm's turns, time your jump and Hammer swings carefully to counter their attacks. ▶ Guardarm Dodge and Counter Strategies |
| 5 |
 After defeating the Guardarms, use the Green Pipe northeast of the starting point to fast-travel to the Island Plaza. |
| 6 |
 At the Island Plaza, you’ll have another chance to buy consumables and upgrade your gear. Take time to prepare before continuing further! |
| 7 |
 From the Island, head north and turn right to find a wall with Red and Green buttons. Press L to have have Luigi smash the Green button, then press X to have Mario smash the Red button. This will lower the bridge, granting access to the eastern part of the island. |
| 8 |
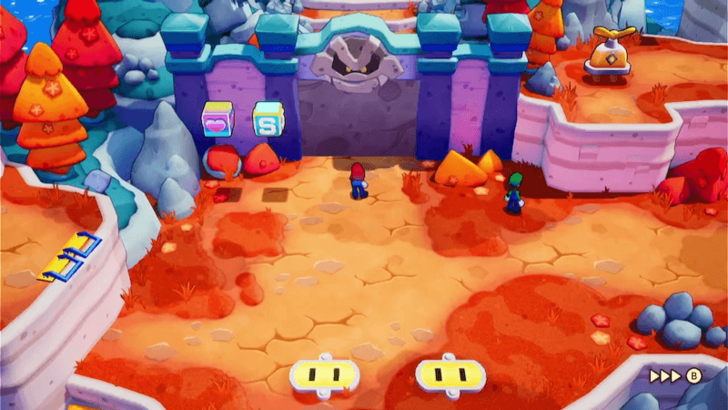 Proceed east to find a Boss Door that needs two Door Plugs to open. Be prepared for battles during your search, as enemies will be scattered throughout the area. |
| 9 |
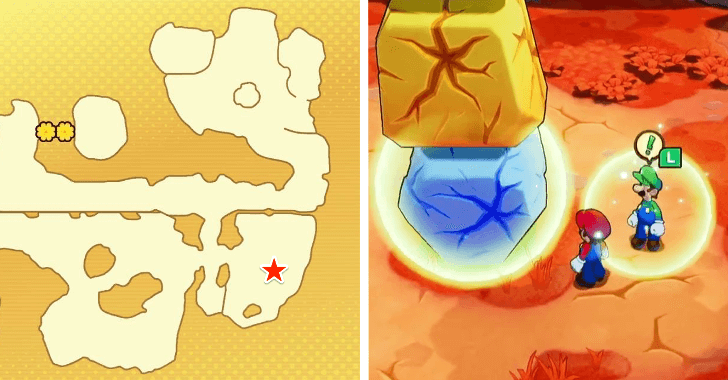 To find the Door Plugs, head east until you come across three colored rocks stacked on top of each other. Use your Hammer to break the rocks and pick up the Blue Boulder. |
| 10 |
 Place it on the designated spot in southwest part of the area to create a path to the high ground. |
| 11 |
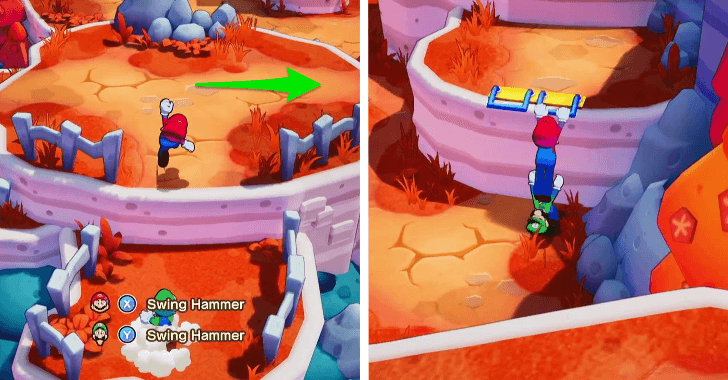 Once you’re on the high ground, head north and then turn right. Climb the blue-yellow ledge on the right by pressing A, then use B to have Luigi catapult both of you higher. |
| 12 |
Once you’re up, have Luigi jump onto the green L platform by pressing L. When the red M platform appears, have Mario jump onto it to create a new platform for Luigi. Continue alternating jumps in this manner until you reach another stack of colored rocks. |
| 13 |
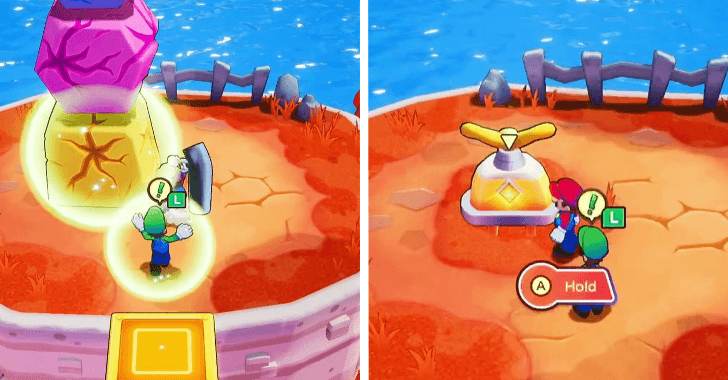 Break the rocks with your Hammer to obtain the Door Plug. Have Luigi pick it up by pressing L, and go back to the cliffs you came from. |
| 14 |
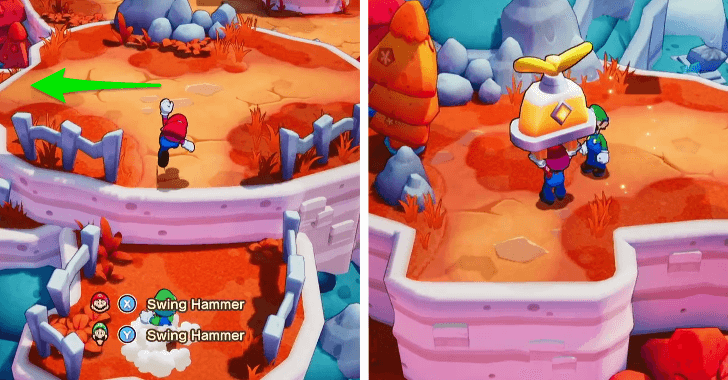 Back at the intersection on the high ground, head left. Break any rocks blocking your path until you reach the Door Plug. Pick it up, jump back down, and place both Door Plugs into their slots in front of the Boss Door to unlock it. |
| 15 |
 Before entering the Boss Area, jump onto the Recovery Block near the doorway to fully heal and prepare for the boss fight! |
| 16 |
 Enter the Boss Area and battle Gorumbla. Similar to Guardarms, if Gorumbla's hands are in front of them, use Jump attacks. If their hands are shielding their head, switch to Hammer attacks. Time your jump and Hammer swings carefully to counter Gorumbla's attacks. Read our guide below to learn how to beat Gorumbla efficiently. ▶ How to Beat Gorumbla |
| 17 |
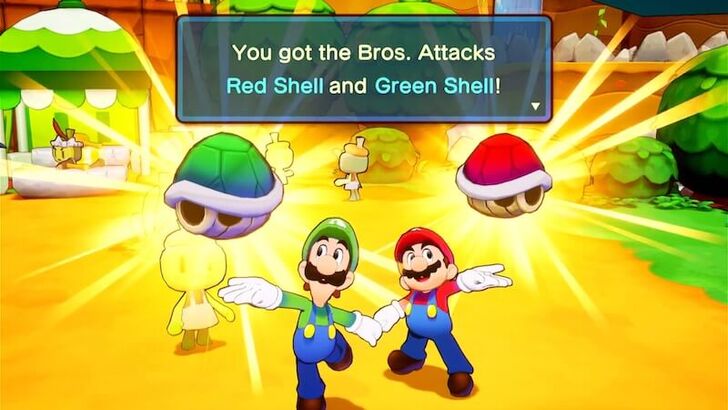 After defeating Gorumbla, a lenghty cutscene will play. Return to Shipshape Island after to receive your first Bros. Attacks: the Red Shell and Green Shell. Bros. Attacks allow Mario and Luigi to team up to perform powerful special moves. ▶ List of All Bros. Attacks |
Rumbla Island Puzzles
How to Activate Color Coded Switches
Hit the Red Button with a Hammer
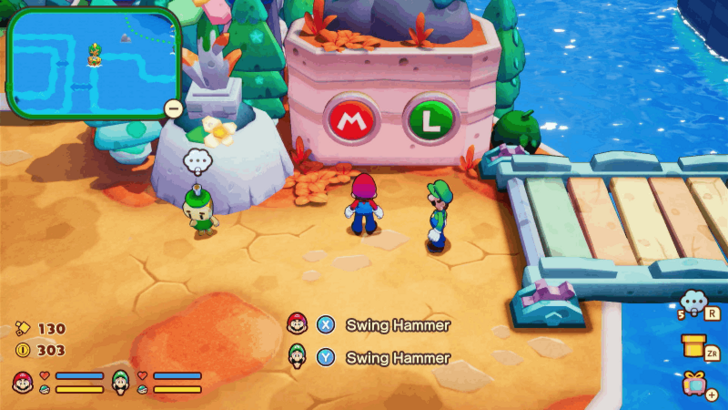
When you first visit Rumbla Island you will come across large red or green buttons with Mario and Luigi's initial letters on it.
Solving this puzzle requires you to obtain the hammer from Billdit or Maykit during the main story. When you visit the island for the second time, use Mario's hammer to hit the red button and have Luigi use the hammer to hit the green button.
How to Solve the Floor Grate Puzzle
Requires UFO Vacuum Bros. Move Upgrade
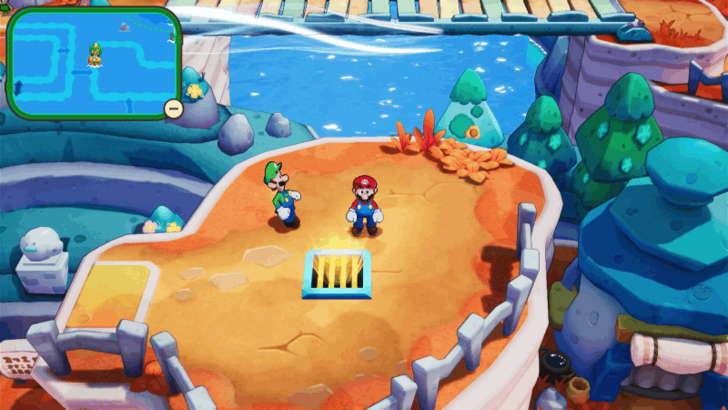
Located at the top-right corner of Rumbla Island's plaza is a blue and yellow floor grate. You can reach this area using the UFO Spin Bros. Move but solving the floor grate puzzle requires its upgrade, the UFO Vacuum.
How to Solve the Plug Puzzle
Place the Plugs on the Sockets
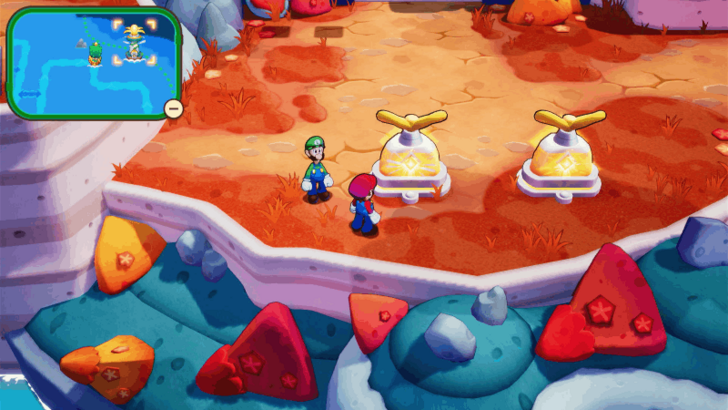
When you revisit Rumbla Island, you will need to find two plugs to open the gate that leads to the boss. You will need to find and carry the plugs and return to the location of the sockets. Place the plugs on the sockets to open the gate.
Bosses in Rumbla Island
Gorumbla
| Enemy | Details |
|---|---|
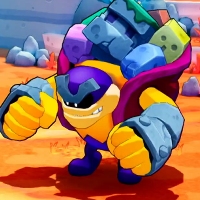 Gorumbla Gorumbla
|
First Encounter Level and Location: ・Level 7 ・Rumbla Island Best Option to Attack With: Depends ; If Gorumbla's hands are in front of him, use Jump attacks. If Gorumbla's hands are protecting his head, use Hammer attacks. |
Gorumbla is the first boss that you will encounter once you completed the socket puzzle in Rumbla Island.
Glohm Gorumbla
| Enemy | Details |
|---|---|
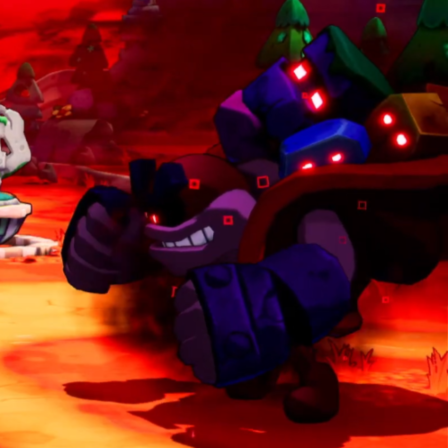 Glohm Gorumbla Glohm Gorumbla
|
First Encounter Level and Location: ・Level 41 ・Rumbla Island Best Option to Attack With: Depends ; Use Jump attacks if Glohm Gorumbla is blocking his face with his hands and use Hammer attacks if he's blocking his head instead. |
Glohm Gorumbla is a boss encountered when you revisit Rumbla Island while collecting Bonds for the Bonding Can near the end of the game.
Enemies in Rumbla Island
All Enemies Found in Rumbla Island
| Enemy | Enemy Tips |
|---|---|
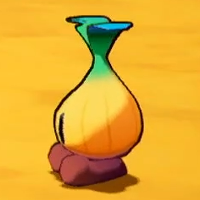 Seedle Seedle
|
Seedle has two attacks that are both easy to dodge and counter. |
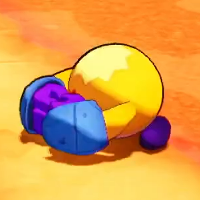 Guardarm Guardarm
|
If Guardarm's hands are in front of him, use Jump attacks. If Guardarm's hands are protecting his head, use Hammer attacks. |
 Glohm Seedle Glohm Seedle
|
The Glohmed version explodes upon defeat. Jump to avoid the shockwaves that follow especially if multiple Glohm Seedles are defeated in the same turn. |
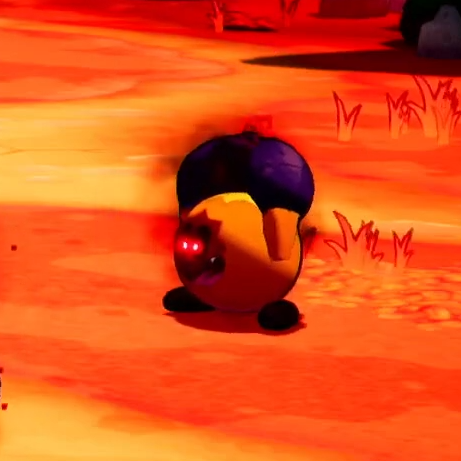 Glohm Guardarm Glohm Guardarm
|
Like in the non-Glohmed version, use Jump attacks if its hands are blocking its face and Hammer attacks if they're blocking its head. |
Rumbla Island Shops
Item Shop
| Map Image | Overworld Image |
|---|---|
 |
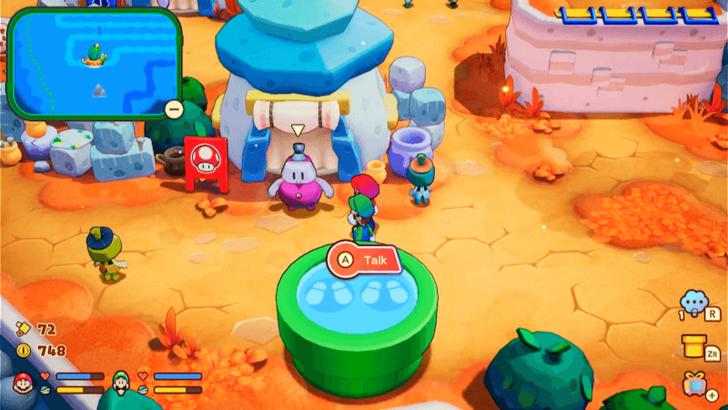 |
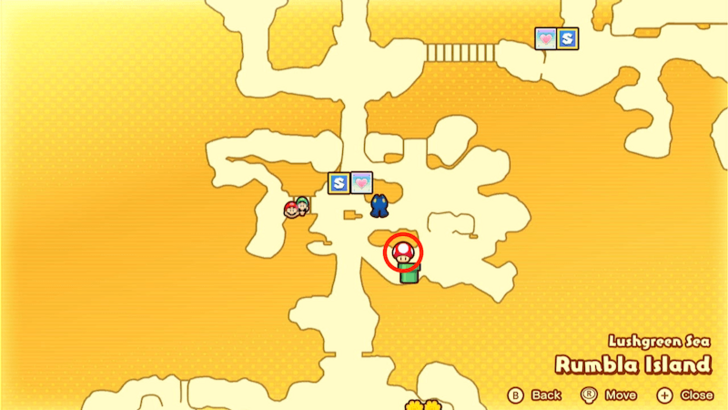
The item shop is located at the plaza, center of Rumbla Island.
Items Sold
| Item | Price |
|---|---|
|
|
10 |
|
|
50 |
|
|
20 |
|
|
20 |
|
|
30 |
|
|
5 |
Gear Shop
| Map Image | Overworld Image |
|---|---|
 |
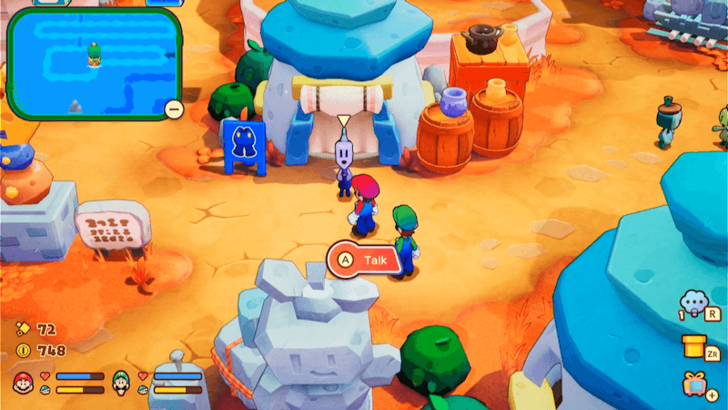 |
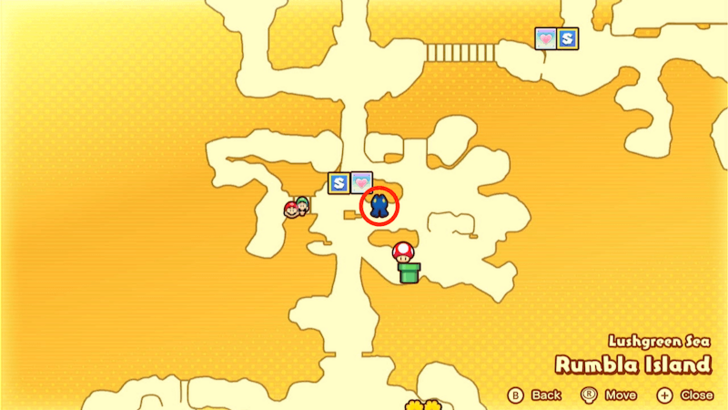
The gear shop is located at the plaza, center of Rumbla Island.
Gear Sold
| Gear | Price |
|---|---|
|
|
20 |
|
|
20 |
|
|
160 |
|
|
1,200 |
|
|
240 |
|
|
500 |
|
|
20 |
|
|
60 |
|
|
160 |
|
|
20 |
|
|
60 |
|
|
120 |
Mario and Luigi: Brothership Related Guides

List of All Islands and Islets
All Islands
| Lushgreen Sea Islands | |
|---|---|
| Great Lighthouse Island (Lushgreen Sea) | Rumbla Island |
| Twistee Island | Raynforst Island |
| Florall Island | |
| Color-Full Sea Islands | |
| Great Lighthouse Island (Color-Full Sea) | Desolatt Island |
| Merrygo Island | Lottacoins Island |
| Allsand Island | |
| Brrrning Sea Islands | |
| Great Lighthouse Island (Brrrning Sea) | Bulbfish Island |
| Heatfreeze Island | Skorcheen Island |
| Slippenglide Island | |
| Gulchrock Sea Islands | |
| Great Lighthouse Island (Gulchrock Sea) | Offandon Island |
| Wayaway Island | |
| Stormstar Sea Islands | |
| Conductor Island | Jellyfish Island |
| Fortress Zokket | Soli-Tree |
Comment
There's a hidden block in the alcove to the right of the area with the block with the item in it. ... Sadly don't remember what was in it.
Author
Rumbla Island Walkthrough Guide
improvement survey
03/2026
improving Game8's site?

Your answers will help us to improve our website.
Note: Please be sure not to enter any kind of personal information into your response.

We hope you continue to make use of Game8.
Rankings
- We could not find the message board you were looking for.
Gaming News
Popular Games

Genshin Impact Walkthrough & Guides Wiki

Honkai: Star Rail Walkthrough & Guides Wiki

Umamusume: Pretty Derby Walkthrough & Guides Wiki

Pokemon Pokopia Walkthrough & Guides Wiki

Resident Evil Requiem (RE9) Walkthrough & Guides Wiki

Monster Hunter Wilds Walkthrough & Guides Wiki

Wuthering Waves Walkthrough & Guides Wiki

Arknights: Endfield Walkthrough & Guides Wiki

Pokemon FireRed and LeafGreen (FRLG) Walkthrough & Guides Wiki

Pokemon TCG Pocket (PTCGP) Strategies & Guides Wiki
Recommended Games

Diablo 4: Vessel of Hatred Walkthrough & Guides Wiki

Fire Emblem Heroes (FEH) Walkthrough & Guides Wiki

Yu-Gi-Oh! Master Duel Walkthrough & Guides Wiki

Super Smash Bros. Ultimate Walkthrough & Guides Wiki

Pokemon Brilliant Diamond and Shining Pearl (BDSP) Walkthrough & Guides Wiki

Elden Ring Shadow of the Erdtree Walkthrough & Guides Wiki

Monster Hunter World Walkthrough & Guides Wiki

The Legend of Zelda: Tears of the Kingdom Walkthrough & Guides Wiki

Persona 3 Reload Walkthrough & Guides Wiki

Cyberpunk 2077: Ultimate Edition Walkthrough & Guides Wiki
All rights reserved
© Nintendo. Games are property of their respective owners.
The copyrights of videos of games used in our content and other intellectual property rights belong to the provider of the game.
The contents we provide on this site were created personally by members of the Game8 editorial department.
We refuse the right to reuse or repost content taken without our permission such as data or images to other sites.




![Everwind Review [Early Access] | The Shaky First Step to A Very Long Journey](https://img.game8.co/4440226/ab079b1153298a042633dd1ef51e878e.png/thumb)

![Monster Hunter Stories 3 Review [First Impressions] | Simply Rejuvenating](https://img.game8.co/4438641/2a31b7702bd70e78ec8efd24661dacda.jpeg/thumb)


Apologies, thought I was on the twistee island post section.