Fortress Zokket Walkthrough Guide
★ Mario & Luigi: Brothership out now!
★ How to Unlock and Complete Every Challenge!
★ Pull off strong Bros. Attacks for maximum damage!
★ Best Gear | Best Battle Plugs | Rank-Up Bonuses
★ Power up with Best Battle Plug Combos.
★ Share your Hammer Rally high scores!
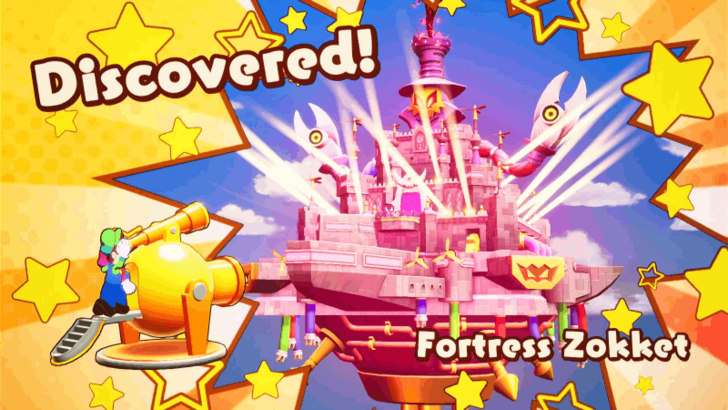
Fortress Zokket is an Island located at Stormstar Sea in Mario & Luigi: Brothership. See a map of Fortress Zokket, its location in Concordia, and how to unlock it.
List of Contents
Fortress Zokket Map and Location
Fortress Zokket Map
| Icon | How to Use |
|---|---|
 | Show Names This button reveals the Name of every icon currently shown. |
 | Show Pins This button will toggle between showing and hiding all the pins that you have already marked as acquired. |
 | Fullscreen This button will change the map display to fill the screen. |
 | Search Mode Toggle This button will display a search bar which you can use to search for an individual pin by its name. |
 | Icon Mode Toggle In Search Mode, this button will toggle you back to Icon Mode, removing the search bar and displaying the icons again. |
 | All Pins This button is shown along with the Icons on the right when there are over 6 types of pins. Click it for a full selection of all available pin types. |
 | Counter Tracks the number of pins you have of a certain type. The pin type shown is set to the page and currently cannot be changed; however, all pin type counters can be viewed by clicking the checklist icon on the right side. |
| View All Counters This icon is found on the right side of the Counter. When a map has more than one pin type, click this icon to see Counters for all pin types. |
List of All Islands and Islets
Fortress Zokket Location
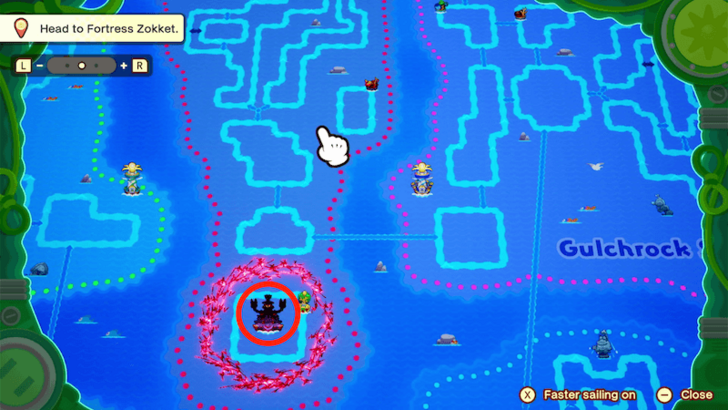
Zokket's Fortress is located on the bottom part of Stormstar Sea.
Fortress Zokket Grampy Turnip Location
No Grampy Turnip in This Location
| There is no Grampy Turnip in this location. |
All 18 Grampy Turnip Locations
Fortress Zokket Item Locations
| There doesn't appear to be any notable items to be found in Fortress Zokket. |
Fortress Zokket Walkthrough
Fortress Zokket First Visit
| # | Step by Step Objectives |
|---|---|
| 1 |
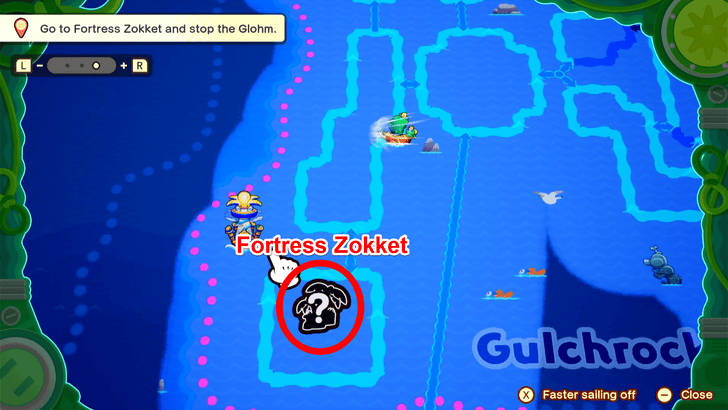 After relighting Gulchrock Sea's Great Lighthouse, a new current unlocks in the Gulchrock Sea that will lead ShipShape Island to Fortress Zokket's location. Upon discovering it through the telescope, fire away toward the fortress once you are comfortable with your gear and collection of items. |
| 2 |
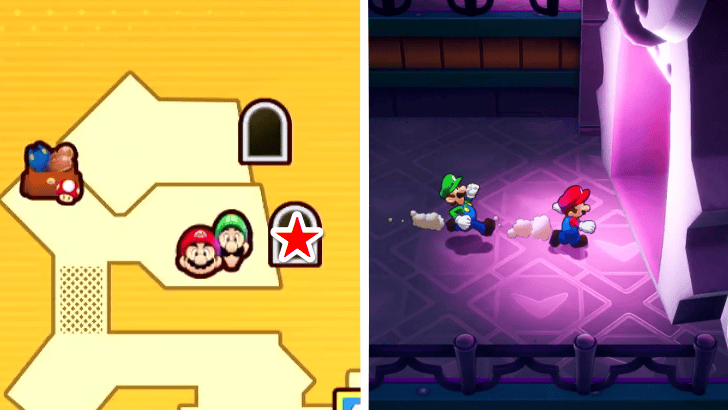 The brothers will find themselves on the exterior of Fortress Zokket's Second Floor. Head toward the doorway east of the area, across from the travelling merchant, and find yourself inside the 2F Main Area. The main area features no notable items, but to the east, you will find a raised stairway that cannot be unlocked at this time. Exercise caution as enemies like Jet Zok Troopers and Spike Zok Troopers patrol the vicinity. |
| 3 |
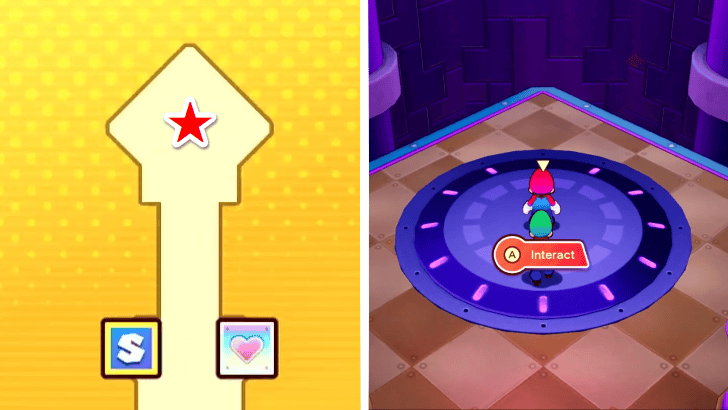 Go past the main archway and head north toward the elevator after utilizing the Save Block and Recovery Block on the way. Once there, the brothers will be greeted with the sight of the Extension Corps and Zokket, standing around Bowser. |
| 4 |
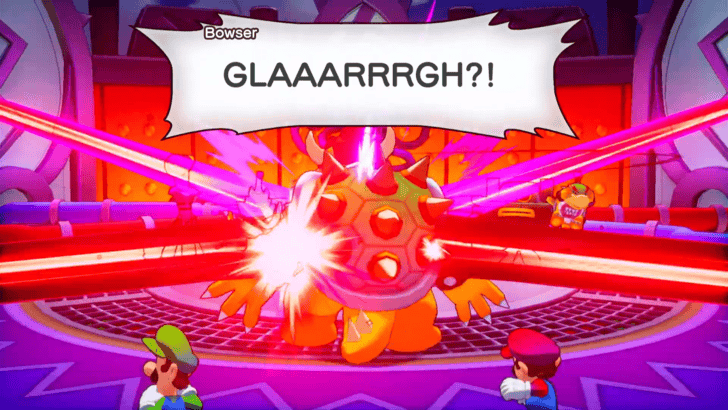 As Bowser fights for his son's freedom in the clutches of the Extension Corps, he is hit by the Glohmatic Quad-Ray and turns into Glohm Bowser! The brothers will now be forced to knock him back to his senses and fight their way through their frenzied foe! ★ Battle Tip! Beating Glohm Bowser The most efficient way to defeat Glohm Bowser would be to attack him while he is stunned. During this period of time, utilize the cannon ship that Bowser's Shy Guys are riding via Luigi Logic, and hit Bowser as much as possible while dodging his aerial attacks. ▶︎ How to Beat Glohm Bowser |
| 5 |
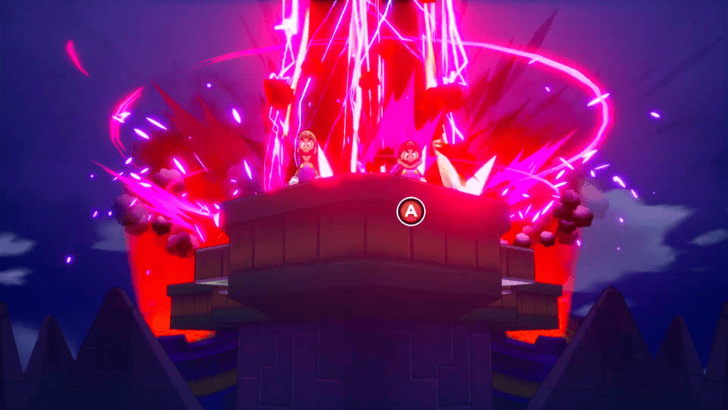 After defeating Bowser, Zokket points the Glohmatic Quad-Ray toward the brothers, and chases them through the Top Floor of Fortress Zokket. Keep running straight and don't look back, then press the A and B Button when prompted to let Mario and Luigi jump off of the fortress. When they wake, they will find themselves in a curiously mysterious island. |
Return to Fortress Zokket
| # | Step by Step Objectives |
|---|---|
| 1 |
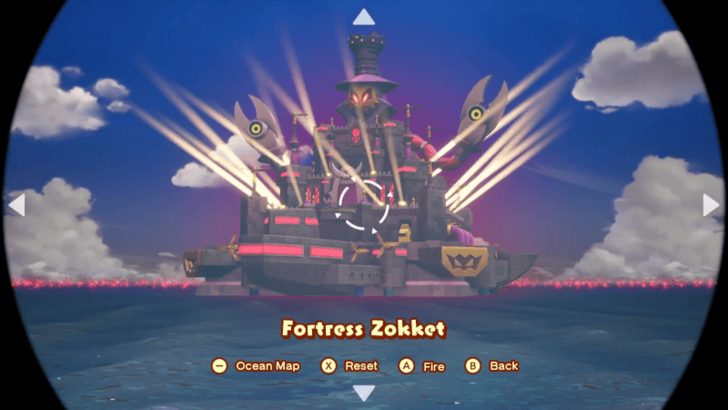 After obtaining the necessary Ship Part from Bowser's Castle and returning to Shipshape, have it repaired with the help of either Technikki or Adaphne. Once your ship is fixed, you’ll be ready to head back to Fortress Zokket and confront Zokket himself. ★ Helpful Tip: It is best to prepare before returning to Fortress Zokket a second time, this includes stocking up on your items, and having the best equipment before heading into the final battle. ▶ Technikki or Adaphne? Which Engine Should You Choose? |
| 2 |
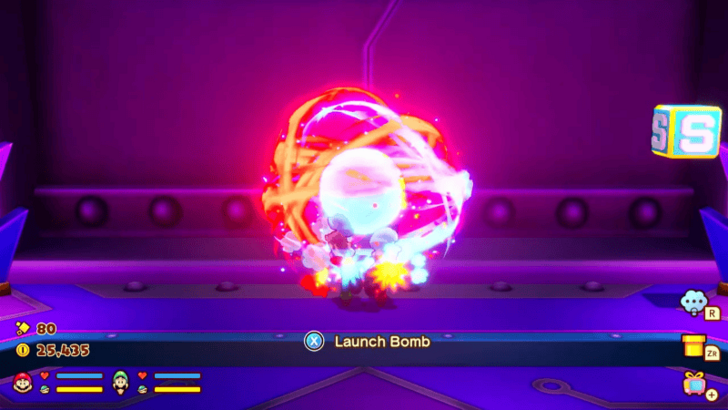 Upon arriving at Fortress Zokket, you can use the nearby Save Block to save your game, then enter the big door using your Fire and Ice Bros. Move charged attack. |
| 3 |
 In the next area, you'll need to use all your Bros. Moves to navigate the obstacles. Use the Bro Ball Bros. Move to bypass rotating spike traps and the UFO Spin Move to cross gaps. Continue employing these techniques as needed until you reach the next section. |
| 4 |
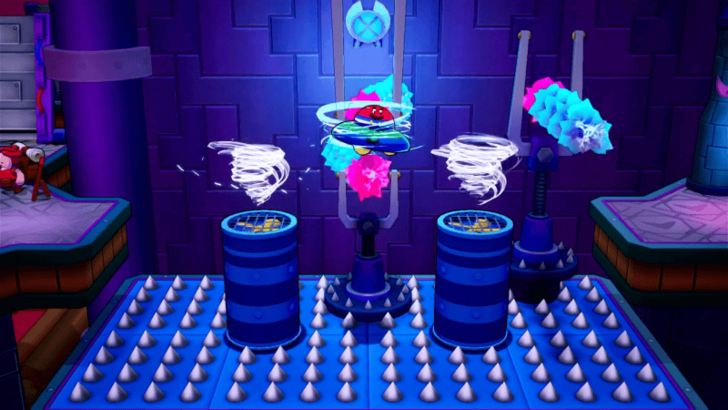 Upon entering the next area, immediately use a charged Ball Blitz move to swiftly bypass the fast-spinning spike traps. Shortly after, you’ll come across a shop, take this opportunity to restock your items before moving on. Once ready, proceed forward and use your UFO Spin move to cross the gap ahead. Continue heading straight to reach the next area. |
| 5 |
 Break the boxes blocking your path and continue forward, battling enemies along the way. Once you've cleared the crate-filled path, look for the entrance to the next area, which you'll find to the south. |
| 6 |
 Upon entering the next area, head north and you'll come across another path blocked by crates. Destroy the crates to clear your way and continue along the path. Keep moving forward until you reach the next entrance. |
| 7 |
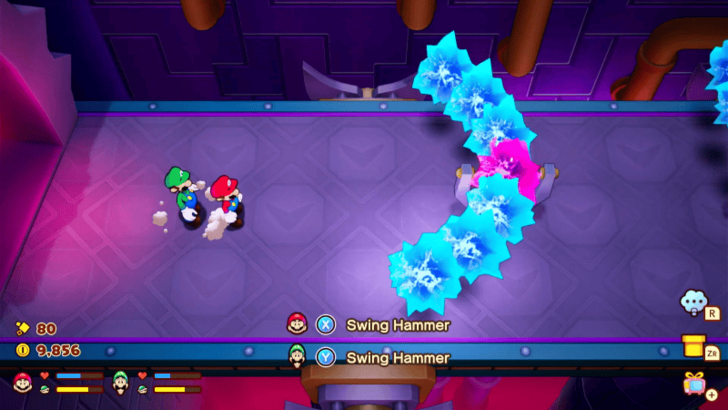 The next area is straightforward. Avoid the rotating curved spike traps as you move forward. Head up the stairs at the end of the path to reach the 2F of Fortress Zokket. |
| 8 |
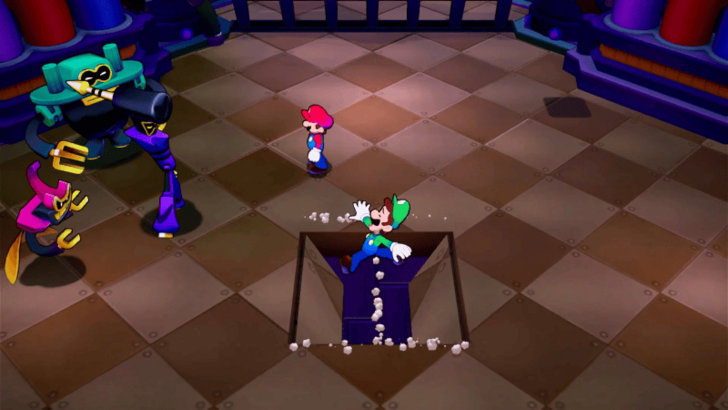 Upon reaching the 2F, your next objective is to head toward the middle of the map. Follow the path, battling enemies along the way, until you reach the center. Here, you'll spot a Save Block and a Recovery Block—but before you can access them, Ten and his gang will block your path. After a brief cutscene, Luigi will fall through a trap hole created by Ten and his friends, leaving Mario behind. ★ Helpful Tip: This area is populated with Glohmed Zok Trooper enemies, which are significantly stronger than their original counterparts. Prepare for tougher battles as you navigate through this section. |
| 9 |
 From this point, you'll take control of Luigi. After Luigi wakes up, you will notice a Save Block nearby, you can use this to save your game progress. Then, proceed to the next area while avoiding the electric traps by jumping over them. ★ Helpful Tip: Since you will be alone from here on, it's best to avoid engaging in battles until you rendezvous with Mario. |
| 10 |
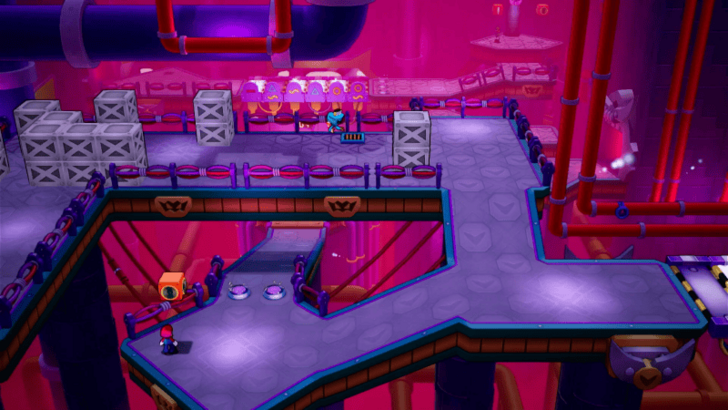 Upon arriving in the next area, you'll encounter a dead end. Head north and locate the Transmitter Block to switch control back to Mario. Once you’ve switched to Mario, backtrack to the previous area and spot Luigi in the distance, though too far to reach. Head south to find another Transmitter Block. Activating it will remove the blockade, clearing the way to both Luigi's location and Mario's path forward. |
| 11 |
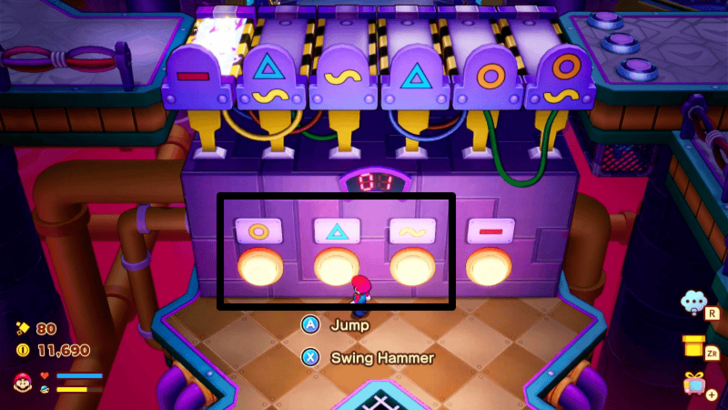 Have Mario proceed down the newly opened path, where you’ll encounter a machine with several buttons, each marked with a sign. This machine controls the electrified bridge Luigi needs to cross. Hit the first three of the buttons on the machine with your hammer, in any order, to deactivate the electricity on most of the bridge steps. After this, head back to the previous area and hit the Transmitter Block to change control to Luigi ★ Helpful Tip: Avoid hitting all the buttons, as you’re limited to three moves before the system resets! |
| 12 |
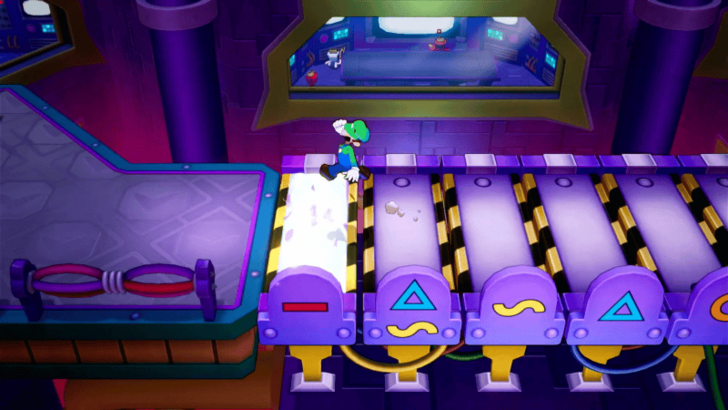 Luigi can now freely cross the bridge, but remember to jump on the last step as the electricity was not removed in here. Then, proceed to the next area. Ignore the Exclamation Block for now, and hit the Transmitter Block to switch to controlling Mario. |
| 13 |  Have Mario follow the only available path, moving from room until he ends up at another electric bridge puzzle. Go to the right side of the puzzle first, by the large, green punching glove, and hammer the boxes at the base of the metal crates blocking the glove’s path. Go to the Transmitter Block to the left of this section to switch over to Luigi. |
| 14 | As Luigi, go down the path until you reach the green punching glove. Hit it with your hammer to make a block fall down into Mario’s area, then return to the Transmitter Block. Switch the controls over to Mario again. |
| 15 | 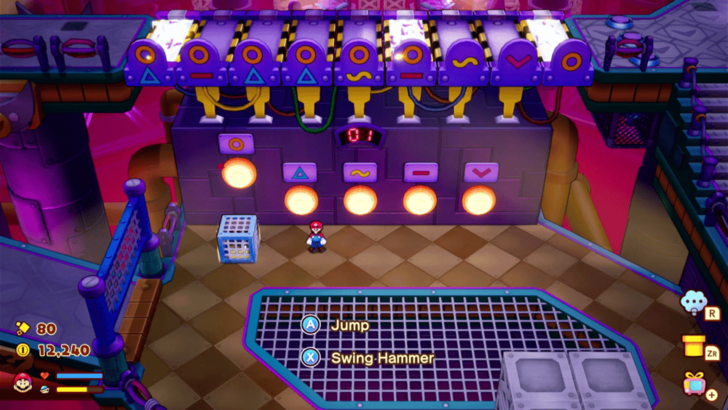 As Mario, pick up the block that was just dropped, and bring it in front of the button with the yellow circle. Hammer at the first, second, third, and last buttons (orange circle, blue triangle, yellow squiggle, and pink V) to allow Luigi to pass through. Go back to the Transmitter Block and swap over to Luigi. |
| 16 | As Luigi, hit the Exclamation Block to open up the gate to your left. Jump over any electrified sections, and make your way across. Continue along the path, and Mario and Luigi will be reunited. |
| 17 | 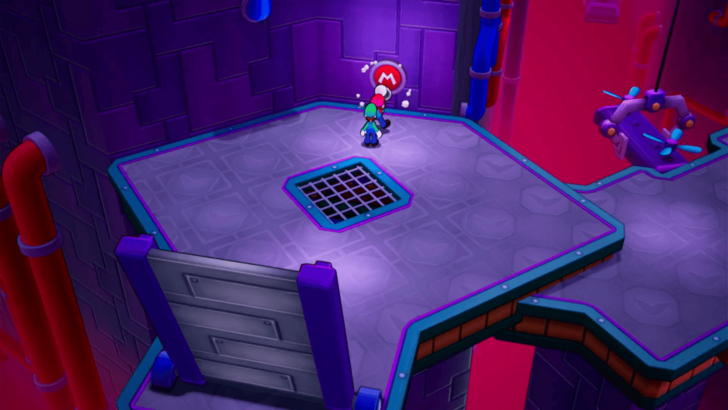 Follow the path northwest until you reach an M button on the wall. Have Mario hit this button with his hammer to bring down the bridge. Upon crossing the bridge, a Peddler will arrive. Make sure to buy everything you need from him and use the Recovery and Save Blocks as you approach this last stretch of Fortress Zokket. |
| 18 |
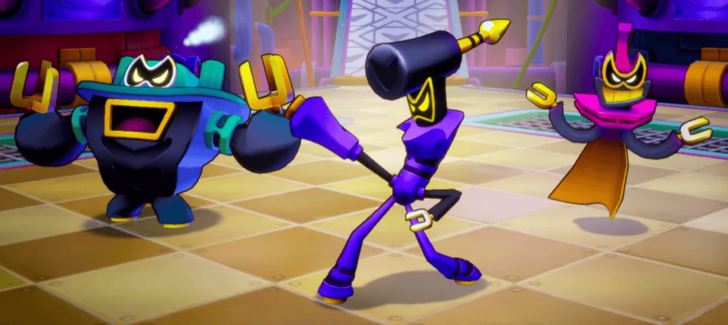 Once you’re ready, continue onward and face the Extension Corps in a boss battle. ▶ How to Beat the Extension Corps |
| 19 |  After defeating the Extension Corps, head up the path and activate the Green Warp Pipe. Use this pipe to get to the 2F of Fortress Zokket. Head north, and make use of the Save Block and Recovery Block before going up the elevator and facing Zokket. ▶ How to Beat Zokket |
Fortress Zokket Puzzles
How to Pass Through the Electric Obstacles
Use the Bro Ball Bros. Move
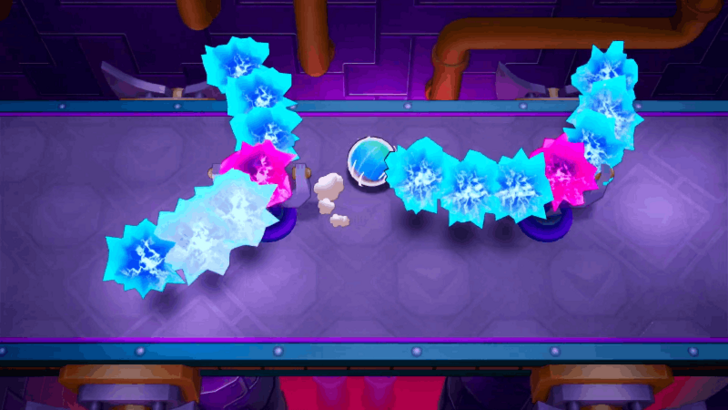
There is a hallway in Fortress Zokket that requires you to pass through it while avoiding three rotating electric obstacles.
Use the Bro Ball Bros. Move to navigate around the obstacles quickly. If you get hit by any of the obstacles, you will restart from the left side of the hallway.
Bosses in Fortress Zokket
Glohm Bowser
| Enemy | Details |
|---|---|
 Glohm Bowser Glohm Bowser
|
First Encounter Level and Location: ・Level 36 ・Fortress Zokket Best Option to Attack With: Either Hammer or Jump Attacks |
Glohm Bowser is the boss that you encounter at the top floor of Fortress Zokket.
Enemies in Fortress Zokket
All Enemies Found in Fortress Zokket
| Enemy | Enemy Tips |
|---|---|
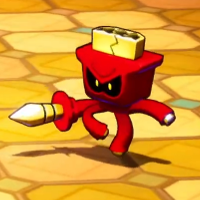 Spike Zok Trooper Spike Zok Trooper
|
You’ll know Spike Zok Trooper is done taunting when its spike starts to glow. This is your cue to use your hammer to counter, as it will attack shortly after. |
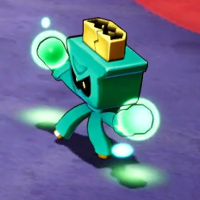 Ring Zok Trooper Ring Zok Trooper
|
Ring Zok Trooper's Ring Laser attack reduces your Power if it hits, so aim to hit the solid part of the laser to stop it from reaching you. |
 Ring Zok Trooper Ring Zok Trooper
|
Ring Zok Trooper's Ring Laser attack reduces your Power if it hits, so aim to hit the solid part of the laser to stop it from reaching you. |
 Jet Zok Trooper Jet Zok Trooper
|
When Jet Zok Trooper drops its spiked ball, make sure to always counter it, as it will give you an extra attack toward a different enemy on the opposing team. |
 Foopfly R Foopfly R
|
When Foopfly R goes in front of either brother and hits them with rocks consecutively, make sure to dodge these attacks as they can inflict a Dizzy status ailment. |
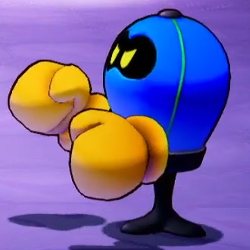 Palooka R Palooka R
|
When Palooka R gets in front either brother, make sure to hit it repeatedly with hammer attacks before it finishes up charging its attack, as they are lethal. |
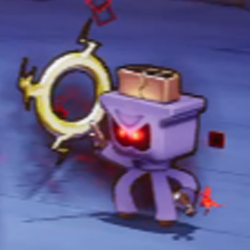 Glohm Zokkarang Trooper Glohm Zokkarang Trooper
|
Each time Glohm Zokkarang's turn ends, it increases its POW. Make sure to prioritize eliminating them first to avoid devastating damage to either brother. |
Fortress Zokket Shops
Item and Gear Shop
| Map Image | Overworld Image |
|---|---|
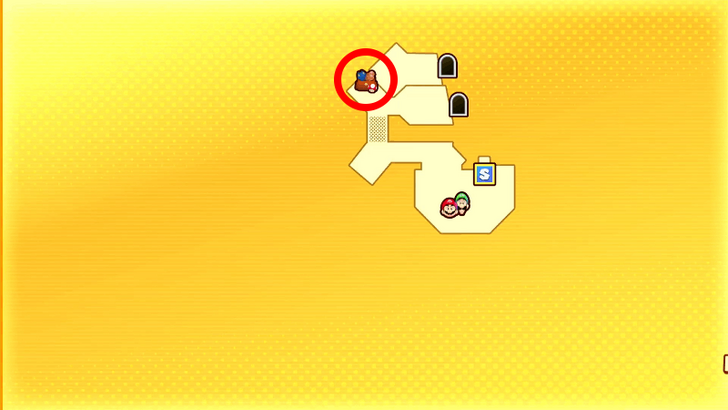 |
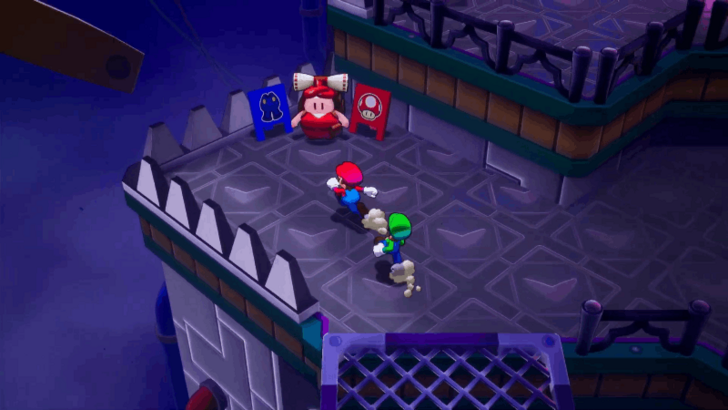 |
The item and gear shop is located northwest of the first save block in Fortress Zokket.
Items Sold
| Item | Price |
|---|---|
|
|
10 |
|
|
30 |
|
|
100 |
|
|
300 |
|
|
50 |
|
|
400 |
|
|
20 |
|
|
20 |
|
|
60 |
|
|
200 |
|
|
600 |
|
|
30 |
|
|
100 |
|
|
300 |
|
|
800 |
|
|
5 |
Gear Sold
| Gear | Price |
|---|---|
|
|
2,300 |
|
|
3,100 |
|
|
3700 |
|
|
2,300 |
|
|
3,100 |
|
|
3700 |
|
|
1,800 |
|
|
2,500 |
|
|
3000 |
Mario and Luigi: Brothership Related Guides

List of All Islands and Islets
All Islands
| Lushgreen Sea Islands | |
|---|---|
| Great Lighthouse Island (Lushgreen Sea) | Rumbla Island |
| Twistee Island | Raynforst Island |
| Florall Island | |
| Color-Full Sea Islands | |
| Great Lighthouse Island (Color-Full Sea) | Desolatt Island |
| Merrygo Island | Lottacoins Island |
| Allsand Island | |
| Brrrning Sea Islands | |
| Great Lighthouse Island (Brrrning Sea) | Bulbfish Island |
| Heatfreeze Island | Skorcheen Island |
| Slippenglide Island | |
| Gulchrock Sea Islands | |
| Great Lighthouse Island (Gulchrock Sea) | Offandon Island |
| Wayaway Island | |
| Stormstar Sea Islands | |
| Conductor Island | Jellyfish Island |
| Fortress Zokket | Soli-Tree |
Comment
Really enjoying using these walkthroughs, until now. This is a poor walkthrough for this section. Written so sloppily with errors all over. Maybe fix this?
Author
Fortress Zokket Walkthrough Guide
improvement survey
03/2026
improving Game8's site?

Your answers will help us to improve our website.
Note: Please be sure not to enter any kind of personal information into your response.

We hope you continue to make use of Game8.
Rankings
- We could not find the message board you were looking for.
Gaming News
Popular Games

Genshin Impact Walkthrough & Guides Wiki

Honkai: Star Rail Walkthrough & Guides Wiki

Umamusume: Pretty Derby Walkthrough & Guides Wiki

Pokemon Pokopia Walkthrough & Guides Wiki

Resident Evil Requiem (RE9) Walkthrough & Guides Wiki

Monster Hunter Wilds Walkthrough & Guides Wiki

Wuthering Waves Walkthrough & Guides Wiki

Arknights: Endfield Walkthrough & Guides Wiki

Pokemon FireRed and LeafGreen (FRLG) Walkthrough & Guides Wiki

Pokemon TCG Pocket (PTCGP) Strategies & Guides Wiki
Recommended Games

Diablo 4: Vessel of Hatred Walkthrough & Guides Wiki

Fire Emblem Heroes (FEH) Walkthrough & Guides Wiki

Yu-Gi-Oh! Master Duel Walkthrough & Guides Wiki

Super Smash Bros. Ultimate Walkthrough & Guides Wiki

Pokemon Brilliant Diamond and Shining Pearl (BDSP) Walkthrough & Guides Wiki

Elden Ring Shadow of the Erdtree Walkthrough & Guides Wiki

Monster Hunter World Walkthrough & Guides Wiki

The Legend of Zelda: Tears of the Kingdom Walkthrough & Guides Wiki

Persona 3 Reload Walkthrough & Guides Wiki

Cyberpunk 2077: Ultimate Edition Walkthrough & Guides Wiki
All rights reserved
© Nintendo. Games are property of their respective owners.
The copyrights of videos of games used in our content and other intellectual property rights belong to the provider of the game.
The contents we provide on this site were created personally by members of the Game8 editorial department.
We refuse the right to reuse or repost content taken without our permission such as data or images to other sites.





![Everwind Review [Early Access] | The Shaky First Step to A Very Long Journey](https://img.game8.co/4440226/ab079b1153298a042633dd1ef51e878e.png/thumb)

![Monster Hunter Stories 3 Review [First Impressions] | Simply Rejuvenating](https://img.game8.co/4438641/2a31b7702bd70e78ec8efd24661dacda.jpeg/thumb)


Missing two invisible blocks on the interactive map, right next to the Ampberry in 2F.