This survey will take about 1 minute.
Your answers will help us to improve our website.
Horizon Zero Dawn
The Forge of Winter Walkthrough

This guide will show you how to complete The Forge of Winter, a main quest in Horizon Zero Dawn - The Frozen Wilds. Read on to learn the objectives, strategies, location, and rewards for The Forge of Winter main quest.
| Previous Quest | Next Quest |
|---|---|
| Firebreak | - |
List of Contents
The Forge of Winter Quest Information
General Info
| Quest Name | The Forge of Winter |
|---|---|
| Quest Giver | None. This quest triggers immediately after the quest, Firebreak. |
| Rewards |
16670 XP +1 EPSILON Overrides +1 Skill Point +1 Extraordinary Reward Box +7 Bluegleam |
| Recommended Level | 50 |
| Percent (%) Completion | - - |
| Description | To rescue CYAN and learn the true nature of the Daemon, Aloy and her companions must fight their way through the Cauldron beneath Thunder's Drum. |
The Forge of Winter Walkthrough
How to Complete
| Objectives | |
|---|---|
| 1 | 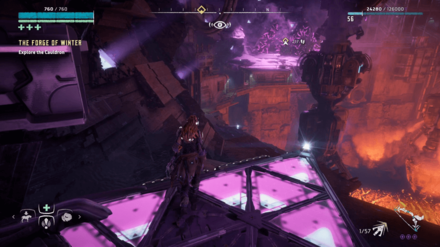 Cross the large chasm and head deeper into Cauldron EPSILON. Your destination is the Antechamber. |
| 2 | 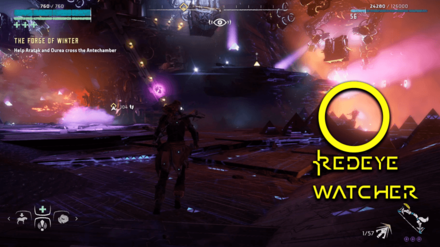 This is the first of 3 sections where you have to extend bridges to help Aratak and Ourea navigate the Cauldron. Go ahead and kill the Redeye Watcher patrolling the area before proceeding. |
| 3 | 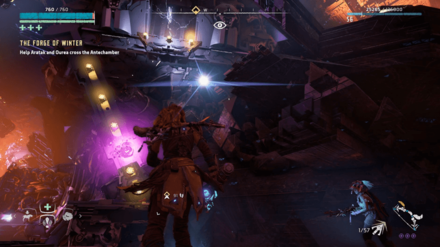 Go to the nearby handholds and start climbing. There will be an electric hazard at the top so make sure to time your crossing. To get rid of the daemonic miasma on the handholds, shoot them with regular arrows. |
| 4 |  At the top, jump and hang on to one of the moving cargo boxes. Ride it to the center of the Antechamber. |
| 5 | 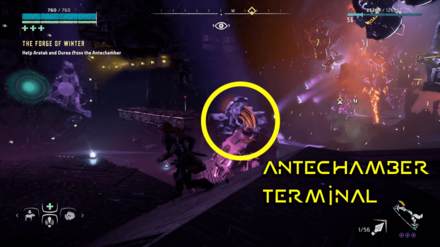 Override the nearby terminal to shut-off the flames that had been preventing you from progressing. This also releases a Shell-Walker in the Antechamber. |
| 6 | 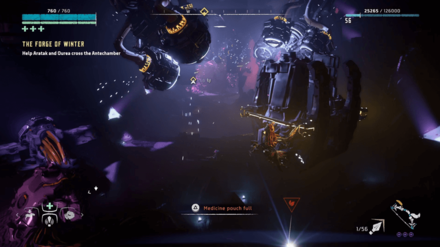 Climb up again and ride the cargo box to the end of the Antechamber. |
| 7 | 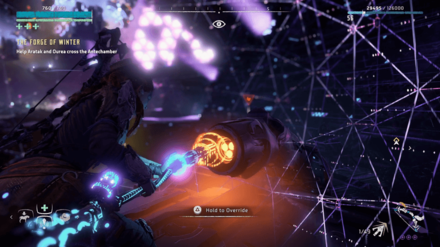 Override and extend the bridge to help Aratak and Ourea cross. Aratak will use his Icerail to open up the way to the next area of the Cauldron. |
| 8 |  Override the console to listen to some of CYAN's transmissions about what transpired in the Cauldron. This unlocks the way to the Production Area. |
| 9 | 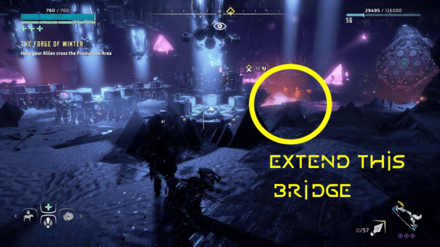 This area is a bit tricky. Players can opt to go stealth or engage all the Machines in combat. Either way, the room will be patrolled by 6 Daemonic Shell-Walkers, 3 Daemonic Watchers, and 2 Daemonic Scorchers. |
| 10 | 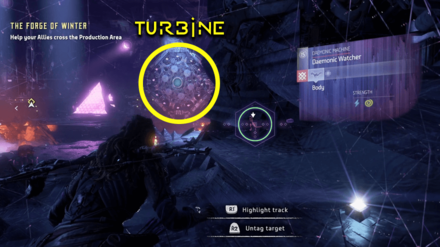 To go the stealth route, immediately turn right and head for the lone Watcher at the northern end of the room (where the Turbine is). Kill it silently or avoid it before extending the bridge leading to the Turbine. |
| 11 | 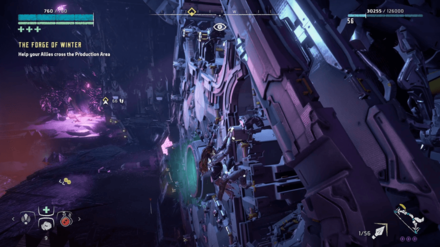 Ride the Turbine, staying on it until the patrolling Scorcher and the earlier Watcher are no longer looking your way. |
| 12 | 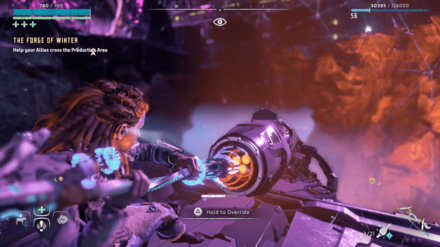 When the coast is relatively clear, drop down and head for the second bridge area. Pay attention to the positions of the 2 Scorchers and the Shell-Walker in order to remain hidden. Extend the bridge for Aratak and Ourea. |
| 13 | 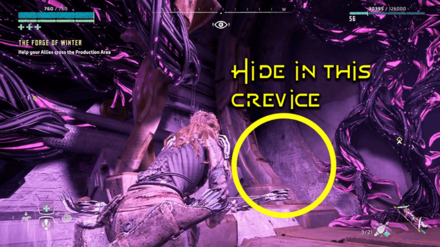 Once the bridge is up, immediately head for the Production Area Exit. Hide behind one of the crevices and wait for Aratak to come to you. Even if they are spotted and attacked by Machines, Aratak will eventually come to you and open the way forward. |
| 14 | 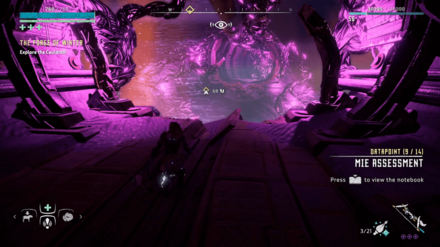 Leave the enemy machines behind and continue exploring the Cauldron. |
| 15 | 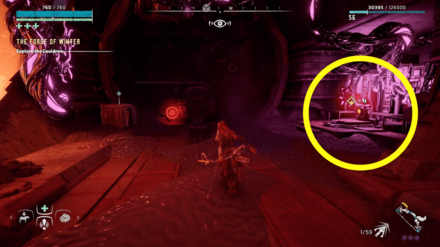 Override the Console to listen to another of CYAN's messages. This opens the way to the Recylcing Area. |
| 16 | 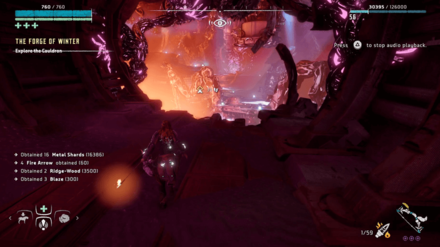 This is the final area where you'll need to help the siblings cross. It will be patrolled by multiple Daemonic Watchers. |
| 17 | 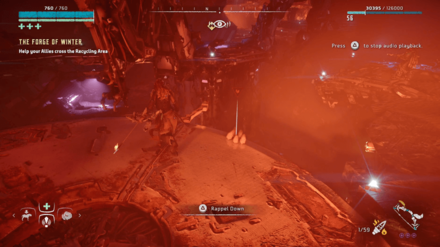 Begin by rapelling down the Tallneck Head to your left (after first entering the room). Kill the Watcher guarding the ground floor. |
| 18 | 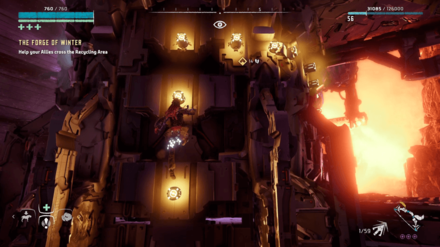 There will be handholds and platforms leading to the upper floors. Climb up until you reach another Turbine. |
| 19 |  Ride the Turbine to the Override Point. Overriding it shuts off the steam vent and opens the way up to the structure patrolled by Watchers. |
| 20 | 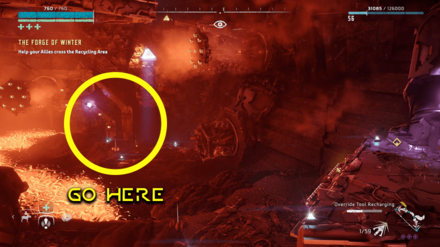 With the way clear, head to the base of the structure patrolled by Watchers. |
| 21 | 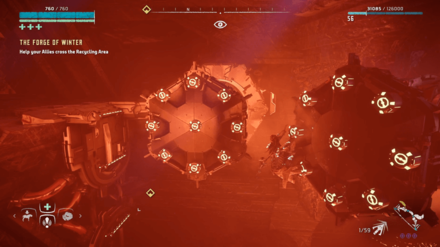 Climb up and kill the Watchers guarding the structure. This should put you level with the moving cargo boxes. |
| 22 | 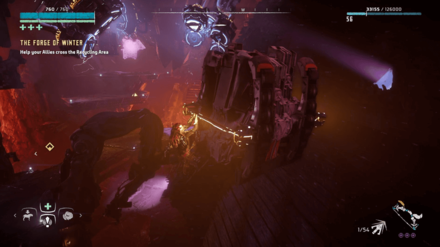 Ride one all the way to the End of the recylcing area. Drop down on the elevated platform located next to the exit. |
| 23 | 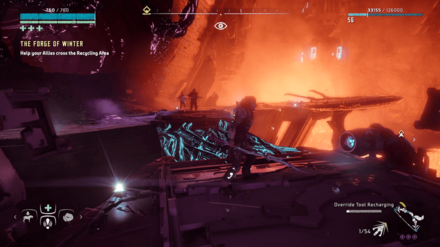 Hop down and extend the bridge at the center for Aratak and Ourea. Wait for the former to open up the exit using his Icerail. |
| 24 | 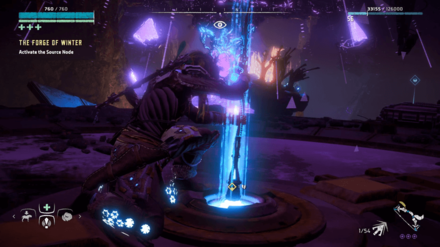 Climb up to the final control room and activate the Source Node using Aloy's spear. |
| 25 | 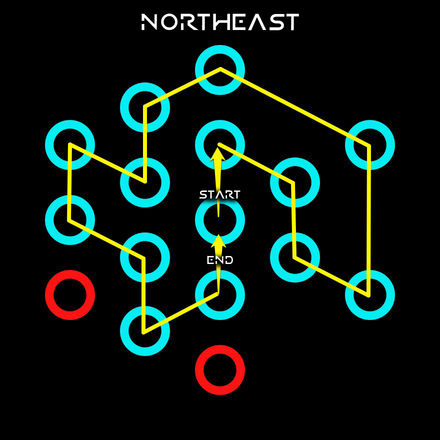 Restore CYAN by re-routing the data flow. Use the provided solution to activate the inert AI. |
| 26 |  Speak to CYAN about what happened in the facility. |
| 27 | 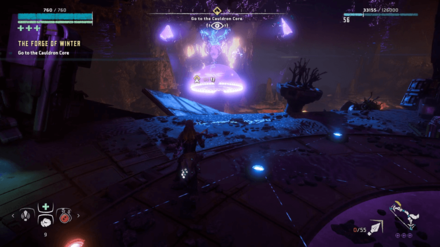 Head over to the Cauldron Core by crossing the river of lava. |
| 28 |  A Control Tower is keeping the Core's shield up. Destroy or override it to bring down the shield. |
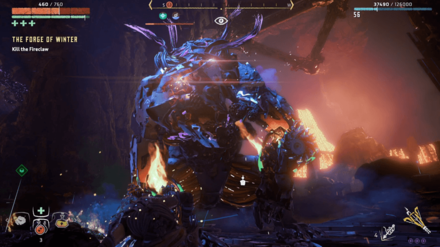
| 29 | 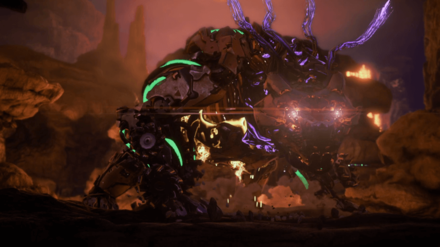 A new machine, the Fireclaw, will appear. Destroy it with the help of Aratak to access the Cauldron Core. |
| 30 | 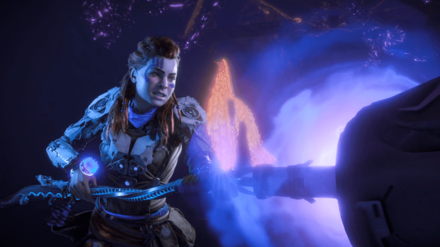 Override the Cauldron Core using your spear. Watch the cutscene of the aftermath. |
| 31 | 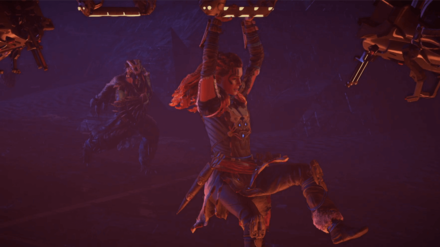 Escape the Cauldron. Escape the Cauldron.Run over to the waypoint to escape the Cauldron. A cutscene will play detailing your escape. |
| 32 | 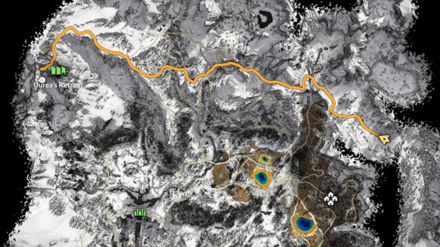 With CYAN free, head back to Ourea's Retreat to commune with the artificial intelligence. |
| 33 | 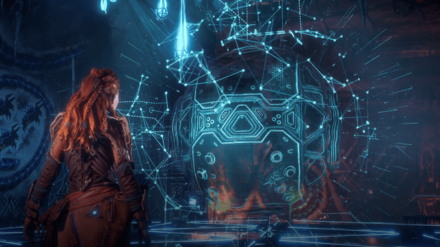 Talk to CYAN. Talk to CYAN.Talk to CYAN about what exactly happened in the Cut and her purpose within the Firebreak Facility. |
| 34 |  Talk to Aratak. Talk to Aratak.Speak to Aratak at the helipad outside of the Retreat. This conversation concludes the Frozen Wilds main questline. |
Tips and Strategies
Use Regular Arrows to Clear Handholds

Some handholds within the cauldron will have writhing purple miasma covering them. Use regular arrows to easily get rid of these obstacles.
Production Area: Fight the Machines
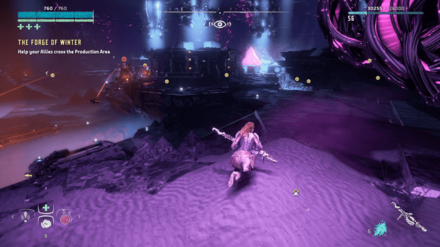
Due to the very tight patrol patterns of the Production Area's Machines, players will most likely be detected if they do not pay close attention while navigating the room.
When it comes down to it, combat will be tedious but much easier than going the stealth route. Have Aratak distract the Machines while you take potshots at them from a distance.
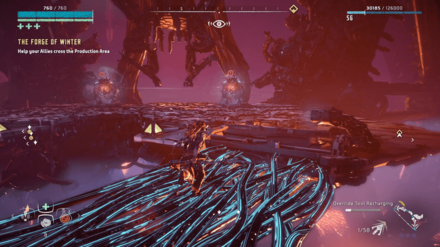
Production Area: Stay on the Turbine to Avoid Detection

When going the stealth route, make sure to be quick and direct with your movements as there is very little geometry in the room that can be used as cover to hide.
If detected, your best bet is to run up to the Turbine, ride it to the top, and stay there. For some reason, Machines will slowly lose alert levels as long as you stay on it.
Production Area: Do not Override the Southern Bridge
The area to the south of the production area will have a bridge that you can override. However, all that's waiting for you on the other side is a pair of Frostclaws, adding to the already significant number of enemy Machines in the area.
Fireclaw Fight: Shoot Down Freeze Canisters for Use
Flying service robots will occasionally fly over the arena carrying Freeze Canisters. Shoot the robots with any kind of arrow to have them drop the Freeze Canisters for use against the Fireclaw.
Fireclaw Fight: Pair the Freeze Canisters with Hardpoint Arrows
Once the Fireclaw is frozen by the Freeze Canister explosion, start hitting it with Hardpoint Arrows. Pair this with the Triple Shot skill to maximize the damage bonus of the Freeze debuff
Note: When Frozen, aim for the Fireclaw's eyes. Do not aim for the Fire Sacs or the Fire Unit as rupturing either will immediately cancel the effects of Freeze.
Fireclaw Fight: Shoot the Power Cells to Stun the Fireclaw
There are 4 Power Cells on the back of the Fireclaw (just above its hind legs). Shoot one with a Shock Arrow to dentonate it. This will stun the Fireclaw for a short duration.
Alternate between shooting the Power Cells and triggering the Freeze debuff to control the early stages of the Fireclaw fight.
Fireclaw Fight: Destroy the Control Tower

When the Fireclaw is brought down to 1/2th and 1/4th of its HP, Control Towers will appear. They can repair damaged Machines and even shut down the shield of the Shield Weaver Outfit. Destroy them before they start repairing the weakened Fireclaw.
Fireclaw Fight: Destroy the Fire Sacs and Fire Unit
The key to taking off chunks of the Fireclaw's HP is to aim for the Fire Sacs (located on each of its shoulders) and its Fire Unit (located on its chest). Rupture each one to quickly bring its health down and set it on fire.
Fireclaw Fight: Start Kiting once the Fireclaw Drops to Half Health
At half health, the attack patterns of the Fireclaw will change. It gains a heavy-hitting rock slam, a ranged attack, and flaming lunges. Kite it whenever it attacks and only shoot when there is a lull in battle.
Note: Controlling it with a Ropecaster at this stage will be tricky as the attack where it picks up a large boulder will snap all the existing wires immediately.
Horizon Zero Dawn Quests
Main Quest Guides
Frozen Wild Main Quest Guides
| Frozen Wild Main Quest Walkthroughs | |
|---|---|
| Into the Frozen Wilds | The Shaman's Path |
| For the Werak | Firebreak |
| The Forge of Winter | |
Author

The Forge of Winter Walkthrough
Please participate in our site
improvement survey
03/2026
improvement survey
03/2026
Would you assist in
improving Game8's site?
improving Game8's site?

×
We are listening to our users' valuable opinions and discussing how to act on them.
The information collected through this survey will be used for the purpose of improving our services. In addition, the information will only be disclosed a part of a statistic in a format that will not allow identification of personal information.
Begin Survey
Not Now
×
Please rate each item regarding Game8.co's Advertisements.
Amount of Ads
Very Dissatisfied
Somewhat Dissatisfied
Fine
Somewhat Satisfied
Highly Satisfied
Placement of Ads
Timing of Ad Display
Ad Loading Speed
Safeness of Ads
Content of Ads
×
Please rate each item regarding Game8.co's Quality of Articles.
Amount of information
Very Dissatisfied
Somewhat Dissatisfied
Fine
Somewhat Satisfied
Highly Satisfied
Frequency of updates
Speed of new information
Accuracy of articles
Understandibility of articles
Readability of sentences
×
Please rate each item regarding Game8.co's Usability of the Site.
Ease of finding information
Very Dissatisfied
Somewhat Dissatisfied
Fine
Somewhat Satisfied
Highly Satisfied
Loading Speed
Use of Color
Font Size
Visibility of Images
Easy to Understand Layout
×
Please rate each item regarding Game8.co's Message Boards, Comments.
Ease of Writing
Very Dissatisfied
Somewhat Dissatisfied
Fine
Somewhat Satisfied
Highly Satisfied
Readability
Ease in Finding Information
Comment Quality
Comment Quantity
Admin Response
×
Please rate each item regarding Game8.co's Site's new design.
Please rate our site's new design
Very Dissatisfied
Somewhat Dissatisfied
Fine
Somewhat Satisfied
Highly Satisfied
Do you think that the website's design change makes the site easier to use?
Has the new design made it easier for you to find information on the site?
Has the new design improved the overall visual appeal of the site?
How would you rate your overall satisfaction with the new design of the site?
×
How likely are you to recommend Game8 to someone you know?
Very Unlikely
0
1
2
3
4
5
6
7
8
9
10
Very Likely
If you have other opinions regarding potential improvement to the website, please share them with us. We would appreciate your honest opinion.
Note: This is a free response section, so you can proceed without entering anything.
Note: Please be sure not to enter any kind of personal information into your response.
Note: Please be sure not to enter any kind of personal information into your response.
×
Thank You
×
Thank you for participating in our survey! Your answers will help us to improve the quality of our website and services.
We hope you continue to make use of Game8.
We hope you continue to make use of Game8.
Close
Rankings
- We could not find the message board you were looking for.
Gaming News


![Everwind Review [Early Access] | The Shaky First Step to A Very Long Journey](https://img.game8.co/4440226/ab079b1153298a042633dd1ef51e878e.png/thumb)

![Monster Hunter Stories 3 Review [First Impressions] | Simply Rejuvenating](https://img.game8.co/4438641/2a31b7702bd70e78ec8efd24661dacda.jpeg/thumb)
Popular Games

Genshin Impact Walkthrough & Guides Wiki
Honkai: Star Rail Walkthrough & Guides Wiki
Umamusume: Pretty Derby Walkthrough & Guides Wiki
Pokemon Pokopia Walkthrough & Guides Wiki
Resident Evil Requiem (RE9) Walkthrough & Guides Wiki
Monster Hunter Wilds Walkthrough & Guides Wiki
Wuthering Waves Walkthrough & Guides Wiki
Arknights: Endfield Walkthrough & Guides Wiki
Pokemon FireRed and LeafGreen (FRLG) Walkthrough & Guides Wiki
Pokemon TCG Pocket (PTCGP) Strategies & Guides Wiki


Recommended Games
Diablo 4: Vessel of Hatred Walkthrough & Guides Wiki
Fire Emblem Heroes (FEH) Walkthrough & Guides Wiki
Yu-Gi-Oh! Master Duel Walkthrough & Guides Wiki
Super Smash Bros. Ultimate Walkthrough & Guides Wiki
Pokemon Brilliant Diamond and Shining Pearl (BDSP) Walkthrough & Guides Wiki
Elden Ring Shadow of the Erdtree Walkthrough & Guides Wiki
Monster Hunter World Walkthrough & Guides Wiki
The Legend of Zelda: Tears of the Kingdom Walkthrough & Guides Wiki
Persona 3 Reload Walkthrough & Guides Wiki
Cyberpunk 2077: Ultimate Edition Walkthrough & Guides Wiki


All rights reserved
©2016 Sony Interactive Entertainment Europe. Horizon Zero Dawn is a trademark of Sony Interactive Entertainment
America LLC. Developed by Guerrilla.
Sony Interactive Entertainment Privacy Policy & EULA
The copyrights of videos of games used in our content and other intellectual property rights belong to the provider of the game.
The contents we provide on this site were created personally by members of the Game8 editorial department.
We refuse the right to reuse or repost content taken without our permission such as data or images to other sites.