This survey will take about 1 minute.
Your answers will help us to improve our website.
Horizon Zero Dawn
The Shaman's Path Walkthrough
This guide will show you how to complete The Shaman's Path, a main quest in Horizon Zero Dawn - The Frozen Wilds. Read on to learn the objectives, strategies, location, and rewards for The Shaman's Path main quest.
| Previous Quest | Next Quest |
|---|---|
| Into the Frozen Wilds | For the Werak |
List of Contents
The Shaman's Path Quest Information
General Info
| Quest Name | The Shaman's Path |
|---|---|
| Quest Giver | Burgrend |
| Rewards |
10000 XP +1 Extraordinary Reward Box +6 Bluegleam |
| Recommended Level | 30 |
| Percent (%) Completion | - - |
| Description | Rumors of daemons and spirits abound in the Banuk territory of the Cut. To learn more, Aloy must find someone who can separate fact from fabrication. |
The Shaman's Path Walkthrough
How to Complete
| Objectives | |
|---|---|
| 1 | 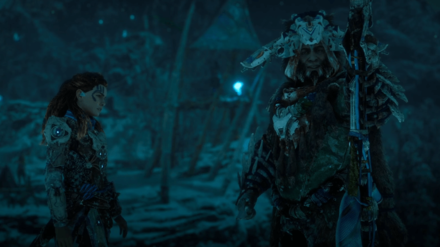 Talk to Aratak (Optional). Talk to Aratak (Optional).Given the novelty of the new region, players can opt to speak to Aratak to get more information about the setting and events of the Frozen Wilds. |
| 2 | 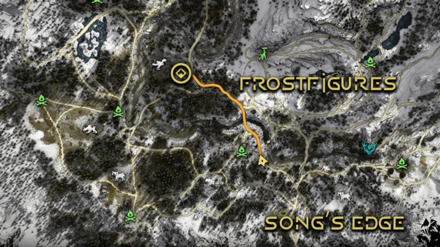 Head over to Naltuk. He can be found to the northwest of Song's Edge, right next to a Control Tower. |
| 3 | 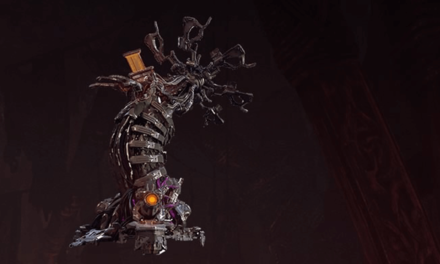 Destroy or Override the Tower. Destroy or Override the Tower.Naltuk would have you prove yourself. Destroy the Control Tower by hitting its Cooling Element repeatedly, or override it to send out an EMP shockwave that disables nearby machines. |
| 4 |  Destroy the machines that were guarding the tower. It will be 1 Longleg and a collection of Scrappers. |
| 5 | 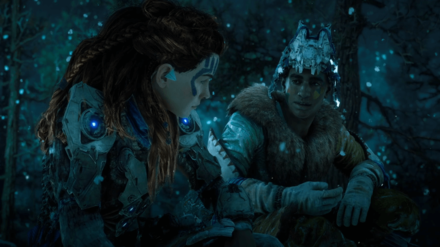 Talk to Naltuk. Talk to Naltuk.With your might proven, speak to Naltuk and ask where you can find Ourea and the Shaman's Path. |
| 6 | 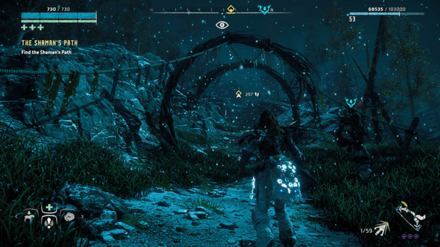 Head north. The ascent to the Shaman's Path will be right beside a Bluegleam Merchant. |
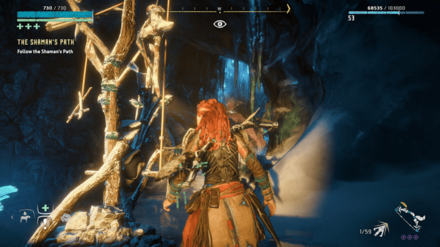
| 7 | 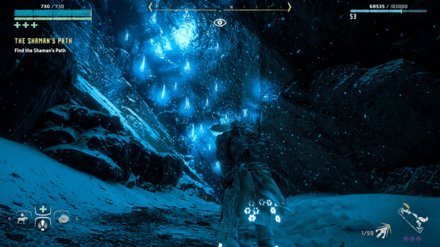 The entrance to the Shaman's Path will be marked by blue-glowing lamps/plants. Enter the cave to begin. |
| 8 | 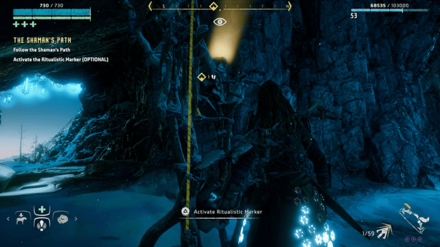 Activating the marker will shine a light in the direction of your next objective. Keep lighting these as you navigate the caves to quickly make it through. |
| 9 | 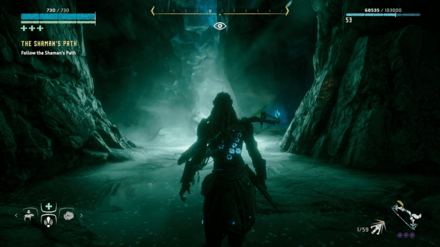 Light the Ritualistic Markers and use your Focus to scan for Wind Chimes. These will help you go the right direction. Some areas will be guarded by Stalkers. |
| 10 |  Shaman's Path (First Log Bridge). Shaman's Path (First Log Bridge).Cross the first log bridge. Wait for the waterfall to fill it up and get on when it starts to tilt your way. |
| 11 | 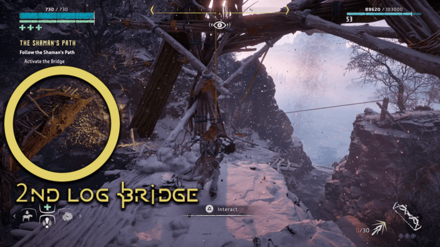 This log bridge is deactivated. Climb down to the lower level and make your way to the back of the water contraption. Here, you will find a rope to activate the water flow that moves the bridge. Cross it to progress. |
| 11.5 | 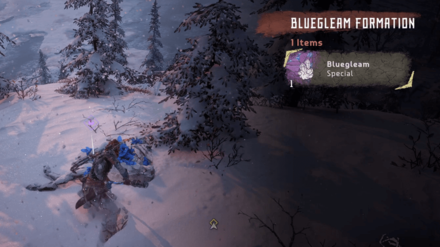 Before leaving this area, players can get the Blue Gleam & Pigment - Light Oxide in the area. |
| 12 |  Shaman's Path (Third Log Bridge). Shaman's Path (Third Log Bridge).Cross the third log bridge. Wait for this one to reach its apex before jumping off to reach the other side. |
| 13 | 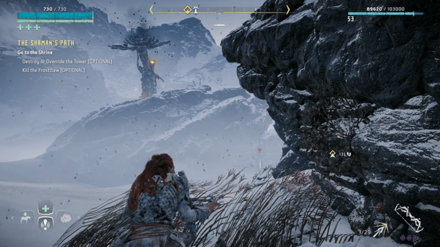 This entire area is optional. Aloy can run up to the next quest marker to skip this fight entirely. However, if you want to face off against the machine, destroy the tower first to prevent it from healing your opponent. |
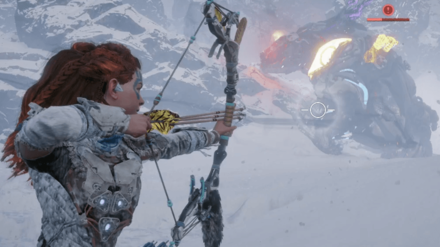
| 14 | 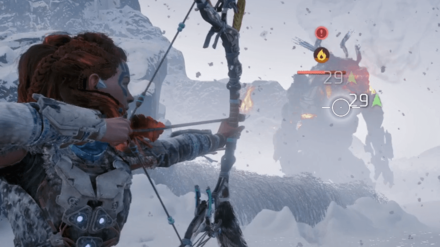 Next, defeat the Frostclaw - a machine unique to the Frozen Wilds. Destroy its Freeze Sac and Freeze Unit to deal massive damage and render it Frozen. |
| 15 | 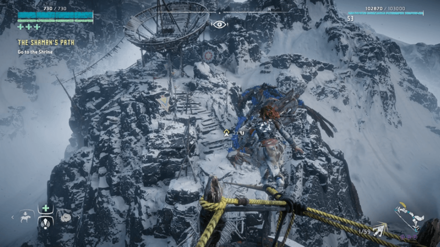 Make your way up to the shrine. It should be just under the large, dilapidated satellite dish. |
| 16 | 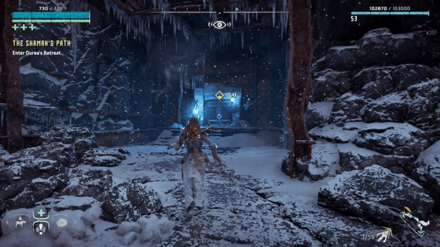 Ourea has retreated inside the facility. Head up to the door and explore the inside. Follow the waypoints to a locked bunker door. |
| 17 | 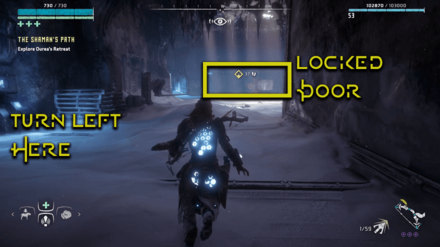 When you get to the room with the locked bunker door, immediately head left. At the end of this room, past all the shelves, is a vent entrance. Go inside and work your way to the area that contains the lock mechanism. |
| 18 | 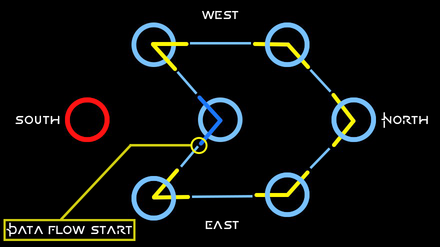 To unlock the door, players must reroute the Data Flow in this new puzzle type. Use the provided solution to open it. The indicated directions follow your compass. |
| 19 | 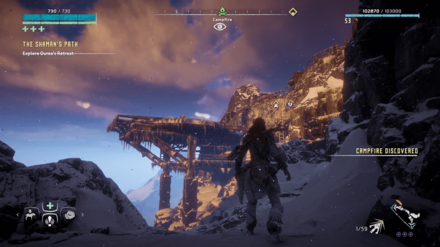 Return to the locked door and climb up, into another vent. This brings you to the mountains outside. Parkour your way to the helipad to access the final area of Ourea's Retreat. |
| 20 | 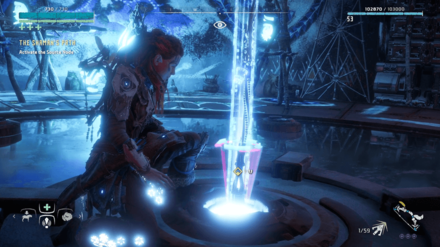 Using your spear, activate the Source Node at the center of the room. |
| 21 | 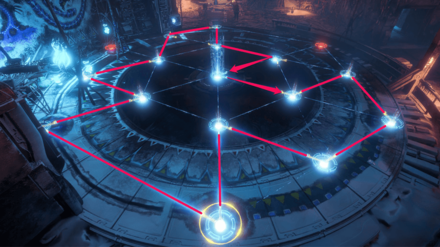 Another Data Flow Puzzle will await you once the node is activated. Solve it using the provided solution and listen to CYAN's message. |
| 22 | 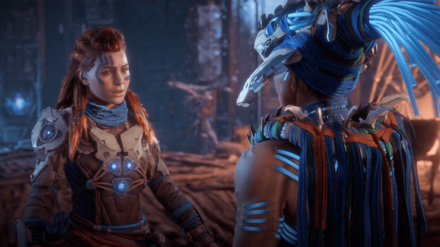 Talk to Ourea. Talk to Ourea.Talk to Ourea about what you just heard. When the conversation ends, she will ask you to take her weapon. Before doing so, make sure to collect the Animal Figurine inside the room. |
| 23 |  Grab the Banuk Stormslinger from the nearby bench to complete the quest. |
Tips and Strategies
Always Activate Ritualistic Markers
Unlike the base game levels, DLC areas tend to have a lot of branching paths that lead to either collectibles or resources. To make pathfinding easier (and keep you on track), always activate the Ritualistic Markers that line the Shaman's Path.
Always Destroy or Override Control Towers First
During this quest, Aloy will take on two Control Towers. These new enemies will heal damaged Machines and disable the shields of the Shield Weaver Outfit when they let out a pulse of energy.
Always disable them first before going up against any of the Machines. This levels the playing field significantly, especially given how high level the enemies are in the DLC.
Destroy the Frostclaw's Freeze Sacs and Freeze Unit
The brand new Frostclaw is a very tanky and dangerous Machine. Players looking to tackle it as part of the optional objective should aim for the Freeze Sacs and Freeze Unit on its shoulders and chest, respectively.
Use Triple Shot to Deal Massive Burst Damage
|
|
Use R1 (on PS4) while aiming to notch up to 3 arrows at once on all bow weapons. |
|---|
A frozen Frostclaw will be suceptible to normal arrow damage. Use a combination of the Triple Shot ability and Hardpoint Arrows to deal a lot of damage within a short amount of time.
With the right damage modifications on your Shadow Hunter or Banuk Striker Bow, the Frostclaw should go down in record time.
Horizon Zero Dawn Quests
Main Quest Guides
Frozen Wild Main Quest Guides
| Frozen Wild Main Quest Walkthroughs | |
|---|---|
| Into the Frozen Wilds | The Shaman's Path |
| For the Werak | Firebreak |
| The Forge of Winter | |
Author
The Shaman's Path Walkthrough
Please participate in our site
improvement survey
03/2026
improvement survey
03/2026
Would you assist in
improving Game8's site?
improving Game8's site?

×
We are listening to our users' valuable opinions and discussing how to act on them.
The information collected through this survey will be used for the purpose of improving our services. In addition, the information will only be disclosed a part of a statistic in a format that will not allow identification of personal information.
Begin Survey
Not Now
×
Please rate each item regarding Game8.co's Advertisements.
Amount of Ads
Very Dissatisfied
Somewhat Dissatisfied
Fine
Somewhat Satisfied
Highly Satisfied
Placement of Ads
Timing of Ad Display
Ad Loading Speed
Safeness of Ads
Content of Ads
×
Please rate each item regarding Game8.co's Quality of Articles.
Amount of information
Very Dissatisfied
Somewhat Dissatisfied
Fine
Somewhat Satisfied
Highly Satisfied
Frequency of updates
Speed of new information
Accuracy of articles
Understandibility of articles
Readability of sentences
×
Please rate each item regarding Game8.co's Usability of the Site.
Ease of finding information
Very Dissatisfied
Somewhat Dissatisfied
Fine
Somewhat Satisfied
Highly Satisfied
Loading Speed
Use of Color
Font Size
Visibility of Images
Easy to Understand Layout
×
Please rate each item regarding Game8.co's Message Boards, Comments.
Ease of Writing
Very Dissatisfied
Somewhat Dissatisfied
Fine
Somewhat Satisfied
Highly Satisfied
Readability
Ease in Finding Information
Comment Quality
Comment Quantity
Admin Response
×
Please rate each item regarding Game8.co's Site's new design.
Please rate our site's new design
Very Dissatisfied
Somewhat Dissatisfied
Fine
Somewhat Satisfied
Highly Satisfied
Do you think that the website's design change makes the site easier to use?
Has the new design made it easier for you to find information on the site?
Has the new design improved the overall visual appeal of the site?
How would you rate your overall satisfaction with the new design of the site?
×
How likely are you to recommend Game8 to someone you know?
Very Unlikely
0
1
2
3
4
5
6
7
8
9
10
Very Likely
If you have other opinions regarding potential improvement to the website, please share them with us. We would appreciate your honest opinion.
Note: This is a free response section, so you can proceed without entering anything.
Note: Please be sure not to enter any kind of personal information into your response.
Note: Please be sure not to enter any kind of personal information into your response.
×
Thank You
×
Thank you for participating in our survey! Your answers will help us to improve the quality of our website and services.
We hope you continue to make use of Game8.
We hope you continue to make use of Game8.
Close
Rankings
- We could not find the message board you were looking for.
Gaming News


![Everwind Review [Early Access] | The Shaky First Step to A Very Long Journey](https://img.game8.co/4440226/ab079b1153298a042633dd1ef51e878e.png/thumb)

![Monster Hunter Stories 3 Review [First Impressions] | Simply Rejuvenating](https://img.game8.co/4438641/2a31b7702bd70e78ec8efd24661dacda.jpeg/thumb)
Popular Games

Genshin Impact Walkthrough & Guides Wiki
Honkai: Star Rail Walkthrough & Guides Wiki
Umamusume: Pretty Derby Walkthrough & Guides Wiki
Pokemon Pokopia Walkthrough & Guides Wiki
Resident Evil Requiem (RE9) Walkthrough & Guides Wiki
Monster Hunter Wilds Walkthrough & Guides Wiki
Wuthering Waves Walkthrough & Guides Wiki
Arknights: Endfield Walkthrough & Guides Wiki
Pokemon FireRed and LeafGreen (FRLG) Walkthrough & Guides Wiki
Pokemon TCG Pocket (PTCGP) Strategies & Guides Wiki


Recommended Games
Cyberpunk 2077: Ultimate Edition Walkthrough & Guides Wiki
Diablo 4: Vessel of Hatred Walkthrough & Guides Wiki
Fire Emblem Heroes (FEH) Walkthrough & Guides Wiki
Yu-Gi-Oh! Master Duel Walkthrough & Guides Wiki
Super Smash Bros. Ultimate Walkthrough & Guides Wiki
Pokemon Brilliant Diamond and Shining Pearl (BDSP) Walkthrough & Guides Wiki
Elden Ring Shadow of the Erdtree Walkthrough & Guides Wiki
Monster Hunter World Walkthrough & Guides Wiki
The Legend of Zelda: Tears of the Kingdom Walkthrough & Guides Wiki
Persona 3 Reload Walkthrough & Guides Wiki


All rights reserved
©2016 Sony Interactive Entertainment Europe. Horizon Zero Dawn is a trademark of Sony Interactive Entertainment
America LLC. Developed by Guerrilla.
Sony Interactive Entertainment Privacy Policy & EULA
The copyrights of videos of games used in our content and other intellectual property rights belong to the provider of the game.
The contents we provide on this site were created personally by members of the Game8 editorial department.
We refuse the right to reuse or repost content taken without our permission such as data or images to other sites.