This survey will take about 1 minute.
Your answers will help us to improve our website.
Horizon Zero Dawn
The Mountain That Fell Walkthrough
This guide will show you how to complete The Mountain That Fell, a main quest in Horizon Zero Dawn. Read on to learn the objectives, strategies, location, and rewards for The Mountain That Fell main quest.
| Previous Quest | Next Quest |
|---|---|
| The Heart of the Nora | The Looming Shadow |
List of Contents
The Mountain That Fell Quest Information
General Info
| Quest Name | The Mountain That Fell |
|---|---|
| Quest Giver | GAIA |
| Rewards |
14000 XP +1 Skill Point Sylen's Lance |
| Recommended Level | 28 |
| Percent (%) Completion | - - |
| Description | Aloy journeys to the ruins of GAIA Prime in search of the Master Override - her only hope to defeat HADES. |
The Mountain That Fell Walkthrough
How to Complete
| Objectives | |
|---|---|
| 1 | 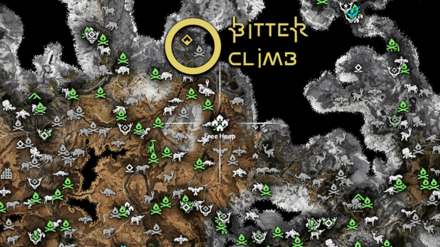 The Bitter Climb can be found in the mountains north of Free Heap. Head over to the marked Campfire to begin the quest. |
| 2 | 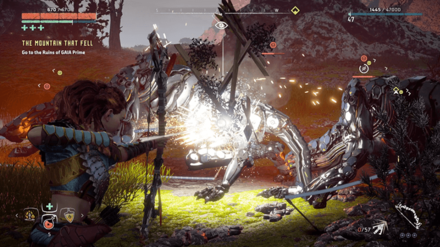 Climb up to the first level. Here, players will fight 3 Stalkers and a handful of Watchers. Defeat them to continue the climb. |
| 3 |  Climb up to the second level. Here, players will fight 2 Ravagers and a handful of Glinthawks. Defeat them to continue the climb. |
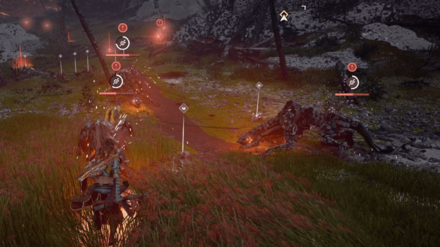
| 4 | 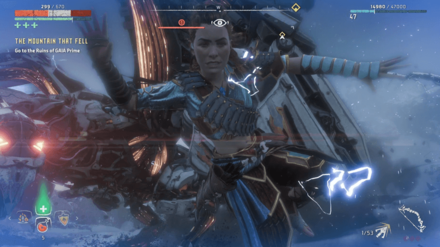 On the third and final level is a Stormbird. Defeat it to safely make it to the ruins of GAIA Prime. |
| 5 | 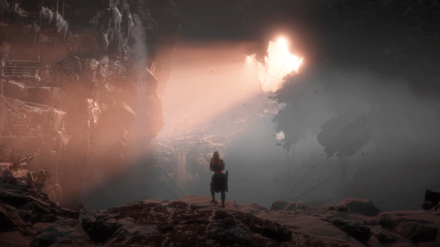 Go to the Ruins of GAIA Prime. Go to the Ruins of GAIA Prime.With the Stormbird defeated, start heading to the mouth of GAIA Prime's crater. |
| 6 | 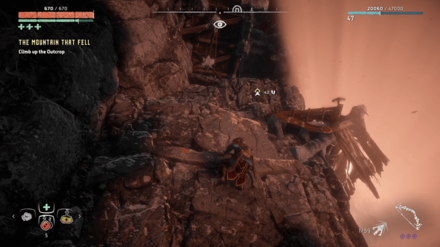 Listen to Sylens and climb up the outcrop. This leads Aloy to Sylen's makeshift workshop. |
| 7 | 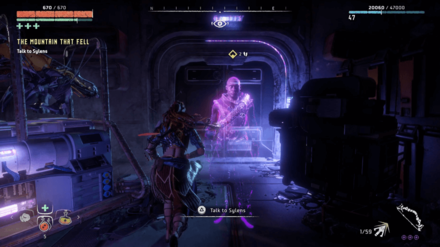 Speak to Sylens about your objectives and, once done, scan yourself at the door to unlock it.. |
| 8 | 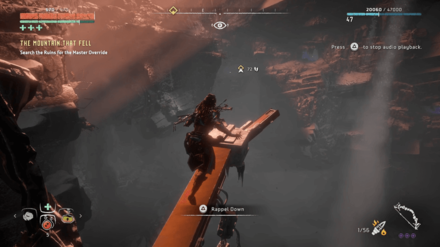 Follow the waypoints to descend to the ruins. Eventually, you will rappel down to reach the bridge that connects each end of the chasm. |
| 8.5 | 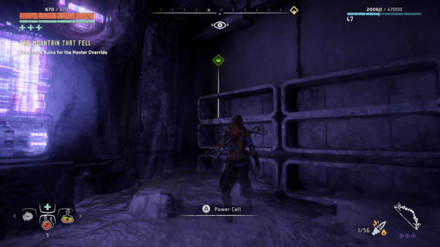 Before you first cross the expanse leading up to the main ruins of GAIA Prime, Aloy will need to rappel down. To get the Power Cell in this level, immediately turn around after rapelling. Climb the cliff you see (there will be handholds) and it should lead you to the area containing the 5th Power Cell. |
| 9 | 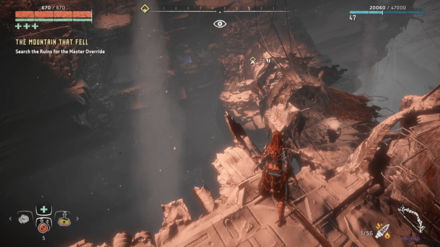 Cross the bridge and head over to the GAIA prime ruins. Follow the waypoints through the facility, past Sobeck's quarters, and into a makeshift Shrine of some sort. |
| 10 | 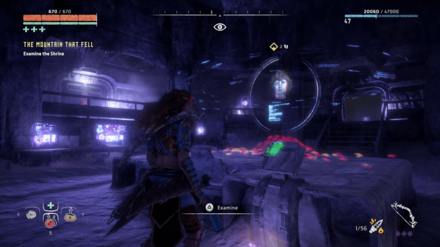 Use the terminal to play a Hologram recording. Watch it to know what became of Dr. Sobeck. |
| 11 | 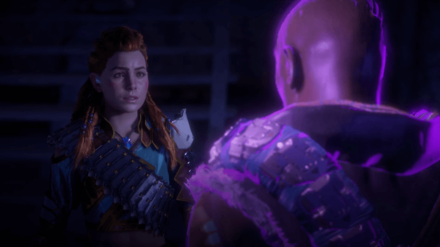 Talk to Sylens. Talk to Sylens.Discuss your findings with Sylens before moving on. |
| 12 | 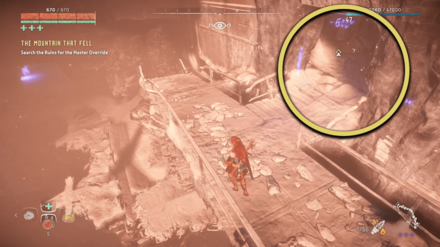 The control room is located on top of a flight of wrecked stairs. Make your way to it by following the waypoints. |
| 13 | 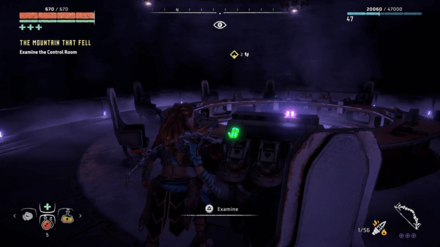 Use the terminal to play a Hologram recording of what happened in the Control Room. |
| 14 |  Talk to Sylens. Talk to Sylens.Speak to Sylens about what you found and the events that happened so far. |
| 15 | 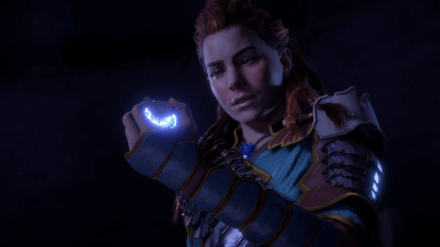 Claim the Master Override. Claim the Master Override.Claim the Master Override. It should be on the circular desk dominating the center of the Control Room. |
| 16 | 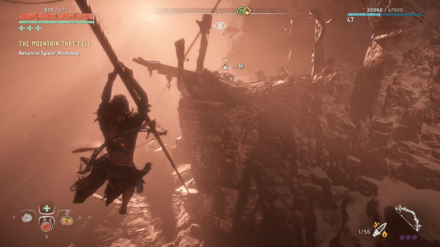 Exit the control room and turn right. Head down the steps and use the zipline to return to the mouth of GAIA Prime's Chasm. Climb up and return to Sylen's Workshop. |
| 17 |  Attach the Master Override to the Lance. Attach the Master Override to the Lance.Once inside the workshop, speak to Sylens one last time. He will give you his lance to which you can attach the Master Override at the workbench. |
| 17.5 | Complete the Oseram Questline. If players have not completed the Oseram questline (first given by Erend during the events of The City of the Sun), they will not be able to continue on to The Looming Shadow main quest. Complete the Oseram Questline to resume Aloy's confrontation with Hades. |
Tips and Strategies
Purchase a Shadow Ropecaster
During the Bitter Climb, Aloy will be facing a lot of fast-moving Machines. All of them have the ability to knock you down during the fight.
To get control of those very chaotic, drawn-out fights, purchase and equip a Shadow Ropecaster. The Tie Down mechanic will work wonders during this quest, allowing you to keep multiple Machines tied up and stunned for long periods of time.
Use Tearblast Arrows to Reveal Stalkers
Stalkers will turn invisible once they detect Aloy's presence. To prevent them from using this ability, use Tearblast Arrows to destroy the Stealth Generators located just below their shoulder blades.
Use Fire Arrows to Disable Glinthawks
During battle, Glinthawks will pepper the field with Freeze bombs, making Aloy stumble and interrupting her actions mid-animation. This is troublesome since the second level fight will be against 2 lunging Ravagers.
To momentarily disable Glinthawks, set them on fire using Fire Arrows. This prevents them from using any freeze attacks and forces them to land for a brief period of time. This should allow you to handle the Ravagers, painlessly.
Detach and Use Ravager Guns
To quickly deal with the Ravagers on the second level, hit their top-mounted cannons with Tearblast Arrows in order to detach them. After, tie down each one with a Ropecaster to prevent them from moving.
With the Ravagers disabled, pick up their detached guns and go to town on their disabled forms. A few bursts from the cannon should deal with each one effectively.
Use the Ropecaster to Tie Down the Stormbird
Hitting the Stormbird mid-flight will be very difficult. To easily deal with it and prevent it from escaping (as well as stopping majority of its Shock Attacks), use the Shadow Ropecaster to keep it grounded.
The close proximity allows you to easily take apart its armor in close range and exploit the different weaknesses it has.
Use Freeze Ammunition on the Stormbird's Freeze Canisters
Do note, before exploiting the Freeze Canisters, players will have to tear apart the armor covering them first. Use Hardpoint Arrows to make quick work of the plating.
Once exposed, use Freeze Ammunition from a Carja War Bow or Sling on the canisters. This sets off an explosion that freezes the Stormbird.
Use Freeze and Hardpoint Arrows to Deal Massive Damage
Oncce frozen, the Stormbird will take increased damage from normal arrows. Use Hardpoint Arrows on the Engine parts (located along its wings) to deal a high amount of damage within a short duration.
Keep repeating these tactics until the Stormbird is defeated and the way is clear to the GAIA Prime Ruins.
Grab the 5th Power Cell
If players have been consistently getting the Ancient Armory Power Cells, the 5th and last cell needed to obtain the Shield Weaver Outfit will be found in the Ruins of GAIA Prime.
| 1 | After first entering the door inside Sylens' Workship, find the rappel location used to descend further into the GAIA Prime Ruins. |
|---|---|
| 2 | 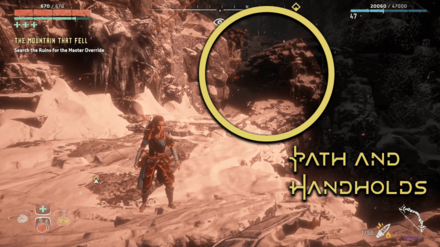 After you rappel down, turn around. There should be handholds that lead up to the cliff behind you. |
| 3 | 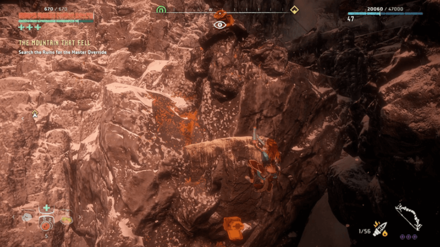 Ascend this cliff face to arrive at the opening in the cliff. |
| 4 | 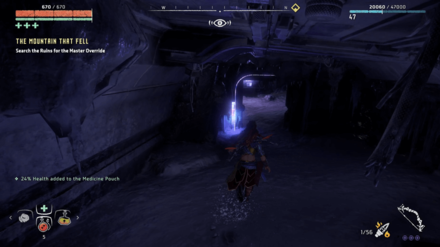 Head inside and through the abandoned hallway. |
| 5 | The hall at the end will contain the 5th Power Cell. It can be looted from one of the shelves. |
Horizon Zero Dawn Quests
Main Quest Guides
| Main Quest Walkthroughs | |
|---|---|
| A Gift From the Past | Lessons of the Wild |
| The Point of the Spear | Mother's Heart |
| The Proving | The Womb of the Mountain |
| A Seeker at the Gates | The City of the Sun |
| Maker's End | The Grave-Hoard |
| To Curse the Darkness | Deep Secrets of the Earth |
| The Terror of the Sun | The Heart of the Nora |
| The Mountain That Fell | The Looming Shadow |
| The Face of Extinction | |
| Main Quests - Nora Tribe | |
| The War-Chief's Trail | Revenge of the Nora |
| Main Quests - Oseram Tribe | |
| The Field of the Fallen | Into the Borderlands |
| The Sun Shall Fall | |
Frozen Wild Main Quest Guides
| Frozen Wild Main Quest Walkthroughs | |
|---|---|
| Into the Frozen Wilds | The Shaman's Path |
| For the Werak | Firebreak |
| The Forge of Winter | |
Author

The Mountain That Fell Walkthrough
Please participate in our site
improvement survey
03/2026
improvement survey
03/2026
Would you assist in
improving Game8's site?
improving Game8's site?

×
We are listening to our users' valuable opinions and discussing how to act on them.
The information collected through this survey will be used for the purpose of improving our services. In addition, the information will only be disclosed a part of a statistic in a format that will not allow identification of personal information.
Begin Survey
Not Now
×
Please rate each item regarding Game8.co's Advertisements.
Amount of Ads
Very Dissatisfied
Somewhat Dissatisfied
Fine
Somewhat Satisfied
Highly Satisfied
Placement of Ads
Timing of Ad Display
Ad Loading Speed
Safeness of Ads
Content of Ads
×
Please rate each item regarding Game8.co's Quality of Articles.
Amount of information
Very Dissatisfied
Somewhat Dissatisfied
Fine
Somewhat Satisfied
Highly Satisfied
Frequency of updates
Speed of new information
Accuracy of articles
Understandibility of articles
Readability of sentences
×
Please rate each item regarding Game8.co's Usability of the Site.
Ease of finding information
Very Dissatisfied
Somewhat Dissatisfied
Fine
Somewhat Satisfied
Highly Satisfied
Loading Speed
Use of Color
Font Size
Visibility of Images
Easy to Understand Layout
×
Please rate each item regarding Game8.co's Message Boards, Comments.
Ease of Writing
Very Dissatisfied
Somewhat Dissatisfied
Fine
Somewhat Satisfied
Highly Satisfied
Readability
Ease in Finding Information
Comment Quality
Comment Quantity
Admin Response
×
Please rate each item regarding Game8.co's Site's new design.
Please rate our site's new design
Very Dissatisfied
Somewhat Dissatisfied
Fine
Somewhat Satisfied
Highly Satisfied
Do you think that the website's design change makes the site easier to use?
Has the new design made it easier for you to find information on the site?
Has the new design improved the overall visual appeal of the site?
How would you rate your overall satisfaction with the new design of the site?
×
How likely are you to recommend Game8 to someone you know?
Very Unlikely
0
1
2
3
4
5
6
7
8
9
10
Very Likely
If you have other opinions regarding potential improvement to the website, please share them with us. We would appreciate your honest opinion.
Note: This is a free response section, so you can proceed without entering anything.
Note: Please be sure not to enter any kind of personal information into your response.
Note: Please be sure not to enter any kind of personal information into your response.
×
Thank You
×
Thank you for participating in our survey! Your answers will help us to improve the quality of our website and services.
We hope you continue to make use of Game8.
We hope you continue to make use of Game8.
Close
Rankings
- We could not find the message board you were looking for.
Gaming News


![Everwind Review [Early Access] | The Shaky First Step to A Very Long Journey](https://img.game8.co/4440226/ab079b1153298a042633dd1ef51e878e.png/thumb)

![Monster Hunter Stories 3 Review [First Impressions] | Simply Rejuvenating](https://img.game8.co/4438641/2a31b7702bd70e78ec8efd24661dacda.jpeg/thumb)
Popular Games

Genshin Impact Walkthrough & Guides Wiki
Honkai: Star Rail Walkthrough & Guides Wiki
Umamusume: Pretty Derby Walkthrough & Guides Wiki
Pokemon Pokopia Walkthrough & Guides Wiki
Resident Evil Requiem (RE9) Walkthrough & Guides Wiki
Monster Hunter Wilds Walkthrough & Guides Wiki
Wuthering Waves Walkthrough & Guides Wiki
Arknights: Endfield Walkthrough & Guides Wiki
Pokemon FireRed and LeafGreen (FRLG) Walkthrough & Guides Wiki
Pokemon TCG Pocket (PTCGP) Strategies & Guides Wiki


Recommended Games
Diablo 4: Vessel of Hatred Walkthrough & Guides Wiki
Fire Emblem Heroes (FEH) Walkthrough & Guides Wiki
Yu-Gi-Oh! Master Duel Walkthrough & Guides Wiki
Super Smash Bros. Ultimate Walkthrough & Guides Wiki
Pokemon Brilliant Diamond and Shining Pearl (BDSP) Walkthrough & Guides Wiki
Elden Ring Shadow of the Erdtree Walkthrough & Guides Wiki
Monster Hunter World Walkthrough & Guides Wiki
The Legend of Zelda: Tears of the Kingdom Walkthrough & Guides Wiki
Persona 3 Reload Walkthrough & Guides Wiki
Cyberpunk 2077: Ultimate Edition Walkthrough & Guides Wiki


All rights reserved
©2016 Sony Interactive Entertainment Europe. Horizon Zero Dawn is a trademark of Sony Interactive Entertainment
America LLC. Developed by Guerrilla.
Sony Interactive Entertainment Privacy Policy & EULA
The copyrights of videos of games used in our content and other intellectual property rights belong to the provider of the game.
The contents we provide on this site were created personally by members of the Game8 editorial department.
We refuse the right to reuse or repost content taken without our permission such as data or images to other sites.