This survey will take about 1 minute.
Your answers will help us to improve our website.
Final Fantasy Crystal Chronicles
The Mine of Cathuriges Dungeon Walkthrough

This is a guide to the dungeon The Mine of Cathuriges in Final Fantasy: Crystal Chronicles Remastered Edition (FFCC). Read on to see our guide about The Mine of Cathuriges and a list of all obtainable items, artifacts, scrolls, and monsters you can encounter in this dungeon on each cycle.
| Normal | Hard |
|---|---|
| The Mine of Cathuriges | Miasma Pit |
List of Contents
The Mine of Cathuriges Map
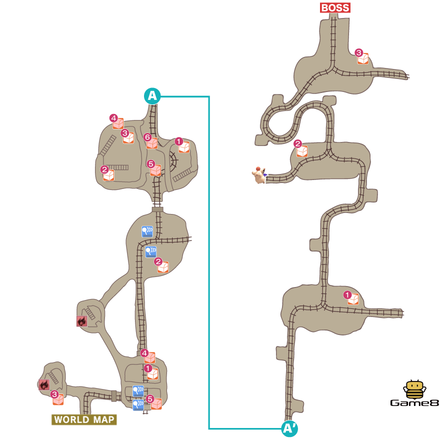 Enlarge
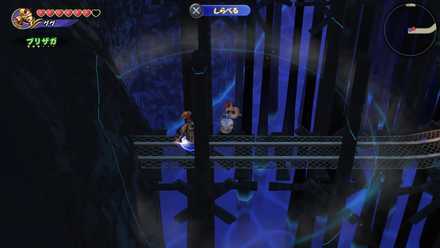
On the second half of the map, there are dead ends near treasure chests. Go towards the second dead end
to get your Moogle Stamp.
Item List
Area 1
| Contents | |
|---|---|
| 1 | 10 Gil/20 Gil/15 Gil/30 Gil |
| 2 | Clear |
| 3 | - |
| 4 | - |
| 5 | - |
Area 2
| Contents | |
|---|---|
| 1 | Cure |
| 2 | Raise |
| 3 | 10 Gil/20 Gil/15 Gil/30 Gil |
| 4 | - |
| 5 | - |
| 6 | - |
Area 3
| Contents | |
|---|---|
| 1 | Clear |
| 2 | Buckler/Silver Spectacles |
| 3 | Earth Pendant |
Area 1
| Contents | |
|---|---|
| 1 | 20 Gil/40 Gil/30 Gil/60 Gil |
| 2 | Clear |
| 3 | Alloy/Mythril |
| 4 | Tome of Speed |
| 5 | Tome of Speed |
Area 2
| Contents | |
|---|---|
| 1 | Cure |
| 2 | Raise |
| 3 | 20 Gil/30 Gil/40 Gil/60 Gil |
| 4 | Alloy/Mythril/Shiny Shard |
| 5 | Alloy/Mythril/Shiny Shard |
| 6 | Alloy/Mythril/Shiny Shard |
Area 3
| Contents | |
|---|---|
| 1 | Clear |
| 2 | Black Hood/Silver Spectacles |
| 3 | Earth Pendant/Moogle Pocket |
Area 1
| Contents | |
|---|---|
| 1 | 40 Gil/100 Gil/60 Gil/150 Gil |
| 2 | Clear |
| 3 | Diamond Ore/Mythril/Tiny Crystal |
| 4 | Secret of Speed/Tome of Speed |
| 5 | Tome of Speed |
Area 2
| Contents | |
|---|---|
| 1 | Cure |
| 2 | Raise |
| 3 | 40 Gil/60 Gil/100 Gil/150 Gil |
| 4 | Diamond Ore/Mythril/Tiny Crystal |
| 5 | Diamond Ore/Mythril/Tiny Crystal |
| 6 | Diamond Ore/Mythril/Tiny Crystal |
Area 3
| Contents | |
|---|---|
| 1 | Clear |
| 2 | Black Hood |
| 3 | Earth Pendant/Moogle Pocket/Wonder Bangle |
The Mine of Cathuriges Walkthrough
Recommended Starting Stats
| HP | Strength | Defense | Magic |
|---|---|---|---|
| 4 | 20 | 15 | 10 |
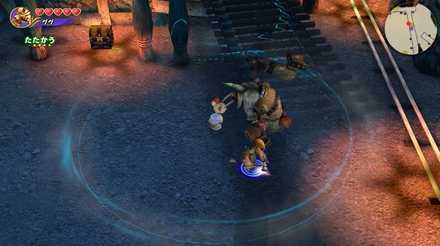
Defeat the Enemy to the Left for Cure
The second you enter the dungeon turn left to find a monster that will drop a Cure magicite. There are enemies that drop other magicite as well but this dungeon doesn't require magic too heavily (unless you play as a Yuke) so you don't need to worry about it so much.
List of Magicite and its Effects
Watch Out For Bombs
Final Fantasy veterans will know that when tackling Bomb or Grenade type enemies to beware of them exploding in their face. The same holds true here as you will encounter Bombs in this dungeon. Be sure to get away from them quickly when they go down to avoid taking heavy damage. The explosion will also damage other monsters so try and take Bombs out first to take advantage of this.
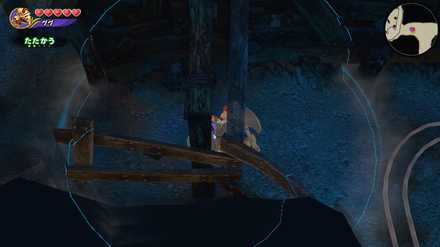
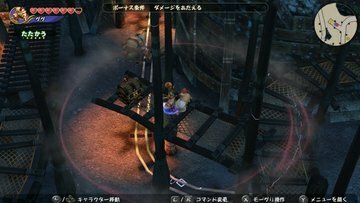
Both Minecart Switches Are the Northern Switch
Throughout the dungeon you will be hitting a minecart along the tracks to destroy otherwise unbreakable barriers. Don't hit the cart too many times, however, as at two points on your way through the mines you will have to change the direction of the track by stepping on a switch. Both switches will be the one to the north of the cart. Once you've confirmed the tracks are facing in the correct direction keep on smacking the cart!
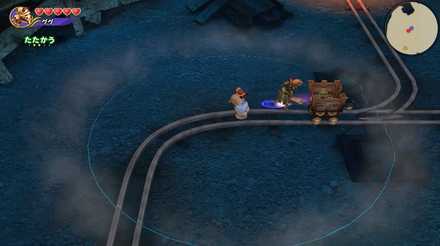
An Ogre Has the Key
Past the first screen transition you will eventually encounter a gate blocking your way. To unlock the gate and pass through, head back down to your left and kill the Ogre there to get the key. Ogres are have attacks that can't be avoided without blocking so be careful when taking them on.
More to Explore in Cycle 2 and Beyond
Starting in the second cycle the layout of the dungeon will change allowing you to explore the upper floors of many of the rooms. There also plenty of new treasure chests to loot so if you have the time to spare you should take another look around. Despite the layout differences, however, the path to the boss remains unchanged.
Use Holy on Wraiths
In cycles 2 and 3, use Holy to make Wraiths vulnerable, then finish them off with all you've got.
Broader View Upstairs
Go upstairs during the 2nd and 3rd cycles, to get a wider view of every room, making it easier to find all treasure.
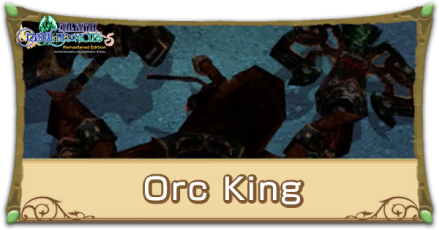
The Mine of Cathuriges Boss Guide
Orc King
The Mine of Cathuriges Monsters
| Monster |
Bat
Cycle: 2 & 3 |
Bomb
Cycle: All |
|---|---|
|
Cockatrice
Cycle: 2 & 3 |
Ice Bomb
Cycle: 2 & 3 |
|
Ogre
Cycle: All |
Orc
Cycle: All |
|
Orc (Mace)
Cycle: 2 & 3 |
Orc (Spear)
Cycle: 2 & 3 |
|
Orc Mage
Cycle: All |
Thunder Bomb
Cycle: 2 & 3 |
|
Wraith
Cycle: 2 & 3 |
|
The Mine of Cathuriges Obtainables
The alphabets and numbers refers to the items/monsters where those items can be obtained respectively.
Scrolls List
| Scroll |
Tome of Speed
(Cycle 2 & 3) |
Secrets of Speed
(Cycle 3) |
Frost Craft
(Cycle 2 & 3) |
|---|---|---|
|
Flame Craft
(Cycle 2 & 3) |
Mythril Armor
(Cycle 2 & 3) |
Lightning Armor
(Cycle 3) |
|
Frost Armor
(Cycle 3) |
Flame Armor
(Cycle 3) |
Bronze Armor
(Cycle 2) |
|
Master's Weapon
(Cycle 2 & 3) |
Legendary Weapon
(Boss) |
|
Materials
| Materials |
Orc Belt
(Boss) |
Orichalcum
(Boss) |
Bronze
(Cycle 1) |
|---|---|---|
|
Bronze Shard
(Cycle 1) |
Iron
(Cycle 1 & 2) |
Iron Shard
(Cycle 1 & 2) |
|
Crystal Ball
(Cycle 2) |
Shiny Shard
(Cycle 2) |
Alloy
(Cycle 2 & 3) |
|
Chilly Gel
(Cycle 2 & 3) |
Cockatrice Scale
(Cycle 2 & 3) |
Magma Rock
(Cycle 2 & 3) |
|
Mythril
(Cycle 2 & 3) |
Ogre Fang
(Cycle 2 & 3) |
Thunderball
(Cycle 2 & 3) |
|
Diamond Ore
(Cycle 3) |
Tiny Crystal
(Cycle 3) |
|
Artifacts
| Artifacts |
Earth Pendant
(All & Boss) |
Kaiser Knuckles
(Boss) |
Faerie Ring
(Boss) |
|---|---|---|
|
Ultimate Pocket
(Boss) |
Onion Sword
(Boss) |
Winged Cap
(Boss) |
|
Murasame
(Boss) |
Cat's Bell
(Cycle 1 & 2 & Boss) |
Double Axe
(Cycle 1 & 2 & Boss) |
|
Green Beret
(Cycle 1 & 2 & Boss) |
Silver Bracer
(Cycle 1 & 2 & Boss) |
Silver Spectacles
(Cycle 1 & 2 & Boss) |
|
Buckler
(Cycle 1 & Boss) |
Dragon's Whisker
(Cycle 1 & Boss) |
Mage Masher
(Cycle 1 & Boss) |
|
Maneater
(Cycle 1 & Boss) |
Shuriken
(Cycle 1 & Boss) |
Flametongue
(Cycle 2 & 3) |
|
Ice Brand
(Cycle 2 & 3) |
Kris
(Cycle 2 & 3) |
Sage's Staff
(Cycle 2 & 3) |
|
Black Hood
(Cycle 2 & 3 & Boss) |
Moogle Pocket
(Cycle 2 & 3 & Boss) |
Loaded Dice
(Cycle 3 & Boss) |
|
Mage's Staff
(Cycle 3 & Boss) |
Rune Bell
(Cycle 3 & Boss) |
Sasuke's Blade
(Cycle 3 & Boss) |
|
Wonder Bangle
(Cycle 3 & Boss) |
||
Crystal Chronicles Related Guides

Story Walkthrough Guides
| All Story Guides | |
|---|---|
| Story Walkthrough | Post-Game Dungeons |
All Dungeon and Town Guides
| Tipa Peninsula | |
|---|---|
| Tipa | Port Tipa |
| River Belle Path | Goblin Wall |
| Iron Mine Downs | |
| Marr's Pass | Jegon River (East) |
| The Mushroom Forest | The Mine of Cathuriges |
| Vale of Alfitaria | |
| Alfitaria | Tida |
| Moschet Manor | - |
| Veo Lu | |
| Shella | Veo Lu Sluice |
| Plains of Fum | |
| The Fields of Fum | Jegon River (West) |
| Daemon's Court | Selepation Cave |
| Kilanda Islands | |
| Kilanda | - |
| Rebena Plains | |
| Conall Curach | Rebena Te Ra |
| Lynari Isle | |
| Leuda | Lynari Desert |
| The Abyss | |
| Mag Mell | Mount Vellenge |
| The Nest of Memories | - |
Author
The Mine of Cathuriges Dungeon Walkthrough
Please participate in our site
improvement survey
03/2026
improvement survey
03/2026
Would you assist in
improving Game8's site?
improving Game8's site?

×
We are listening to our users' valuable opinions and discussing how to act on them.
The information collected through this survey will be used for the purpose of improving our services. In addition, the information will only be disclosed a part of a statistic in a format that will not allow identification of personal information.
Begin Survey
Not Now
×
Please rate each item regarding Game8.co's Advertisements.
Amount of Ads
Very Dissatisfied
Somewhat Dissatisfied
Fine
Somewhat Satisfied
Highly Satisfied
Placement of Ads
Timing of Ad Display
Ad Loading Speed
Safeness of Ads
Content of Ads
×
Please rate each item regarding Game8.co's Quality of Articles.
Amount of information
Very Dissatisfied
Somewhat Dissatisfied
Fine
Somewhat Satisfied
Highly Satisfied
Frequency of updates
Speed of new information
Accuracy of articles
Understandibility of articles
Readability of sentences
×
Please rate each item regarding Game8.co's Usability of the Site.
Ease of finding information
Very Dissatisfied
Somewhat Dissatisfied
Fine
Somewhat Satisfied
Highly Satisfied
Loading Speed
Use of Color
Font Size
Visibility of Images
Easy to Understand Layout
×
Please rate each item regarding Game8.co's Message Boards, Comments.
Ease of Writing
Very Dissatisfied
Somewhat Dissatisfied
Fine
Somewhat Satisfied
Highly Satisfied
Readability
Ease in Finding Information
Comment Quality
Comment Quantity
Admin Response
×
Please rate each item regarding Game8.co's Site's new design.
Please rate our site's new design
Very Dissatisfied
Somewhat Dissatisfied
Fine
Somewhat Satisfied
Highly Satisfied
Do you think that the website's design change makes the site easier to use?
Has the new design made it easier for you to find information on the site?
Has the new design improved the overall visual appeal of the site?
How would you rate your overall satisfaction with the new design of the site?
×
How likely are you to recommend Game8 to someone you know?
Very Unlikely
0
1
2
3
4
5
6
7
8
9
10
Very Likely
If you have other opinions regarding potential improvement to the website, please share them with us. We would appreciate your honest opinion.
Note: This is a free response section, so you can proceed without entering anything.
Note: Please be sure not to enter any kind of personal information into your response.
Note: Please be sure not to enter any kind of personal information into your response.
×
Thank You
×
Thank you for participating in our survey! Your answers will help us to improve the quality of our website and services.
We hope you continue to make use of Game8.
We hope you continue to make use of Game8.
Close
Rankings
- We could not find the message board you were looking for.
Gaming News


![Everwind Review [Early Access] | The Shaky First Step to A Very Long Journey](https://img.game8.co/4440226/ab079b1153298a042633dd1ef51e878e.png/thumb)

![Monster Hunter Stories 3 Review [First Impressions] | Simply Rejuvenating](https://img.game8.co/4438641/2a31b7702bd70e78ec8efd24661dacda.jpeg/thumb)
Popular Games

Genshin Impact Walkthrough & Guides Wiki
Honkai: Star Rail Walkthrough & Guides Wiki
Umamusume: Pretty Derby Walkthrough & Guides Wiki
Pokemon Pokopia Walkthrough & Guides Wiki
Resident Evil Requiem (RE9) Walkthrough & Guides Wiki
Monster Hunter Wilds Walkthrough & Guides Wiki
Wuthering Waves Walkthrough & Guides Wiki
Arknights: Endfield Walkthrough & Guides Wiki
Pokemon FireRed and LeafGreen (FRLG) Walkthrough & Guides Wiki
Pokemon TCG Pocket (PTCGP) Strategies & Guides Wiki


Recommended Games
Diablo 4: Vessel of Hatred Walkthrough & Guides Wiki
Fire Emblem Heroes (FEH) Walkthrough & Guides Wiki
Yu-Gi-Oh! Master Duel Walkthrough & Guides Wiki
Super Smash Bros. Ultimate Walkthrough & Guides Wiki
Pokemon Brilliant Diamond and Shining Pearl (BDSP) Walkthrough & Guides Wiki
Elden Ring Shadow of the Erdtree Walkthrough & Guides Wiki
Monster Hunter World Walkthrough & Guides Wiki
The Legend of Zelda: Tears of the Kingdom Walkthrough & Guides Wiki
Persona 3 Reload Walkthrough & Guides Wiki
Cyberpunk 2077: Ultimate Edition Walkthrough & Guides Wiki


All rights reserved
© 2003, 2020 SQUARE ENIX CO., LTD. All Rights Reserved.
The copyrights of videos of games used in our content and other intellectual property rights belong to the provider of the game.
The contents we provide on this site were created personally by members of the Game8 editorial department.
We refuse the right to reuse or repost content taken without our permission such as data or images to other sites.