All Treasure Locations
★ Trophy Guide: How to Get Platinum
☆ Interactive Map | All Treasure Locations
┗ Toshara | Tatooine | Kijimi | Akiva
★ Credits Farming | Reputation Guide
☆ Best Loadout | Best Faction
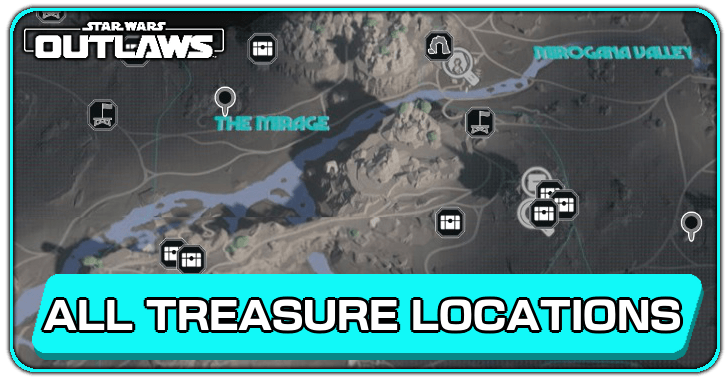
Treasure is hidden throughout the 4 planets in Star Wars Outlaws. See a list of Treasures here for each planet and each point of interest.
List of Contents
All Treasure Locations Interactive Map
| You can use the dropdown box to cycle through the different maps of each planet and point of interest. |
Treasure Map Legend
| All Treasure Locations These locations hide treasure. Some are as easy as going in a room, while others require some platforming and exploration. | |||||
|---|---|---|---|---|---|
| - |
The Interactive Map both shows the location of key points on the map, and doubles as a collectible checker.
- Click an icon on the right side to show all the pins of a specific type, or click the magnifying glass button to search for a specific pin by name.
- Click a pin on the map to see its name and description, and a relevant picture or video if available.
- From here, click Mark as Acquired to indicate that you've gotten a collectible already. This will change its icon on the map to show that it has been collected, and add 1 to that pin type's Counter.
- To undo this, click on the same pin and click Restore to unclaimed.
- To check how many pins you have marked so far, check the Counter in the bottom left, and click the icon that looks like a checklist to see counters for all pin types.
- If the collected pins start to get in the way, you can hide them all by clicking the green Show Pins button on the left side.
| Icon | How to Use |
|---|---|
 | Show Names This button reveals the Name of every icon currently shown. |
 | Show Pins This button will toggle between showing and hiding all the pins which you have already marked as acquired. |
 | Fullscreen This button will change the map display to fill the screen. |
 | Search Mode Toggle This button will display a searchbar which you can use to search for an individual pin by its name. |
 | Icon Mode Toggle In Search Mode, this button will toggle you back to Icon Mode, removing the search bar and displaying the icons again. |
 | All Pins This button is shown along with the Icons on the right when there are over 6 types of pins. Click it for a full selection of all available pin types. |
 | Counter Tracks the number of pins you have of a certain type. The pin type shown is set to the page and currently cannot be changed; however, all pin type counters can be viewed by clicking the checklist icon on the right side. |
| View All Counters This icon is found on the right side of the Counter. When a map has more than one pin type, click this icon to see Counters for all pin types. | |
| Zoom In / Zoom Out This icon is found on the top left side of the map. You can press these buttons, or use your scroll wheel while hovering, to Zoom In and Out of the interactive map. |
Toshara Treasure Locations
| Found? | Treasure Details | |
|---|---|---|
 |
 |
|
|
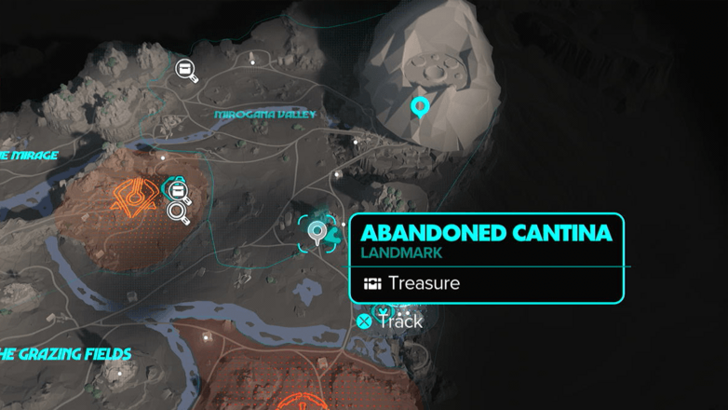
Location Name:
Abandoned Cantina
How to Get: Take out the two Varaki outside the cantina. Use your Ion Blaster to open the door. The crate will be behind a locked door. Reward: Scout IV Trinket |
||
 |
 |
|
|
Location Name:
Abandoned Skiff
How to Get: Take out the Pyke members in the area. This crate can be found next to a decrepit door. Reward: Scout Trinket |
||
 |
 |
|
|
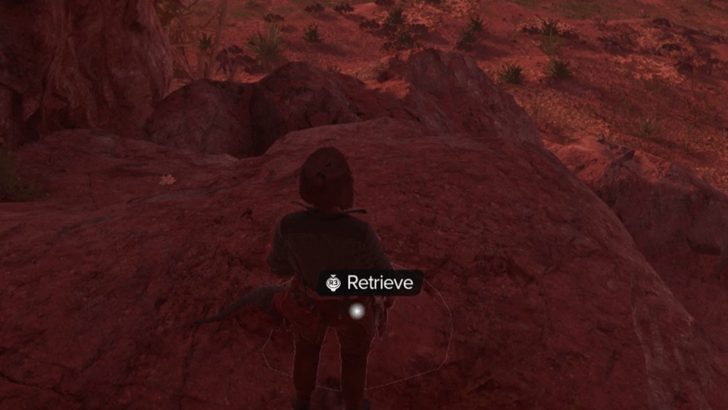
Location Name:
Amberine Cave
How to Get: The cave entrance is blocked by a destructible mossy wall. The crate will be behind the wall. Reward: Toshara Ruffian Pants |
||
 |
 |
|
|
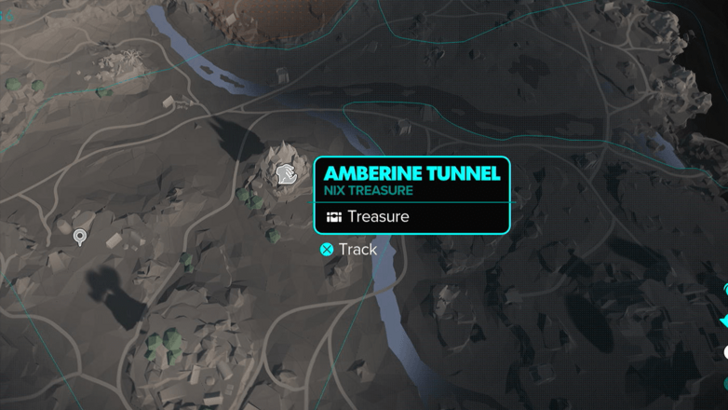
Location Name:
Amberine Tunnel
How to Get: Platform through this tunnel and you will get the Nix Treasure at the very end. Reward: Gun Piece |
||
 |
 |
|
|
Location Name:
Bosan Mound
How to Get: Take out the Varaki. The crate will be further in the cave near a pile of bones. Reward: Robuma Leather |
||
 |
 |
|
|
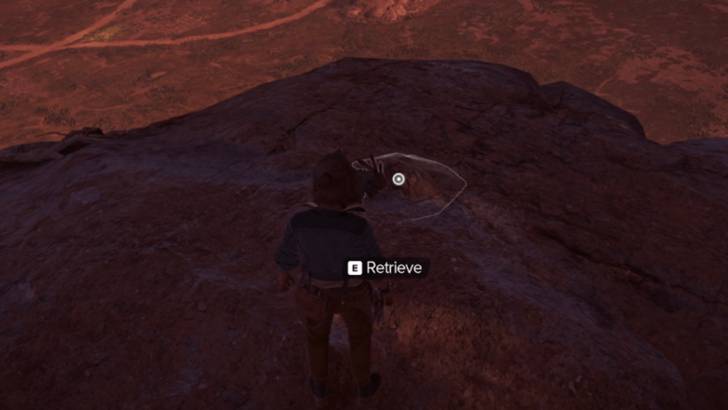
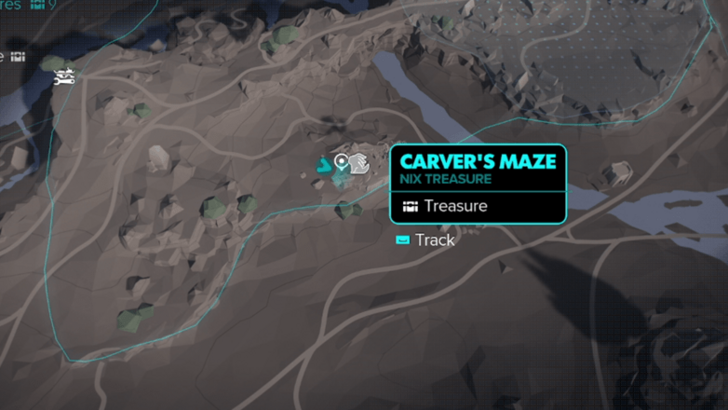
Location Name:
Carver’s Maze
How to Get: Platform through this maze and you will get the Nix Treasure at the very end. Reward: Shiny Lump |
||
 |
 |
|
|
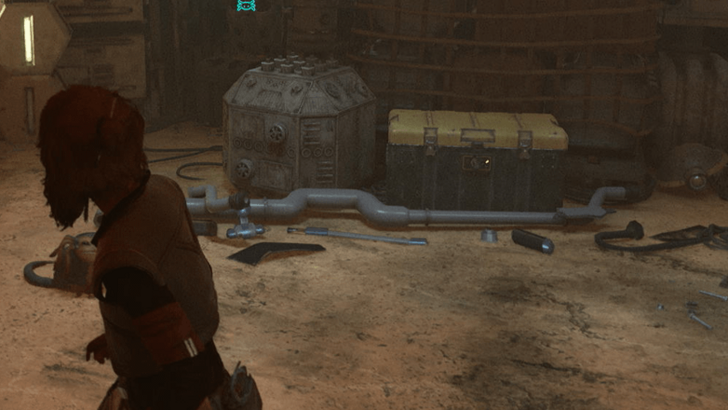
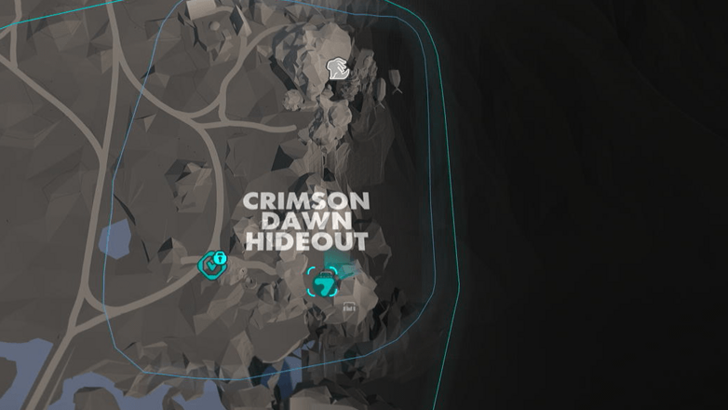
Location Name:
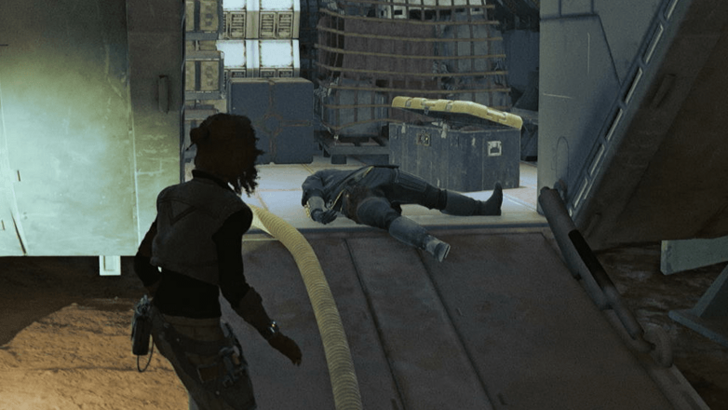
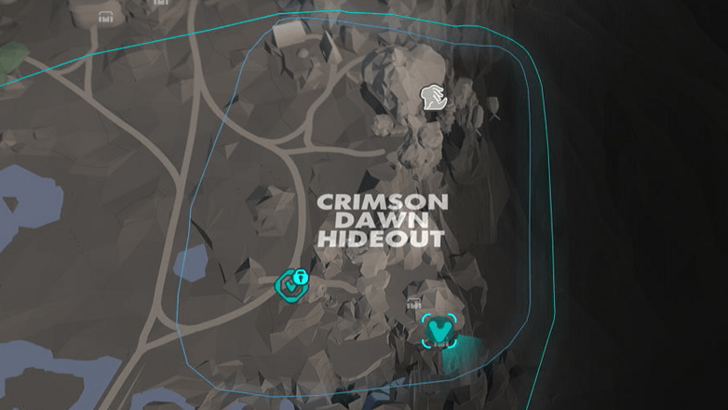
Crimson Dawn Hideout Treasure 1
How to Get: The crate will be in the restricted area of the hideout past the turbolift. Reward: H-M Energy Power Core |
||
 |
 |
|
|
Location Name:
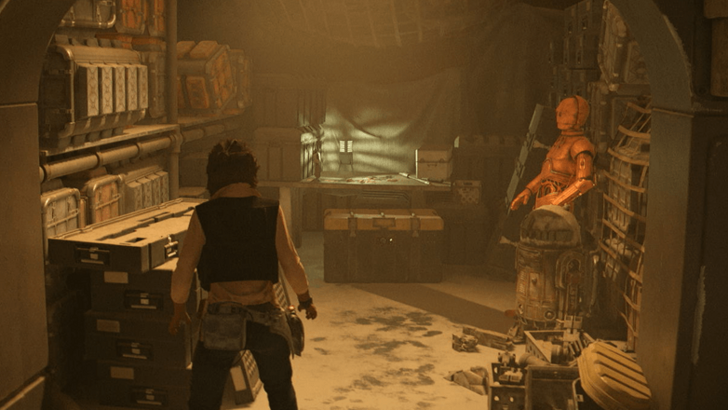
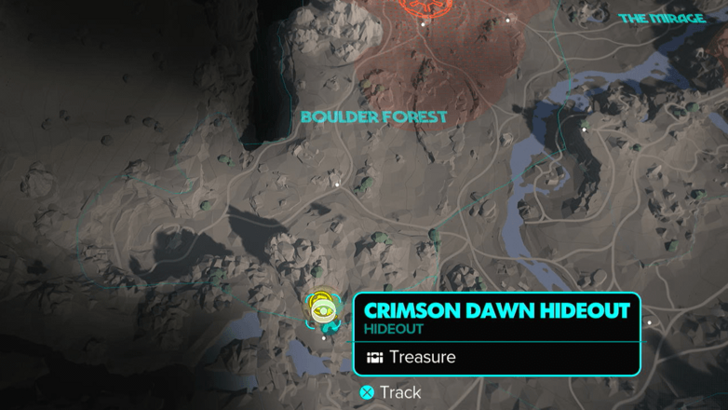
Crimson Dawn Hideout Treasure 2
How to Get: The crate will be in the restricted area of the hideout inside a docked ship. Reward: Anaxes Ruffian Jacket |
||
 |
 |
|
|
Location Name:
Crimson Dawn Hideout Treasure 3
How to Get: This is the location of the Durafiber Fabric key part intel. The crate will be behind the locked door. If you are able, it is recommended to knock out the Crimson Dawn members to not risk losing repution with them. Reward: Durafiber Fabric |
||
 |
 |
|
|
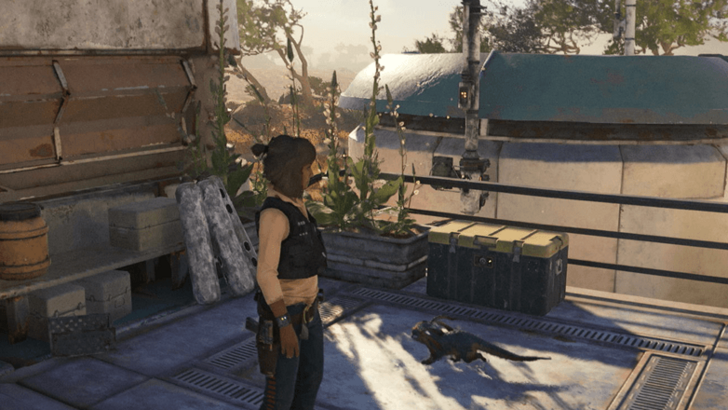
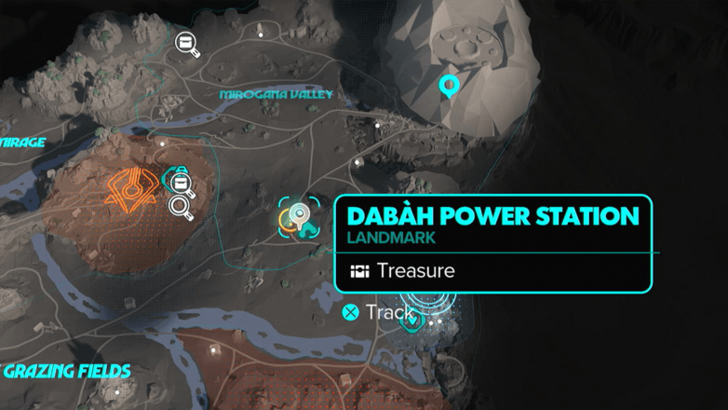
Location Name:
Dabah Power Station
How to Get: Use Nix to release the ladder at the back of the building. The crate will be near the ledge. Reward: Commander Paint Job |
||
 |
 |
|
|
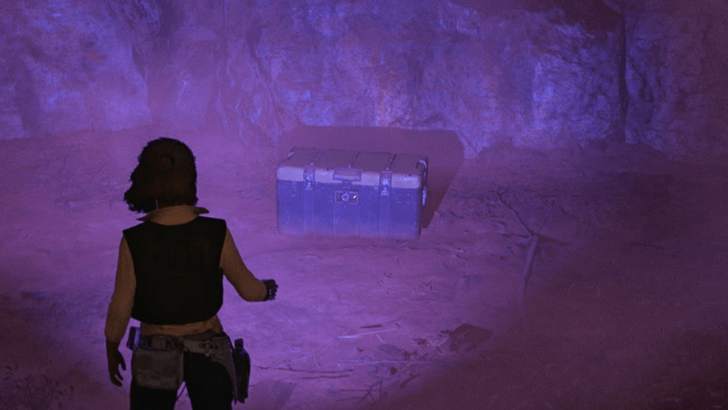
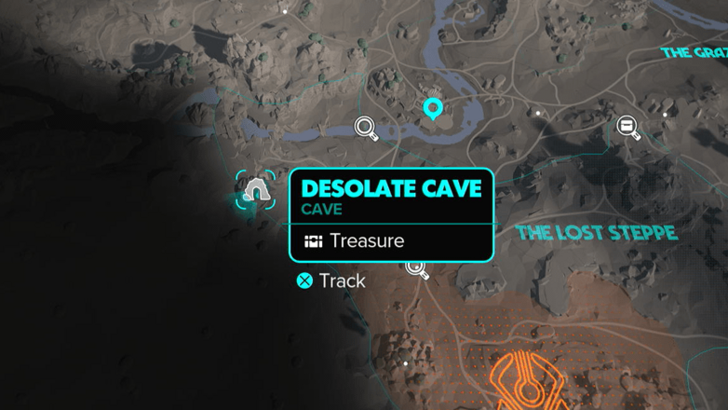
Location Name:
Desolate Cave
How to Get: The entrance to the cave is blocked by a destructible mossy wall. The crate will be at the bottom of the cave. Reward: Shadow Order Paint Job |
||
 |
 |
|
|
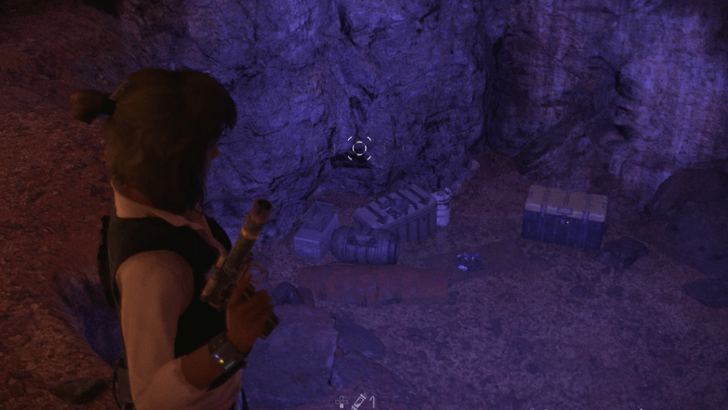
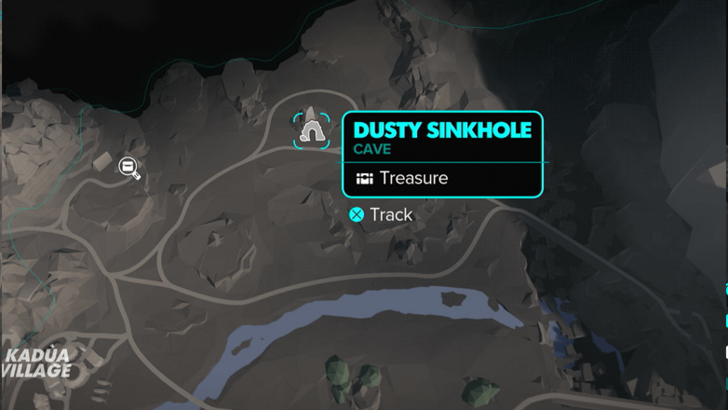
Location Name:
Dusty Sinkhole
How to Get: The treasure is behind a destructible mossy wall. Complete the Gunsmith main quest on Kijimi to acquire the Bolt modification for your blaster to get this treasure. Reward: Red Keffi Paint Job |
||
 |
 |
|
|
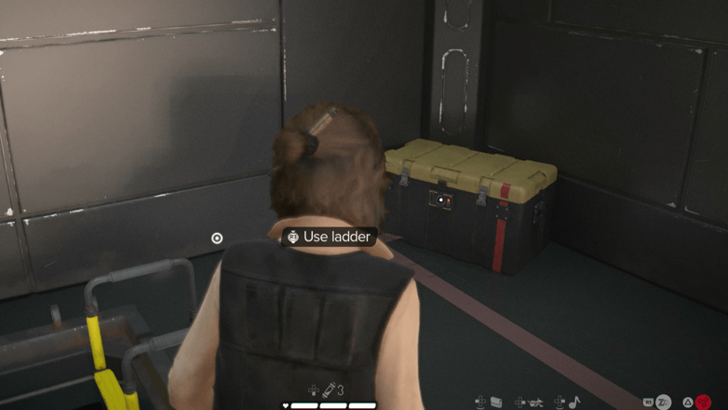
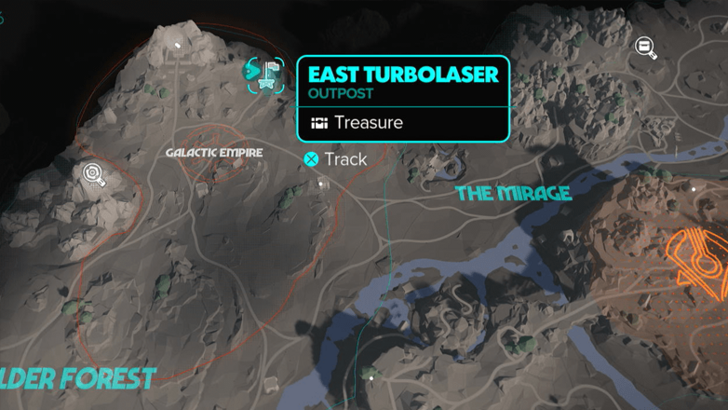
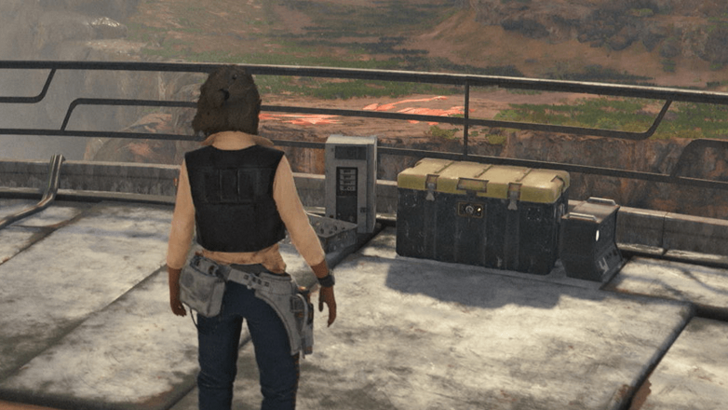
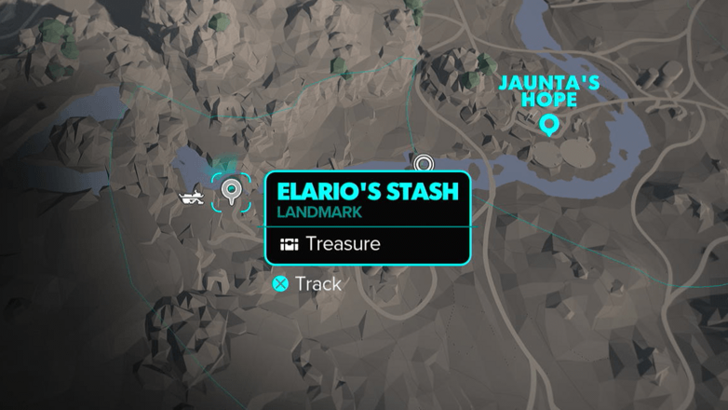
Location Name:
East Turbolaser
How to Get: The crate will be at the base of the tower. Reward: Actuating Module |
||
 |
 |
|
|
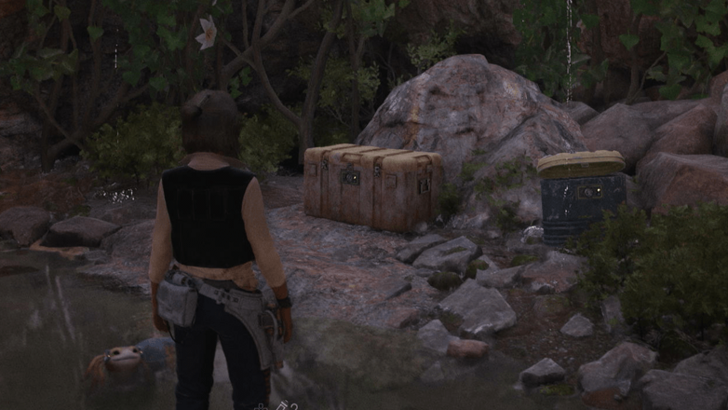
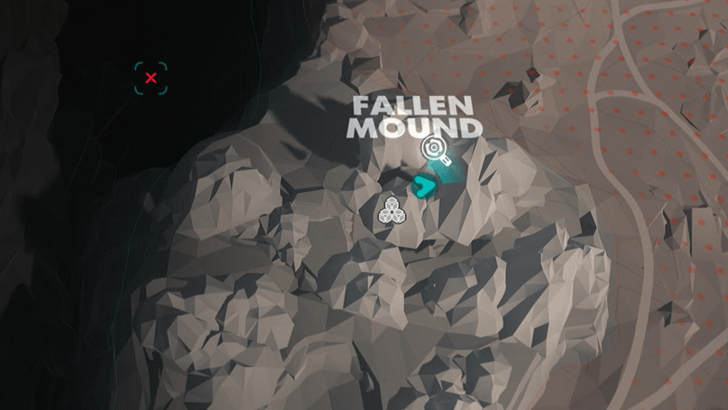
Location Name:
Elario’s Stash
How to Get: The crate will be near the ledge overlooking the waterfall. Reward: Actuating Module |
||
 |
 |
|
|
Location Name:
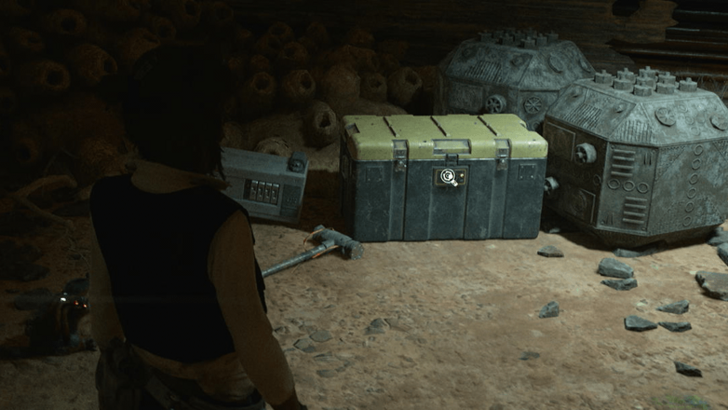
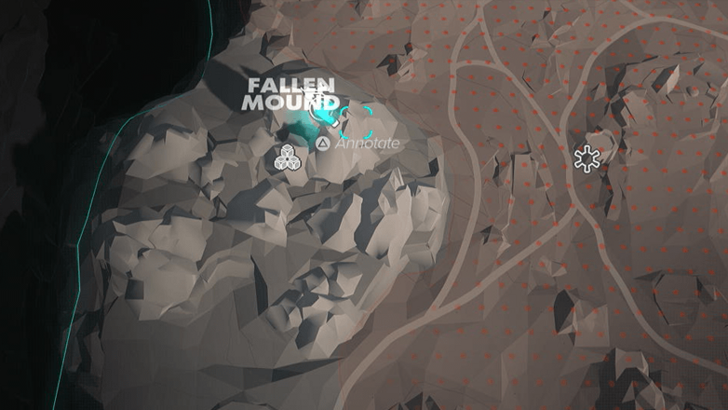
Fallen Mound Treasure 1
How to Get: The crate will be deep inside the Fallen Mound. You will have to pass through a room that is constantly swept by strong winds to access this crate. Reward: Overgrown Amber Stone Charm |
||
 |
 |
|
|
Location Name:
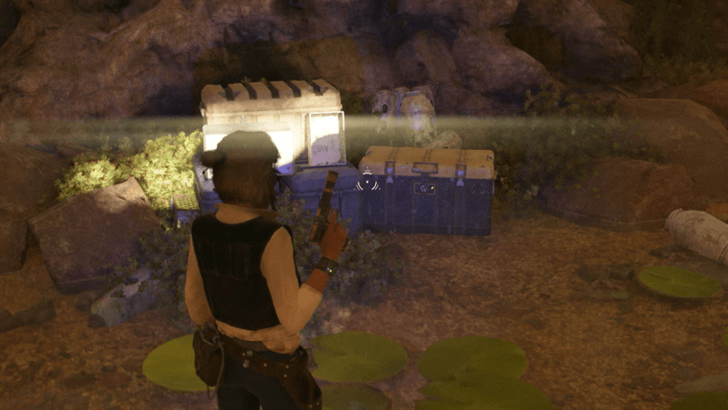
Fallen Mound Treasure 2
How to Get: This is part of the Smoke Bomb Compressor key part intel. The crate will be at the very end of the Fallen Mound as you exit from the elevator. Reward: Smoke Bomb Compressor |
||
 |
 |
|
|
Location Name:
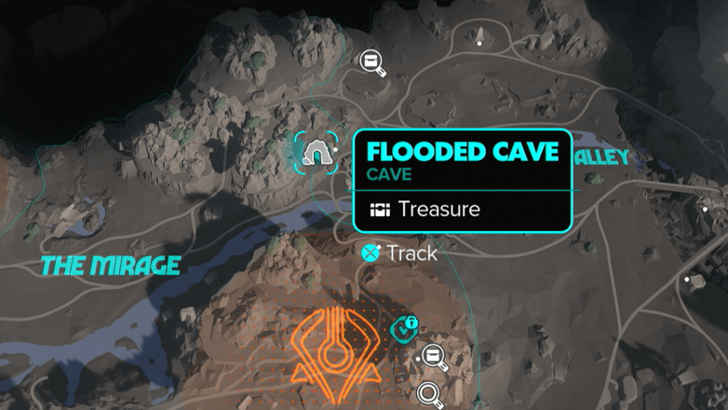
Flooded Cave
How to Get: This cave has treasure inside it. Use the ramp to land near the cave’s entrance. Reward: Camtono Bag Trophy |
||
 |
 |
|
|
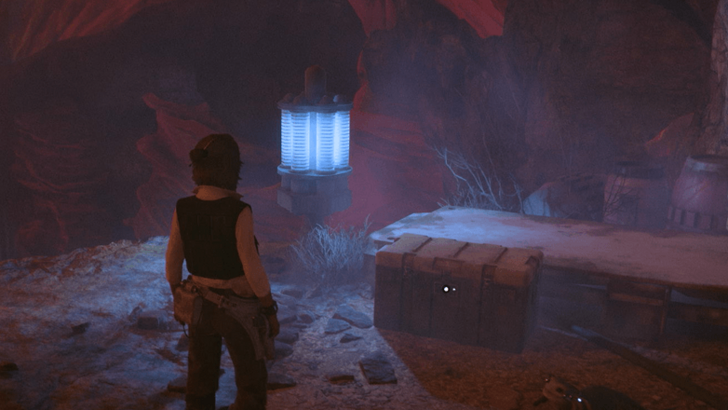
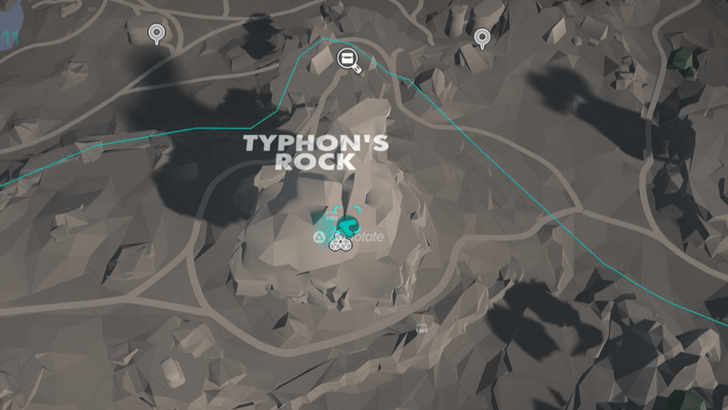
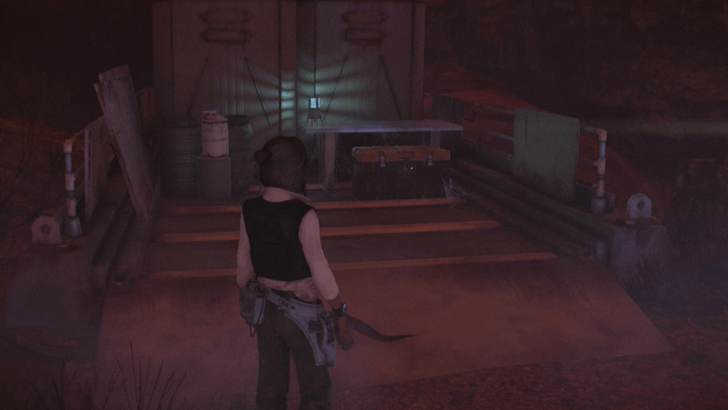
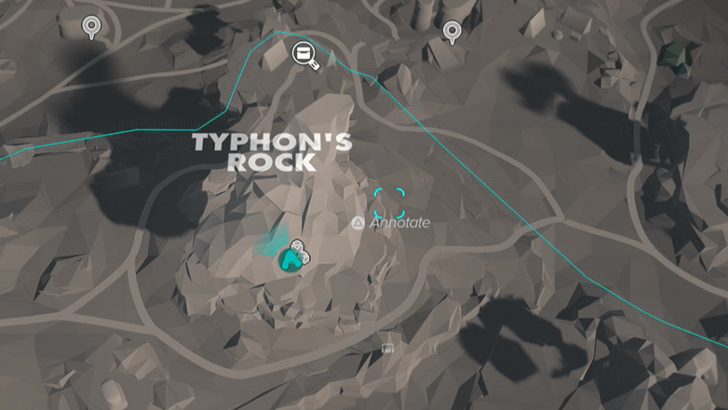
Location Name:
Flyer Ridge Treasure 1
How to Get: This crate will be deep within the mountain. The crate is found past the elevator near a blue light post and red shield gate. Reward: BT-009S Fastshot Trigger |
||
 |
 |
|
|
Location Name:
Flyer Ridge Treasure 2
How to Get: This crate will be deep within the mountain. The crate is found past the elevator in the central area of Flyer Ridge. Reward: Ancient Hunter Carving Charm |
||
 |
 |
|
|
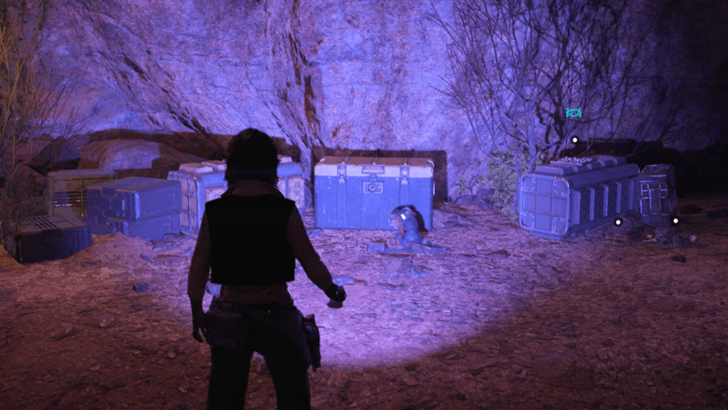
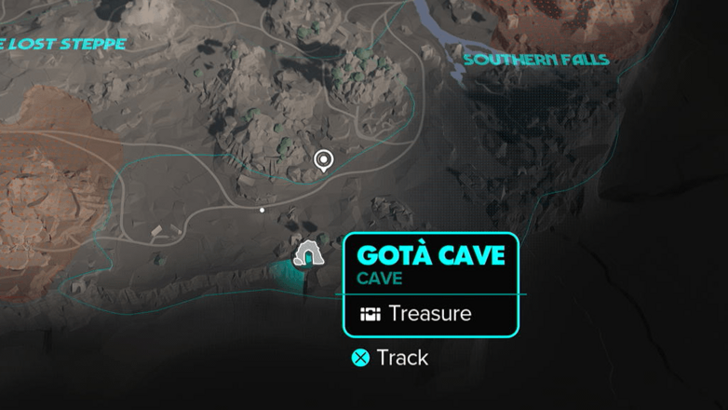
Location Name:
Gota Cave
How to Get: The crate is located deep inside the cave. Reward: Scout III Trinket |
||
 |
 |
|
|
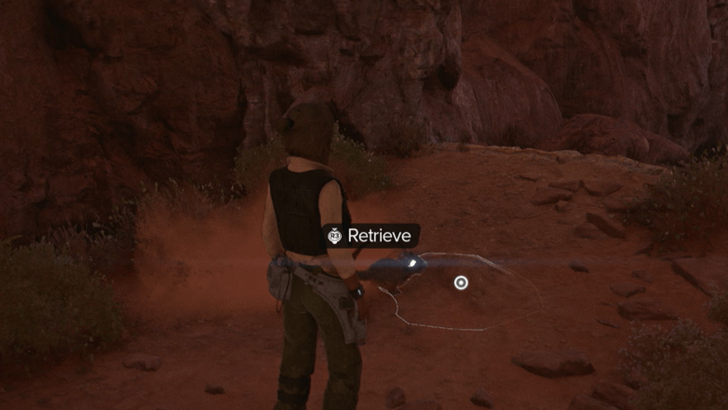
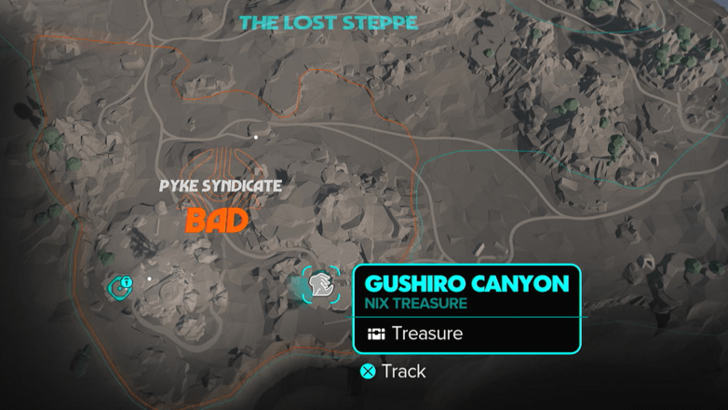
Location Name:
Gushiro Canyon
How to Get: Platform through this tunnel and you will get the Nix Treasure at the very end. Reward: Secret Amulet |
||
 |
 |
|
|
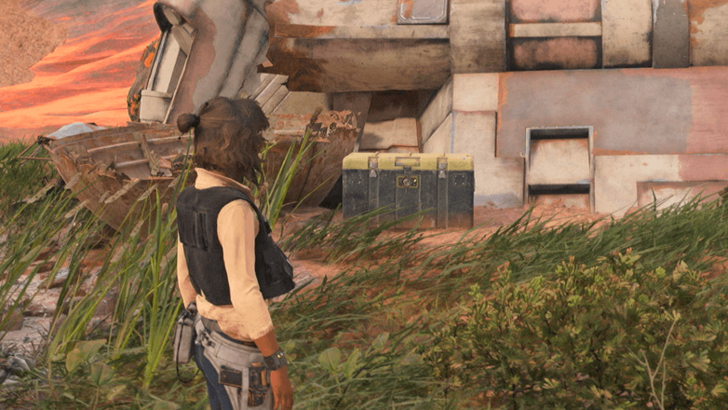
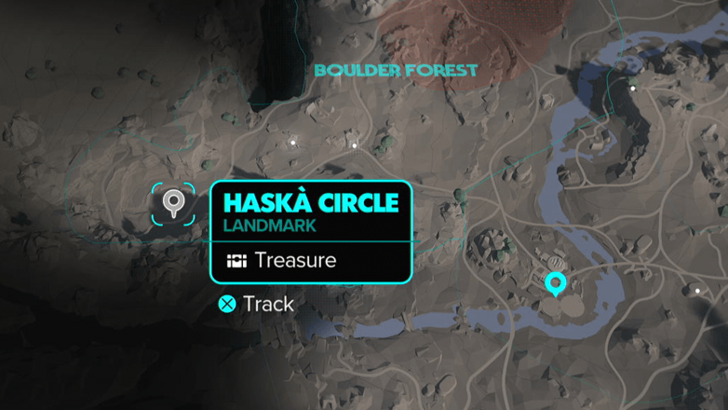
Location Name:
Haska Circle
How to Get: The crate is found next to the shipwreck. There is a Varaki in the area, best to kill it before going after the treasure. Reward: Dud II Trinket |
||
 |
 |
|
|
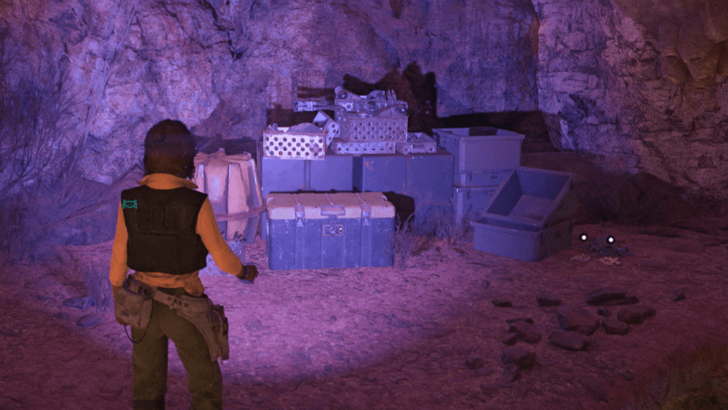
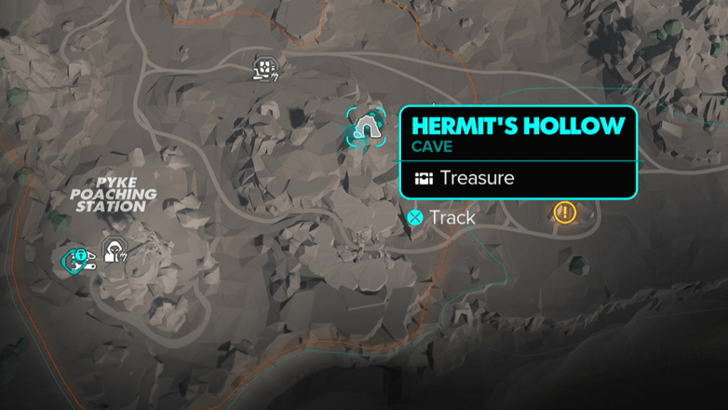
Location Name:
Hermit’s Hollow
How to Get: The treasure is behind a destructible mossy wall. Complete the Gunsmith main quest on Kijimi to acquire the Bolt modification for your blaster to get this treasure Reward: Weathered Finish |
||
 |
 |
|
|
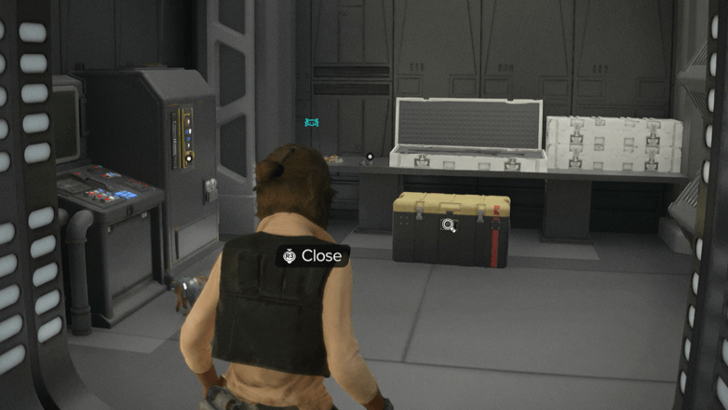
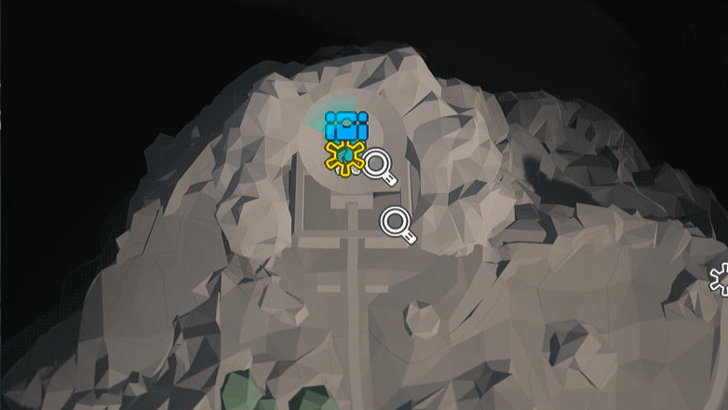
Location Name:
Imperial Comm Base Treasure 1
How to Get: This crate is located in the top room past the elevator in the main tower. Reward: Credits |
||
 |
 |
|
|
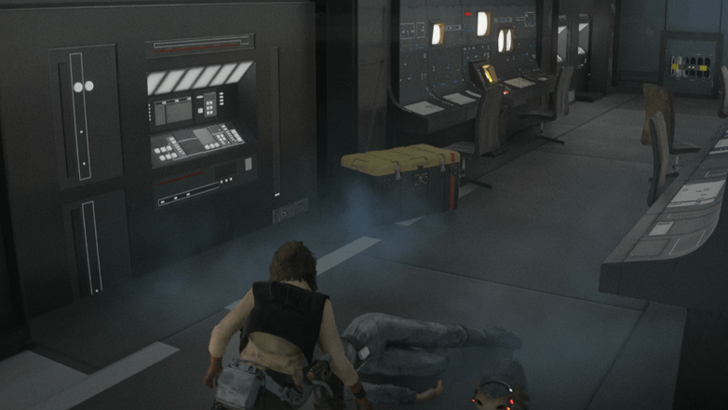
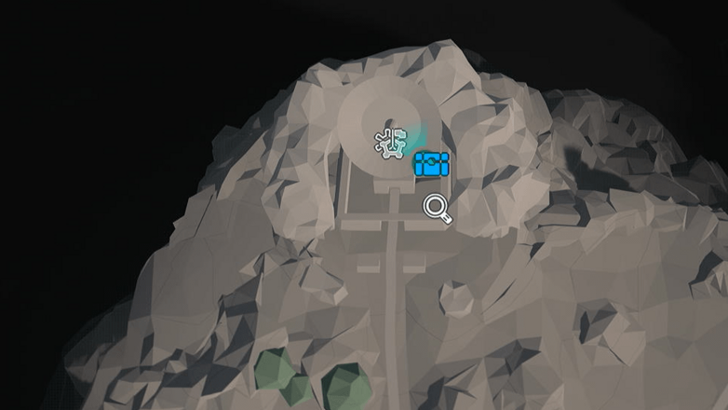
Location Name:
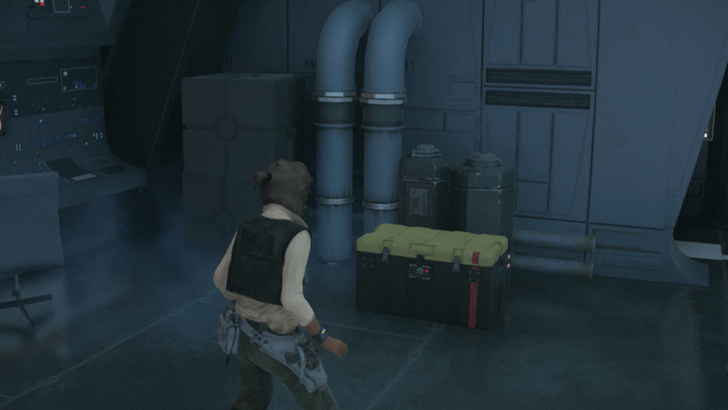
Imperial Comm Base Treasure 2
How to Get: This crate is located in the Server Room. Reward: Actuating Module |
||
 |
 |
|
|
Location Name:
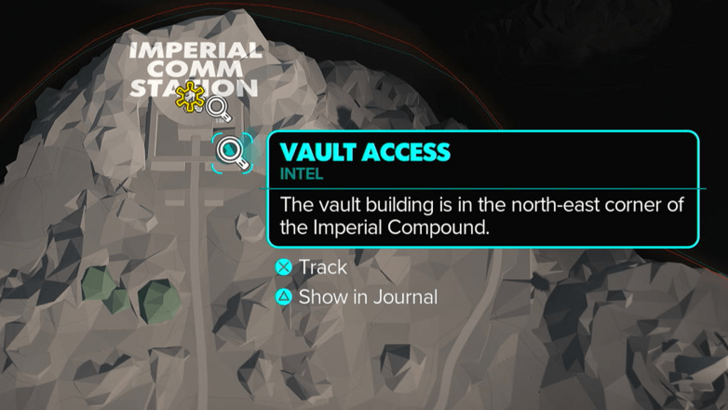
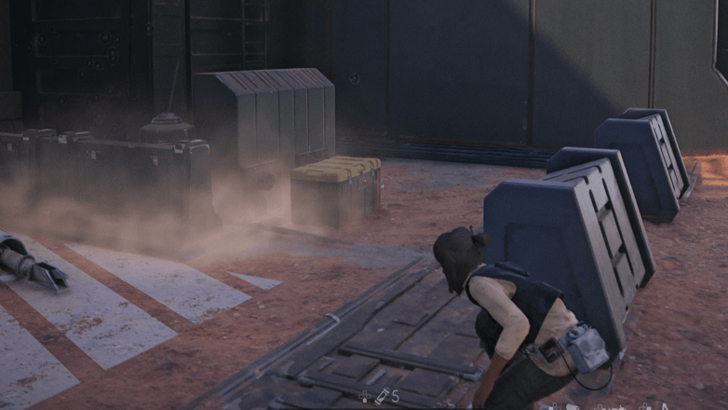
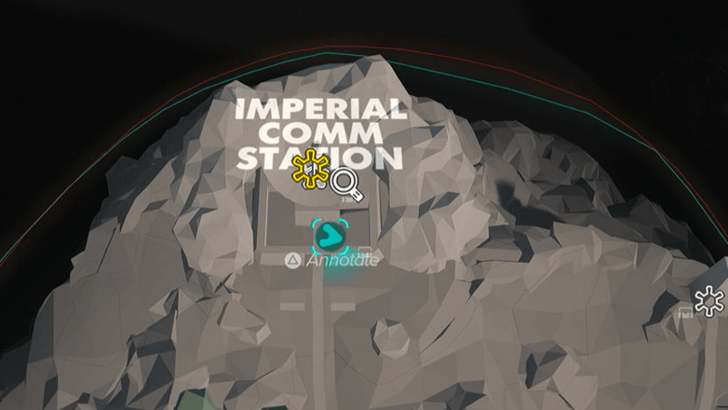
Imperial Comm Base Treasure 3
How to Get: This crate is located in the vault of the compound. You’ll need to slice a terminal to open the door to the vault. Reward: Outlander Coating |
||
 |
 |
|
|
Location Name:
Imperial Comm Base Treasure 4
How to Get: This crate is located near the entrance. It will be beside the powered down AT-ST. Reward: Cryo Coil |
||
 |
 |
|
|
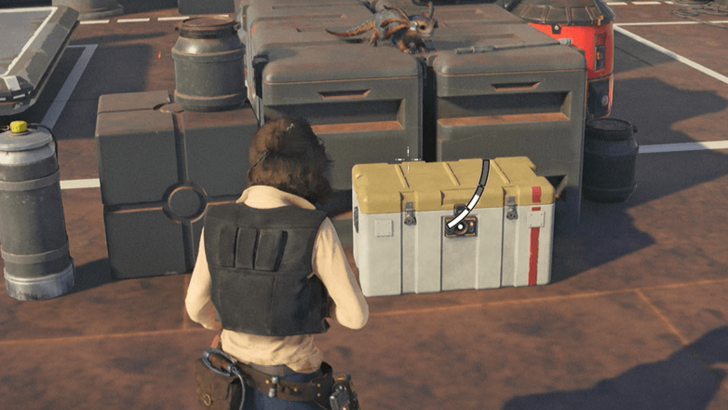
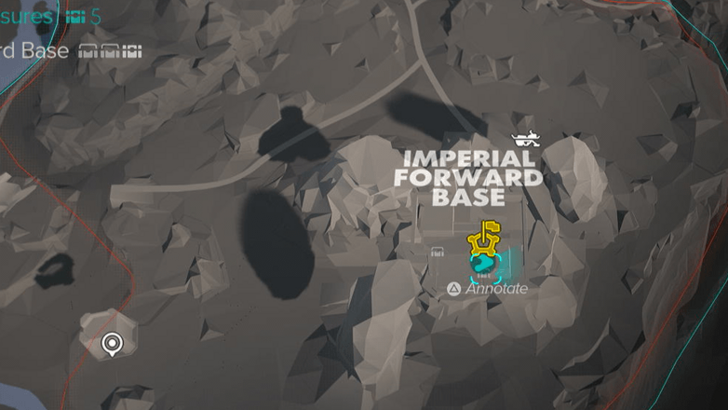
Location Name:
Imperial Forward Base Treasure 1
How to Get: The treasure is found in a crate on a landing pad on the roof. Reward: Ion Cell |
||
 |
 |
|
|
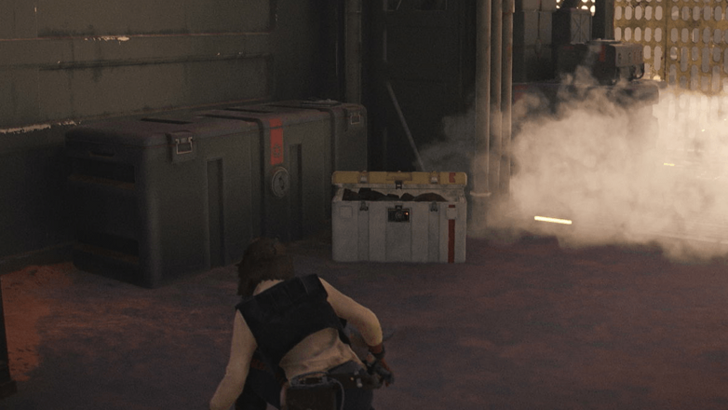
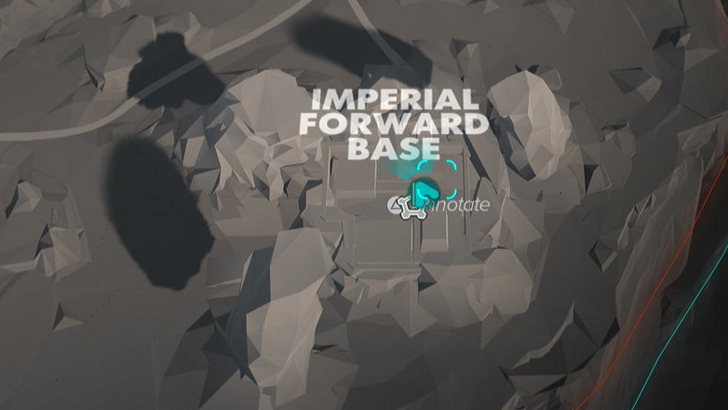
Location Name:
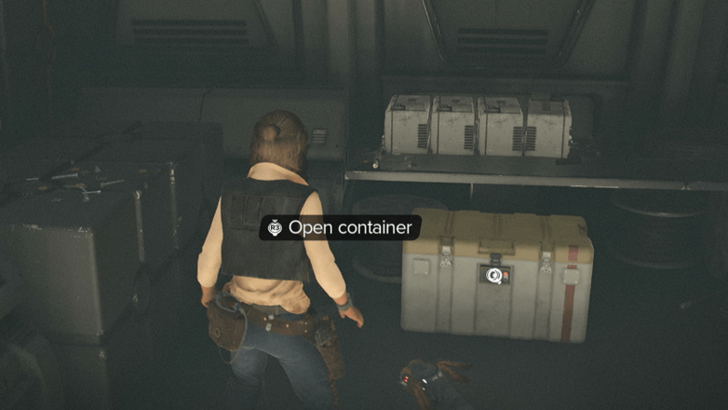
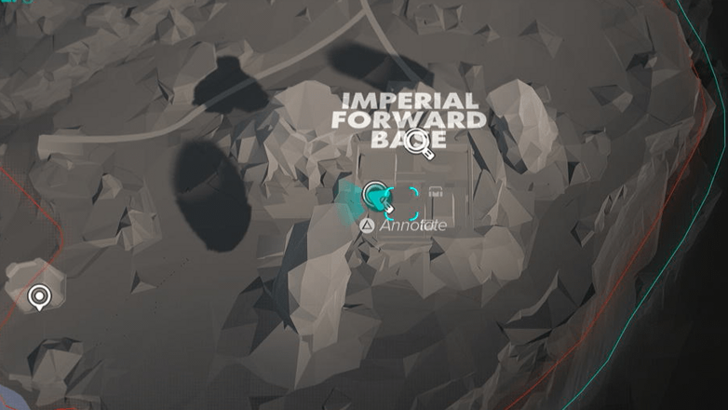
Imperial Forward Base Treasure 2
How to Get: The treasure is found in a crate in a landing pad near the center of the base. Reward: Scout Trooper Helmet |
||
 |
 |
|
|
Location Name:
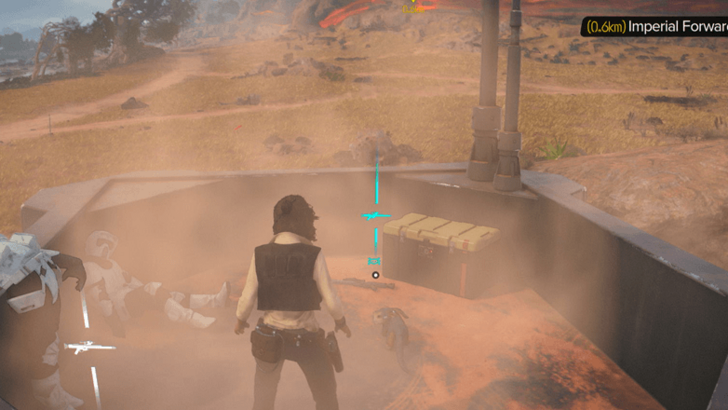
Imperial Forward Base Treasure 3
How to Get: The treasure is found in a crate in the vault near the center of the base. Reward: Sentinel Coating |
||
 |
 |
|
|
Location Name:
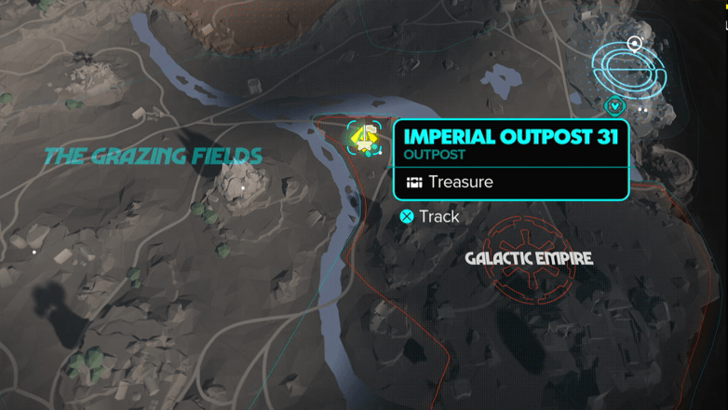
Imperial Outpost 31
How to Get: Take out the Imperial officers and Stormtroopers and get the treasure on top of the small watchtower. Reward: Ray Accelerator |
||
 |
 |
|
|
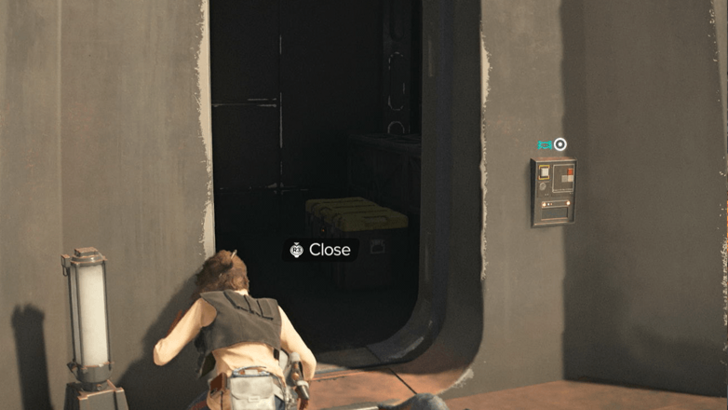
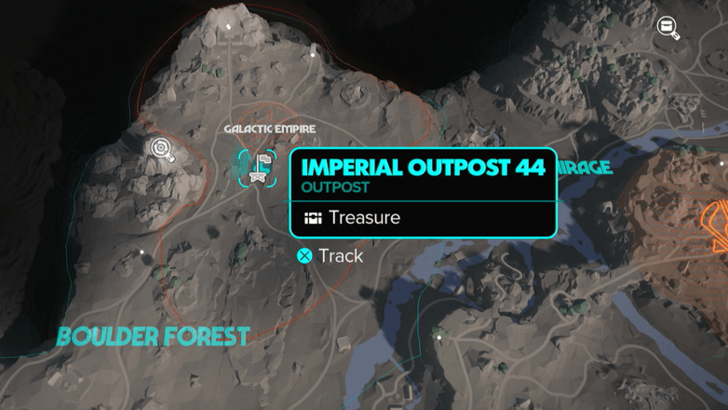
Location Name:
Imperial Outpost 44
How to Get: The crate will be inside the watchtower. Reward: IT-0 Interrogation Unit |
||
 |
 |
|
|
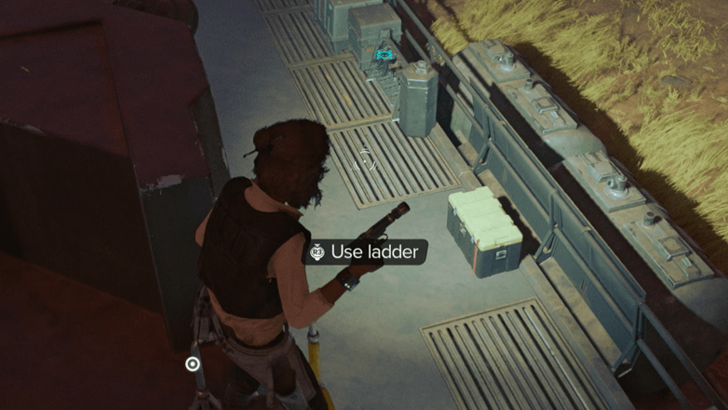
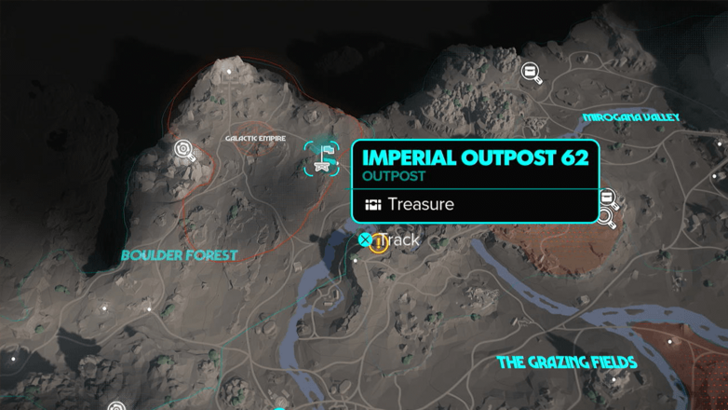
Location Name:
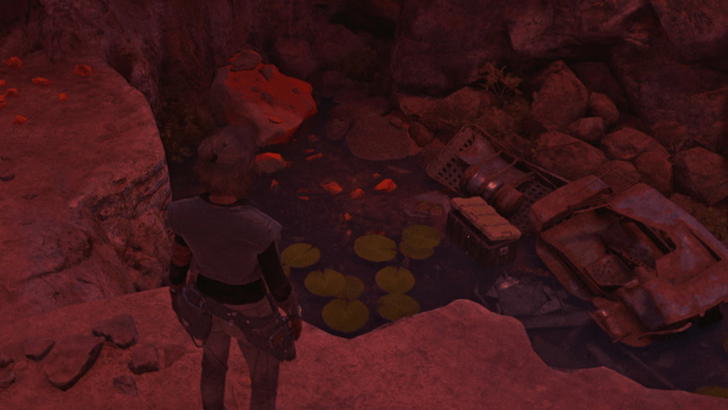
Imperial Outpost 62
How to Get: The crate will be behind the watchtower. If all the troopers are at the front, it is easier to sneak through the back and get the treasure. Reward: MG-2 Power Exceeder |
||
 |
 |
|
|
Location Name:
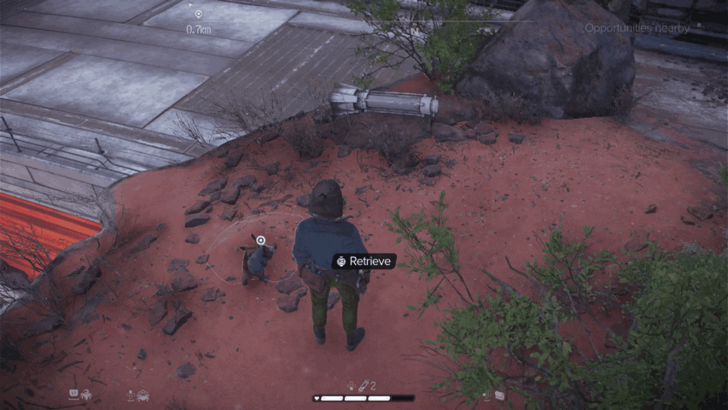
Kashuda Pit
How to Get: Rappel down to the bottom of the pit to find the container. Reward: Credits |
||
 |
 |
|
|
Location Name:
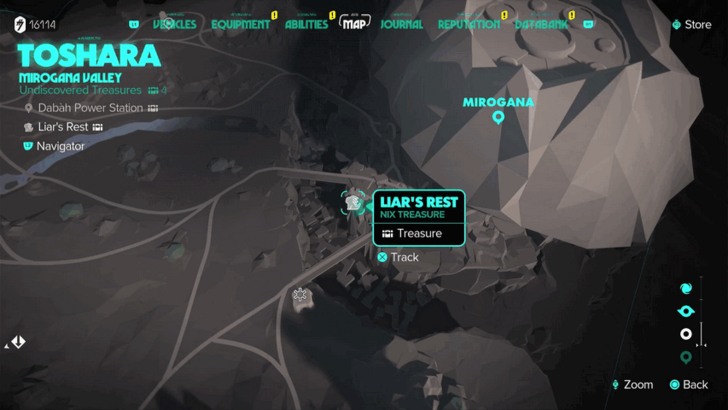
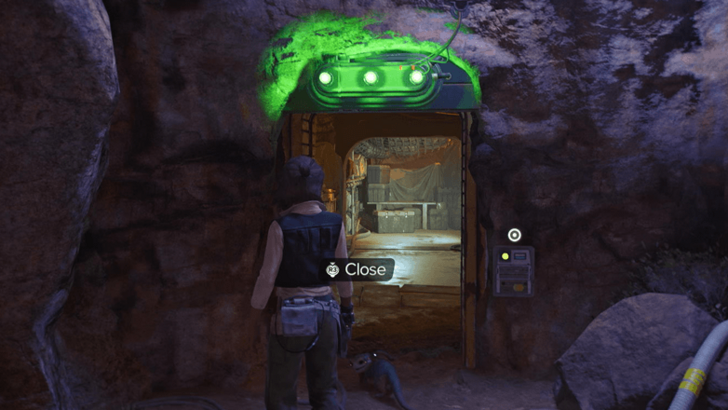
Liar’s Rest
How to Get: Platform through this tunnel and you will get the Nix Treasure at the very end. Reward: Lucky Cubes |
||
 |
 |
|
|
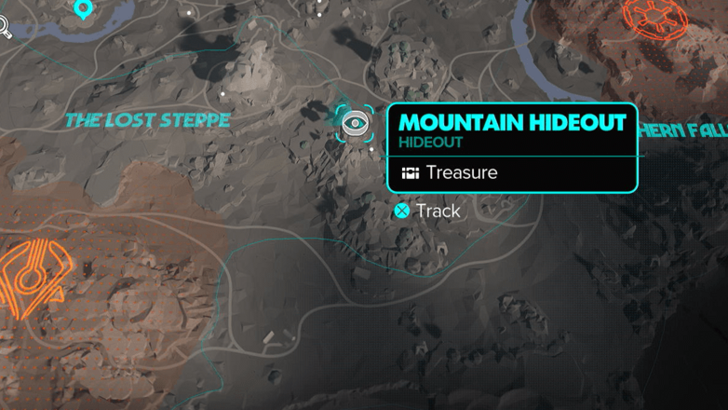
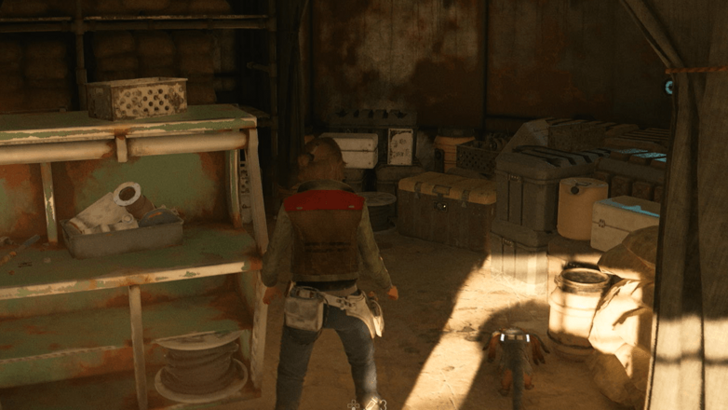
Location Name:
Mountain Hideout
How to Get: This is the location of the HD05-G Circuit key part intel and is related to the Smuggler’s Hideout Intel. The crate is behind a locked door that requires turning on 3 fans to open. Reward: HD05-G Circuit |
||
 |
 |
|
|
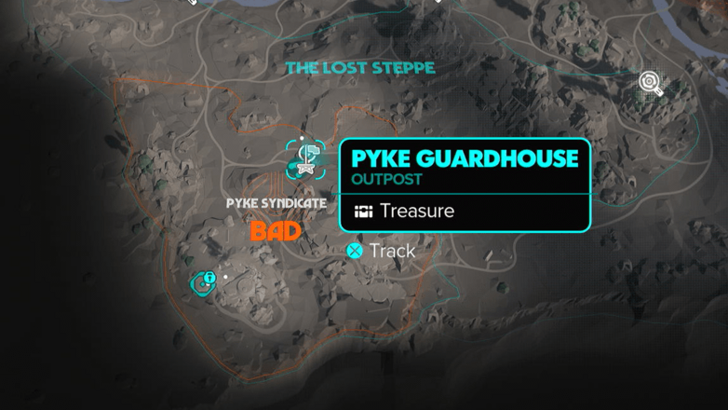
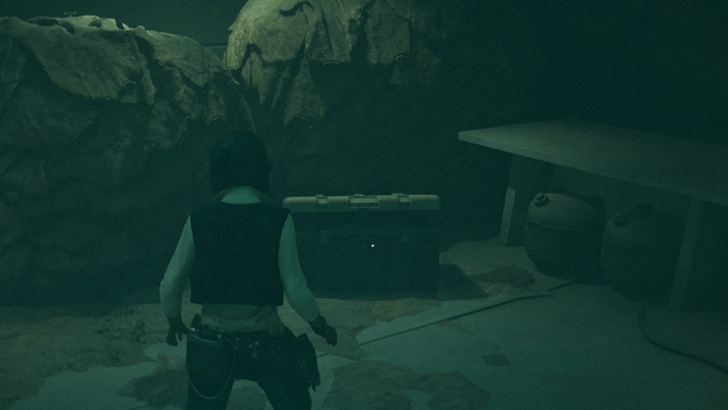
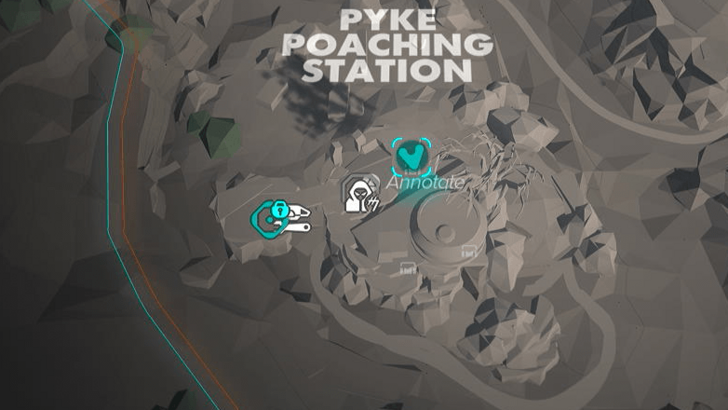
Location Name:
Pyke Guardhouse
How to Get: The crate will be inside the guardhouse. Use your Data Spike to open the locked door. Reward: Helicyclic Gears |
||
 |
 |
|
|
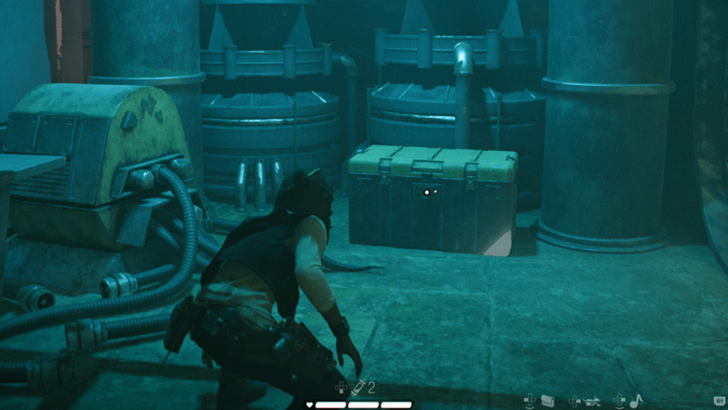
Location Name:
Pyke Poaching Station Treasure 1
How to Get: This treasure can be found inside the building near the arch by the entrance. Reward: Chak-Root |
||
 |
 |
|
|
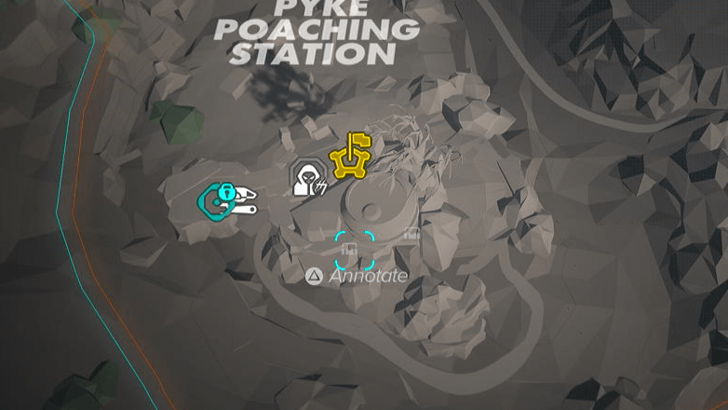
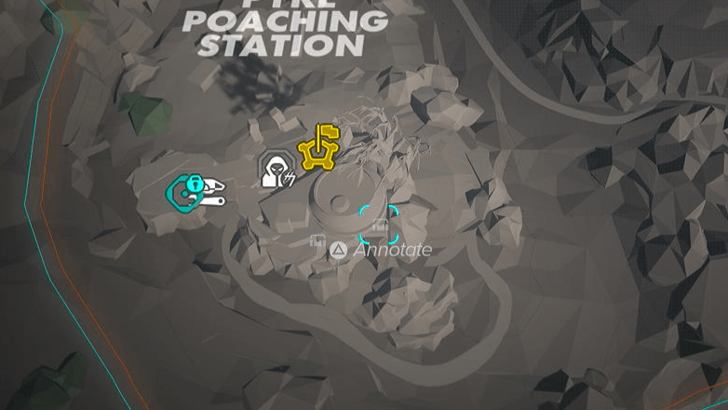
Location Name:
Pyke Poaching Station Treasure 2
How to Get: The treasure is found in a container inside the building near the end of the station past the second arch. Reward: H-M Engine Power Core |
||
 |
 |
|
|
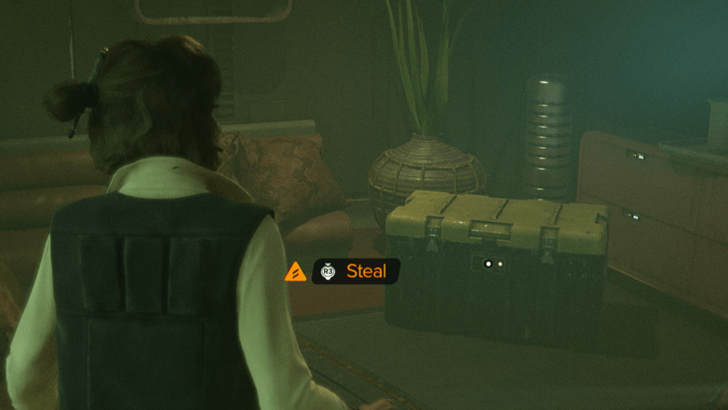
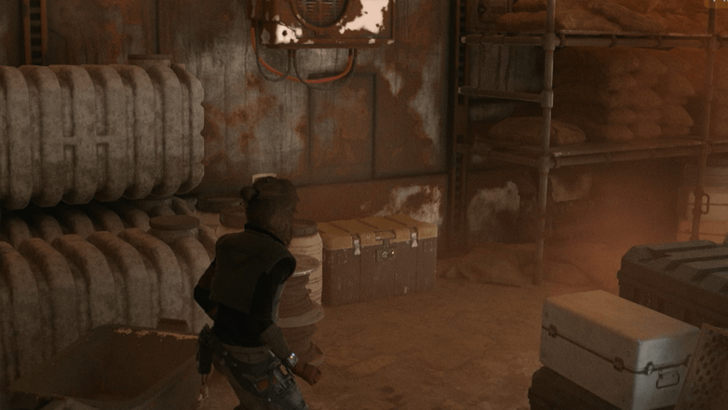
Location Name:
Pyke Poaching Station Treasure 3
How to Get: The treasure can be found in the last room of the last building of the Pyke Poaching Station where you complete the Sabotage syndicate quest. Reward: Anaxes Ruffian Belt |
||
 |
 |
|
|
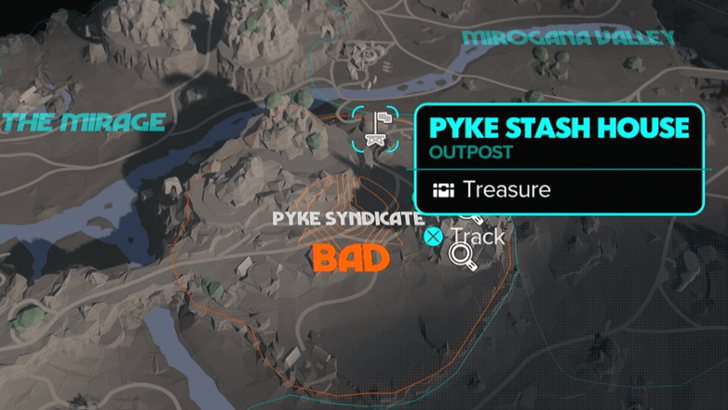
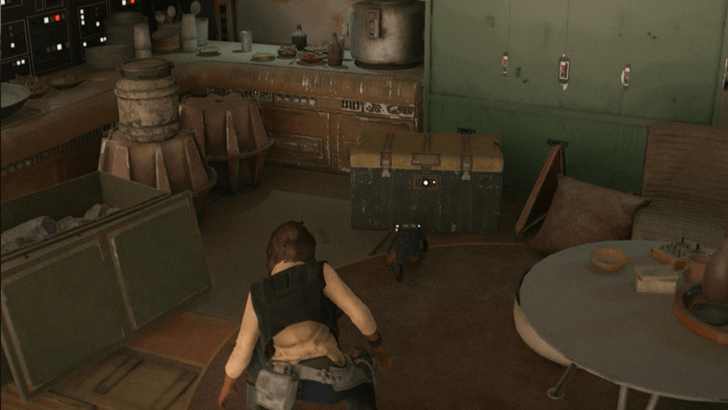
Location Name:
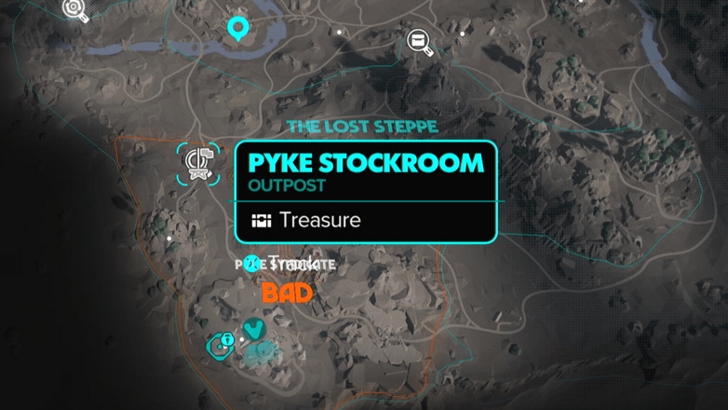
Pyke Stash House
How to Get: The crate will be inside the stash house protected by a few Pyke thugs. Reward: Credits |
||
 |
 |
|
|
Location Name:
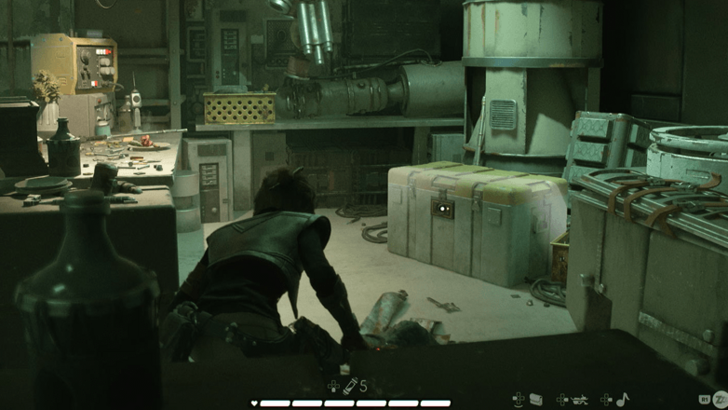
Pyke Stockroom
How to Get: The crate will be located in the building. Use your Data Spike on the locked door. Reward: Direct-Energy Circuit |
||
 |
 |
|
|
Location Name:
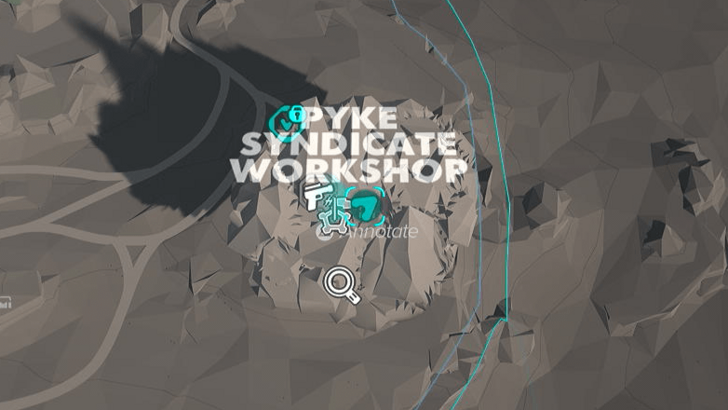
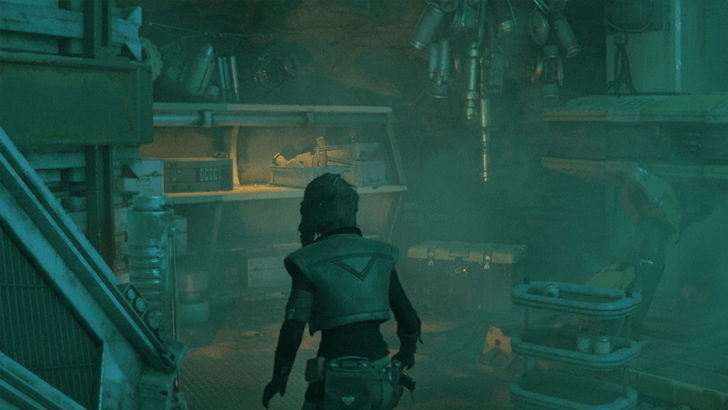
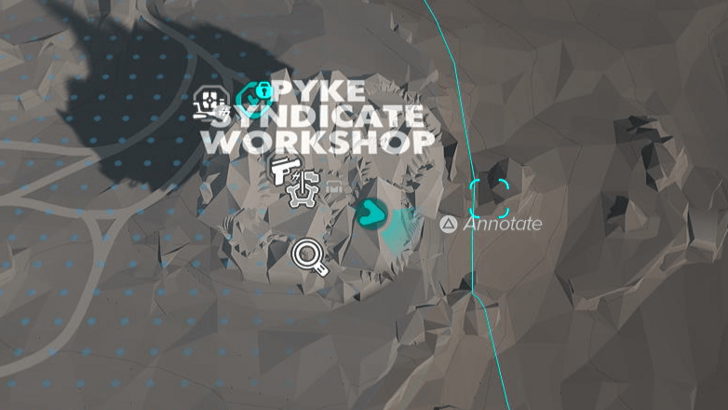
Pyke Syndicate Workshop Treasure 1
How to Get: This crate will be inside the workshop’s restricted area. Use Nix to open the door to the room containing this treasure. Reward: Anaxes Ruffian Pants |
||
 |
 |
|
|
Location Name:
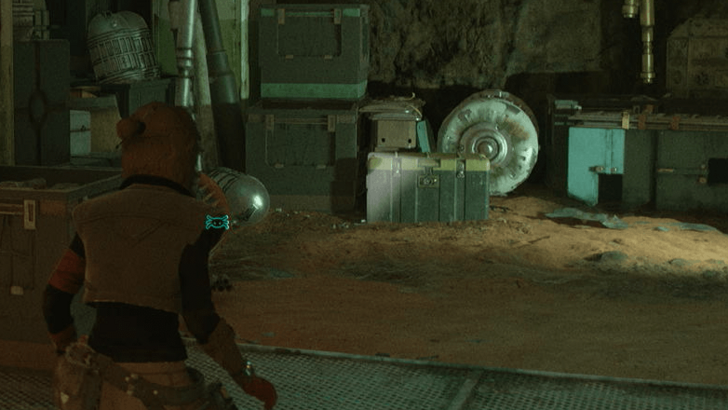
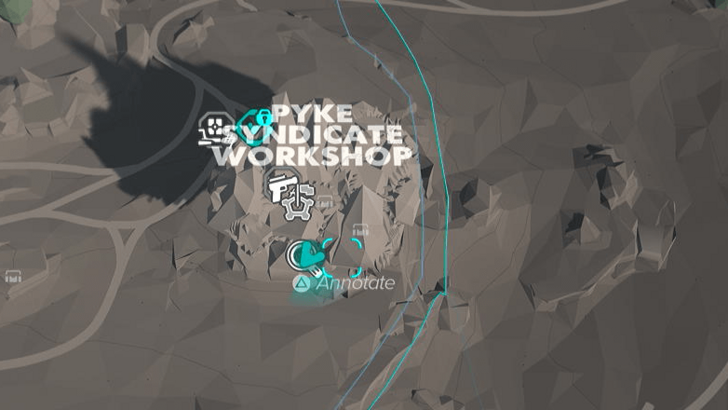
Pyke Syndicate Workshop Treasure 2
How to Get: This crate will be inside a locked room that requires a computer terminal to open. The terminal will be next to the mechanics on the platform. Reward: H-M Engine Power Core |
||
 |
 |
|
|
Location Name:
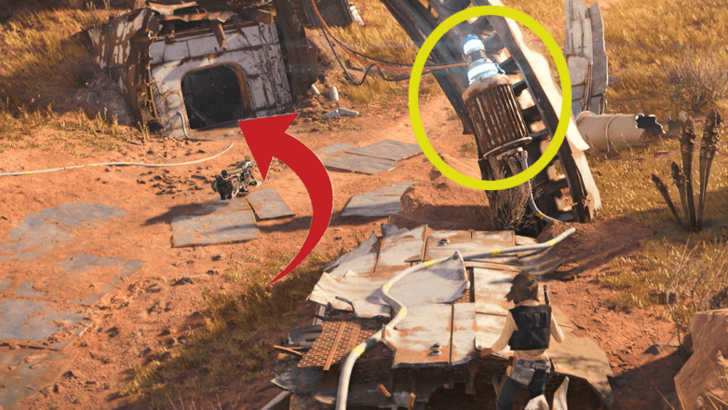
Pyke Syndicate Workshop Treasure 3
How to Get: This crate will be on an elevated area that is only accessible by riding a crate in the workshop Reward: Pyke Helmet Trophy |
||
 |
 |
|
|
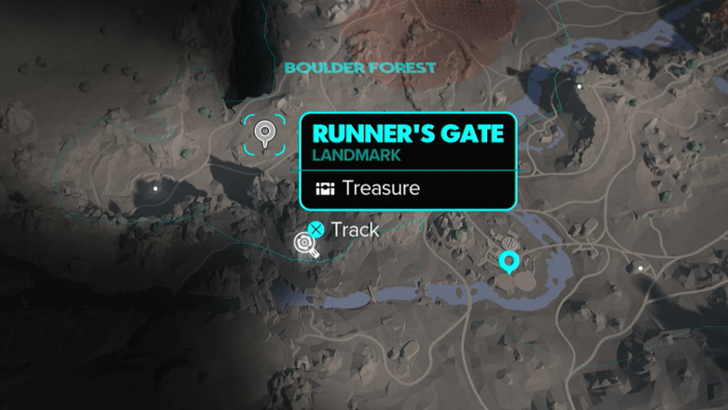
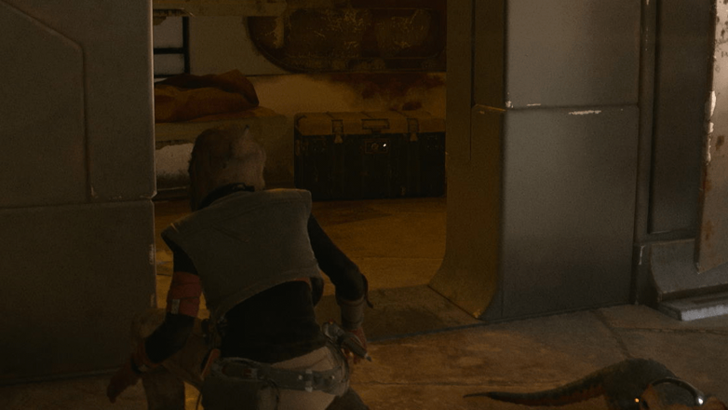
Location Name:
Runner’s Gate
How to Get: Shoot the ion transmitter to open the locked door. You will have to time this right as the door will close again once the charge is gone. The crate will be behind the door. Reward: Black Feeler Wrappings |
||
 |
 |
|
|
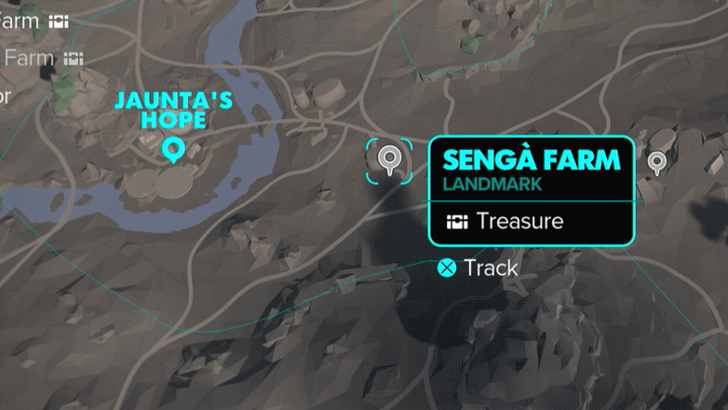
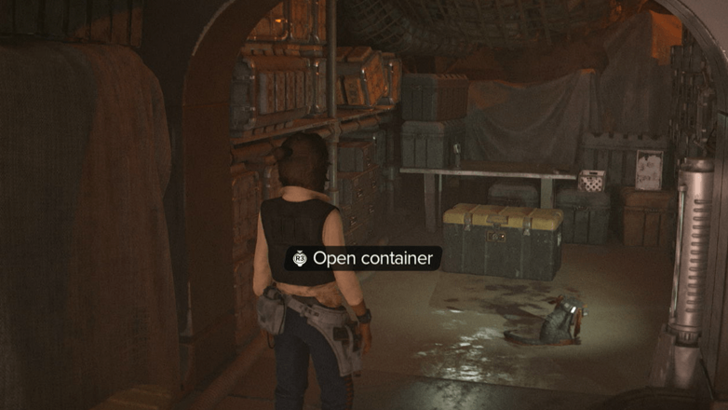
Location Name:
Senga Farm
How to Get: The crate will be inside the house. You will need the fusioncutter to get inside. Reward: Dominance Paint Job |
||
 |
 |
|
|
Location Name:
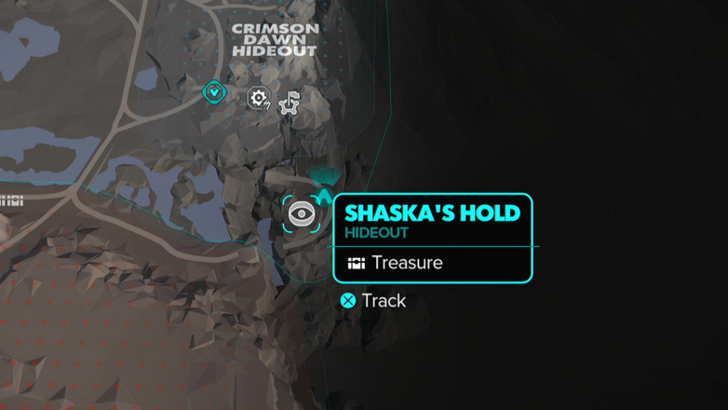
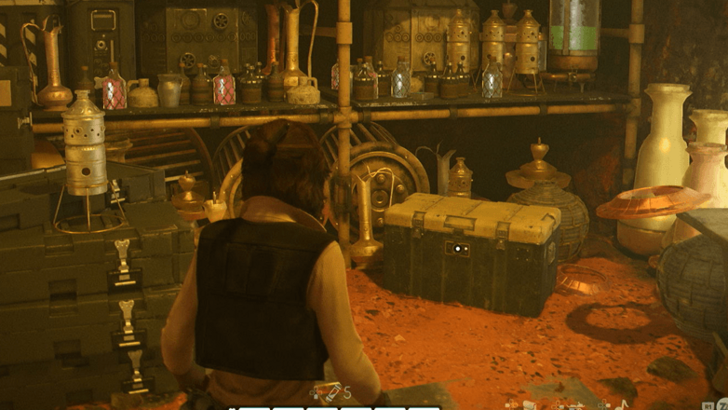
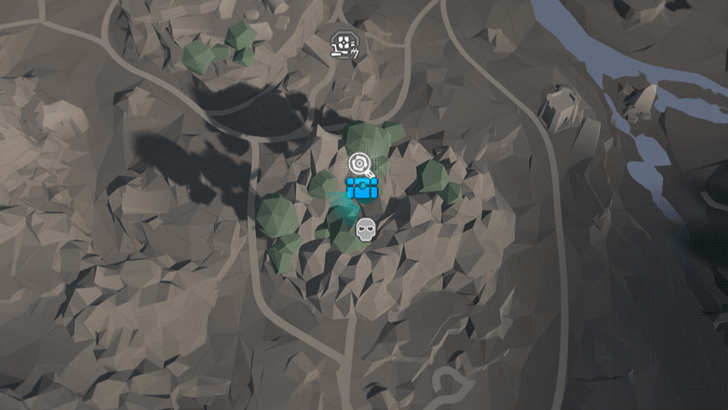
Shaska’s Hold
How to Get: Getting to Shaska’s Hold requires the Speed Boost upgrade for your Speeder. Use the amberine ramp to get to the top of the rock base. The treasure will be behind a locked door and laser gate. Reward: Blaster Recirculator |
||
 |
 |
|
|
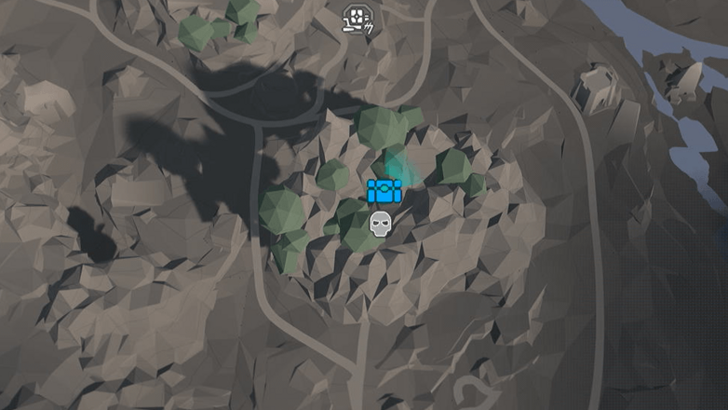
Location Name:
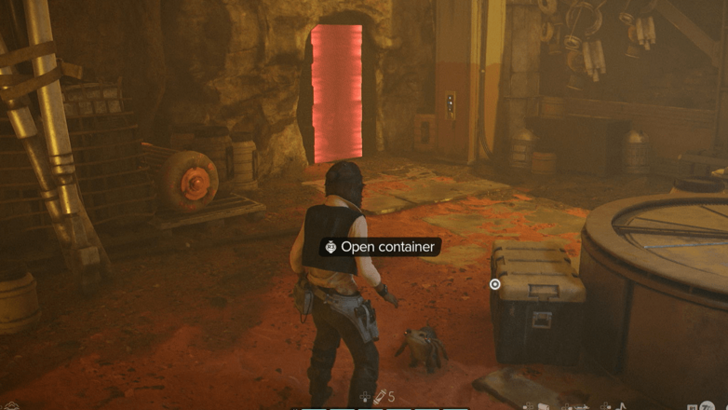
Shipjacker Workshop Treasure 1
How to Get: This treasure is related to the Code Breaker Chip Expert Key Part Intel. The crate will be deep in the camp behind a small room with an energy shield. Reward: Code Breaker Chip |
||
 |
 |
|
|
Location Name:
Shipjacker Workshop Treasure 2
How to Get: This crate is located in one of the storage rooms with an extension closed off with a red energy shield. Reward: Enhanced Durasteel Hull |
||
 |
 |
|
|
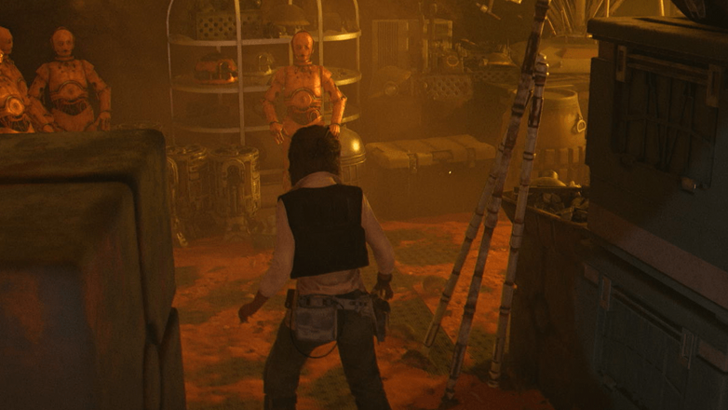
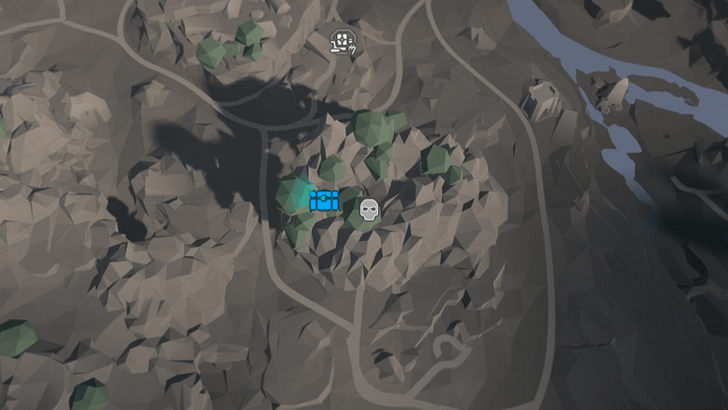
Location Name:
Shipjacker Workshop Treasure 3
How to Get: This crate is located in deep inside the camp behind a large red energy shield. Reward: Shipjacker Fuel |
||
 |
 |
|
|
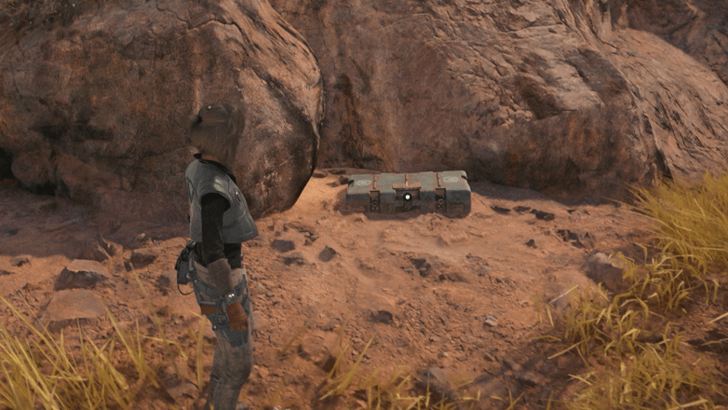
Location Name:
Shipjacker Workshop Treasure 4
How to Get: This crate is hidden inside a droid workshop behind a destructible mossy wall. Reward: A-A5 Paint Job |
||
 |
 |
|
|
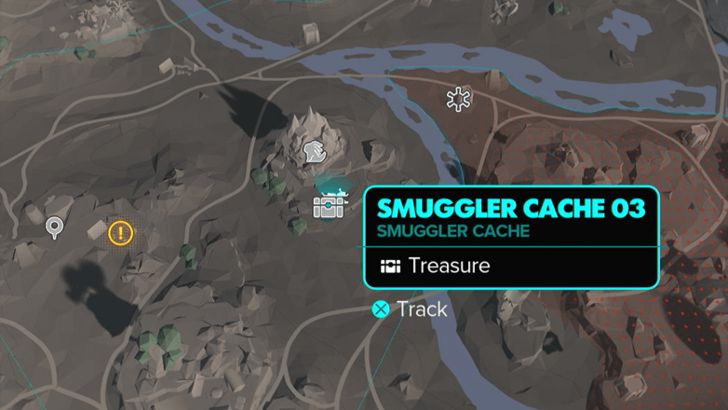
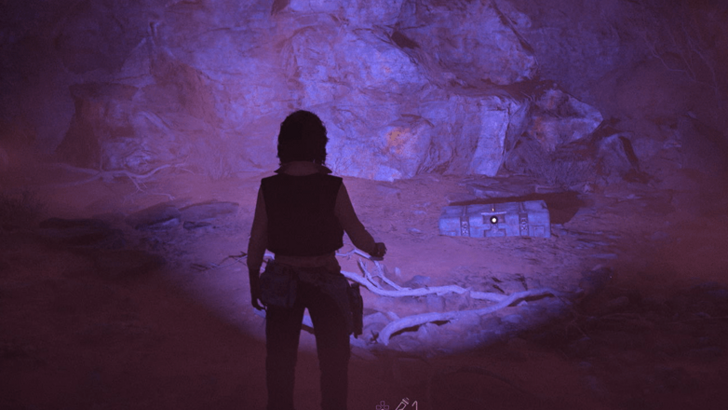
Location Name:
Smuggler Cache 03
How to Get: The cache will be by a rock at the base of the Amberine Tunnel. Reward: Actuating Module |
||
 |
 |
|
|
Location Name:
Smuggler Cache 05
How to Get: This cache can be found in a cave behind a destructible mossy wall. It requires both the Boost upgrade for the speeder and the Bolt upgrade for your blaster. Reward: Materials and Valuables |
||
 |
 |
|
|
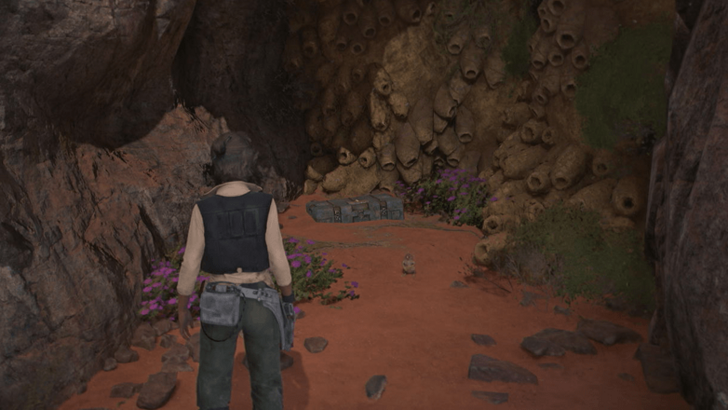
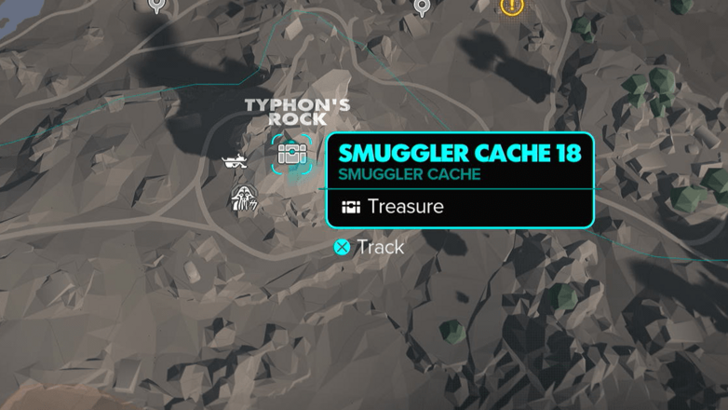
Location Name:
Smuggler Cache 18
How to Get: This cache can be found inside a small cave in Typhon’s Rock a little past Shuma’s Shop. Reward: Materials and Valuables |
||
 |
 |
|
|
Location Name:
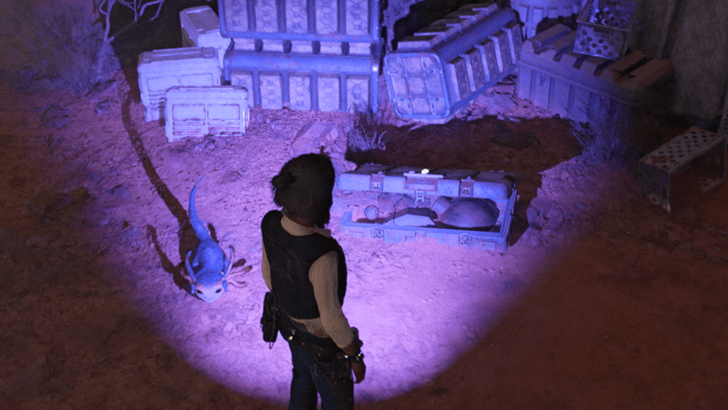
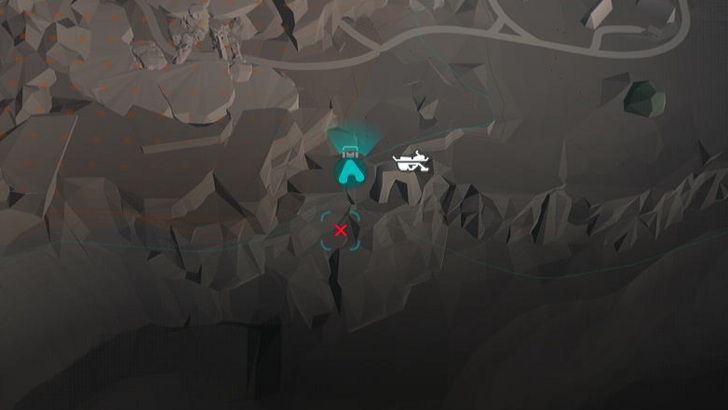
Smuggler Cache 20
How to Get: This cache can be found next to a big rock by the cliff. Reward: Materials and Valuables |
||
 |
 |
|
|
Location Name:
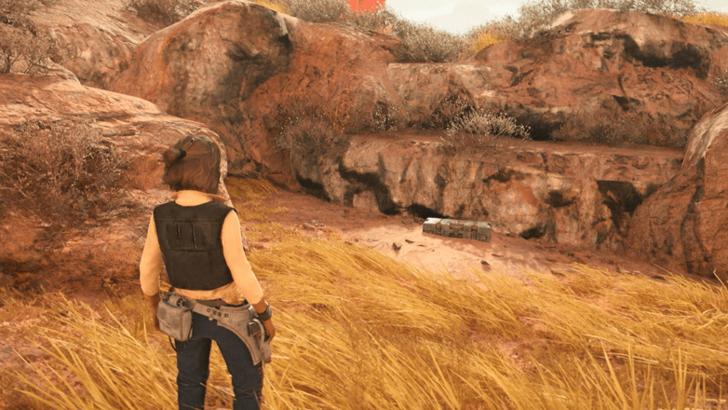
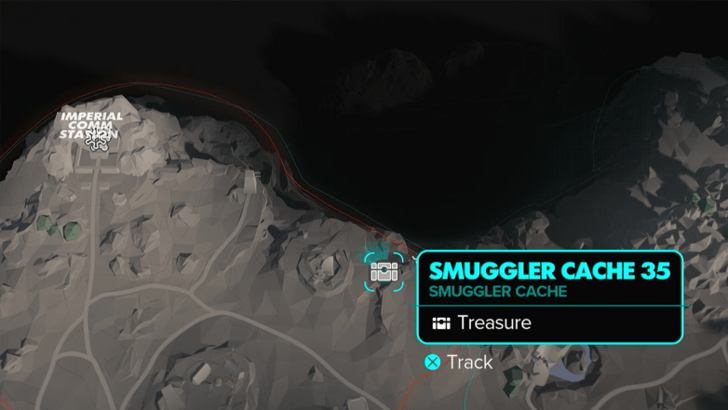
Smuggler Cache 22
How to Get: The treasure can be retrieved from a cache inside the cave. Reward: Materials and Valuables |
||
 |
 |
|
|
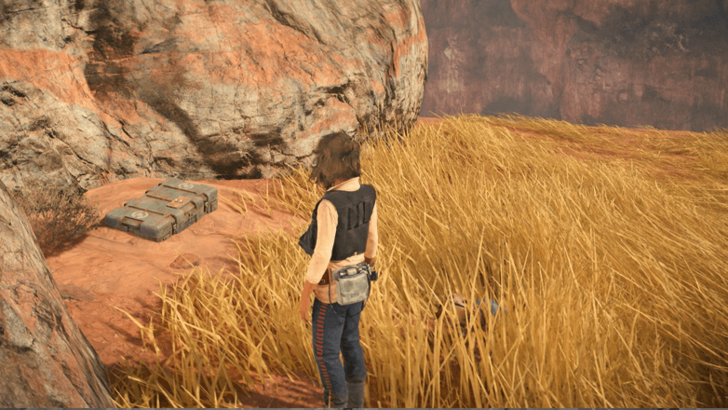
Location Name:
Smuggler Cache 35
How to Get: This cache can be found at the end of the rocky path near the ledge. Reward: Materials and Valuables |
||
 |
 |
|
|
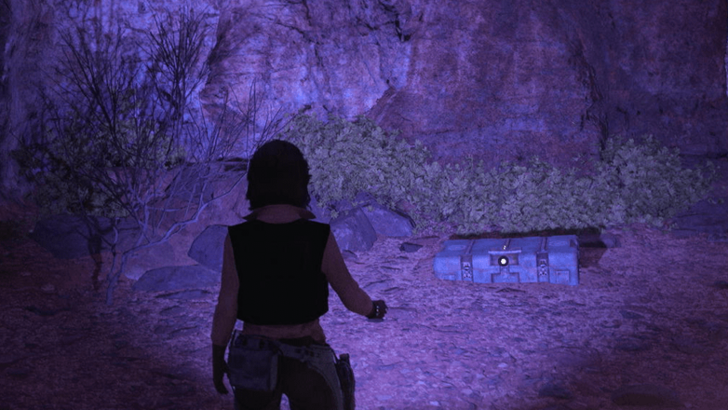
Location Name:
Smuggler Cache 37
How to Get: This cache can be found near a boulder next to a cliff. Reward: Materials and Valuables |
||
 |
 |
|
|
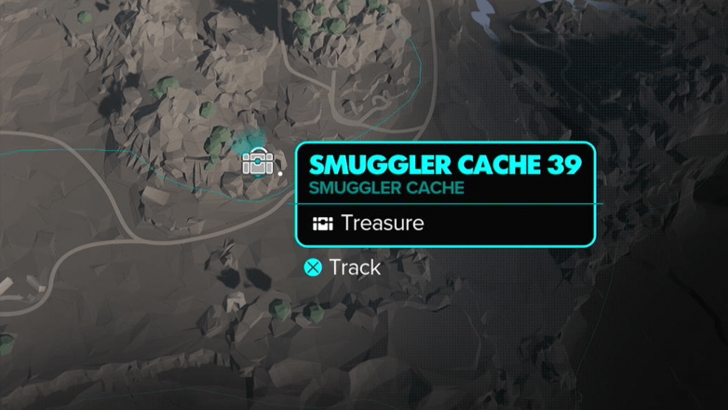
Location Name:
Smuggler Cache 39
How to Get: This cache can be found inside a small cavern. Reward: Materials and Valuables |
||
 |
 |
|
|
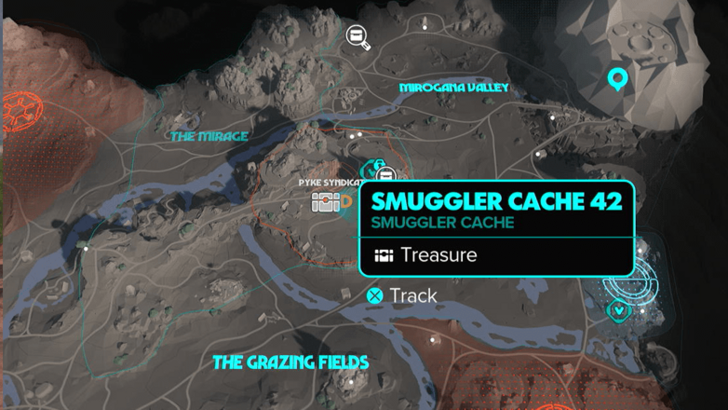
Location Name:
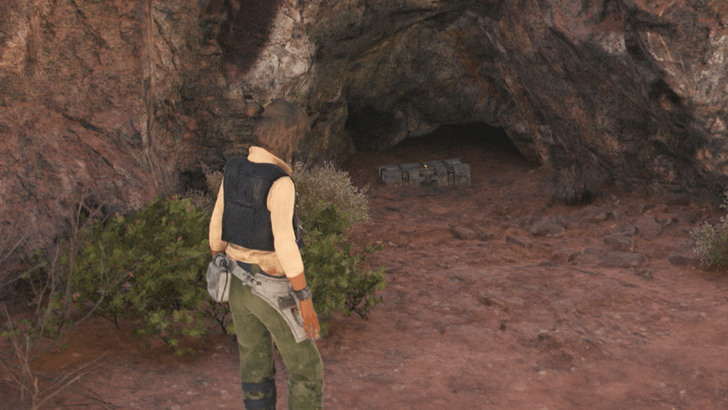
Smuggler Cache 42
How to Get: This cache will be on top of a rock formation. It can’t be climbed. You’ll have to jump from an adjacent rock ramp to land on it. The cache will be under a tree. Reward: Blaster and Speeder Materials |
||
 |
 |
|
|
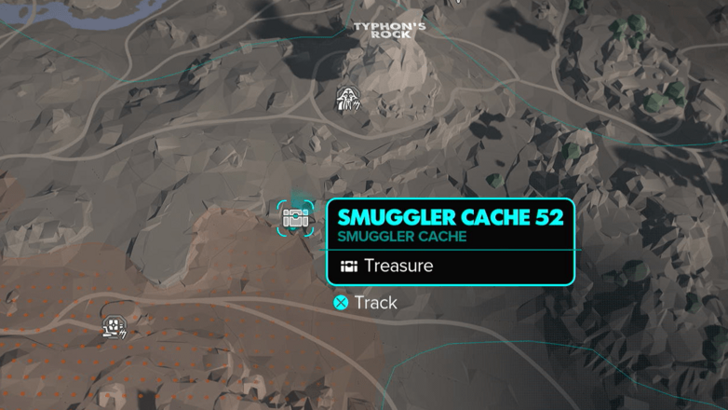
Location Name:
Smuggler Cache 52
How to Get: This cache can be found inside a crevice along the cliff Reward: Materials and Valuables |
||
 |
 |
|
|
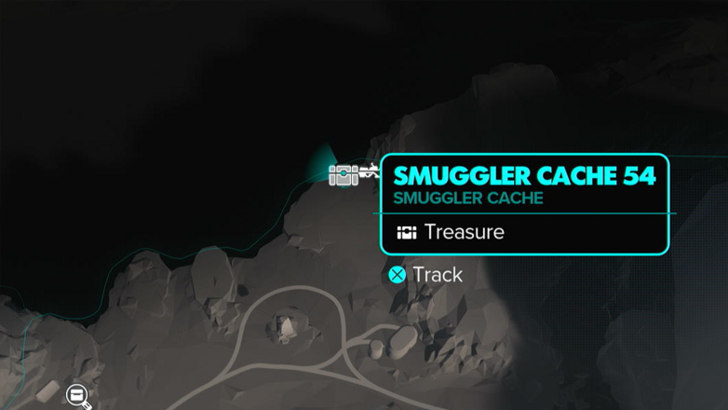
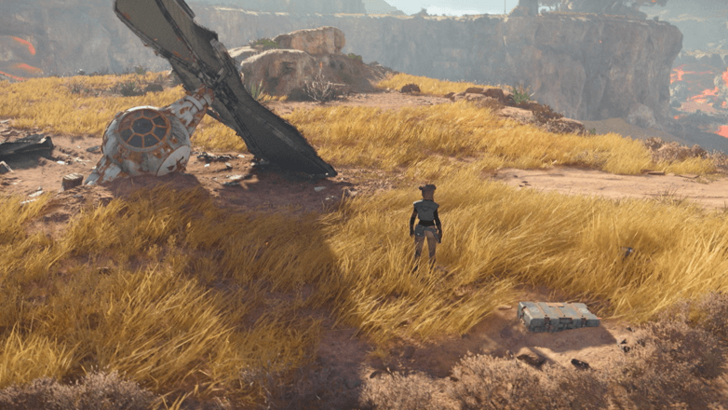
Location Name:
Smuggler Cache 54
How to Get: This cache can be found north of the Dusty Sinkhole near the cliffs. Reward: Materials and Valuables |
||
 |
 |
|
|
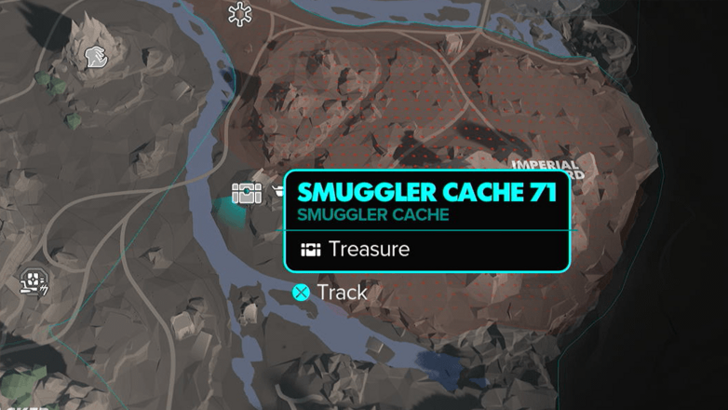
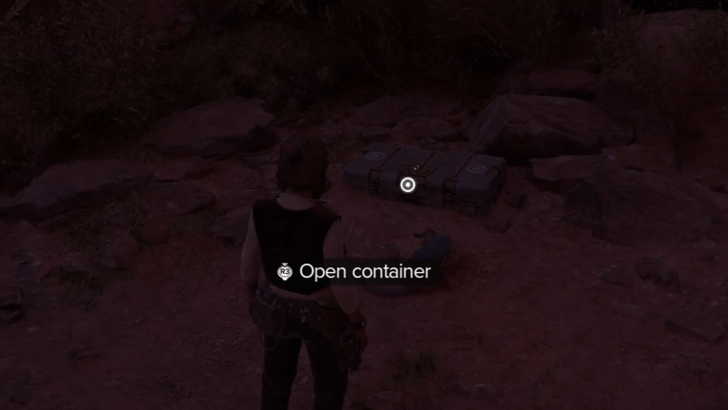
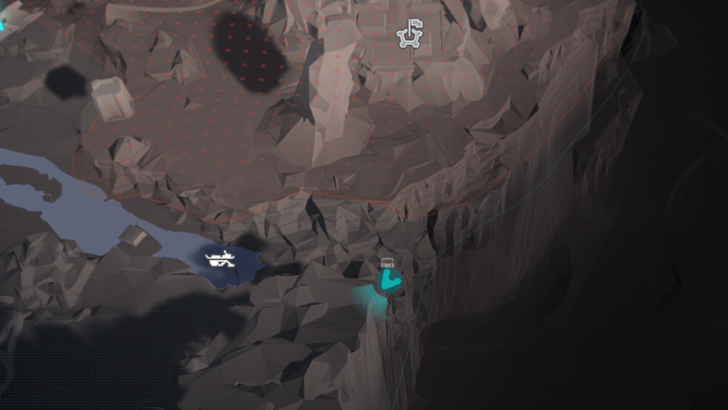
Location Name:
Smuggler Cache 71
How to Get: The cache will be on top of a rocky structure near a ship wreck. Use the amberine ramp from the Imperial Forward Base to reach this location. Reward: Materials and Valuables |
||
 |
 |
|
|
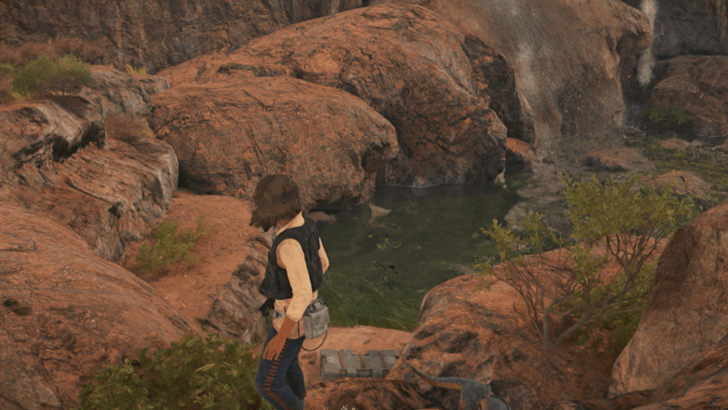
Location Name:
Smuggler Cache 86
How to Get: This is part of the Stolen Imperial Goods intel. The cache is located on a ledge near the water. Reward: Materials and Valuables |
||
 |
 |
|
|
Location Name:
Smuggler Cache 88
How to Get: This cache can be found on a small beach near the small waterfall. Reward: Materials and Valuables |
||
 |
 |
|
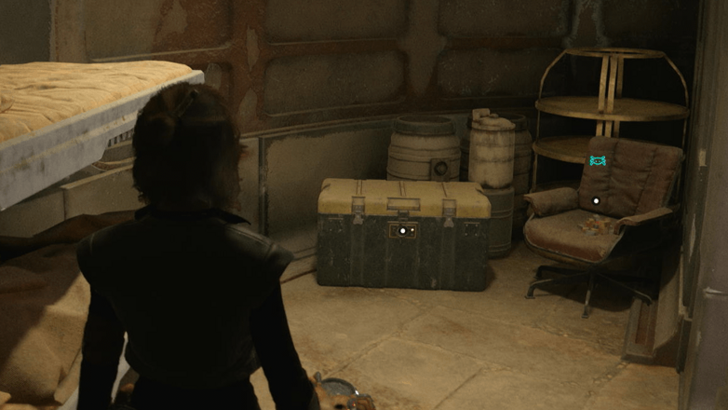
|
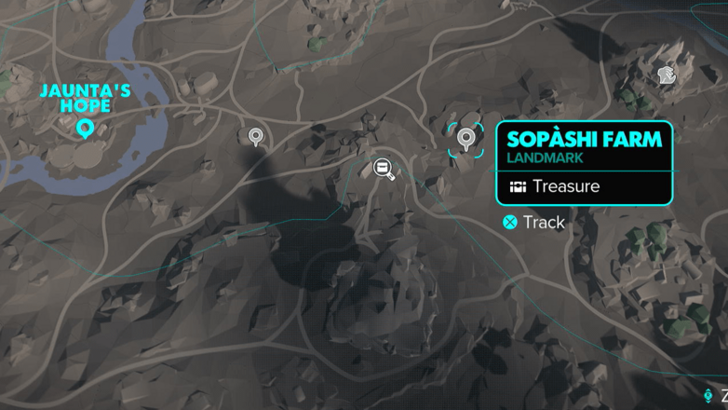
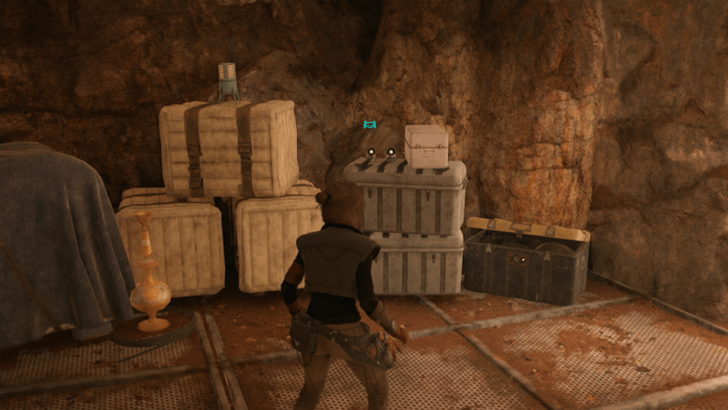
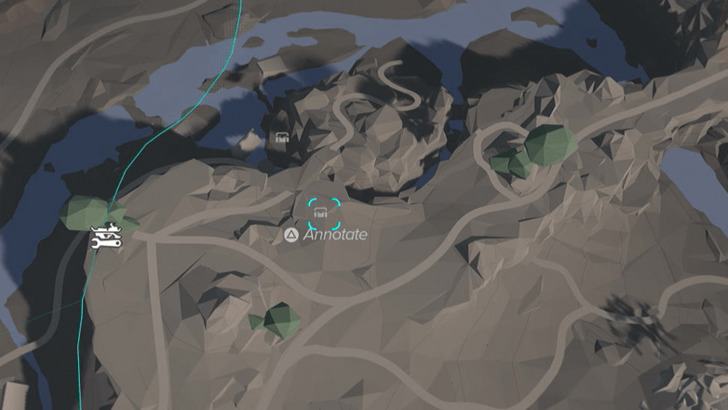
Location Name:
Sopashi Farm
How to Get: The crate will be inside a locked house. You will need the ion blaster upgrade to open the door. Reward: Data Cylinder Charm |
||
 |
 |
|
|
Location Name:
Trapper’s Gulley Treasure 1
How to Get: The treasure is found in a crate inside a room. The treasure is a new paintjob for the Speeder. Reward: Sergeant Speeder Paint Job |
||
 |
 |
|
|
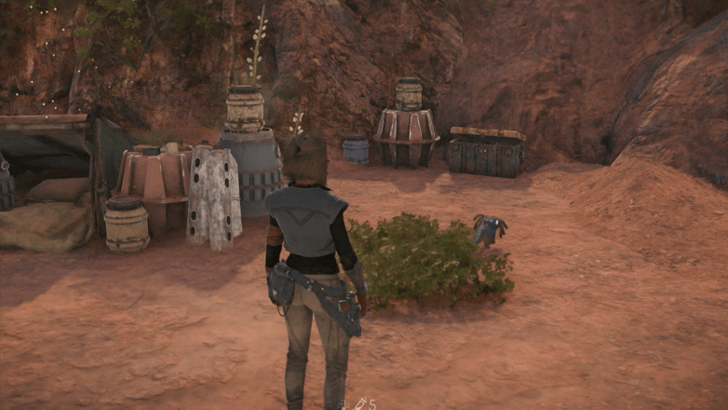
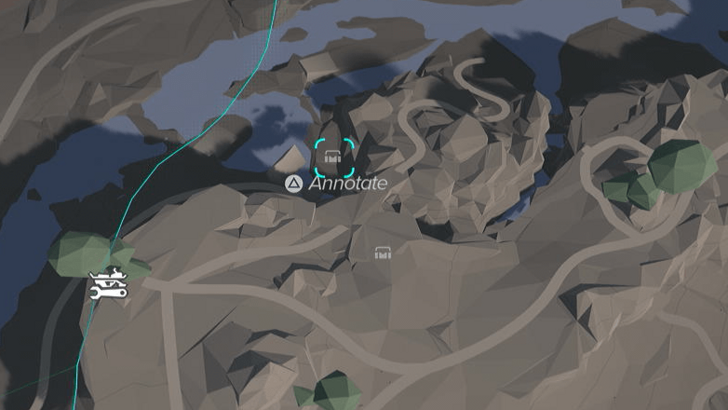
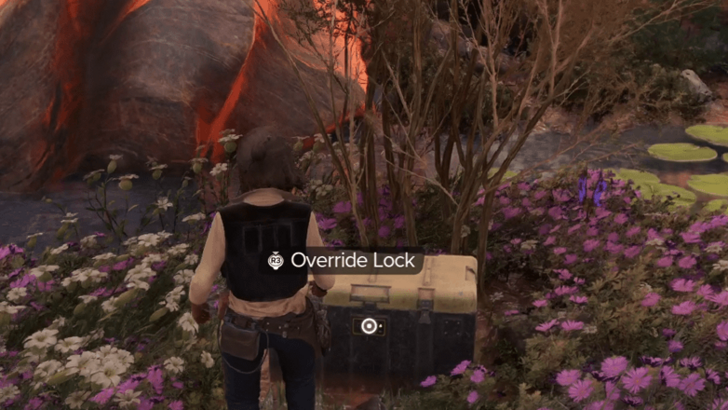
Location Name:
Trapper’s Gulley Treasure 2
How to Get: The treasure is found in a crate in the hostile camp. Reward: Contraband Trophy |
||
 |
 |
|
|
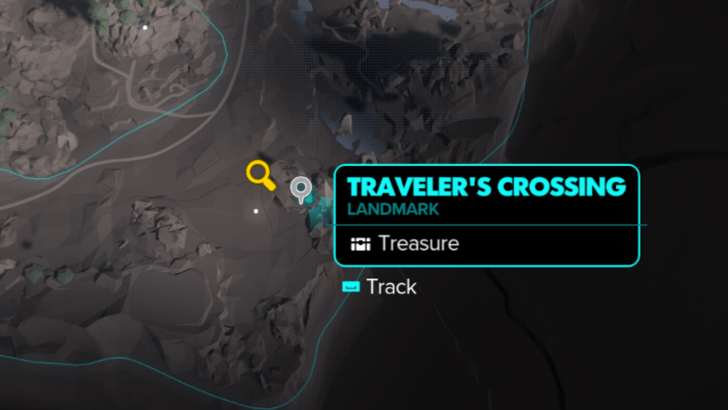
Location Name:
Traveler’s Crossing
How to Get: This cave is the location of the Gushiro Nest intel. The crate is located deep inside the cave. Reward: Yellow Scarf |
||
 |
 |
|
|
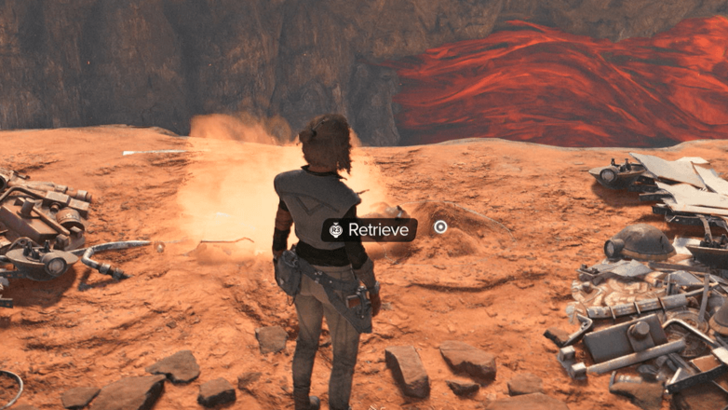
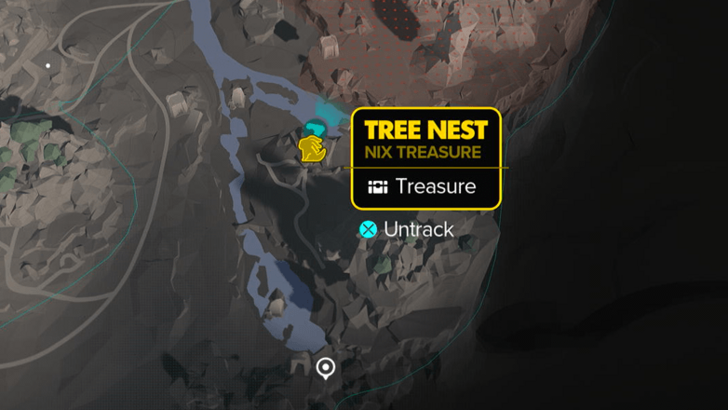
Location Name:
Tree Nest
How to Get: Follow Nix to the end of the path to acquire the treasure. Reward: Droid Eye |
||
 |
 |
|
|
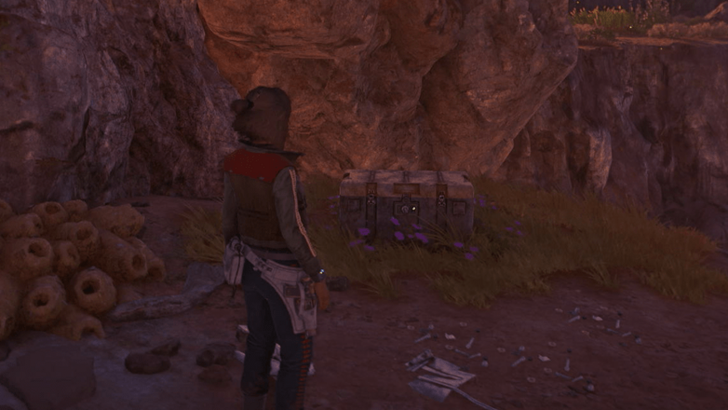
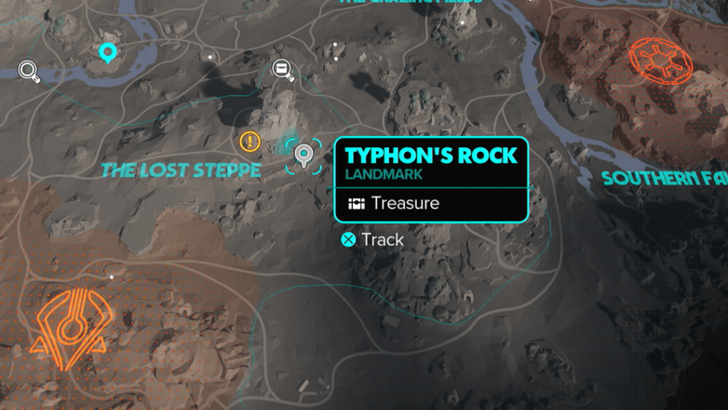
Location Name:
Typhon’s Rock
How to Get: The crate will be atop the rocky climb. Reward: Tooka Paw Charm |
||
 |
 |
|
|
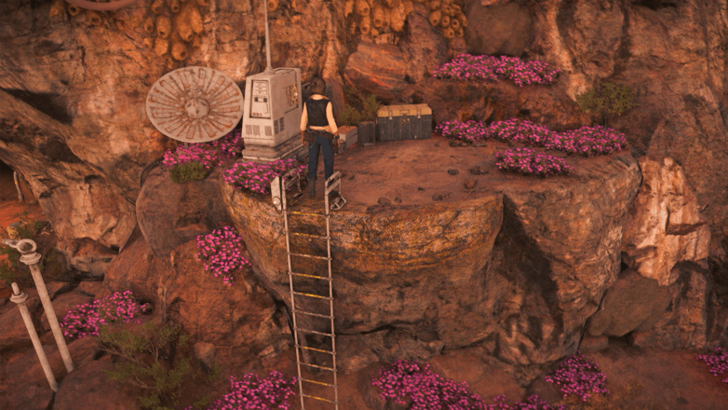
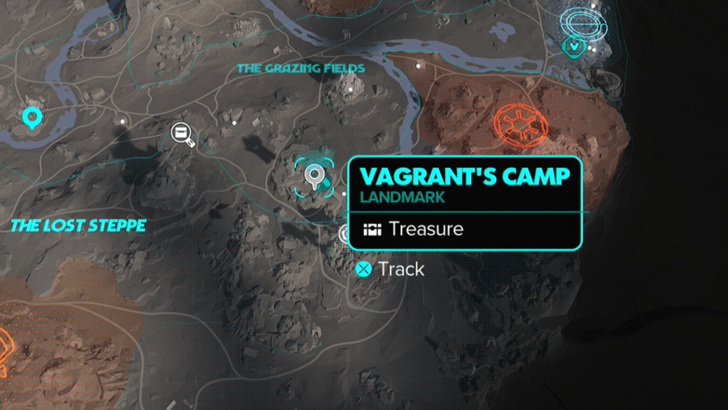
Location Name:
Vagrant’s Camp
How to Get: The treasure crate is on top of a rocky ledge. Use Nix to deploy the ladder. Reward: Yellow Tail Wrappings |
||
 |
 |
|
|
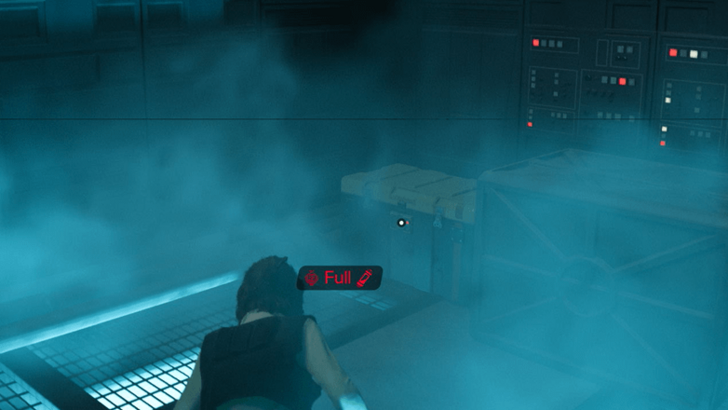
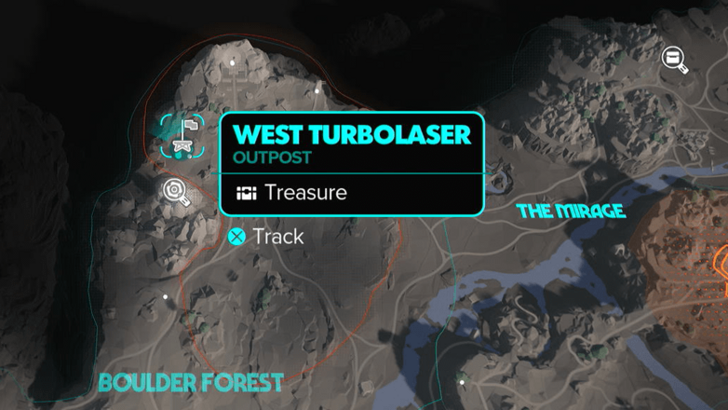
Location Name:
West Turbolaser
How to Get: The crate will be at the lower levels of the tower. Reward: Ion Capacitor Charge |
||
 |
 |
|
|
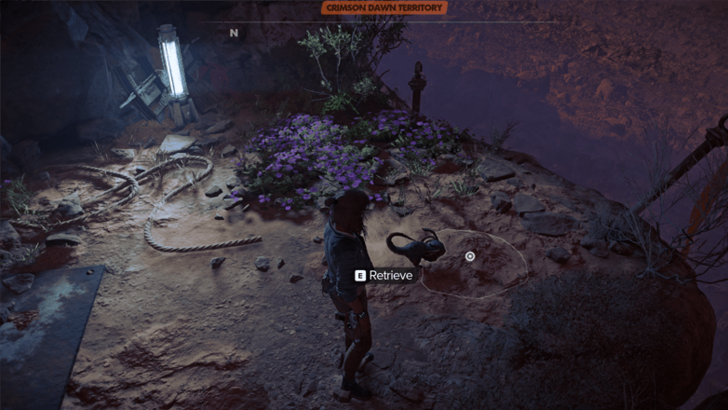
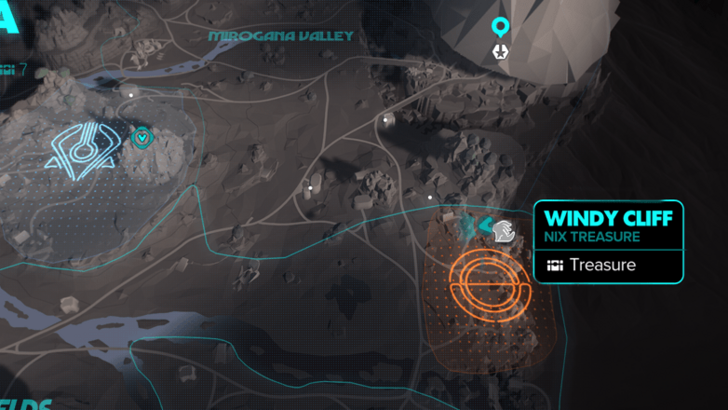
Location Name:
Windy Cliff
How to Get: Platform through this cliffside and you will get the Nix Treasure at the very end. Reward: Twinkly Metal |
||
Mirogana Treasure Locations
| Found? | Treasure Details | |
|---|---|---|
 |
 |
|
|
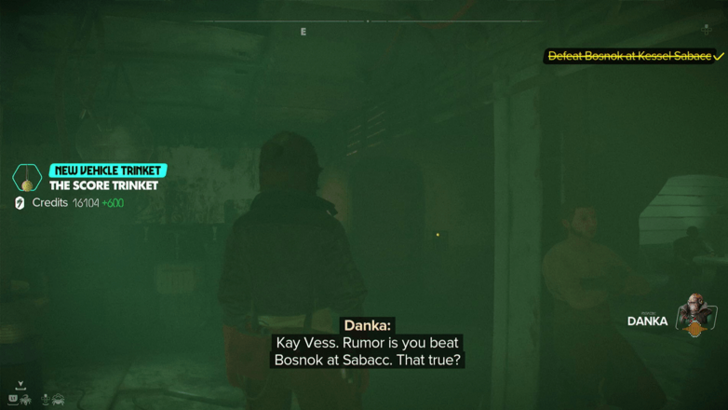
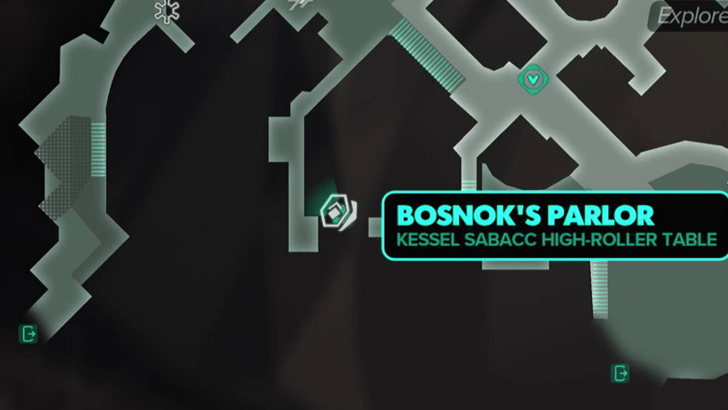
Location Name:
Bosnok’s Parlor
How to Get: Treasure is obtained via playing Sabacc and winning. Reward: The Score Trinket |
||
 |
 |
|
|
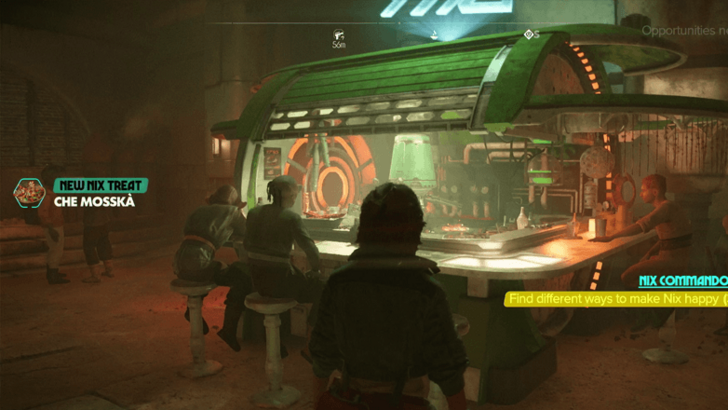
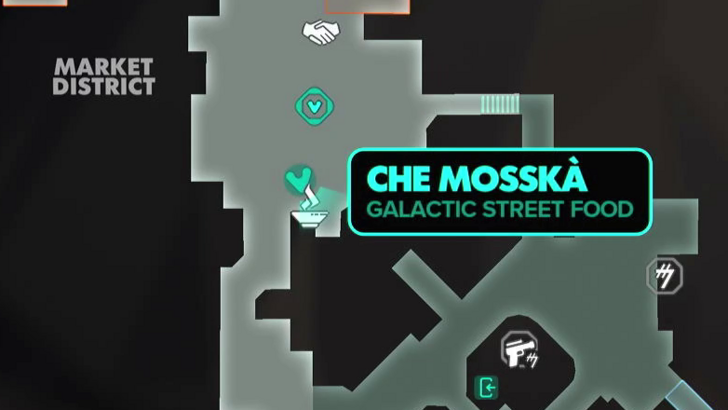
Location Name:
Che Mosska
How to Get: Order this from the robot for 200 credits to obtain a Nix Treat. |
||
 |
 |
|
|
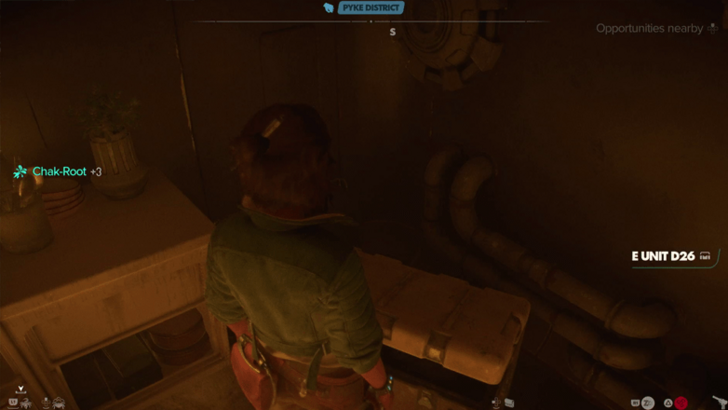
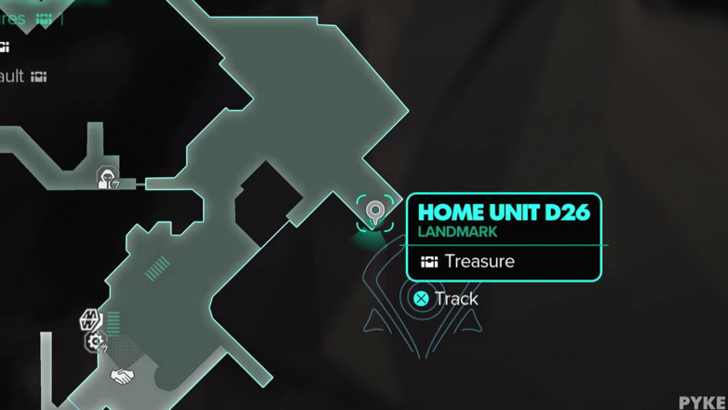
Location Name:
Home Unit D26
How to Get: This container is found deep inside the Pyke Syndicate Stronghold in Mirogana. Reward: Chak-Root |
||
 |
 |
|
|
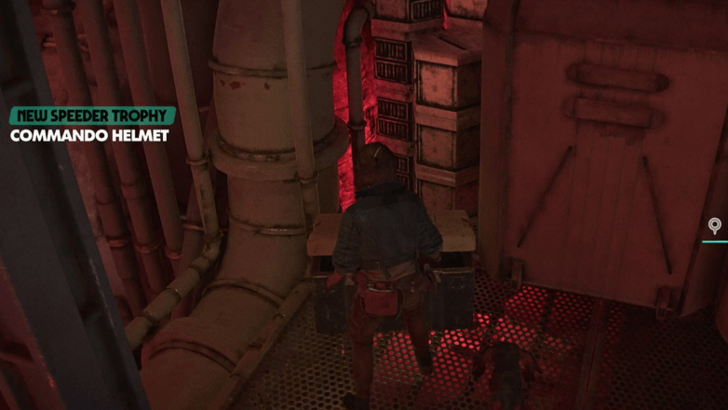
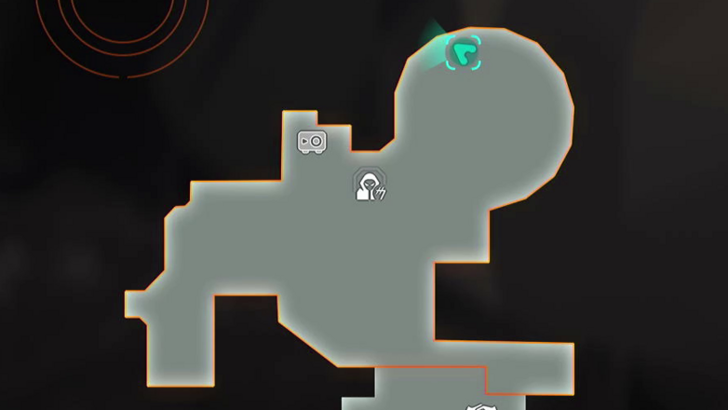
Location Name:
Jodara’s Stash
How to Get: This container is found inside the Crimson Dawn territory in Mirogana. Reward: Commando Helmet |
||
 |
 |
|
|
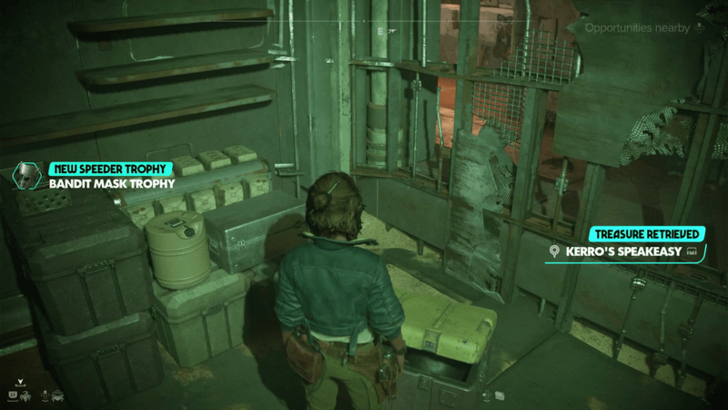
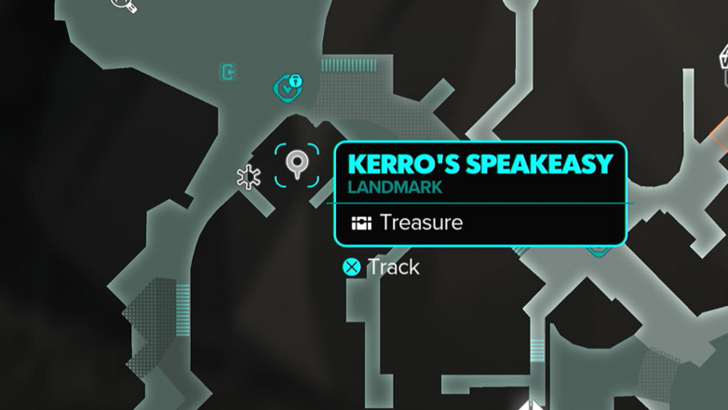
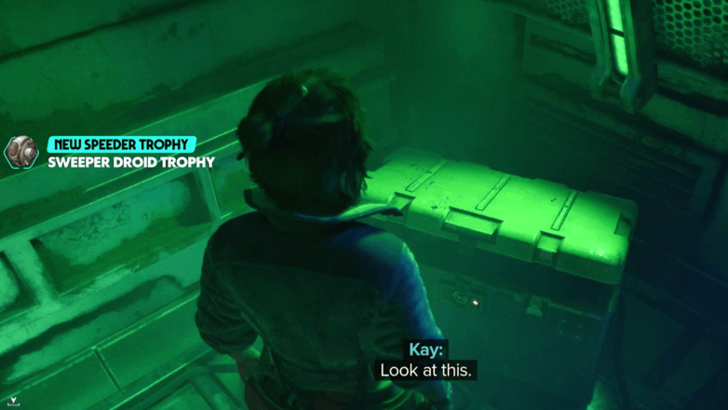
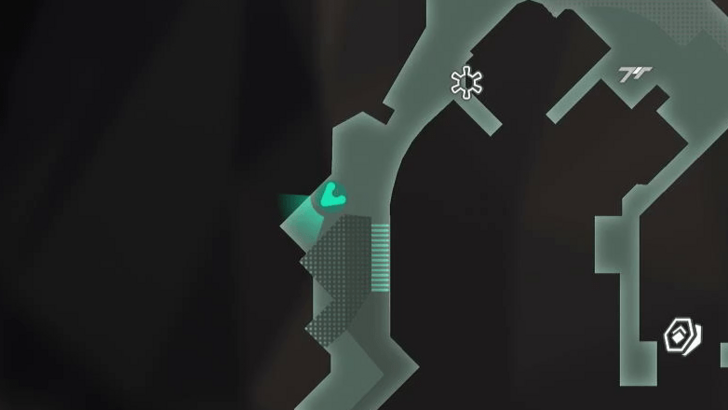
Location Name:
Kerro’s Speakeasy
How to Get: Climb through the vent from the alley to land inside Kerro’s Speakeasy. The treasure will be behind the red energy shield. Requires the Slicing Kit. Reward: Bandit Mask Trophy |
||
 |
 |
|
|
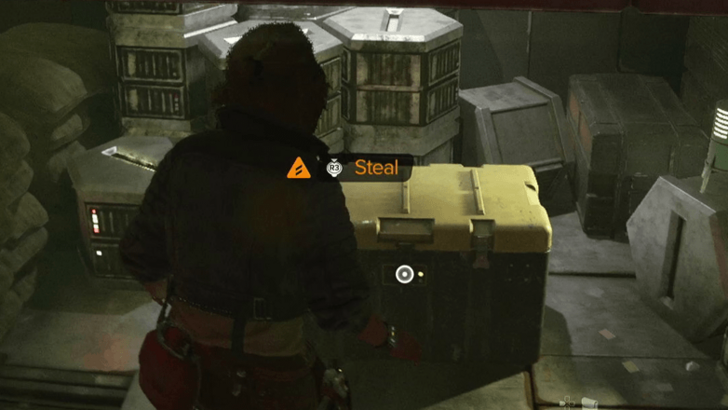
Location Name:
Maintenance Room
How to Get: Squeeze through a narrow passageway then crawl through a vent to enter a room with a bunch of droids and a strobe light. Reward: Sweeper Droid Trophy |
||
 |
 |
|
|
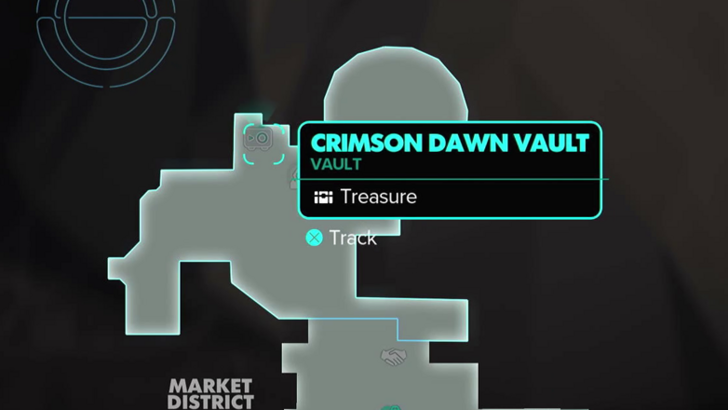
Location Name:
Mirogana Crimson Dawn Vault (Treasure)
How to Get: This vault requires Eleera’s Vault Keycard, Zafi’s Vault Keycard, and Odana’s Vault Keycard. Once you have all three, these can be found inside the Crimson Dawn territory of Mirogana. Reward: Crimson Reign Paint Job |
||
 |
 |
|
|
Location Name:
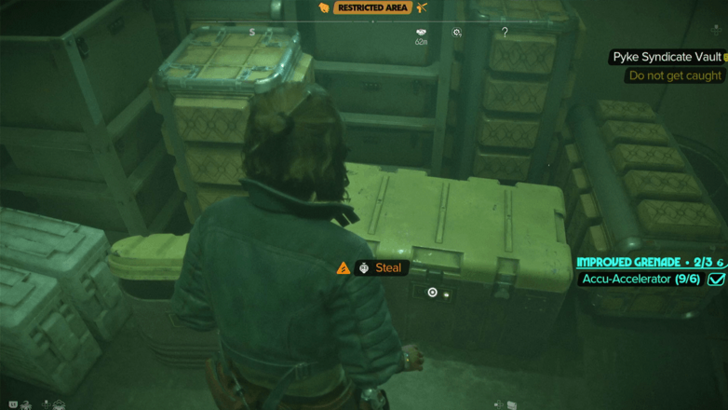
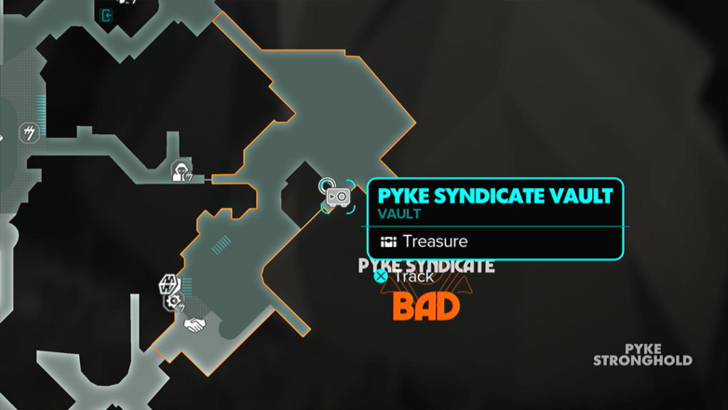
Mirogana Pyke Syndicate Vault (Treasure)
How to Get: Get all three keycards to open this fault. Gather intel on the computer. Reward: Imperial Paint Job, Target Tariff, and 5000 Credits |
||
 |
||
|
Location Name:
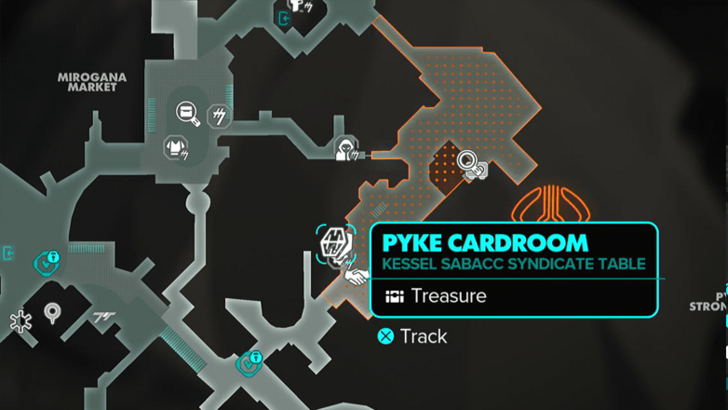
Pyke Cardroom
Pyke Cardroom
How to Get: Treasure is obtained via playing Sabacc and winning. |
||
Jaunta's Hope Treasure Locations
| Found? | Treasure Details | |
|---|---|---|
 |
 |
|
|
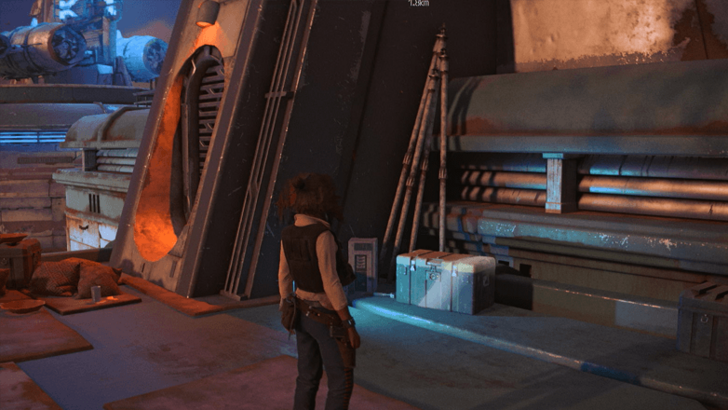
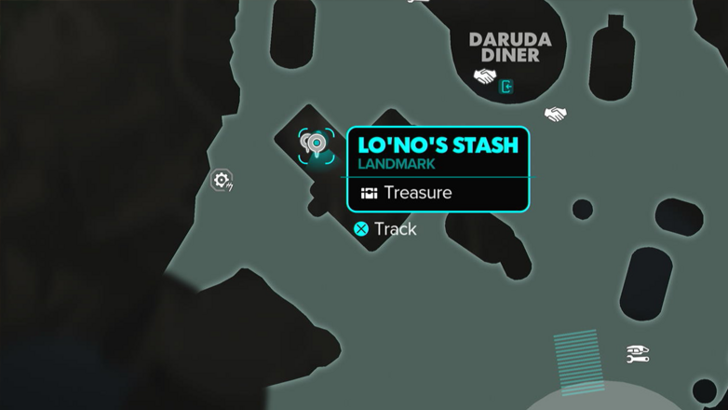
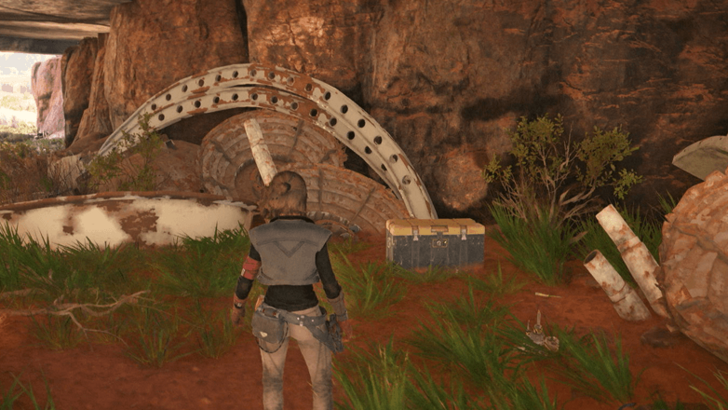
Location Name:
Lo’no’s Stash
How to Get: Use the Slicing Kit to deploy the ladder. The crate will be on the roof. Reward: Amberwoven Carpet Trophy |
||
 |
 |
|
|
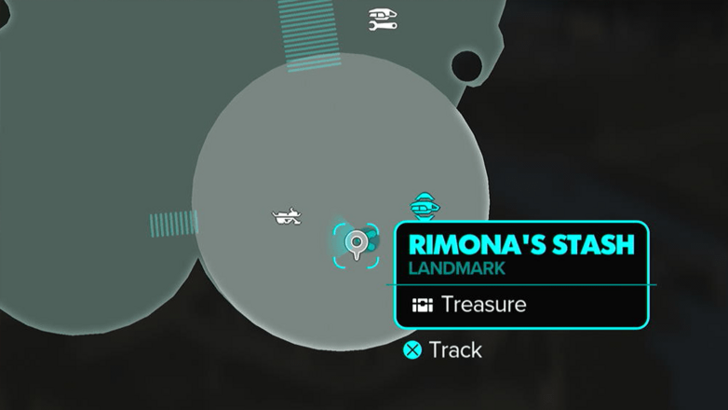
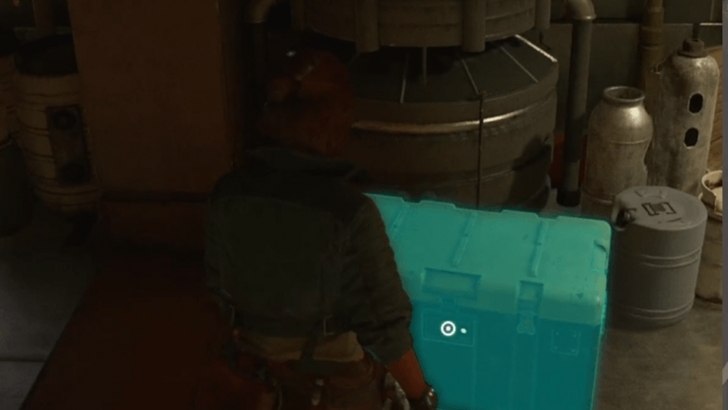
Location Name:
Rimona’s Stash
How to Get: This crate will be in trash heap underneath the landing zone. Reward: Robuma Leather |
||
 |
 |
|
|
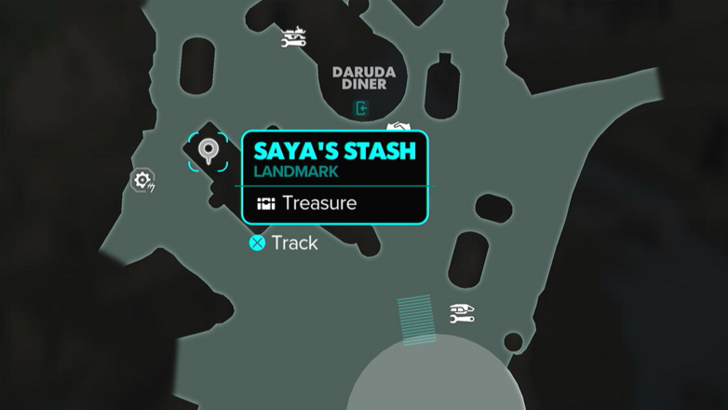
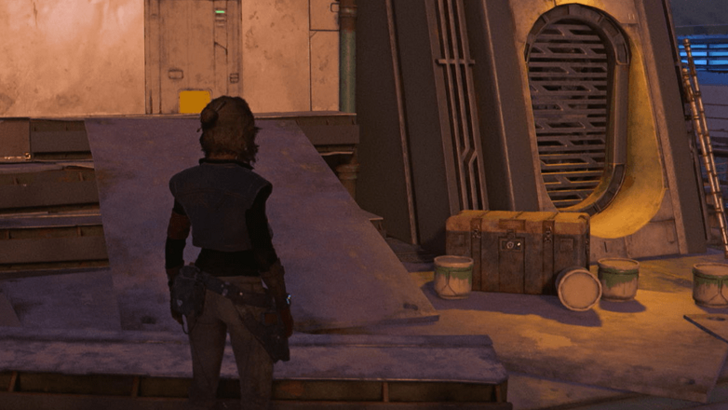
Location Name:
Saya’s Stash
How to Get: Unlock this area by talking to the malfunctioning astromech droid and fixing him up. Reward: Datapad Trinket |
||
 |
 |
|
|
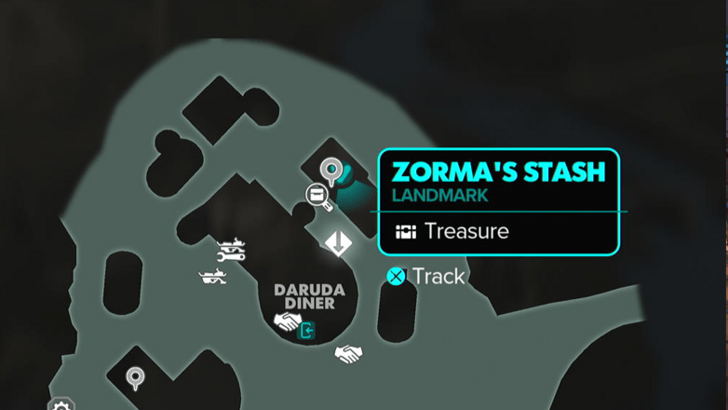
Location Name:
Zorma’s Stash
How to Get: This crate will be on the rooftop next to some paint buckets but will not spawn if you do not have the Rooftop Stash intel. The intel is gained through listening on the conversation in the nearby building. Reward: Baradium-357 Cannister |
||
Toshara Orbit Treasure Locations
| Found? | Treasure Details | |
|---|---|---|
 |
 |
|
|
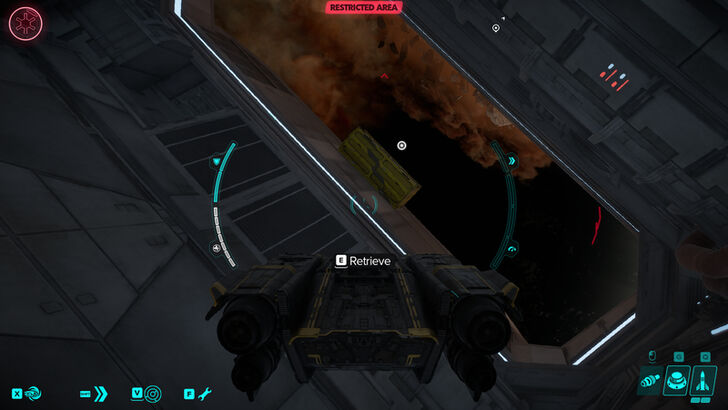
Location Name:
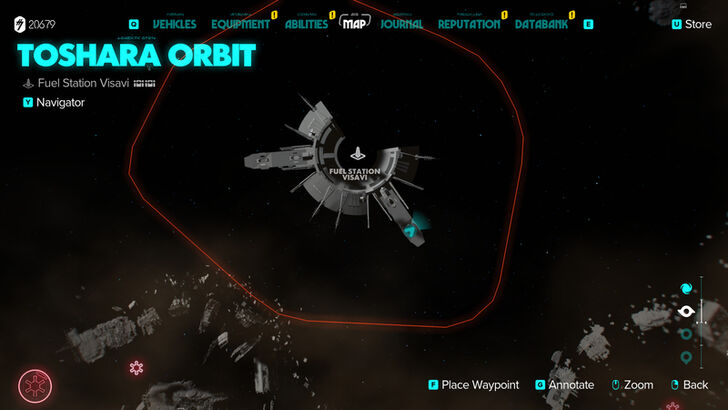
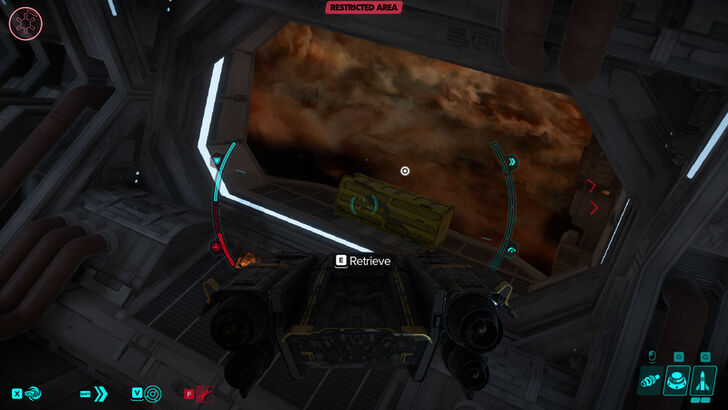
Fuel Station Visavi Treasure 1
How to Get: The crate is inside the tunnel-like entrance of the station. Reward: Ruby Cover Finish |
||
 |
 |
|
|
Location Name:
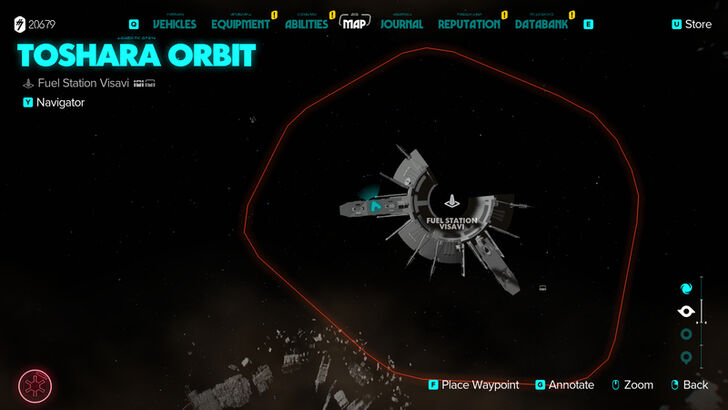
Fuel Station Visavi Treasure 2
How to Get: The crate is inside the tunnel-like entrance of the station. Reward: X-FP-C28 Ship Computer |
||
 |
 |
|
|
Location Name:
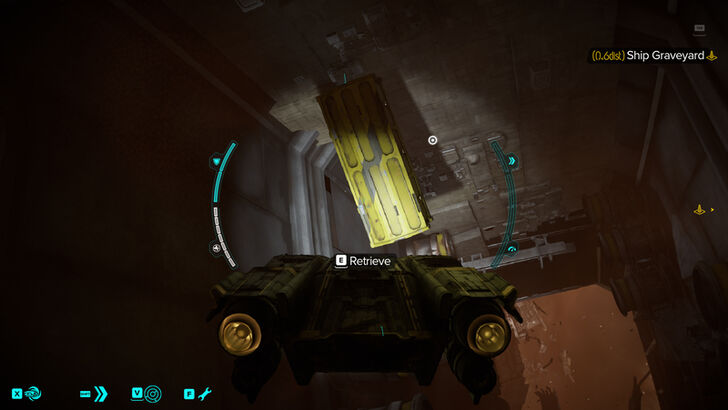
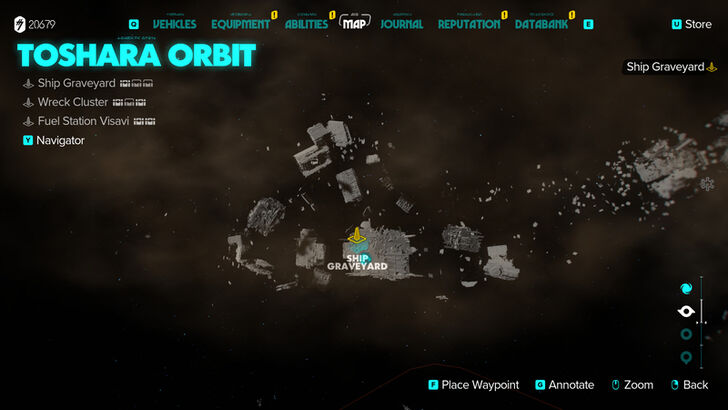
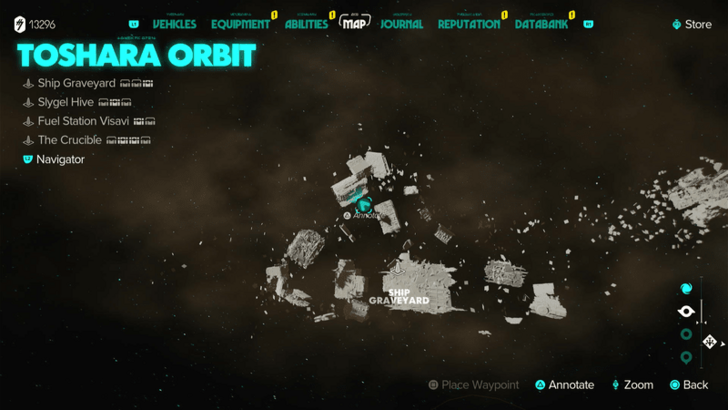
Ship Graveyard Treasure 1
How to Get: Inside a broken ship behind a laser barrier, player will have to shoot a large power cell to disable the laser. Once inside, player will have to shoot the pipes and mines in order to get to the treasure. Reward: Ruby Detail Finish |
||
 |
 |
|
|
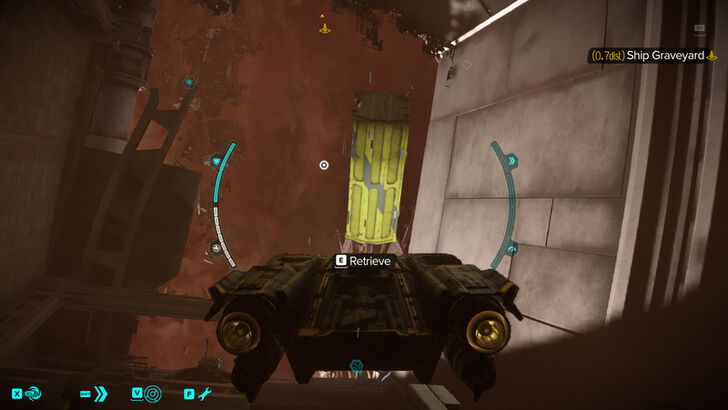
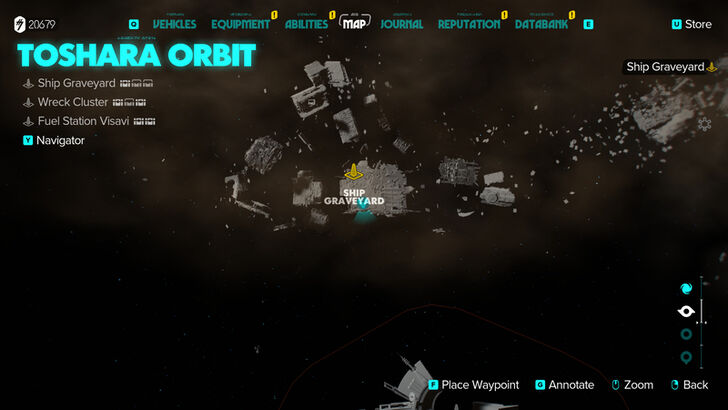
Location Name:
Ship Graveyard Treasure 2
How to Get: Inside a broken ship behind a laser barrier, player will have to shoot a large power cell to disable the laser. Once inside, player will have to shoot the pipes and mines in order to get to the treasure. Reward: Verdant Stripe Finish |
||
 |
 |
|
|
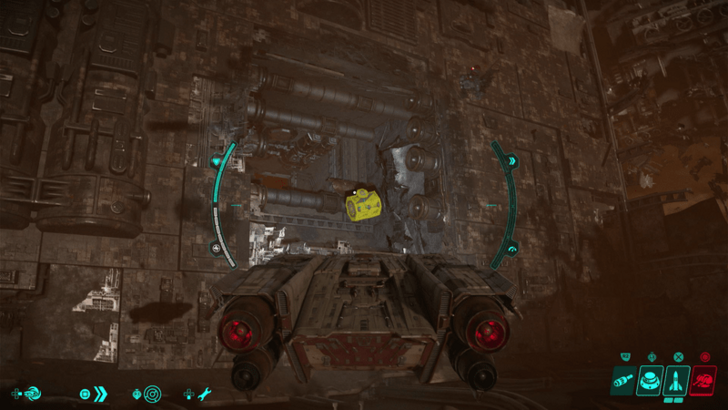
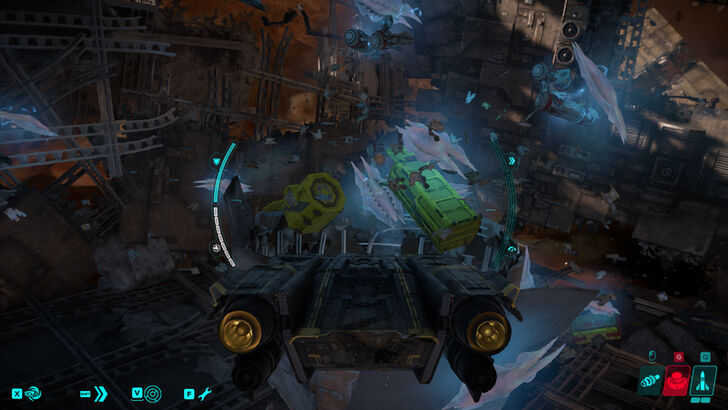
Location Name:
Ship Graveyard Treasure 3
How to Get: This Transmission is inside a floating crate. Collect 5 of them to unlock The Veteran Expert Quest. Once you have all 16 Transmissions, you will unlock the Disruptor Gear set. Reward: Sefin’s Journey 01 |
||
 |
 |
|
|
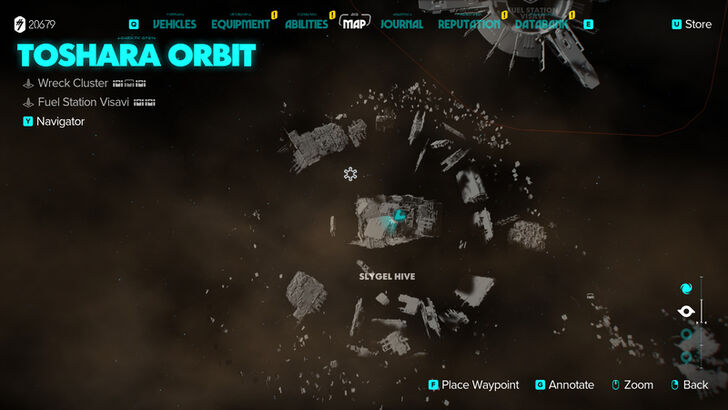
Location Name:
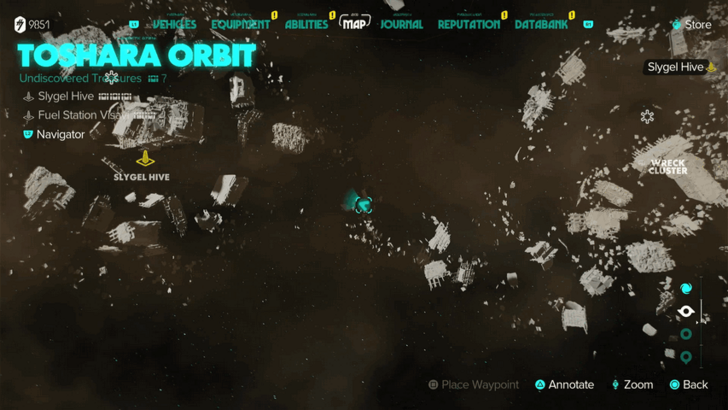
Slygel Hive Treasure 1
How to Get: In the middle of Slygel Hive inside a big ship with many Slygel nearby. Reward: X-FP-C28 Ship Computer |
||
 |
 |
|
|
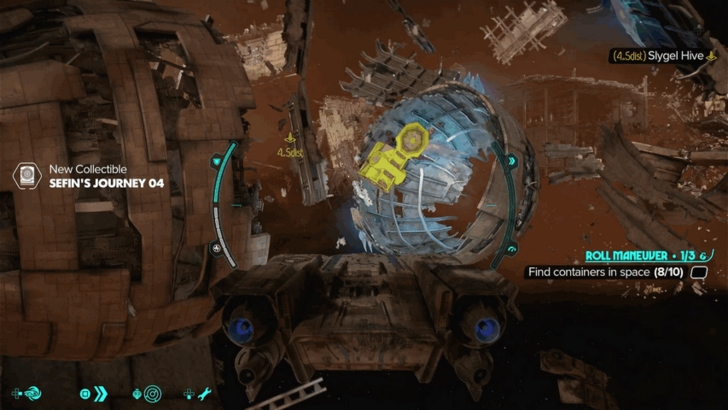
Location Name:
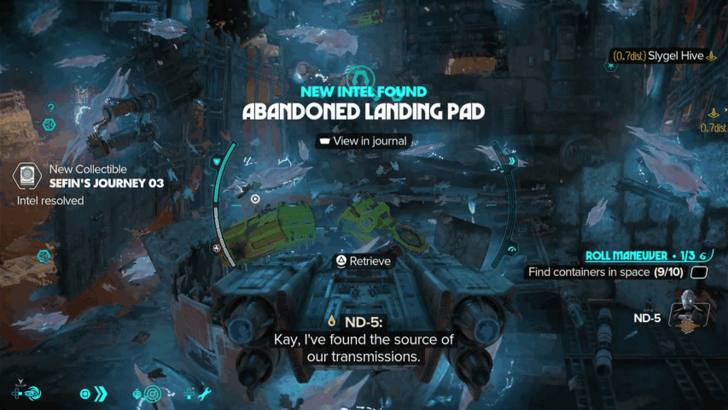
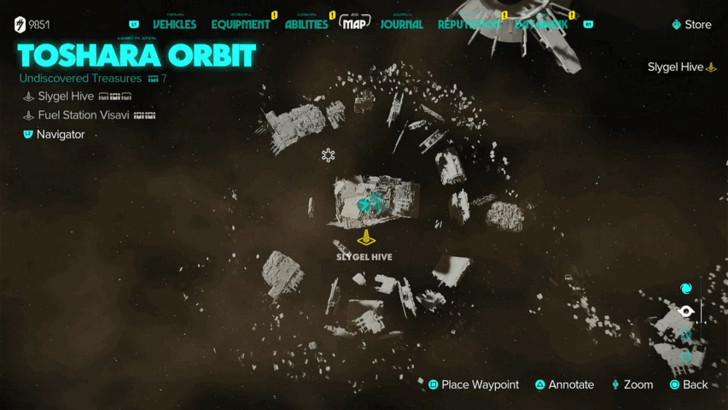
Slygel Hive Treasure 2
How to Get: This Transmission is inside a floating crate. Collect 5 of them to unlock The Veteran Expert Quest. Once you have all 16 Transmissions, you will unlock the Disruptor Gear set. Reward: Sefin’s Journey 04 |
||
 |
 |
|
|
Location Name:
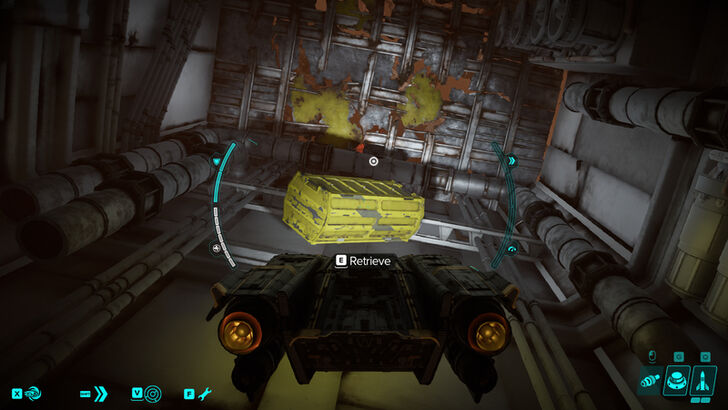
Slygel Hive Treasure 3
How to Get: This Transmission is inside a floating crate. Collect 5 of them to unlock The Veteran Expert Quest. Once you have all 16 Transmissions, you will unlock the Disruptor Gear set. Reward: Sefin’s Journey 03 |
||
 |
 |
|
|
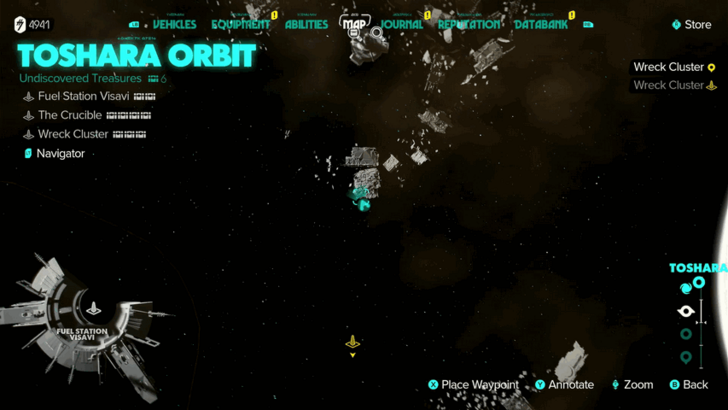
Location Name:
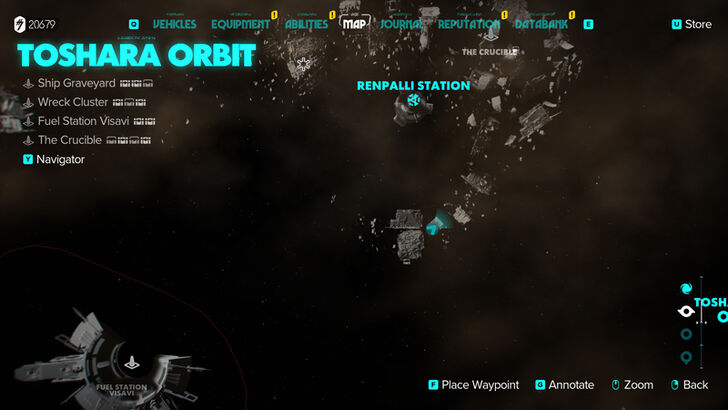
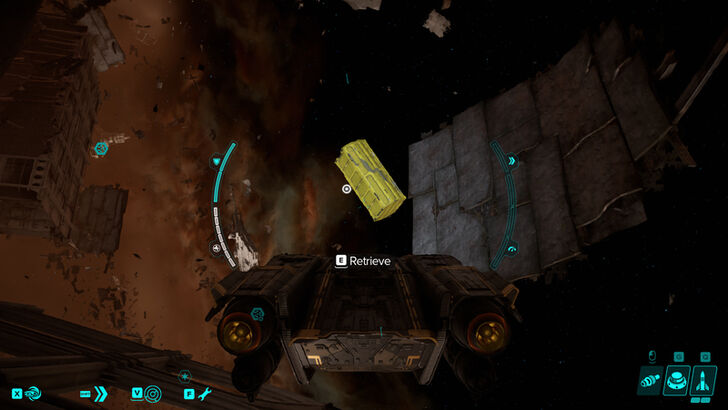
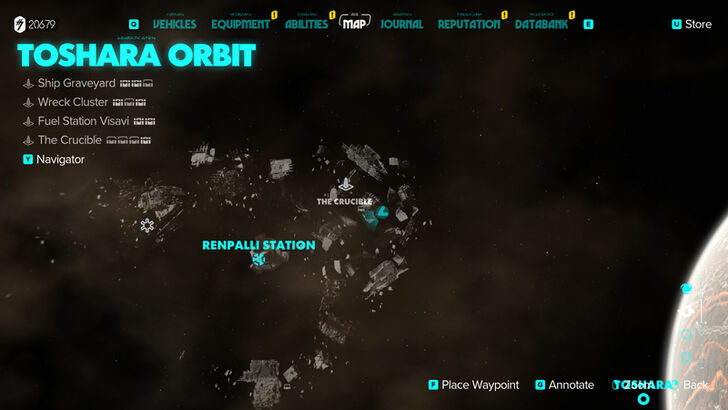
The Crucible Treasure 1
How to Get: Inside a large rectangular debris, player will have to shoot the yellow parts in order to get inside. Reward: Cobalt Streak Finish |
||
 |
 |
|
|
Location Name:
The Crucible Treasure 2
How to Get: From the treasure 2, just wrap around behind the place and you’ll see this 4th treasure. Reward: Verdant Detail Finish |
||
 |
 |
|
|
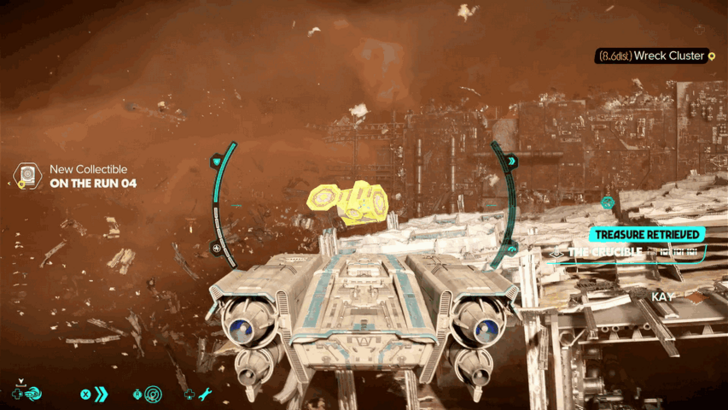
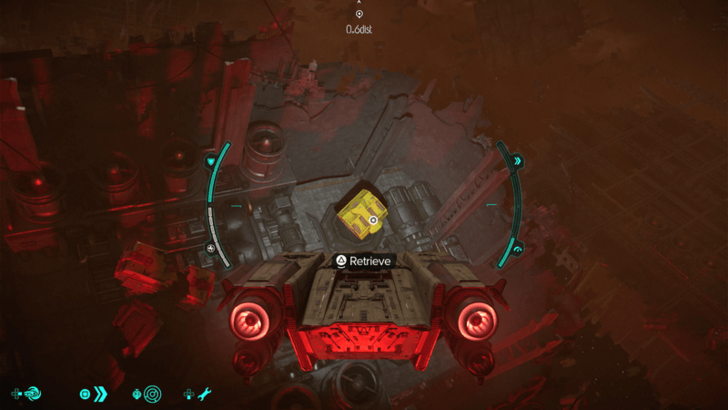
Location Name:
The Crucible Treasure 3
How to Get: This Transmission is inside a floating crate. Collect 5 of them to unlock The Veteran Expert Quest. Once you have all 16 Transmissions, you will unlock the Disruptor Gear set. Reward: On the Run 04 |
||
 |
 |
|
|
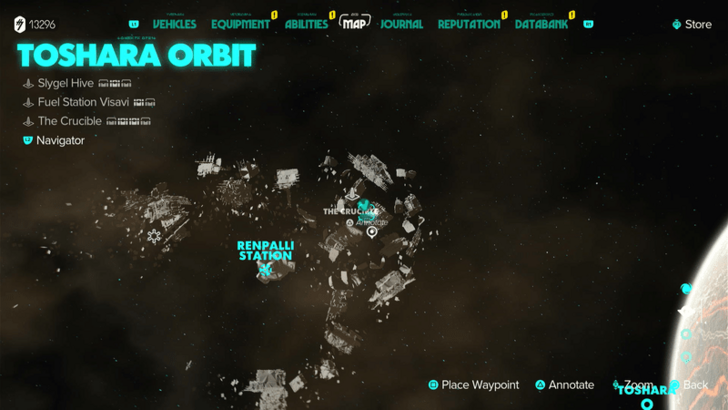
Location Name:
The Crucible Treasure 4
How to Get: This Transmission is inside a floating crate. Collect 5 of them to unlock The Veteran Expert Quest. Once you have all 16 Transmissions, you will unlock the Disruptor Gear set. Reward: On the Run 02 |
||
 |
 |
|
|
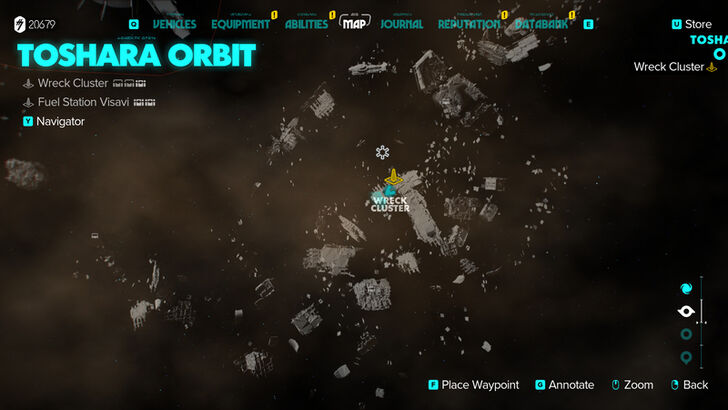
Location Name:
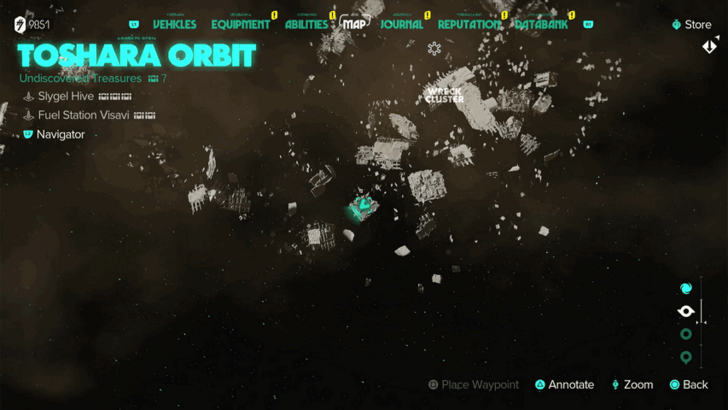
Wreck Cluster Treasure 1
How to Get: Inside a broken part of a ship next to some pipes with mines and Slygel nearby. Reward: Ruby Cross Finish |
||
 |
 |
|
|
Location Name:
Wreck Cluster Treasure 2
How to Get: Locked behind a laser barrier, player will have to shoot a power cell to disable the barrier. Once inside, shoot the mines to clear the pipes that are in the way. Reward: Verdant Streak Finish |
||
 |
 |
|
|
Location Name:
Wreck Cluster Treasure 3
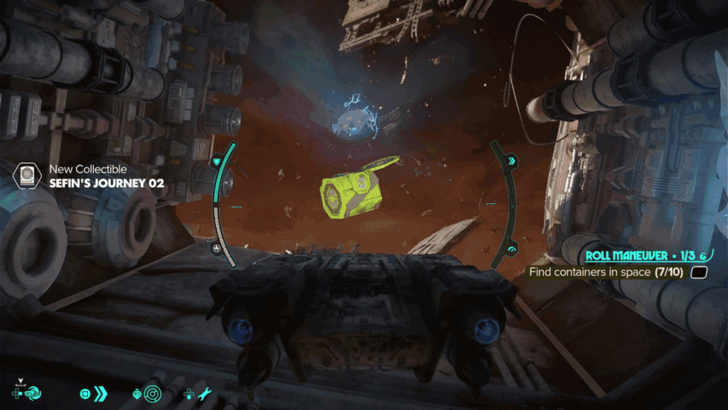
How to Get: This Transmission is inside a floating crate. Collect 5 of them to unlock The Veteran Expert Quest. Once you have all 16 Transmissions, you will unlock the Disruptor Gear set. Reward: Sefin’s Journey 02 |
||
Renpalli Station Treasure Locations
| Found? | Treasure Details | |
|---|---|---|
 |
 |
|
|
Location Name:
Camble’s Stash
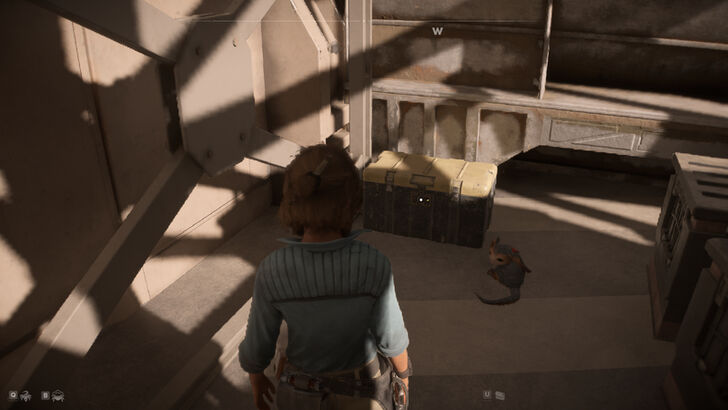
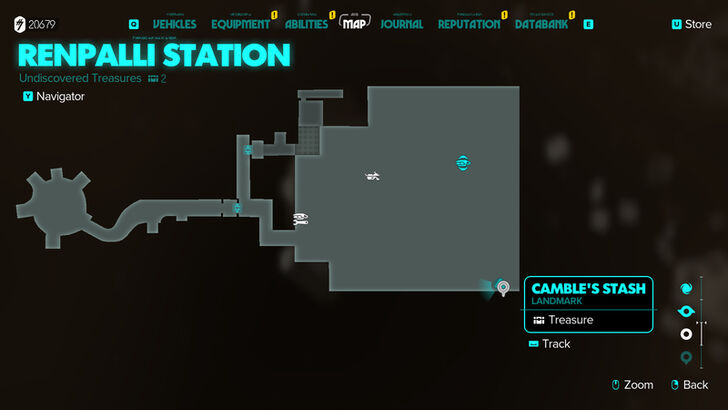
How to Get: This crate will be hidden some crates on the station. Reward: Sodium-Laden Fuel |
||
 |
 |
|
|
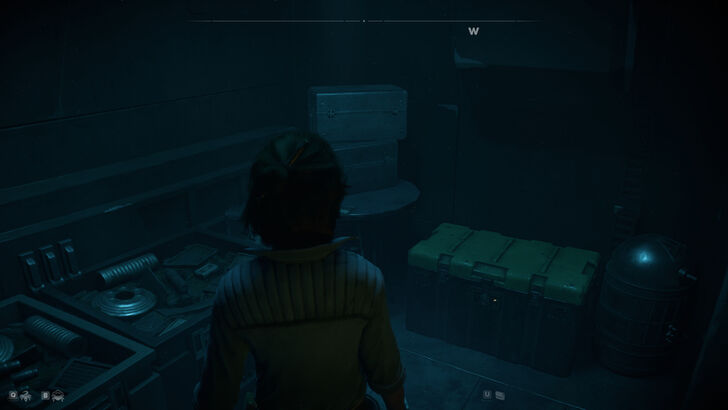
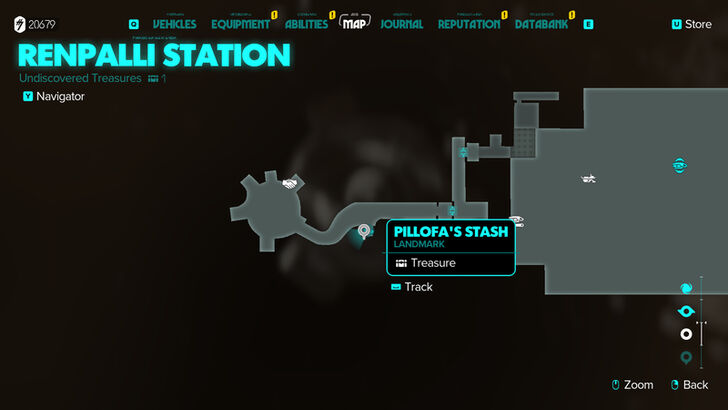
Location Name:
Pillofa’s Stash
How to Get: The crate is behind a small locked room that requires the Renpalli Station Keycard. You can also get the Odana’s Vault Keycard in the same room. Reward: CO-BA Countermeasures |
||
 |
 |
|
|
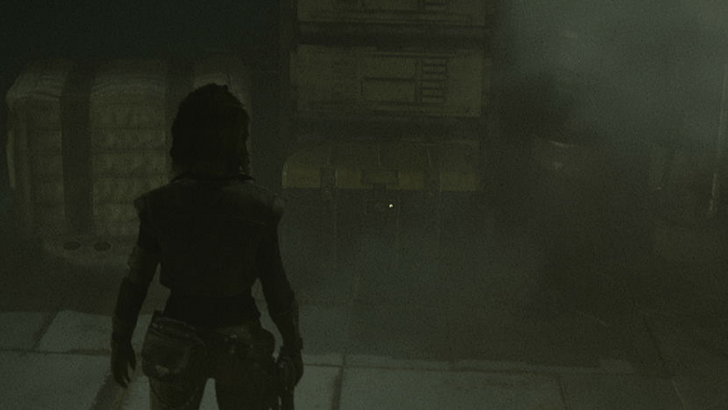
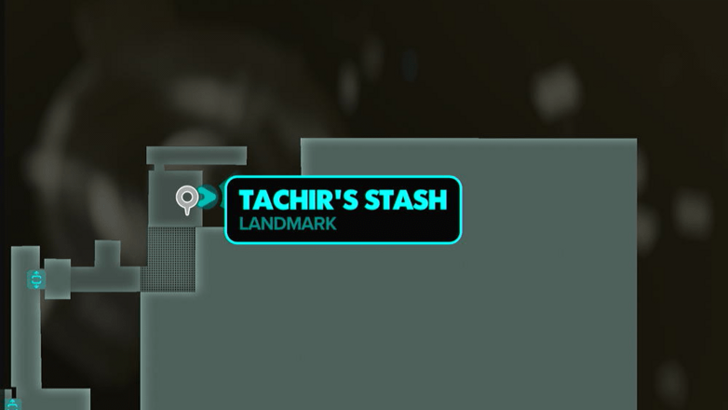
Location Name:
Tachir’s Stash
How to Get: This crate is in the hallway where you find Tizlak Sharr in the Traitor side quest. Reward: 4XB Calculation Unit |
||
Tatooine Treasure Locations
| Found? | Treasure Details | |
|---|---|---|
 |
 |
|
|
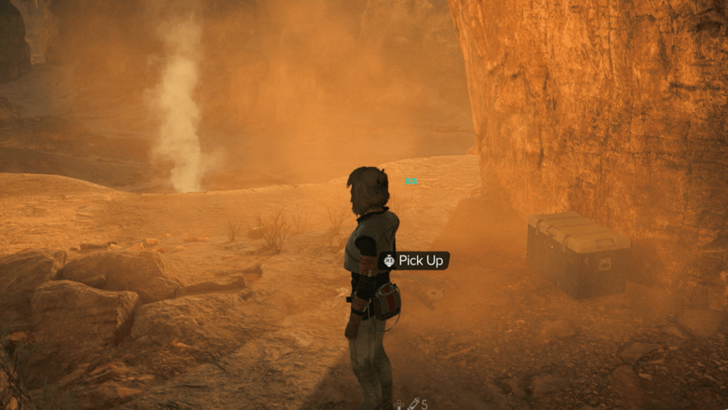
Location Name:
Abandoned Mine
How to Get: Accessing this location requires the fusioncutter. The crate is found at the bottom of the cave. Reward: Unity Paint Job |
||
 |
 |
|
|
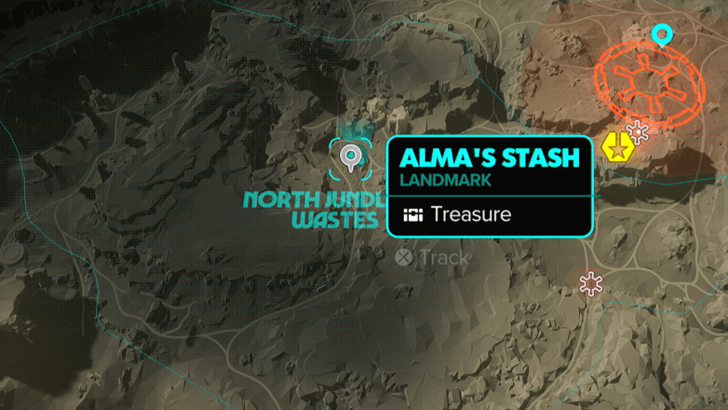
Location Name:
Alma’s Stash
How to Get: The crate will be on a elevated platform overlooking the camp. Reward: Dud III Trinket |
||
 |
 |
|
|
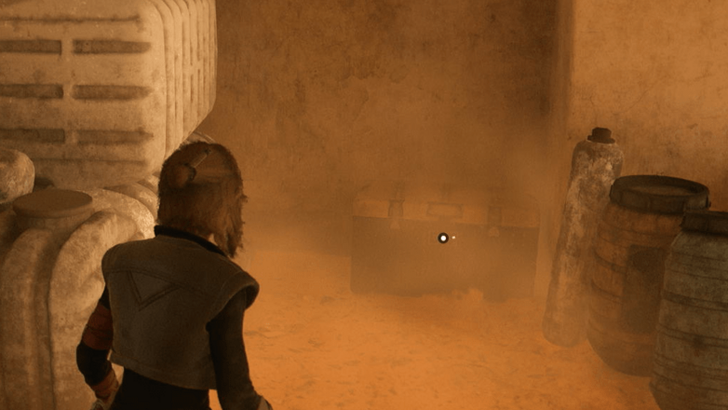
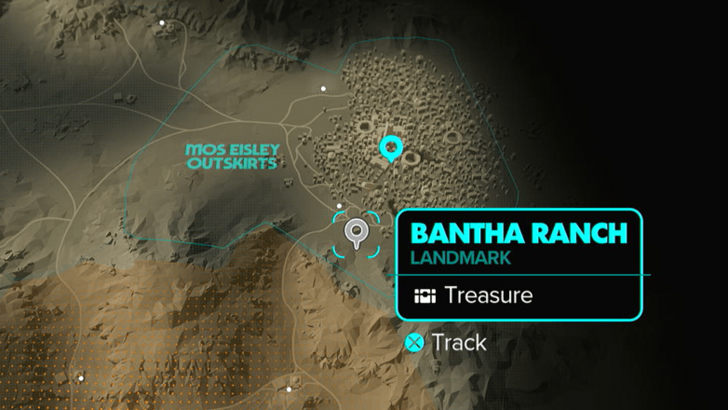
Location Name:
Bantha Ranch
How to Get: The crate will inside one of buildings. Reward: Bantha Wool |
||
 |
 |
|
|
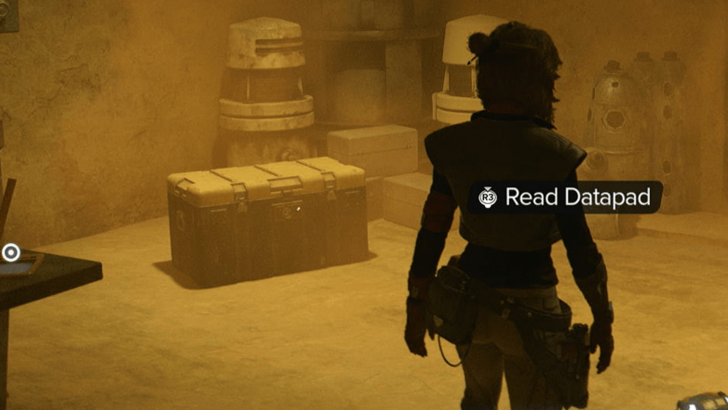
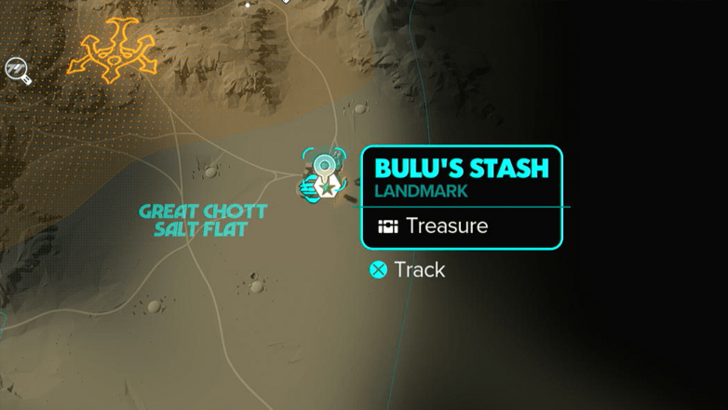
Location Name:
Bulu’s Stash
How to Get: This crate is locked inside a building in Wayfar. This requires the Wayfar Stash Keycard from the nearby scaffolding. Reward: Messenger Trinket |
||
 |
 |
|
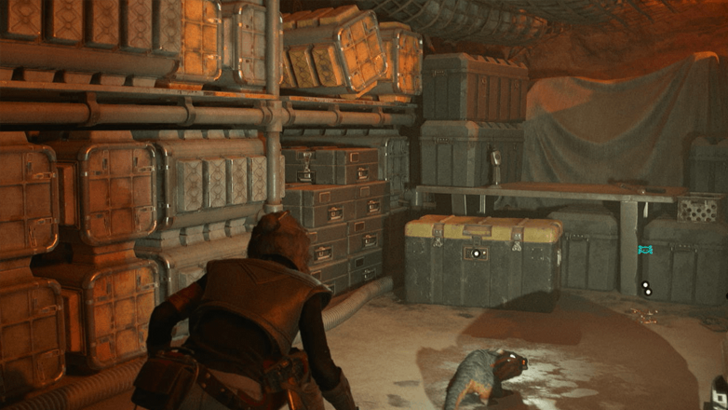
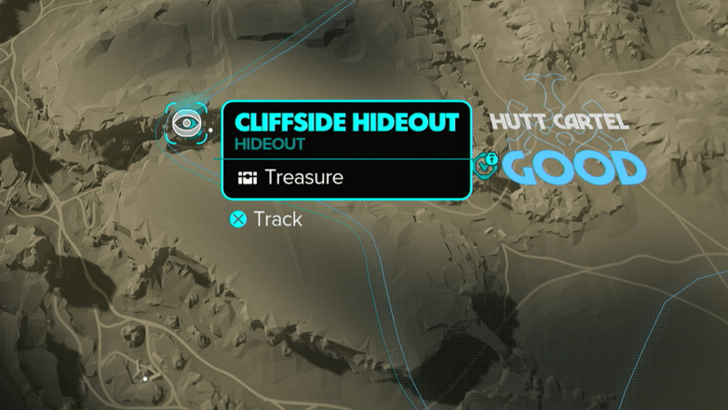
|
Location Name:
Cliffside Hideout
How to Get: This is the location of the LC3-Skifter Expert Key Part intel. The crate will be inside a locked room. Take out the energy cores to disable the turrets, then use your Data Spike to access the room. Reward: LC3-Skifter |
||
 |
 |
|
|
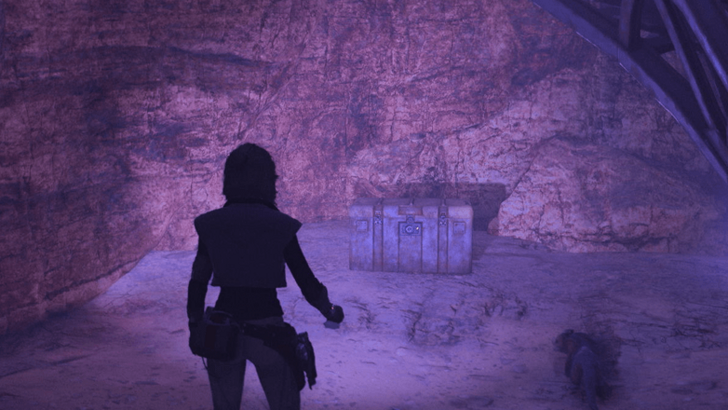
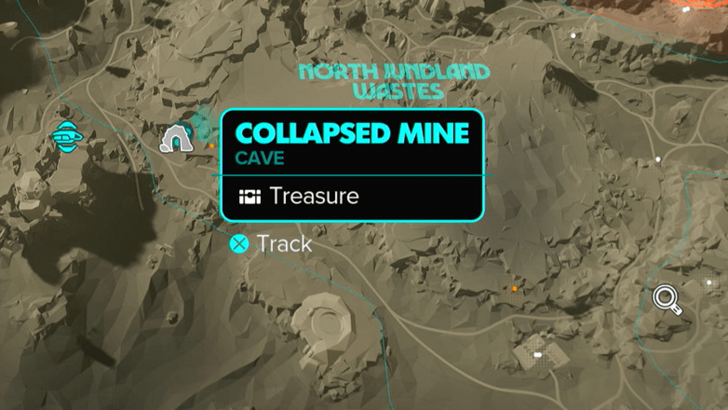
Location Name:
Collapsed Mine
How to Get: This crate will be inside the collapsed mine. You will need a fusioncutter to enter. Reward: Mandalorian Paint Job |
||
 |
 |
|
|
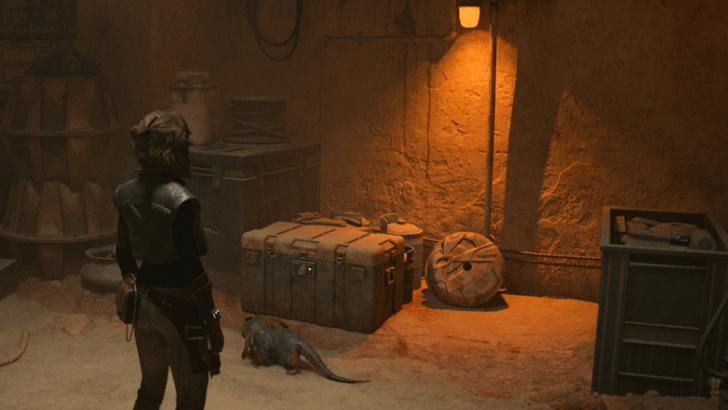
Location Name:
Curtek Homestead
How to Get: This crate will be behind a locked door. Use Nix to open a shutter and shoot it with your ion module. Then use your Data Spike to open the door. Reward: Vintage Chrono |
||
 |
 |
|
|
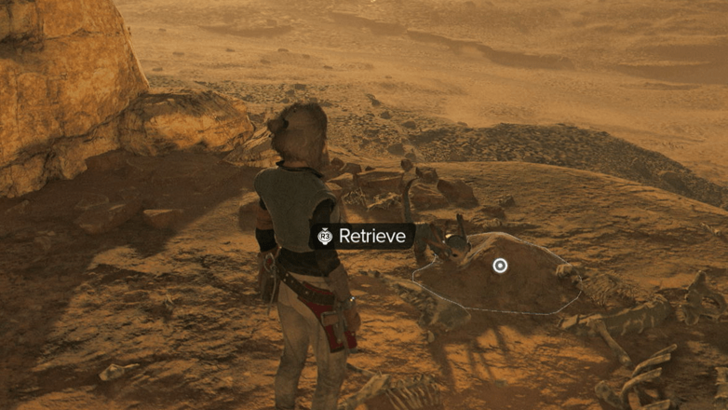
Location Name:
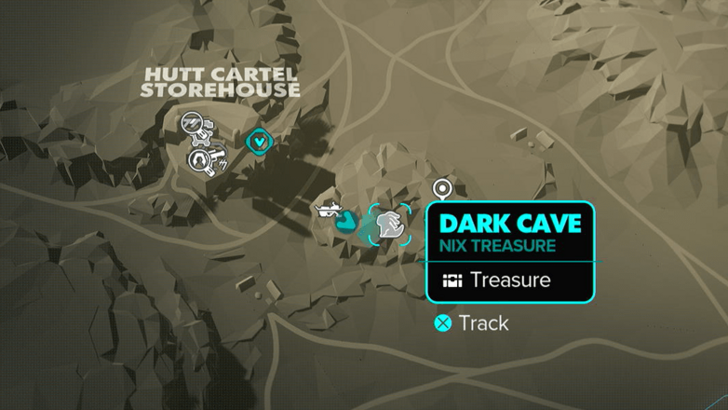
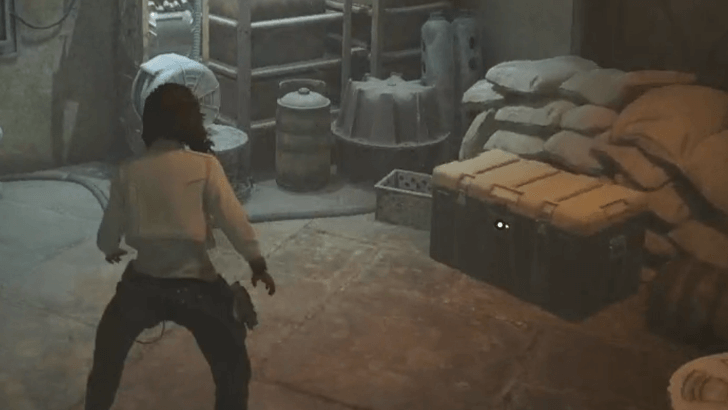
Dark Cave
How to Get: Follow Nix to the end of the path to acquire the treasure. Reward: Horns |
||
 |
 |
|
|
Location Name:
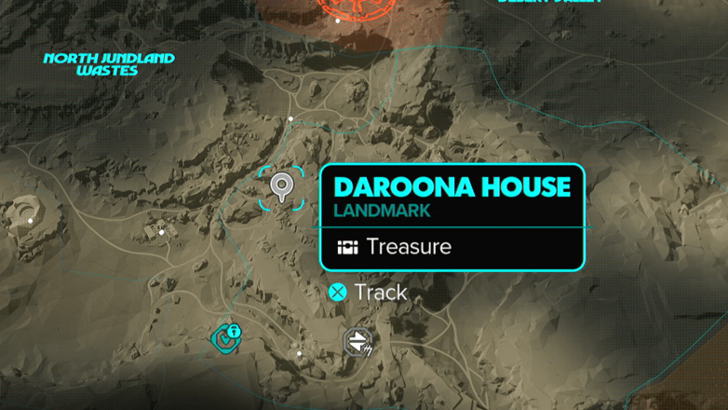
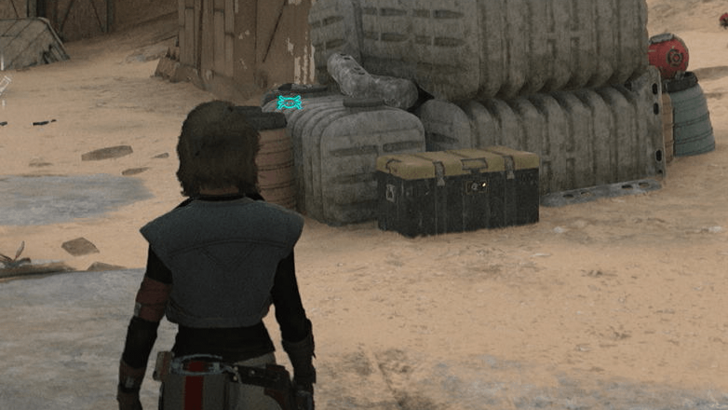
Daroona House
How to Get: The crate will be inside the main building by the wall. To unlock the house you will have to complete the main quest, Jabba’s Favor. Then, you also need to clear the Crimson Dawn Syndicate Quest called Defector which can be found in Bestine. Reward: Crimson Paint Job |
||
 |
 |
|
|
Location Name:
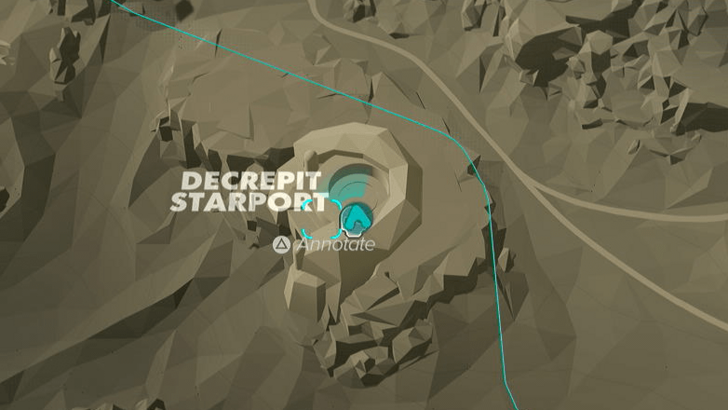
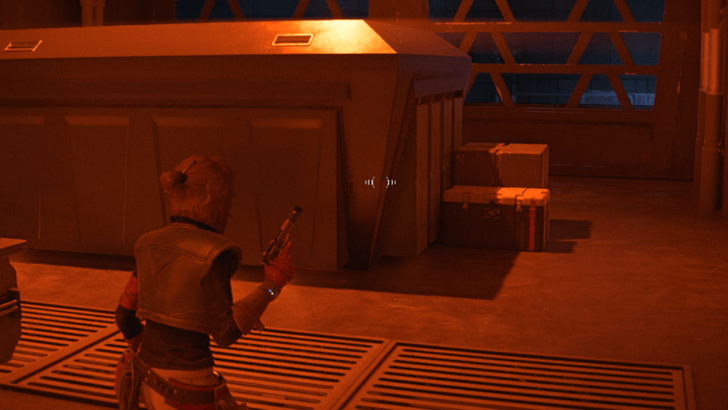
Decrepit Spaceport Treasure 1
How to Get: The crate will be in the middle of the hangar. Reward: X-FP-C28 Ship Computer |
||
 |
 |
|
|
Location Name:
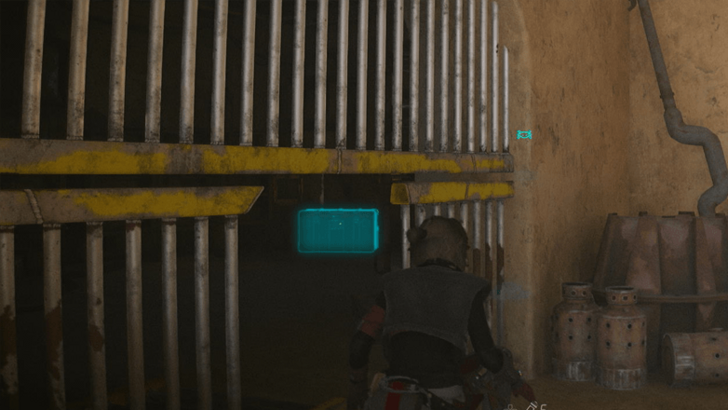
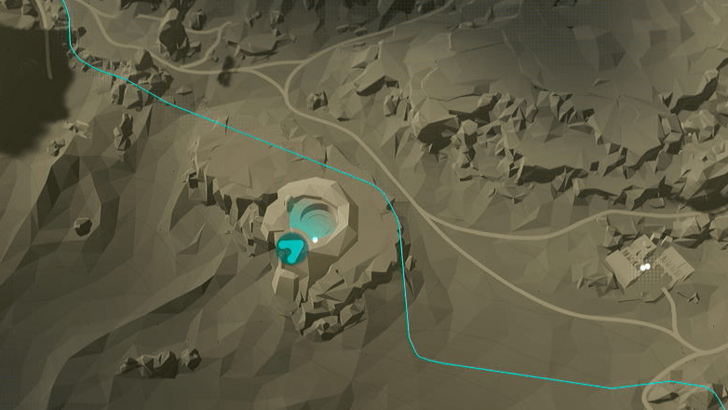
Decrepit Spaceport Treasure 2
How to Get: This crate will be nearer the entrance and requires the fusioncutter. Reward: Sandstorm Finish |
||
 |
 |
|
|
Location Name:
Dryko’s Stash
How to Get: The crate will be in a campsite near a campfire. Reward: Captain Paint Job |
||
 |
 |
|
|
Location Name:
Elvo Homestead
How to Get: The crate will inside a locked room. Use Nix to open a shutter then blast it with your ion module to open the door. Reward: Rippinnium Laden Fuel |
||
 |
 |
|
|
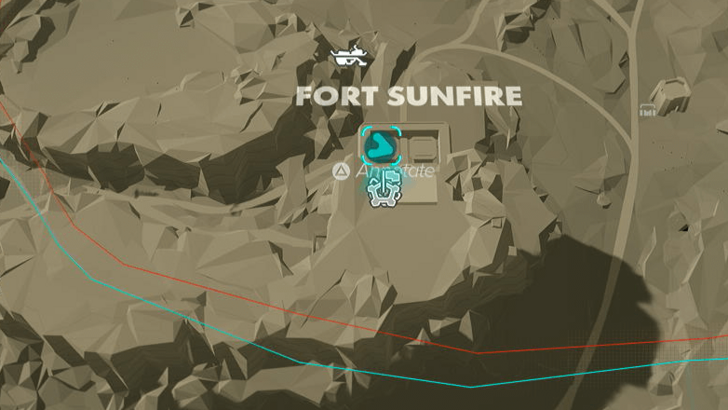
Location Name:
Fort Sunfire Treasure 1
How to Get: The crate will be in a locked garage in the compound. Reward: Cryo Coil |
||
 |
 |
|
|
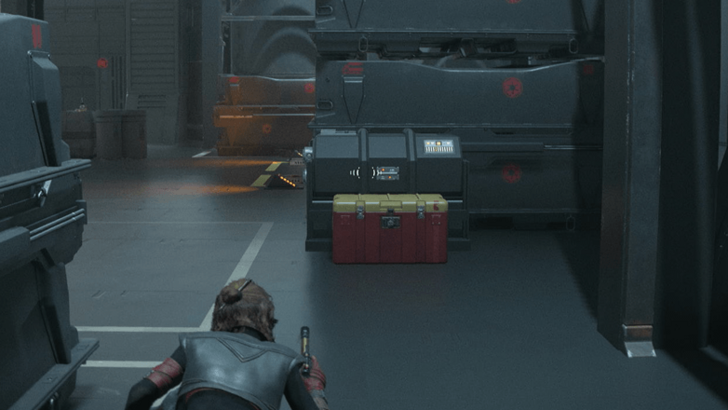
Location Name:
Fort Sunfire Treasure 2
How to Get: The crate will be on the lower levels of the vehicle bay. Reward: MG-2 Power Exceeder |
||
 |
 |
|
|
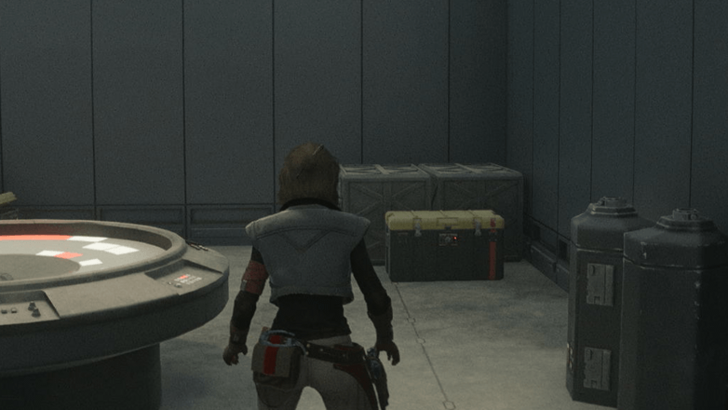
Location Name:
Fort Sunfire Treasure 3
How to Get: The crate will be in a sealed room near the main control room at the top floor. Use the data port to unseal the room. Reward: Credits |
||
 |
 |
|
|
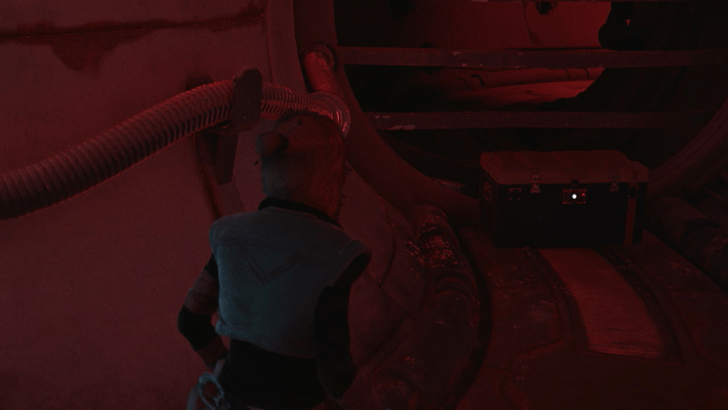
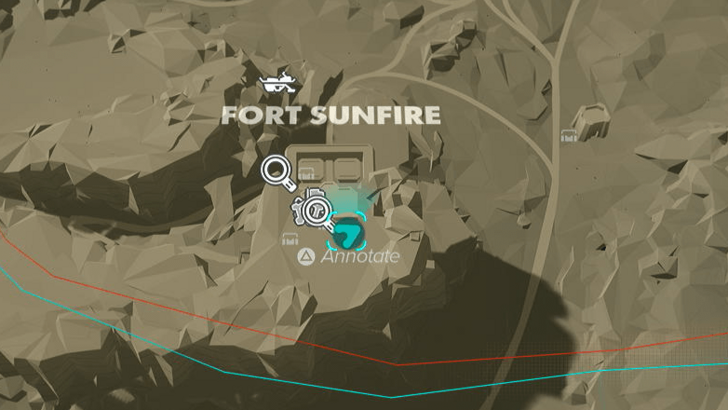
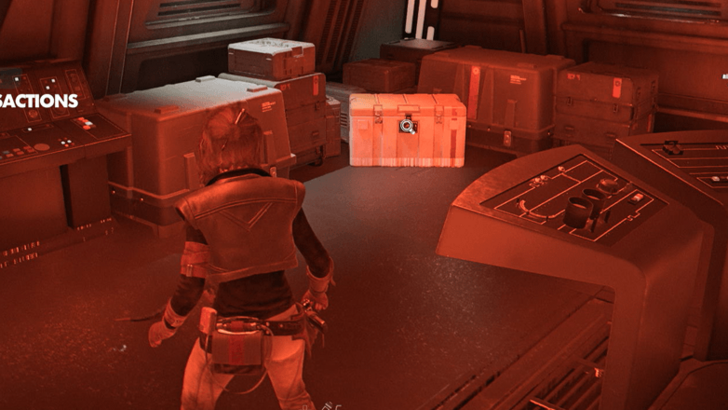
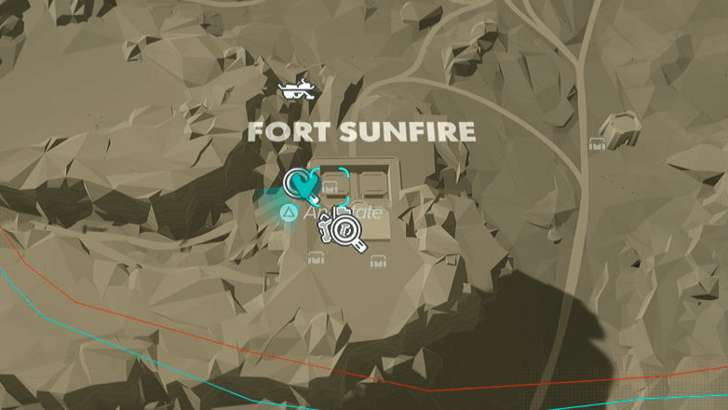
Location Name:
Fort Sunfire Treasure 4
How to Get: This crate will be in the maintenance area. You’ll have to be flung by the fan to a ledge. Reward: Imperial Plaques |
||
 |
 |
|
|
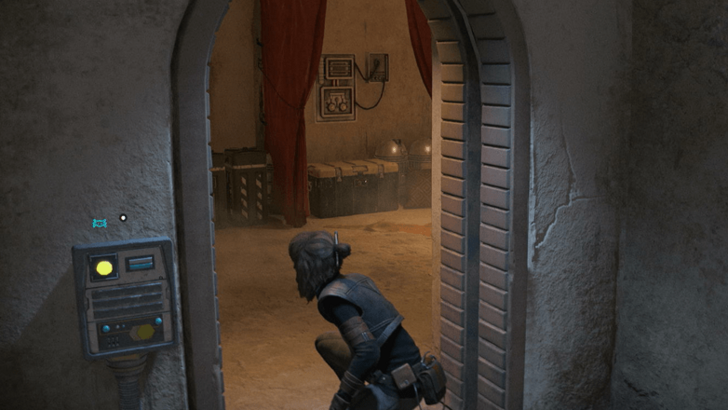
Location Name:
Fort Sunfire Treasure 5
How to Get: This crate will be inside the vault in the middle of the base. It requires the vault codes from the main control room. Reward: Rogue Coating |
||
 |
 |
|
|
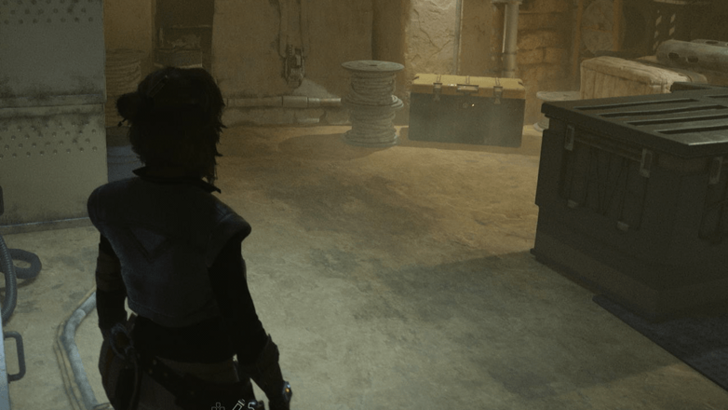
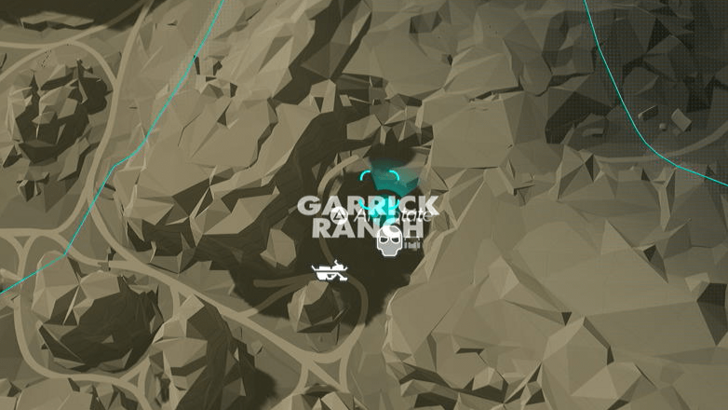
Location Name:
Garrick Ranch Treasure 1
How to Get: This crate will be inside a locked room. Use your data spike to open the door. Reward: Heuristic Processor |
||
 |
 |
|
|
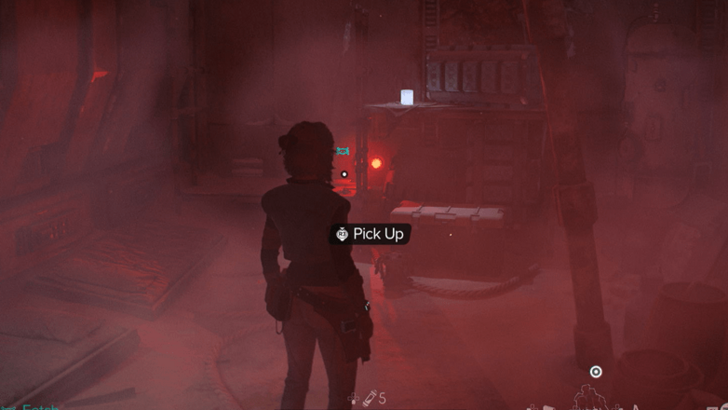
Location Name:
Garrick Ranch Treasure 2
How to Get: This crate will be in the main building of the camp. Reward: X-FP-C28 Chip Processor |
||
 |
 |
|
|
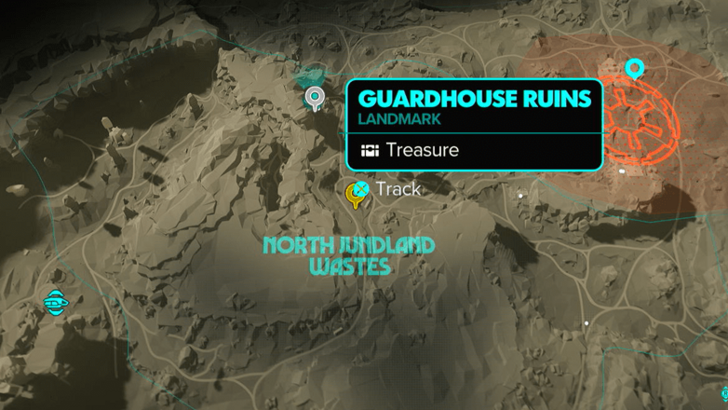
Location Name:
Guardhouse Ruins
How to Get: The crate will be in an underground bunker. Find the vent and go down to reach the treasure. Reward: Bounty Hunter Mask Trophy |
||
 |
 |
|
|
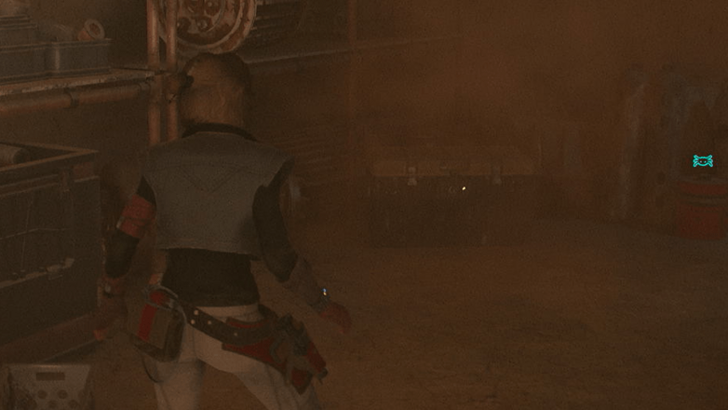
Location Name:
Hutt Barracks Treasure 1
How to Get: This crate can be found in the garage of the barracks, a restricted area. Reward: Helicyclic Gears |
||
 |
 |
|
|
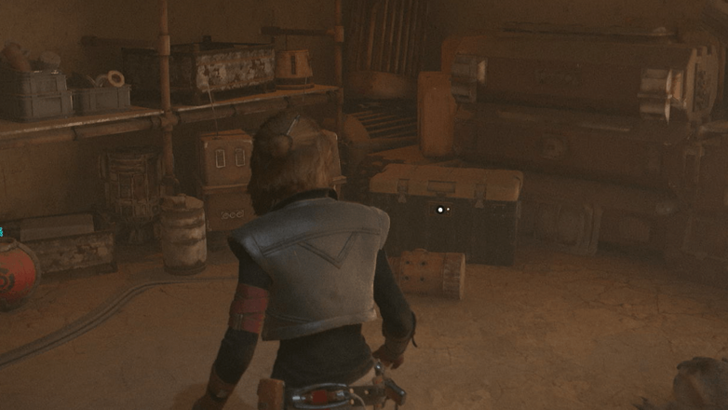
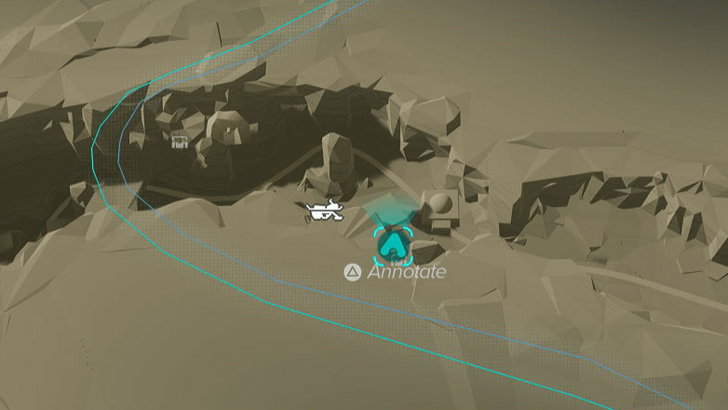
Location Name:
Hutt Barracks Treasure 2
How to Get: This crate is also inside garage by the door. Reward: Lieutenant Paint Job |
||
 |
 |
|
|
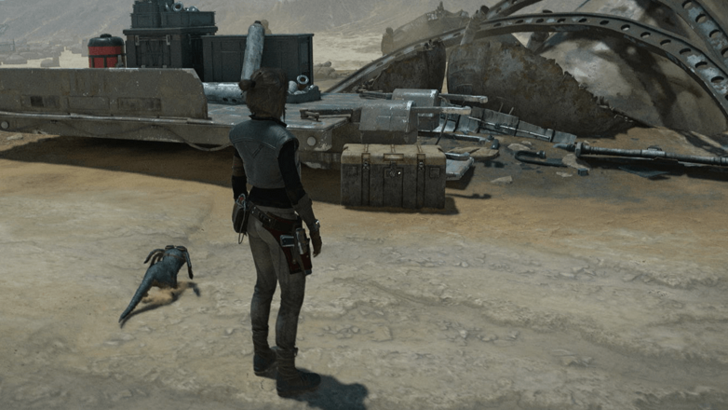
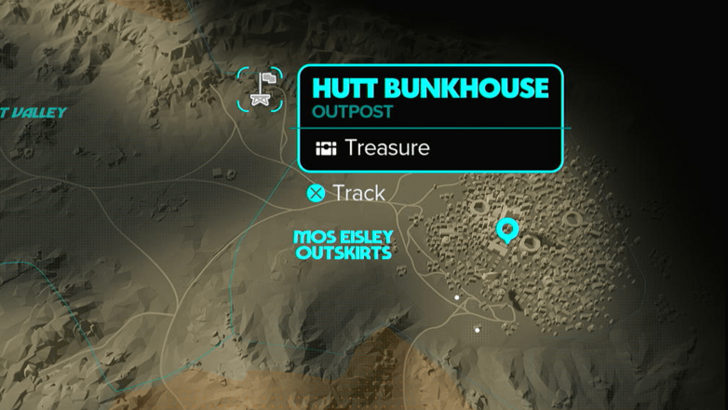
Location Name:
Hutt Bunkhouse
How to Get: The crate will be out in the open in the middle of the bunkhouse. Reward: Hired Gun Trophy |
||
 |
 |
|
|
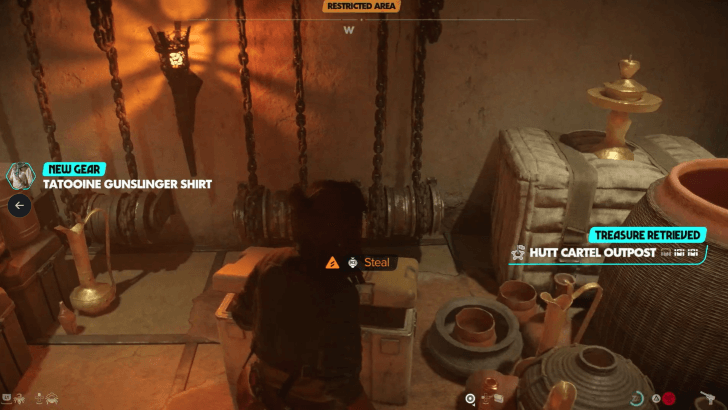
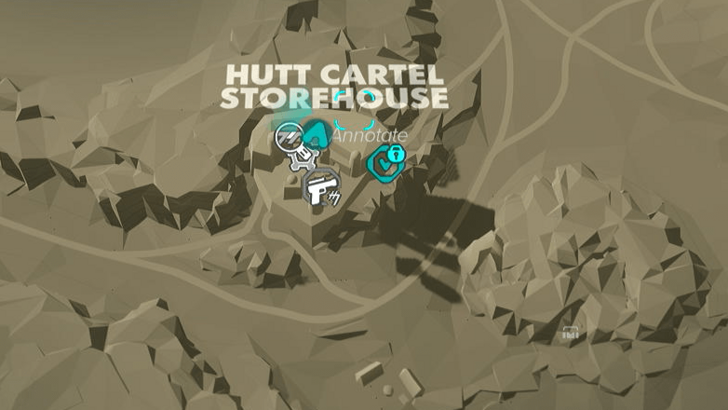
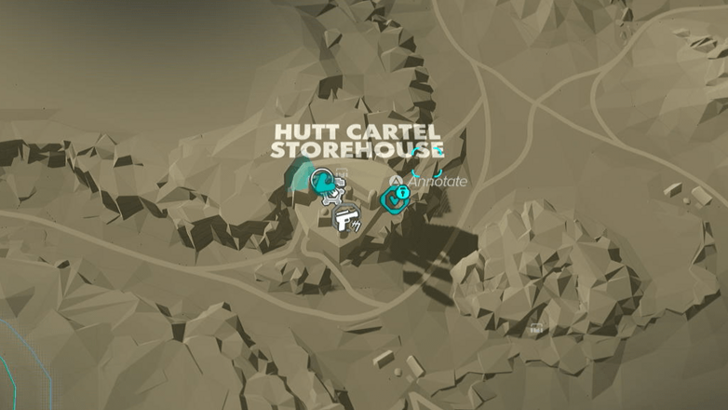
Location Name:
Hutt Cartel Outpost Treasure 1
How to Get: This crate will be in a locked room near the elevator to the garage. Reward: Tatooine Gunslinger Shirt |
||
 |
 |
|
|
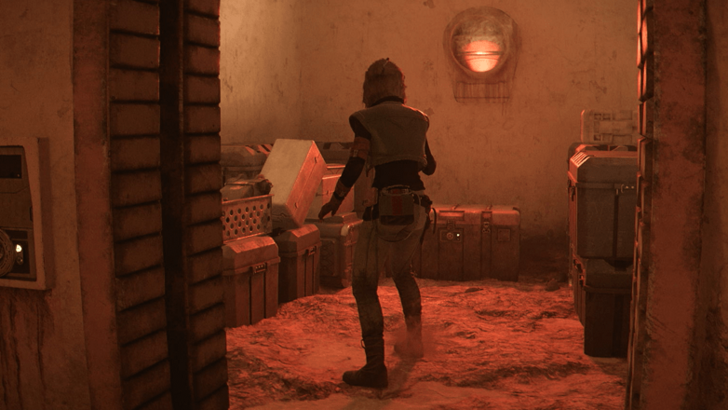
Location Name:
Hutt Cartel Outpost Treasure 2
How to Get: This crate will be inside a locked room with a computer terminal. This is also the location of the Hutt Files intel. Reward: H-M Engine Power Core |
||
 |
 |
|
|
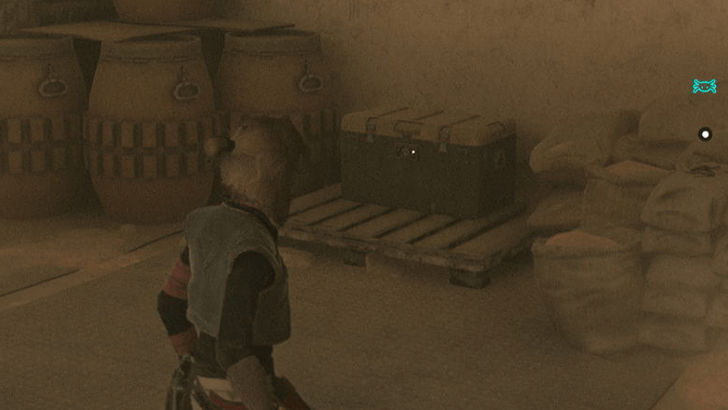
Location Name:
Hutt Cartel Outpost Treasure 3
How to Get: This crate will be on a ledge that you have to swing to from one of the offices. Reward: Mandalorian Jetpack Trophy |
||
 |
 |
|
|
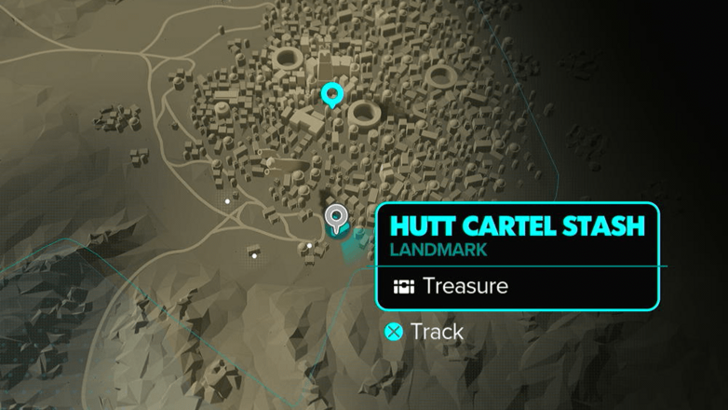
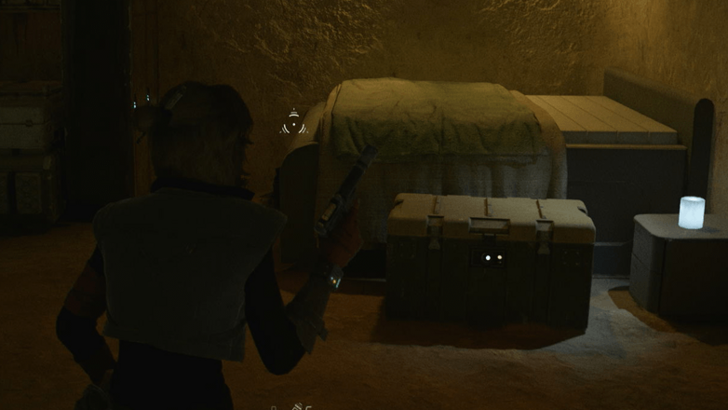
Location Name:
Hutt Cartel Stash
How to Get: The crate will be at the end of the stash area near a wall. Reward: Direct-Energy Circuit |
||
 |
 |
|
|
Location Name:
Hutt Stash House
How to Get: The crate will be inside the stash house. You’ll have to distract or take out the guards to get inside. Reward: Crimson Night Paint Job |
||
 |
 |
|
|
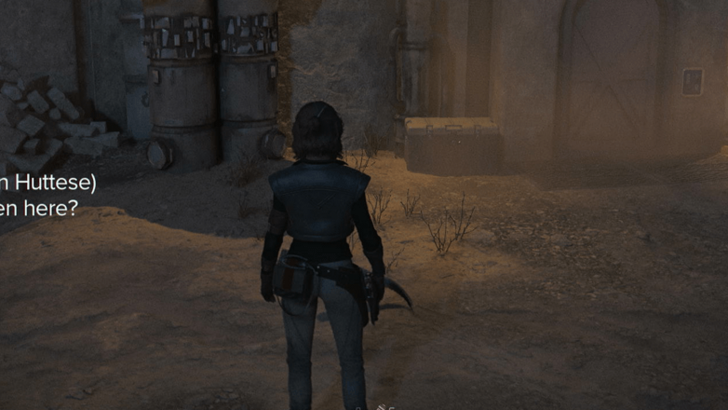
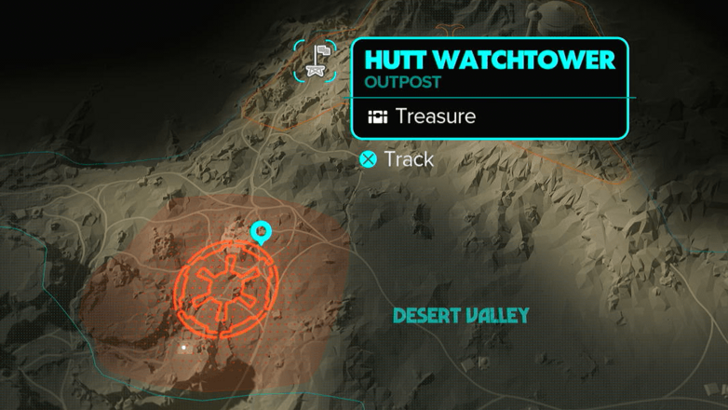
Location Name:
Hutt Watchtower
How to Get: The crate will be by the door to the watchtower. It will be out in the open so you have to be discreet. Reward: Dud V Trinket |
||
 |
 |
|
|
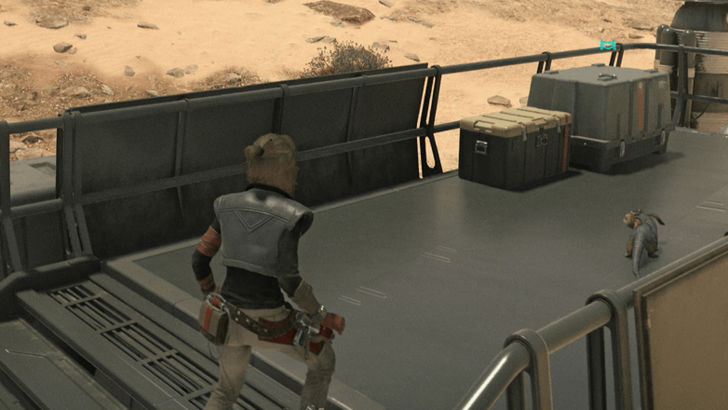
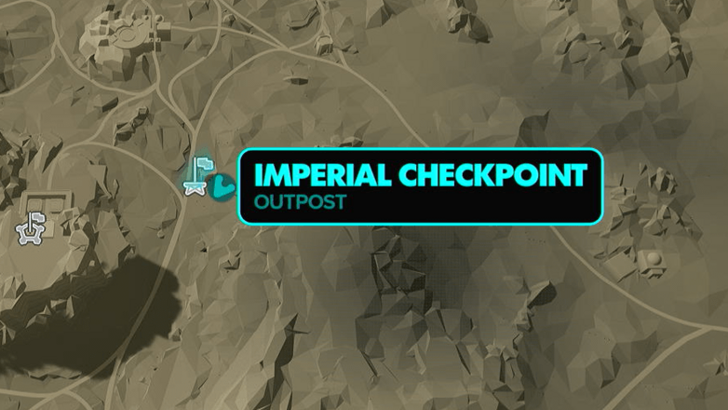
Location Name:
Imperial Checkpoint
How to Get: The crate will be on one of the platforms in the checkpoint. Reward: MG-2 Power Exceeder |
||
 |
 |
|
|
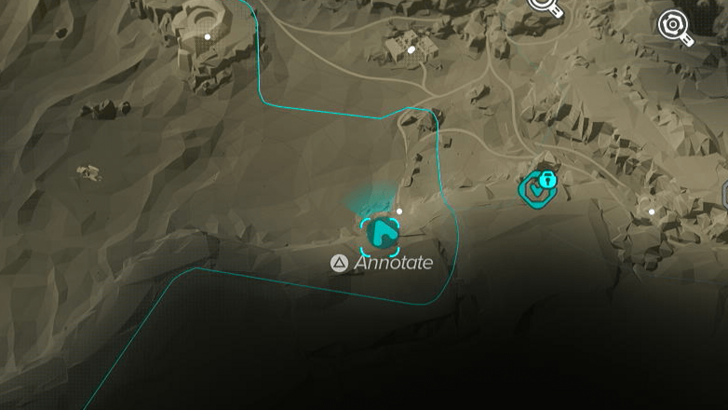
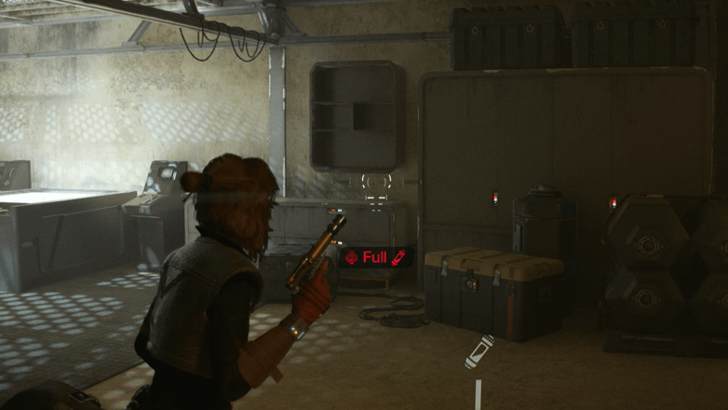
Location Name:
Imperial Outpost 42
How to Get: The crate will be inside the main building of the outpost. Reward: Blaster Recirculator |
||
 |
 |
|
|
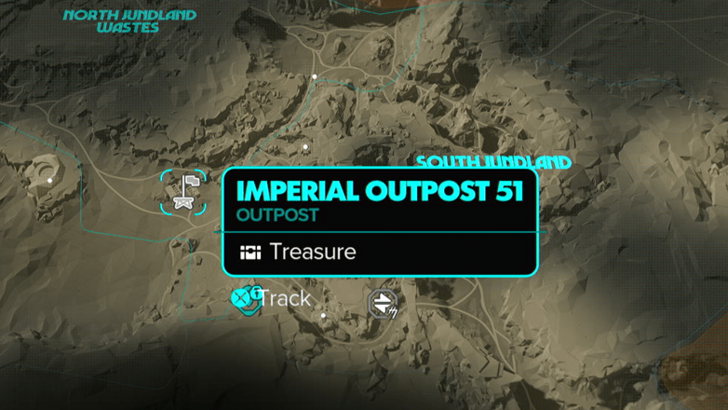
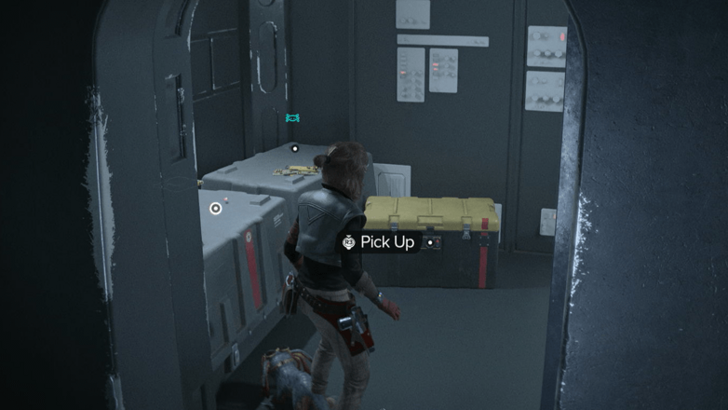
Location Name:
Imperial Outpost 51
How to Get: The crate will be inside the main building. Reward: Compact Detonite |
||
 |
 |
|
|
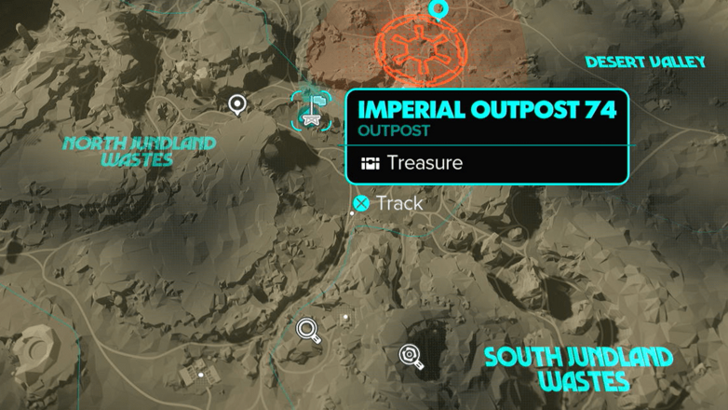
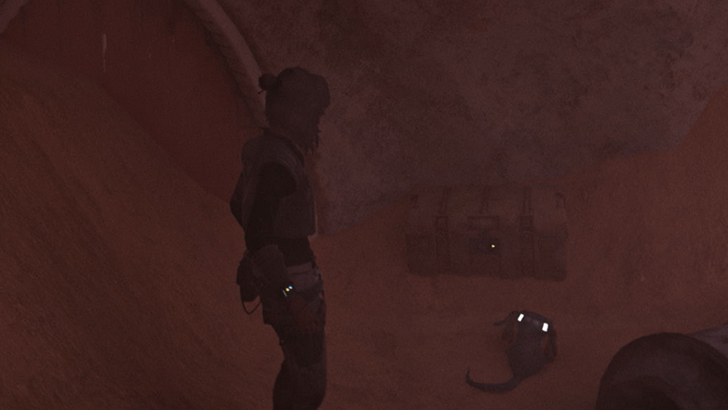
Location Name:
Imperial Outpost 74
How to Get: The crate will be inside the watchtower. You’ll have to open it using the data port on the side of the outpost. Reward: Scanner Trinket |
||
 |
 |
|
|
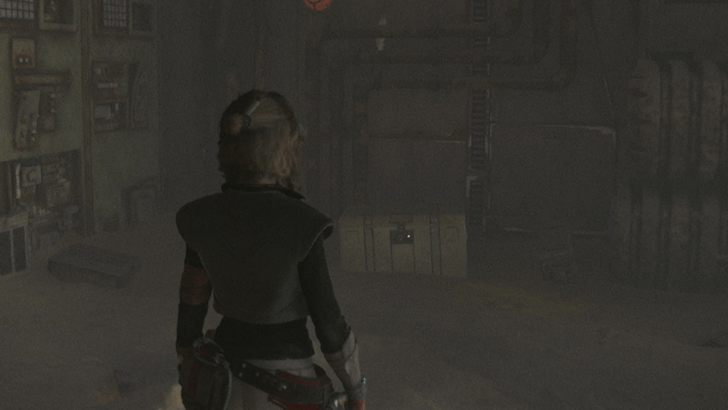
Location Name:
Lars Homestead
How to Get: The crate will be in the hole. Rappel down and the crate will be by the wall. Reward: Gray Scarf |
||
 |
 |
|
|
Location Name:
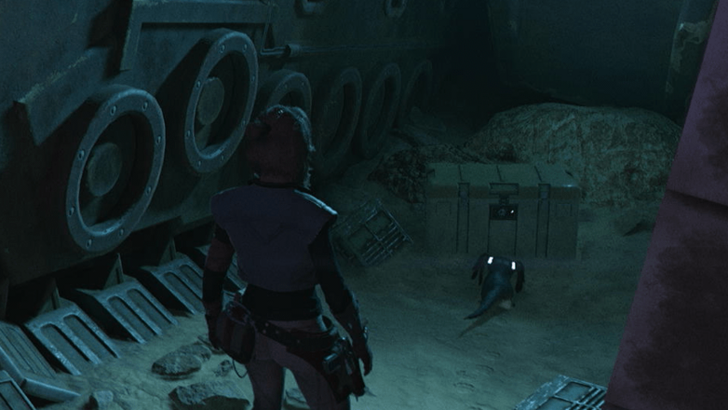
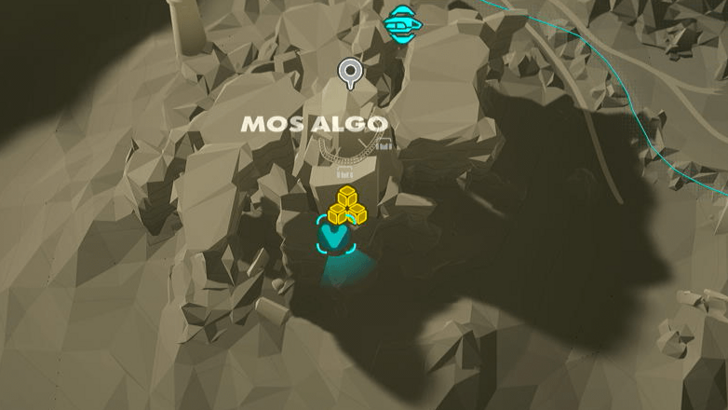
Lost Sandcrawler Treasure 1
How to Get: This crate will be behind a destructible boulder inside the Sandcrawler. Reward: Helicyclic Gears |
||
 |
 |
|
|
Location Name:
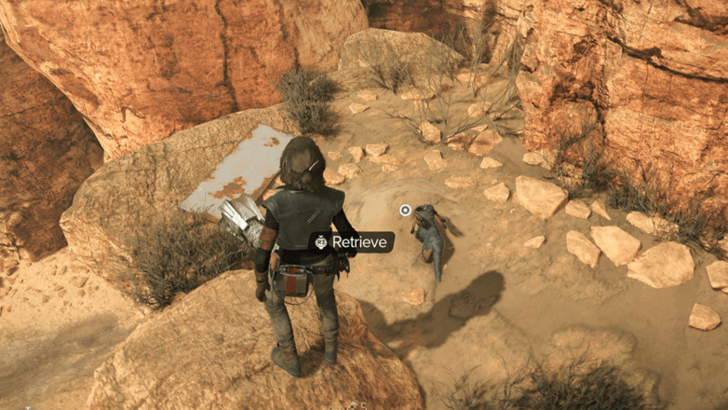
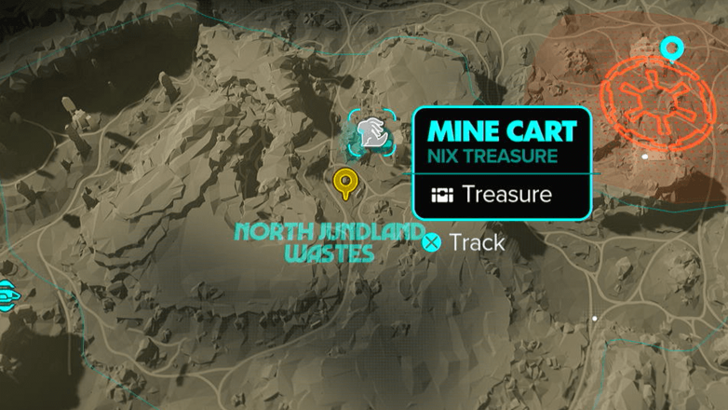
Lost Sandcrawler Treasure 2
How to Get: This crate will be inside the lost sandcrawler deep within the location Reward: Tusken Amulet Major Charm |
||
 |
 |
|
|
Location Name:
Mine Cart
How to Get: Follow Nix to reach the treasure at the top of the pillar. Reward: Hammer Rock |
||
 |
 |
|
|
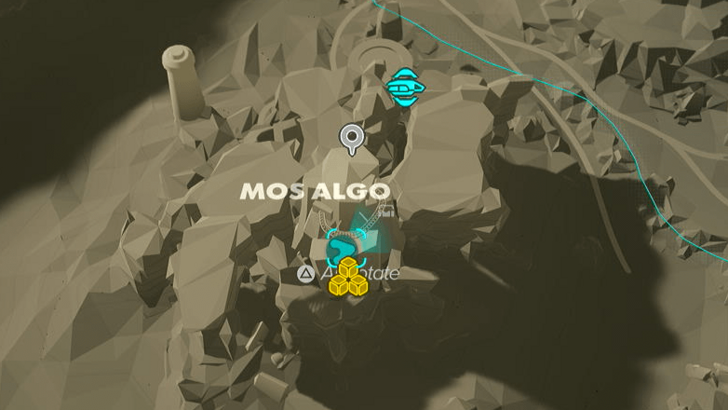
Location Name:
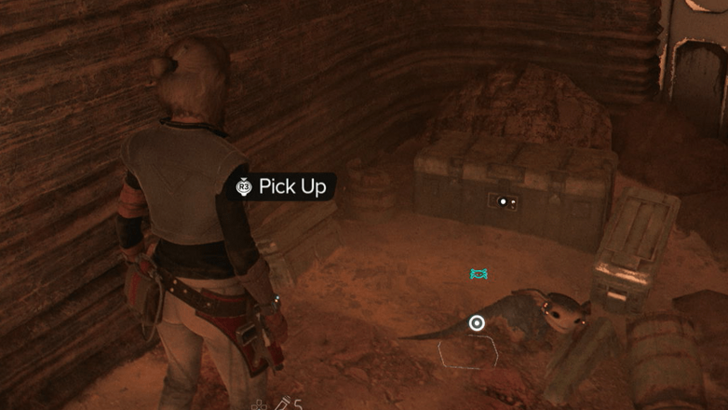
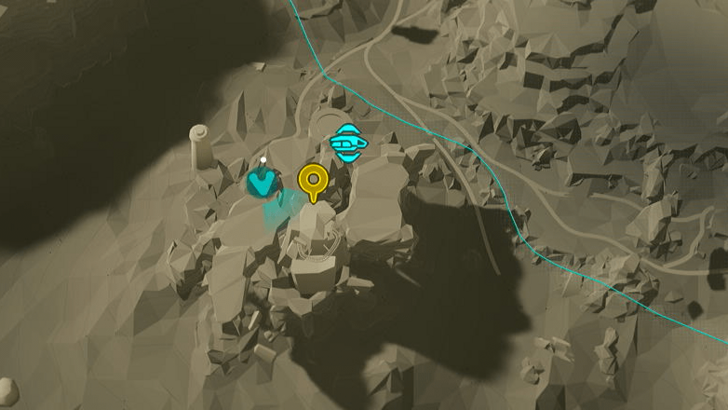
Mos Algo Treasure 1
How to Get: This crate is found in a tunnel behind two destructible boulders. Reward: Credits |
||
 |
 |
|
|
Location Name:
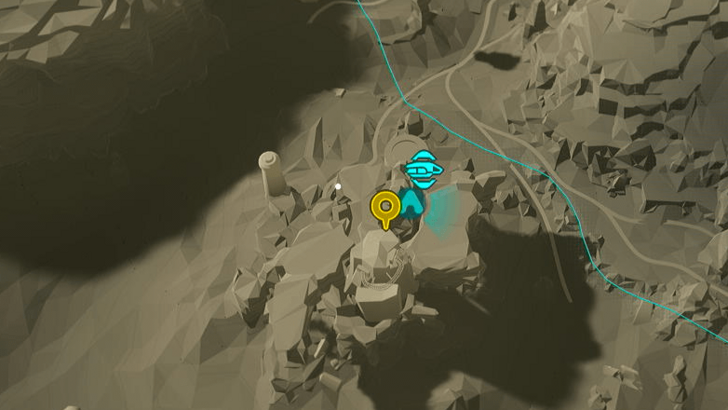
Mos Algo Treasure 2
How to Get: This crate is found higher in Mos Alga on a platform overlooking the ravine. Reward: Materials and Valuables |
||
 |
 |
|
|
Location Name:
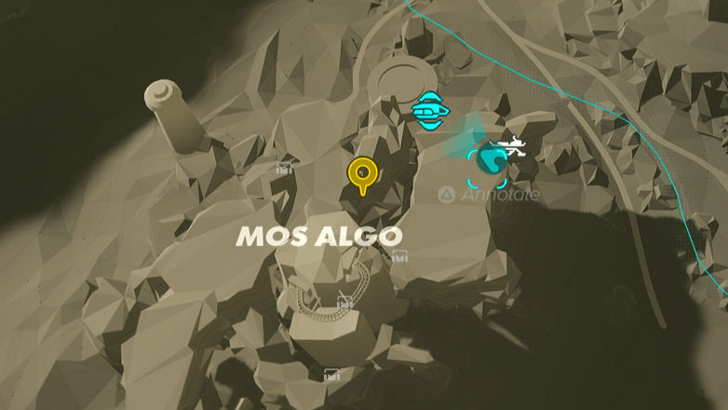
Mos Algo Treasure 3
How to Get: This crate is found on top of a catwalk. You’ll have to climb and swing to this location. Reward: Rebel Holos |
||
 |
 |
|
|
Location Name:
Mos Algo Treasure 4
How to Get: This crate is found deep within Mos Algo. It requires getting the Mine Supply keycard from one of the houses outside, then having Nix hold open a shutter to blast a power core with your ion module to unlock a door. Reward: Pit Droid Trophy |
||
 |
 |
|
|
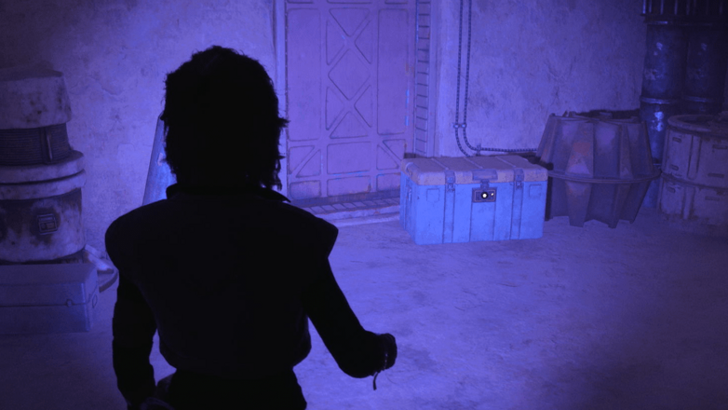
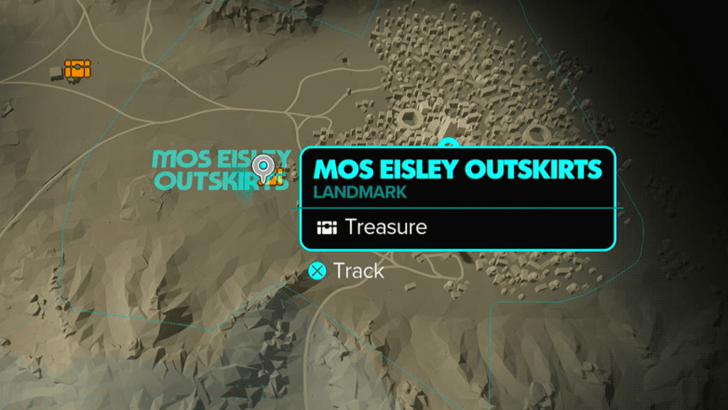
Location Name:
Mos Eisley Outskirts
How to Get: The crate is inside a locked house. Visit the location at night, look for the power terminal to open the door. Have Nix drop the lamp in the alley while you pull down the lever. It is recommended to do a save before attempting this as the timing needs to be right. Reward: Coronet Ace Paint Job |
||
 |
 |
|
|
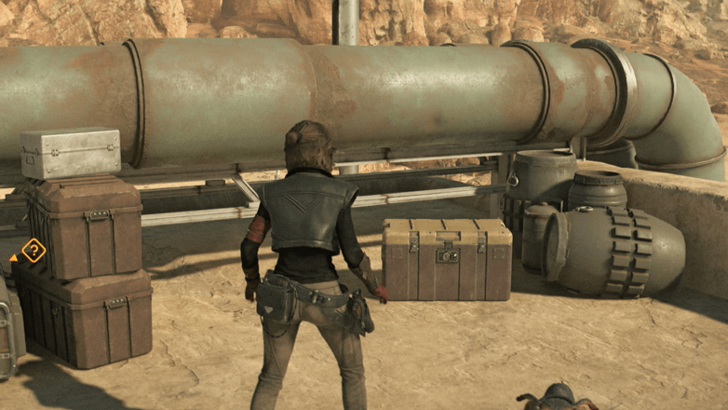
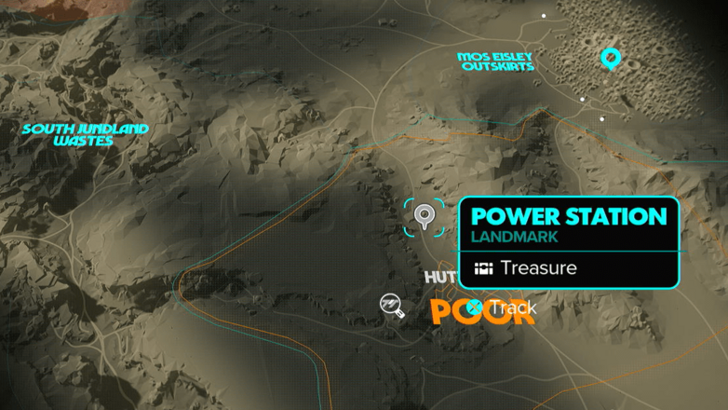
Location Name:
Power Station
How to Get: The crate will be on the roof. Use Nix to release the ladder. Reward: Forged Identichips |
||
 |
||
|
Location Name:
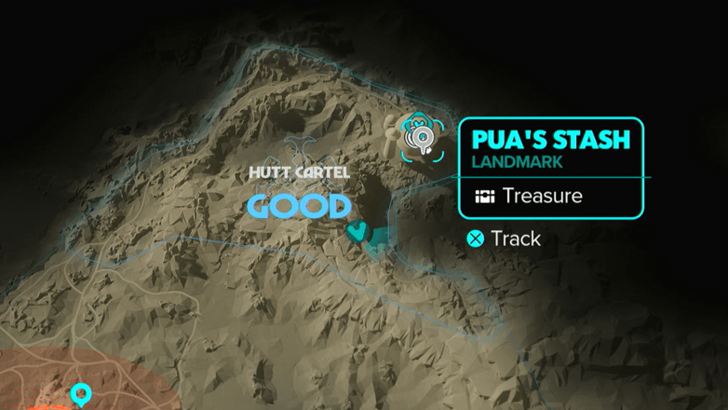
Pua’s Stash
How to Get: This crate can only be accessed inside Jabba’s Palace. If were not able to secure it during the Partners mission, you will need Excellent reputation with the Hutts to enter the palace again. Reward: Mixed Feeler Wrappings |
||
 |
 |
|
|
Location Name:
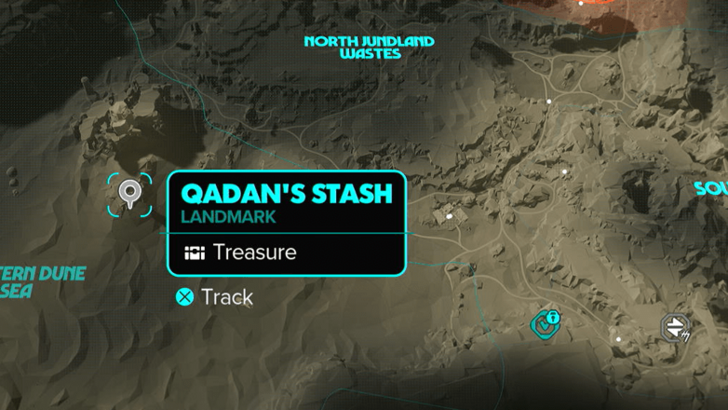
Qadan’s Stash
How to Get: The crate will be near a destroyed TIE fighter ship. Reward: Cobalt Stripe Finish |
||
 |
 |
|
|
Location Name:
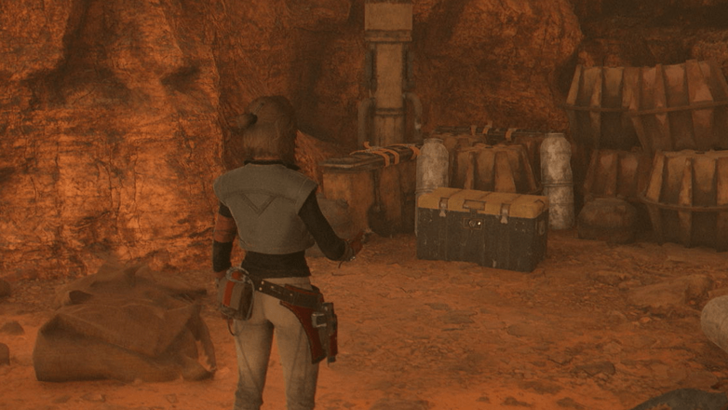
Seeker’s Peril Treasure 1
How to Get: The first treasure can be found on the upper cliff platforms. Reward: Bantha Wool |
||
 |
 |
|
|
Location Name:
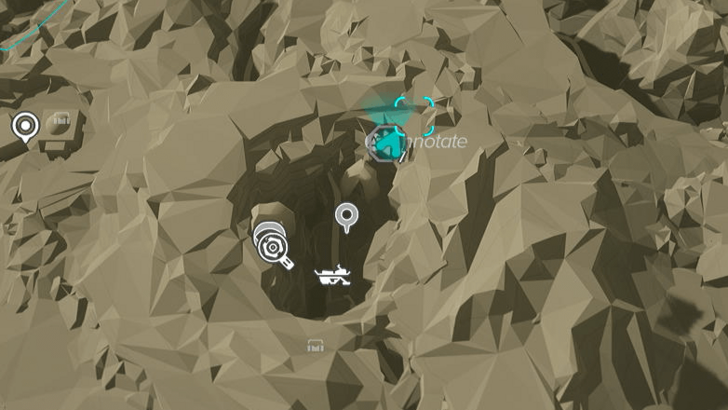
Seeker’s Peril Treasure 2
How to Get: The second treasure is higher up in the cliffs on the north side. The crate will be near a Jawa trader’s small encampment. Reward: Vibroblade Talisman Charm |
||
 |
||
|
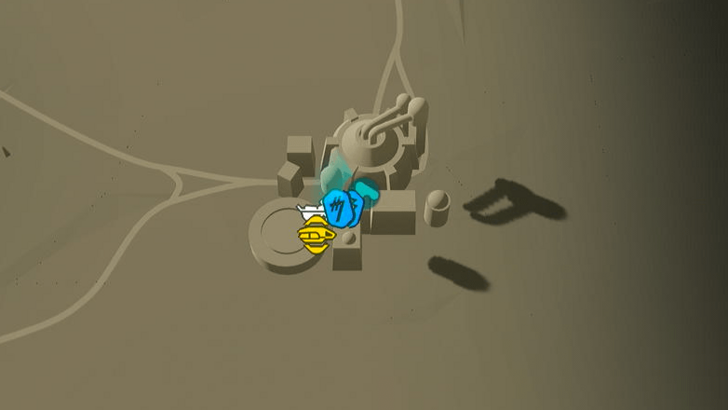
Location Name:
Sheriff Quint’s Parlor
How to Get: Defeat Bosnok in Sabacc in Mirogana to unlock this table. Treasure is obtained via playing Sabacc and winning. Reward: Golden Maru Paint Job |
||
 |
 |
|
|
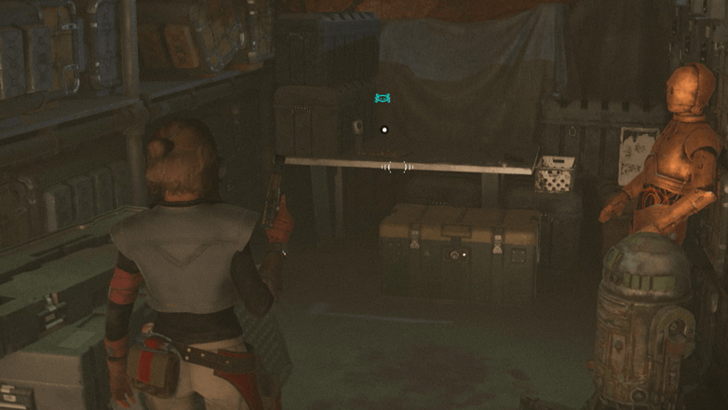
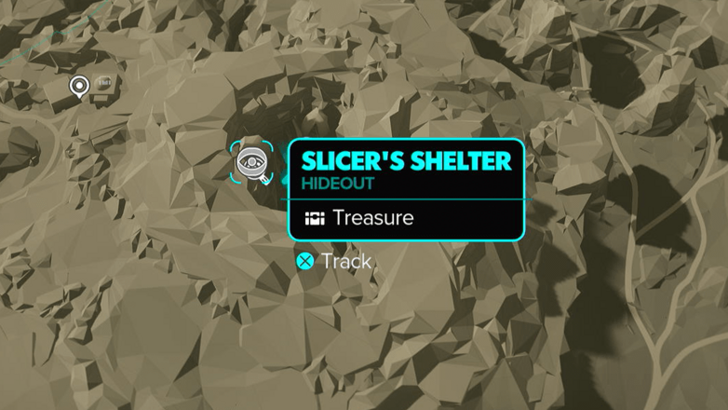
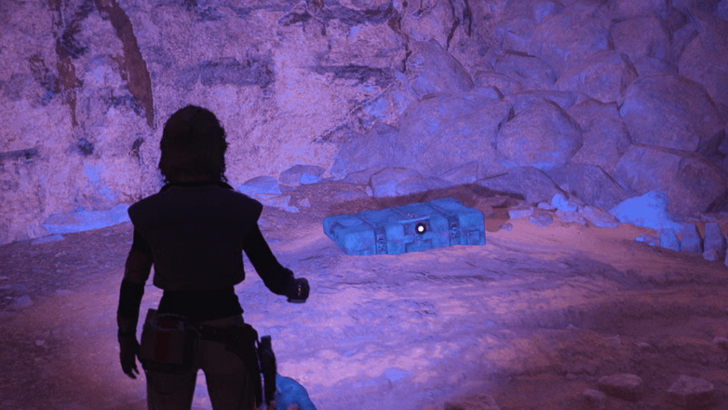
Location Name:
Slicer’s Shelter
How to Get: This is the location of the BT-2X Charge Controller key part intel. You’ll have to shoot 3 energy cores with your ion module to unlock the door. Reward: BT-2X Charge Controller |
||
 |
 |
|
|
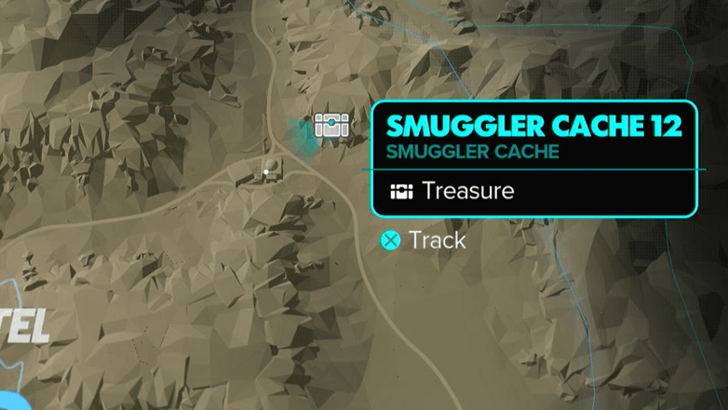
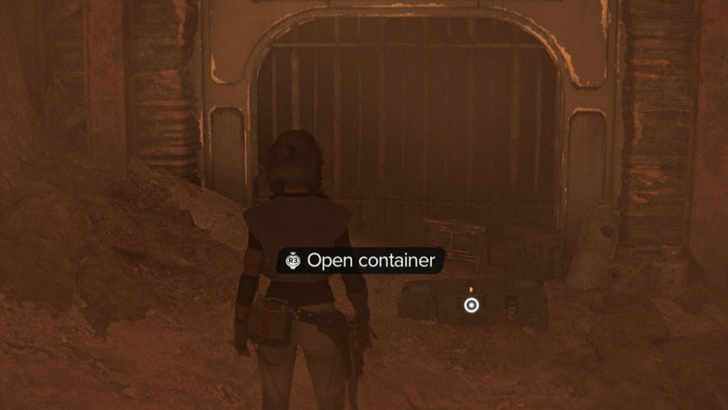
Location Name:
Smuggler Cache 12
How to Get: This cache will be behind a second destructible wall inside Zain’s Stash. Reward: Materials and Valuables |
||
 |
 |
|
|
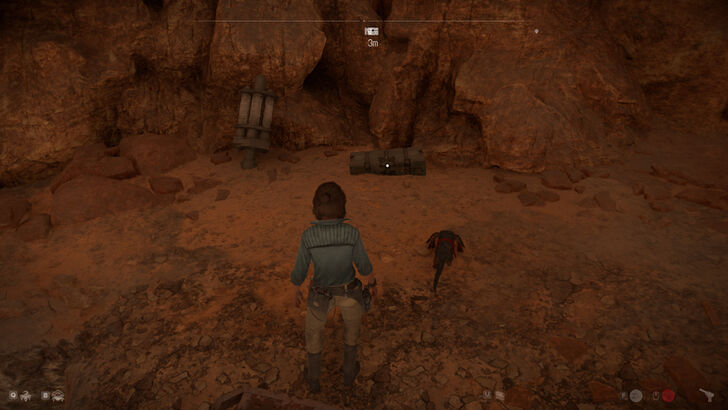
Location Name:
Smuggler Cache 13
How to Get: The cache will be deep within Mos Algo. From the landing zone, head south into the crevice to find the cache. Reward: Materials and Valuables |
||
 |
 |
|
|
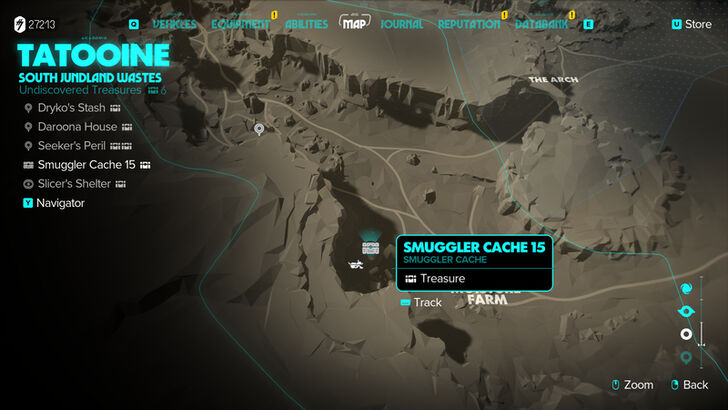
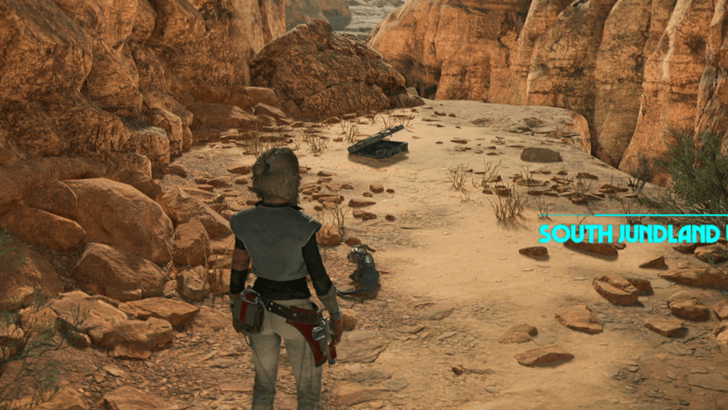
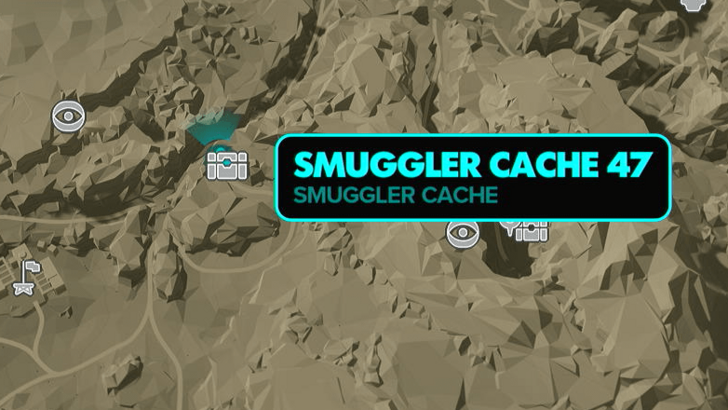
Location Name:
Smuggler Cache 15
How to Get: Smuggler Cache 15 is located west of the Abandoned Moisture Farm in South Jundland Wastes. Specifically, it can be found inside a cave with mastiffs. Reward: Materials and Valuables |
||
 |
 |
|
|
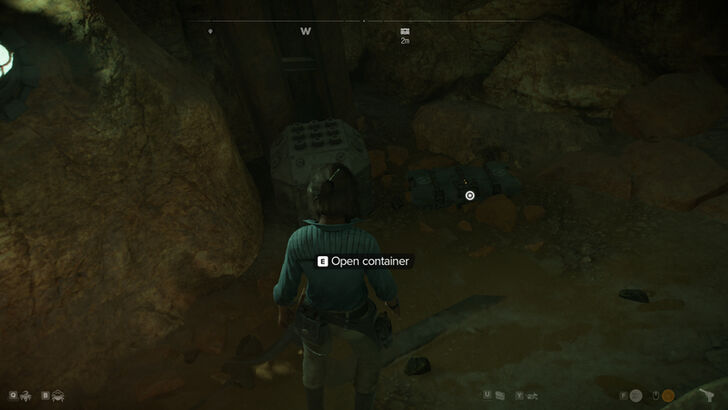
Location Name:
Smuggler Cache 47
How to Get: The cache can be found west of Daroona House by the cliffside. This is also related to the Drop Off Intel. Reward: Materials and Valuables |
||
 |
 |
|
|
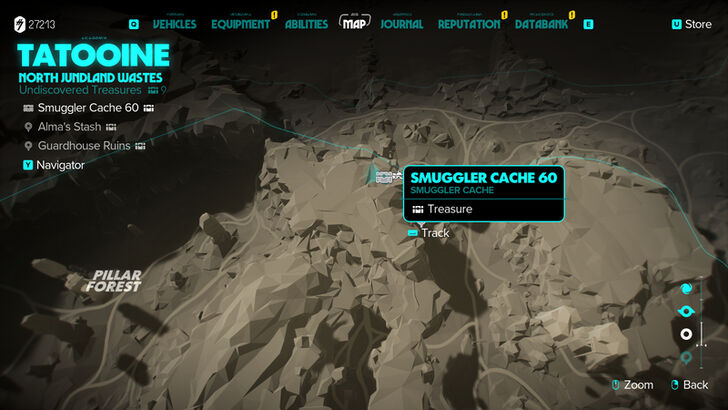
Location Name:
Smuggler Cache 60
How to Get: Smuggler Cache 60 is located northeast of the Pillar Forest. Specifically, the cache is inside a cave behind a destructible wall, player will have to use the power module of their blaster to destroy the wall. Reward: Materials and Valuables |
||
 |
 |
|
|
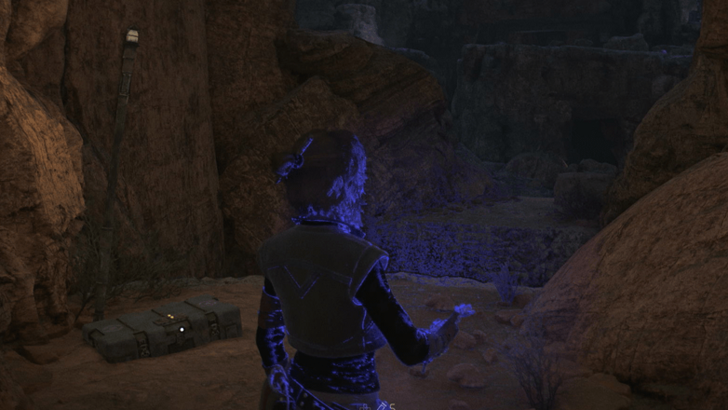
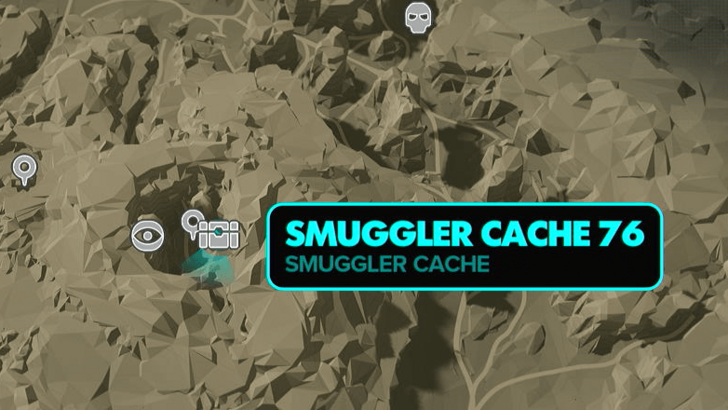
Location Name:
Smuggler Cache 76
How to Get: The cache will be on a lower ledge inside Seeker’s Peril. Reward: Materials and Valuables |
||
 |
 |
|
|
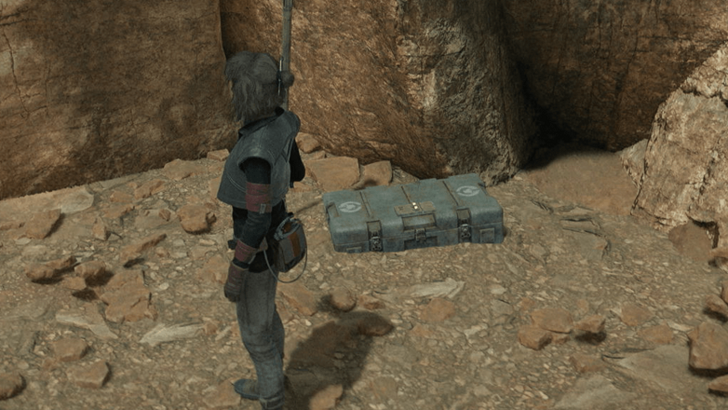
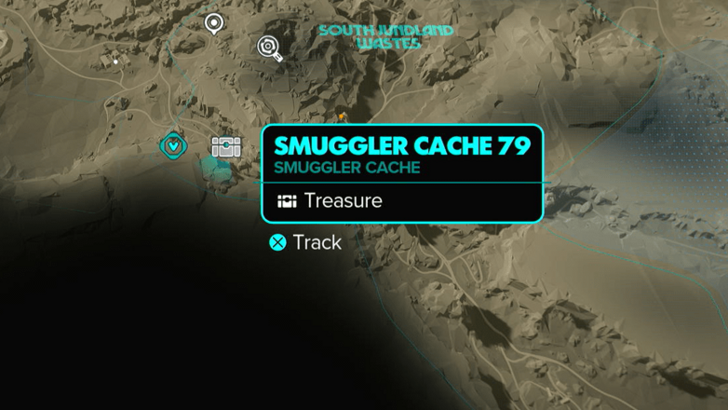
Location Name:
Smuggler Cache 79
How to Get: The cache will along the cliffside. You will have to swing from Curtek Homestead to reach this. Reward: Materials and Valuables |
||
 |
 |
|
|
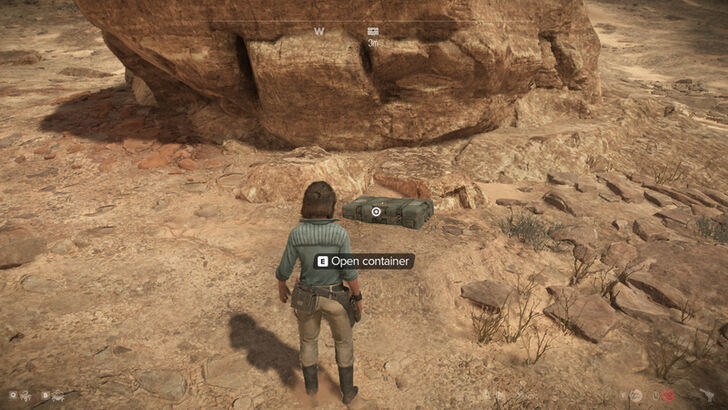
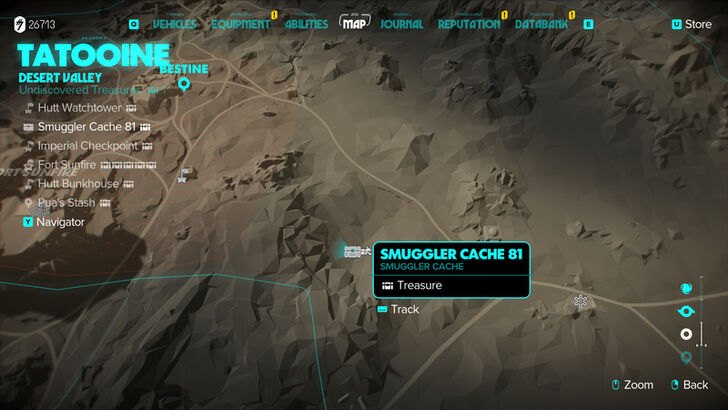
Location Name:
Smuggler Cache 81
How to Get: Smuggler Cache 81 is located next to a boulder, southeast of Bestine in Desert Valley. Reward: Materials and Valuables |
||
 |
 |
|
|
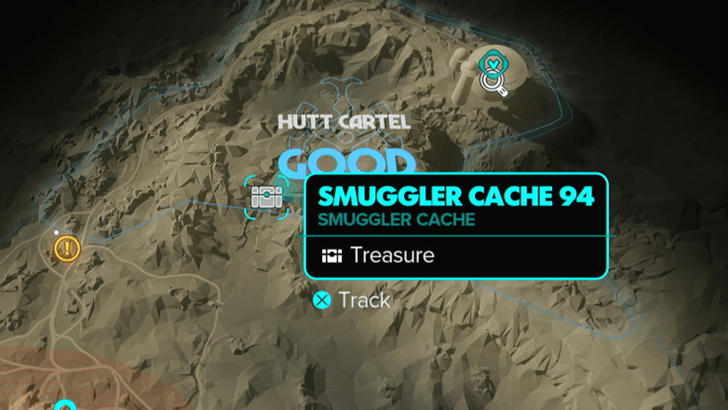
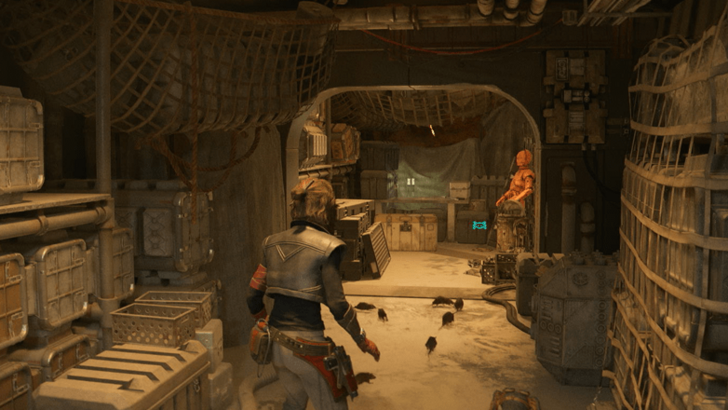
Location Name:
Smuggler Cache 94
How to Get: The cache will be next to a rock wall. Reward: Materials and Valuables |
||
 |
 |
|
|
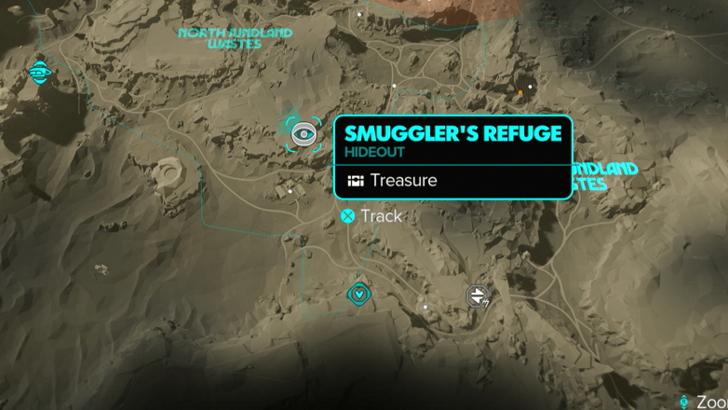
Location Name:
Smuggler’s Refuge
How to Get: The crate will be in locked room on the upper levels of the hideout. Reward: HS-2300 Heat Sink |
||
 |
 |
|
|
Location Name:
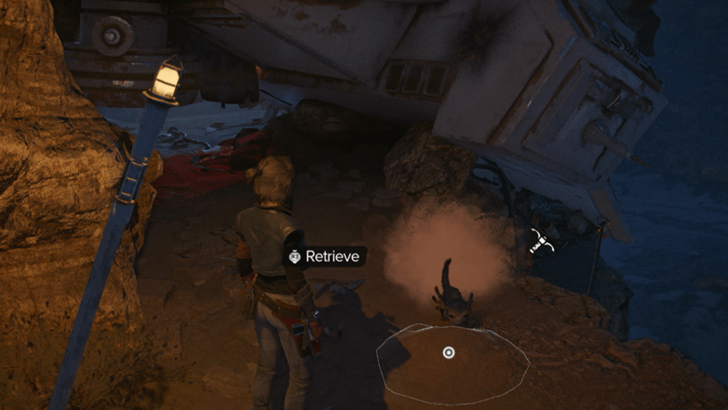
Strange Pillar
How to Get: Follow Nix to reach the treasure at the top of the pillar. Reward: Bang Button |
||
 |
 |
|
|
Location Name:
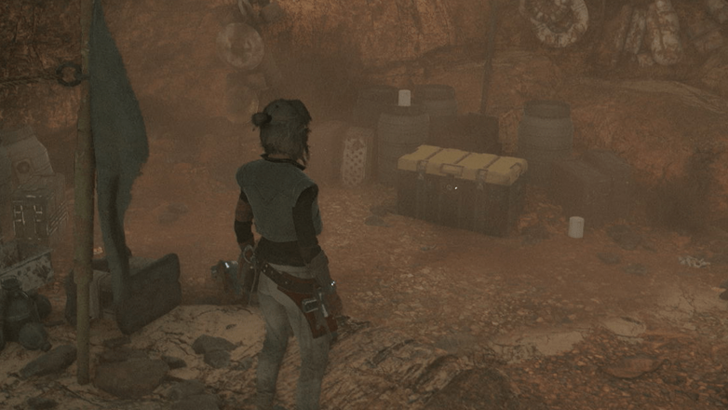
Tusken Camp Treasure 1
How to Get: The crate will be inside the camp, on an elevated platform. Reward: Krayt Dragon Fang Charm |
||
 |
 |
|
|
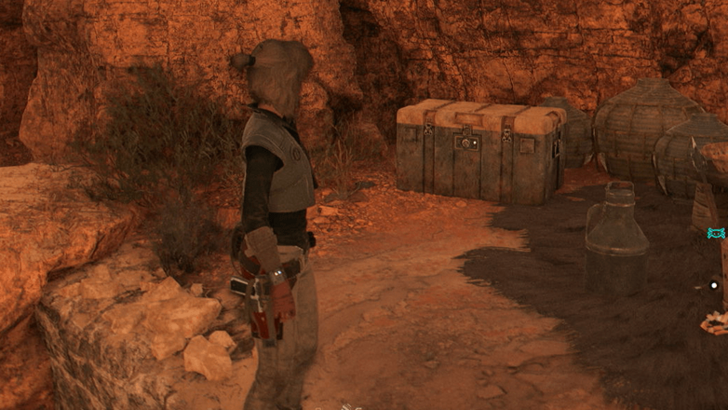
Location Name:
Tusken Camp Treasure 2
How to Get: The crate will be inside the camp, on an elevated platform. Reward: Meiloorun Fruit |
||
 |
 |
|
|
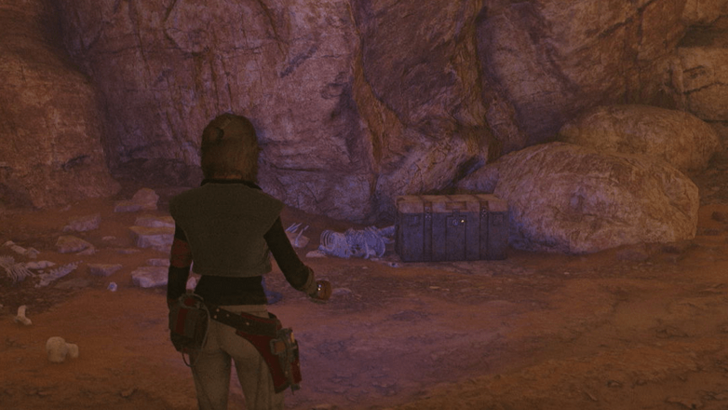
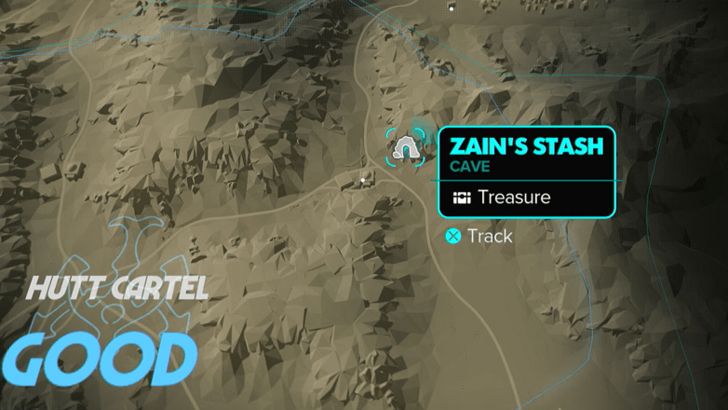
Location Name:
Zain’s Stash
How to Get: This crate is behind a destructible wall. Reward: Blaster Recirculator |
||
Mos Eisley Treasure Locations
| Found? | Treasure Details | |
|---|---|---|
 |
 |
|
|
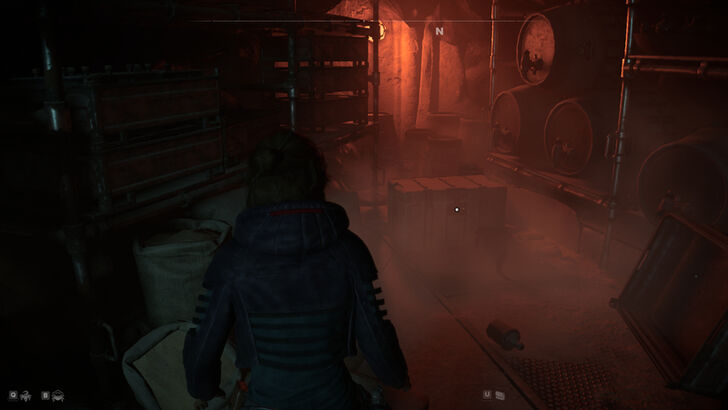
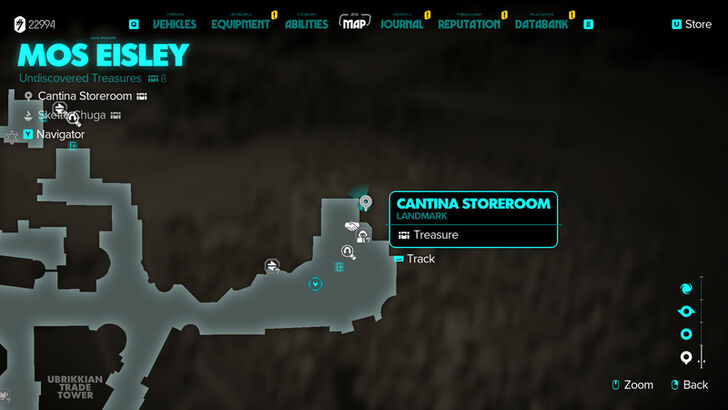
Location Name:
Cantina Storeroom
How to Get: The crate is in the Cantina’s Cellar, you will need a keycard to open the door. Keycard can be found in a storage room with a sleeping massiff in the middle of the room. Reward: Bandfill Trophy |
||
 |
 |
|
|
Location Name:
Dukot’s Stash
How to Get: You must climb up the building to the East of the treasure, then use your rope to swing to the balcony where the treasure is located. Reward: Equilibrium Paint Job |
||
 |
 |
|
|
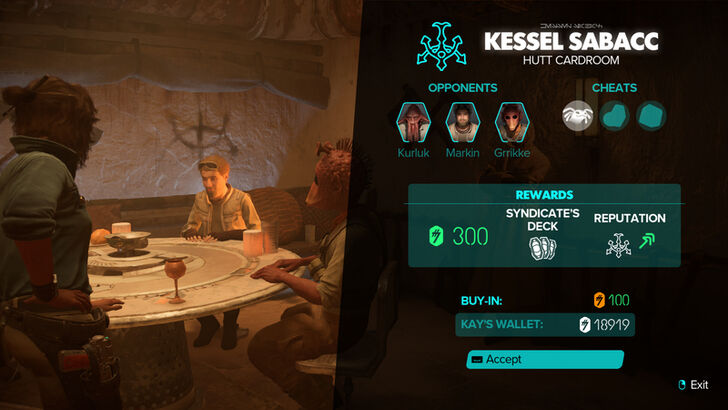
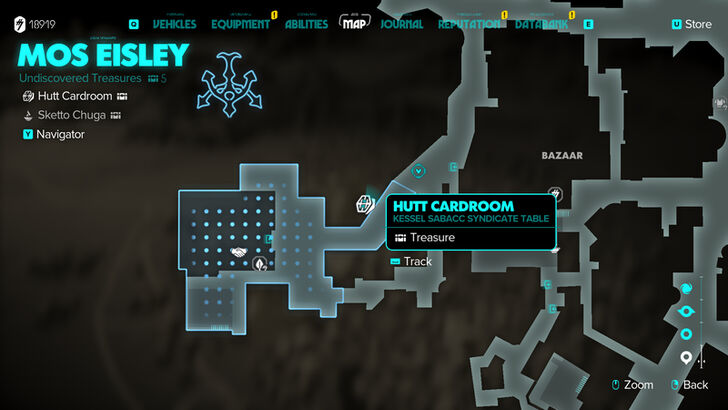
Location Name:
Hutt Cardroom
How to Get: Treasure is obtained via playing Sabacc and winning. Reward: Syndicate Deck |
||
 |
 |
|
|
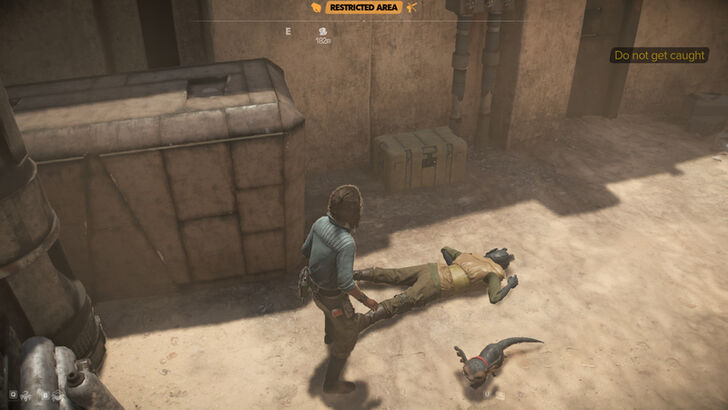
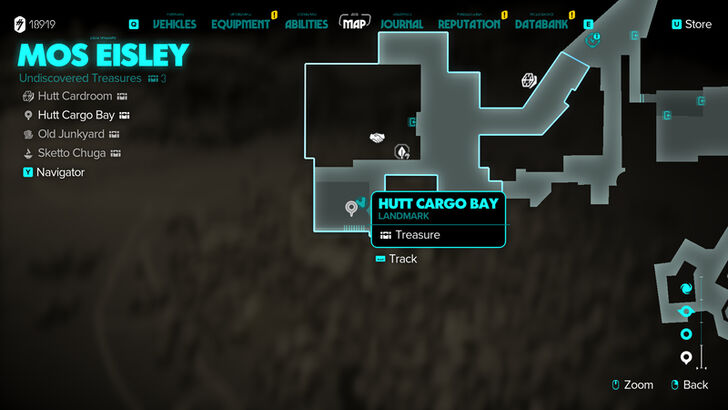
Location Name:
Hutt Cargo Bay
How to Get: The crate is beside a container guarded by one Hutt Cartel member. Reward: Boonta Brawler Fuel |
||
 |
 |
|
|
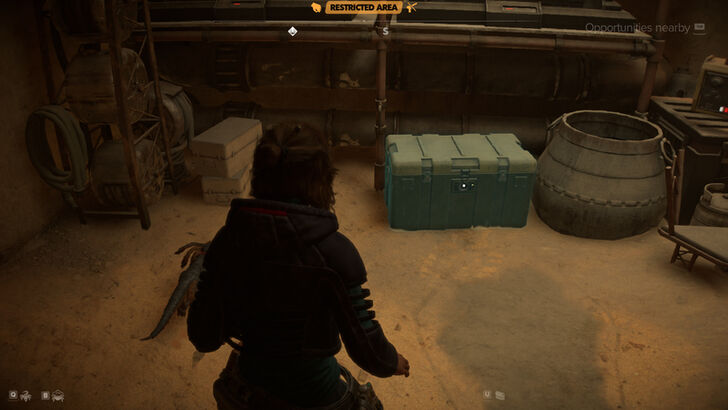
Location Name:
Hutt Market House
How to Get: The crate is inside a house guarded by Hutt Cartel. Reward: The Cleaver Trinket |
||
 |
 |
|
|
Location Name:
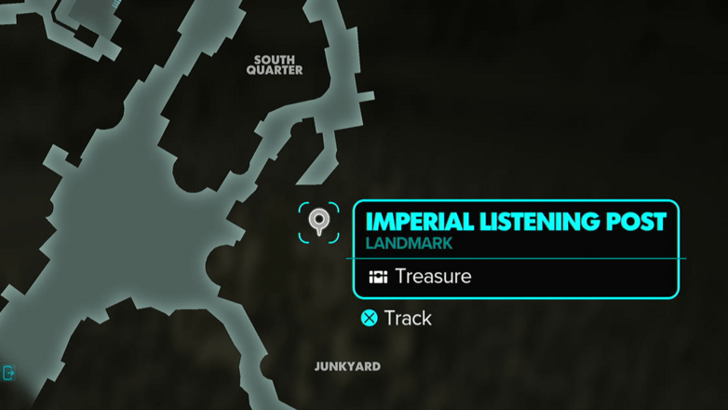
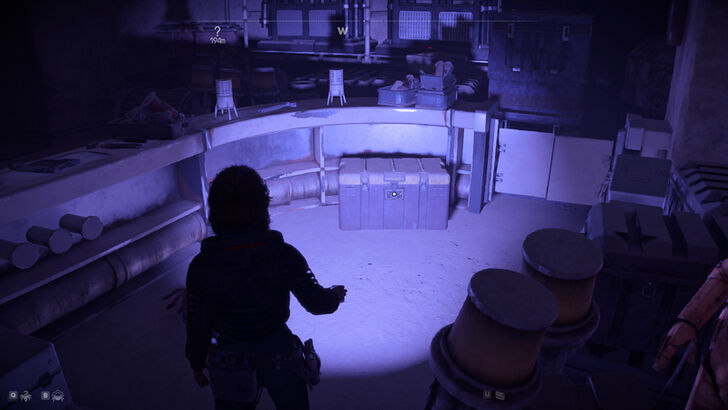
Imperial Listening Post
How to Get: This crate is in a room behind a laser barrier, the room is hidden behind a shelf. The player will have to use Nix to drop down a hanging decoration to be able to override the lock, then press the button to make the shelf move. Use Nix to disable the laser barrier. Reward: IT-O Speeder Trophy |
||
 |
 |
|
|
Location Name:
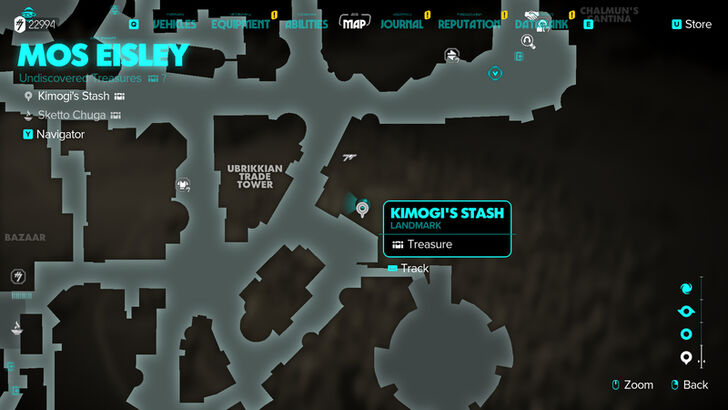
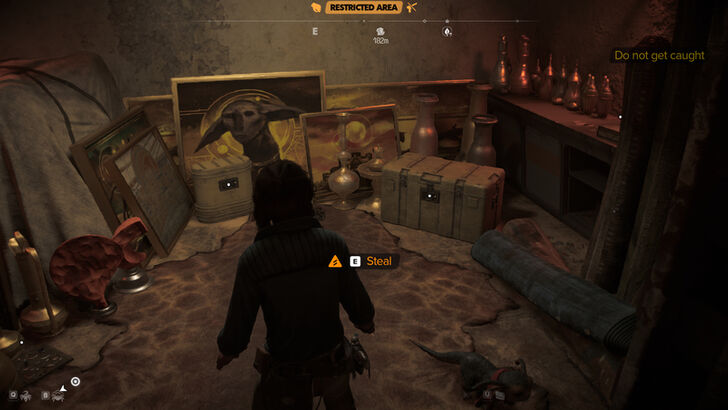
Kimogi’s Stash
How to Get: The crate is in a locked room that can only be opened from the inside. The player will have to use a vent outside to get in here. Reward: Pa’Red Patrol Paint Job |
||
 |
 |
|
|
Location Name:
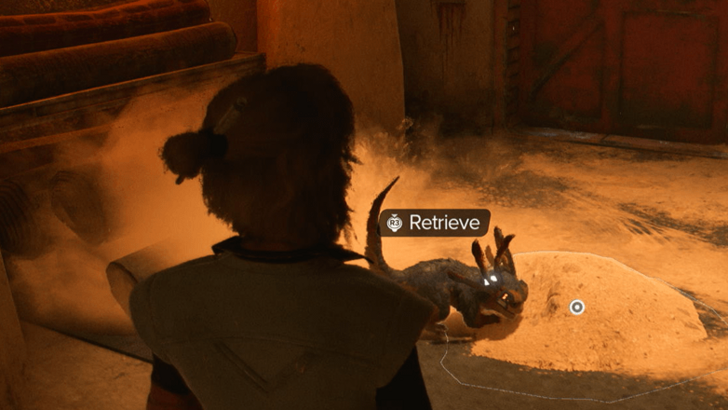
Mos Eisley Hutt Cartel Vault
How to Get: The crate is locked behind two laser barriers with enemies roaming around nearby. The first laser can be disabled by commanding Nix to hold the lever. To disable the second laser, you need three keycards. The keycards are Bib's, Dokk's, and Garfalaquox's. Reward: Boonta Brawler Finish |
||
 |
 |
|
|
Location Name:
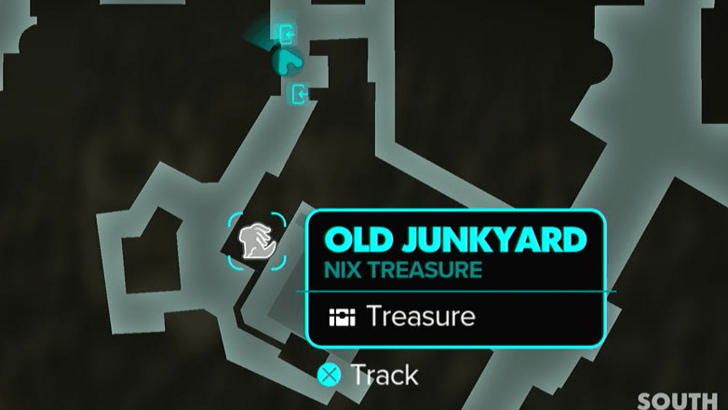
Old Junkyard
How to Get: Follow Nix to the end of the path to acquire the treasure. Reward: Tiny Ship |
||
 |
 |
|
|
Location Name:
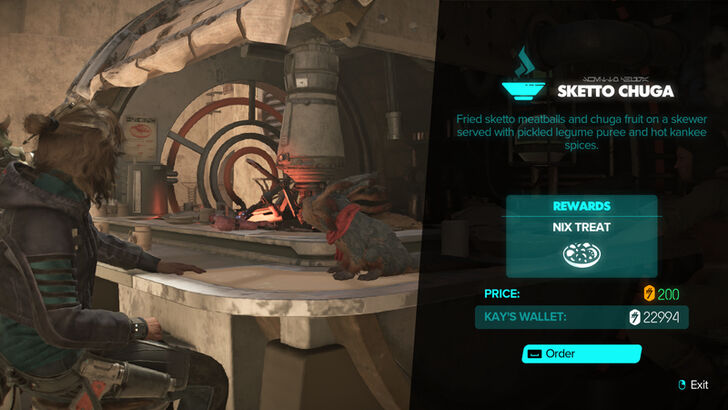
Sketto Chuga
How to Get: Order this from the robot for 200 credits to obtain a Nix Treat. |
||
 |
 |
|
|
Location Name:
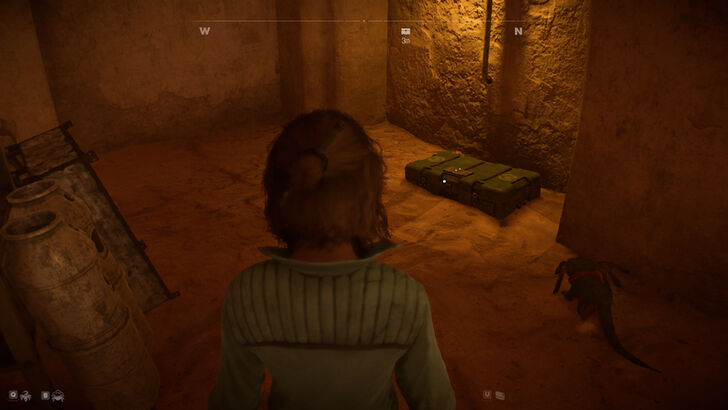
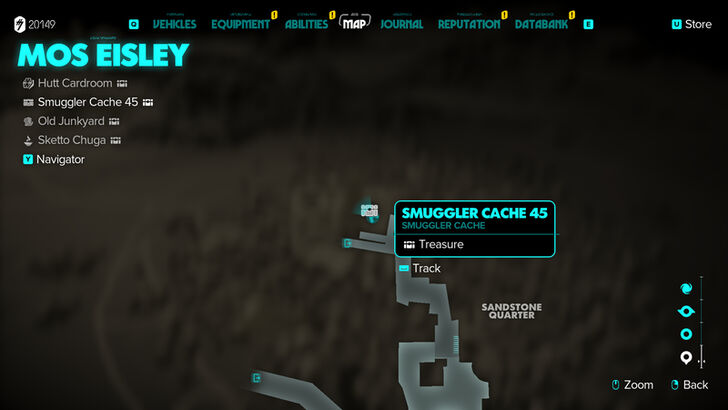
Smuggler Cache 45
How to Get: Smuggler Cache 45 is locked behind a gate, player will have to use the Fusioncutter to get through. Reward: Materials and Valuables |
||
 |
 |
|
|
Location Name:
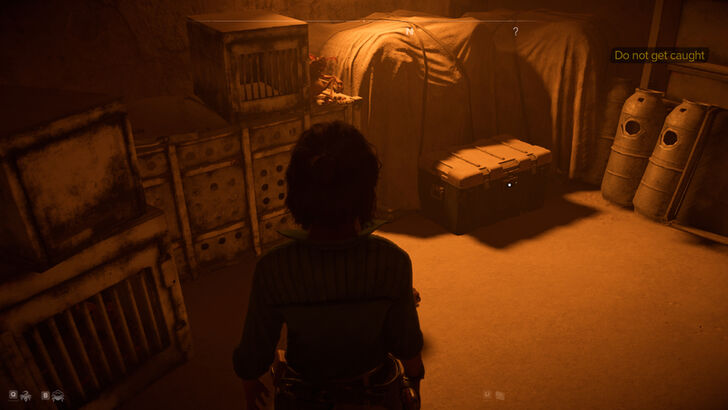
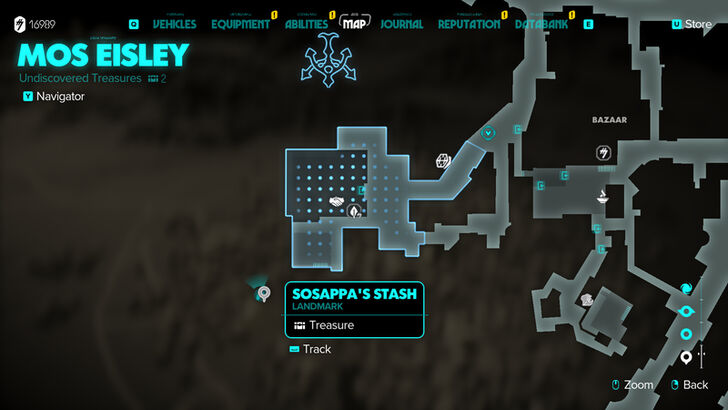
Sosappa’s Stash
How to Get: The crate is locked behind a laser barrier that requires a Slicing Kit. Reward: Arda Explorer Paint Job |
||
Bestine Treasure Locations
| Found? | Treasure Details | |
|---|---|---|
 |
 |
|
|
Location Name:
Imperial Cargo
How to Get: This crate is inside a guarded area. You will have to distract the guards to get this crate. Reward: The Snitch Trinket |
||
 |
 |
|
|
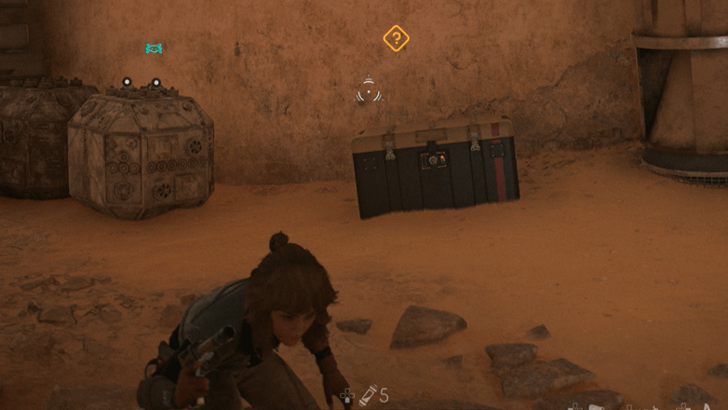
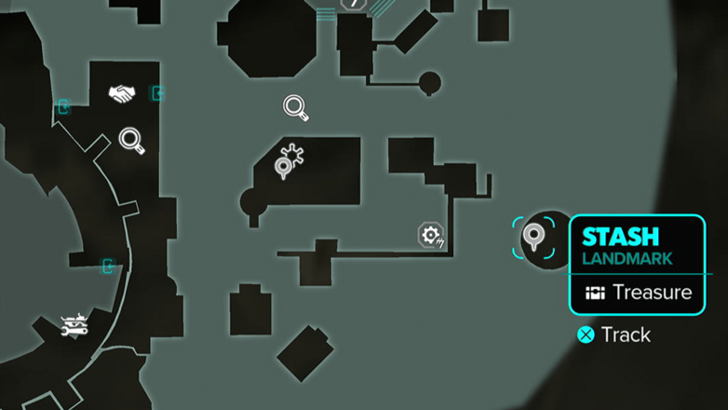
Location Name:
Stash
How to Get: The crate will be outside a guarded area. Reward: Bantha Wool |
||
Tatooine Orbit Treasure Locations
| Found? | Treasure Details | |
|---|---|---|
 |
 |
|
|
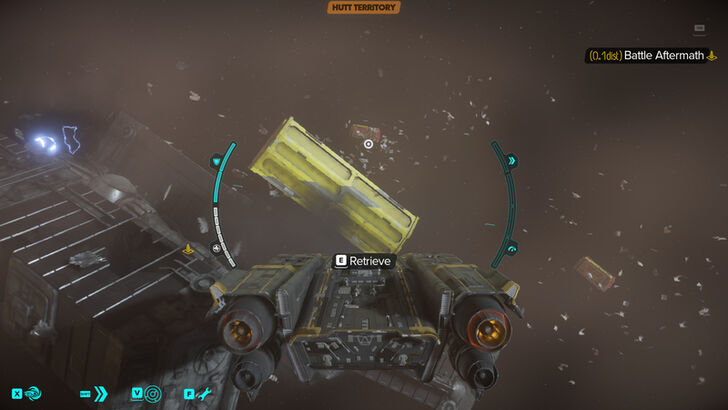
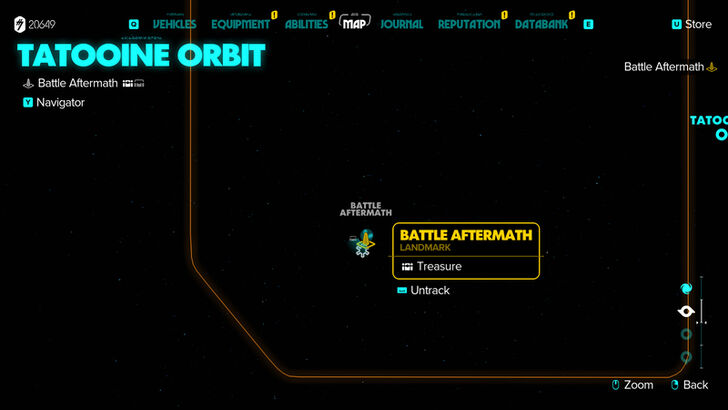
Location Name:
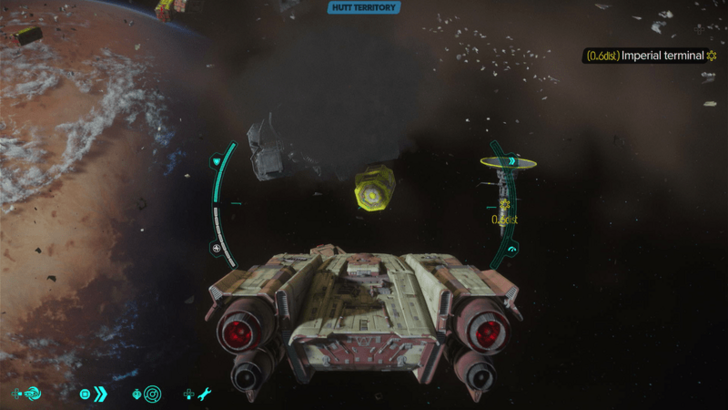
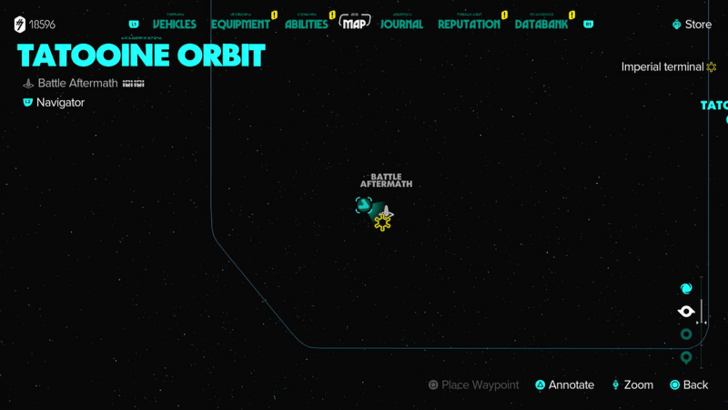
Battle Aftermath Treasure 1
How to Get: Floating crate is located next to a destroyed ship. Reward: Amber Cover Finish |
||
 |
 |
|
|
Location Name:
Battle Aftermath Treasure 2
How to Get: This Transmission is inside a floating crate. Collect 5 of them to unlock The Veteran Expert Quest. Once you have all 16 Transmissions, you will unlock the Disruptor Gear set. Reward: On the Run 03 |
||
Kijimi Treasure Locations
| Found? | Treasure Details | |
|---|---|---|
 |
||
|
Location Name:
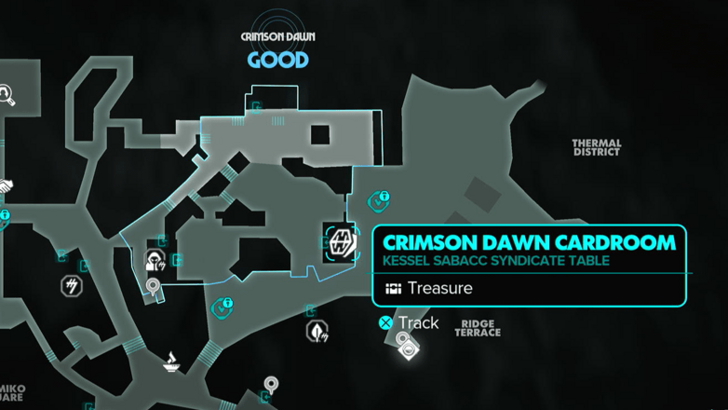
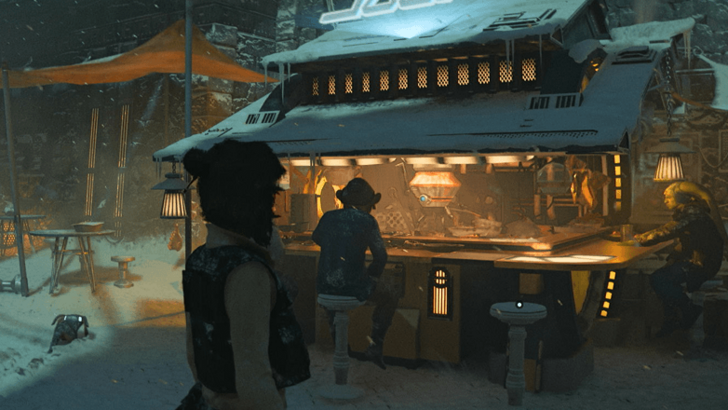
Crimson Dawn Cardroom
How to Get: Treasure is obtained via playing Sabacc and winning. |
||
 |
 |
|
|
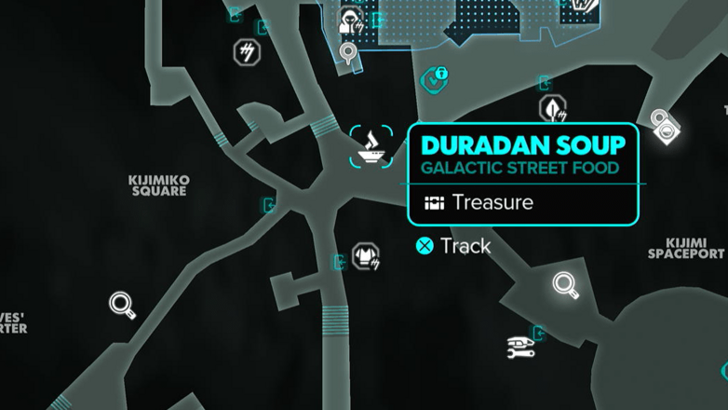
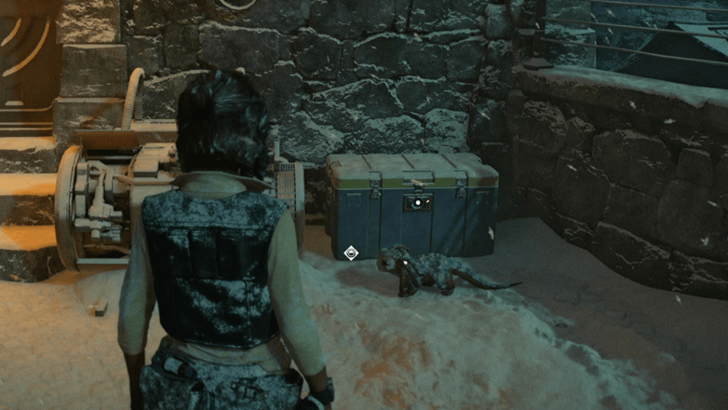
Location Name:
Duradan Soup
How to Get: Order this from the robot for 200 credits to obtain a Nix Treat. |
||
 |
 |
|
|
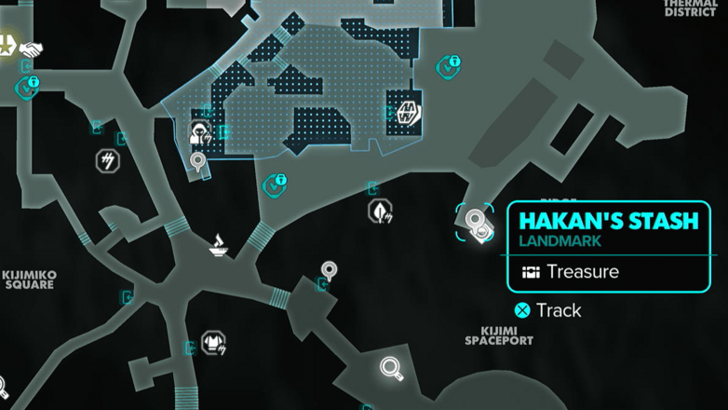
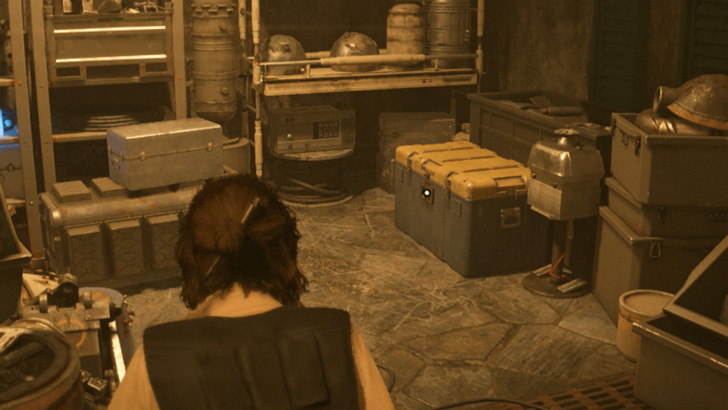
Location Name:
Hakan’s Stash
How to Get: This crate can be found near the Crimson Dawn member in Ridge Terrace. Reward: Henku Wool |
||
 |
 |
|
|
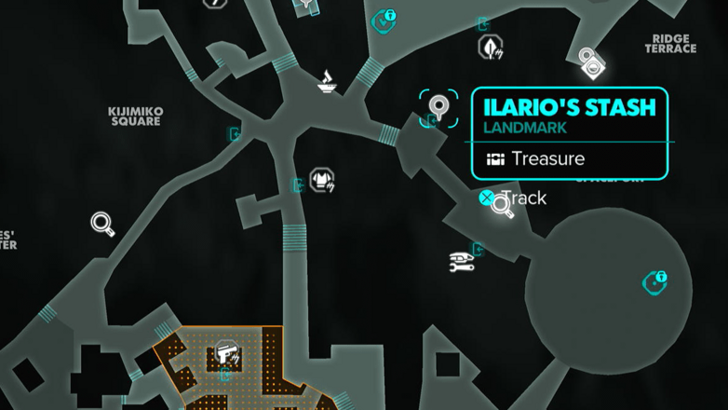
Location Name:
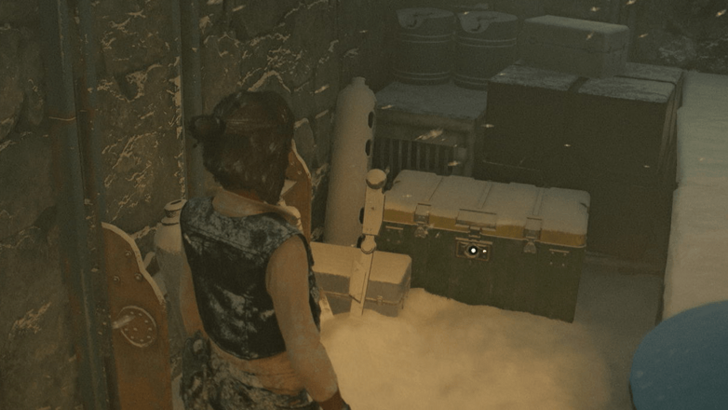
Ilario’s Stash
How to Get: This crate can be found near the Spaceport. Use Nix to open the door. Reward: Credits |
||
 |
 |
|
|
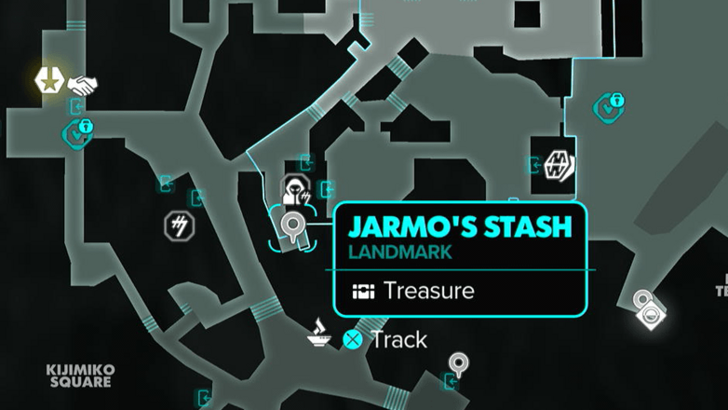
Location Name:
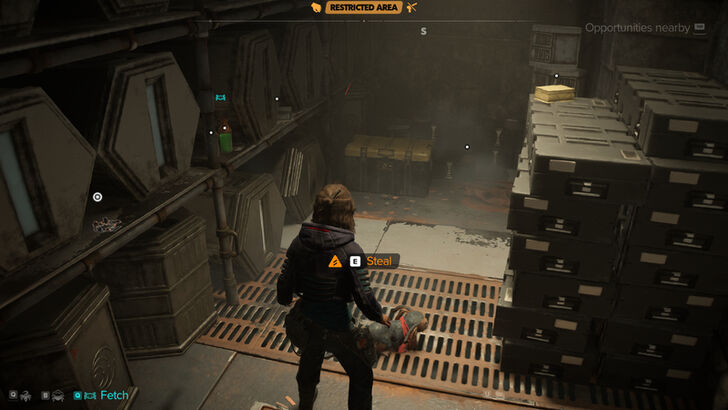
Jarmo’s Stash
How to Get: This crate is found in an alley deep within Crimson Dawn territory. Reward: Credits |
||
 |
 |
|
|
Location Name:
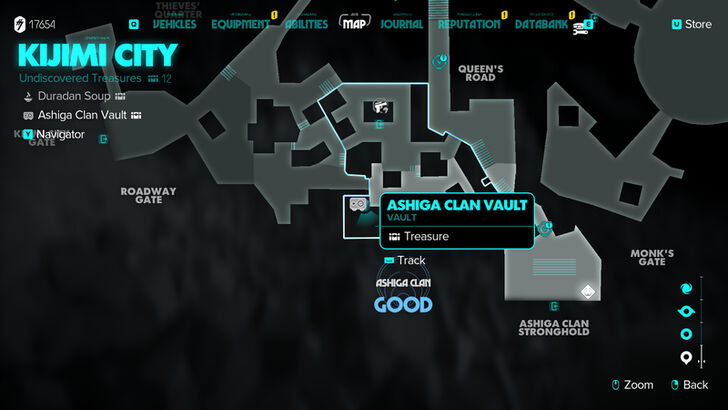
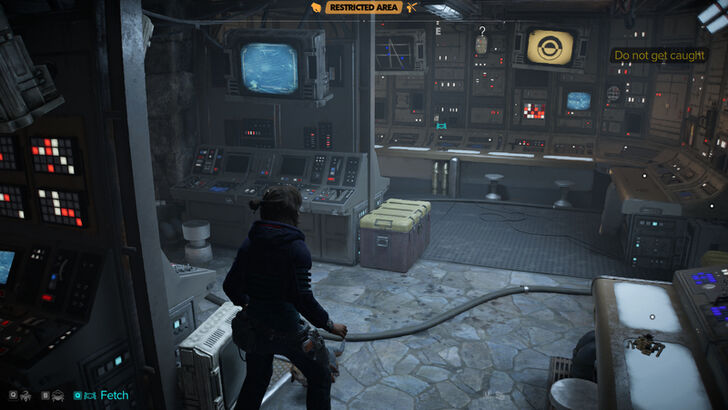
Kijimi Ashiga Clan Vault
How to Get: The vault is locked behind a laser barrier that requires three keycards: Mehdo’s, Zyssyk’s, and Krisk’s. Reward: Kijimi Explorer Cosmetics for the Speeder and Trailblazer |
||
 |
 |
|
|
Location Name:
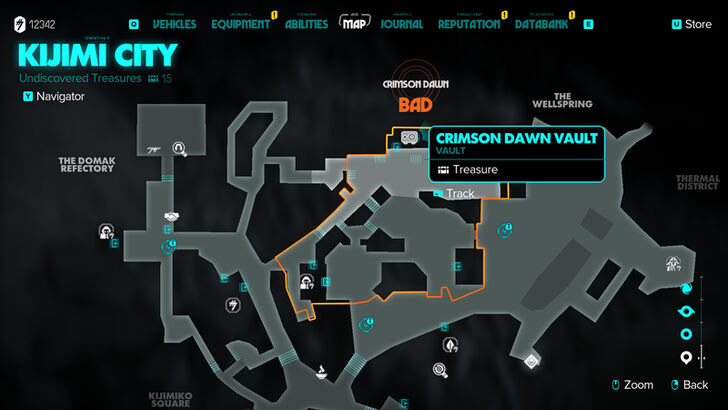
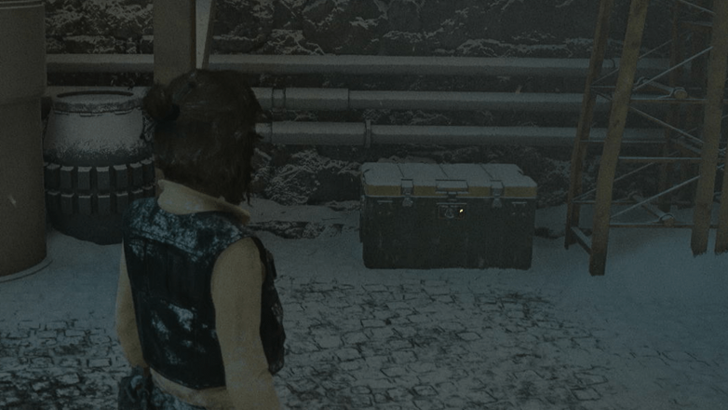
Kijimi Crimson Dawn Vault (Treasure)
How to Get: The vault is locked behind a laser barrier that requires three keycards. Reward: Crimson Reign Finish |
||
 |
 |
|
|
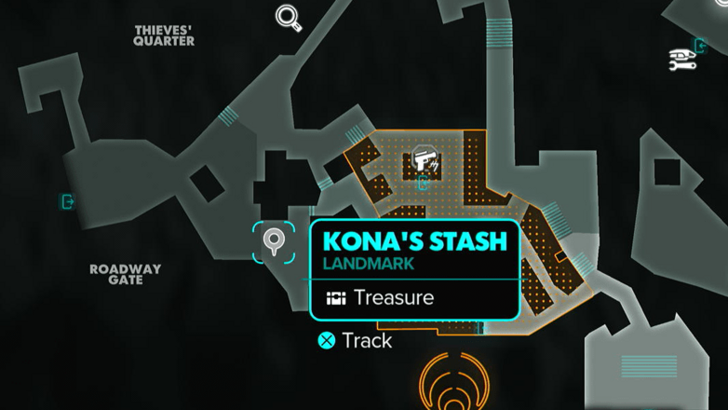
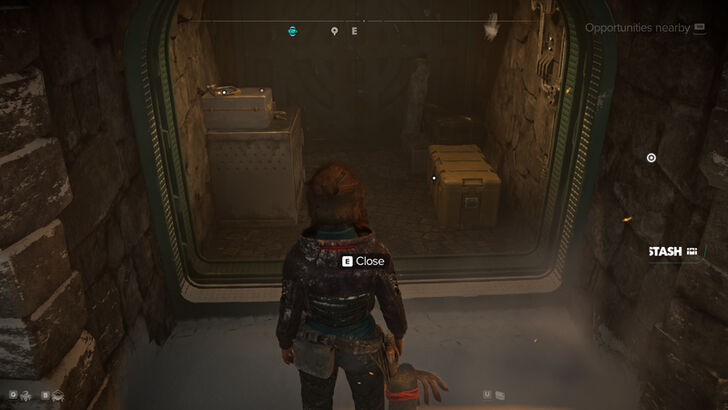
Location Name:
Kona’s Stash
How to Get: This crate can be found near the Ashiga Clan district. You can reach it by climbing a few ledges from the Thieves’ Quarters. Reward: Spot Lantern Trophy |
||
 |
 |
|
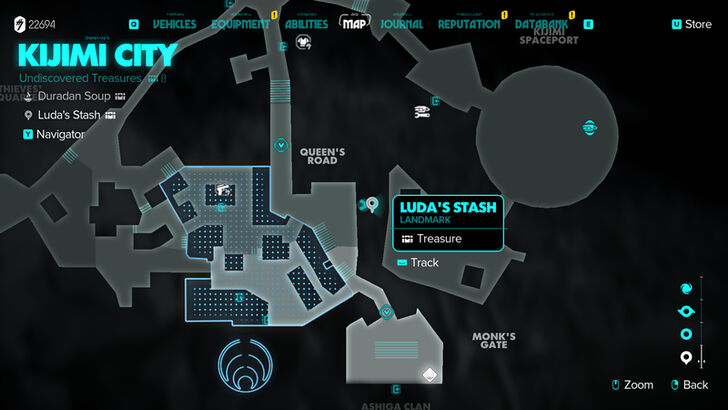
|
Location Name:
Luda’s Stash
How to Get: The crate is in a room with a secret button, player will have to get the intel first. Reward: Blaster Recirculator |
||
 |
||
|
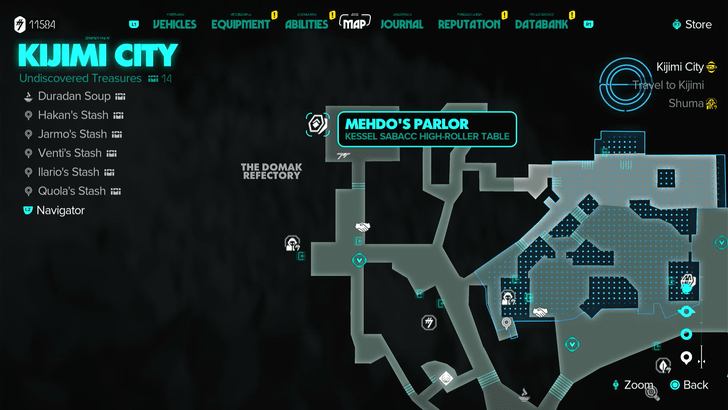
Location Name:
Mehdo’s Table (Treasure)
How to Get: Treasure is obtained via playing Sabacc and winning. Reward: Nightfall Finish |
||
 |
 |
|
|
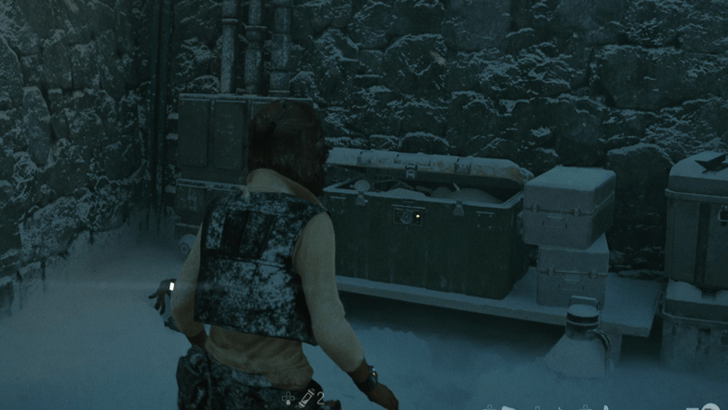
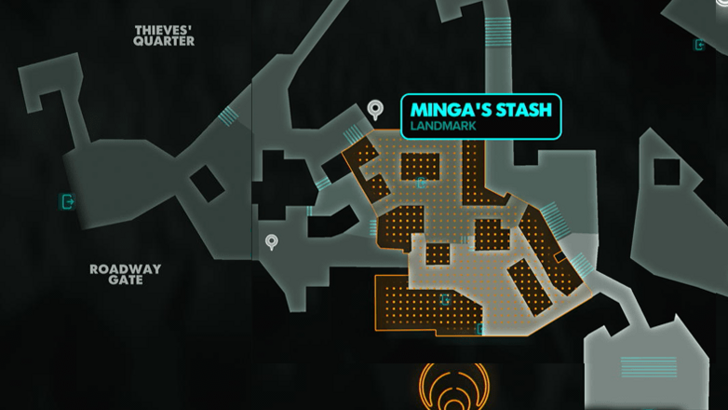
Location Name:
Minga’s Stash
How to Get: This crate can be found at the end of an alley near the Ashiga Clan district. Reward: Parasol Lantern Trophy |
||
 |
 |
|
|
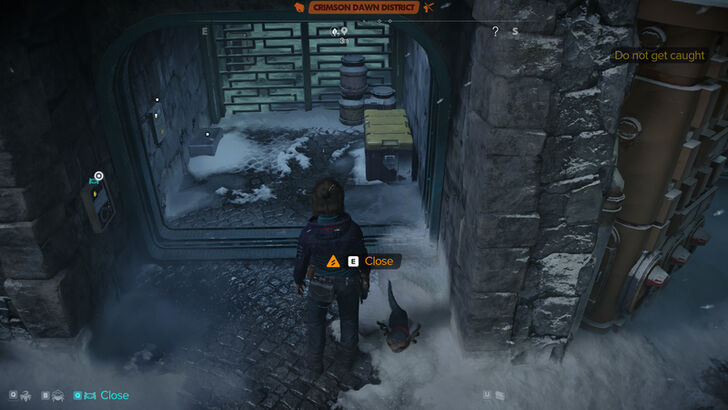
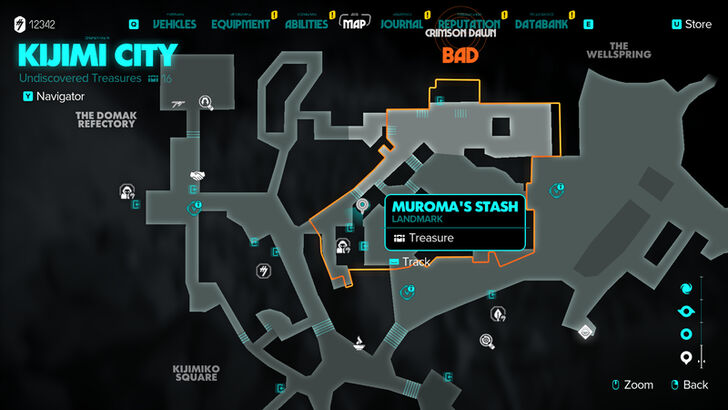
Location Name:
Muroma’s Stash
How to Get: The crate is found inside a locked room, player will have to use their Data Spike to unlock the door. You can also get Dart’s Vault Keycard in the same room. Reward: Crimelord’s Petars |
||
 |
 |
|
|
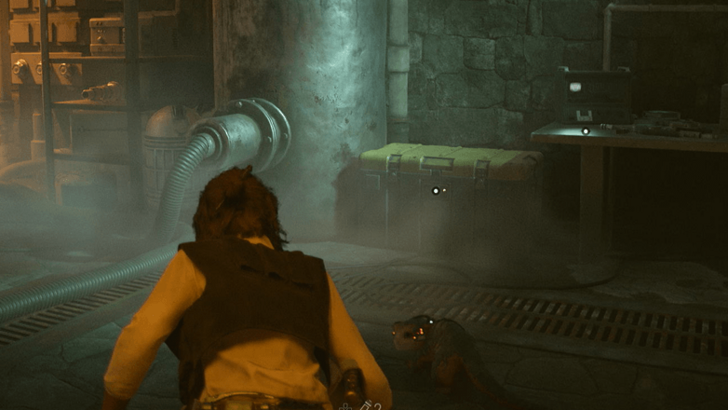
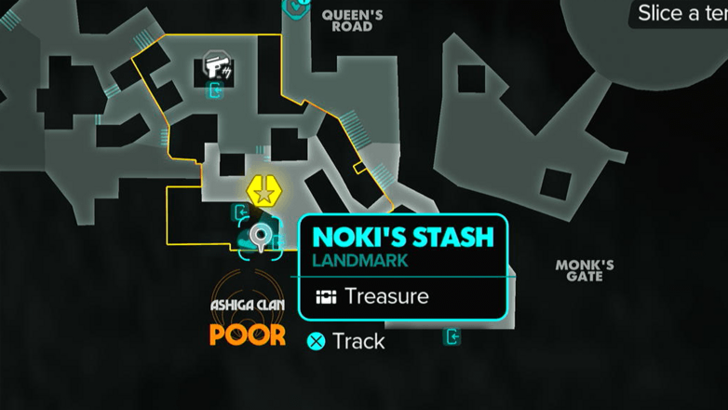
Location Name:
Noki’s Stash
How to Get: This crate can be found deep within the Ashiga Clan Stronghold. Reward: Kijimi Explorer Fuel |
||
 |
 |
|
|
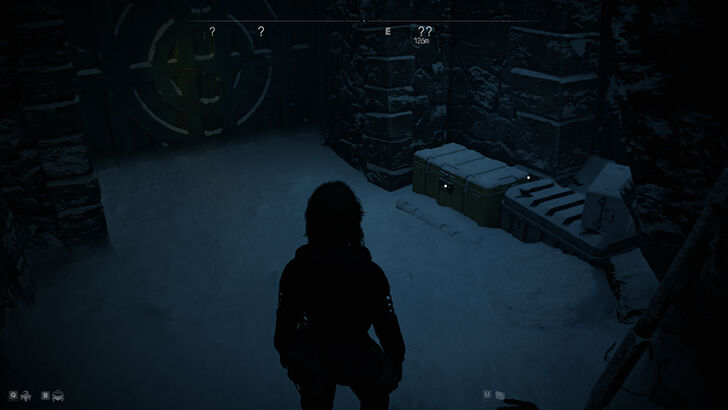
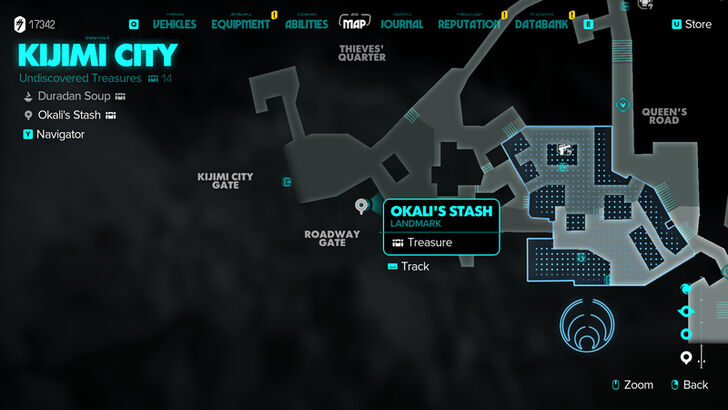
Location Name:
Okali’s Stash
How to Get: The crate is in a locked room, player will have to use a keycard to unlock the door. You can also get the Zyssyk’s Vault keycard in the same room. Reward: Survival Kit Trophy |
||
 |
 |
|
|
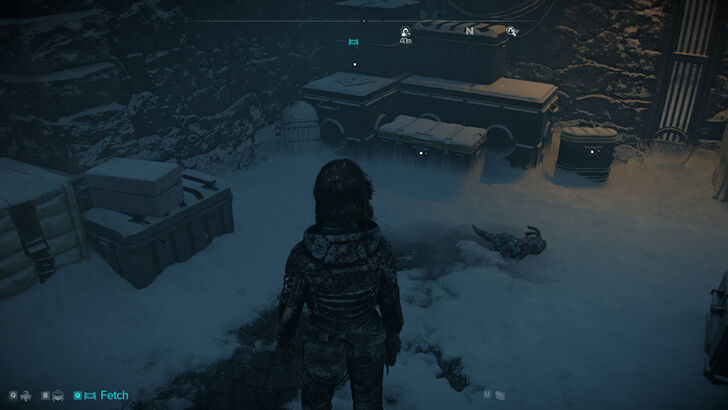
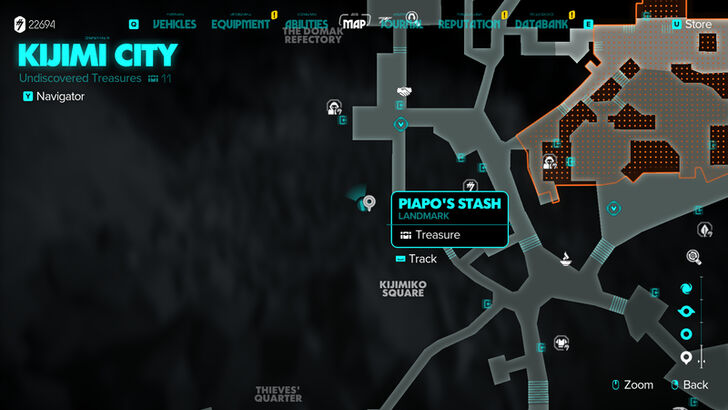
Location Name:
Piapo’s Stash
How to Get: This crate is locked behind a gate, a Fusioncutter is required in order to get in. Reward: Starburst Finish |
||
 |
 |
|
|
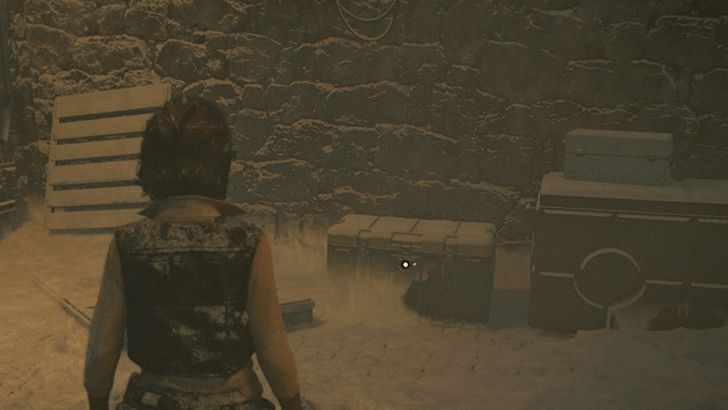
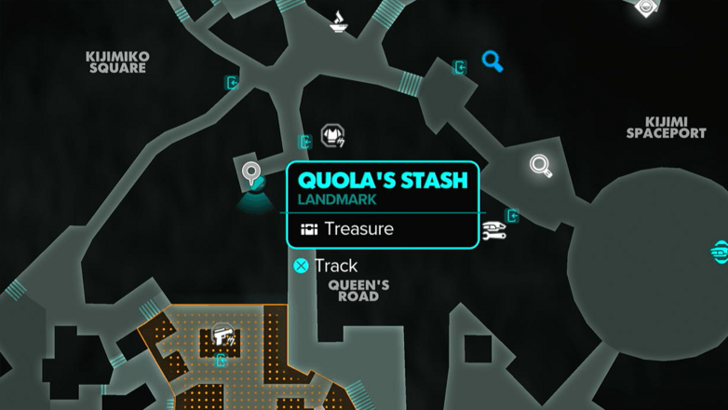
Location Name:
Quola’s Stash
How to Get: This crate can be found behind a locked gate in the Queen’s Road. Use your Splicing Kit to open the gate. Reward: Vandor Survivalist Belt |
||
 |
 |
|
|
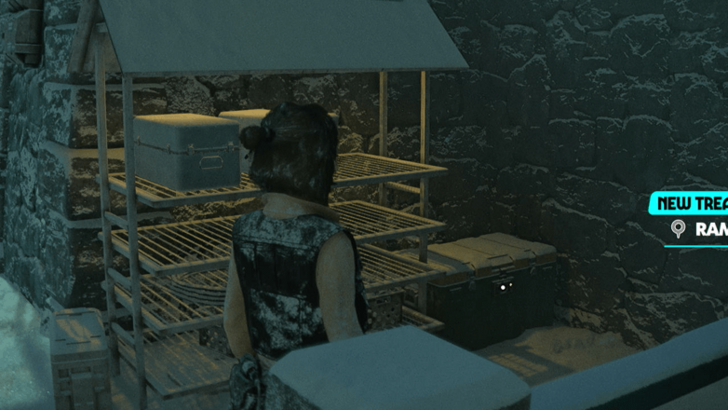
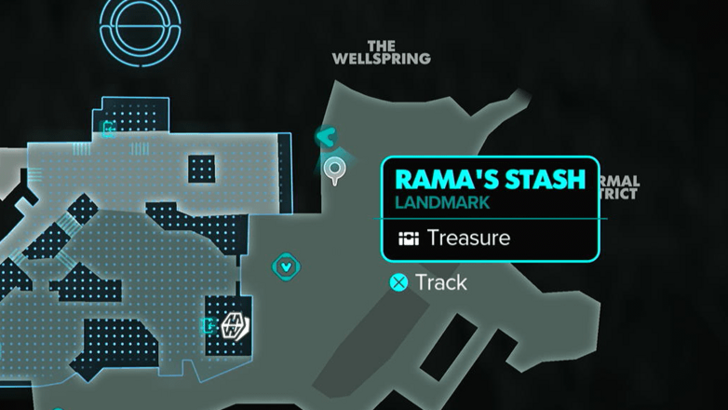
Location Name:
Rama’s Stash
How to Get: This crate can be found next to a wall near the entrance to the Wellspring in the Thermal District. Reward: Blue Scarf |
||
 |
 |
|
|
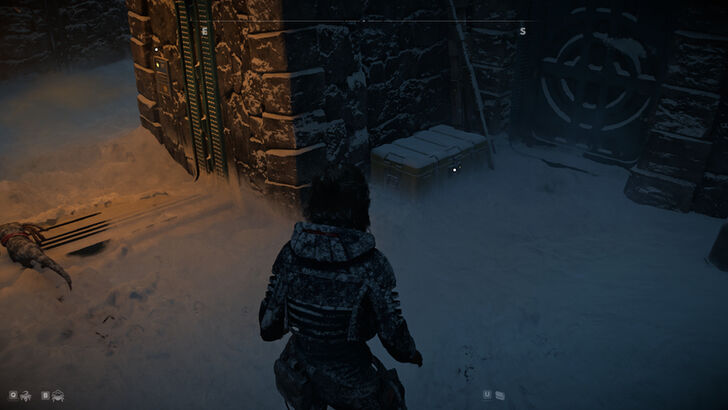
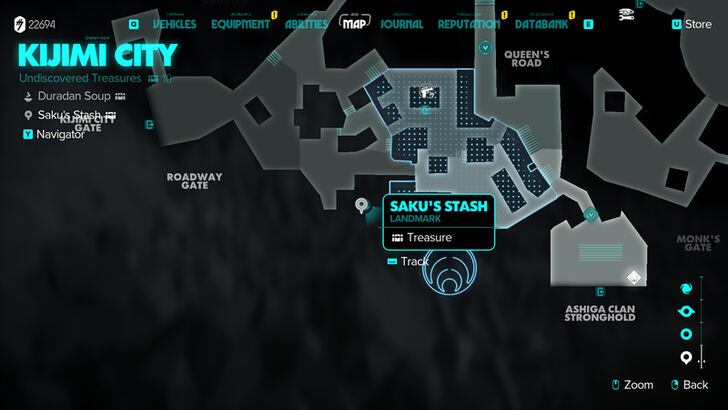
Location Name:
Saku’s Stash
How to Get: The crate is inside a locked room that requires a passcode. The passcode is gathered as Intel in Kijimi City. Reward: Tauntaun Horn Trinket |
||
 |
 |
|
|
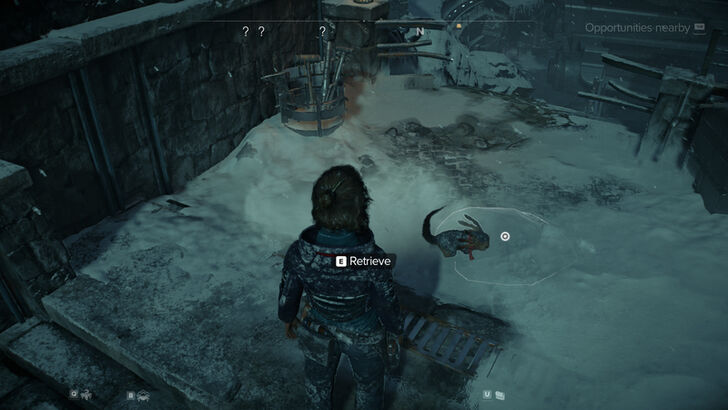
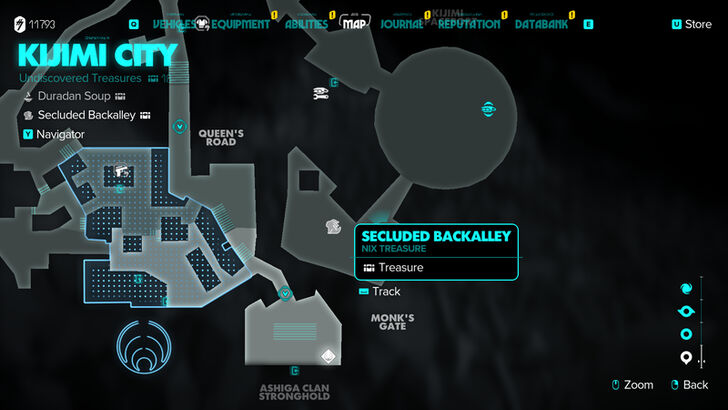
Location Name:
Secluded Back Alley
How to Get: Follow Nix to the end of the path to acquire the treasure. Reward: Picture Card |
||
 |
 |
|
|
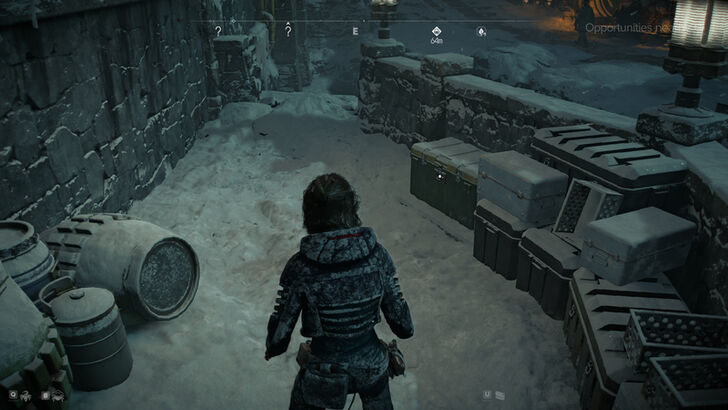
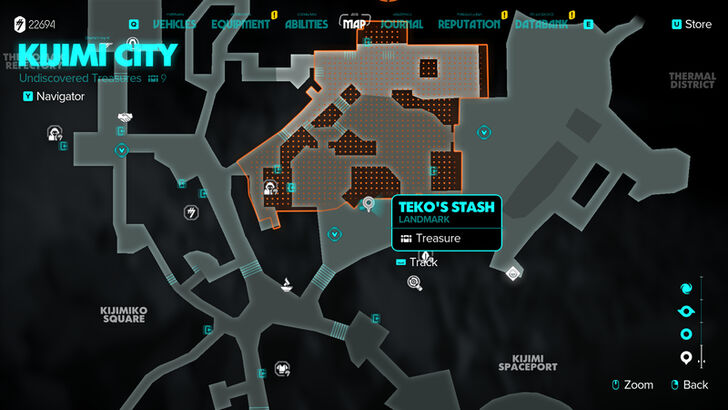
Location Name:
Teko’s Stash
How to Get: The crate is on a platform next to crates and barrels, player will have to jump across to get here. Reward: Blue Tail Wrappings |
||
 |
 |
|
|
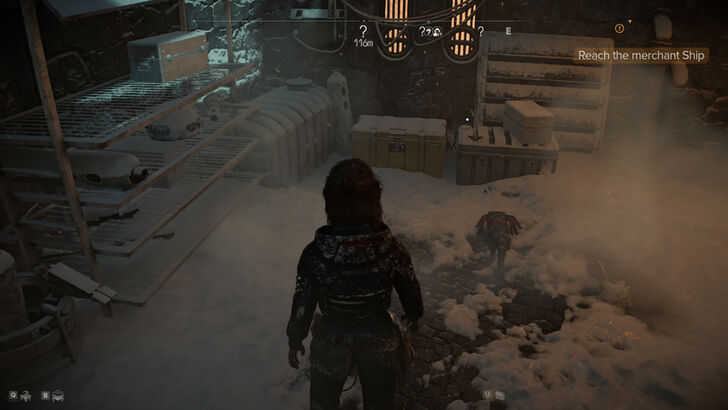
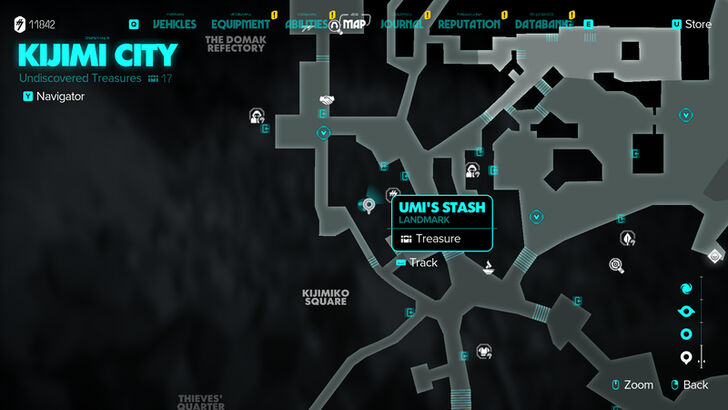
Location Name:
Umi’s Stash
How to Get: The crate is found inside a locked room, player will have to use their Data Spike to unlock the door. You can also get Kuroma’s Keycard here Reward: Materials and Valuables |
||
 |
 |
|
|
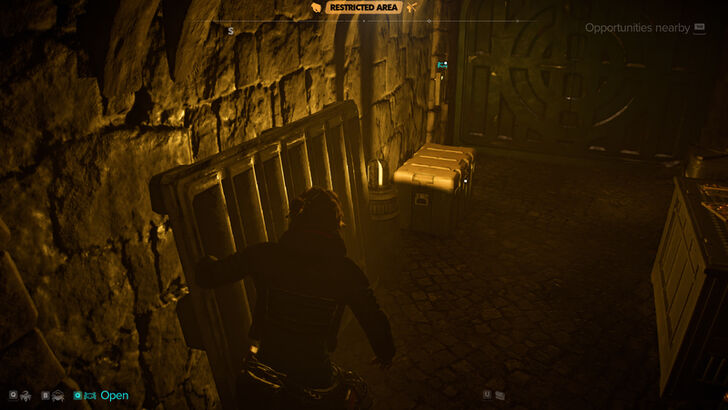
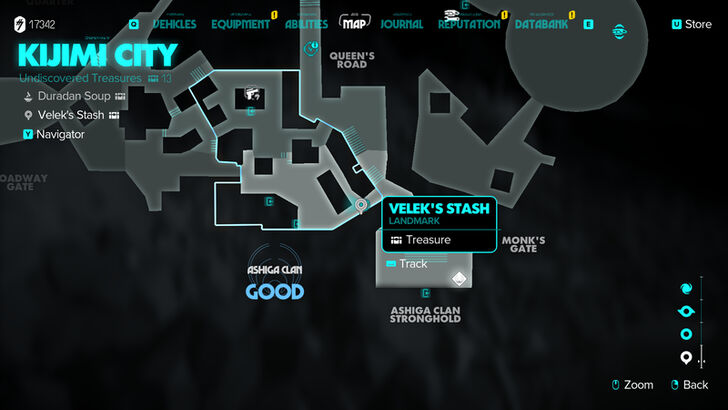
Location Name:
Velek’s Stash
How to Get: The crate is in a locked room, player will have to use a keycard to unlock the door. You can also get the Krisk’s Vault keycard in the same room. Reward: Credits |
||
 |
 |
|
|
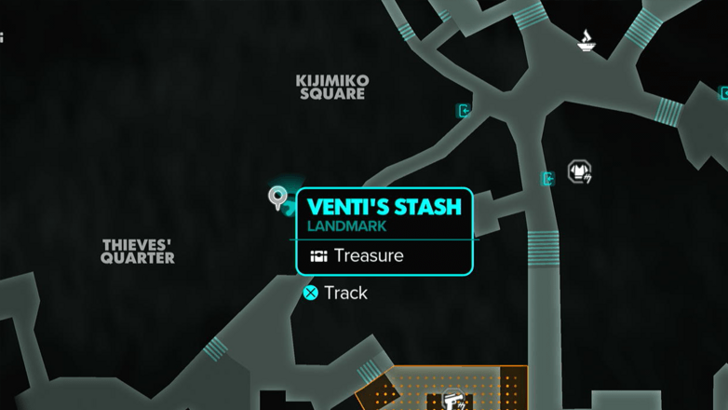
Location Name:
Venti’s Stash
How to Get: This crate can be found behind a locked gate in the Thieves’ Quarters. The code to the gate can be found on a datapad in The Domak Refectory. Reward: Credits |
||
Kijimi Orbit Treasure Locations
| Found? | Treasure Details | |
|---|---|---|
 |
 |
|
|
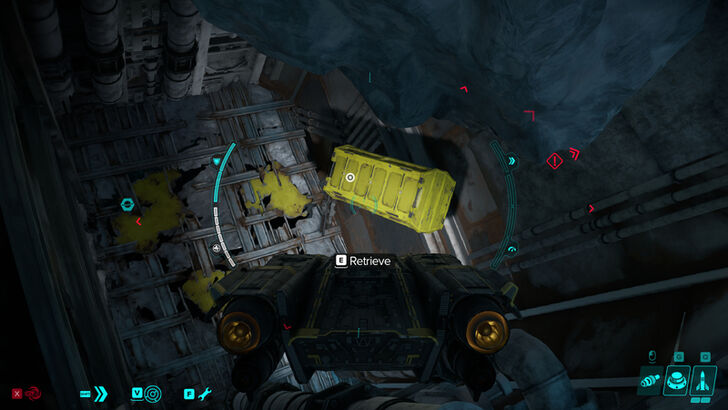
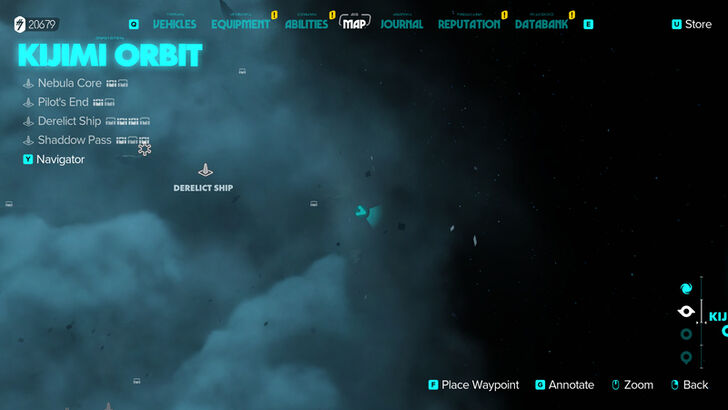
Location Name:
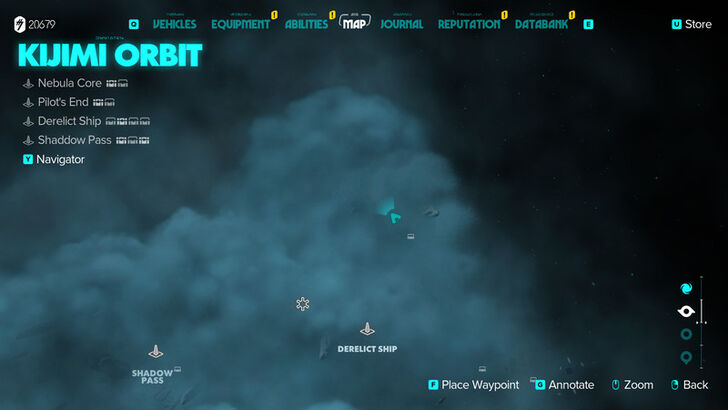
Derelict Ship Treasure 1
How to Get: The floating crate is inside a broken ship part next to rocks and a destructible wall. Reward: X-FP-C28 Ship Computer |
||
 |
 |
|
|
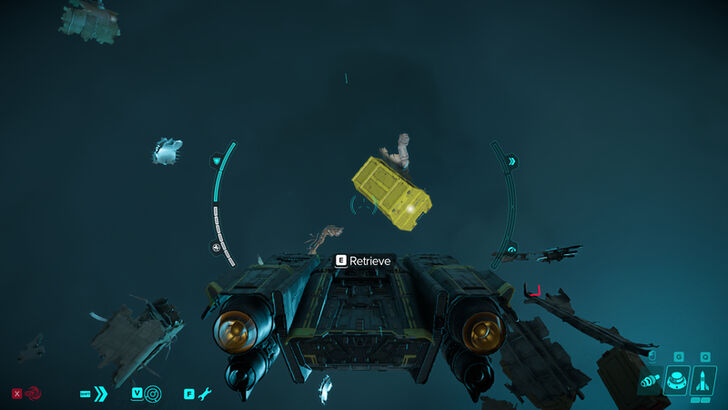
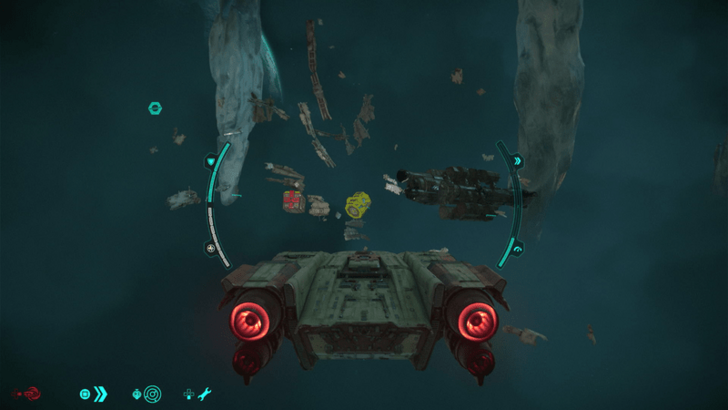
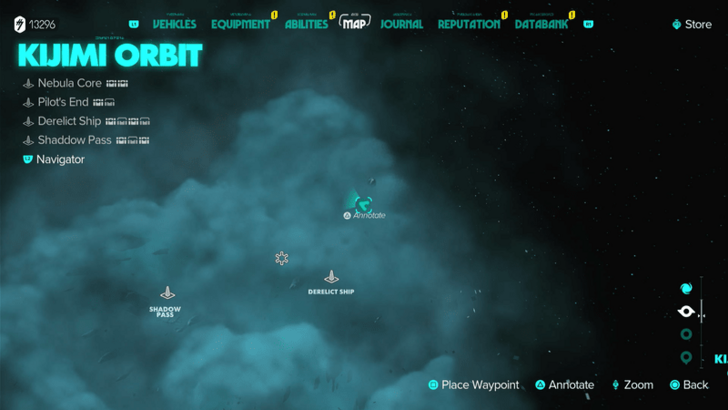
Location Name:
Derelict Ship Treasure 2
How to Get: This crate is floating next to debris, north of the Derelict Ship Treasure 2. Reward: Cobalt Cover Finish |
||
 |
 |
|
|
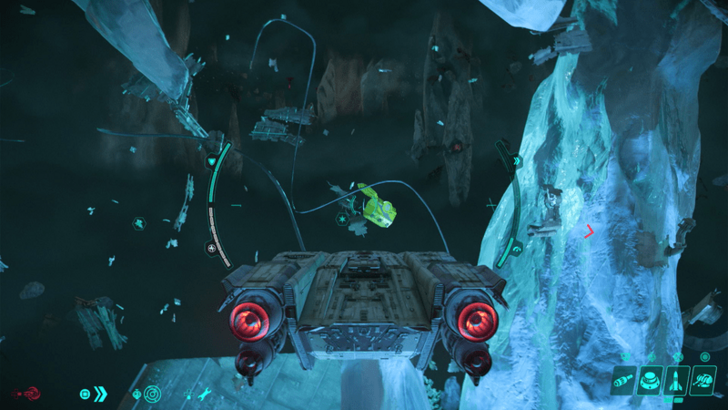
Location Name:
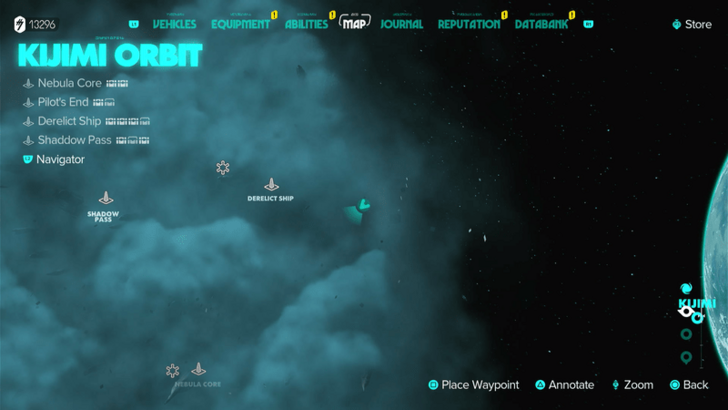
Derelict Ship Treasure 3
How to Get: This Transmission is inside a floating crate. Collect 5 of them to unlock The Veteran Expert Quest. Once you have all 16 Transmissions, you will unlock the Disruptor Gear set. Reward: Maranda’s Mistake 02 |
||
 |
 |
|
|
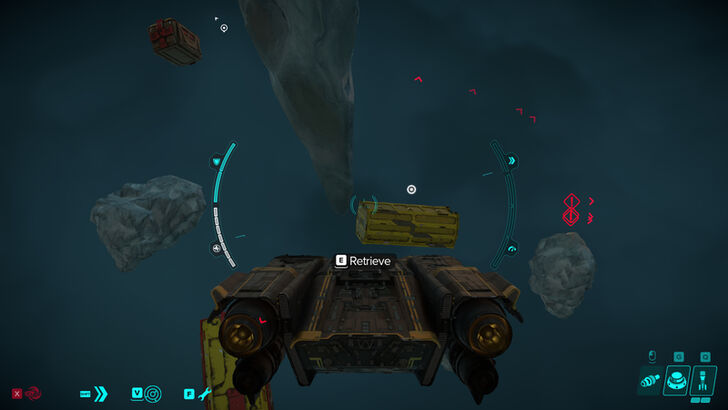
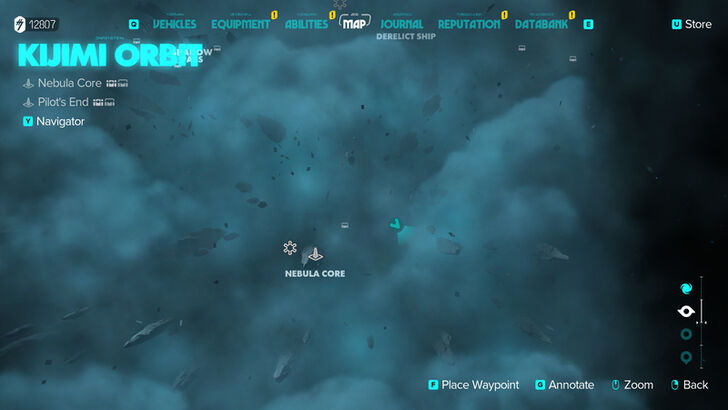
Location Name:
Derelict Ship Treasure 4
How to Get: This Transmission is inside a floating crate. Collect 5 of them to unlock The Veteran Expert Quest. Once you have all 16 Transmissions, you will unlock the Disruptor Gear set. Reward: Maranda’s Mistake 04 |
||
 |
 |
|
|
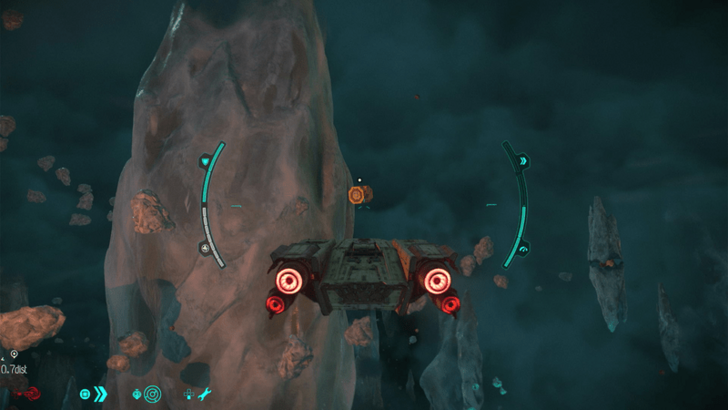
Location Name:
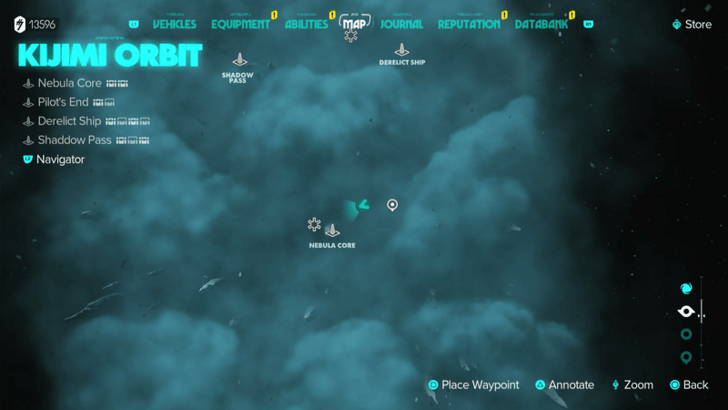
Nebula Core Treasure 1
How to Get: This floating crate can be found near several rocks. Reward: Ruby Stripe Finish |
||
 |
 |
|
|
Location Name:
Nebula Core Treasure 2
How to Get: This Transmission is inside a floating crate. Collect 5 of them to unlock The Veteran Expert Quest. Once you have all 16 Transmissions, you will unlock the Disruptor Gear set. Reward: On the Run 01 |
||
 |
 |
|
|
Location Name:
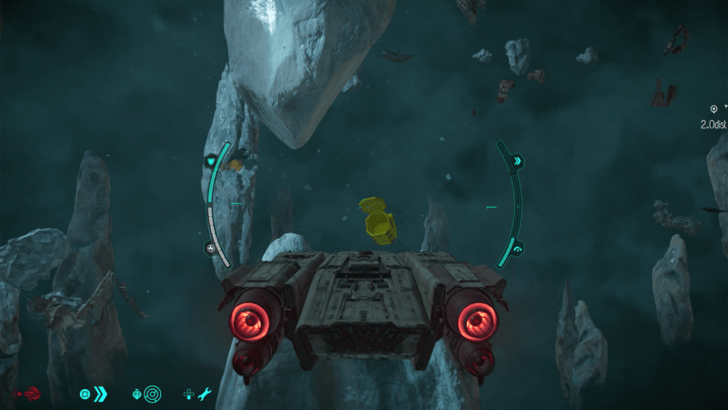
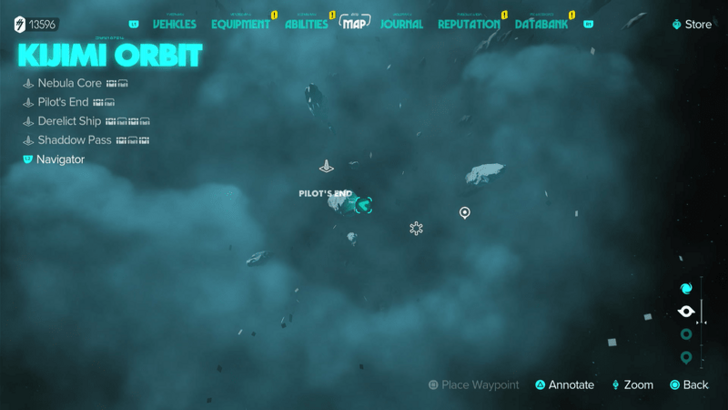
Pilot’s End Treasure 1
How to Get: Floating next to crates and rocks northwest of Pilot's End. Reward: Amber Detail Finish |
||
 |
 |
|
|
Location Name:
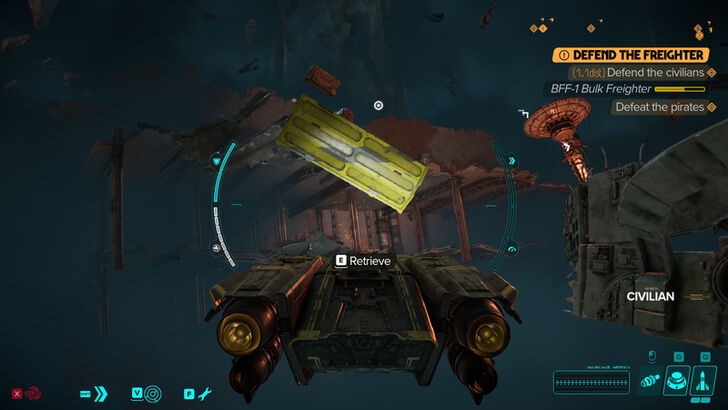
Pilot’s End Treasure 2
How to Get: This Transmission is inside a floating crate. Collect 5 of them to unlock The Veteran Expert Quest. Once you have all 16 Transmissions, you will unlock the Disruptor Gear set. Reward: Maranda’s Mistake 01 |
||
 |
 |
|
|
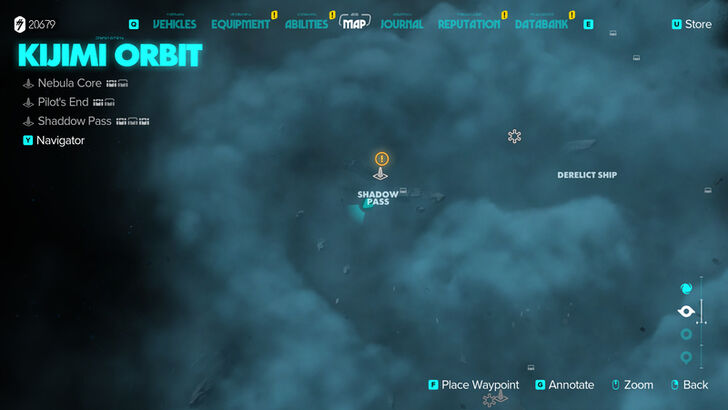
Location Name:
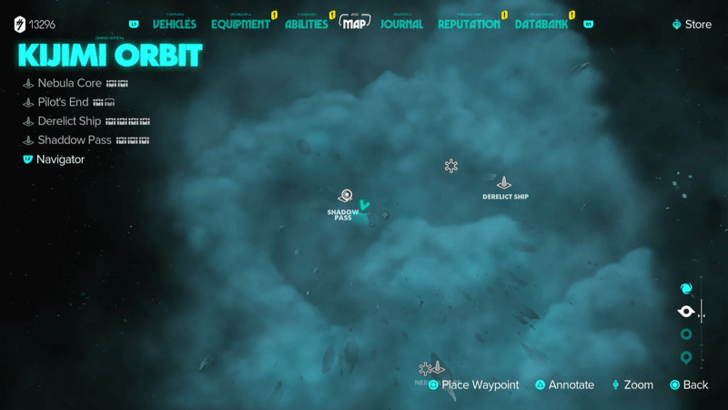
Shaddow Pass Treasure 1
How to Get: This crate is floating nearby a Jammer. Reward: Dark Cross Finish |
||
 |
 |
|
|
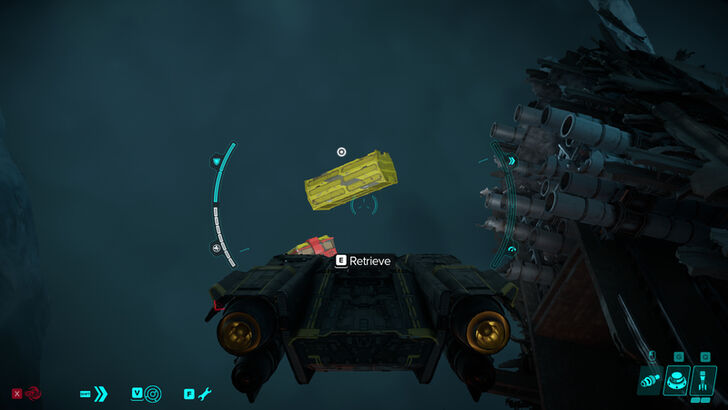
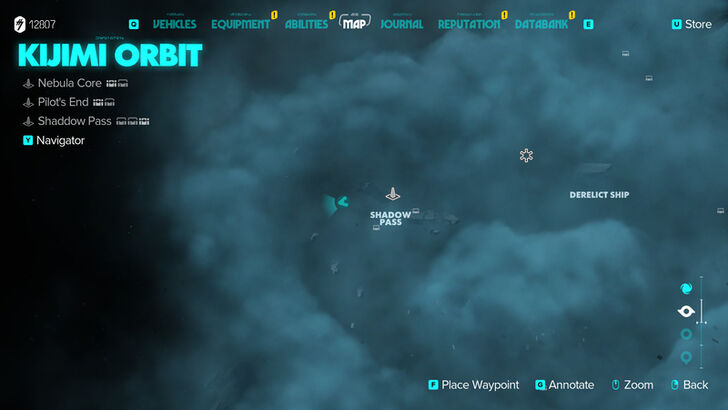
Location Name:
Shaddow Pass Treasure 2
How to Get: This crate is floating next to a broken ship part and nearby crates. Reward: X-FP-C28 Ship Computer |
||
 |
 |
|
|
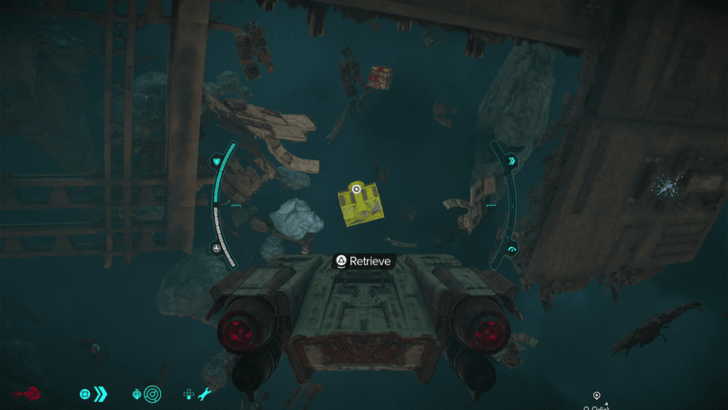
Location Name:
Shaddow Pass Treasure 3
How to Get: This Transmission is inside a floating crate. Collect 5 of them to unlock The Veteran Expert Quest. Once you have all 16 Transmissions, you will unlock the Disruptor Gear set. Reward: Maranda’s Mistake 03 |
||
Akiva Treasure Locations
| Found? | Treasure Details | |
|---|---|---|
 |
 |
|
|
Location Name:
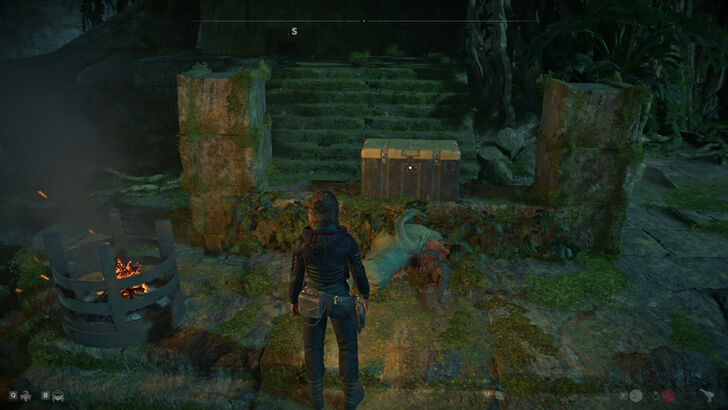
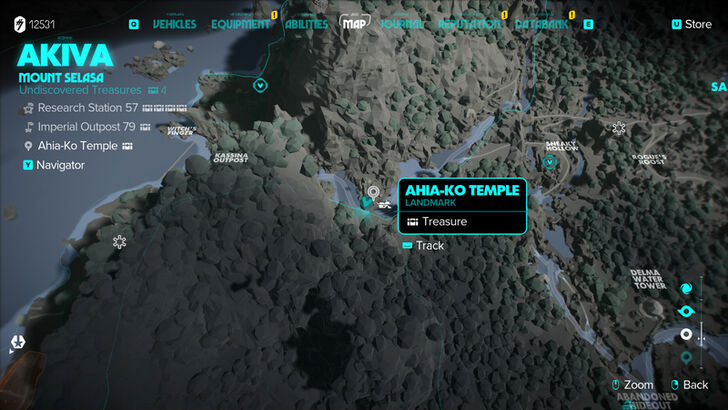
Ahia-Ko Temple
How to Get: This crate is found on some ruins guarded by lizard enemies. Reward: Carmine Coating |
||
 |
 |
|
|
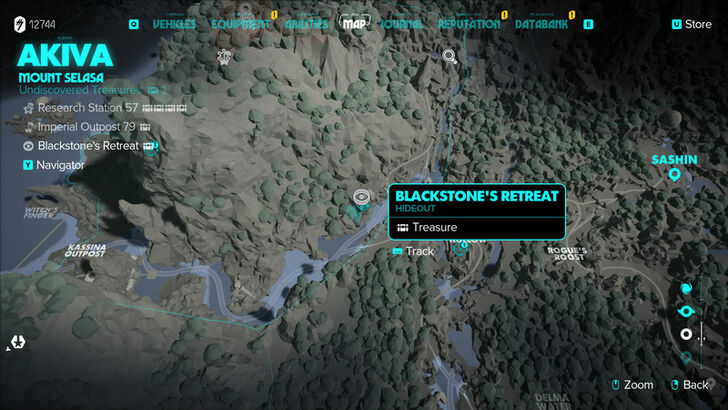
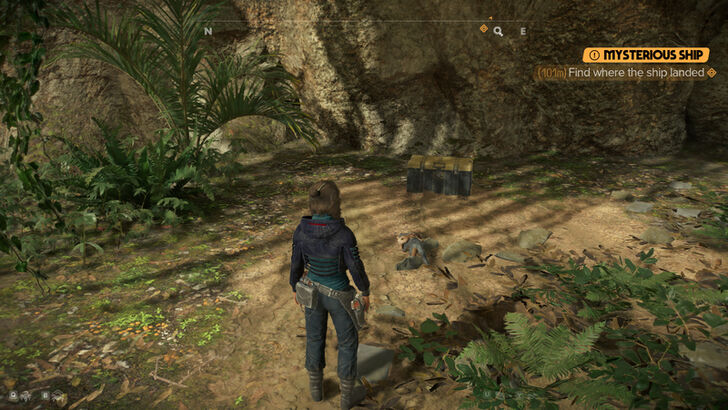
Location Name:
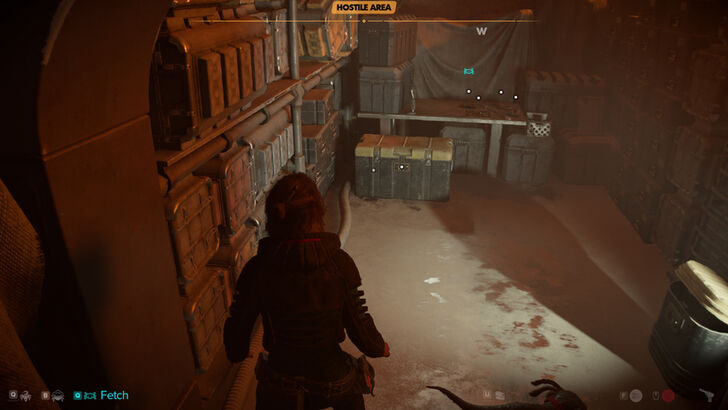
Blackstone’s Retreat
How to Get: This crate is found inside a locked room, player will have to use their Data Spike to unlock the door. Reward: Jarwal Bloom |
||
 |
 |
|
|
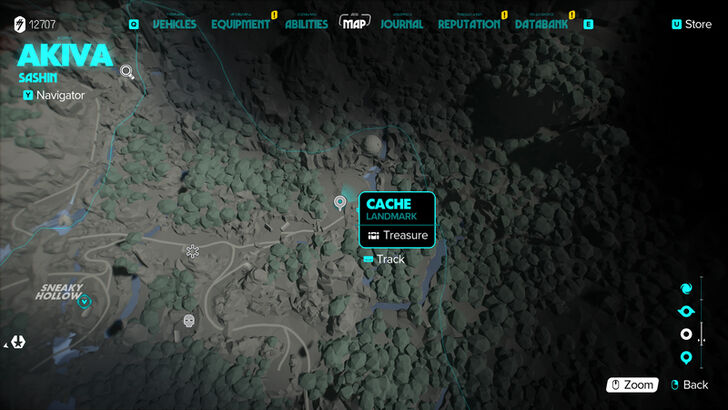
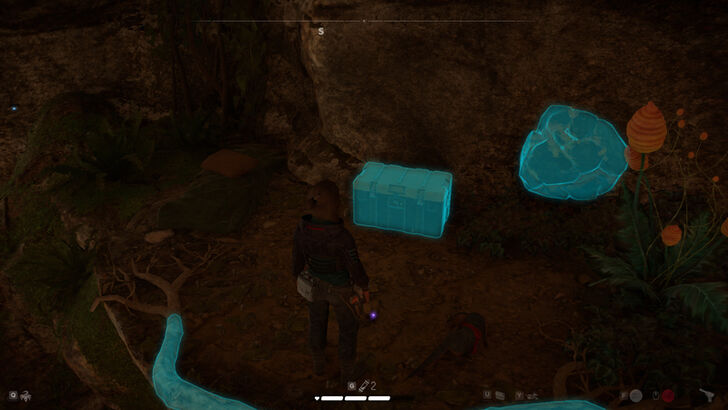
Location Name:
Cache
How to Get: The cache will be beneath a boulder with a tree on top. Reward: Bottles of Akivian Herb |
||
 |
 |
|
|
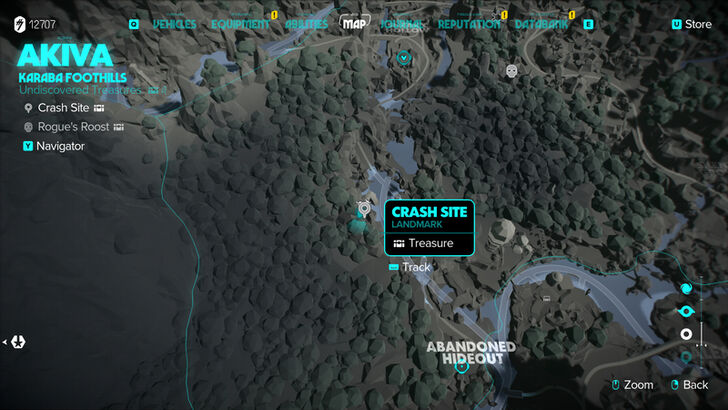
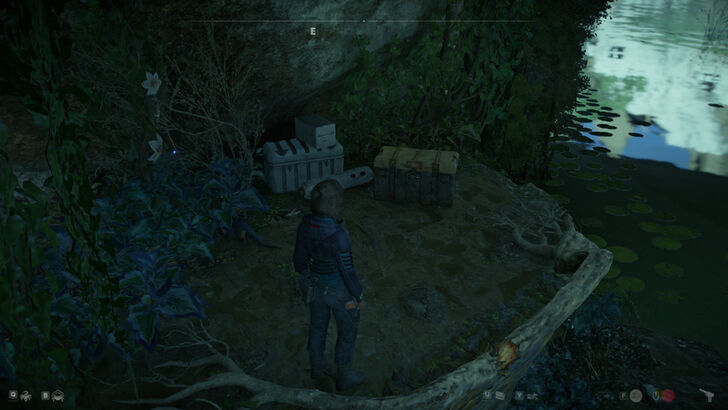
Location Name:
Crash Site
How to Get: The crate is on a platform next to a destructible rock, the player will have to use their rope to climb up here. Reward: Wildland Finish |
||
 |
 |
|
|
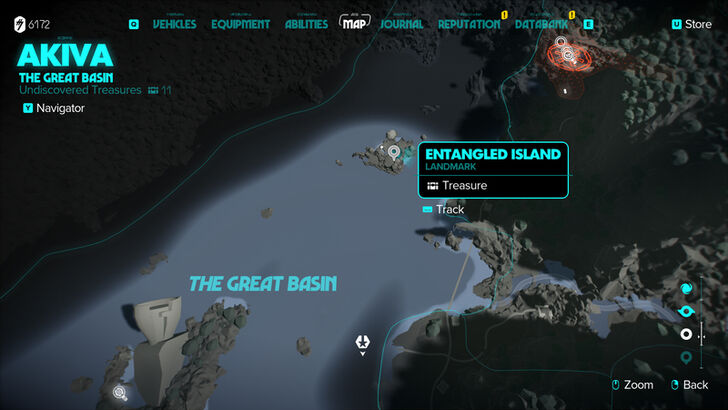
Location Name:
Entangled Island
How to Get: This crate is on top of a platform, the player will have to use their rope to climb up here. Reward: Violet Brezak Paint Job |
||
 |
 |
|
|
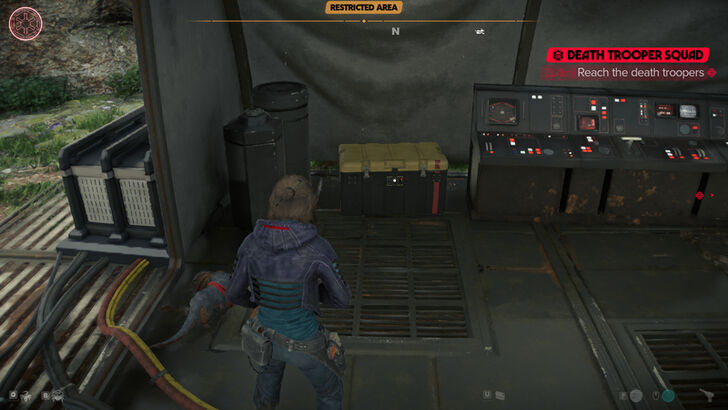
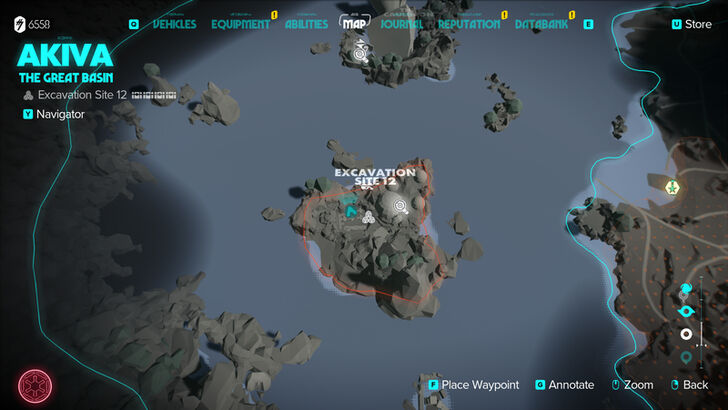
Location Name:
Excavation Site 12 Treasure 1
How to Get: The crate is located inside a tent northwest of the site. Reward: Blaster Recirculator |
||
 |
 |
|
|
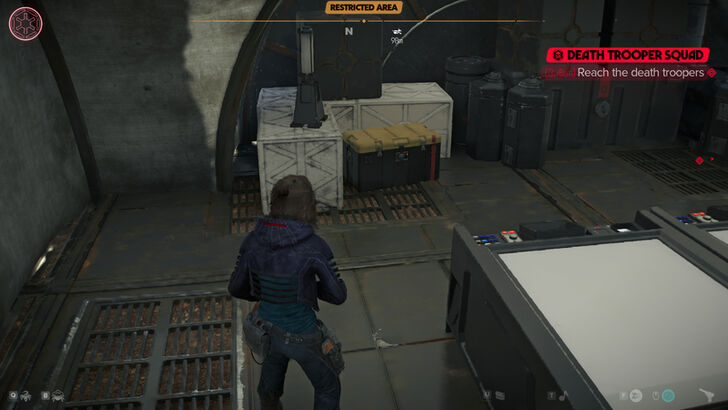
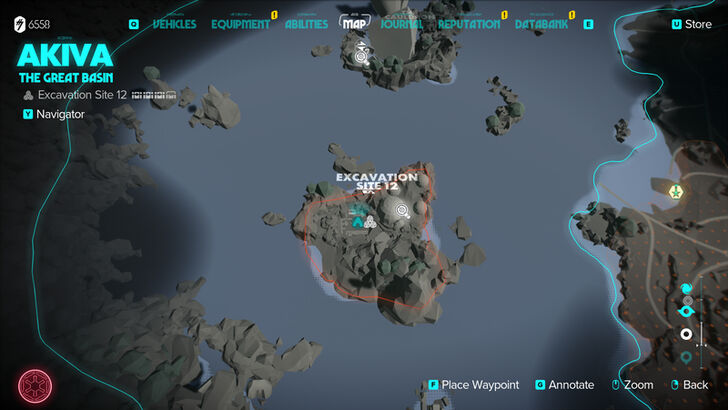
Location Name:
Excavation Site 12 Treasure 2
How to Get: The crate is located inside a tent with cameras outside. Reward: NL-02 Charge Emitter |
||
 |
 |
|
|
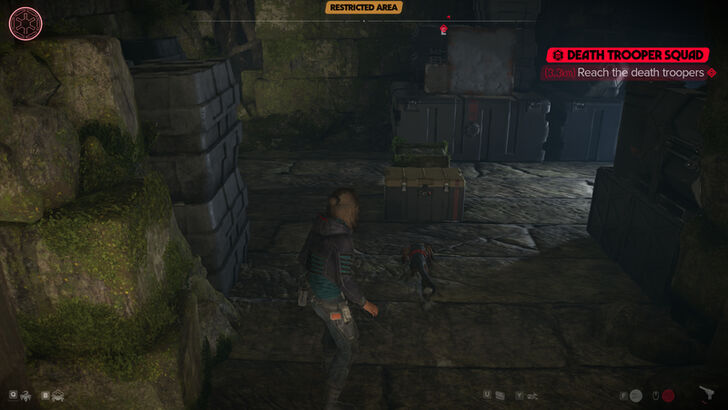
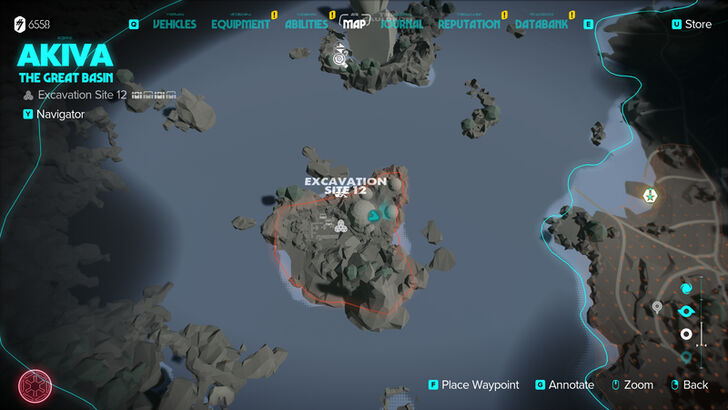
Location Name:
Excavation Site 12 Treasure 3
How to Get: The crate is located behind a laser barrier, the player will have to shoot a power cell to deactivate the barrier. Reward: Cyclone Relic |
||
 |
 |
|
|
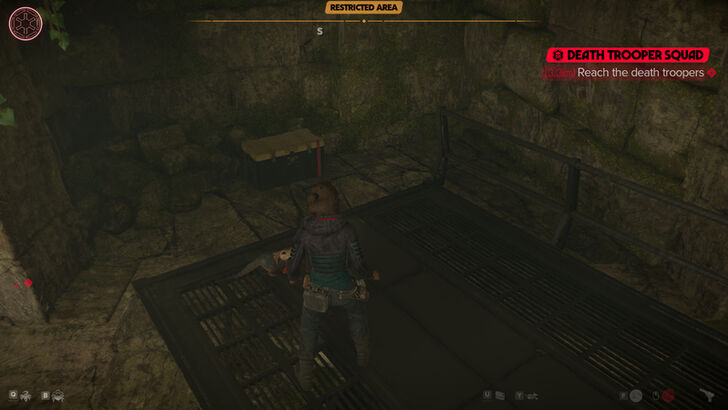
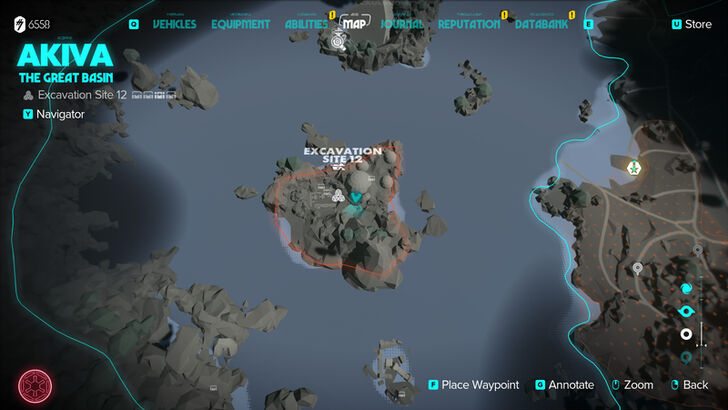
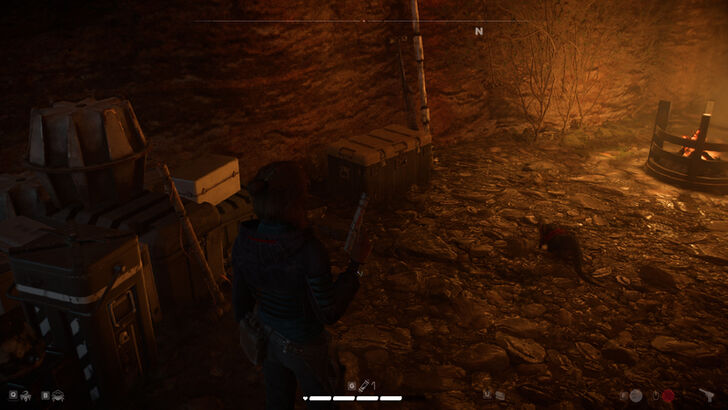
Location Name:
Excavation Site 12 Treasure 4
How to Get: After taking the turbolift down, head straight to your right and you will see the treasure Reward: Ion Cell |
||
 |
 |
|
|
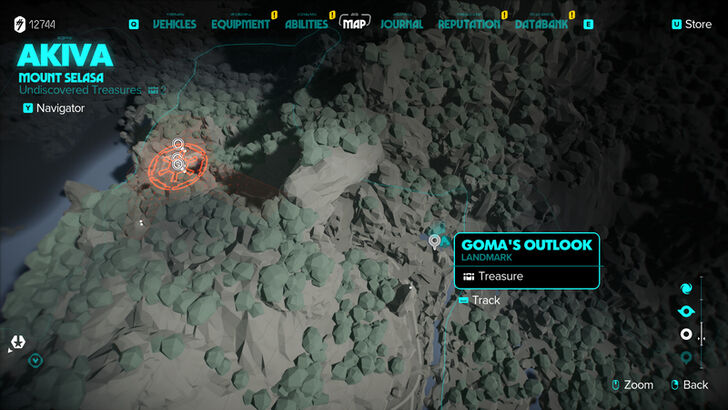
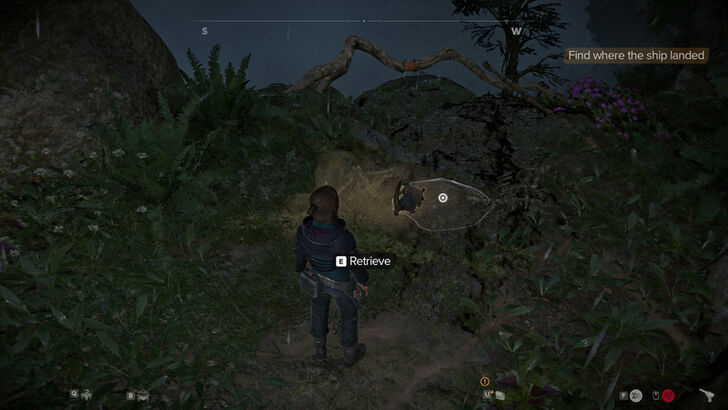
Location Name:
Goma’s Outlook
How to Get: This crate is found behind a destructible wall near a crashed ship, the player will have to use their blaster to destroy the wall. Reward: Blaster Recirculator |
||
 |
 |
|
|
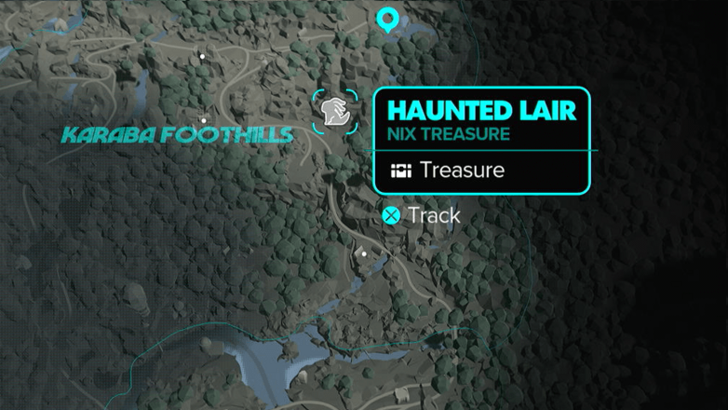
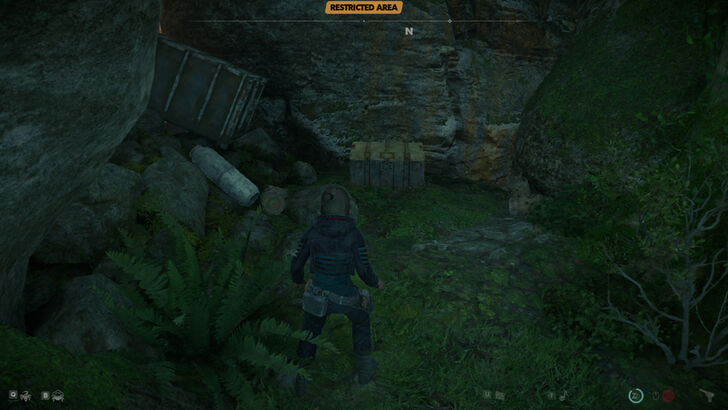
Location Name:
Haunted Lair
How to Get: Follow Nix to reach the end of the path. Reward: Smelly Bone |
||
 |
 |
|
|
Location Name:
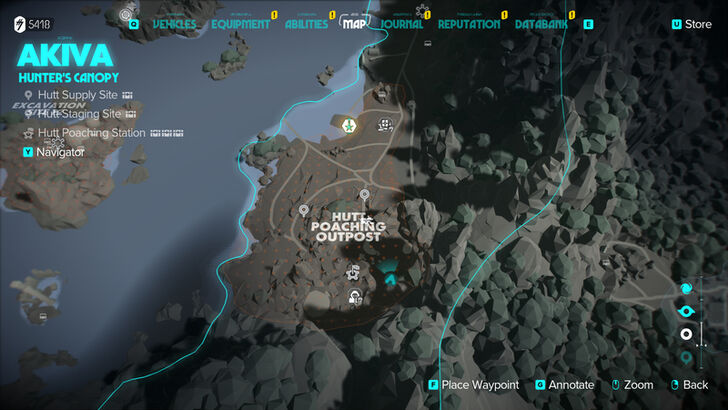
Hutt Poaching Outpost Treasure 1
How to Get: The crate is found nearby the gate where you need to use the Fusioncutter. Reward: Republic Paint Job |
||
 |
 |
|
|
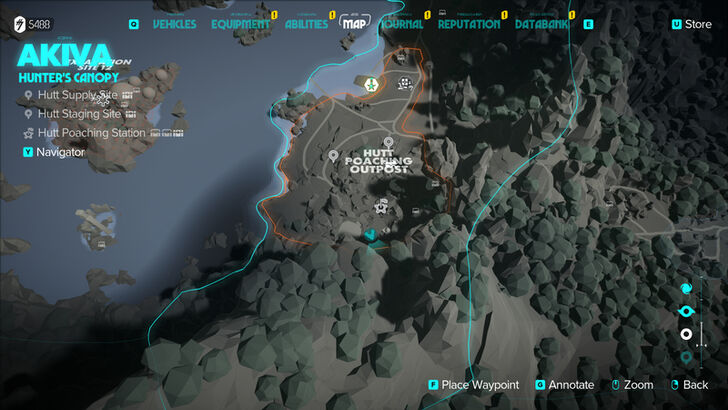
Location Name:
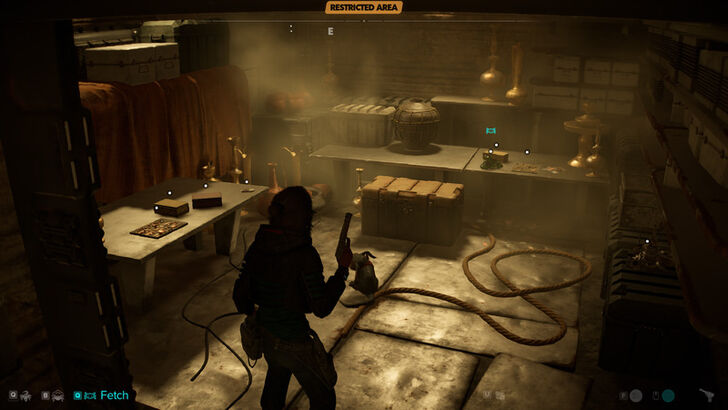
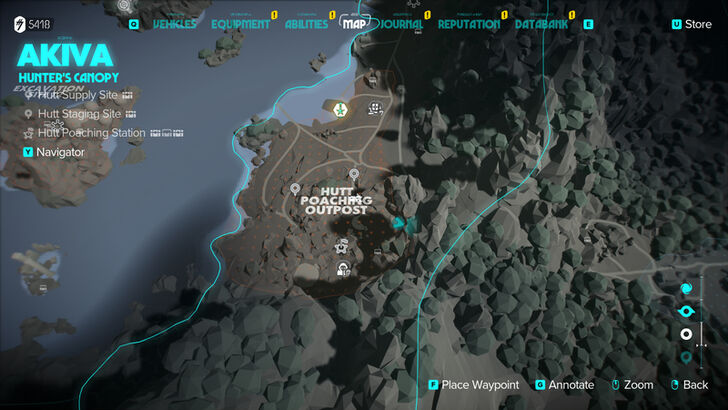
Hutt Poaching Outpost Treasure 2
How to Get: The crate is found in a structure’s basement, locked behind a laser barrier. The player will have to use Nix to open the shutter and shoot with their Ion blaster to remove the laser barrier. Reward: Akiva Thief Belt |
||
 |
 |
|
|
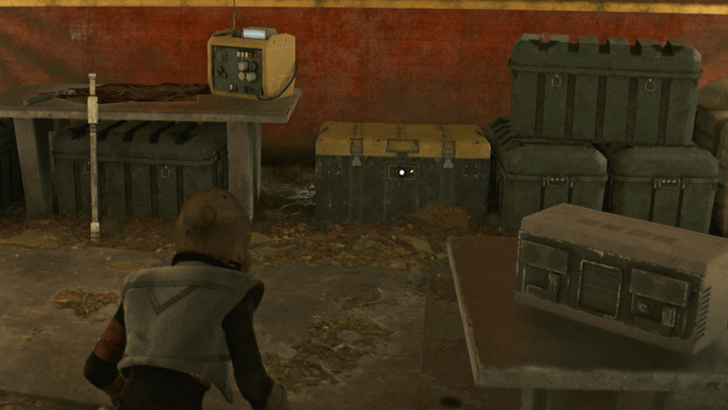
Location Name:
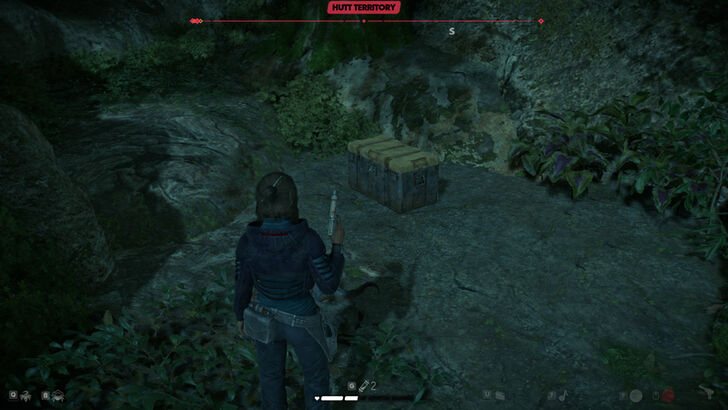
Hutt Poaching Outpost Treasure 3
How to Get: The crate is found after climbing up a wall. Reward: H-M Engine Power Core |
||
 |
 |
|
|
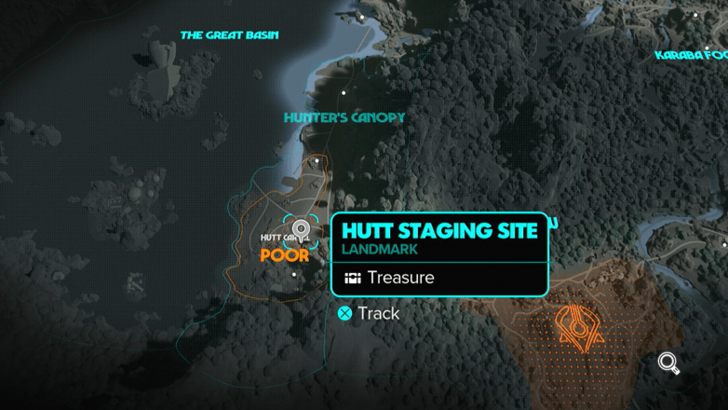
Location Name:
Hutt Staging Site
How to Get: The crate can be found in a tent deep within Hutt Territory in Akiva. Reward: Tan Feeler Wrappings |
||
 |
 |
|
|
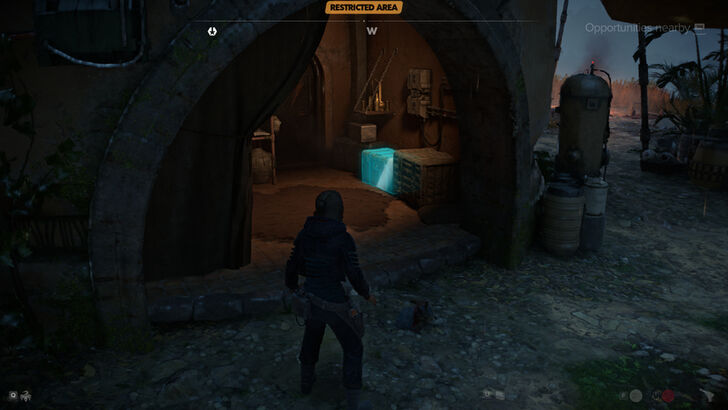
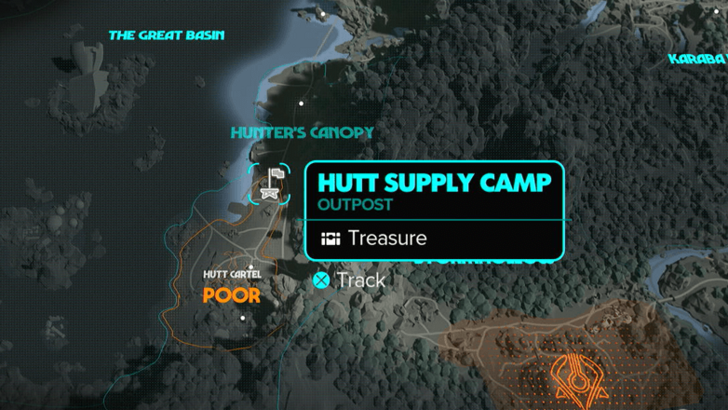
Location Name:
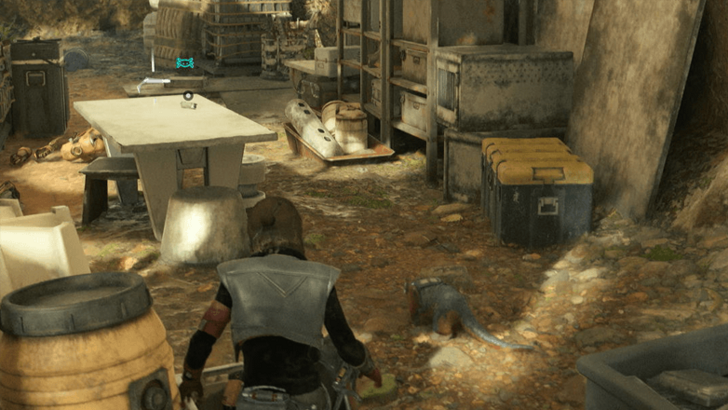
Hutt Supply Camp
How to Get: The crate is inside a structure with guards. Reward: Dud IV Trinket |
||
 |
 |
|
|
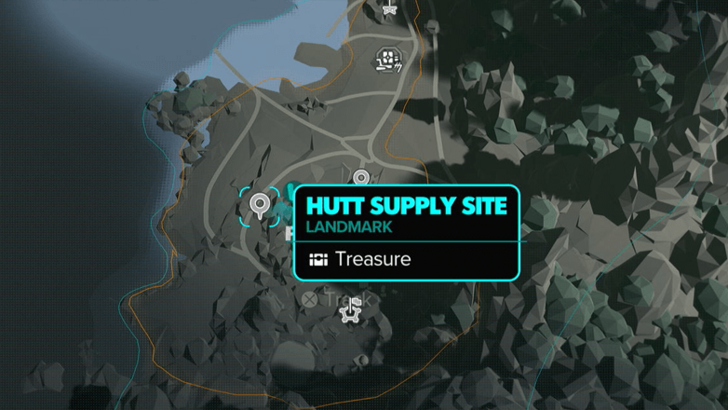
Location Name:
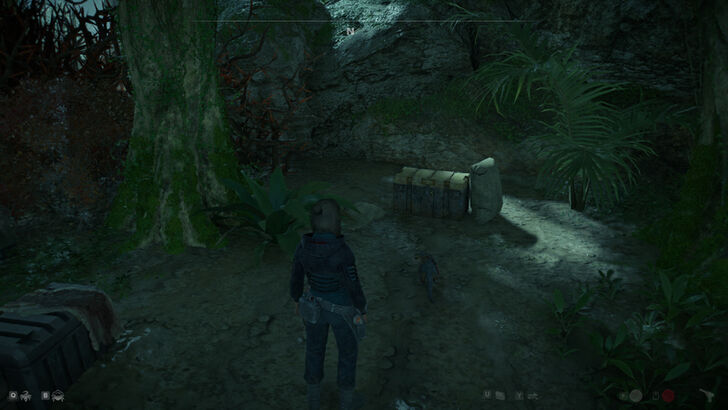
Hutt Supply Site
How to Get: The crate can be found in a tent deep within Hutt Territory in Akiva. Reward: Hutt Paint Job |
||
 |
 |
|
|
Location Name:
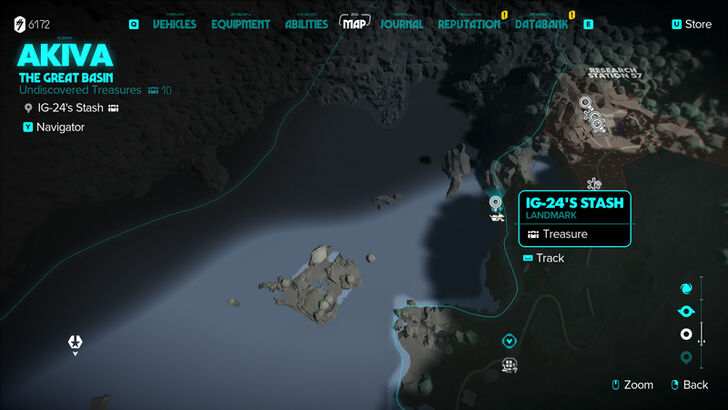
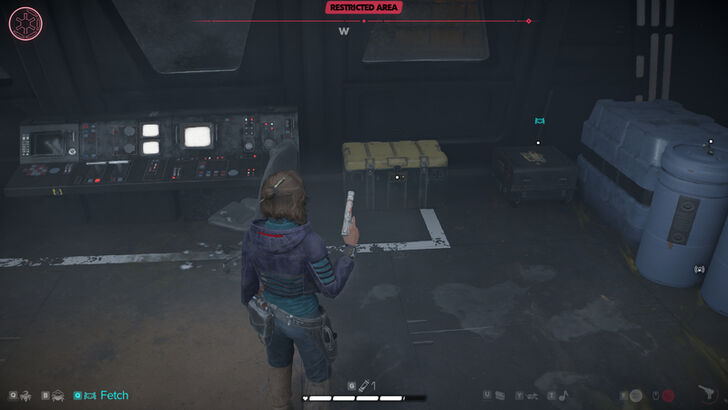
IG-24’s Stash
How to Get: This crate is in a small camp on a platform, the player will have to use their rope to climb up here. Reward: Cloudscape Finish |
||
 |
 |
|
|
Location Name:
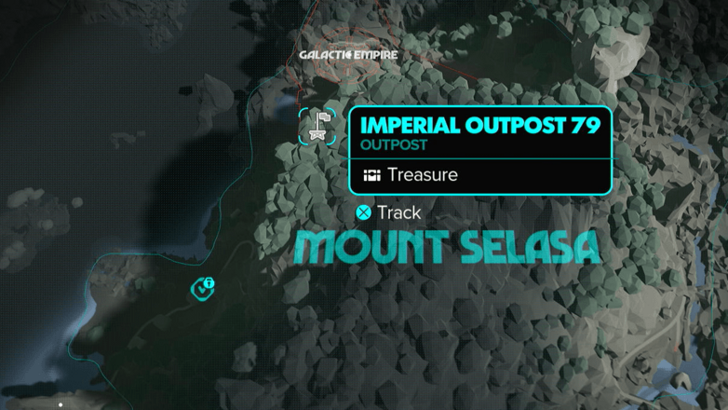
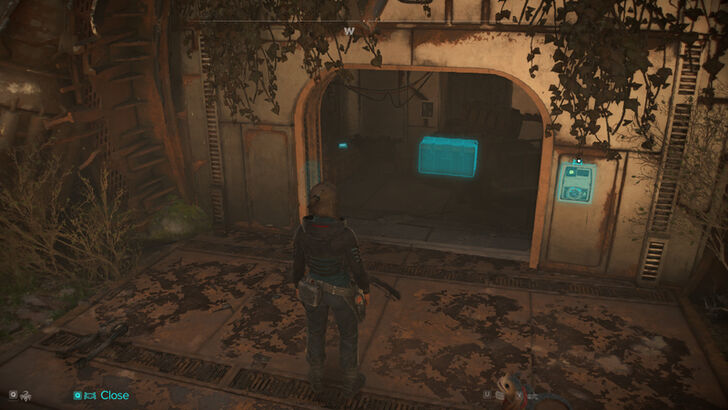
Imperial Outpost 79
How to Get: The crate is found inside a locked Outpost, player will have to use Nix to open the shutter outside and shoot with their Ion blaster to unlock the door. Reward: IT-0 Interrogation Unit |
||
 |
 |
|
|
Location Name:
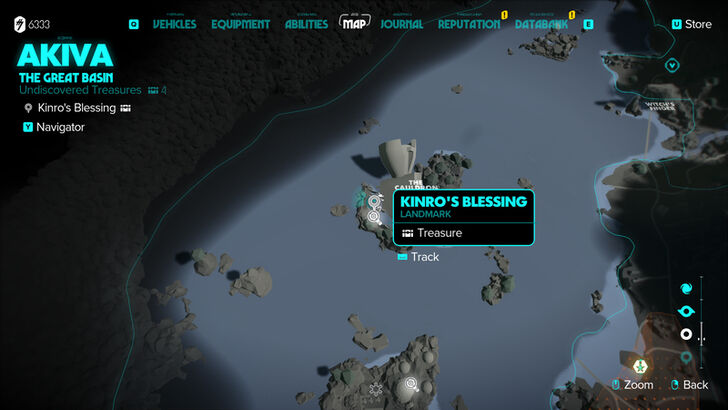
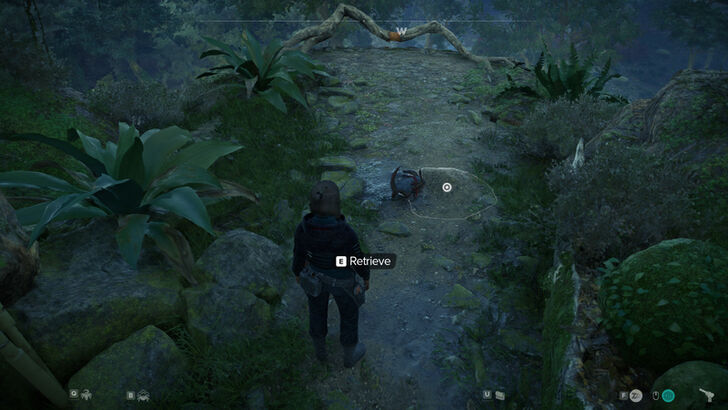
Kinro’s Blessing
How to Get: The crate is inside a locked room, the player will have to use their Data Spike to unlock the door Reward: Clear Detail Finish |
||
 |
 |
|
|
Location Name:
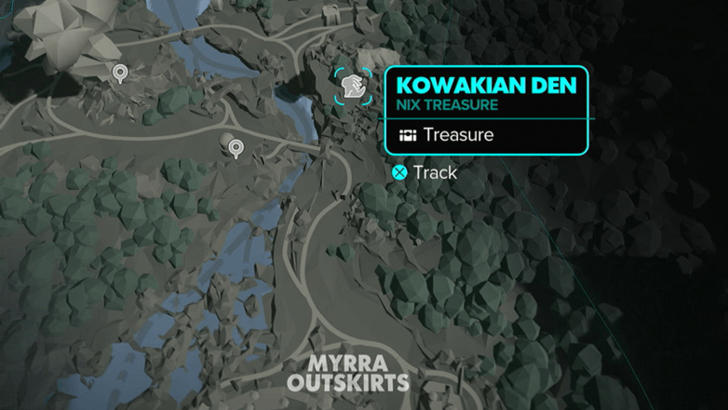
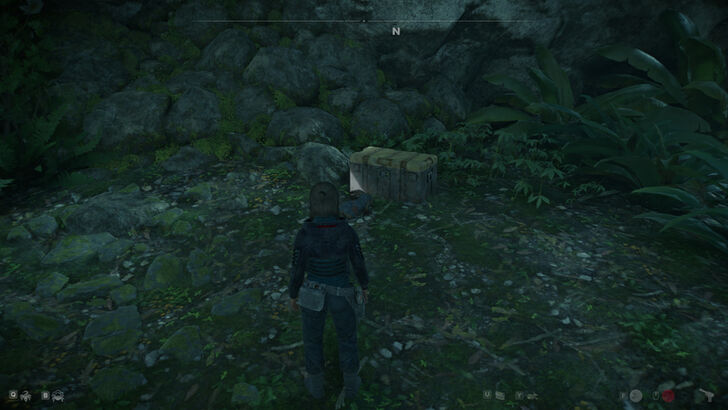
Kowakian Den
How to Get: Keep on following Nix to reach the treasure. Reward: Old Money |
||
 |
 |
|
|
Location Name:
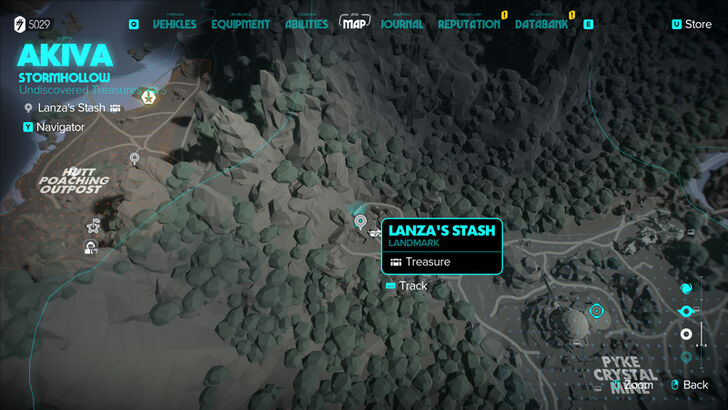
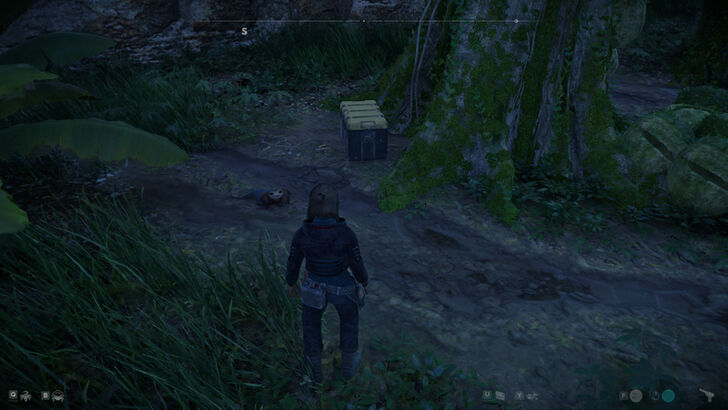
Lanza’s Stash
How to Get: This crate is near the area where the player encounters a beast master, you will need to climb up rocks to get here. Reward: Credits |
||
 |
 |
|
|
Location Name:
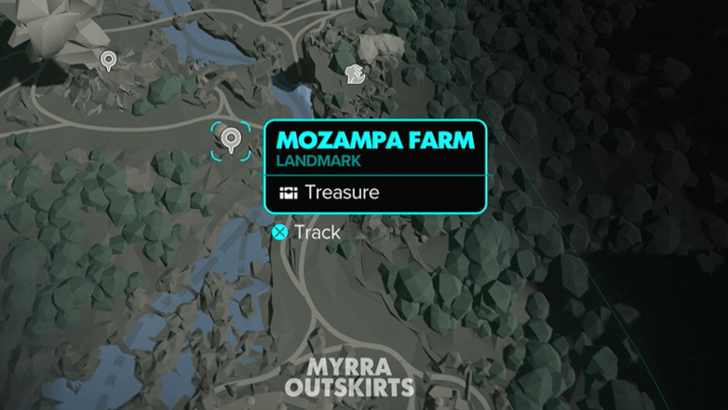
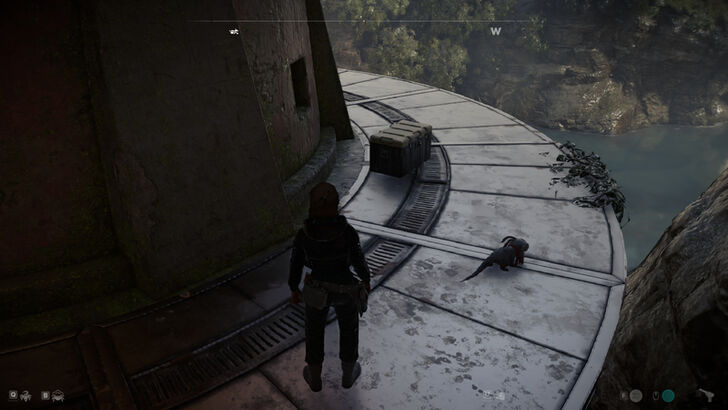
Mozampa Farm
How to Get: The crate is found next to a big tree with Stormtroopers. Reward: Saphire Camtono Trophy |
||
 |
 |
|
|
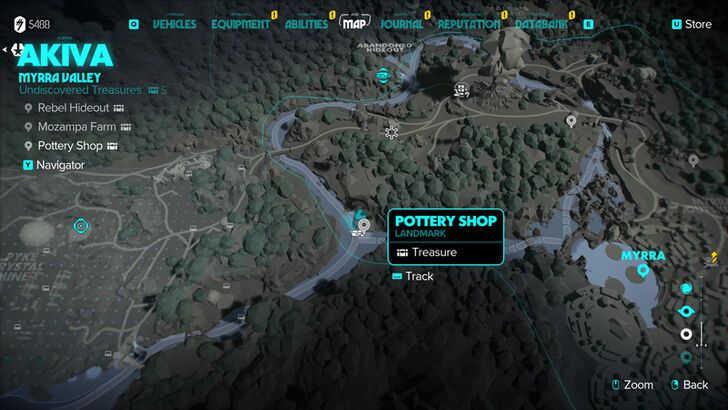
Location Name:
Pottery Shop
How to Get: The crate is found at the top of a structure, the player will have to use their Ion Blaster to lower down the ladder. Reward: Scout II Trinket |
||
 |
 |
|
|
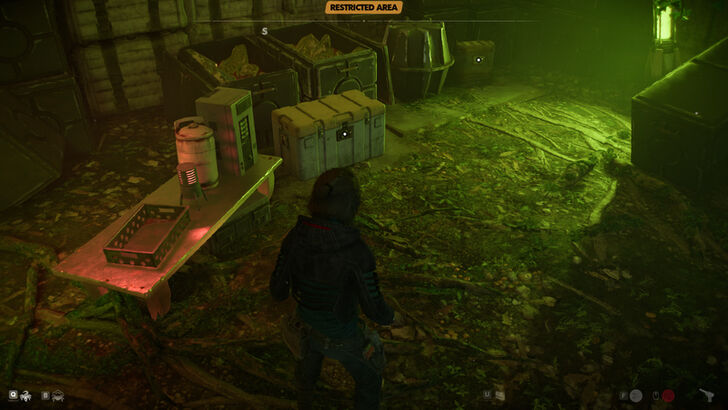
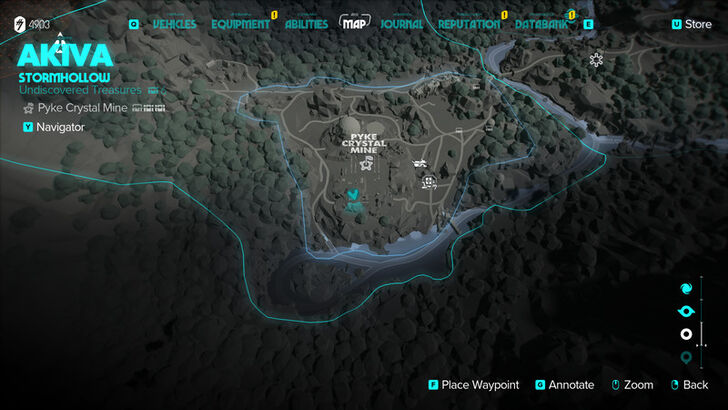
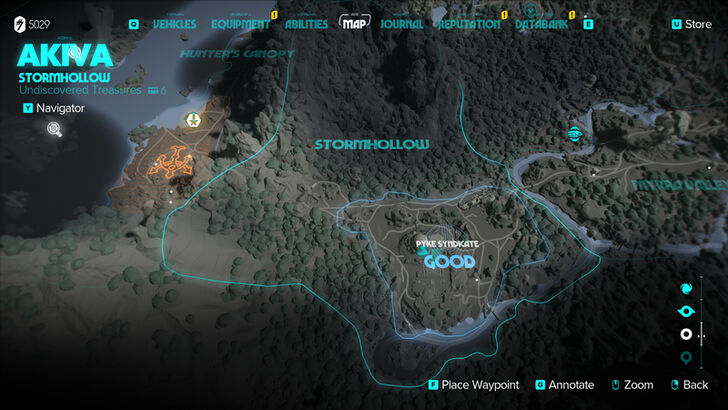
Location Name:
Pyke Crystal Mine Treasure 1
How to Get: The crate is behind a laser barrier protected by many guards, the player will have to get a keycard from one of the guards. Reward: Akiva Thief Vest |
||
 |
 |
|
|
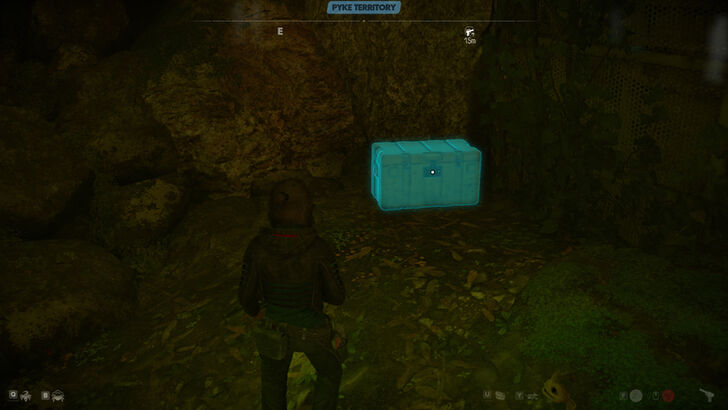
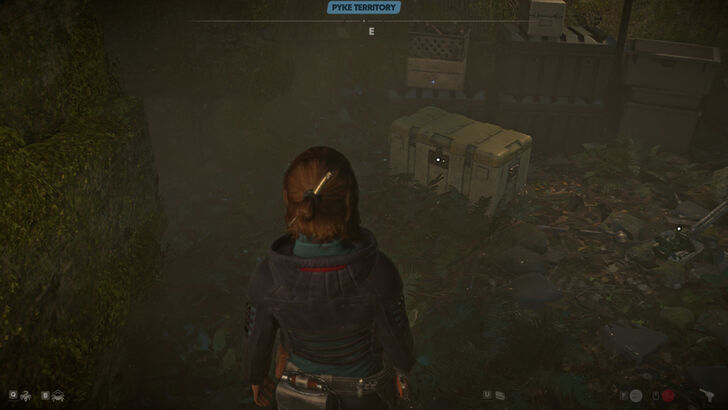
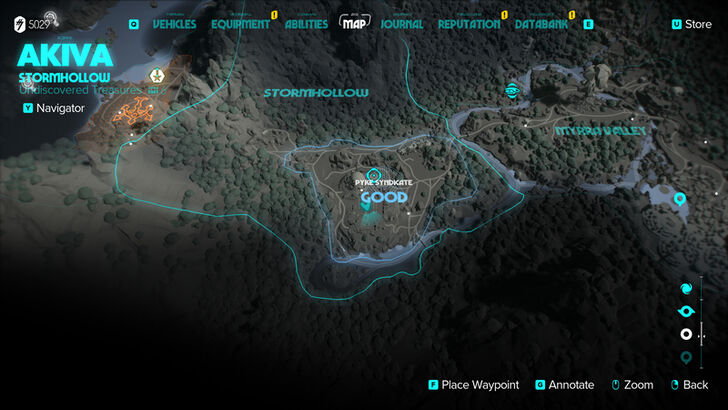
Location Name:
Pyke Crystal Mine Treasure 2
How to Get: The crate is on the right side where the mine carts are parked. Reward: Seroryte Ore |
||
 |
 |
|
|
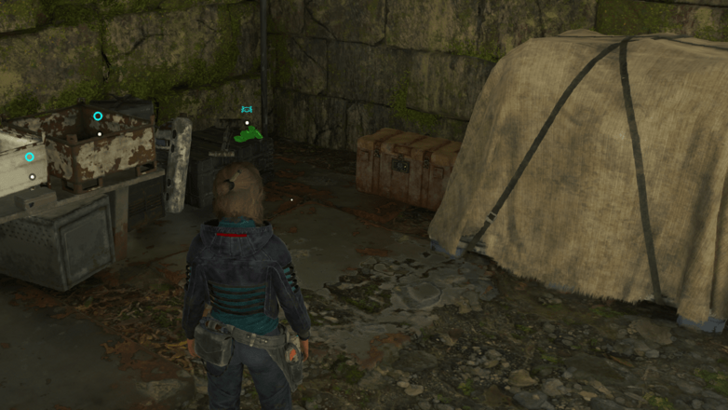
Location Name:
Pyke Crystal Mine Treasure 3
How to Get: The crate is behind a gate in the ruins of Pyke Crystal Mine, the player will need a Fusioncutter to get the treasure. Reward: H-M Engine Power Core |
||
 |
 |
|
|
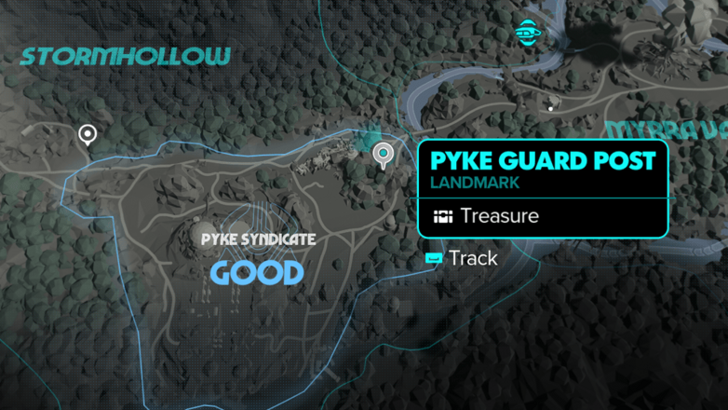
Location Name:
Pyke Guard Post
How to Get: The crate will be in the corner of a room inside the guard post. Reward: Credits |
||
 |
 |
|
|
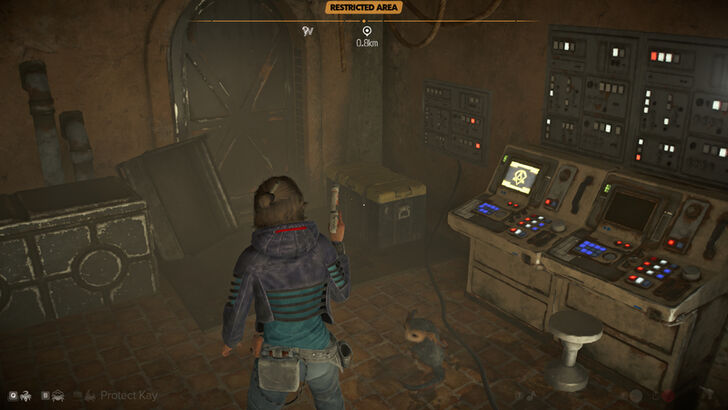
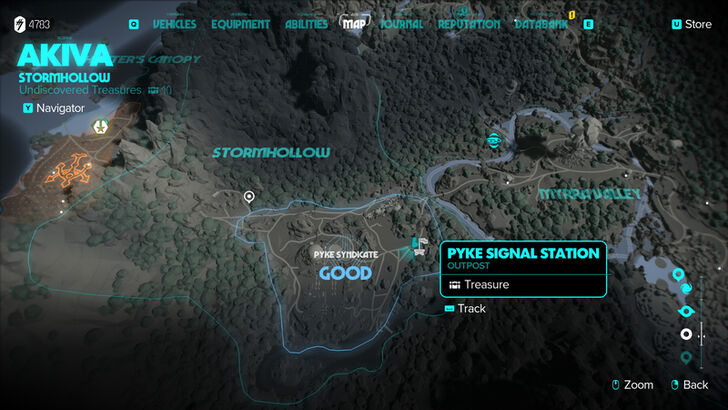
Location Name:
Pyke Signal Station
How to Get: The crate will be by a door and computer terminal inside the station. Reward: Midnight Paint Job |
||
 |
 |
|
|
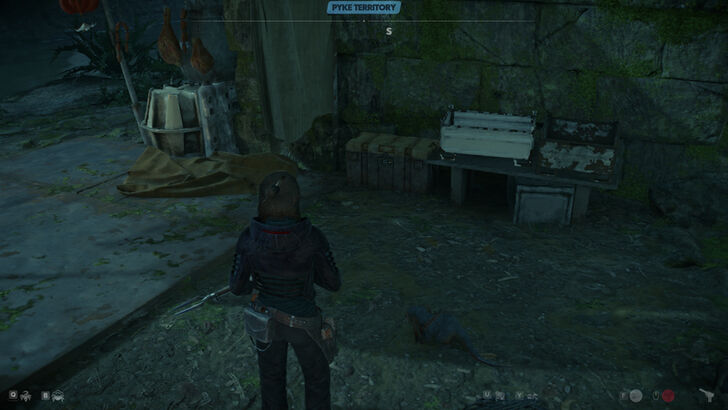
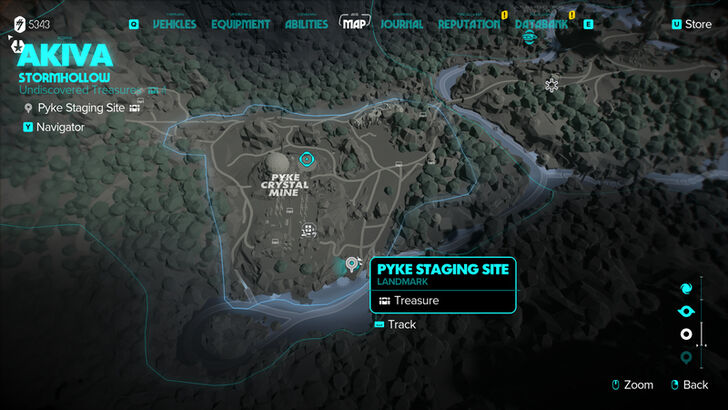
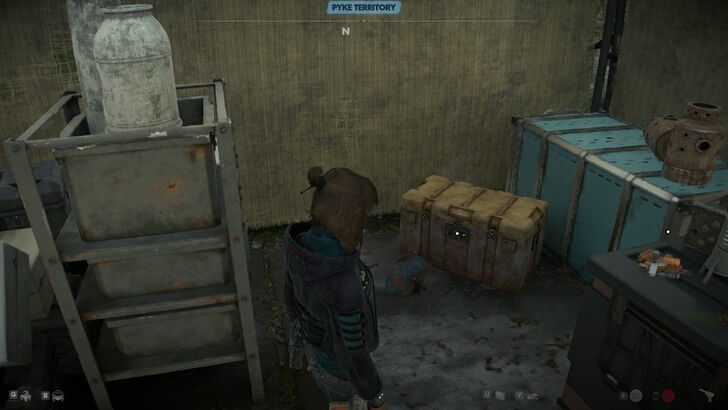
Location Name:
Pyke Staging Site
How to Get: This crate is in a tent on the ruins near the river. Reward: Amber Stripe Finish |
||
 |
 |
|
|
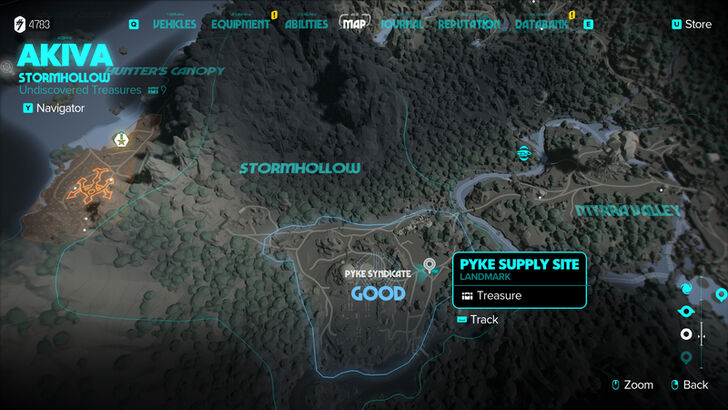
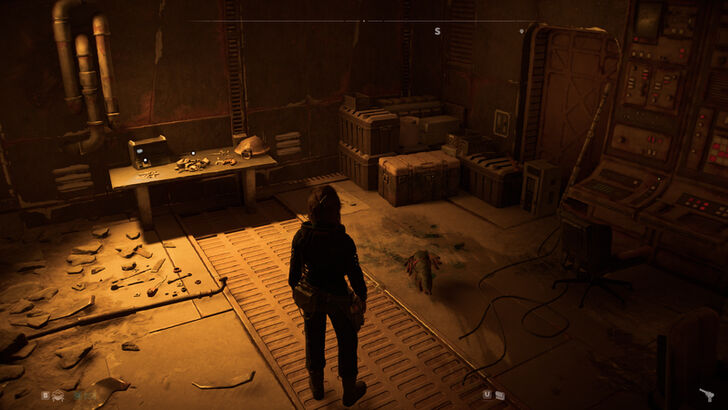
Location Name:
Pyke Supply Site
How to Get: The crate will be inside a tent guarded by Pykes. Reward: Direct-Energy Circuit |
||
 |
 |
|
|
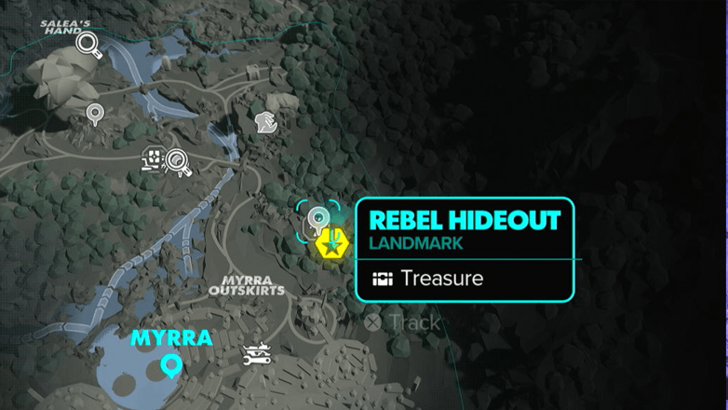
Location Name:
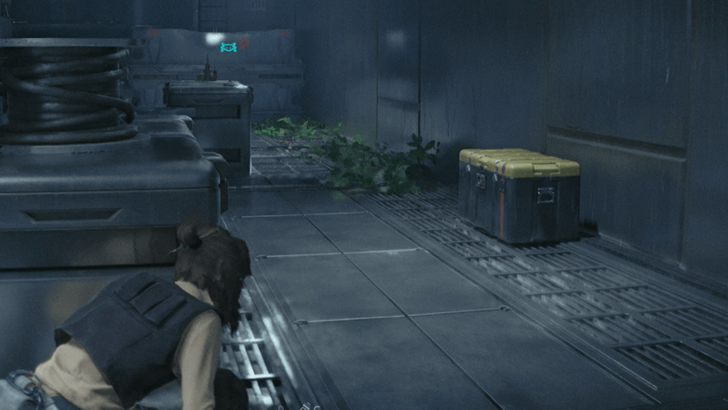
Rebel Hideout
How to Get: This area is accessible in The Legacy main quest. The crate is found behind a locked room in the second floor of Rebel Hideout, the player will have to use their Data Spike to unlock the door. Reward: Iron Rebel Mask Trophy |
||
 |
 |
|
|
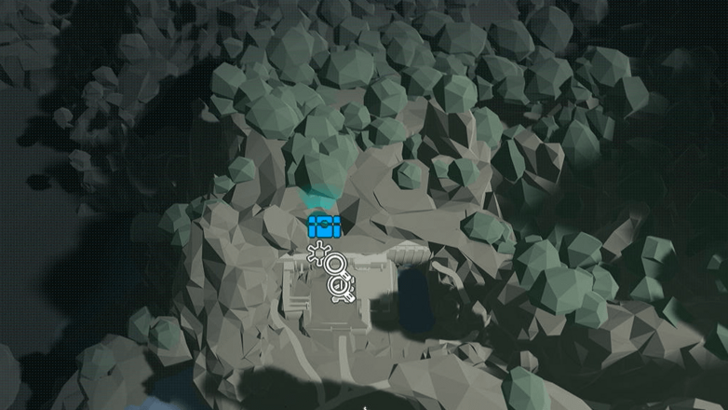
Location Name:
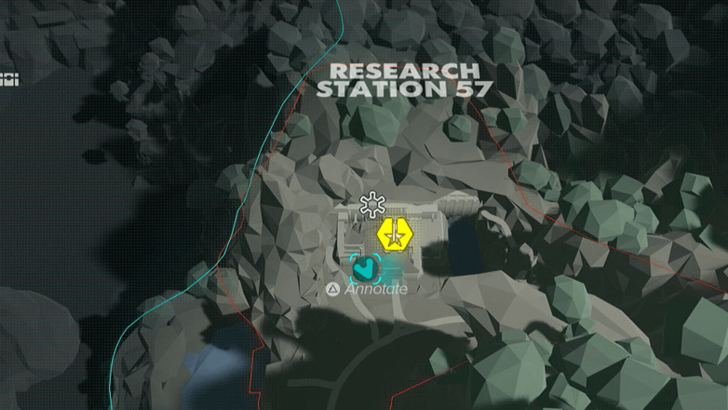
Research Station 57 Treasure 1
How to Get: This crate is found near the entrance on the west side. Reward: MSE Droid Trophy |
||
 |
 |
|
|
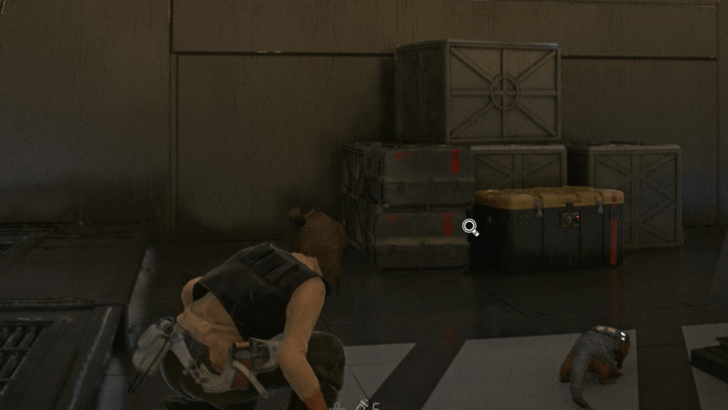
Location Name:
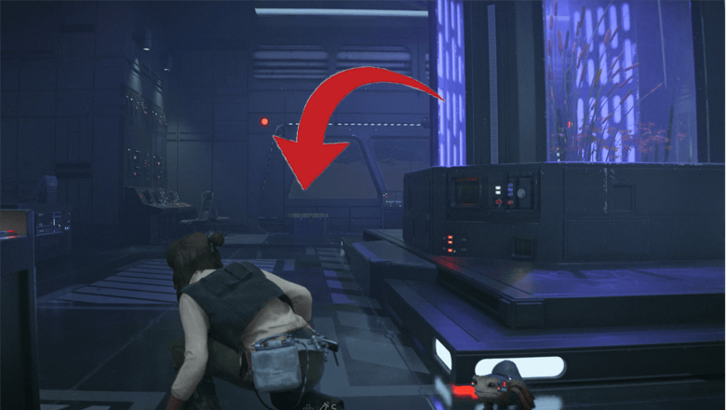
Research Station 57 Treasure 2
How to Get: This crate is found in one of the labs with a plant specimen in the middle of the room. Reward: Credits |
||
 |
 |
|
|
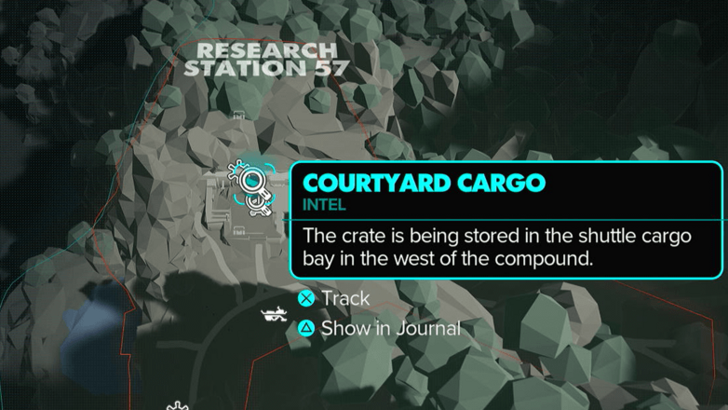
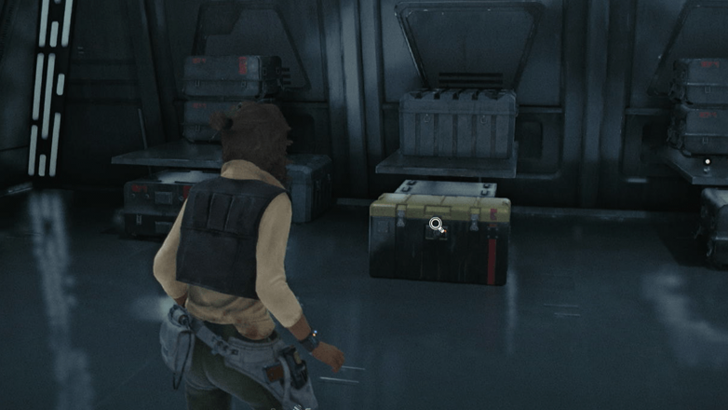
Location Name:
Research Station 57 Treasure 3
How to Get: This crate is found outside in the courtyard. It is also tagged as the Courtyard Cargo intel. Reward: Ion Cell |
||
 |
 |
|
|
Location Name:
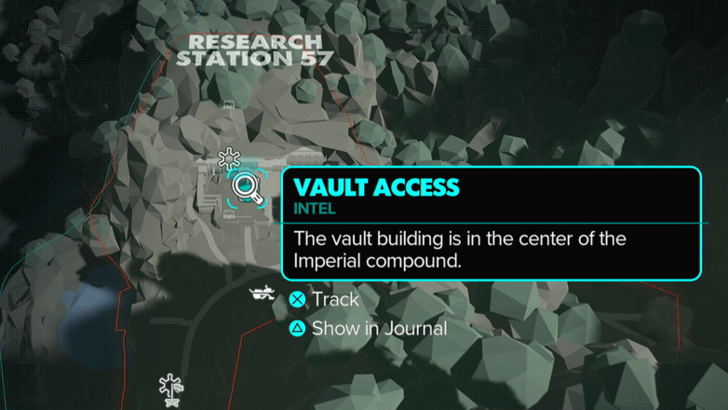
Research Station 57 Treasure 4
How to Get: This crate is found inside the vault in the middle of the compound’s courtyard. Reward: Onyx Coating |
||
 |
 |
|
|
Location Name:
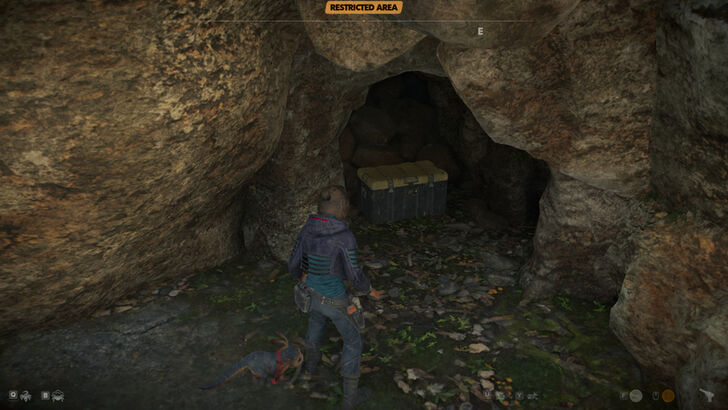
Rogue’s Roost
How to Get: The crate is hidden behind a destructible rock, player will have to use their blaster to destroy the rock. Reward: Kowak Ranger Paint Job |
||
 |
 |
|
|
Location Name:
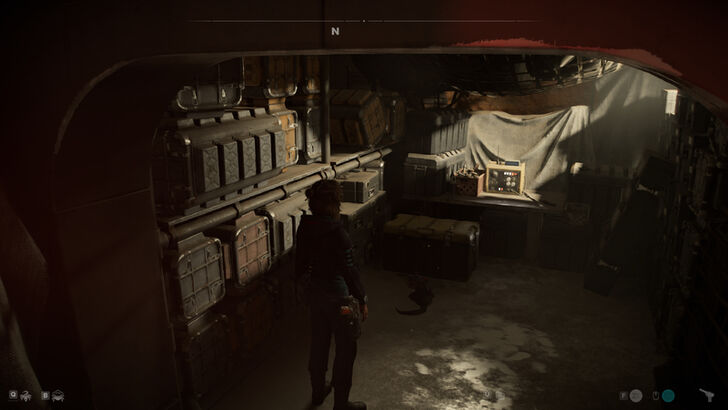
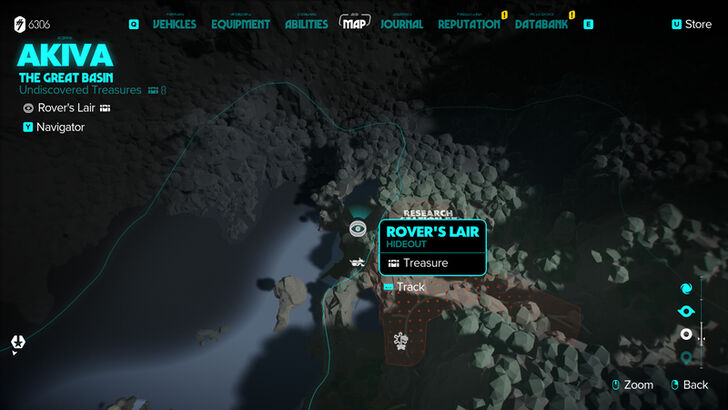
Rover’s Lair
How to Get: The crate is in a room where you have to enter a vent, the player will have to use their Ion Blaster to open the vent. Reward: Flux Compressor |
||
 |
 |
|
|
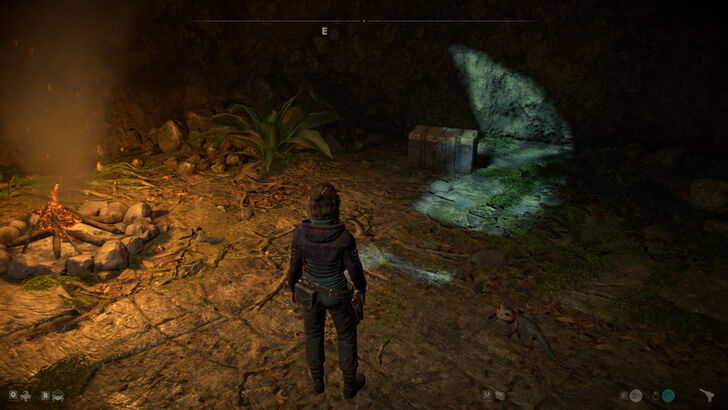
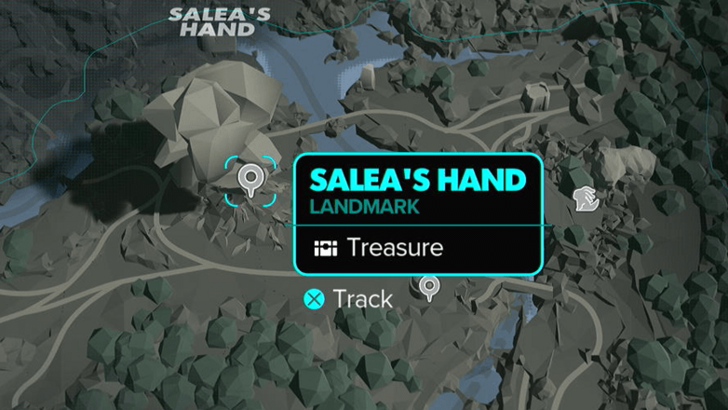
Location Name:
Salea’s Hand
How to Get: The crate is found on a small camp, the entrance to this camp can be found by heading left from the traveling merchant. Reward: Jug Trinket |
||
 |
 |
|
|
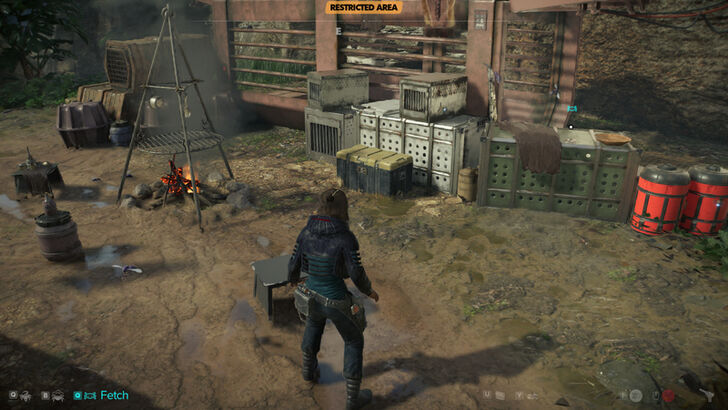
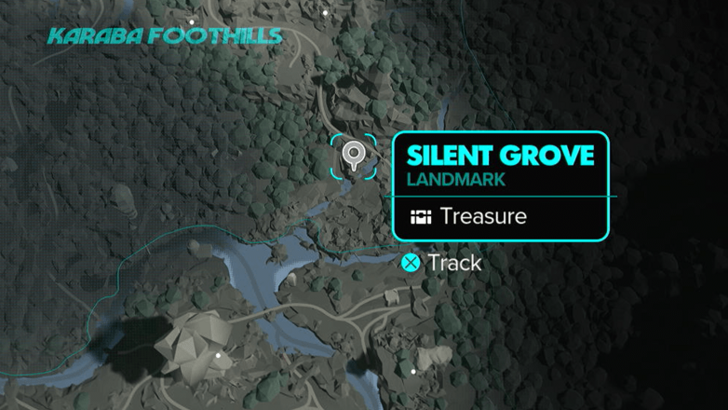
Location Name:
Silent Grove
How to Get: The crate is found in a camp next to the campfire. Reward: Blue Convor Paint Job |
||
 |
 |
|
|
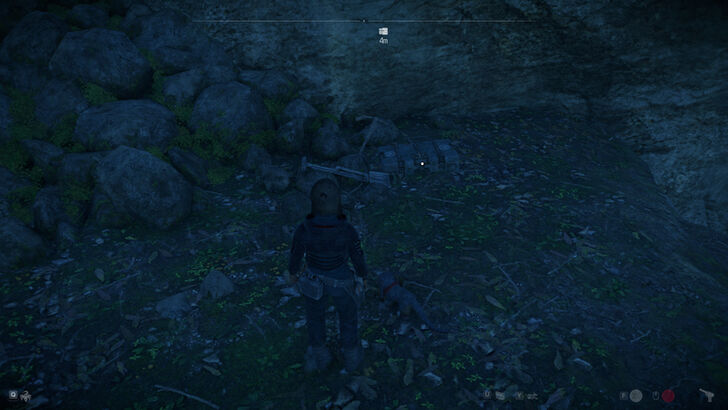
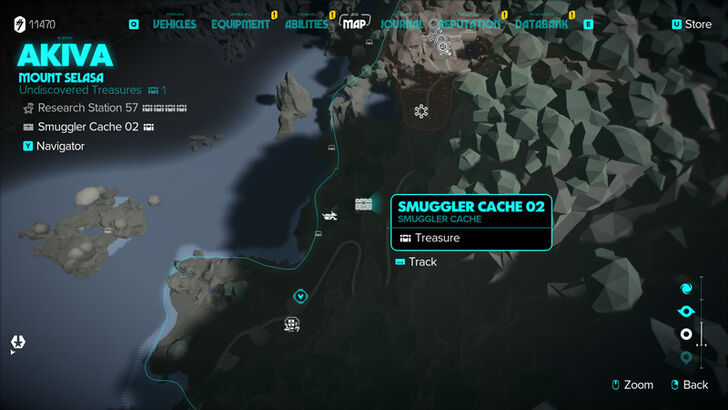
Location Name:
Smuggler Cache 02
How to Get: The cache is buried treasure on a platform, player will have to climb up and swing using the rope in order to get here. Reward: Materials and Valuables |
||
 |
 |
|
|
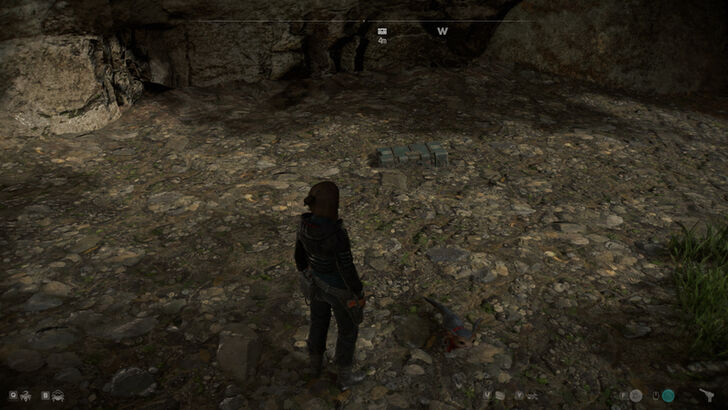
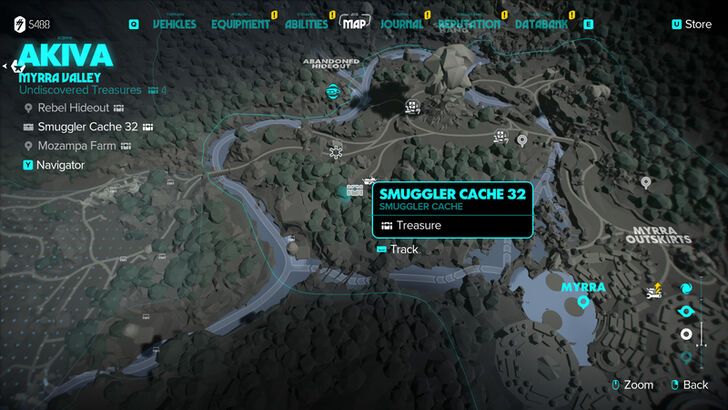
Location Name:
Smuggler Cache 32
How to Get: The cache is found next to a wall with two boulders nearby. Reward: Materials and Valuables |
||
 |
 |
|
|
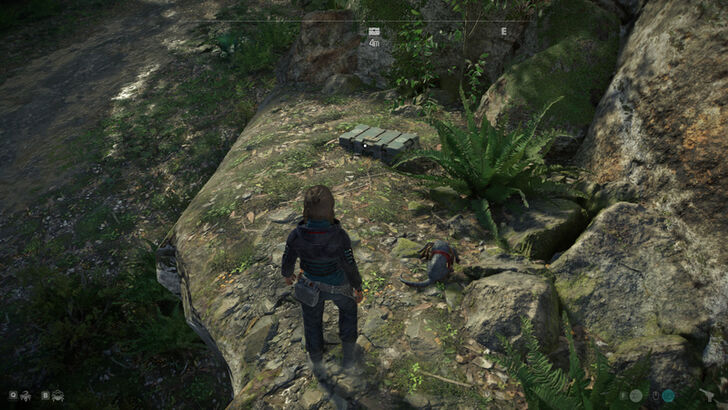
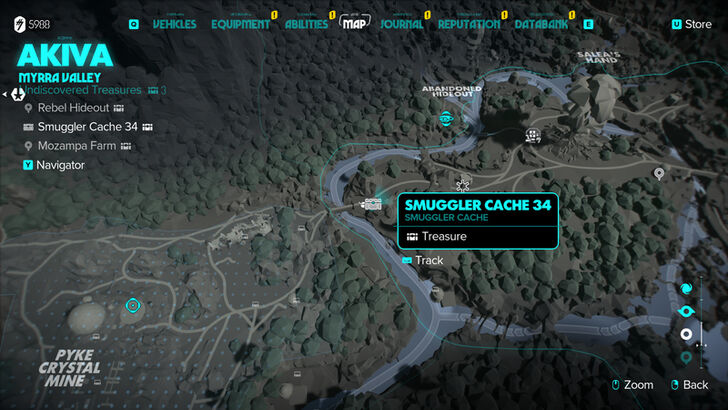
Location Name:
Smuggler Cache 34
How to Get: The cache is on a platform, the player will have to use their rope to climb up here. Reward: Materials and Valuables |
||
 |
 |
|
|
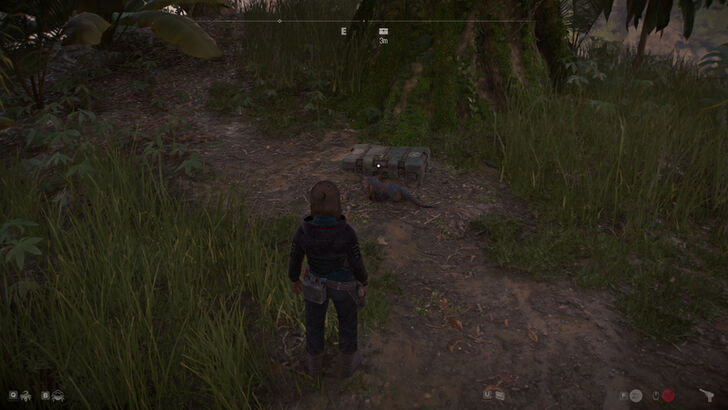
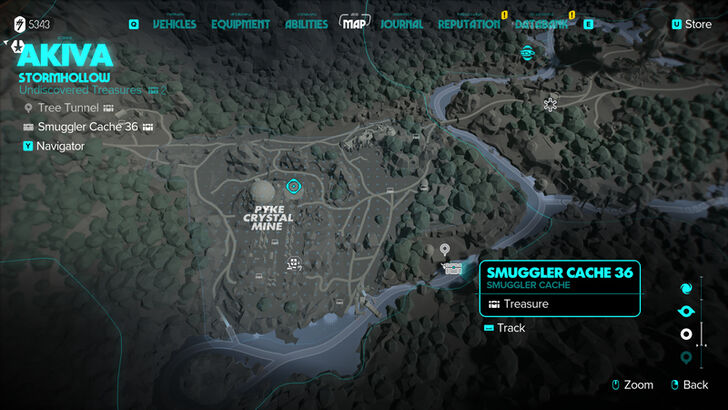
Location Name:
Smuggler Cache 36
How to Get: This crate is in top of a boulder in Tree Tunnel. Reward: Materials and Valuables |
||
 |
 |
|
|
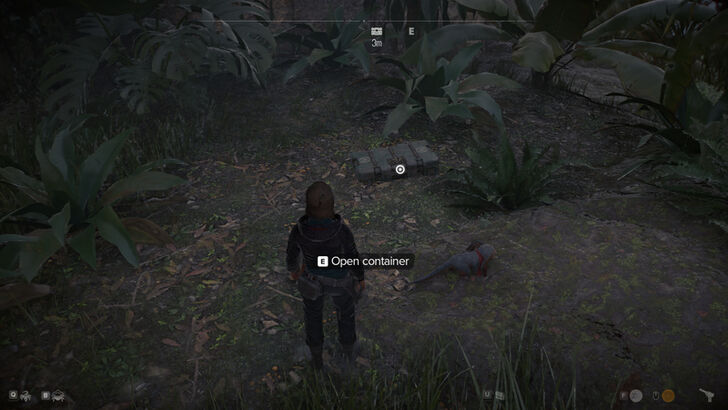
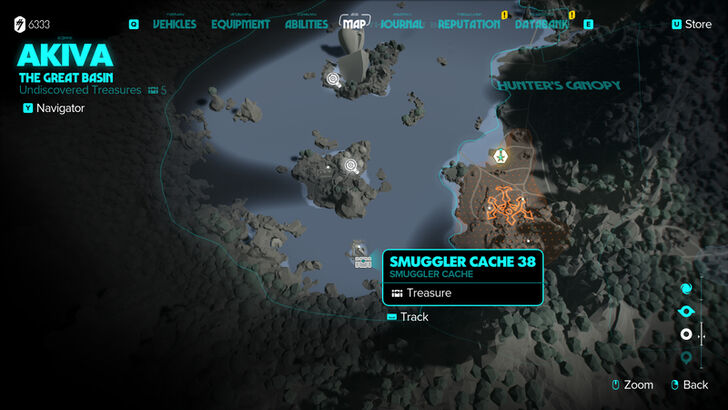
Location Name:
Smuggler Cache 38
How to Get: The crate is located in a small island, the player will have to climb to the top, break the wall with the blaster, and then use the rope to lower yourself down to reach the treasure. Reward: Materials and Valuables |
||
 |
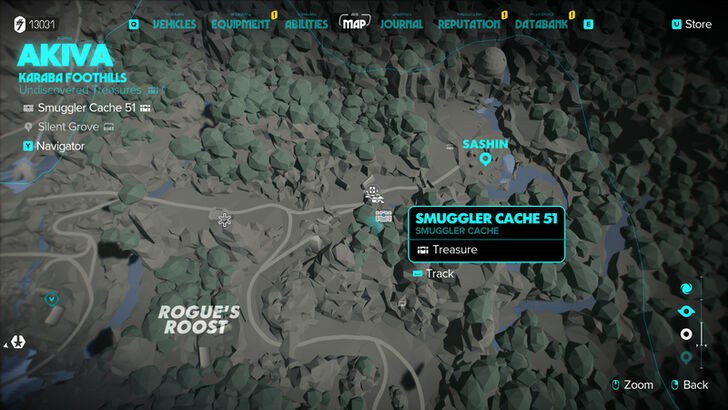 |
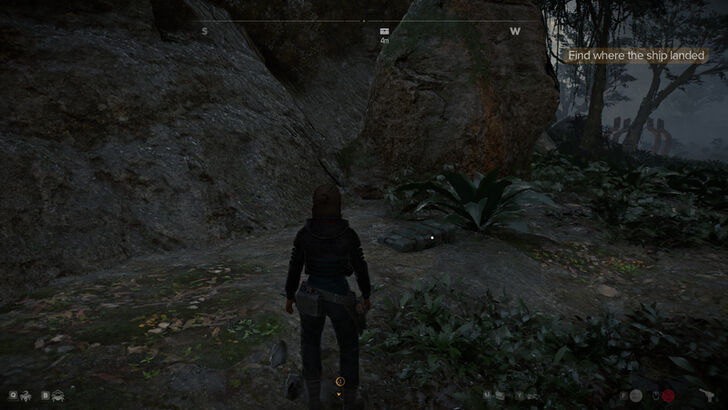
|
|
Location Name:
Smuggler Cache 51
How to Get: The cache is buried next to a boulder west of Sashin. Reward: Materials and Valuables |
||
 |
 |
|
|
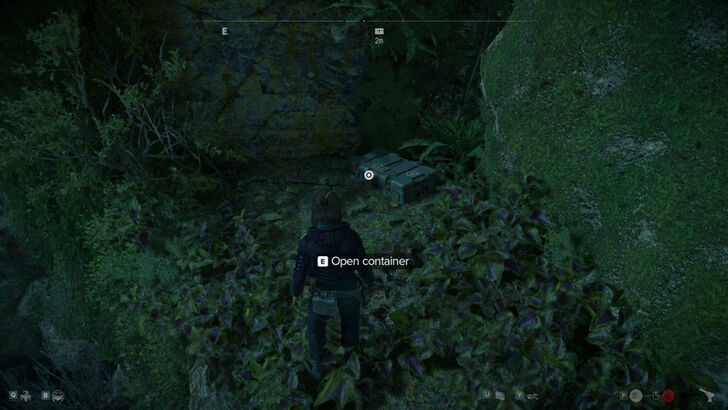
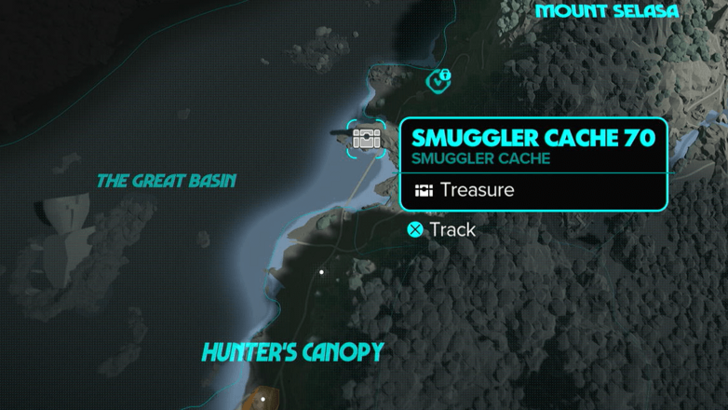
Location Name:
Smuggler Cache 70
How to Get: The player will have to use their rope to swing into a platform, and then drop down to another platform to get to the treasure Reward: Materials and Valuables |
||
 |
 |
|
|
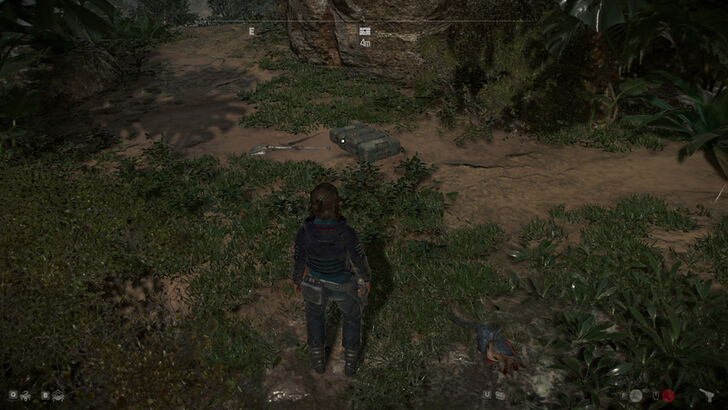
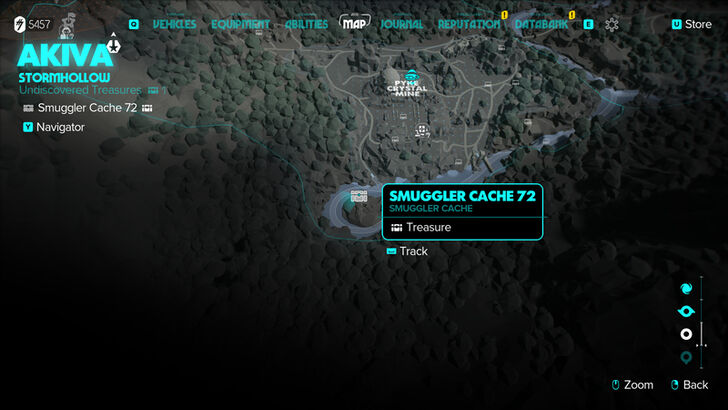
Location Name:
Smuggler Cache 72
How to Get: This crate is on a small island-like area, the player will have to climb up rocks to get here. Reward: Materials and Valuables |
||
 |
 |
|
|
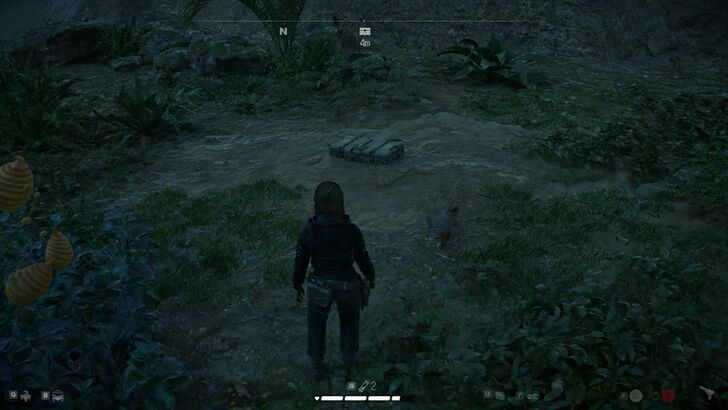
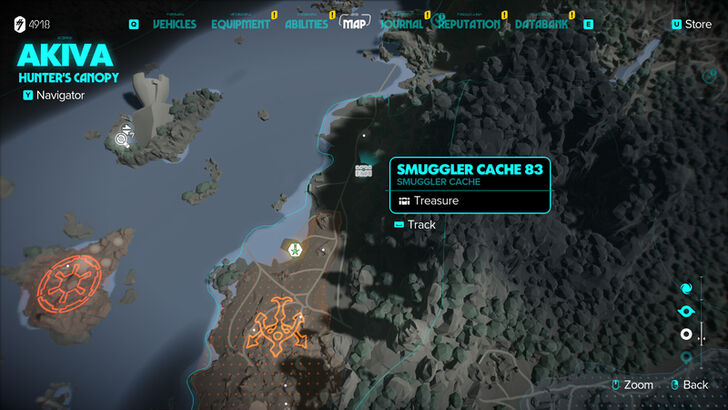
Location Name:
Smuggler Cache 83
How to Get: The crate is found on an elevated area near the road. Reward: Materials and Valuables |
||
 |
 |
|
|
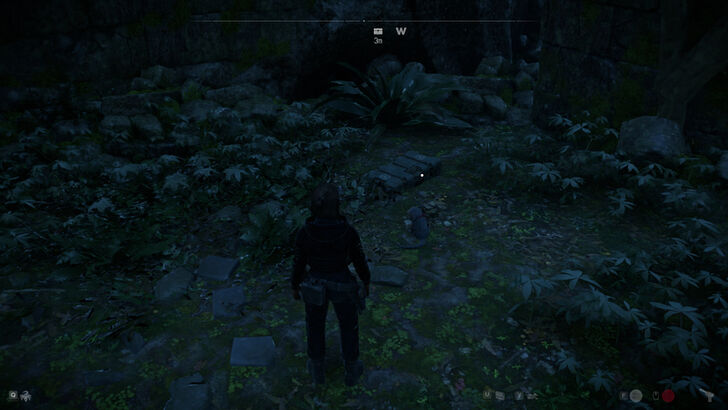
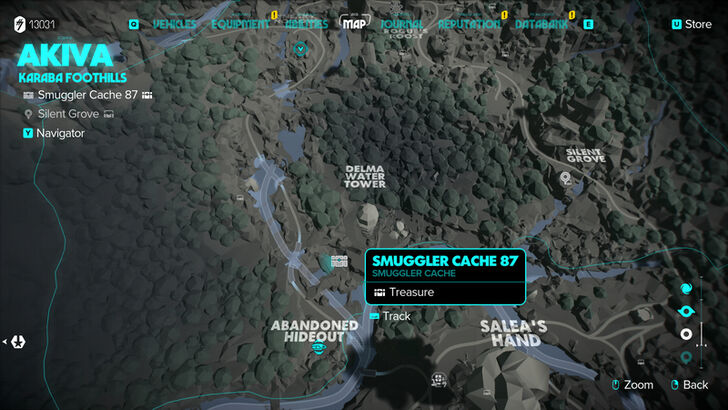
Location Name:
Smuggler Cache 87
How to Get: The cache is buried next to some ruins near the Delma Water Tower. Reward: Materials and Valuables |
||
 |
 |
|
|
Location Name:
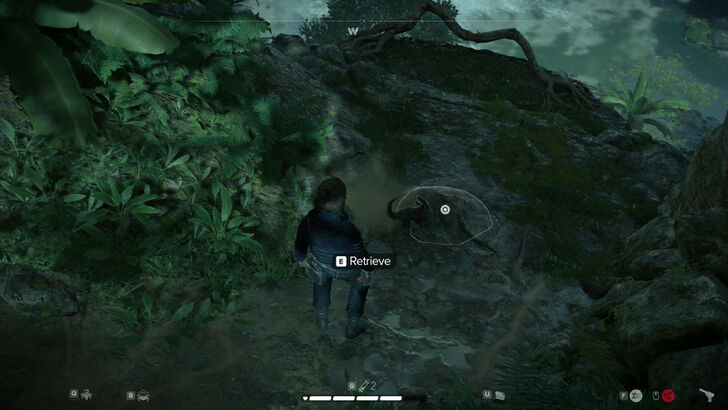
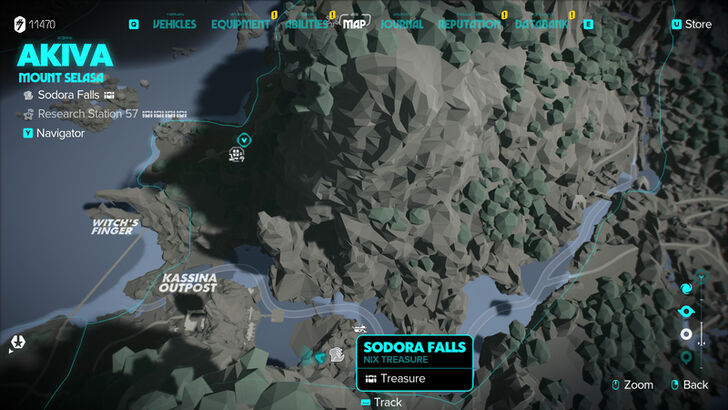
Sodora Falls
How to Get: Follow Nix to the end of the path to acquire the treasure. Reward: Talk Box |
||
 |
 |
|
|
Location Name:
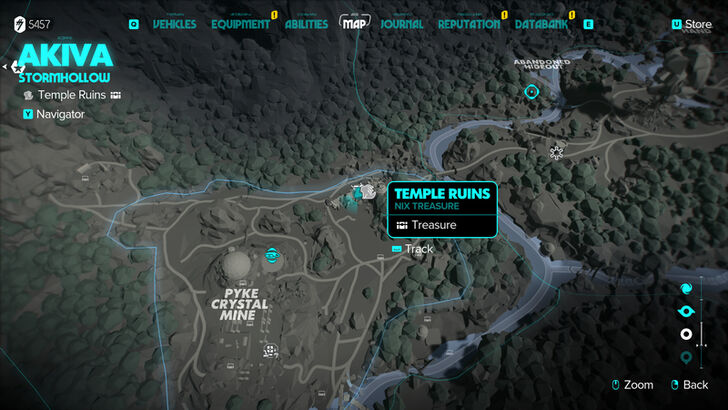
Temple Ruins
How to Get: This crate is on top of ruins, the player can just follow Nix to get to the treasure. Reward: Fruit Wrapper |
||
 |
 |
|
|
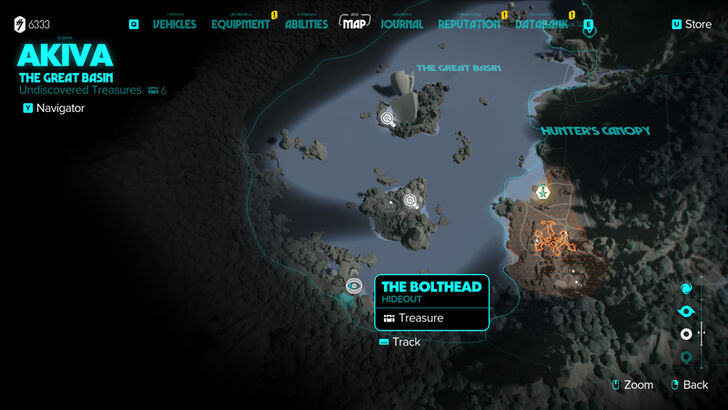
Location Name:
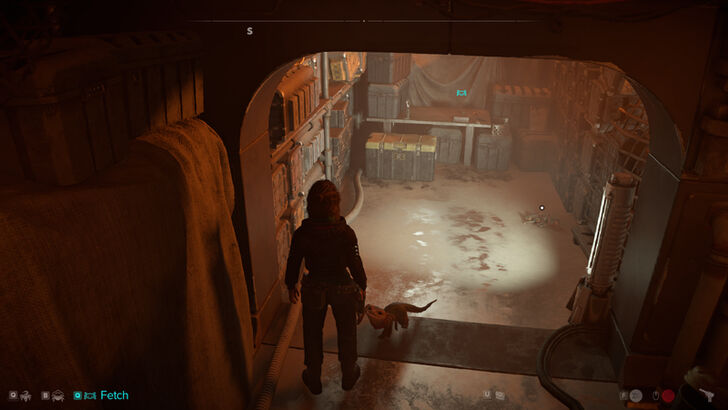
The Bolthead
How to Get: The crate is located inside a locked vent, the player will have to shoot 3 power cells to unlock the vent. Reward: Trans-Accelerator |
||
 |
 |
|
|
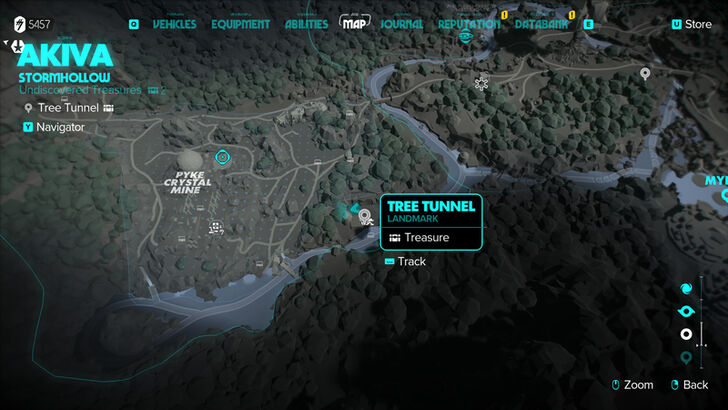
Location Name:
Tree Tunnel
How to Get: This crate is on a platform, the player will need to use their ion blaster and Nix to lower down the ladder. Reward: Red Scarf |
||
 |
 |
|
|
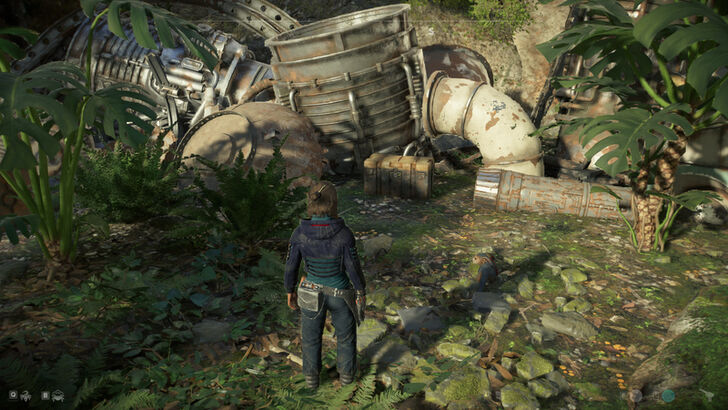
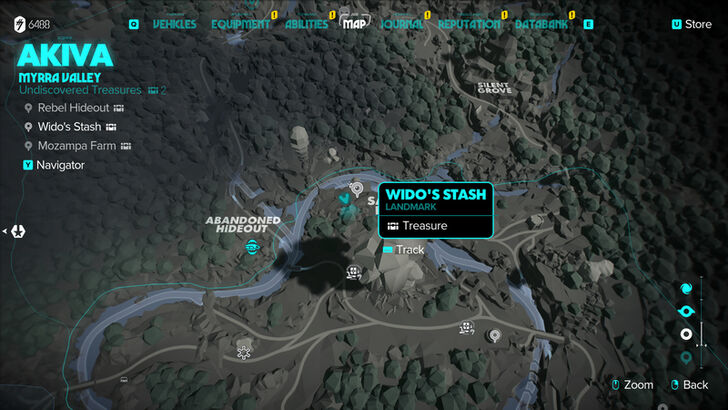
Location Name:
Wido’s Stash
How to Get: The crate is found in a junkyard. Reward: Canister Trinket |
||
 |
 |
|
|
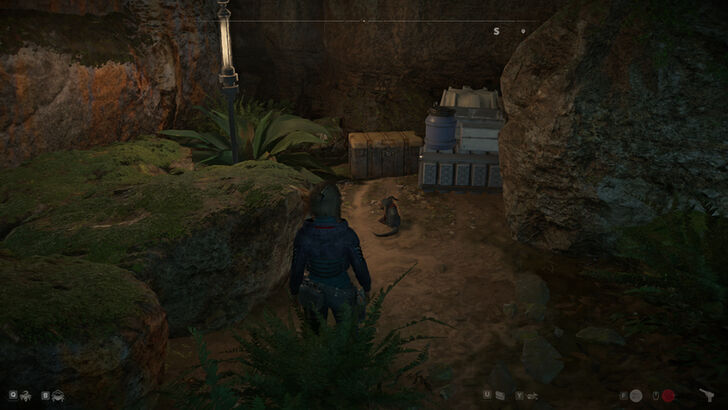
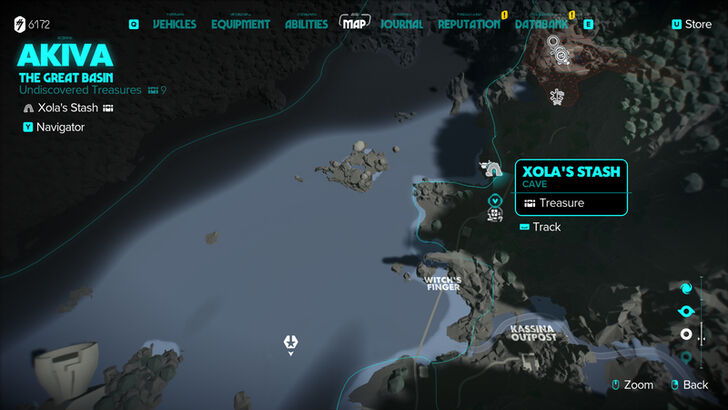
Location Name:
Xola’s Stash
How to Get: This crate can be found in the small cave. Reward: Kamino Paint Job |
||
Myrra Treasure Locations
| Found? | Treasure Details | |
|---|---|---|
 |
 |
|
|
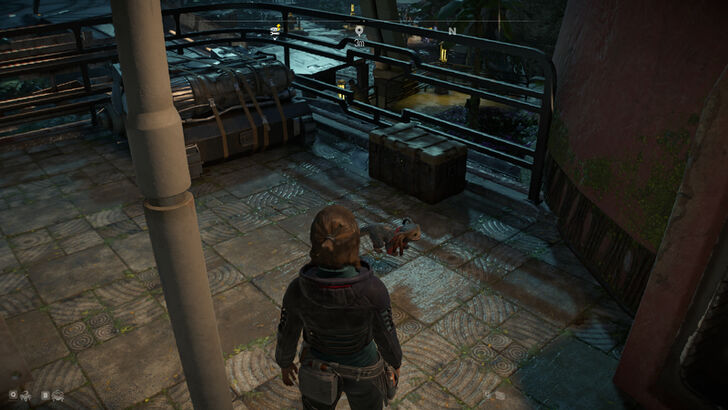
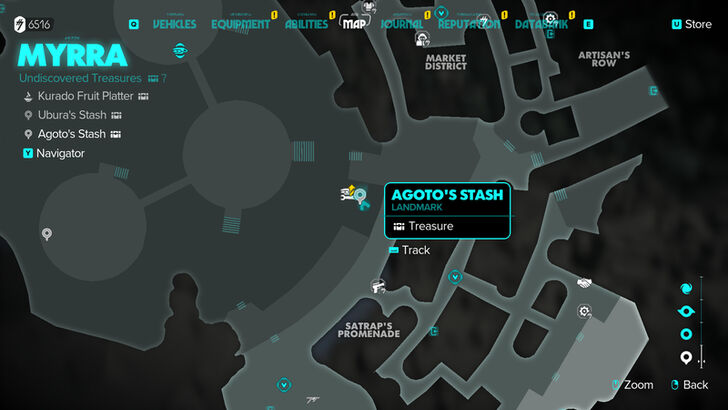
Location Name:
Agoto’s Stash
How to Get: This crate is on the roof of Jas Wit’u’s shop. Reward: Jarwal Fiber |
||
 |
 |
|
|
Location Name:
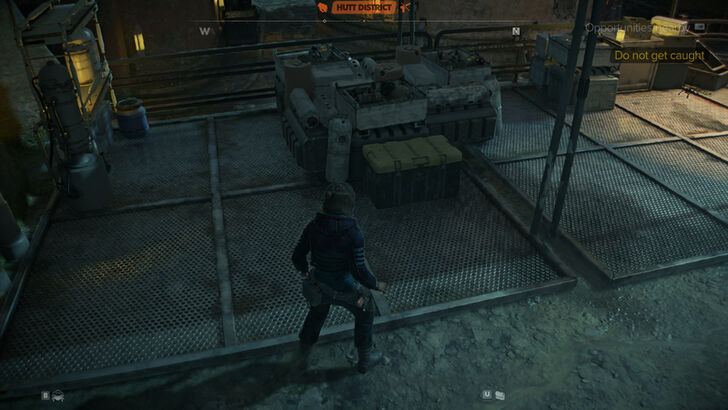
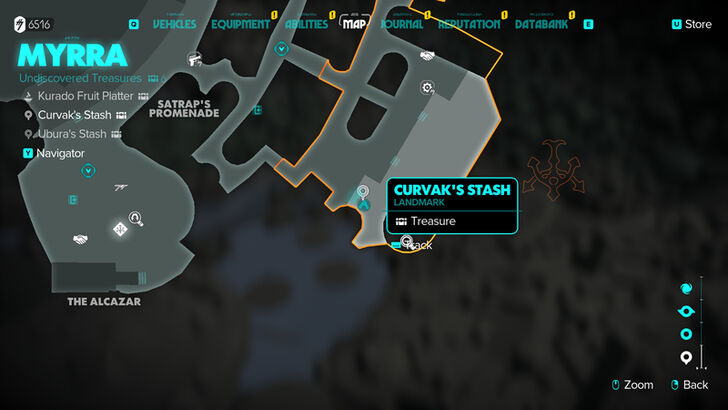
Curvak’s Stash
How to Get: This crate is found in a tent next to guards roaming around. Reward: Artist’s Airbrush |
||
 |
 |
|
|
Location Name:
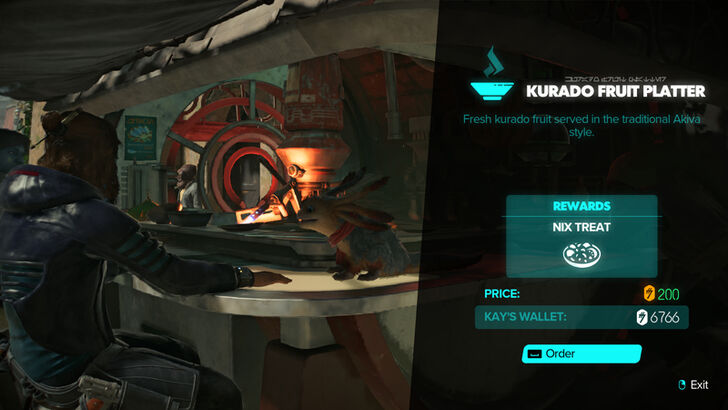
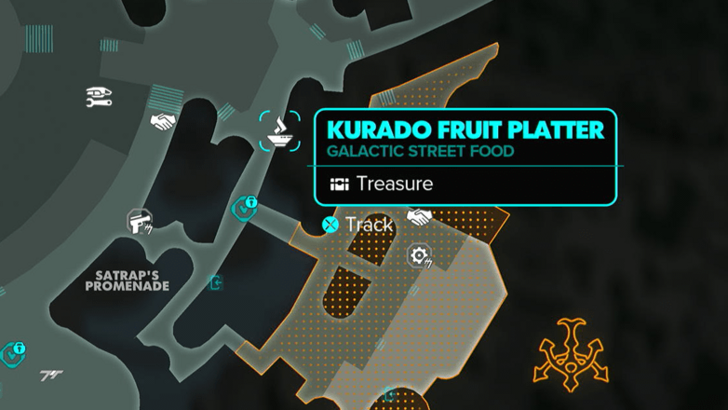
Kurado Fruit Platter
How to Get: Order this from the robot for 200 credits to obtain a Nix Treat. |
||
 |
||
|
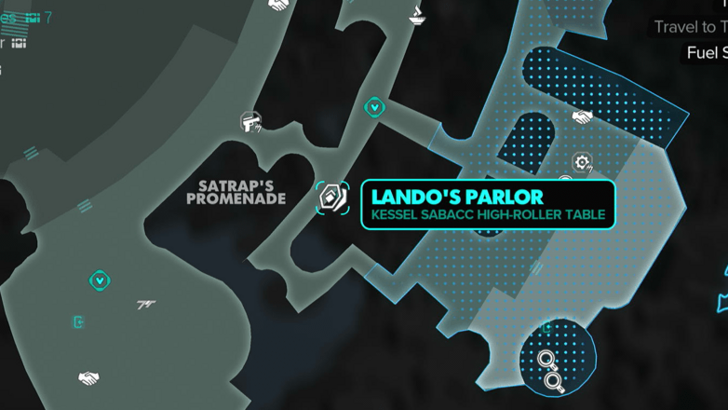
Location Name:
Lando’s Parlor
How to Get: Complete the main quests on Akiva to unlock the Private Parlor intel. Treasure is obtained via playing Sabacc and winning. Reward: Iridescence Coating |
||
 |
 |
|
|
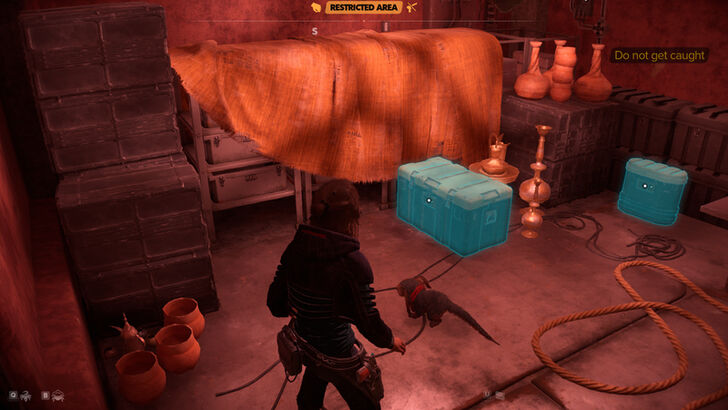
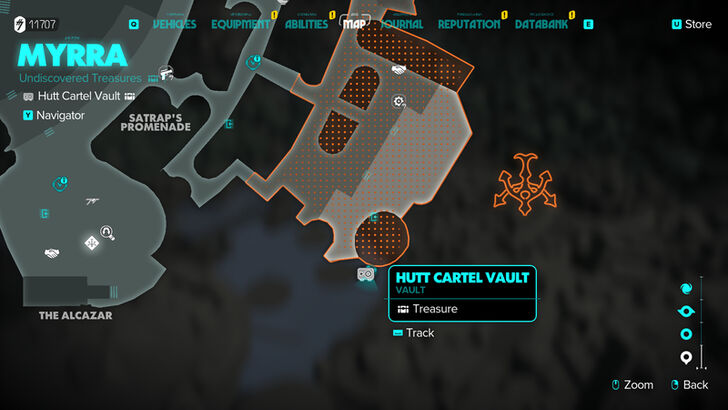
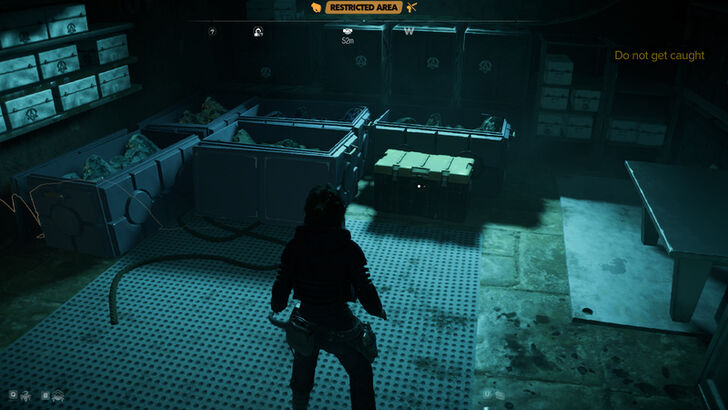
Location Name:
Myrra Hutt Cartel Vault
How to Get: The crate is on a structure’s basement locked behind a laser barrier, you can either use a slicing kit or find Badru’s Vault Keycard to turn off the laser barrier. Reward: Boonta Brawler Paint Job |
||
 |
 |
|
|
Location Name:
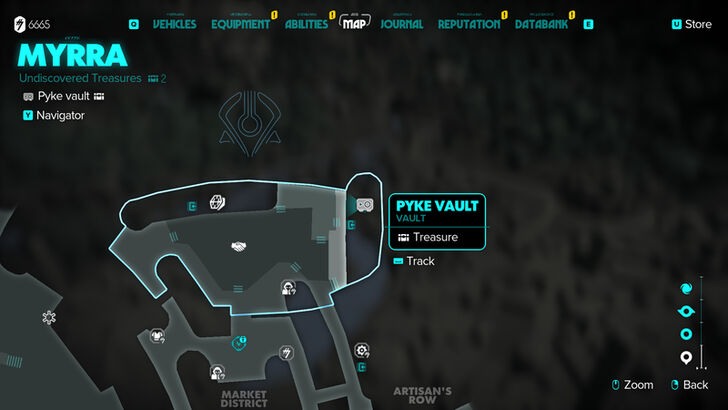
Myrra Pyke Syndicate Vault
How to Get: This crate is locked behind a laser barrier with cameras, you can either use a slicing kit or find Neroli’s Vault Keycard to get to turn off the laser barrier. Reward: Imperial Finish |
||
 |
 |
|
|
Location Name:
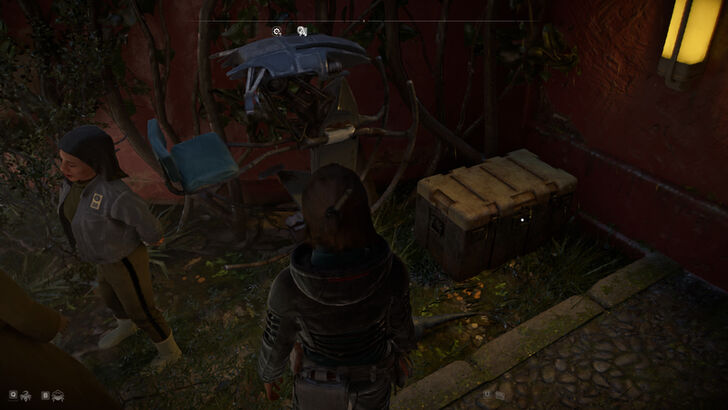
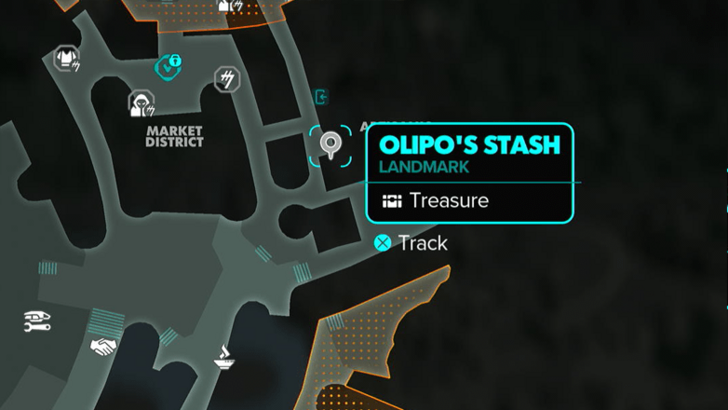
Olipo’s Stash
How to Get: The crate is found next to two persons talking to each other. Reward: Elegant Tail Wrappings |
||
 |
 |
|
|
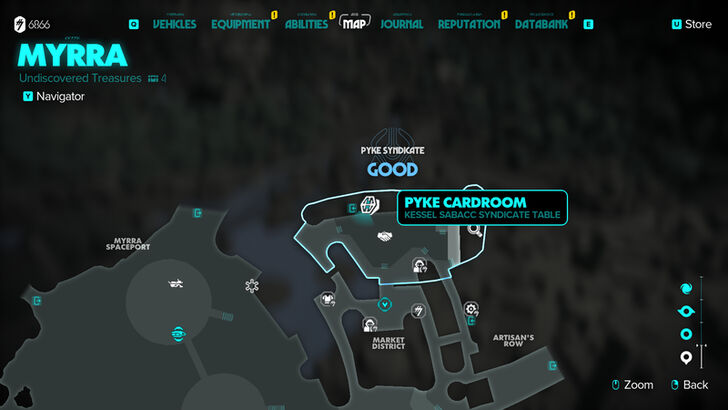
Location Name:
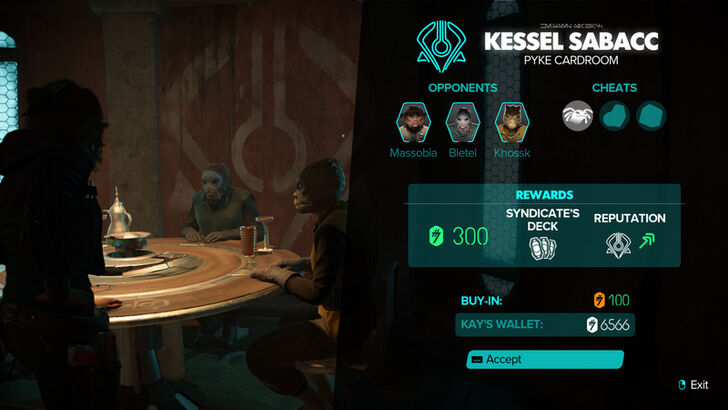
Pyke Cardroom
Pyke Cardroom
How to Get: Treasure is obtained via playing Sabacc and winning. Reward: Pyke Syndicate’s Deck |
||
 |
 |
|
|
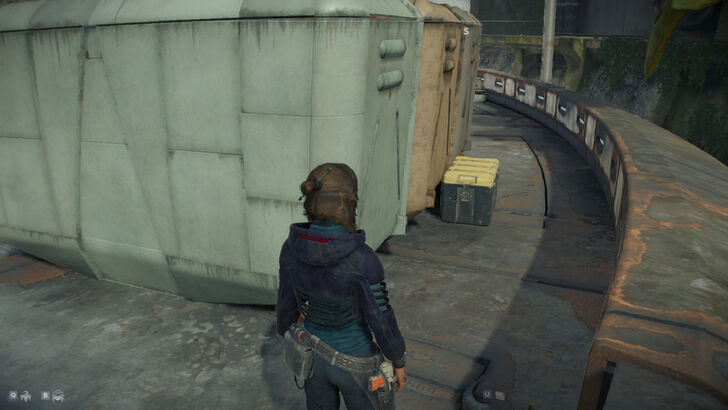
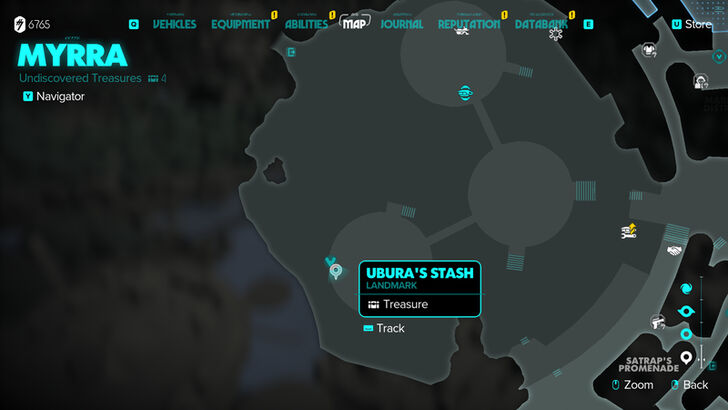
Location Name:
Ubura’s Stash
How to Get: The crate will be behind the three containers. Reward: Verdant Cross Finish |
||
 |
 |
|
|
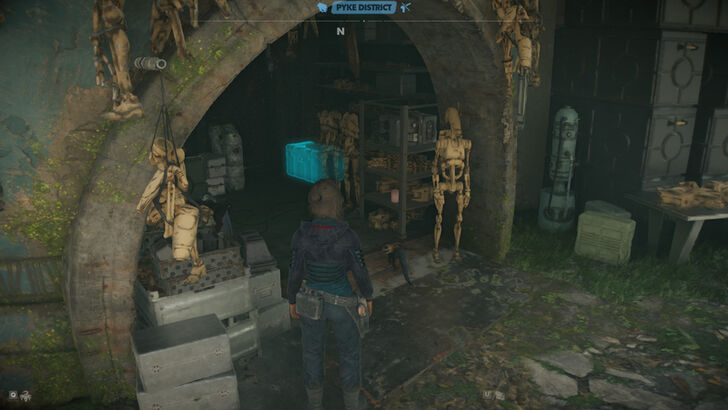
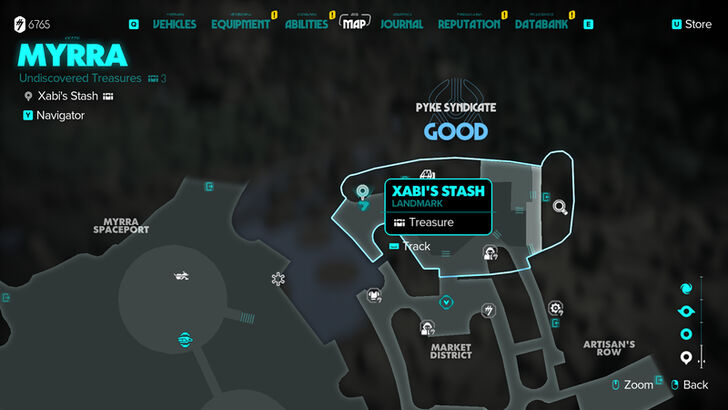
Location Name:
Xabi’s Stash
How to Get: The crate will be in the room full of droids. Reward: Forged Identichips |
||
Sashin Treasure Locations
| Found? | Treasure Details | |
|---|---|---|
 |
 |
|
|
Location Name:
Alley
How to Get: This crate can be found in the alley by a wall and a lantern. Reward: Jarwal Fiber |
||
Akiva Orbit Treasure Locations
| Found? | Treasure Details | |
|---|---|---|
 |
 |
|
|
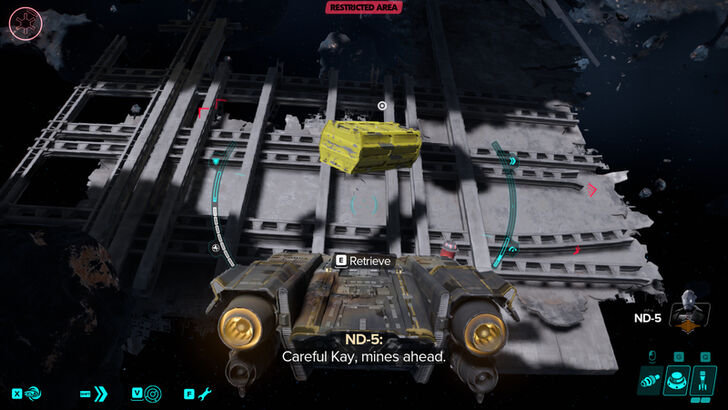
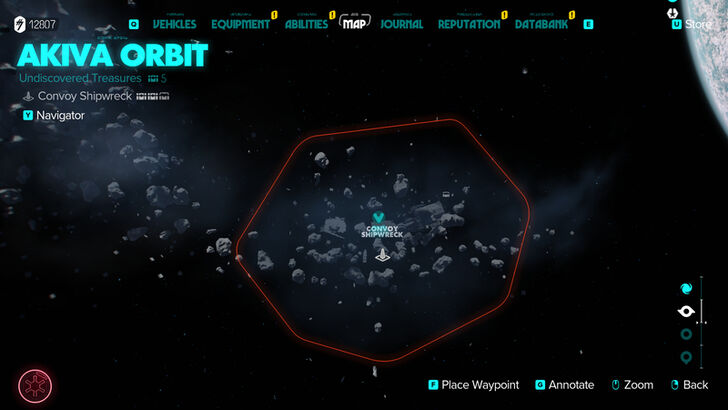
Location Name:
Convoy Shipwreck Treasure 1
How to Get: The crate is floating next to some mines. Reward: X-FP-C28 Ship Computer |
||
 |
 |
|
|
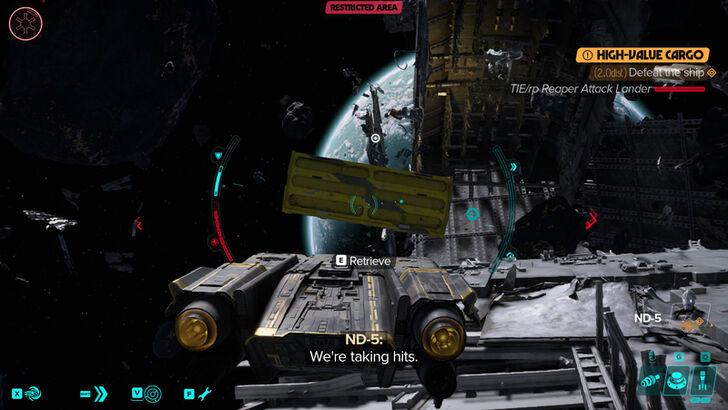
Location Name:
Convoy Shipwreck Treasure 2
How to Get: The crate is just right above Convoy Shipwreck Treasure 2. Reward: Cobalt Cross Finish |
||
 |
 |
|
|
Location Name:
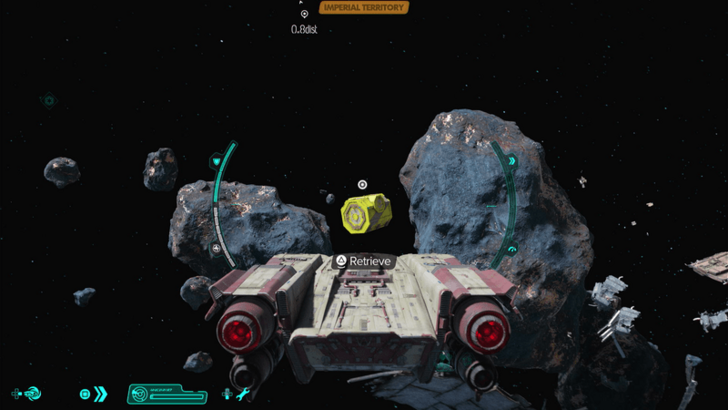
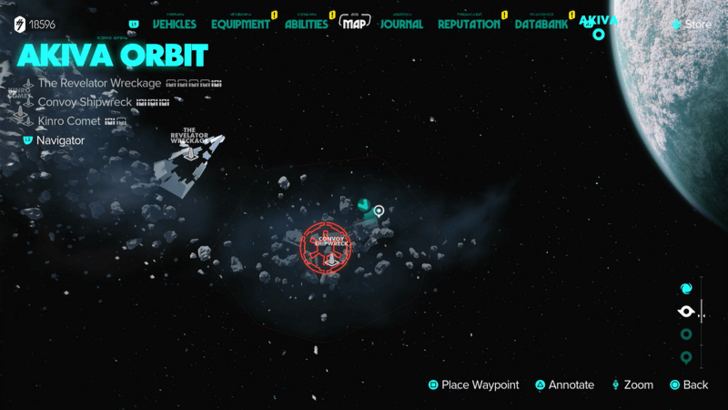
Convoy Shipwreck Treasure 3
How to Get: This Transmission is inside a floating crate. Collect 5 of them to unlock The Veteran Expert Quest. Once you have all 16 Transmissions, you will unlock the Disruptor Gear set. Reward: CIS Tranmission 03 |
||
 |
 |
|
|
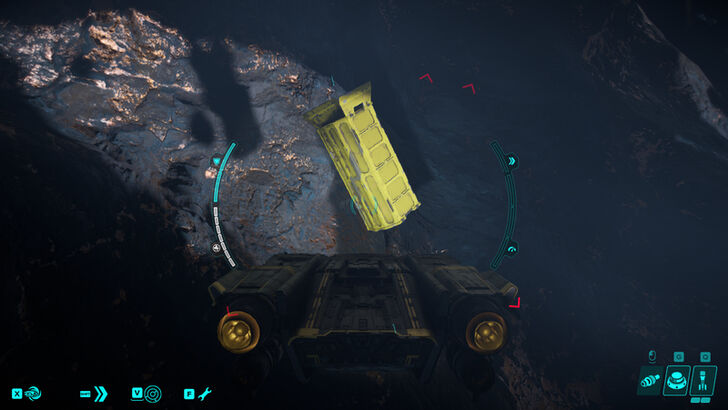
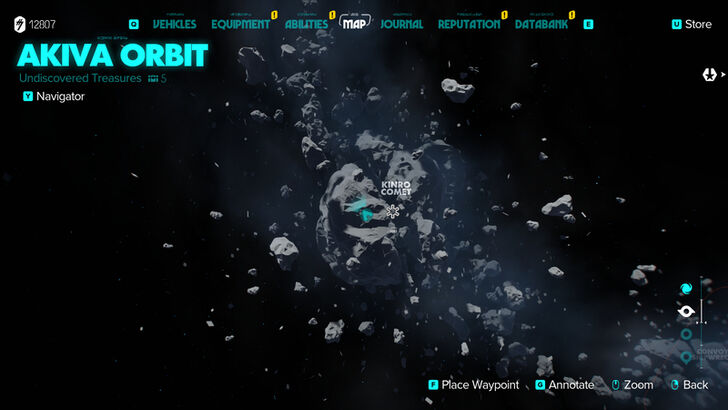
Location Name:
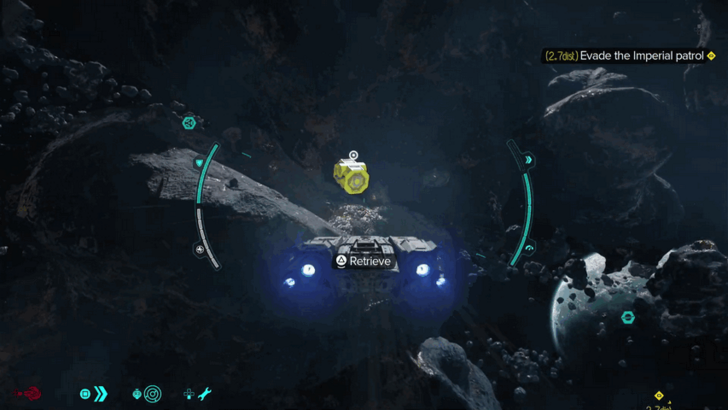
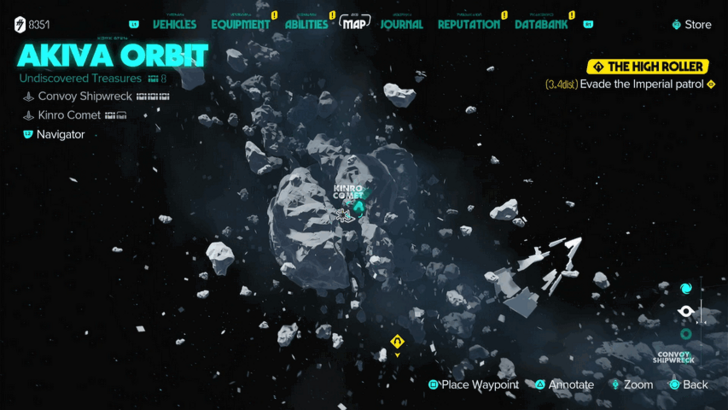
Kinro Comet Treasure 1
How to Get: The crate can be found near the signal jammer. Reward: Verdant Cover Finish |
||
 |
 |
|
|
Location Name:
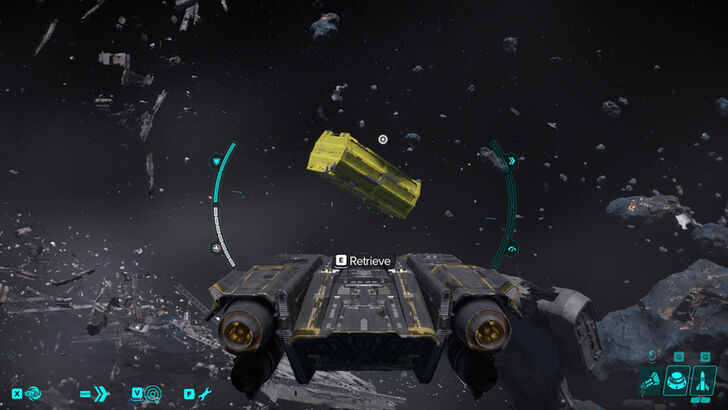
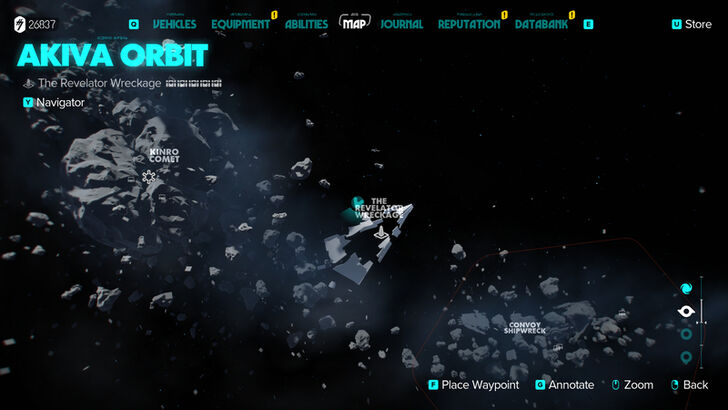
Kinro Comet Treasure 2
How to Get: This Transmission is inside a floating crate. Collect 5 of them to unlock The Veteran Expert Quest. Once you have all 16 Transmissions, you will unlock the Disruptor Gear set. Reward: CIS Transmission 02 |
||
 |
 |
|
|
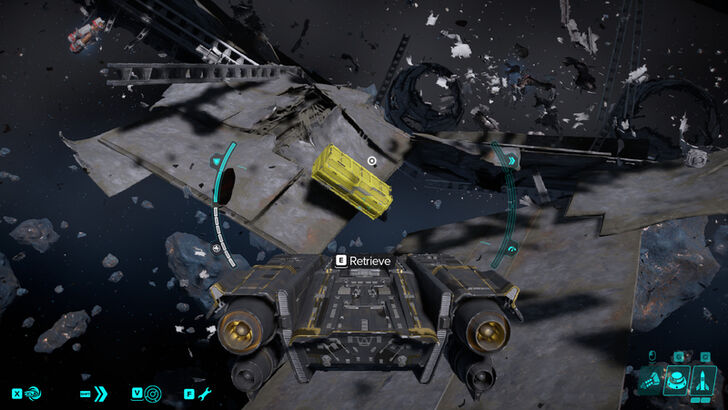
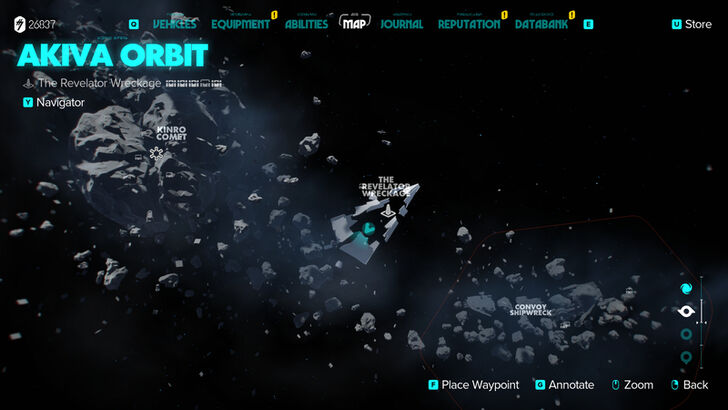
Location Name:
Post-Game POI Treasure 1
How to Get: Note that this treasure is only available after completing Star Wars Outlaw's main story. The crate is floating next to some junk. Reward: Materials and Valuables |
||
 |
 |
|
|
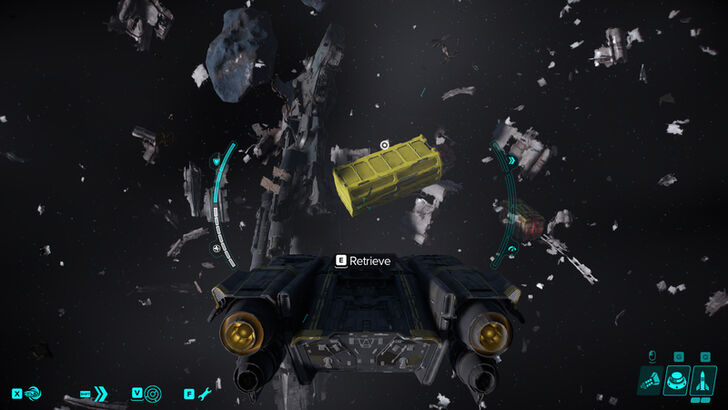
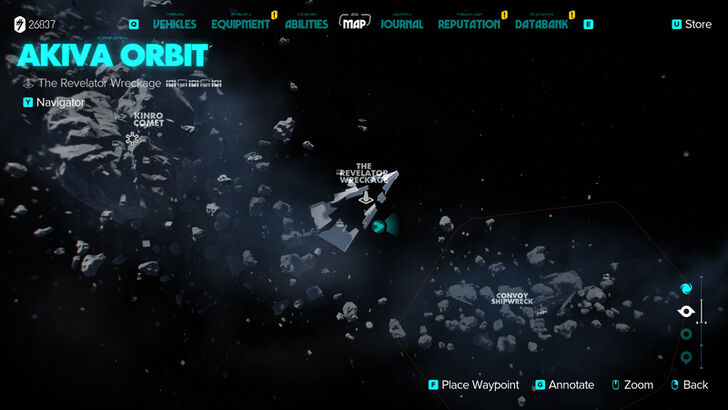
Location Name:
Post-Game POI Treasure 2
How to Get: Note that this treasure is only available after completing Star Wars Outlaw's main story. The crate is floating next to some mines. Reward: Materials and Valuables |
||
 |
 |
|
|
Location Name:
Post-Game POI Treasure 3
How to Get: Note that this treasure is only available after completing Star Wars Outlaw's main story. The crate is floating next to scraps. Reward: Megonite Laden Fuel |
||
 |
 |
|
|
Location Name:
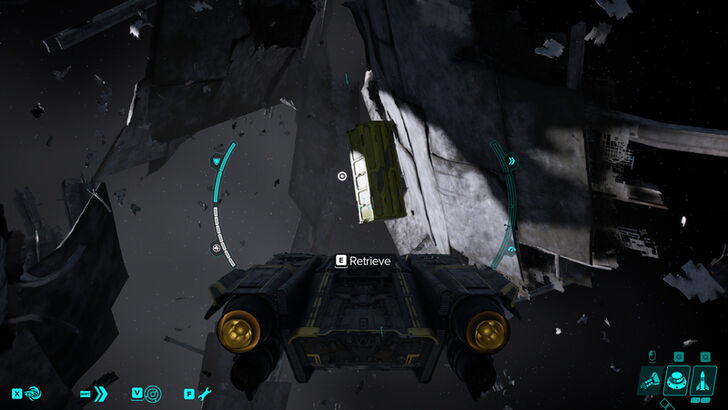
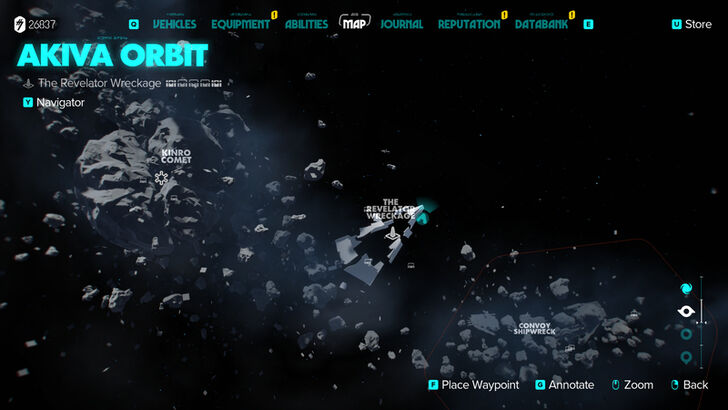
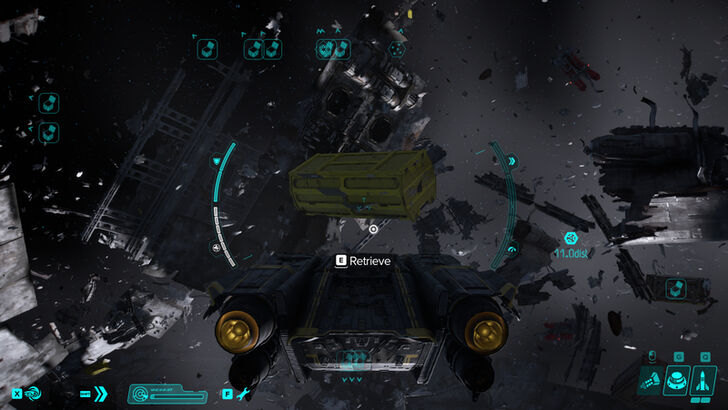
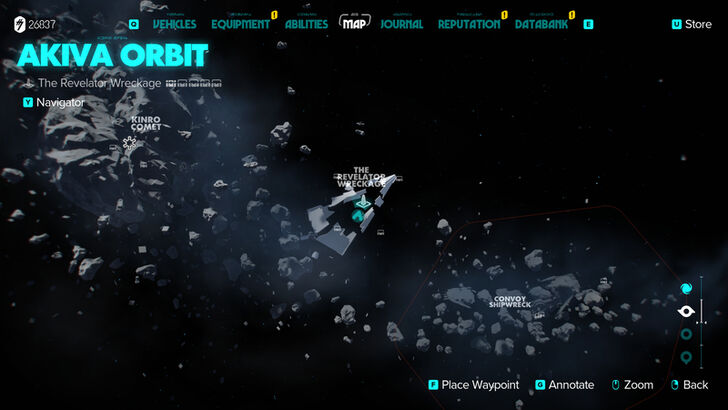
Post-Game POI Treasure 4
How to Get: Note that this treasure is only available after completing Star Wars Outlaw's main story. The crate is floating next to some scraps. Reward: Shimmering Finish |
||
 |
 |
|
|
Location Name:
Post-Game POI Treasure 5
How to Get: Note that this treasure is only available after completing Star Wars Outlaw's main story. This crate is surrounded by scraps. Reward: Credits |
||
 |
 |
|
|
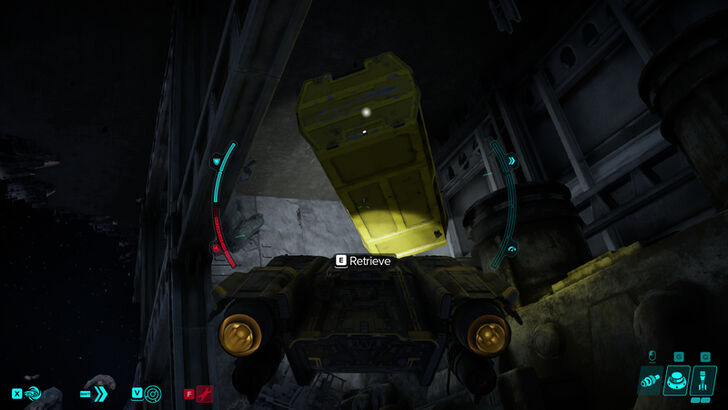
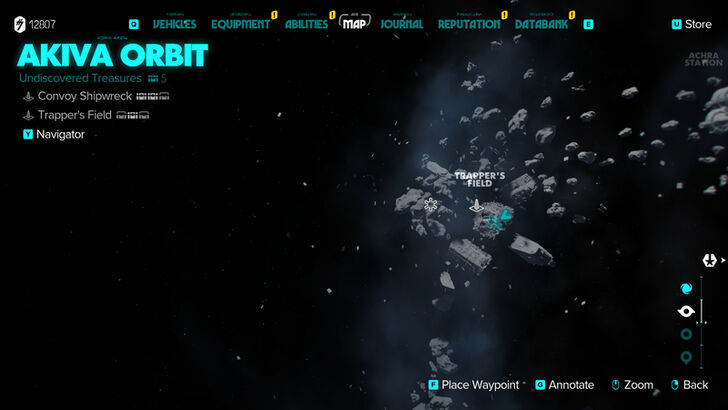
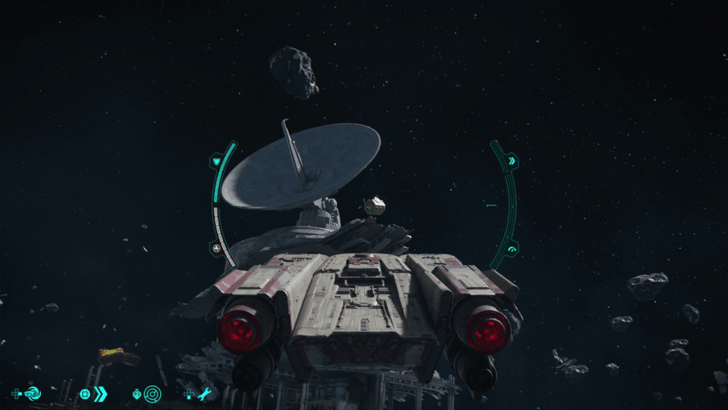
Location Name:
Trapper’s Field Treasure 1
How to Get: The crate is inside a broken building just below the satellite. Reward: X-FP-C28 Ship Computer |
||
 |
 |
|
|
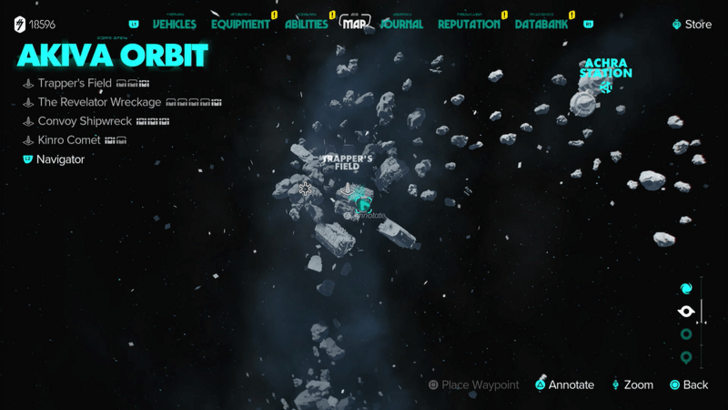
Location Name:
Trapper’s Field Treasure 2
How to Get: This Transmission is inside a floating crate. Collect 5 of them to unlock The Veteran Expert Quest. Once you have all 16 Transmissions, you will unlock the Disruptor Gear set. Reward: CIS Transmission 01 |
||
 |
 |
|
|
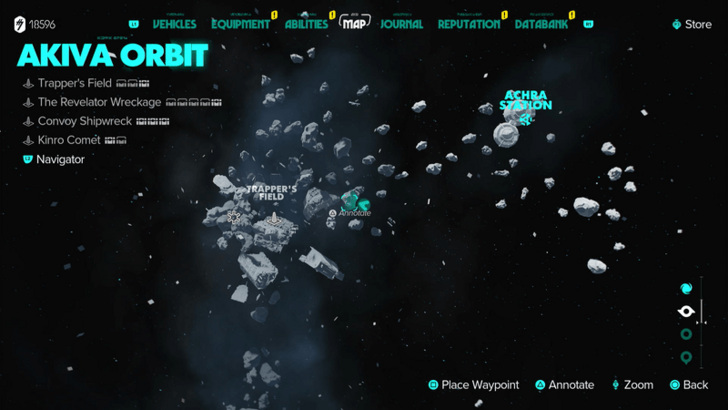
Location Name:
Trapper’s Field Treasure 3
How to Get: This Transmission is inside a floating crate. Collect 5 of them to unlock The Veteran Expert Quest. Once you have all 16 Transmissions, you will unlock the Disruptor Gear set. Reward: CIS Transmission 04 |
||
Achra Station Treasure Locations
| Found? | Treasure Details | |
|---|---|---|
 |
 |
|
|
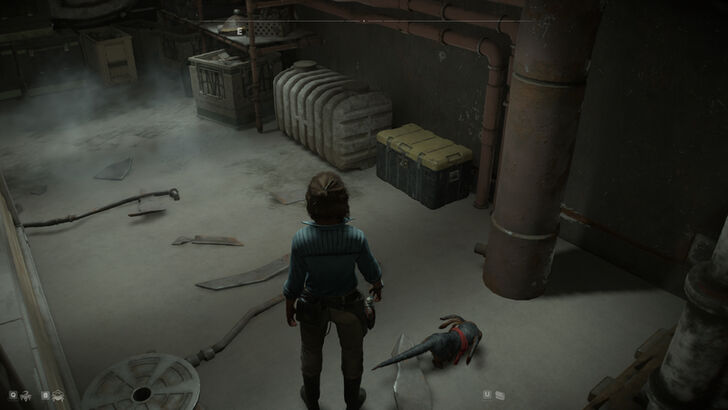
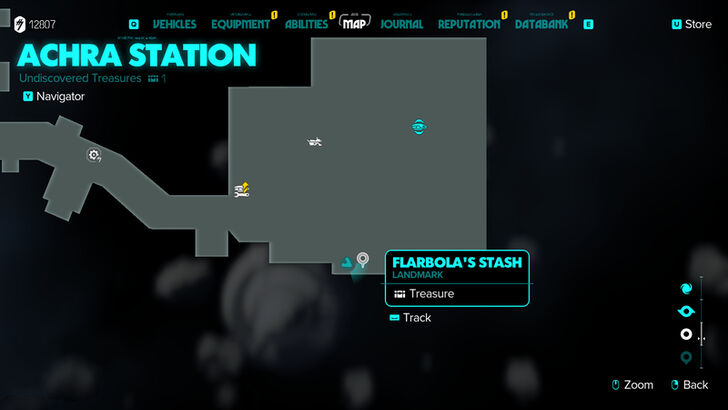
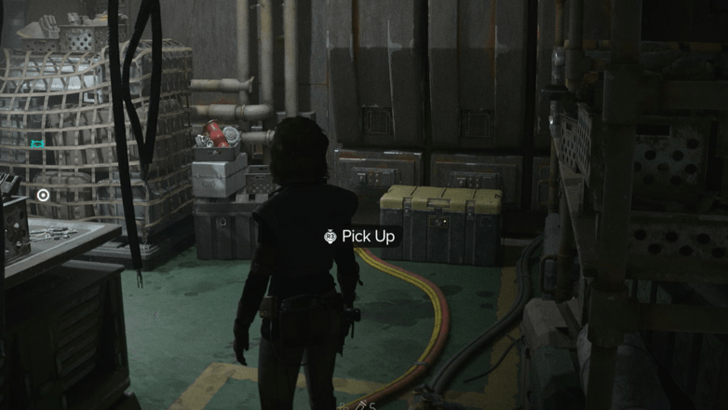
Location Name:
Flarbola's Stash
How to Get: The stash is located behind a broken ship. Reward: Barium Laden Fuel |
||
 |
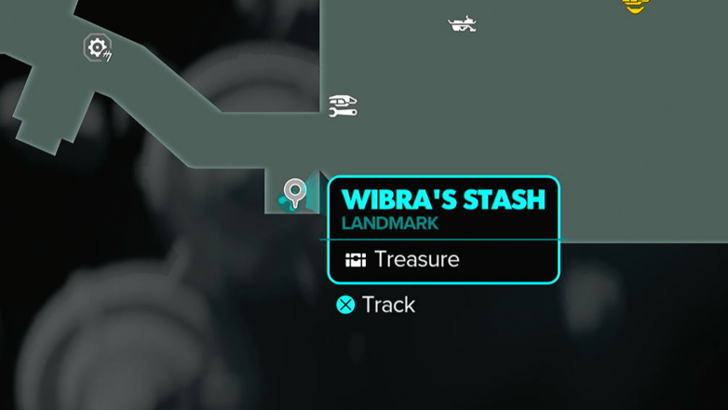 |
|
|
Location Name:
Wibra’s Stash
How to Get: This treasure is accessible during The Passenger syndicate quest. Reward: SE-JA-4 Sensor Jammer |
||
What Are Treasures?
Collectible Rewards

Treasures offer a variety of items rangin from cosmetics for your Speeder and Trailblazer, modifications for your blaster, and even cosmetic gear for Kay Vess and Nix.
Star Wars Outlaws Related Guides

Star Wars Outlaws Walkthrough Wiki
Recommended Guides
Author
All Treasure Locations
improvement survey
03/2026
improving Game8's site?

Your answers will help us to improve our website.
Note: Please be sure not to enter any kind of personal information into your response.

We hope you continue to make use of Game8.
Rankings
- We could not find the message board you were looking for.
Gaming News
Popular Games

Genshin Impact Walkthrough & Guides Wiki

Honkai: Star Rail Walkthrough & Guides Wiki

Umamusume: Pretty Derby Walkthrough & Guides Wiki

Pokemon Pokopia Walkthrough & Guides Wiki

Resident Evil Requiem (RE9) Walkthrough & Guides Wiki

Monster Hunter Wilds Walkthrough & Guides Wiki

Wuthering Waves Walkthrough & Guides Wiki

Arknights: Endfield Walkthrough & Guides Wiki

Pokemon FireRed and LeafGreen (FRLG) Walkthrough & Guides Wiki

Pokemon TCG Pocket (PTCGP) Strategies & Guides Wiki
Recommended Games

Diablo 4: Vessel of Hatred Walkthrough & Guides Wiki

Cyberpunk 2077: Ultimate Edition Walkthrough & Guides Wiki

Fire Emblem Heroes (FEH) Walkthrough & Guides Wiki

Yu-Gi-Oh! Master Duel Walkthrough & Guides Wiki

Super Smash Bros. Ultimate Walkthrough & Guides Wiki

Pokemon Brilliant Diamond and Shining Pearl (BDSP) Walkthrough & Guides Wiki

Elden Ring Shadow of the Erdtree Walkthrough & Guides Wiki

Monster Hunter World Walkthrough & Guides Wiki

The Legend of Zelda: Tears of the Kingdom Walkthrough & Guides Wiki

Persona 3 Reload Walkthrough & Guides Wiki
All rights reserved
STAR WARS © & TM 2024 Lucasfilm Ltd. All Rights Reserved. Developed by Ubisoft. Ubisoft TM & © 2024 Ubisoft Entertainment. All Rights Reserved.
The copyrights of videos of games used in our content and other intellectual property rights belong to the provider of the game.
The contents we provide on this site were created personally by members of the Game8 editorial department.
We refuse the right to reuse or repost content taken without our permission such as data or images to other sites.
 Main Quests Walkthrough
 Factions and Syndicate Quests
 Side Quests
 Intel
Intel Experts
 Choices
 Tips and Tricks
 Planets and Locations
 Treasures
 Outfits
 Abilities
 Collectibles
 Items
Items Materials
 Blaster Upgrades
 Ship Upgrades
 Speeder Upgrades
 Tools
Tools Contracts
 Nix Accessories
 Nix Treats
 Vendors
 Weapons
 Trinkets
 Latest News
 Bugs and Errors
 DLC Quests




![Monster Hunter Stories 3 Review [First Impressions] | Simply Rejuvenating](https://img.game8.co/4438641/2a31b7702bd70e78ec8efd24661dacda.jpeg/thumb)


okay, my bad, I missed this one "Bosan Mound"