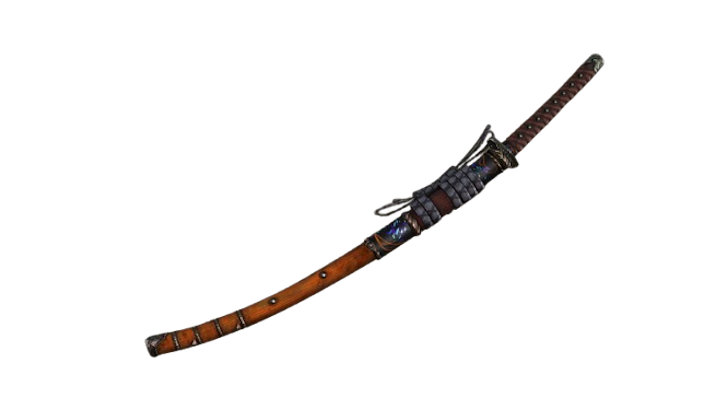
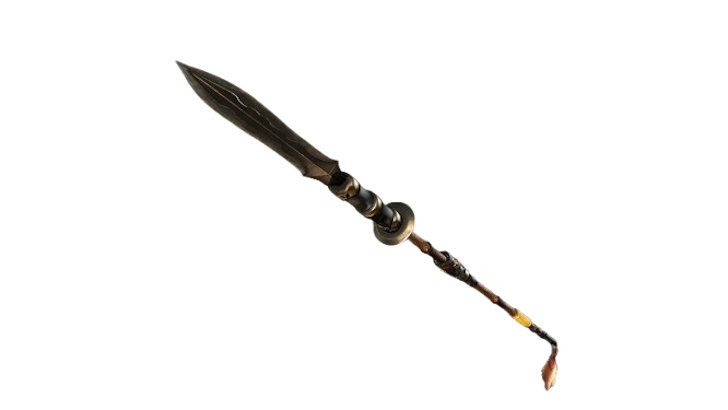
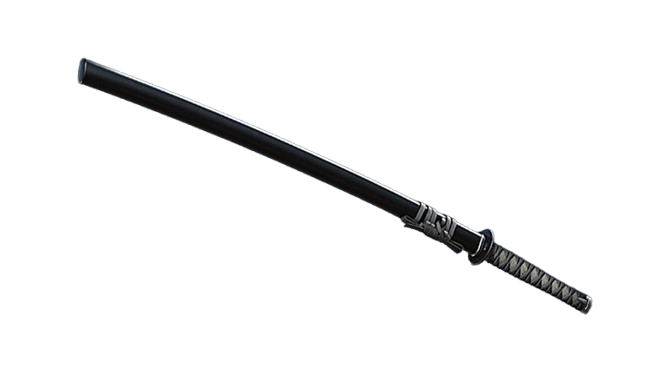
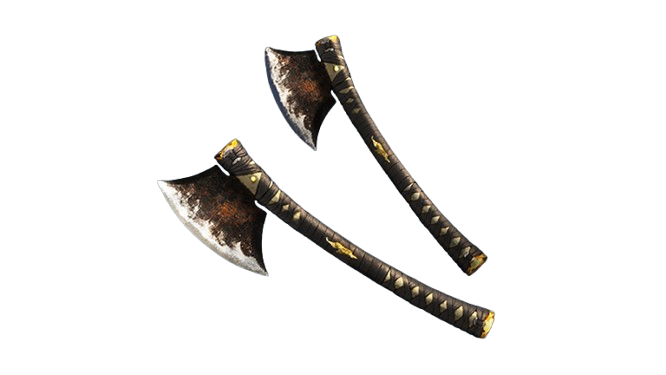
Best Hatchets Build
This is a guide to the best build for Hatchets in Nioh 3. See the best armor and accessories to use with the Hatchets, which Guardian Spirit and Soul Cores to equip, as well as which stats to level up.
List of Contents
Hatchets Strengths and Weaknesses
| Strengths | Weaknesses |
|---|---|
| ✔︎ Deals decent health and Ki damage mid-range.
✔︎ Can do fast, long-range throws. ✔︎ Viable for hit-and-run strategy in combat. |
✖︎ Some skills can be slow and sluggish to perform.
✖︎ Skills consume a lot of Ki and will require Ki management. |
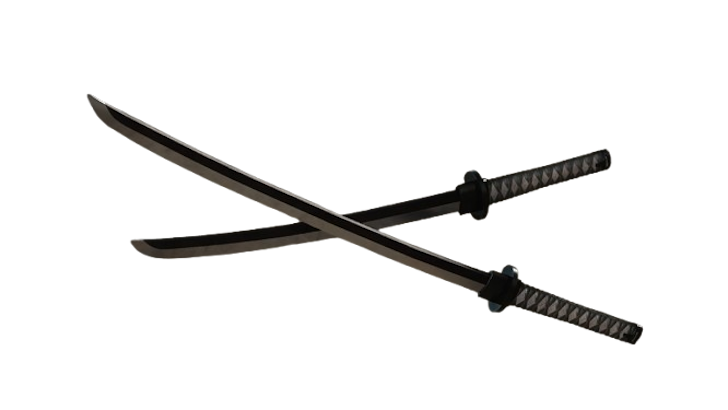
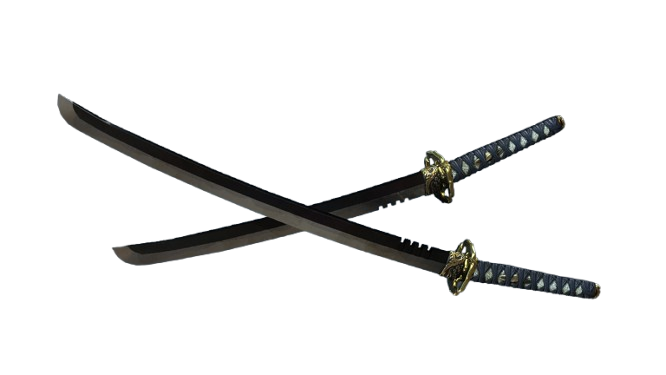
The Hatchets function as both a short-range and mid-range weapon, similar to the Kusarigama. Its unique playstyle allows you to throw one (or both) hatchet(s) at enemies. Just like any Ninja weapon, the Hatchet is capable of fast slashes. However, unlike the Tonfa or the Dual Ninja Swords, some of the Hatchets' moves can be sluggish to perform, making combo chaining a bit awkward. However, once you get the basics of throwing and doing follow-ups, the Hatchets are quite effective in dishing out damage during combat.
Best Scaling for Hatchets
Put Points Into Skill and Intellect
| Hatchets Scaling |
|---|
| Character Stats |
The Hatchet scales with Stamina, Intellect, and Skill. Prioritize both Intellect and Skill to make your Ninjutsus more effective. Particularly, having a scaling in Intellect makes the effects of Ninja Tools such as Uncanny Flame last longer.
Then, consider investing at least 15 points in Magic to unlock a few slots for Onmyo Magic, as this build will be using Lightning Talismans to accumulate the Shock status ailment. Lastly, if you have Amrita to spare, use it on Strength for more Ki damage. You can also put points into Stamina for damage scaling and higher equipment weight capacity but it is not required.
If you feel that the stats where a weapon scales are not beneficial to your playstyle or build, you can use Remodel in the Blacksmith to change them. However, do note that this will cost materials and Gold, as such, it's not recommended to do until you get better equipment.
Best Special Effects for Hatchets
| Jump to Section! | |
|---|---|
| Weapon | Armor |
| Accessories | |
Best Special Effects for Weapons
| Common Special Effects | |
|---|---|
| ・Melee Ki Damage
・Melee Damage ・Imbue Lightning ・Ki Damage vs. Electrified Enemy ・Life Drain (Quick Attack) ・Attack Bonus (Skill/Intellect) ・Ki Recovery Speed ・Melee Damage vs. Winded Enemy |
|
| Fixed Special Effects | |
| ・Strong Attack Ki Damage
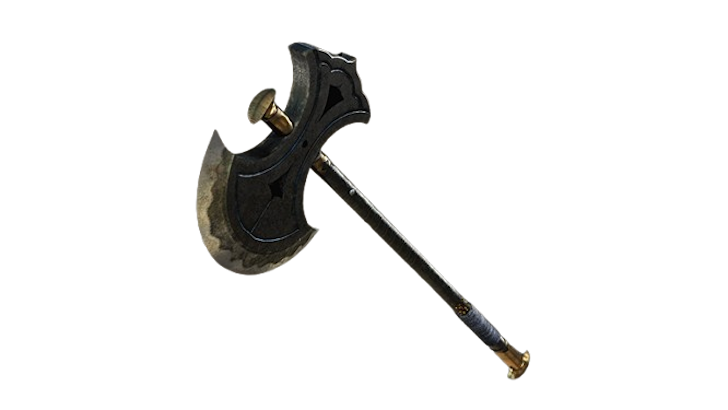
Weapons: Mountain Bandit Hatchets |
|
| Weapon Sets | |
| ・Heizo's Hatchets (Devious Loyalty) | |
You may use any equipment that has one or two of the special effects listed above.
For this build, we will be using Lightning as our main element, so equip any Hatchets that has Imbue Lightning. However, if you don't have this special effect yet, any Hatchets with Ki Damage or Life Drain will do for now.
If your current Hatchets do not have Imbue Lightning, get a Lightning Talisman from a Thunderstorm Oni-bi Soul Core in the Yin position.
Best Special Effects for Armor
| Common Special Effects | |
|---|---|
| ・Life Recovery (Amrita Absorption)
・Decrease Damage Taken (Amrita Absorption) ・Auto Life Recovery (Evade) ・Defense ・Toughness ・Ki Recovery Speed ・Martial Arts Ki Damage |
|
| Fixed Special Effects | |
| ・Dodge Ki Consumption
Armor: ・Ascetic armor piece ・Heir's Shinobi armor piece ・Strong Attack Ki Consumption Armor: ・Mitsumono armor piece |
|
| Armor Sets | |
| ・Heizo Armor Set (Devious Loyalty)
・Demon Horde Armor Set (Demon Incarnate) |
|
You may use any equipment that has one or two of the special effects listed above.
To take advantage of using the Extraction Talisman for this build, have at least one or two armor pieces that have Life Recovery (Amrita Absorption) and Decrease Damage Taken (Amrita Absorption). Every time you hit an enemy, the Extraction Talisman will make enemies release Amrita which you'll absorb to activate these effects.
If you don't have that special effect yet, you can opt for Auto Life Recovery (Evade) or Ki Recovery Speed instead for survivability.
For set bonuses, try to get a complete set of Heizo armor to get the Attack Bonus (Skill) at 6 pieces including the weapon. For the Demon Horde set, you can have at least 2 to get Life Drain (Melee Kill).
Best Special Effects for Accessories
| Common Special Effects | |
|---|---|
| ・Shock Accumulation (Enemy)
・Life Drain (Lightning Damage) ・Imbue Lightning ・Toughness ・Spirit Force Gauge ・Living Artifact Duration |
|
| Fixed Special Effects | |
| ・Onmyo Magic Power
Accessory: Divination Board ・Ki Recovery Speed Accessory: Fan |
|
You may use any equipment that has one or two of the special effects listed above.
For Accessories, consider using those that Imbues Lightning or accumulates Shock to build up the status ailment. You can also get Living Artifact Duration and Spirit Force Gauge to be able to use those often. Alternatively, any Accessory with Ki recovery speed is viable to use.
Best Ninjutsu and Martial Arts for Hatchets
| Jump to Section! | |
|---|---|
| Hatchets Skills | Ninja Style Skills |
| Crucible Arts | |
Where to Spend Skill Points?
Spend your points on the Hatchets and Ninja Style skill trees to learn new combos for the Hatchets, while also acquiring useful Ninjutsu and Martial Arts.
Hatchets Skills
| Skills | Requirements |
|---|---|
| Dual Hurl | Unlocked at the start |
| Dual Hurl Light | 1 Ninja Point
Prerequisite: ・Dual Hurl |
| Wild Surge | 1 Ninja Point
Prerequisite: ・Dual Hawks |
| Wild Surge II | 1 Ninja Point
Prerequisite: ・Dual Hawks ・Wild Surge |
| Mountain Climber | 1 Ninja Point
Prerequisite: ・Dual Hurl |
| Mountain Climber II | 2 Ninja Points
Prerequisite: ・Mountain Climber |
| Biting Hail | 2 Ninja Points
Prerequisite: ・Chain Hurl ・Mountain Climber |
| Fire Foot Drill Jump | 2 Ninja Points
Prerequisite: ・Scaling Waterfall ・Fire Foot Drill |
| Eagle's Shadow | 1 Ninja Point
Prerequisite: ・Chain Hurl ・Demon Undercut |
| Plummet | 1 Ninja Point
Prerequisite: ・Piercing Hurl |
| Tile Shaker | 1 Ninja Point
Prerequisite: ・Dual Hurl Light ・Dual Hurl Shadow |
| Bell Ringer | 3 Ninja Points
Prerequisite: ・Dual Hurl ・Dual Hurl Light ・Dual Hurl Shadow ・Tile Shaker |
| Spiked Wall | 2 Ninja Points
Prerequisite: ・Dual Hurl Light |
| Roundabout | Prerequisite:
・Defeat Kajiwara Kagetoki |
| Tireless Throw | 3 Ninja Points
Prerequisite: ・Piercing Hurl ・Plummet ・Complete Way of the Ninja: Veteran |
The attacks for Hatchets can be started with the Dual Hurl with Wild Surge to close the distance between you and your target. Then follow it up with Mountain Climber to either do a mid-air attack like Plummet or to position behind an enemy to do backstab damage. Roundabout can also be used in place of Dual Hurl if you've already acquired the skill after beating Kajiwara Kagetoki.
As the Hatchets can also be a mid-range throwable weapon, you have skills like Eagle's Shadow, Biting Hail, and Dual Hurl that can be used at a distance to finish off enemies.
Take note that using Dual Hurl requires holding down the strong attack button, so timing and spacing are necessary to avoid getting punished. You can get either Dual Hurl Light to shorten the wind-up of Dual Hurl, or you can take Dual Hurl Shadow to increase the throw distance. You cannot equip both upgrades at the same time.
Ninja Style Skills
| Skills | Requirements |
|---|---|
| Evade | 1 Ninja Point |
| Cicada Shell | 1 Ninja Point |
| Kunai | 1 Ninja Point
Prerequisite: ・Shuriken |
| Uncanny Bolt | 1 Ninja Point
Prerequisite: ・Uncanny Flame |
| Footstool Jump | 1 Ninja Point
Prerequisite: ・Evade |
| Shrapnel Bomb | 1 Ninja Point
Prerequisite: ・Shuriken ・Gunpowder Bomb |
| Fire Shuriken | Prerequisite:
・Learned from a Handbook |
| Thundering Calamity | 1 Ninja Point
Prerequisite: ・Uncanny Flame ・Uncanny Bolt |
For Ninjutsu, always get the Shrapnel Bomb, as it is good for attracting enemies, dealing chip damage, or accumulating the Burn status especially with high Skill stats. Take Uncanny Bolt as well to support the build-up of the Shocked ailment on your target. Once you get further in the game, upgrade Uncanny Bolt to Thundering Calamity.
Crucible Arts
| All Ablaze | Increases Attack and movement speed in exchange for sacrificing Defense. Can only be used when your hatchets are sheathed. |
|---|
The All Ablaze skill powers up your Attack and movement speed in exchange for Defense. As this requires the Hatchets to be sheathed to trigger, it's best to use this before combat, or when you're at a safe spot during a fight. This skill will add more damage to the Hatchets in both short or long range.
Best Combo for Hatchets
Dual Hurl and Mountain Climber Combo String
This is a basic Hatchets combo that uses Dual Hurl followed by Wild Surge to dash forward then performing Mountain Climber to jump up in the air. Once airborne, you have the choice to use Plummet or Fire Foot Drill Jump to continue the combo, or end with a plunging strong attack as you move behind the enemy. From this point, you can do Roundabout to dash past the enemy while dealing damage.
Using Wild Surge and Roundabout could sometimes lead to overshooting the move or falling off edges, so make sure you're positioned well. Additionally, Plummet or Fire Foot Drill Jump can be punished by an enemy while you're in the air.
Best Skills for Hatchets
Secret Skills Text
| Secret Skill | Effects |
|---|---|
| Evil-Dispelling Evade | Dispels the Yokai Realm from an area where you have successfully Evaded. |
| Armor Piercer | Increases damage dealt by Final Blow and Grapple by 10.0%. |
| Tachi Arts | Increase melee attack by 8.4% against enemies with maximum Life. |
| Awakening | Allows to use Onmyo Magic faster. |
| Panacea Curefast | Increase Life restored by elixirs by 15.0% |
| Lingering Spirit | Recovers 30.0% of the Amrita left at your grave when you die. |
The Evil-Dispelling Evade is one of the most important Secret Skill for the Ninja Style. When combined with the Evade Ninjutsu, it has the same effects as the Samurai Style's Ki Pulse, so it is highly recommended to acquire both skills as soon as possible. Awakening is valuable too, as plenty of Ninja weapons scale with Magic, so using Onmyo and Talismans are often encouraged.
Other Secret Skills of note are Panacea Curefast and Lingering Spirit. As these are Common Secret Skills, they provide effects that apply to both Samurai and Ninja Styles.
For combat, Taichi Arts and Armor Piercer are easily found within the Warring States period, but these Secret Skills can be changed based on your weapon or playstyle.
Best Guardian Spirits for Hatchets
| Early Game Mid Game |
|
|---|---|
| Late Game |
Use Nekomata in Early Game and Mid Game
| Nekomata | ATK | DEF | Element |
|---|---|---|---|
 |
10 | 10 | Lightning |
| Quest | |||
| The Fall of Edo Castle | |||
| Special Effects | |||
|
・Ninjutsu Ki Damage +7.3%
・Ki Recovery Speed +6.2% ・Quick Attack Break +10.6 % ・Melee Attack Ki Consumption ・Final Blow/Grapple Damage |
|||
| Guardian Spirit Skill | |||
|
・Electrified Kunai (Spirit Force: 60)
・Thunderclaw Kick (Spirit Force: 40) |
|||
Nekomata's special effects will be useful when using the Hatchets as it increases your Ki Recovery speed and reduces Ki Consumption for melee attacks. Nekomata is also a Lightning Guardian Spirit, so his Spirit Force skill and Living Artifact form can help in adding Lightning damage to your combos and maintaining the build-up of status ailments.
The skill Thunderclaw Kick can be used when you run out of Ki as using a Guardian Spirit Skill resets the Ki meter. Nekomata's skill can also accumulate the Shock status, so use it to maintain the ailment's duration. As this skill does a backflip kick, use it whenever you need to escape an enemy.
Use Shami-choro in Late Game
| Shami-choro | ATK | DEF | Element |
|---|---|---|---|
 |
21 | 20 | Lightning |
| Quest | |||
| The Sweet Sound of Strings | |||
| Special Effects | |||
|
・Faster Movement (Evade)
・Faster Ki Recovery (Onmyo Magic Hit) ・Lightning Damage +8.9% ・Auto Life Recovery (Critical) +8.9% ・Status Enhancement Duration +14.2% |
|||
| Guardian Spirit Skill | |||
|
・Thunderous Performance (Spirit Force: 60)
・Strings of LIght (Spirit Force: 40) |
|||
Shami-choro provides beneficial buffs for offense and support. Her Lightning Damage effect, in particular, synergizes well with this build and will bolster your elemental attacks further. She also makes your Ki recover faster whenever you use an offensive Onmyo Magic. For defensive buffs, her Status Enhancement Duration extends the duration of all the Onmyo buffs you cast, like the Extraction Talisman, adding to your survivability in tougher combat.
For her skills, Strings of Light unleashes a rope from your hand that pulls you closer to an enemy to deal Lightning damage. This skill has decent Lightning damage and is quite efficient in landing a Burst Break (Skill) against enemies, as it can be used from a distance.
Best Soul Cores for Hatchets
| Yang Position |
|---|
| Yin Position |
Use Sunakake-baba Soul Core for Yang
| Sunakake-baba Soul Core | |
|---|---|
 |
|
| Yang Position | Special Effects:
・Ki Pulse Bonus +50 ・Blindness (Onmyo Magic Hit) Yokai Ability: ・Summoning Seal: Sunakake-baba x4 |
| Yin Position | Talisman:
・Devigorate Talisman x3 |
Sunakake-baba's special effect can inflict Blindness upon hitting an enemy with any offensive Onmyo Magic. Blinded tenemies are emporarily disoriented and will run or attack in random directions, giving you the opportunity to counterattack until the effect lasts.
Use Bloodedge Demon Soul Core for Yang
| Bloodedge Demon Soul Core | |
|---|---|
 |
|
| Yang Position | Special Effects:
・Elemental Damage +5.5% ・Damage vs. Revenants +7.5% Yokai Ability: ・Summoning Seal: Bloodedge Demon x1 |
| Yin Position | Talisman:
・Carnage Talisman x5 |
Use the Bloodedge Demon Soul Core on the 2nd Yang position for its Elemental Damage special effect. This will allow you to deal even more damage when you use Lightning attacks. This Soul Core also has Damage vs. Revenants but it's only good when you are farming Revenants (red graves) for loot and Glory points.
Use Raiju Soul Core for Yin
| Raiju Soul Core | |
|---|---|
 |
|
| Yang Position | Special Effects:
・Lightning Damage +4.4% ・Spirit Force Charge Bonus (Cumulative Damage) C Yokai Ability: ・Summoning Seal: Raiju x5 |
| Yin Position | Talisman:
・Lightning Familiar Talisman x3 |
Raiju's Soul Core gives the Lightning Familiar Talisman which will be used to bolster the Lightning damage you do, as well as accelerate the buildup of the Shock status. The Lightning Familiar talisman is considered an offensive Onmyo, so it can be used to proc Blindness if Sunakake-baba Soul Core is equipped in the Yang position.
Use Gaki Chief Soul Core for Yin
| Gaki Chief Soul Core | |
|---|---|
 |
|
| Yang Position | Special Effects:
・Amrita Guage Charge +7.5% ・Strong Attack Ki Damage +3.5% Yokai Ability: ・Summoning Seal: Gaki Chief x2 |
| Yin Position | Talisman:
・Extraction Talisman x5 |
The Gaki Chief Soul Core's Extraction Talisman will be one of the defensive Onmyo used in this build. Combined with Life Recovery (Amrita Absorption) effect from your equipment, the Extraction Talisman will make the enemies release Amrita whenever you attack them. Absorbing the Amrita restores your health and allows you to fight more aggressively.
Use Mermaid Soul Core for Yin
| Mermaid Soul Core | |
|---|---|
 |
|
| Yang Position | Special Effects:
・Life Drain (Water Damage) B- ・Faster Movement (Ailing) Yokai Ability: ・Summoning Seal: Mermaid x5 |
| Yin Position | Talisman:
・Life Leech Talisman x3 |
Another defensive Onmyo will be the Life Leech Talisman which will restore your HP whenever you hit the target. It is recommended to use this talisman especially during boss fights to increase survivability.
Use Ibaraki Doji Soul Core for Yin
| Ibaraki Doji Demon Soul Core | |
|---|---|
|
|
| Yang Position | Special Effects:
・Spirit Force Bonus (Electrified Enemy) A- ・Melee Damage (Critical) +5.7% Yokai Ability: ・Summoning Seal: Ibaraki Doji x1 |
| Yin Position | Talisman:
・Carnage Talisman x5 |
Get the Carnage Talisman from Ibaraki Dojo's Soul Core to raise your melee damage but lowers your Defense in exchange. Using this talisman is a bit of a risk, especially if you have a low Constitution stat, but its added damage can finish fights faster so it's highly recommended to have it as a buff.
If you have not beaten Ibaraki Doji yet, you can use another Bloodedge Demon Soul Core as an alternative.
Hatchets Tips and Tricks
Spend Your Prestige Points to Get Bonuses
Prestige Points can be used to obtain permanent bonuses (known as Prestige) to enhance a variety of stats from 9 different categories. For the Ninja Style, we suggest using your points on some of the following Prestige:
- Ninja: Dodge Ki Consumption, Melee Attack Ki Consumption
- Tactics: Ki Recovery Speed, Onmyo Magic Power
- Subjugation: Amrita Earned, Damage Taken (Ki Depleted)
- Exploration: Medicine Efficacy
- Crucible: Amrita Earned (Crucible)
Take note that the Prestige Points you've spent can be reset and redistributed to another bonus within the same category.
How to Get Prestige Points?
To get more Prestige Points for a category, fulfill a milestone or complete challenges to earn Titles. To see the available Titles you can unlock, open the Main Menu then go to Titles > Title List.
Use Equipment Suited to Your Level
To get the best bonuses, always use equipment that suits your current level. Using underleved items will give you less attack bonuses for weapons, and less defense bonuses for armor.
Use Purple Rarity If Possible
Items with Purple (Exotic) rarities provide better and rarer special effects. Additionally, you'll sometimes find better combinations of special effects from Exotic weapons.
Raise the Hatchets to Full Familiarity
Constantly using weapons will increase its Familiarity. Weapons with full Familiarity gets a significant bonus in damage.
Nioh 3 Related Guides
All Samurai Builds
| Samurai Weapons | ||
|---|---|---|
 Swords Swords |
 Dual Swords Dual Swords |
 Spears Spears |
 Axes Axes |
 Odachi Odachi |
 Switchglaives Switchglaives |
 Cestesus Cestesus |
||
All Ninja Builds
| Ninja Weapons | ||
|---|---|---|
 Ninja Swords Ninja Swords |
 Dual Ninja Swords Dual Ninja Swords |
 Kusarigama Kusarigama |
 Tonfa Tonfa |
 Hatchets Hatchets |
 Splitstaff Splitstaff |
 Talons Talons |
||
Comment
Author
Best Hatchets Build
Rankings
- We could not find the message board you were looking for.
Gaming News


Popular Games

Genshin Impact Walkthrough & Guides Wiki
Umamusume: Pretty Derby Walkthrough & Guides Wiki
Crimson Desert Walkthrough & Guides Wiki
Monster Hunter Stories 3: Twisted Reflection Walkthrough & Guides Wiki
Honkai: Star Rail Walkthrough & Guides Wiki
Pokemon Pokopia Walkthrough & Guides Wiki
The Seven Deadly Sins: Origin Walkthrough & Guides Wiki
Wuthering Waves Walkthrough & Guides Wiki
Zenless Zone Zero Walkthrough & Guides Wiki
Arknights: Endfield Walkthrough & Guides Wiki


Recommended Games
Fire Emblem Heroes (FEH) Walkthrough & Guides Wiki
Diablo 4: Vessel of Hatred Walkthrough & Guides Wiki
Cyberpunk 2077: Ultimate Edition Walkthrough & Guides Wiki
Yu-Gi-Oh! Master Duel Walkthrough & Guides Wiki
Super Smash Bros. Ultimate Walkthrough & Guides Wiki
Pokemon Brilliant Diamond and Shining Pearl (BDSP) Walkthrough & Guides Wiki
Elden Ring Shadow of the Erdtree Walkthrough & Guides Wiki
Monster Hunter World Walkthrough & Guides Wiki
The Legend of Zelda: Tears of the Kingdom Walkthrough & Guides Wiki
Persona 3 Reload Walkthrough & Guides Wiki


All rights reserved
©KOEI TECMO GAMES CO., LTD. All rights reserved.
The copyrights of videos of games used in our content and other intellectual property rights belong to the provider of the game.
The contents we provide on this site were created personally by members of the Game8 editorial department.
We refuse the right to reuse or repost content taken without our permission such as data or images to other sites.