List of All Kodama
This is a list of all Kodamas and their locations in Nioh 3. See the locations of all Kodamas and the rewards for collecting them in this guide.
 Attention! Attention! |
|
|---|---|
| ⓘ Data is available for the following maps:
・1572 CE - Warring States ・1190 CE - Heian ・247 CE - Antiquity ・1864 CE - Bakumatsu |
|
 under the page's title to be notified of any updates!
Kodama Interactive Map
Click on the arrow ⓘ In-game map pins will eventually be displayed as you increase your Exploration Level. Please also refer to your in-game map! |
All Kodama Locations
Warring States Kodama Locations
| ✔️ | Collectible | Location |
|---|---|---|
| Futamata Kodama 7 |
 Period: Warring States | |
| Futamata Kodama 6 |
Region: Futamata
Period: Warring States | |
| Futamata Kodama 5 |
 Region: Futamata Period: Warring States | |
| Futamata Kodama 4 |
 Period: Warring States | |
| Futamata Kodama 3 |
 Region: Futamata Period: Warring States | |
| Futamata Kodama 2 |
 Period: Warring States | |
| Futamata Kodama 1 |
 Region: Futamata Period: Warring States | |
| Futamata Road Kodama 3 |
 Period: Warring States | |
| Futamata Road Kodama 2 |
 Region: Futamata Road Period: Warring States | |
| Futamata Road Kodama 1 |
 Region: Futamata Road Period: Warring States | |
| Hamamatsu Kodama 2 |
 Region: Hamamatsu Period: Warring States | |
| Hamamatsu Kodama 1 |
 Region: Hamamatsu Period: Warring States | |
| Hamamatsu Kodama 3 |
 Region: Hamamatsu Period: Warring States | |
| Hamamatsu Kodama 4 |
 Region: Hamamatsu Period: Warring States | |
| Hamamatsu Hill Kodama 3 |
In an area accessible through the myth Ii's Memento.
Region: Hamamatsu Hill Period: Warring States | |
| Hamamatsu Hill Kodama 2 |
 Region: Hamamatsu Hill Period: Warring States | |
| Hamamatsu Hill Kodama 1 |
 Region: Hamamatsu Hill Period: Warring States | |
| Iinoya Kodama 1 |
 Region: Iinoya Period: Warring States | |
| Iinoya Kodama 2 |
 Region: Iinoya Period: Warring States | |
| Iinoya Kodama 3 |
 Region: Iinoya Period: Warring States | |
| Iinoya Kodama 4 |
Region: Iinoya
Period: Warring States | |
| Iinoya Kodama 5 |
Region: Iinoya
Period: Warring States | |
| Iinoya Kodama 6 |
Region: Iinoya
Period: Warring States | |
| Iinoya Kodama 7 |
Region: Iinoya
Period: Warring States | |
| Iinoya Kodama 8 |
 Region: Iinoya Period: Warring States | |
| Iinoya Kodama 9 |
 Region: Iinoya Period: Warring States | |
| Iinoya Kodama 10 |
 Region: Iinoya Period: Warring States | |
| Lake Hamana Kodama |
Interactable after obtaining the Cell Keys.
Region: Lake Hamana Period: Warring States | |
| Lake Sanaru Kodama 1 |
Region: Lake Sanaru
Period: Warring States | |
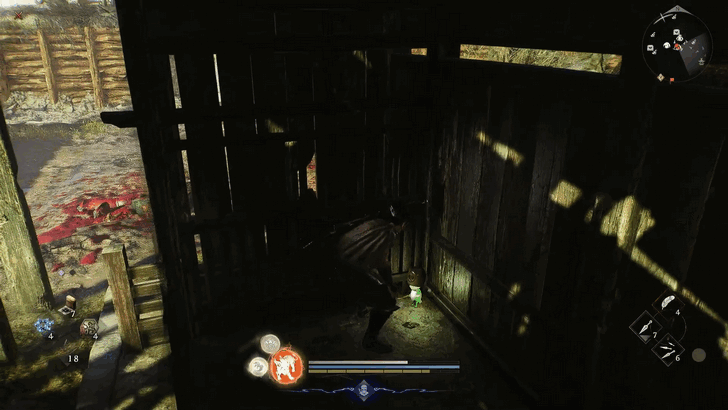
| Lake Sanaru Kodama 2 |
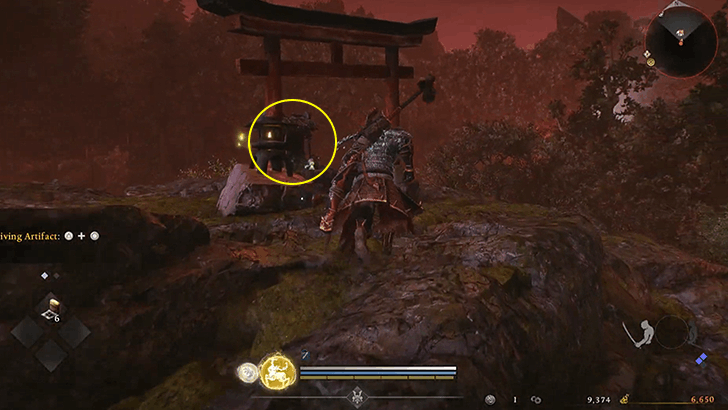
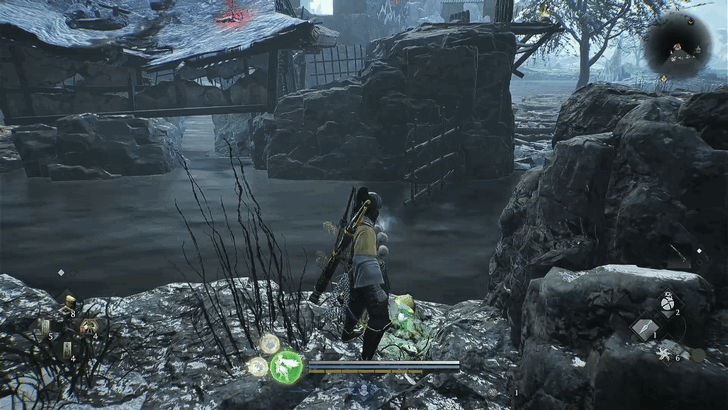
On a small both, in the path going to the large vessel with the Enemy Base.
Region: Lake Sanaru Period: Warring States | |
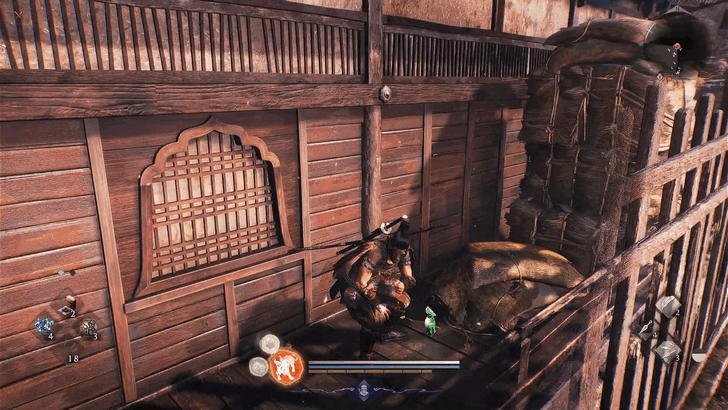
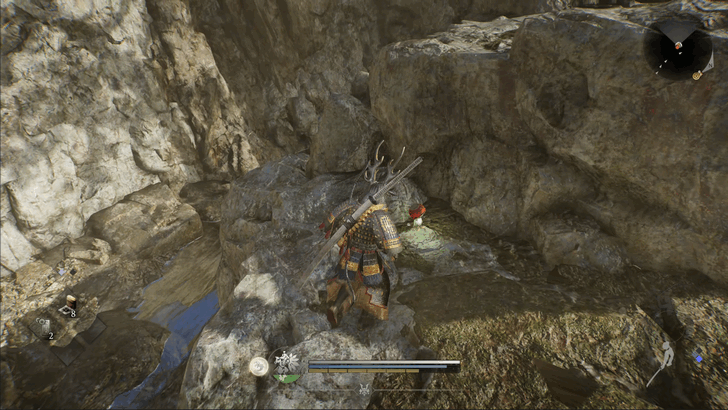
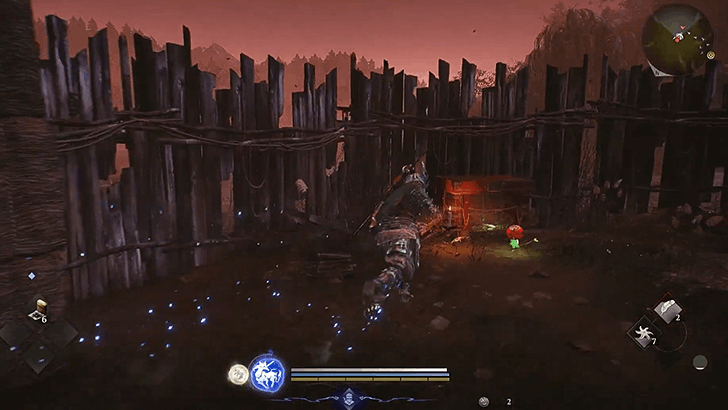
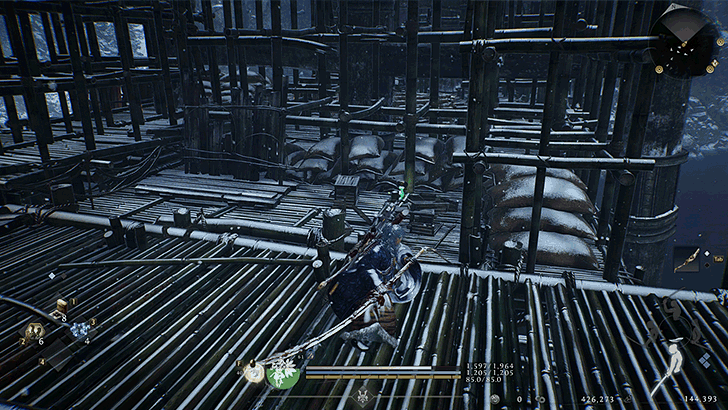
| Lake Sanaru Kodama 3 |
Inside the Enemy Base (the large boat). The entrance is facing the sea; navigate to the back through the small boats. Clear the enemy base to unseal the chest with the Kodama.
Region: Lake Sanaru Period: Warring States | |
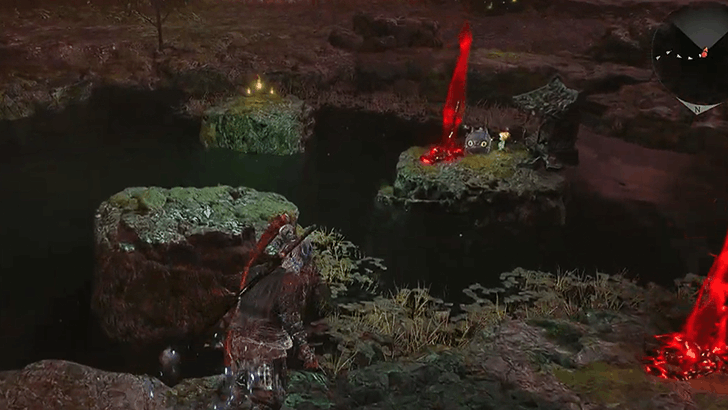
| Lake Sanaru Kodama 4 |
On the nearby isle after you collect the Scampuss at the end of its route.
Region: Lake Sanaru Period: Warring States | |
| Maisaka Kodama 1 |
 Region: Maisaka Period: Warring States | |
| Maisaka Kodama 3 |
 Region: Maisaka Period: Warring States | |
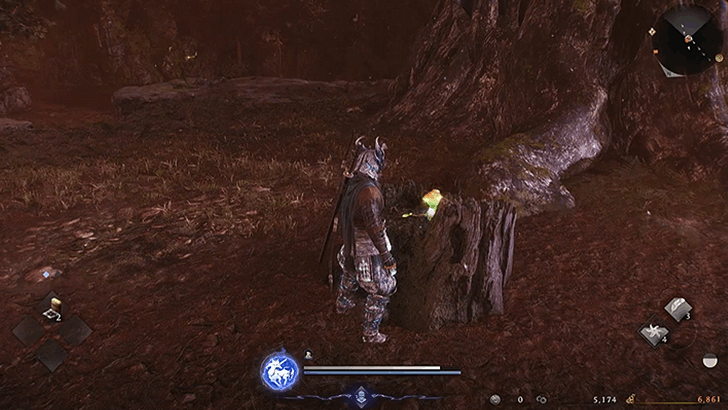
| Maisaka Kodama 2 |
South of the Ascetic Passage Shrine. Follow the pool-steps down from there until you reach a small corner, at the edge of pool. Take care as there is a Nure-onna (snake lady) nearby.
Region: Maisaka Period: Warring States | |
| Mikatagahara Kodama 1 |
Region: Mikatagahara
Period: Warring States | |
| Mikatagahara Kodama 2 |
Region: Mikatagahara
Period: Warring States | |
| Mikatagahara Kodama 3 |
Region: Mikatagahara
Period: Warring States | |
| Mikatagahara Kodama 4 |
Region: Mikatagahara
Period: Warring States | |
| Mikatagahara Kodama 5 |
Region: Mikatagahara
Period: Warring States | |
| Mikatagahara Kodama 6 |
Region: Mikatagahara
Period: Warring States | |
| Tenryu River Kodama 1 |
 Region: Tenryu River Period: Warring States | |
| Tenryu River Kodama 2 |
 Region: Tenryu River Period: Warring States | |
| Tenryu River Kodama 3 |
 Region: Tenryu River Period: Warring States | |
| Tenryu River Kodama 4 |
 Region: Tenryu River Period: Warring States | |
| Tokaido Kodama 1 |
 Region: Tokaido Period: Warring States | |
| Tokaido Kodama 2 |
 Region: Tokaido Period: Warring States | |
| Tokaido Kodama 3 |
 Region: Tokaido Period: Warring States |
Heian Kodama Locations
| ✔️ | Collectible | Location |
|---|---|---|
| Awawa no Tsuji Kodama 1 |
 Region: Awawa no Tsuji Period: Heian | |
| Funaokayama Kodama |
 Region: Funaokayama Period: Heian | |
| Hachijo Kodama 2 |
 Region: Hachijo Period: Heian | |
| Hachijo Kodama 3 |
 Region: Hachijo Period: Heian | |
| Hachijo Kodama 1 |
 Period: Heian | |
| Kamo Village Kodama 1 |
 Region: Kamo Village Period: Heian | |
| Kurama Kodama 1 |
 Region: Kurama Period: Heian | |
| Kurama Kodama 2 |
 Region: Kurama Period: Heian | |
| Rokuhara Kodama 2 |
 Period: Heian | |
| Rokuhara Kodama 1 |
Region: Rokuhara
Period: Heian | |
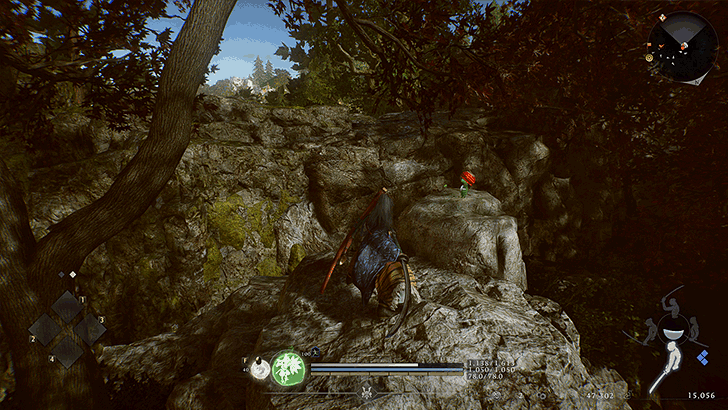
| Rokuhara Kodama 3 |
Found on the roof of the building at this spot.
Region: Rokuhara Period: Heian | |
| Sagano Kodama 1 |
 Region: Sagano Period: Heian | |
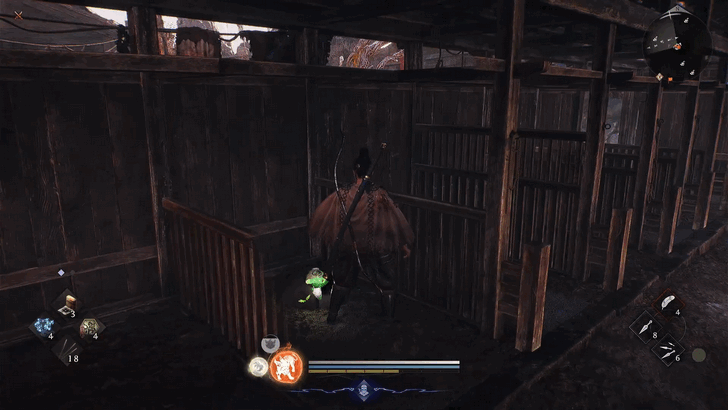
| Sagano Kodama 2 |
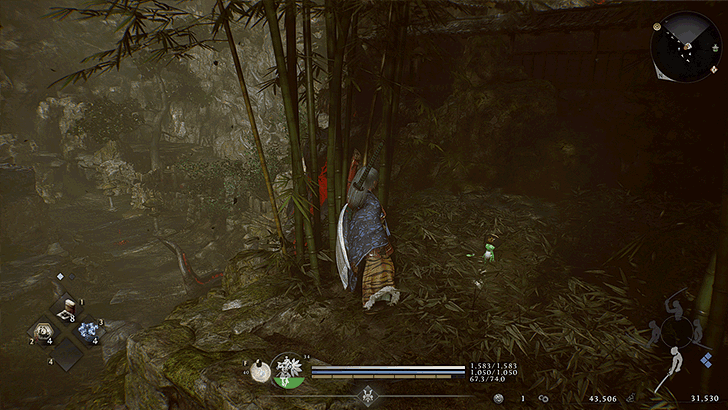
Hidden in a narrow lower area beside a ledge. Best to come back to this spot once you have cleared the giant crow shooting at you in the area.
Region: Sagano Period: Heian | |
| Sagano Kodama 3 |
Region: Sagano
Period: Heian |
Bakumatsu Kodama Locations
| ✔️ | Collectible | Location |
|---|---|---|
| Gion Kodama |
Region: Gion
Period: Bakumatsu | |
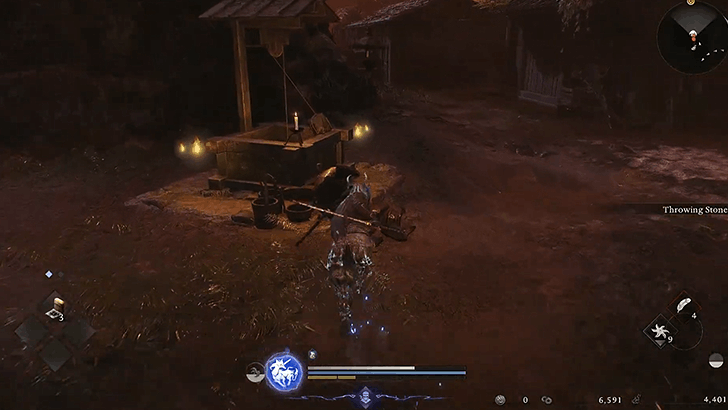
| Kiyomizu Kodama 4 |
Found under the bridge. Look for a small path going at the bridge's south side.
Region: Kiyomizu Period: Bakumatsu | |
| Kiyomizu Kodama 3 |
Region: Kiyomizu
Period: Bakumatsu | |
| Kiyomizu Kodama 2 |
Region: Kiyomizu
Period: Bakumatsu | |
| Kiyomizu Kodama 1 |
Region: Kiyomizu
Period: Bakumatsu | |
| Kyoto Imperial Palace Kodama 1 |
Region: Kyoto Imperial Palace
Period: Bakumatsu | |
| Kyoto Imperial Palace Kodama 2 |
Region: Kyoto Imperial Palace
Period: Bakumatsu | |
| Mibu Kodama |
Region: Mibu
Period: Bakumatsu | |
| Nijo Castle Kodama 1 |
Region: Nijo Castle
Period: Bakumatsu | |
| Nijo Castle Kodama 2 |
Region: Nijo Castle
Period: Bakumatsu | |
| Nijo Castle Kodama 3 |
Region: Nijo Castle
Period: Bakumatsu | |
| Shichijo Kodama 2 |
Region: Shichijo
Period: Bakumatsu | |
| Shichijo Kodama 3 |
Region: Shichijo
Period: Bakumatsu | |
| Shichijo Kodama 4 |
Region: Shichijo
Period: Bakumatsu | |
| Shichijo Kodama 1 |
Region: Shichijo
Period: Bakumatsu | |
| Shijo Kodama |
Region: Shijo
Period: Bakumatsu | |
| Shimabara Kodama 2 |
Region: Shimabara
Period: Bakumatsu | |
| Shimabara Kodama 4 |
Region: Shimabara
Period: Bakumatsu | |
| Shimabara Kodama 3 |
Region: Shimabara
Period: Bakumatsu | |
| Shimabara Kodama 1 |
Region: Shimabara
Period: Bakumatsu | |
| Shirakawa Kodama |
Region: Shirakawa
Period: Bakumatsu | |
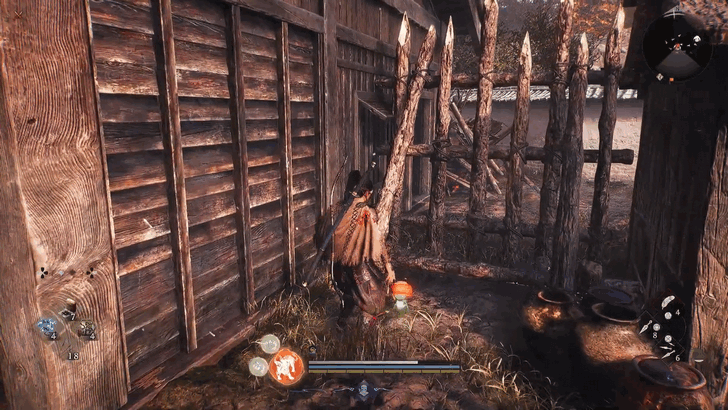
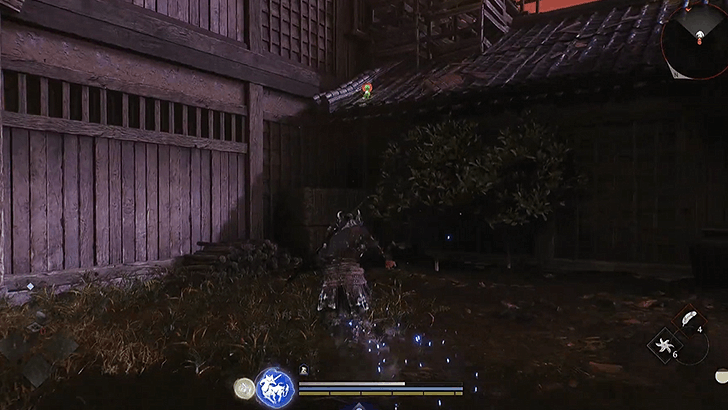
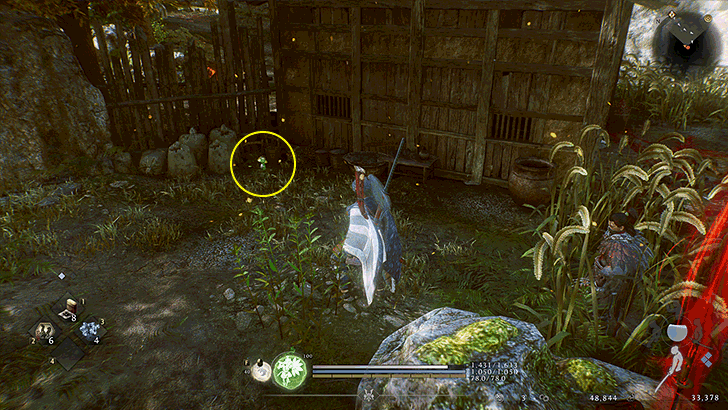
| Shirakawa Kodama 2 |
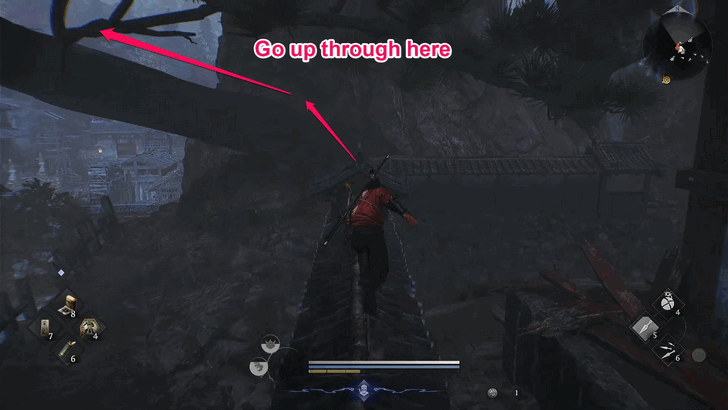
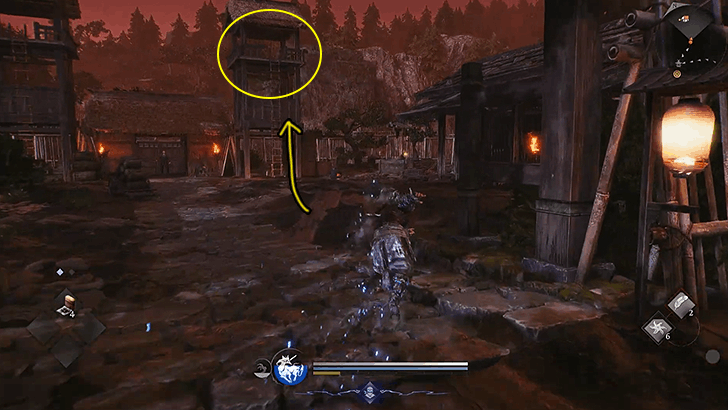
Found on a roof. You can get to this spot by going west of the Yoshidayama Approach Shrine.
Region: Shirakawa Period: Bakumatsu |
Kodama Rewards
Kodama Leader Achievement
 Silver Silver
|
Kodama Leader |
|---|---|
| Guided all Kodama home.
► Kodama Locations |
Guiding all of the Kodamas home in the game will reward you the Kodama Leader achievement.
Trophy List Guide and All Achievements
What are Kodamas?
Provides Kodama Merits for Blessings
 |
|
| Kodama Blessing Special Effects | ・ Elixir Drop Rate
・Medicine Efficacy ・Spirit Force Bonus (Elixir) ・Increased Damage Dealt (Elixir) ・Decreased Damage Taken (Elixir) |
|---|---|
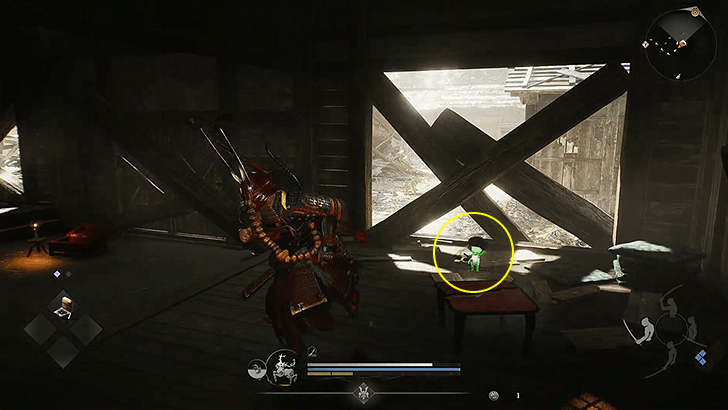
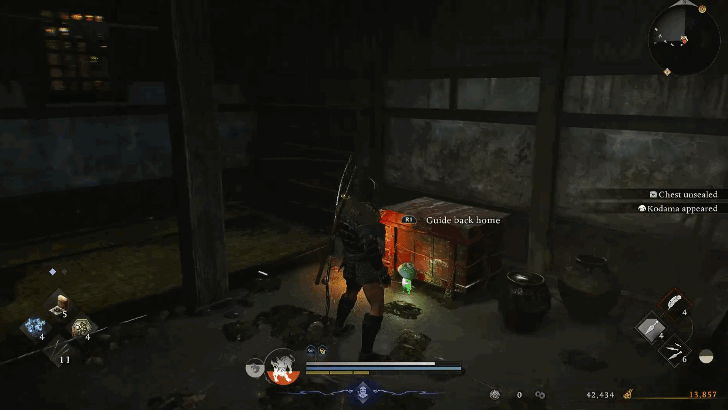
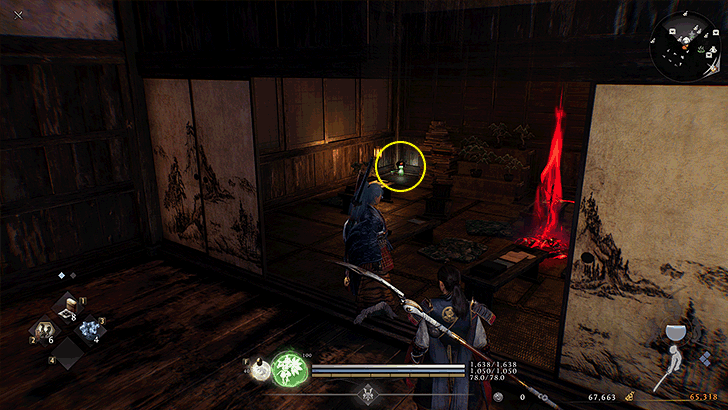
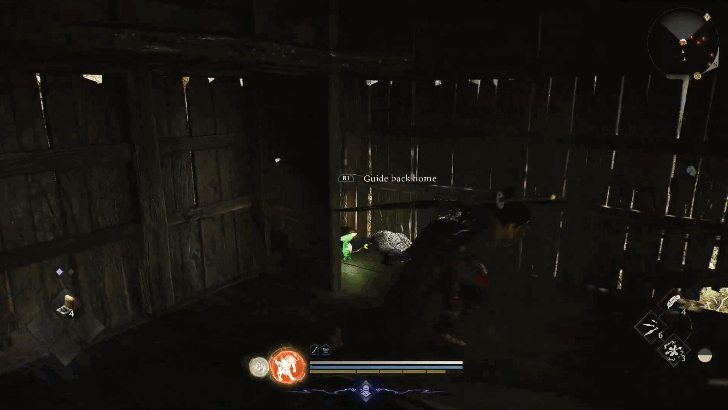
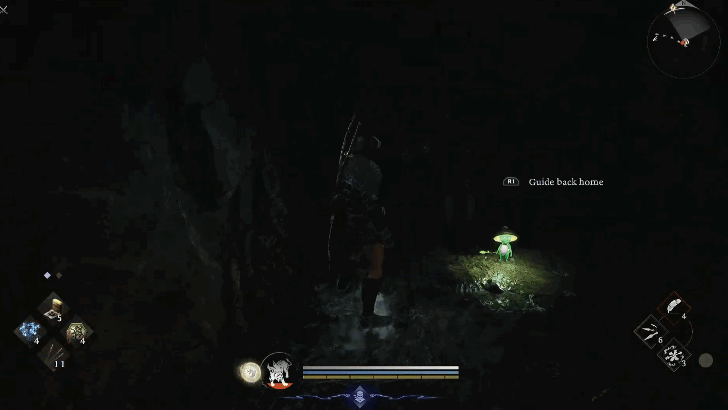
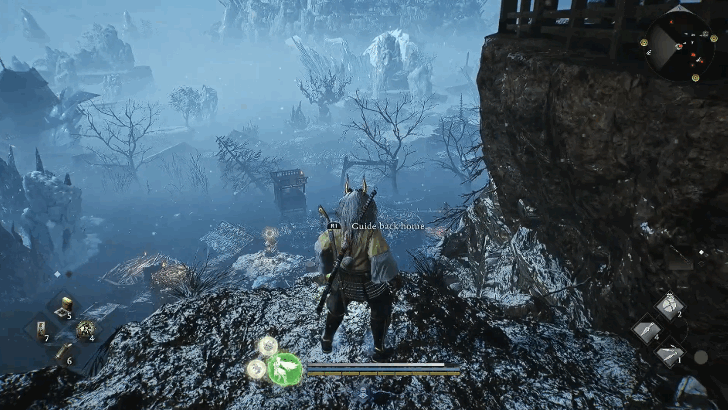
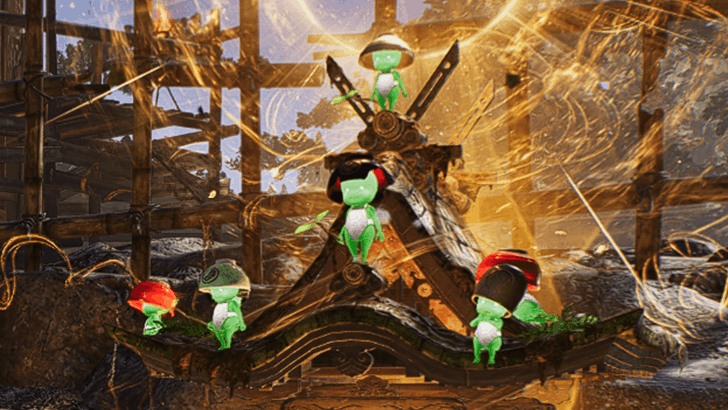
Kodamas are little green Yokai that are found throughout the world of Nioh 3. Interact with them to 'guide them home' (they will go own their own). They emit distinct, squeeky sounds. Listening closely will help you find them!
Guiding Kodamas home will give you Kodama Merits, which you can use to distribute levels to each Special Effect listed above in the Kodama Blessings menu at Shrines and Bodhisattva Statues.
These Special Effects are always active, and are adjustable in the Kodama Blessing screen; you may raise/reduce levels for each Special Effect according to your needs.
Nioh 3 Related Guides

Recommended Guides
 Interactive Map
 Best Weapon Tier List
 Crucible Wraiths
 Best Clans to Join
 Smithing Texts
 List of Soul Cores
 List of Graces
 Endings Explained
 Trophy List and All Achievements
 Character Creation Codes
 List of All Collectibles
Nioh 3 Wiki
| Nioh 3 Wiki Contents | |
|---|---|
 Builds Builds |
 Bosses Bosses |
 Main Missions Main Missions |
 Side Quests and Myths Side Quests and Myths |
 Tips and Tricks Tips and Tricks |
 Martial Arts Martial Arts |
 Armor Armor |
 Weapons Weapons |
 Skills Skills |
 Guardian Spirits Guardian Spirits |
 News and Game Info News and Game Info |
- |
Comment
Author
List of All Kodama
Rankings
- We could not find the message board you were looking for.
Gaming News


Popular Games

Genshin Impact Walkthrough & Guides Wiki
Umamusume: Pretty Derby Walkthrough & Guides Wiki
Crimson Desert Walkthrough & Guides Wiki
Monster Hunter Stories 3: Twisted Reflection Walkthrough & Guides Wiki
Honkai: Star Rail Walkthrough & Guides Wiki
Pokemon Pokopia Walkthrough & Guides Wiki
The Seven Deadly Sins: Origin Walkthrough & Guides Wiki
Wuthering Waves Walkthrough & Guides Wiki
Zenless Zone Zero Walkthrough & Guides Wiki
Arknights: Endfield Walkthrough & Guides Wiki


Recommended Games
Fire Emblem Heroes (FEH) Walkthrough & Guides Wiki
Diablo 4: Vessel of Hatred Walkthrough & Guides Wiki
Cyberpunk 2077: Ultimate Edition Walkthrough & Guides Wiki
Yu-Gi-Oh! Master Duel Walkthrough & Guides Wiki
Super Smash Bros. Ultimate Walkthrough & Guides Wiki
Pokemon Brilliant Diamond and Shining Pearl (BDSP) Walkthrough & Guides Wiki
Elden Ring Shadow of the Erdtree Walkthrough & Guides Wiki
Monster Hunter World Walkthrough & Guides Wiki
The Legend of Zelda: Tears of the Kingdom Walkthrough & Guides Wiki
Persona 3 Reload Walkthrough & Guides Wiki


All rights reserved
©KOEI TECMO GAMES CO., LTD. All rights reserved.
The copyrights of videos of games used in our content and other intellectual property rights belong to the provider of the game.
The contents we provide on this site were created personally by members of the Game8 editorial department.
We refuse the right to reuse or repost content taken without our permission such as data or images to other sites.