This survey will take about 1 minute.
Your answers will help us to improve our website.
Nioh 3
The Hamamatsu Incident Walkthrough

The Hamamatsu Incident is the third main mission in Nioh 3. See the complete demo walkthrough for The Hamamatsu Incident and mission rewards in this guide!
List of Contents
| ◀ Previous Mission | Next Mission ▶ |
|---|---|
| Escape From Hitokoto Slope | The Battle of Futamata Castle |
The Hamamatsu Incident Walkthrough
| Walkthrough Objectives | |
|---|---|
| 1 | Make Your Way Toward Hamamatsu Castle |
| 2 | Enter the Crucible |
| 3 | Crucible Manifested |
Objective 1: Make Your Way Toward Hamamatsu Castle
| # | Walkthrough |
|---|---|
| 1 | 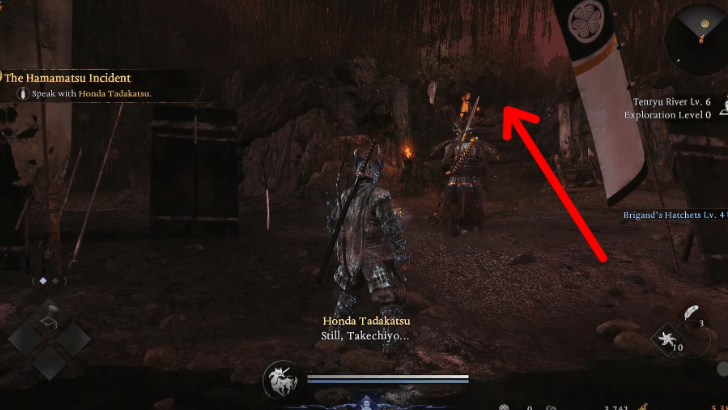 After the cutscene with Honda Tadakatsu, you will have arrived at the Tenryu River. Talk to Honda Tadakatsu briefly and follow the pathway up the hill until you enter a short cutscene. |
| 2 | 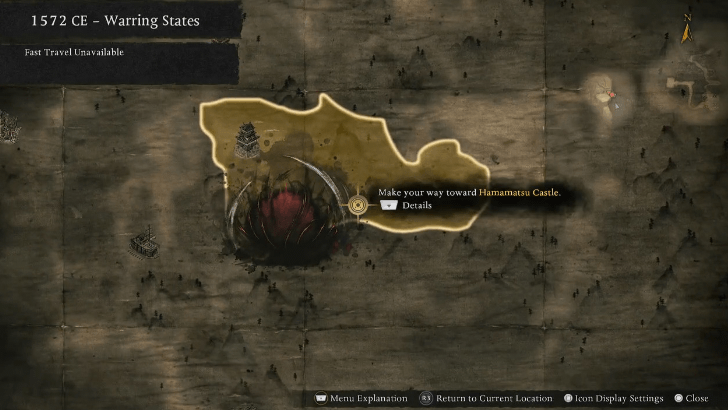 You will need to travel across the map to get to Hamamatsu Castle and the Crucible in the distance. Take the chance to explore the map, interact with friendly yokai, complete side missions, get better gear, and level up your stats! |
| 3 | 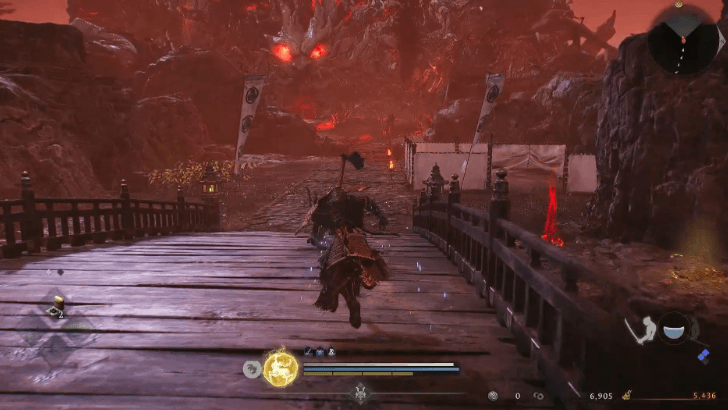 Once you cross the wooden bridge in the Hamamatsu area, another scene will play out. |
Objective 2: Enter the Crucible
| # | Walkthrough |
|---|---|
| 1 | 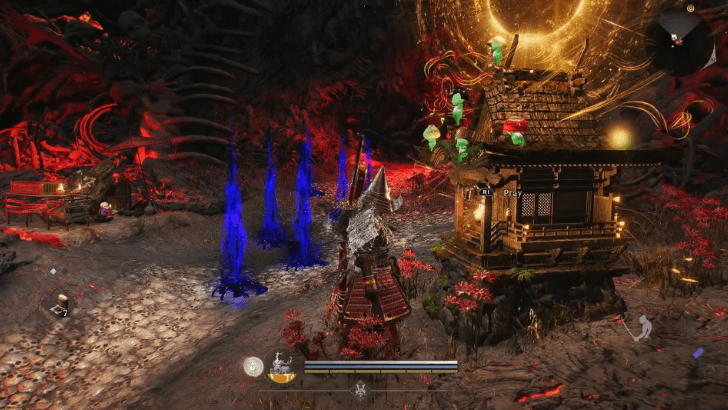 Ii Naotora will guide you to the entrance of the Crucible that had taken over Hamamatsu Castle Town. There will be a yokai merchant and a shrine you can pray to right before the entrance. |
| 2 | It is recommended for players to be at least level 14 and to prepare your skills and equipment thoroughly before entering the Crucible. If you're not prepared yet, you can keep exploring and just come back to the entrance shrine later. |
| 3 | 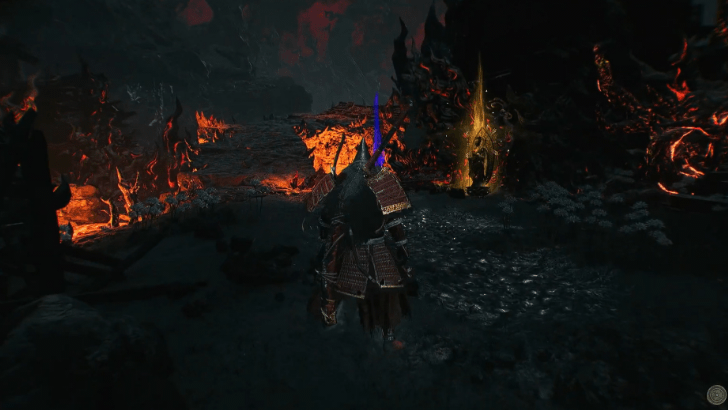 Once inside, there will be a Bodhisattva statue that serves the same function as the shrines outside. You can Fast Travel out of the Crucible as long as you're near a Bodhisattva statue. |
| 4 | 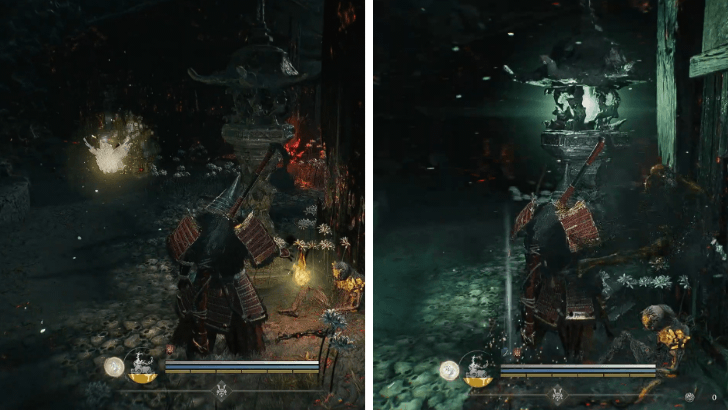 There are also some lamps that are automatically lit by Kusanagi's light. Finding these lamps mean you're going the right way! |
| 5 | 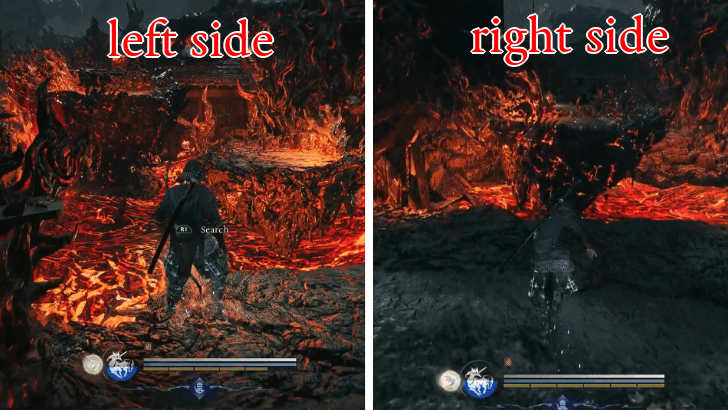 Follow the path until you get to a river of lava with two floating platforms. If you turn right and pass through the house, you can run back and open a previously locked door back to the other side. Crossing the river on the right side will also bring you to a dead end with a chest guarded by an enemy. |
| 6 | 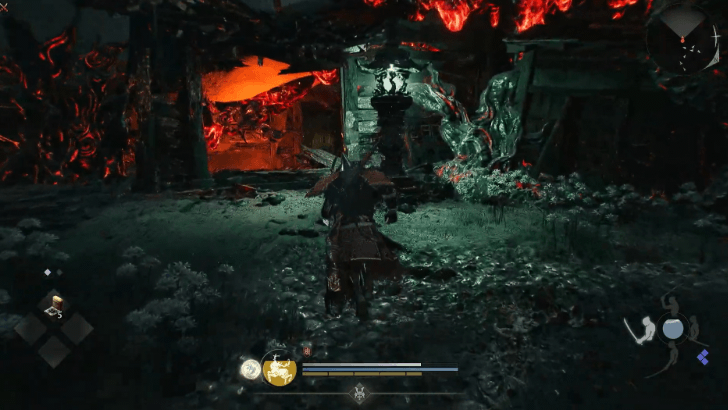 Cross the river on the left side by jumping on the platforms and continue following the road heading northward. You'll have to pass directly through several dilapidated houses and jump over platforms connected to a large bone-like boulder to keep going forward. |
| 7 | 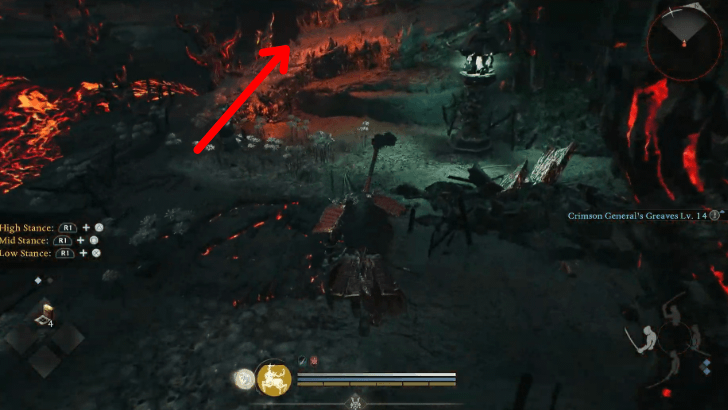 Past this boulder is a U-turn in the road leading to an upper level heading south and then turning again to cross another river lava and head north again. |
| 8 | 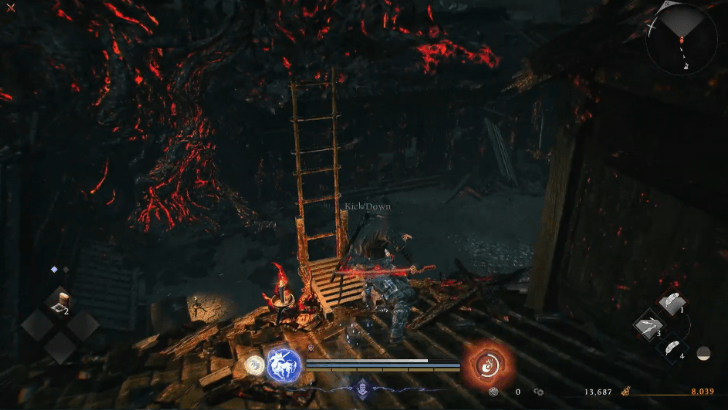 Following this upper path over houses and other structures, you'll eventually come across a ladder you can lower to the same chest in the dead end from before, by the first lava river. If you hadn't gotten the chest before, you can do so with the ladder. There's also a chest on the ground floor of the house beside the ladder. |
| 9 | 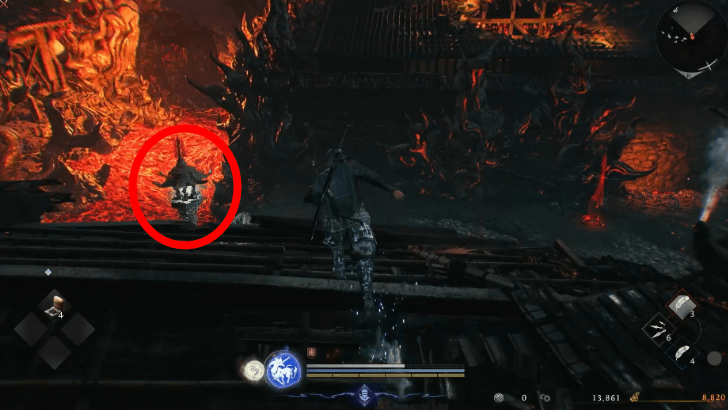 Keep following the roof pathway until you reach another lamp, this one beside a lava river. You can go down on that side and travel along the road. Be careful of yokai scattered along the way. |
| 10 | 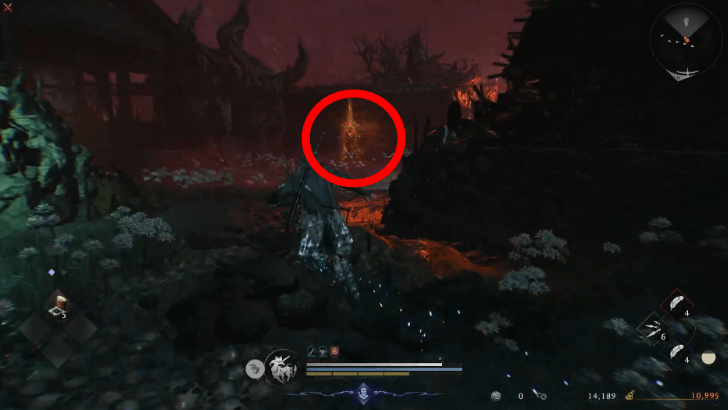 Near the center of the Crucible, you'll come across a large property that is not as burnt or broken down, and there will be a Bodhisattva Statue by the entrance. Pray at the statue to activate it before you proceed into the house. |
| 11 | For better chances of defeating all the enemies inside the house, you can use Ochoko Cups to summon an NPC from the Benevolent Graves located in and around the property. |
| 12 |  The inner courtyard of this property is home to the giant yokai Mikoshi Nyudo. Beware its lightning attacks and don't get caught in its staff swings! |
| 13 |  After defeating Mikoshi Nyudo, exit the house on the other side, marked by a lamp and an open gate. There's another gate just beyond it with yet another lamp to mark the path. |
| 14 | 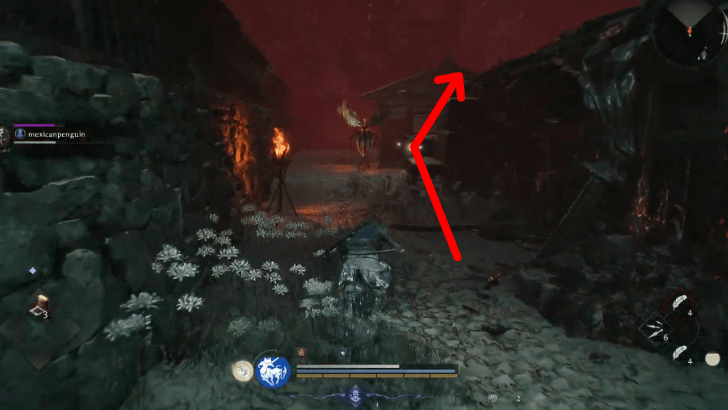 Head into the alley past that second lamp and use the piles of hay to get to the roof. Jump down to the other side at the far end of the alley and continue on the road. |
| 15 | 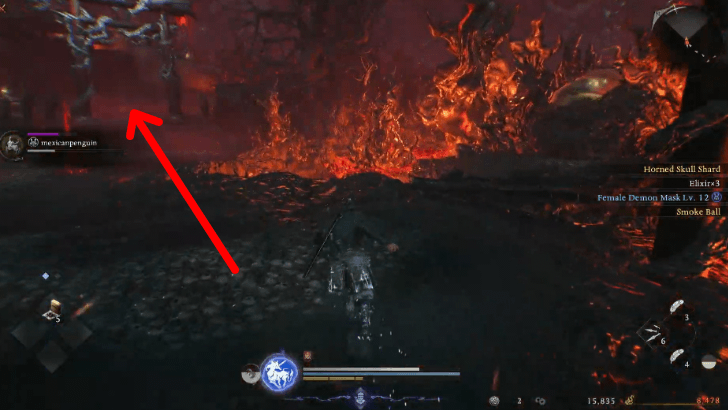 When the road diverges to a set of stairs and an overgrown gate to the left and a bony bridge to the right, go left through the gate. There will be a broken down wall to the left again that continues the path up several stone stairs and through a large house. |
| 16 | Head to the back of the house and around the deck to go up some broken fences and a bony bridge that leads right into a different, smaller house. Past this house, the road continues north. |
| 17 | 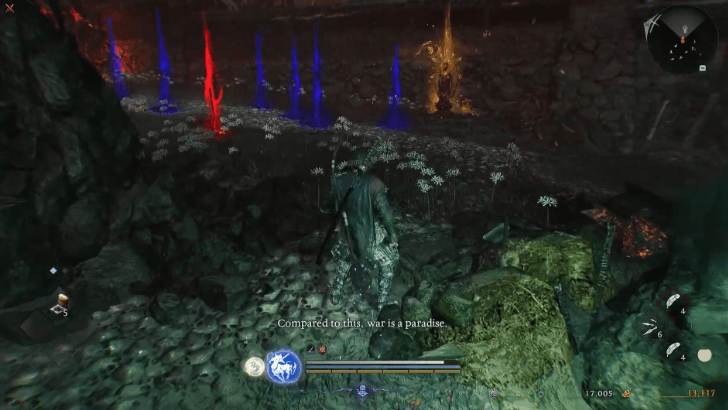 Keep following the lamps northward to a second statue, surrounded by Benevolent Graves. To the left of this statue are heavy double doors that lead to a cutscene and the Crucible boss, Jakotsu-baba. ▶︎ How to Beat Jakotsu-baba |
| 18 | You can request assitance from one of the Benevolent Graves before challenging Jakotsu-baba. This boss has two snake heads it uses to extend and attack at the beginning. When its HP is halved, it will also extend its main head to attack. |
Objective 3: Crucible Manifested
| # | Walkthrough |
|---|---|
| 1 |  After defeating Jakotsu-baba, interact with the Crucible spike to cleanse the Hamamatsu Castle Town Crucible and progress the story. |
| 2 | 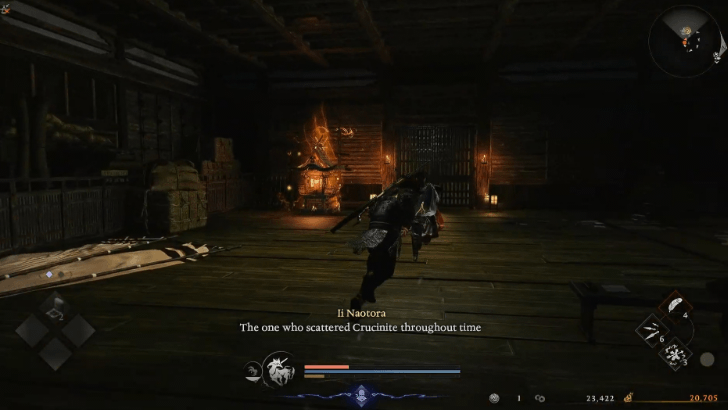 Head inside the keep and follow Ii Naotora until you get to a shrine where you can save your progress. Speak with Ii Naotora to get a Guiding Mirror and continue the mission. |
| 3 | Inside the Guiding Mirror is the Eternal Rift, where Kusanagi once brought you. This time, you can explore the surroundings. |
| 4 | If you head into the first building on the right, you'll find the Fox-masked Blacksmith, who can forge weapons, armor, and other items for you. The Eternal Rift has several other functions, including changing your appearance and unlocking Battle Scroll missions. |
| 5 | After exploring the surroundings, head out to the central pool in the area and speak with Kusanagi to leave the Eternal Rift. |
| 6 | Head past Ii Naotora through the double doors and make your way up the keep until you run into Honda Tadakatsu. Talk to Tokugawa Ieyasu across the room, on the balcony just past Hattori Hanzo. |
The Hamamatsu Incident Rewards
All Hamamatsu Incident Rewards
| Main Mission Rewards | ||
|---|---|---|
| Ninja's Locks | Iron Switchglaive | Simple Talons |
| Tanegashima Matchlock | Guiding Mirror | |
How to Unlock The Hamamatsu Incident
Complete the Escape From Hitokoto Slope Main Mission
The Hamamatsu Incident unlocks automatically after completing Escape From Hitokoto Slope.
Escape From Hitokoto Slope Walkthrough
Nioh 3 Related Guides
All Main Missions
| Edo (1622 CE) | |
|---|---|
| 1 | Ceremony ┗ The Fall of Edo Castle |
| Warring States (1572 CE) | |
| 2 | The Battle of Hitokoto Slope ┗ Escape From Hitokoto Slope |
| 3 | The Hamamatsu Incident |
| 4 | The Battle of Futamata Castle |
| 5 | The Battle of Mikatagahara |
| 6 | The Battle of Saigagake |
| Heian (1190 CE) | |
| 7 | The Age of Clans Begins |
| 8 | Heian Befouled |
| 9 | A Cause Too Great |
| Antiquity (247 CE) | |
| 10 | Calamity’s Seed |
| 11 | Ill Omen |
| Return to Edo (1622 CE) | |
| 12 | To the Beginning |
| Bakumatsu (1864 CE) | |
| 13 | A New Era |
| 14 | Those Left Behind |
| 15 | Final Hope |
| Final Battle of Edo (1622 CE) | |
| 16 | What Makes a Shogun |
Comment
Author
The Hamamatsu Incident Walkthrough
Please participate in our site
improvement survey
04/2026
improvement survey
04/2026
Would you assist in
improving Game8's site?
improving Game8's site?

×
We are listening to our users' valuable opinions and discussing how to act on them.
The information collected through this survey will be used for the purpose of improving our services. In addition, the information will only be disclosed a part of a statistic in a format that will not allow identification of personal information.
Begin Survey
Not Now
×
Please rate each item regarding Game8.co's Advertisements.
Amount of Ads
Very Dissatisfied
Somewhat Dissatisfied
Fine
Somewhat Satisfied
Highly Satisfied
Placement of Ads
Timing of Ad Display
Ad Loading Speed
Safeness of Ads
Content of Ads
×
Please rate each item regarding Game8.co's Quality of Articles.
Amount of information
Very Dissatisfied
Somewhat Dissatisfied
Fine
Somewhat Satisfied
Highly Satisfied
Frequency of updates
Speed of new information
Accuracy of articles
Understandibility of articles
Readability of sentences
×
Please rate each item regarding Game8.co's Usability of the Site.
Ease of finding information
Very Dissatisfied
Somewhat Dissatisfied
Fine
Somewhat Satisfied
Highly Satisfied
Loading Speed
Use of Color
Font Size
Visibility of Images
Easy to Understand Layout
×
Please rate each item regarding Game8.co's Message Boards, Comments.
Ease of Writing
Very Dissatisfied
Somewhat Dissatisfied
Fine
Somewhat Satisfied
Highly Satisfied
Readability
Ease in Finding Information
Comment Quality
Comment Quantity
Admin Response
×
Please rate each item regarding Game8.co's Site's new design.
Please rate our site's new design
Very Dissatisfied
Somewhat Dissatisfied
Fine
Somewhat Satisfied
Highly Satisfied
Do you think that the website's design change makes the site easier to use?
Has the new design made it easier for you to find information on the site?
Has the new design improved the overall visual appeal of the site?
How would you rate your overall satisfaction with the new design of the site?
×
How likely are you to recommend Game8 to someone you know?
Very Unlikely
0
1
2
3
4
5
6
7
8
9
10
Very Likely
If you have other opinions regarding potential improvement to the website, please share them with us. We would appreciate your honest opinion.
Note: This is a free response section, so you can proceed without entering anything.
Note: Please be sure not to enter any kind of personal information into your response.
Note: Please be sure not to enter any kind of personal information into your response.
×
Thank You
×
Thank you for participating in our survey! Your answers will help us to improve the quality of our website and services.
We hope you continue to make use of Game8.
We hope you continue to make use of Game8.
Close
Rankings
- We could not find the message board you were looking for.
Gaming News

![Forza Horizon 6 Review [Preview] | Beautiful Roads With a Whole Lot of Oversteer](https://img.game8.co/4460981/a7254c24945c43fbdf6ad9bea52b5ce9.png/show)


![Forza Horizon 6 Review [Preview] | Beautiful Roads With a Whole Lot of Oversteer](https://img.game8.co/4460981/a7254c24945c43fbdf6ad9bea52b5ce9.png/thumb)
Popular Games

Genshin Impact Walkthrough & Guides Wiki
Crimson Desert Walkthrough & Guides Wiki
Umamusume: Pretty Derby Walkthrough & Guides Wiki
Honkai: Star Rail Walkthrough & Guides Wiki
Monster Hunter Stories 3: Twisted Reflection Walkthrough & Guides Wiki
Wuthering Waves Walkthrough & Guides Wiki
The Seven Deadly Sins: Origin Walkthrough & Guides Wiki
Pokemon TCG Pocket (PTCGP) Strategies & Guides Wiki
Pokemon Pokopia Walkthrough & Guides Wiki
Zenless Zone Zero Walkthrough & Guides Wiki


Recommended Games
Monster Hunter World Walkthrough & Guides Wiki
Fire Emblem Heroes (FEH) Walkthrough & Guides Wiki
Pokemon Brilliant Diamond and Shining Pearl (BDSP) Walkthrough & Guides Wiki
Super Smash Bros. Ultimate Walkthrough & Guides Wiki
Diablo 4: Vessel of Hatred Walkthrough & Guides Wiki
Cyberpunk 2077: Ultimate Edition Walkthrough & Guides Wiki
Yu-Gi-Oh! Master Duel Walkthrough & Guides Wiki
Elden Ring Shadow of the Erdtree Walkthrough & Guides Wiki
The Legend of Zelda: Tears of the Kingdom Walkthrough & Guides Wiki
Persona 3 Reload Walkthrough & Guides Wiki


All rights reserved
©KOEI TECMO GAMES CO., LTD. All rights reserved.
The copyrights of videos of games used in our content and other intellectual property rights belong to the provider of the game.
The contents we provide on this site were created personally by members of the Game8 editorial department.
We refuse the right to reuse or repost content taken without our permission such as data or images to other sites.