Chapter 16: The Great Bridge Coup (Church) Walkthrough
This is the battle walkthrough for the mission The Great Bridge Coup from Fire Emblem: Three Houses (FETH, FE3H). Read on to find out about map features, what enemies you will encounter, and tips for winning!
List of Contents
| Previous Battle | Story Walkthrough | Next Battle |
|---|---|---|
| Chapter 15: Ambush at Ailell | Chapter 16: The Rose-Colored River | Chapter 17: Taking Fort Merceus |
Chapter 16 (Church) - Map and Overview
| Victory Conditions | |
|---|---|
| Defeat all enemy commanders. | |
| Defeat Conditions | |
| Byleth falls in battle. | |
| # of Player Units | 9 |
| # of Enemies | 25 |
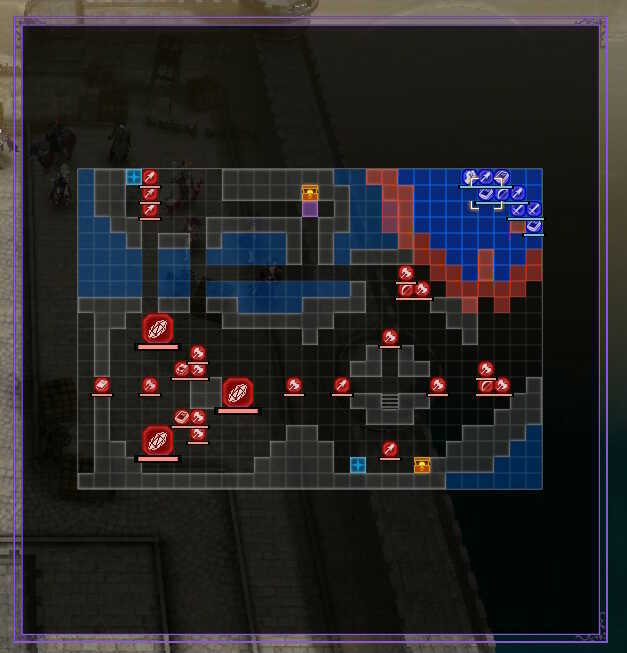
Chapter 16 (Church) - Enemies
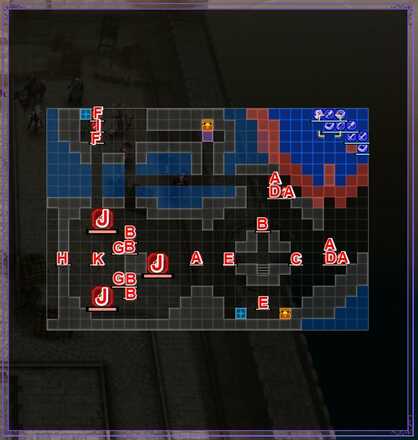
| A | Imperial Soldier (Fortress Knight) | B | Imperial Soldier (Armored Knight) |
|---|---|---|---|
| C | Imperial Soldier (Brigand) | D | Imperial Soldier (Archer) |
| E | Imperial Soldier (Cavalier) | F | Imperial Soldier (Paladin) |
| G | Imperial Soldier (Dark Mage) | H | Imperial Soldier (Priest) |
| I | Imperial General | J | Demon Beasts |
| K | Ladislava | - | - |
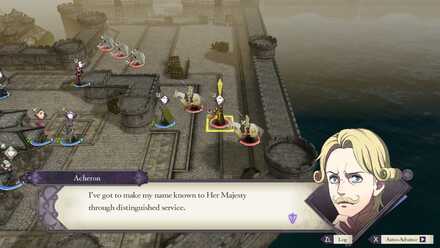
Acheron
| Level | HP | Mov. | Class |
|---|---|---|---|
| 34 | 47 | 4 | Warlock |
| Mt. | Spd | Hit | Crit |
| 35 | 17 | 98 | 23 |
| Range | Prt | Res | Avd |
| 1-2 | 12 | 28 | 27 |
| Weapon | Dropped Items | ||
| Thunder | N/A | ||
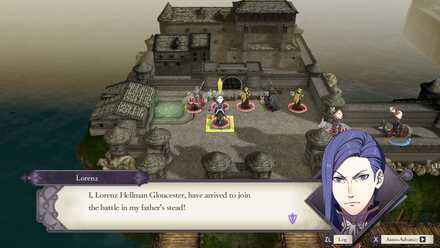
Lorenz
| Level | HP | Mov. | Class |
|---|---|---|---|
| 34 | 61 | 8 | Paladin |
| Mt. | Spd | Hit | Crit |
| 50 | 15 | 127 | 20 |
| Range | Prt | Res | Avd |
| 1 | 31 | 28 | 25 |
| Weapon | Dropped Items | ||
| Silver Lance | N/A | ||
| Battalion | |||
| Gloucester Knights | |||
| Level | Endurance | Gambit | Uses |
| 1 | 105 | Assault Troop | 2 |
Ladislava
| Level | HP | Mov. | Class |
|---|---|---|---|
| 34 | 52 | 8 | Wyvern Lord |
| Mt. | Spd | Hit | Crit |
| 58 | 25 | 92 | 28 |
| Range | Prt | Res | Avd |
| 1 | 37 | 17 | 55 |
| Weapon | Dropped Items | ||
| Silver Axe | N/A | ||
| Battalion | |||
| Empire Elite Wyvern Co. | |||
| Level | Endurance | Gambit | Uses |
| 1 | 75 | Assembly | 2 |
Imperial General
| Level | HP | Mov. | Class |
|---|---|---|---|
| 34 | 60 | 8 | Paladin |
| Mt. | Spd | Hit | Crit |
| 51 | 19 | 115 | 22 |
| Range | Prt | Res | Avd |
| 1 | 31 | 15 | 29 |
| Weapon | Dropped Items | ||
| Silver Lance | N/A | ||
| Battalion | |||
| Empire Knights | |||
| Level | Endurance | Gambit | Uses |
| 1 | 60 | Blaze | 1 |
Chapter 16 (Church) - Chests
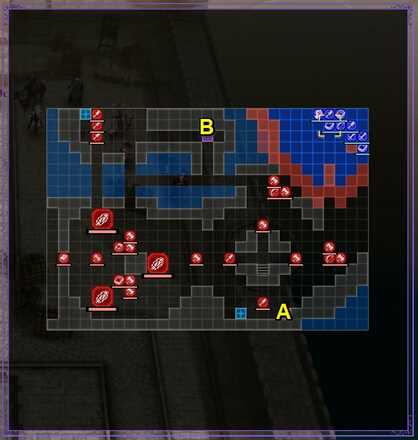
Talisman (A)
A talisman can be obtained from the treasure chest on the lower part of the map.
Critical Ring (B)
A Critical Ring can be found in the treasure chest near the ballista in the upper portion of the map.
Chapter 16 (Church) - Map Features
Tiles
| Tiles | Description |
|---|---|
| Rubble | Navigable only by fliers |
| Rampart | Navigable only by fliers |
| Wall | Navigable only by fliers |
| River | Navigable only by fliers |
| Heal Tile+ | 1 Prt, 1 Res, +30% HP each turn for non-fliers |
Infinite Reinforcements
Enemies will spawn infinitely at the side of Ladislava's army. There are no actions that can be used to stop the enemy from spawning.
Capturing Strongholds
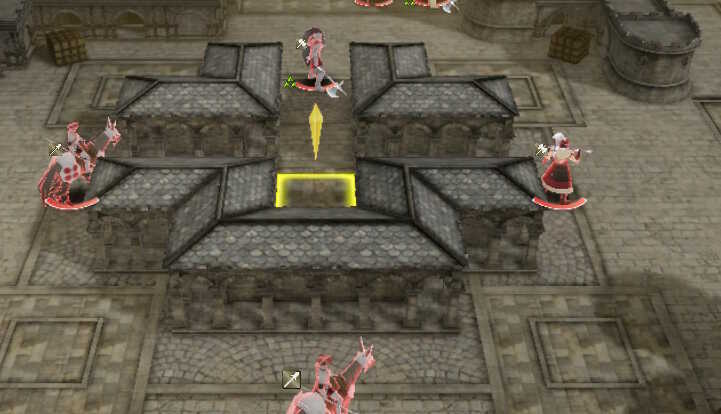
There is a stronghold in the middle of the battlefield. Enemies that are surrounding it must be defeated to stop the enemy from that area to spawn.
Patrolling Demon Beasts
The Demon Beasts will stay idle in the battle unless provoked.
Enemy Ambushes
Two ambushes will occur. First is when your units approach the stronghold where 2 cavalries, 3 heavy armored units, and Acheron will appear. The Second ambush will happen when your units approach the Imperial General on the northwest part of the battlefield.
Chapter 16 (Church) - Tips and Tricks
Prioritize Generals
The number of enemies you need to defeat is too much for your 9 units to handle. Focus on completing the objective of the battle to have an easier time.
Lure Enemies
Enemies will come in droves if your units aren't placed properly. Do not march blindly and observe which units will approach your deployed characters.
Use the Bridge
There is a bridge on the northwestern side of the battlefield. This leads to some generals like the Imperial General, Lorenz (who will ambush you once your units approach the general) and Ladislava.
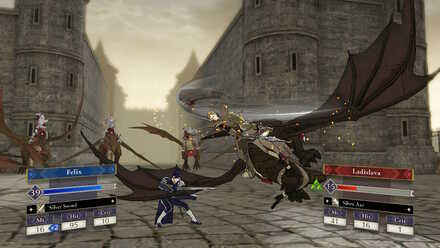
Abuse Ladislava's Low Hit Rate
Ladislava attacking with a 16% hit rate.
Ladislava's hits pack a punch. No unit can realistically handle this damage (unless they are a heavily armored unit or an over levelled one). Lure Ladislava with a unit that has high evasion like a Sword Master to avoid losing a unit.
Fire Emblem: Three Houses - Related Links
Part 2 - Silver Snow Battle Walkthroughs
Comment
Author
Chapter 16: The Great Bridge Coup (Church) Walkthrough
improvement survey
03/2026
improving Game8's site?

Your answers will help us to improve our website.
Note: Please be sure not to enter any kind of personal information into your response.

We hope you continue to make use of Game8.
Rankings
- We could not find the message board you were looking for.
Gaming News
Popular Games

Genshin Impact Walkthrough & Guides Wiki

Honkai: Star Rail Walkthrough & Guides Wiki

Umamusume: Pretty Derby Walkthrough & Guides Wiki

Pokemon Pokopia Walkthrough & Guides Wiki

Resident Evil Requiem (RE9) Walkthrough & Guides Wiki

Monster Hunter Wilds Walkthrough & Guides Wiki

Wuthering Waves Walkthrough & Guides Wiki

Arknights: Endfield Walkthrough & Guides Wiki

Pokemon FireRed and LeafGreen (FRLG) Walkthrough & Guides Wiki

Pokemon TCG Pocket (PTCGP) Strategies & Guides Wiki
Recommended Games

Diablo 4: Vessel of Hatred Walkthrough & Guides Wiki

Fire Emblem Heroes (FEH) Walkthrough & Guides Wiki

Yu-Gi-Oh! Master Duel Walkthrough & Guides Wiki

Super Smash Bros. Ultimate Walkthrough & Guides Wiki

Pokemon Brilliant Diamond and Shining Pearl (BDSP) Walkthrough & Guides Wiki

Elden Ring Shadow of the Erdtree Walkthrough & Guides Wiki

Monster Hunter World Walkthrough & Guides Wiki

The Legend of Zelda: Tears of the Kingdom Walkthrough & Guides Wiki

Persona 3 Reload Walkthrough & Guides Wiki

Cyberpunk 2077: Ultimate Edition Walkthrough & Guides Wiki
All rights reserved
©2019 Nintendo / INTELLIGENT SYSTEMS. Co-developed by KOEI TECMO GAMES CO., LTD. Fire Emblem and Nintendo Switch are trademarks of Nintendo. © 2019 Nintendo.
The copyrights of videos of games used in our content and other intellectual property rights belong to the provider of the game.
The contents we provide on this site were created personally by members of the Game8 editorial department.
We refuse the right to reuse or repost content taken without our permission such as data or images to other sites.


![Everwind Review [Early Access] | The Shaky First Step to A Very Long Journey](https://img.game8.co/4440226/ab079b1153298a042633dd1ef51e878e.png/thumb)

![Monster Hunter Stories 3 Review [First Impressions] | Simply Rejuvenating](https://img.game8.co/4438641/2a31b7702bd70e78ec8efd24661dacda.jpeg/thumb)


