Stellar Blade All Core Locations and Uses
Learn about all Cores including the Body Core, Beta Core and Weapon Core locations and what they do in Stellar Blade. Learn how to get all Cores and the detailed location of each core here!
List of Contents
What Does Each Core Do?
Body Cores Increase Max HP
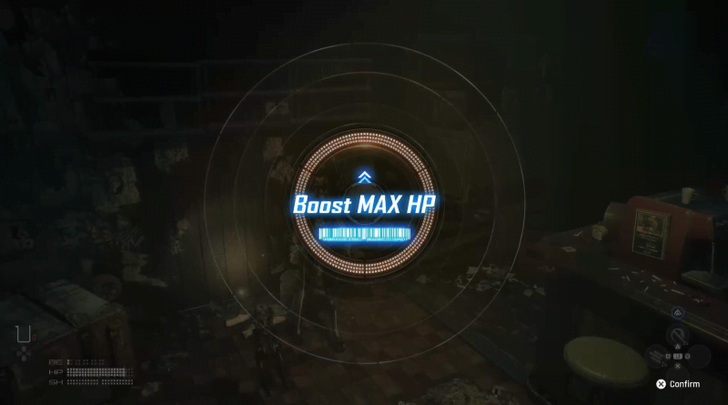
Collecting 3 Body Cores automatically increases Eve's Maximum HP. Body Cores are instant use upon collection, so you do not need to go to any nearby camps before using them.
Beta Cores Increase Max BE
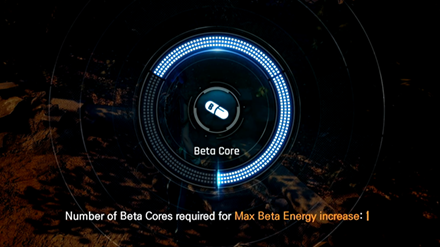
Beta Cores are used to upgrade Eve's maximum Beta Energy (BE) capacity. Like Body Cores, collecting three of these will automatically raise your BE capacity.
BE is consumed when using certain skills such as Beta Skills. The more BE you have, the more opportunities to unleash strong attacks.
Weapon Cores Increase Damage
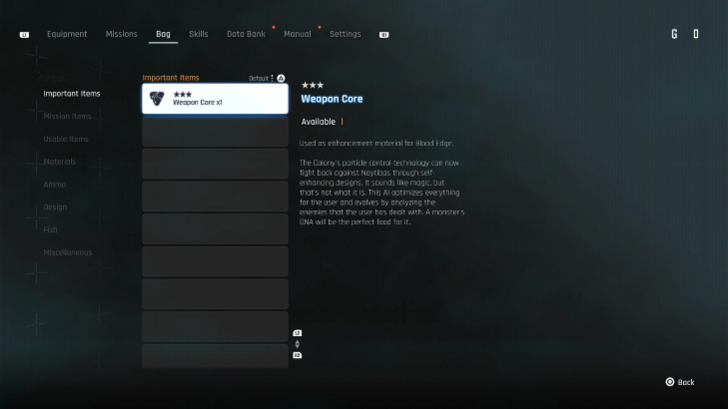
Weapon Cores, unlike the other cores, can only be used as materials for upgrading Eve's Blood Edge sword via the Repair Console at Supply Camps. These give permanent attack boosts.
Raising attack damage will make it much easier to deal with stronger Naytiba.
How to Get Cores
Body Cores and Beta Cores
Examine Corpses
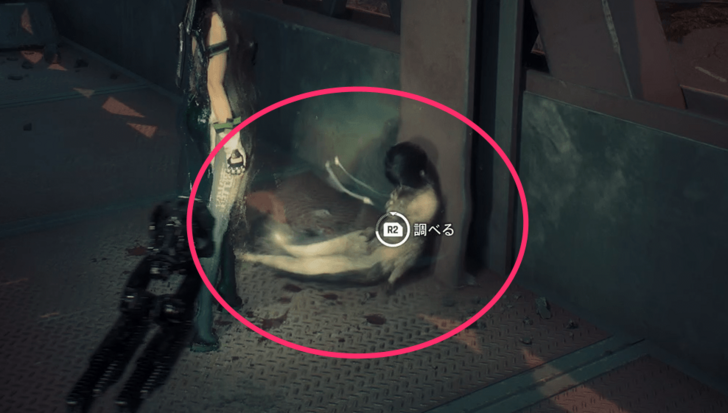
Body Cores are typically found by examining the corpses of Airborne Squad members.
These corpses have a certain glow to them and will be outlined when scanned.
They also have a similar body type to Eve and have a lighter color pallete which makes them easier to distinguish from Legionnaire bodies which typically have Passcodes or Memorysticks.
Weapon Cores
Drops from Elite and Alpha Naytiba
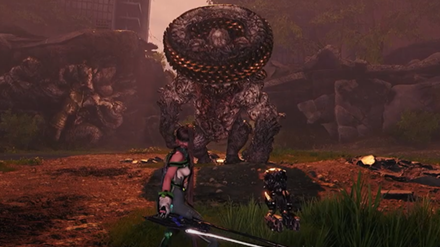
Weapon Cores are obtained by defeating Elite Naytiba and Alpha Naytiba, which are boss-like enemies found throughout the game.
Combat and ecological info about these enemies can be found under the Data Bank tab in the menu.
All Body Core Locations
| Body Core Areas | ||
|---|---|---|
| Eidos 7 | Xion City | Wasteland |
| Matrix 11 | Great Desert | Spire 4 |
Eidos 7 Body Core Locations
| Location Image | How to Get |
|---|---|
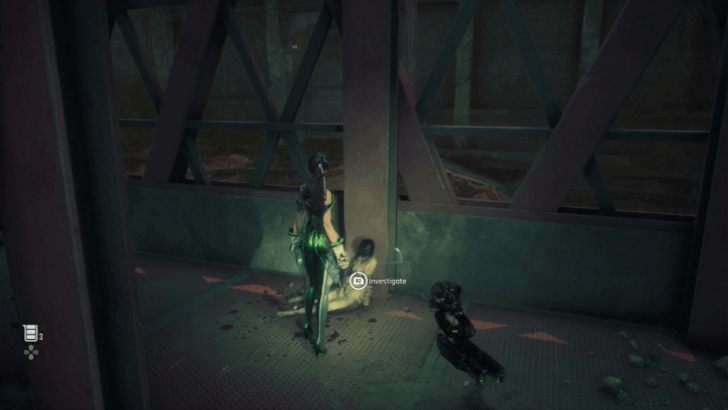 Parking Tower - First Floor |
The first Body Core can be found on a corpse behind the stairs on the first floor of the Parking Tower. |
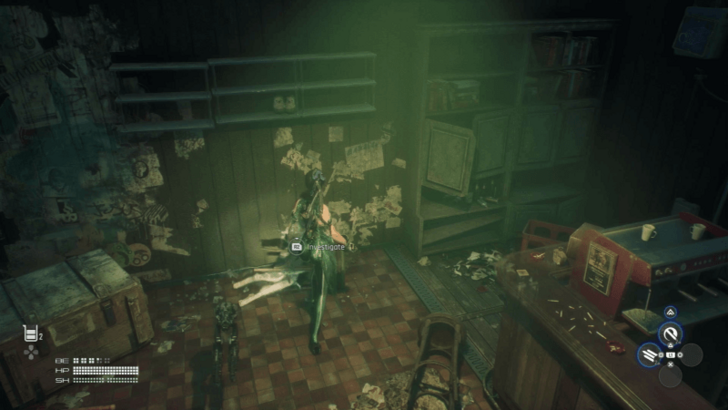 Silent Street - Pub |
Another Body Core can be found on a corpse inside a small pub after descending from the Parking Tower. |
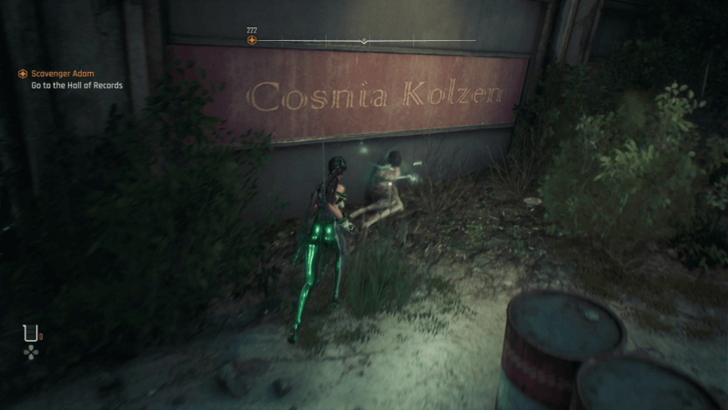 Silent Street - Area After the Underpass |
The third Body Core can be obtained from a corpse lying in an open area accessible through an underpass. |
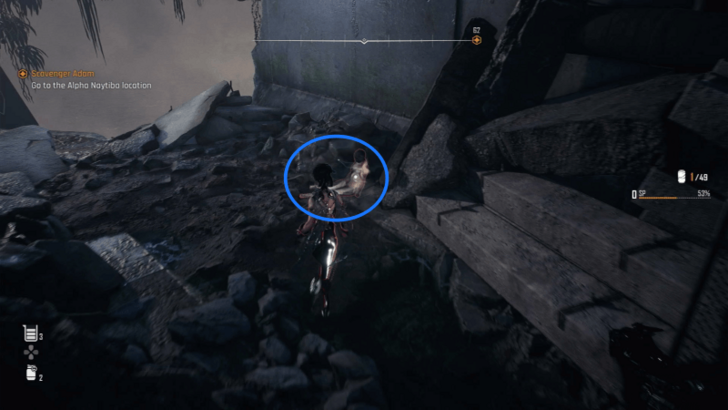 City Underground Sector - First Area |
The last Body Core for this mission can be obtained from a corpse on the far edge of the City Underground Sector's first area. |
Xion Body Core Location
| Body Core Location | How to Get |
|---|---|
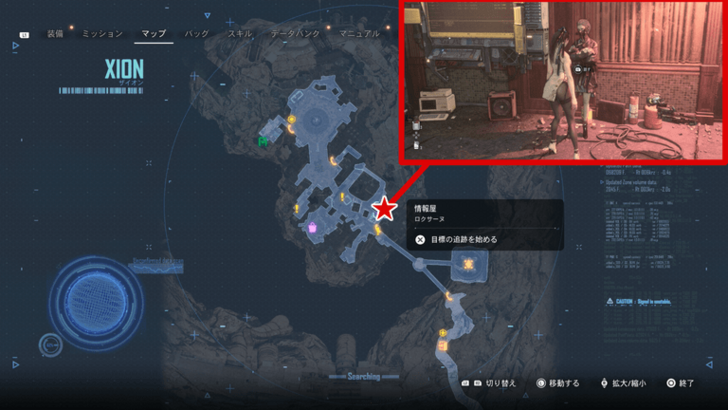 |
Obtained as a reward for completing the An Offer You Can't Refuse side mission. Roxanne gives the quest after defeating the Matrix 11 boss. |
Wasteland Body Core Locations
| Map Location | How to Get |
|---|---|
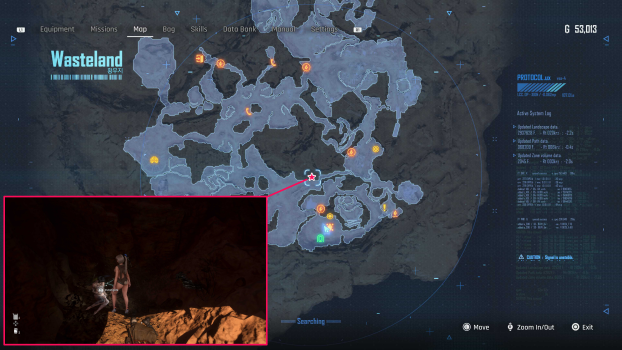 Northeast of Central Great Canyon |
Found inside a small cave just northeast of the Central Great Canyon camp. |
 |
Found inside a container at the north side of the Oil Storage Facility. |
Matrix 11 Body Core Locations
| Location | How to Get |
|---|---|
 Landfill - Tunnel Before the Rail Bridge |
A Body Core can be found on an area near the Rail Bridge camp. Kill the Hive blocking the way to get to the area. |
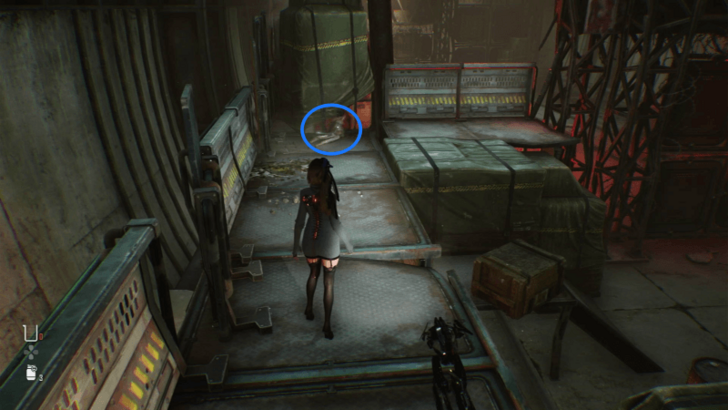 Collapsed Rail Bridge - Area Before Railyard |
Another Body Core can be obtained in the area near the camp before reaching the Railyard. |
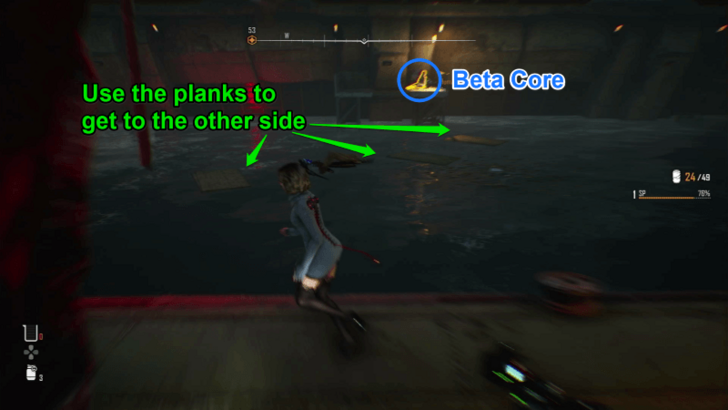 Train Graveyard - Platform on the Right Corner |
The third Body Core can be obtained from a corpse lying on top of a platform in the far right corner of the Train Graveyard. Use the planks floating nearby to reach the platform. |
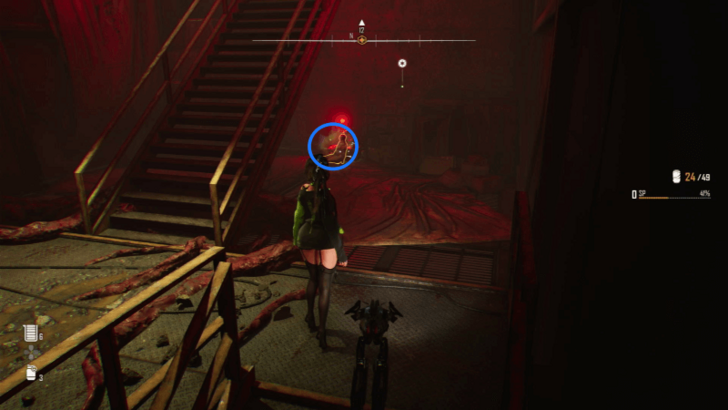 Train Graveyard - Stairs Leading to the Contaminated Water Purification Plant |
The last Body Core for this region can be obtained from a corpse lying on the flight of stairs just before you reach the Contaminated Water Purification Plant. |
Great Desert Body Core Locations
| Map Location | How to Get |
|---|---|
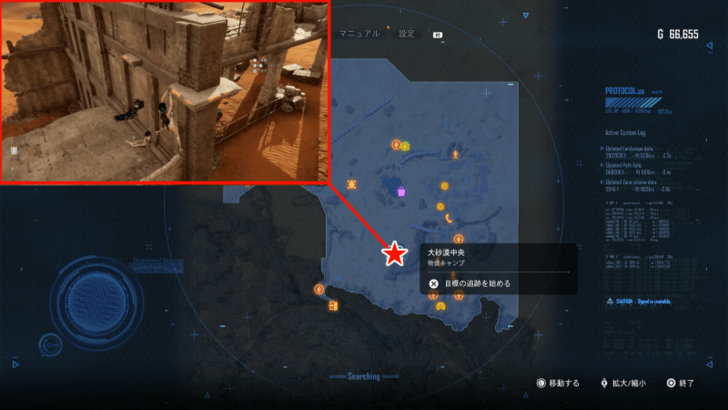 |
From the supply camp Central Great Desert, descend from the outer wall of the adjacent ruin to the second floor. Video Location |
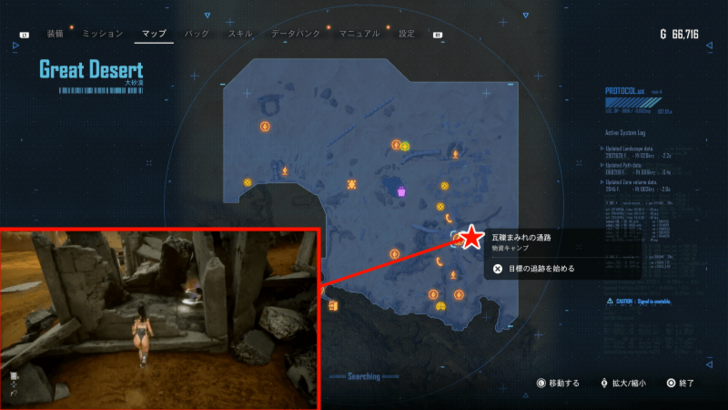 |
Inside the ruins to the east from the supply camp Debris-filled Entryway. |
 |
From the east waypoint, go north and enter the east street at the top of the uphill slope. |
Spire 4 Body Core Locations
| Location | How to Get |
|---|---|
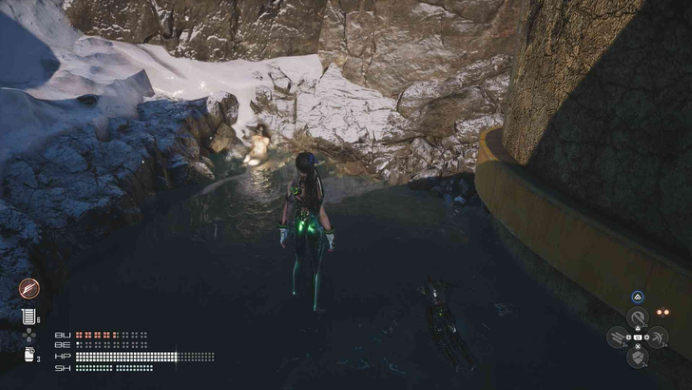 |
After arriving at the Orca Space Complex, go through the submerged cave and it can be found by the fork on the road to the right. Video Guide |
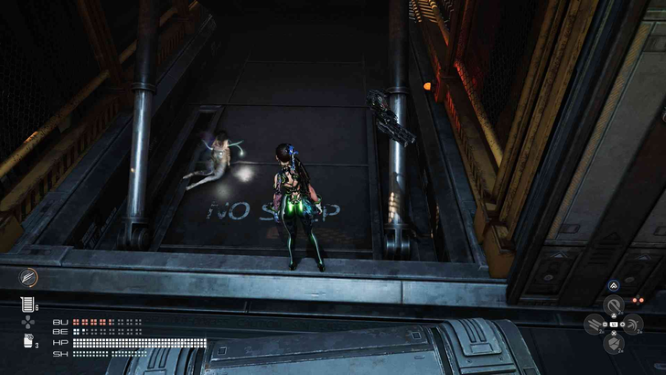 |
From the Space Logistics Center, head for the conveyor area and look behind the first conveyor you run backwards on. It will fall from a conveyor from above. |
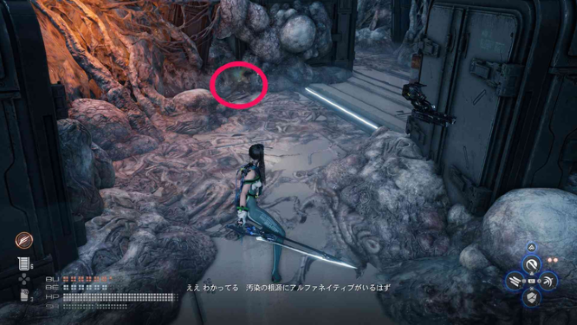 |
Open the gate on the left side of the Space Logistics Center and you will find it in the center of the room with the backup power source. |
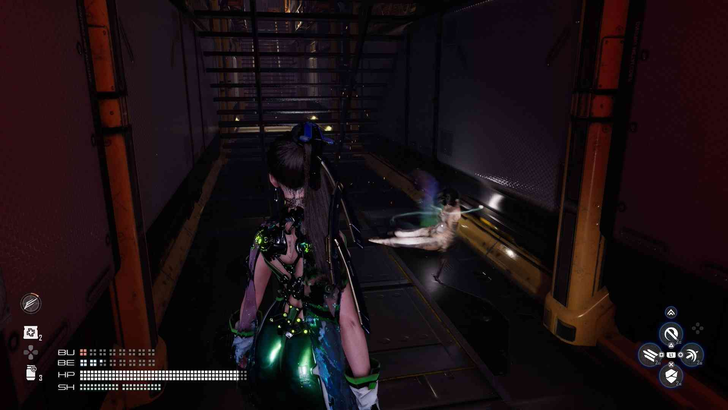 |
When the freight elevator stops, go to the passage on the second floor, climb the stairs on the left, and get it from the corpse when you get off the elevator. |
All Beta Core Locations
| Beta Core Areas | ||
|---|---|---|
| Eidos 7 | Wasteland | Matrix 11 |
| Great Desertt | Spire 4 | - |
Eidos 7 Beta Core Locations
| Location | How to Get |
|---|---|
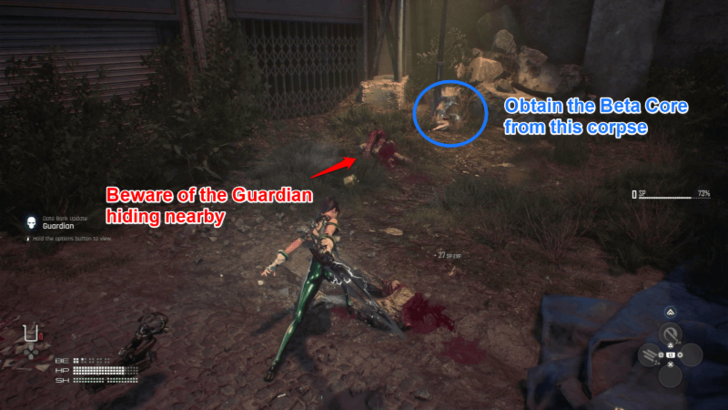 Silent Street - Alley |
A Beta Core can be obtained from a corpse in an alleyway on Silent Street. This alleyway is located to the left of where you get ambushed by a group of Naytibas. |
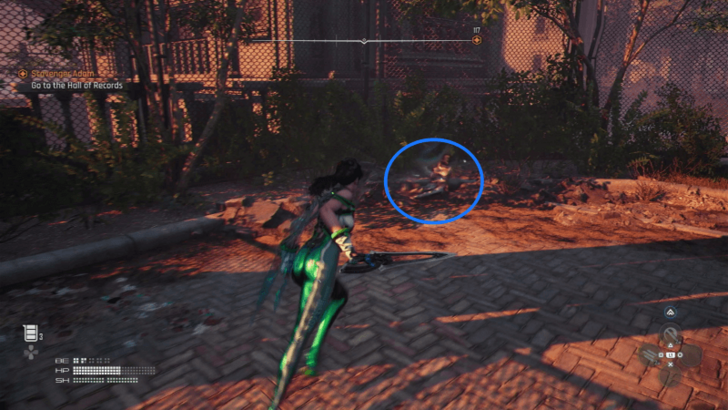 Flooded Commercial Sector - Plaza |
You can get a Beta Core from just below the other end of the monorail station in the Flooded Commercial Sector. |
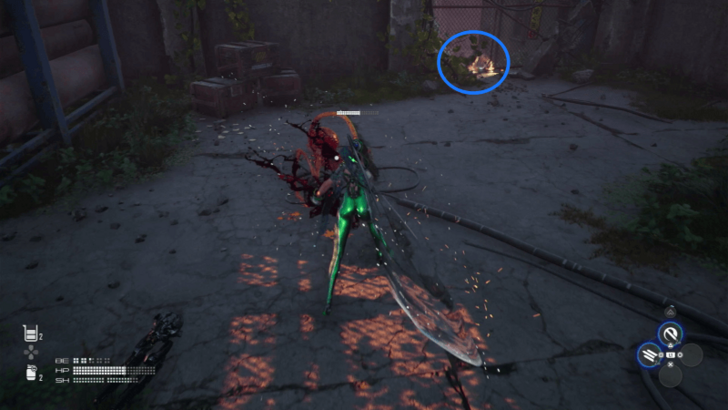 Flooded Commercial Sector - Hidden Path Before the Memory Tower |
Another Beta Core can be obtained in the Flooded Commercial Sector, in a hidden area before reaching the Memory Tower. |
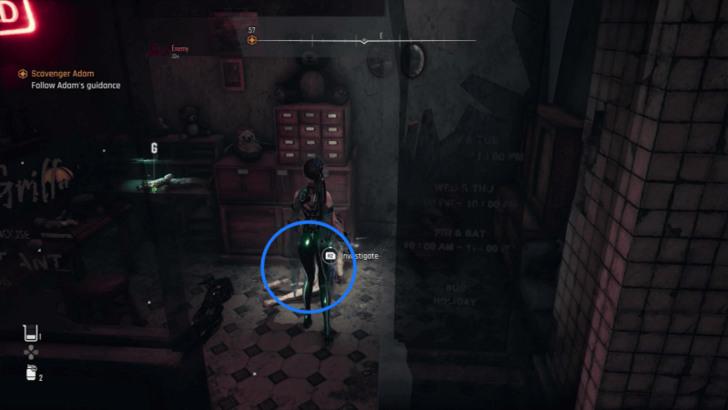 Memory Tower - Shopping Alley |
A Beta Core can also be acquired in the shopping alley after the Corrupter fight. |
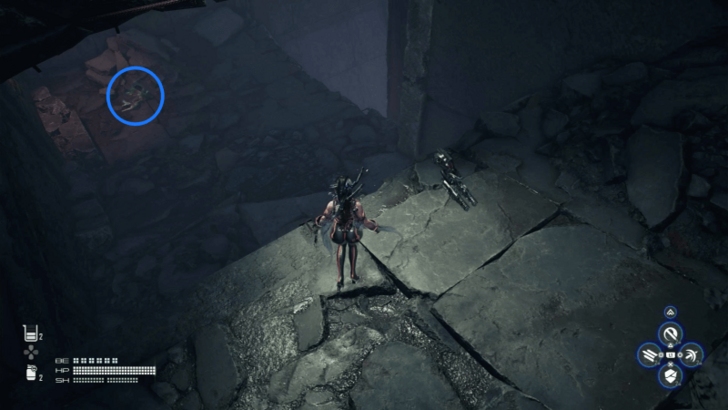 City Underground Sector - Before Reaching the Floodgate Area |
The last Beta Core for this mission can be obtained in the middle section of the City Underground Sector, just past the collapsed pillar. |
Wasteland Beta Core Locations
| Map Location | How to Get |
|---|---|
 Scrapyard Neaer Central Scrap Plains |
Fast Travel to the Central Scrap Plains and head for the scrapyard. |
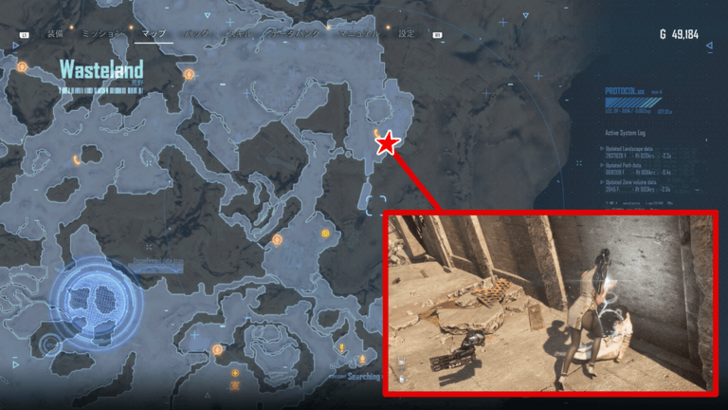 Near the Waypoint |
Fast Travel to the Waypoint and climb the building behind it. Requires Double Jump |
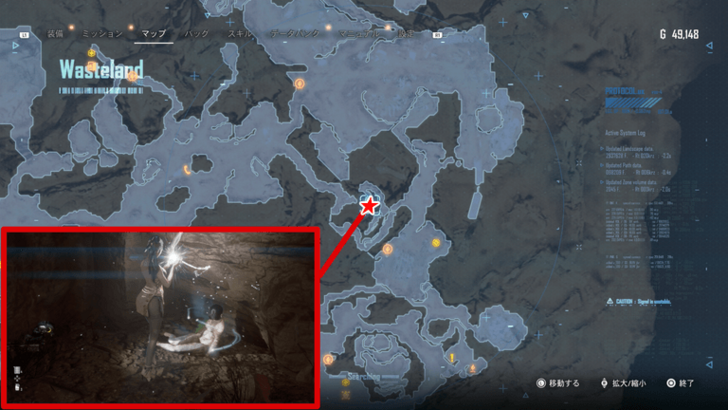 Near the Junkyard |
Fast Travel to the Junkyard and wall run across. Enter the small open to your right and wall run three times again. Requires Double Jump |
Matrix 11 Beta Core Locations
| Location | How to Get |
|---|---|
 Collapsed Rail Bridge - Top Floor |
A Beta Core can be acquired from a corpse inside one of the train carts located on the top floor of the rail bridge. |
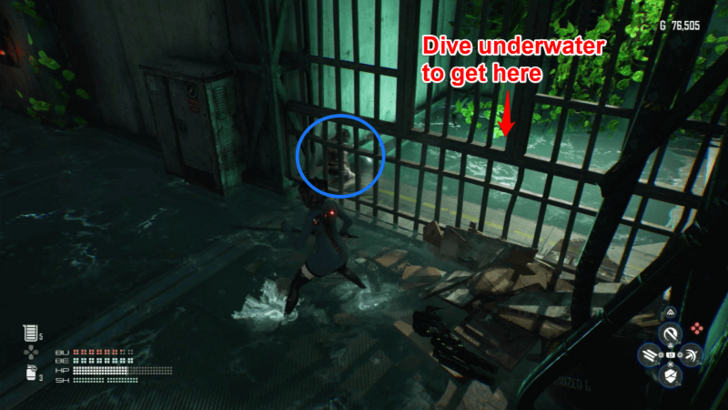 Underground Sewer - Gated Area on the Highest Floor |
You can get a Beta Core behind the gated area located on the top floor of the Underground Sewer. To get to the Beta Core, simply dive underwater and rise above the other side. |
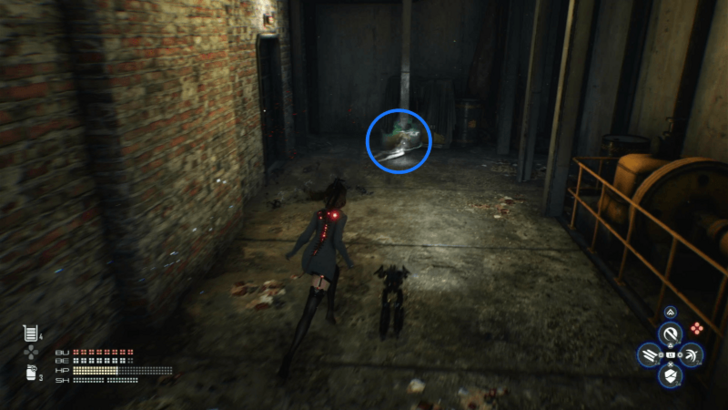 Rotten Labyrinth - Locked Room on the Left |
Another Beta Core can be acquired in the Rotten Labyrinth. To get to this area, simply climb up the upper platforms and jump down the room full of enemy Naytibas. |
 Memory Tower - Shopping Alley |
A Beta Core can also be acquired from a corpse located in one of the paths in the sewer past the abandoned settlement. |
Great Desert Beta Core Locations
| Map Location | How to Get |
|---|---|
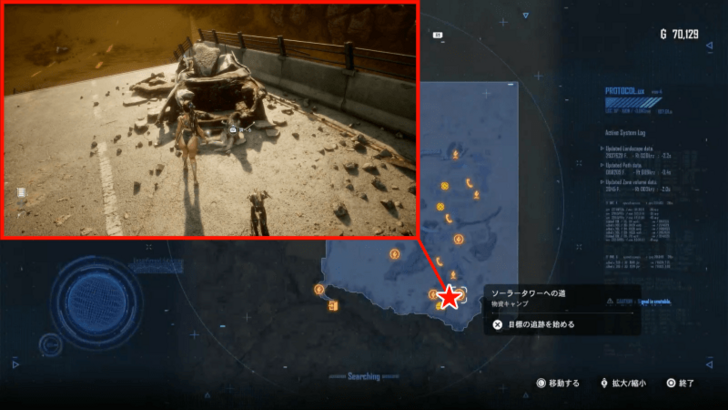 Overpass |
Head south from the Way to the Solar Tower supply camp and enter the tunnel. You can collect it from the person at the far end of the overpass. Beta Core Video Location |
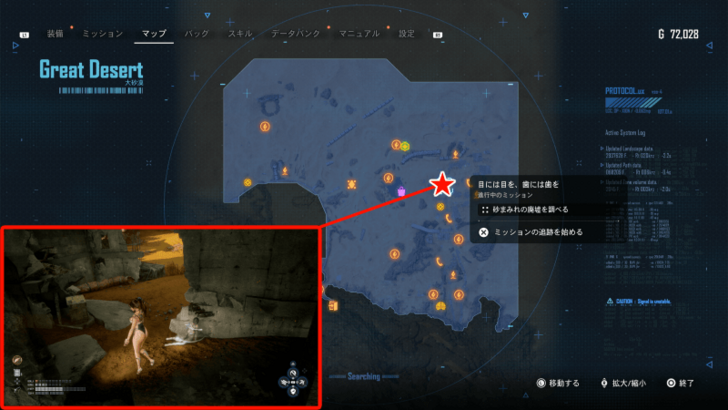 |
Go west from the east waypoint. Beta Core Video Location |
 |
From the Tetrapod, head west and climb the wall, shoot the drone, and lower the rope. Climb the rope and descend the rocky mountain. Beta Core Video Location |
Spire 4 Beta Core Locations
| Location | How to Get |
|---|---|
 |
Found after jumping over the wall in front of you from the Hypertube Entrance. Video Guide |
 |
Found at the entrance of the area where the turrets are firing on you, all the way along the right wall. Video Guide |
 |
After a battle occurs on the 3rd floor of the passenger elevator, grab the rope, and go to the 4th floor to get it from the corpse behind the bed. |
 |
Found near the last supply camp Central Core Entrance |
All Weapon Core Locations
Drops from Elite and Alpha Naytiba
All Alpha Naytiba
| Naytiba | Combat Info |
|---|---|
 Gigas |
・Gigas has strong physical strength and great agility. Beware of its continuous and charging attacks. |
|
Tachy |
・Tachy moves quickly to get tactical advantage. Pay attention to every single one of her movements |
 Raven |
・Raven likes to toy with the enemy with deceptive movements. Do not fall for her tricks. |
 Demogorgon |
・Destroying the Deomogorgon's massive body is no easy feat, but focusing on its weakness may make this achievable. |
 Unidentified Naytiba |
・The unidentified Naytiba is the embodiment of rage. It delivers brutal attacks fueled by pure, unfiltered emotion. |
All Elite Naytiba
| Naytiba | Combat Info |
|---|---|
 Brute |
・Brutes' explosive attacks come in a variety of forms, including continuous explosions, shockwaves, and ground blasts. Keep your distance and act fast. |
 Abaddon |
・Abaddon has the power to harnesss high-voltage electtricity. Do not get caught up in its lightning strikes. |
 Stalker |
・Stalkers' heads are devastating weapons. You must be agile to avoid getting cut by their bone saw blades. |
 Corrupter |
・ Corrupters shoot toxins like cannonballs. You need to react accordingly, depending on the size. |
|
Maelstrom |
・Maelstrom throws explosive test subjects from its head. Be carefule of these living bombs |
 Juggernaut |
・Juggernauts are unexpectedly violent and quick, rather than slow and clumsy. Do not take them lightly. |
 Behemoth |
・Behemoths are ferocious creatures. They unleash various attacks, dealing an onslaught of blows that can be difficult to deal with straight on. |
 Belial |
・Belial has tremendous HP and tenacity. A single fight will most likely not be enough to finish it off. |
 Karakuri |
・Karukari are advanced version of Kokeshi. Watch out for attacks from smaller robots |
 Democrawler |
・Democrawlers drive up their energy to fire barrages or shoot light beams. Be quick to avoid them |
Stellar Blade Related Guides

All Item Types
| All Item Types | |
|---|---|
| Important Items | Usable Items |
| Materials | Ammo |
| Miscellaneous | - |
Item-Related Guides
| Item Guides | |
|---|---|
| Best Drone Upgrades | Body Core Locations |
| Cores Explained and All Locations | Best Items Tier List |
| All Omnibolt Locations | Beta Core Locations |
| Drone Upgrade Module Locations | All Tumbler Expansion Module Locations |
| All Design Pattern Locations | - |
Comment
Author
Stellar Blade All Core Locations and Uses
Rankings
- We could not find the message board you were looking for.
Gaming News
Popular Games

Genshin Impact Walkthrough & Guides Wiki

Honkai: Star Rail Walkthrough & Guides Wiki

Arknights: Endfield Walkthrough & Guides Wiki

Umamusume: Pretty Derby Walkthrough & Guides Wiki

Wuthering Waves Walkthrough & Guides Wiki

Pokemon TCG Pocket (PTCGP) Strategies & Guides Wiki

Abyss Walkthrough & Guides Wiki

Zenless Zone Zero Walkthrough & Guides Wiki

Digimon Story: Time Stranger Walkthrough & Guides Wiki

Clair Obscur: Expedition 33 Walkthrough & Guides Wiki
Recommended Games

Fire Emblem Heroes (FEH) Walkthrough & Guides Wiki

Pokemon Brilliant Diamond and Shining Pearl (BDSP) Walkthrough & Guides Wiki

Diablo 4: Vessel of Hatred Walkthrough & Guides Wiki

Super Smash Bros. Ultimate Walkthrough & Guides Wiki

Yu-Gi-Oh! Master Duel Walkthrough & Guides Wiki

Elden Ring Shadow of the Erdtree Walkthrough & Guides Wiki

Monster Hunter World Walkthrough & Guides Wiki

The Legend of Zelda: Tears of the Kingdom Walkthrough & Guides Wiki

Persona 3 Reload Walkthrough & Guides Wiki

Cyberpunk 2077: Ultimate Edition Walkthrough & Guides Wiki
All rights reserved
© 2024 SHIFT UP Corporation. All rights reserved. Published by Sony Interactive Entertainment Inc.
The copyrights of videos of games used in our content and other intellectual property rights belong to the provider of the game.
The contents we provide on this site were created personally by members of the Game8 editorial department.
We refuse the right to reuse or repost content taken without our permission such as data or images to other sites.


![Neverness to Everness (NTE) Review [Beta Co-Ex Test] | Rolling the Dice on Something Special](https://img.game8.co/4414628/dd3192c8f1f074ea788451a11eb862a7.jpeg/show)


