Stellar Blade Combat Tips and Combos
Here are the best combat tips and combos you need to know to take on challenging enemies in Stellar Blade! Check out our beginner's guide to combat in Stellar Blade, best combos, and all combat tips and guides!
List of Contents
Stellar Blade Beginner's Guide to Combat
Stellar Blade Features Fast-Paced Combat
Stellar Blade features fast-paced combat and you'll need to master the basics of combat such as parrying enemies, dodging and blinking, as well as unleashing powerful combos to overcome the Naytiba!
| Beginner Tips and Techniques |
|---|
|
|
Read the Enemy's Movements
Reading the enemy's movement is important in Stellar Blade since each enemy has its own combos and movesets.
It's a good idea to keep your distance and observe the enemy attacks patterns, especially when encountering a new enemy or boss, and take note of any windows of opportunity to attack them!
Practice Parrying Enemy Attacks
| Perfect Parry | Press |
|---|---|
Parrying enemy attacks is key to survival since even weak Naytiba Minions can unleash powerful combas that can deal a lot of damage.
Timing your parry to the enemy's attacks will cause Eve to perform a Perfect Parry that quickly depletes the enemy's balance and replenishes your Beta Energy, and give you the chance to unleash a follow-up attack!
Deplete Balance to Perform Retribution
| Retribution | Press |
|---|---|
Successfully depleting the enemy's Balance, which are the yellow orbs below the shield bar, through Perfect Parries will cause enemies to stagger.
A yellow glow will then appear on the enemy and you'll have the option to perform a Retribution attack by pressing the Triangle Button, inflicting massive damage to the enemy that can instantly kill weaker Naytiba!
Master Eve's Evasion Skills
| Color the Enemy Shows | Evasion Skill to Use |
|---|---|
| Yellow | Dodge / Perfect Dodge ( Avoid enemy attacks by dodging. A Perfect Dodge will grant you Burst Energy. |
| Blue | Blink ( Tilt Teleports behind enemy and attacks. Gain Burst Energy when Blink is successful. |
| Purple | Repulse (Tilt Teleports behind enemy and attacks. Gain Burst Energy when Blink is successful. |
When enemies emit a certain colored glow, it means they're about to unleash an unblockable attack that's impossible to counter. Fortunately, Eve has plenty of evasive skills to avoid these heavy attacks!
These evasive skills will only activate when the enemy glows a certain color so you'll need to be aware of what color the enemy glows so you can perform the correct evasive skill!
Utilize Eve's Beta Skills
| Beta Skills |
|---|
Beta Skills allow you to unleash powerful attacks and require Beta Energy, which you can replenish by perfect parrying or dodging enemy attacks.
Beta Skills range from defensive, single-target, or AOE attacks and are best used against Elite Naytibas such as Bosses!
Break the Enemy's Shields
Stronger enemies such as Elite and Alpha Naytibas have shields that buff their defense andd make it more difficult to damage.
Depleting the enemy's shield will make these tough enemies easier to handle, and you can do this by throwing Pulse Grenades, using the Shield Breaker Beta Skill, and equiping the Shield Destruction Gear!
Use Combat Consumables
| Combat Consumables | Hold |
|---|---|
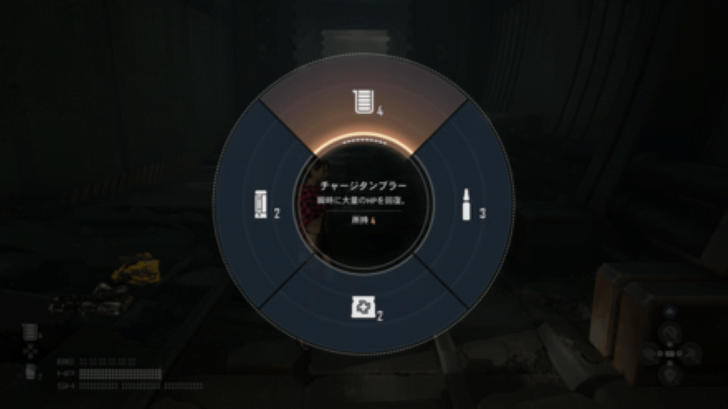
There are a wide array of combat consumables available, each having its own effect such as destroying shields, immobilizing enemies, and more.
It is best to stock up with Combat Consumables before fighting a strong enemy, such as bosses or quest enemies!
Buy Combat Consumables At Shops
Aside from potential enemy drops, you can also purchase combat consumables at shops available in nearby camps or at the R Store in Xion City.
Conserve Your HP
 |
|
| Recovery Items | |
|---|---|
During the battle, always make sure that your health is as close as it should be to maximum. There are enemy attacks, especially from bosses, that are continuous, and once you get hit by one of the chained attacks, you may not be able to get out.
Prioritize your health by actively looking at the bottom left of your screen and heal as much as you can.
Change Difficulty Settings
 |
|
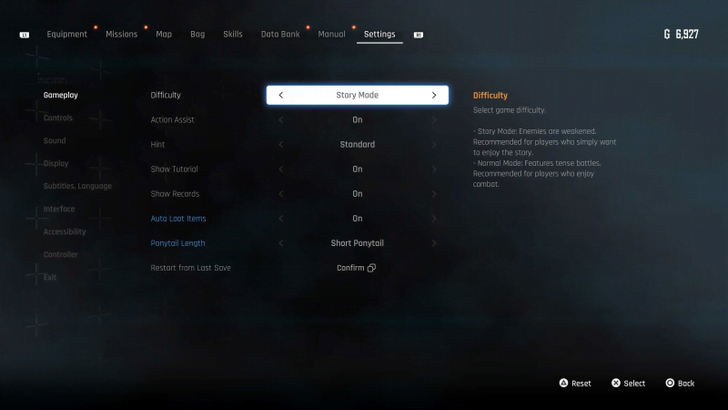
| Difficulty | Story Mode |
|---|---|
| Action Assist | On |
If the battles at your current difficulty setting seem are harder than you expect, you can always change your Difficulty Setting by pressing the Start Button in-game and heading over to the Settings tab. From here, you can choose to change from Normal Mode to Story Mode.
Alternatively, you can turn on Action Assist to make your gameplay easier as it will display necessary command inputs whenever needed.
Sprint Away from Dangerous Situations
Sprinting is a good strategy in most combat situations where you need a short pause to heal.
You can also run away from hard-to-dodge and powerful moves that some bosses dish out on you!
Use an Exospine That Suits Your Playstyle
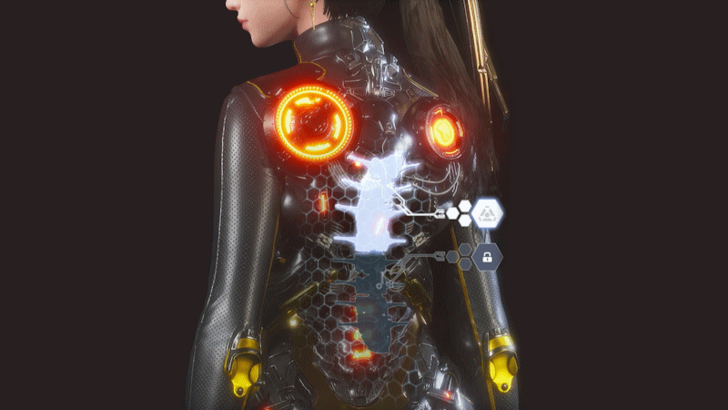
Exospines are game-altering equipment that empowers and rewards certain playstyles, such as more powerful Combos and better Perfect Parry windows!
Make sure to collect and try out all of the Exospines and use the one you feel is the best for you!
Best Combos in Stellar Blade
Best Normal Attack Combos
Normal Attack Combos are standard combos that don't require Beta Energy to use. These are your bread and butter combos that you'll use to stagger enemies, recover Beta Energy, and weave between evasive and defensive skills!
Onslaught IV
| Onslaught IV | |
|---|---|
| Command Input |
|
Onslaught IV is a hard hitting 5-hit combo that alternates between heavy and light attacks. The second and third combo has short recovery times, allowing you to cancel the combo if you want to parry or perfect dodge the enemy's attack.
Rush Chain I
| Rush Chain I | |
|---|---|
| Command Input |
Hold Hold
|
Rush Chain I is a great opener for other combos and allows you to quickly advance towards the enemy. It's useful against Elite Naytiba and some Bosses that like to dodge or jump away from Eve when they're charging their attacks.
Incursion III
| Command Input |
|
|---|
Incursion III is a fast and simple to use combo that deals medium damage. The heavy attacks of this combo will cause Eve to perform a fast two-slash combo that can hit multiple targets due to its wide hitbox and is best used when surrounded by multiple enemies.
Best Beta Skill Combos
Beta Skill Combos are hard-hitting combos that require Beta Energy to use and are often strong enough interrupt enemy attacks while dealing massive damage.
Triplet to Quadruplet
| Triplet to Quadruplet | |
|---|---|
| Command Input |
|
Triplet to Quadruplet is an easy to input and fast Beta Combo that is great at interrupting enemy attacks and breaking posture, while also strong enough to push enemies back!
This makes it a great defensive Beta Combo while being strong enough to deal significant damage to enemies!
Counter I
| Command Input | After Perfect Parry, Hold After Perfect Parry, Hold |
|---|
Counter I is an easy to input Beta Combo that you can use after Perfect Parrying the enemy.
The attack comes out fast and only consumes 1 Beta Energy, which makes it a great punishing attack against slower enemies and can often instantly kill weaker Naytiba Minions.
All Combat Tips and Combos Guides
| Combat and Combo Guides | |
|---|---|
| How to Perfect Dodge | How to Parry and Posture System |
| How to Sprint | Best Exospines to Equip |
| Shield Effect and How to Break | Best Combos |
| How to Repulse | How to Blink |
Stellar Blade Related Guides
Stellar Blade Story Walkthrough
All Stellar Blade Guides
| Stellar Blade Wiki Contents | |
|---|---|
 News News |
 Missions Missions |
 Tips and Tricks Tips and Tricks |
 Combat Tips and Tricks Combat Tips and Tricks |
 Enemy Naytiba Enemy Naytiba |
 Items Items |
 Exterior (Outfits) Exterior (Outfits) |
 Exospines Exospines |
 Gear Gear |
 Skills Skills |
 Collectibles Collectibles |
 Maps and Locations Maps and Locations |
 Characters Characters |
 Puzzles Puzzles |
 Hairstyles Hairstyles |
 Fishing Fishing |
 Shops Shops |
 NieR: Automata DLC NieR: Automata DLC |
 Nikke DLC Nikke DLC |
|
Comment
Author

Stellar Blade Combat Tips and Combos
Rankings
- We could not find the message board you were looking for.
Gaming News


Popular Games

Genshin Impact Walkthrough & Guides Wiki
Umamusume: Pretty Derby Walkthrough & Guides Wiki
Crimson Desert Walkthrough & Guides Wiki
Monster Hunter Stories 3: Twisted Reflection Walkthrough & Guides Wiki
Honkai: Star Rail Walkthrough & Guides Wiki
Pokemon Pokopia Walkthrough & Guides Wiki
The Seven Deadly Sins: Origin Walkthrough & Guides Wiki
Wuthering Waves Walkthrough & Guides Wiki
Zenless Zone Zero Walkthrough & Guides Wiki
Arknights: Endfield Walkthrough & Guides Wiki


Recommended Games
Fire Emblem Heroes (FEH) Walkthrough & Guides Wiki
Diablo 4: Vessel of Hatred Walkthrough & Guides Wiki
Cyberpunk 2077: Ultimate Edition Walkthrough & Guides Wiki
Yu-Gi-Oh! Master Duel Walkthrough & Guides Wiki
Super Smash Bros. Ultimate Walkthrough & Guides Wiki
Pokemon Brilliant Diamond and Shining Pearl (BDSP) Walkthrough & Guides Wiki
Elden Ring Shadow of the Erdtree Walkthrough & Guides Wiki
Monster Hunter World Walkthrough & Guides Wiki
The Legend of Zelda: Tears of the Kingdom Walkthrough & Guides Wiki
Persona 3 Reload Walkthrough & Guides Wiki


All rights reserved
© 2024 SHIFT UP Corporation. All rights reserved. Published by Sony Interactive Entertainment Inc.
The copyrights of videos of games used in our content and other intellectual property rights belong to the provider of the game.
The contents we provide on this site were created personally by members of the Game8 editorial department.
We refuse the right to reuse or repost content taken without our permission such as data or images to other sites.