Great Desert Guide: All Passcodes, Collectibles and Missions
★ How to Start Nikke DLC | How to Beat Scarlet
┗ DLC Missions | Outfits | Hairstyles | Fish
☆ Collectible Interactive Map!
┗ Xion | Wasteland | Great Desert
★ All 49 Cans | All Outfits | Passcodes | Fish
☆ Missions | Secret Garden | Endings
Great Desert is the sixth area in Stellar Blade. Check out this guide to find out more about Great Desert and all its passcodes, outfits, collectibles, missions and how to get to the Great Desert!
List of Contents
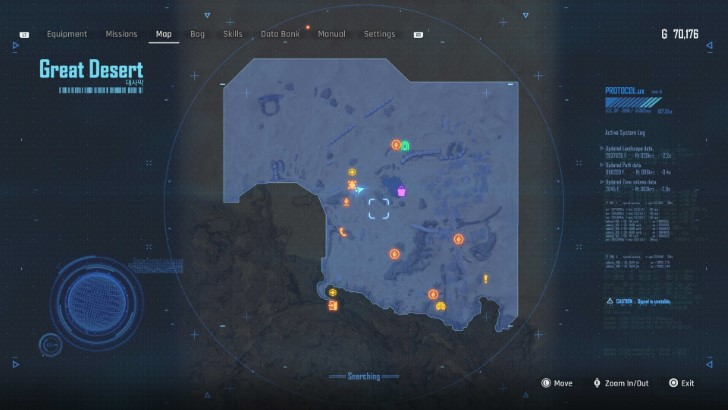
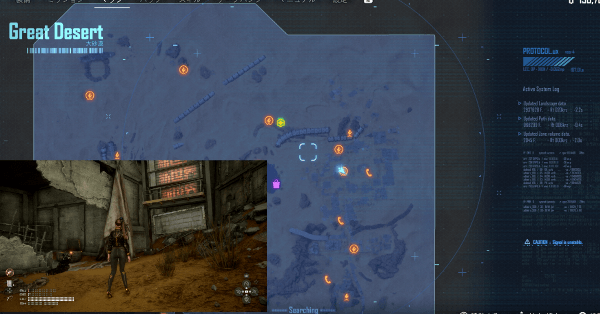
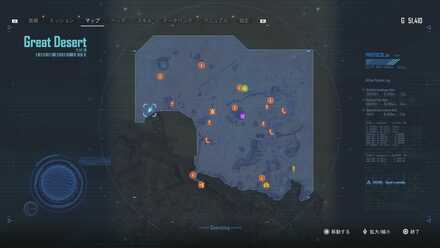
Great Desert Interactive Map
Interactive Great Desert Map
| ★ Select which map to view from the dropped down button. ★ Press the icons on the right side to show collectibles and points of interest on the map. ★ Toggle the Full On icon to expand the map. |
The Interactive Map both shows the location of key points on the map, and doubles as a collectible checker.
- Click an icon on the right side to show all the pins of a specific type, or click the magnifying glass button to search for a specific pin by name.
- Click a pin on the map to see its name and description, and a relevant picture or video if available.
- From here, click Mark as Acquired to indicate that you've gotten a collectible already. This will change its icon on the map to show that it has been collected, and add 1 to that pin type's Counter.
- To undo this, click on the same pin and click Restore to unclaimed.
- To check how many pins you have marked so far, check the Counter in the bottom left, and click the icon that looks like a checklist to see counters for all pin types.
- If the collected pins start to get in the way, you can hide them all by clicking the green Show Pins button on the left side.
| Icon | How to Use |
|---|---|
 | Show Names This button reveals the Name of every icon currently shown. |
 | Show Pins This button will toggle between showing and hiding all the pins which you have already marked as acquired. |
 | Fullscreen This button will change the map display to fill the screen. |
 | Search Mode Toggle This button will display a searchbar which you can use to search for an individual pin by its name. |
 | Icon Mode Toggle In Search Mode, this button will toggle you back to Icon Mode, removing the search bar and displaying the icons again. |
 | All Pins This button is shown along with the Icons on the right when there are over 6 types of pins. Click it for a full selection of all available pin types. |
 | Counter Tracks the number of pins you have of a certain type. The pin type shown is set to the page and currently cannot be changed; however, all pin type counters can be viewed by clicking the checklist icon on the right side. |
| View All Counters This icon is found on the right side of the Counter. When a map has more than one pin type, click this icon to see Counters for all pin types. | |
| Zoom In / Zoom Out This icon is found on the top left side of the map. You can press these buttons, or use your scroll wheel while hovering, to Zoom In and Out of the interactive map. |
Map Legend
| Legend for Map Icons | ||
|---|---|---|
Stellar Blade Great Desert Map and Details
| ◄ Previous Region | Next Region ▶ |
|---|---|
| Matrix 11 | Abyss Levoire |
The Great Desert is a region in Stellar Blade that has no in-game map, and is the second open world region where you can traverse.
All Stellar Blade Maps and Locations
How to Get to the Great Desert
| How to Get to the Great Desert | |
|---|---|
| 1 | Complete the Matrix 11 Main Mission |
| 2 | Head There Via the Tetrapod or Xion's Elevator |
Complete the Alpha Signal Main Mission
Technically, Heading to Matrix 11 already unlocks the Great Desert but only Matrix 11's region is accessible. To unlock the rest of the region, you have to complete the entire Alpha Signal main mission first which is done in Matrix 11 mission to unlock the entire Great Deset region.
Matrix 11 Guide: All Passcodes, Collectibles and Missions
Head There Via the Tetrapod or Xion's Elevator
After unlocking the rest of the Great Desert, you can now travel to the said region. You can talk to Adam and travel to the Great Desert region or access the area using the elevator on the northern side of Xion. Both methods will bring you to a different starting point in the Great Desert!
Stellar Blade Great Desert Collectibles
| All Collectibles | ||
|---|---|---|
| Body Cores | Beta Cores | Omnibolt |
| Tumbler Expansion Module | Drone Upgrade Module | Passcode and Chests |
| Memorystick | Documents | Cans |
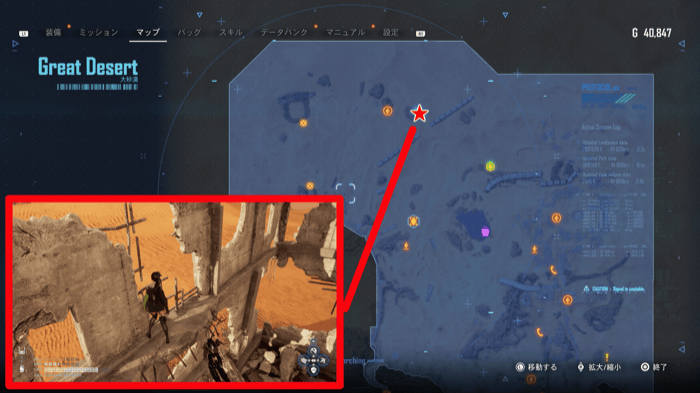
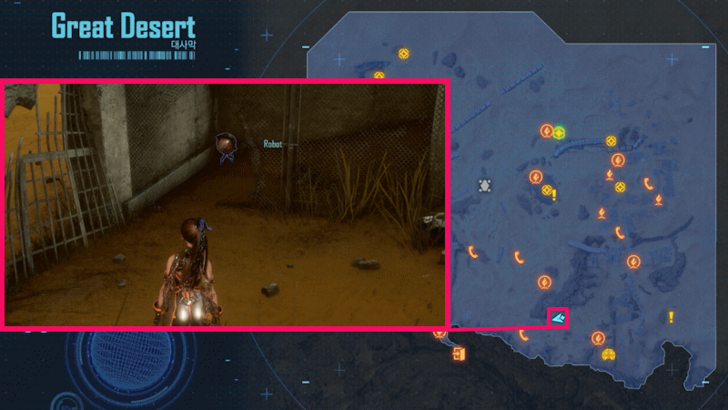
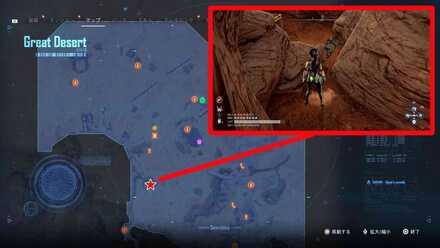
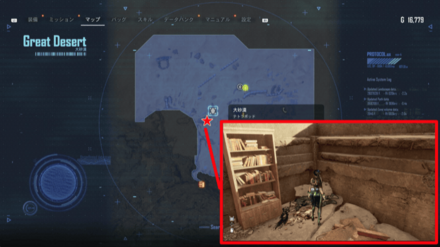
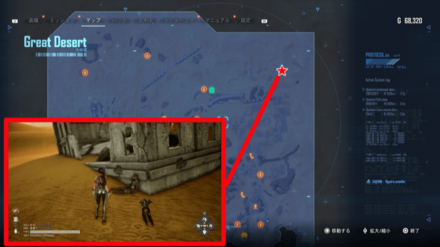
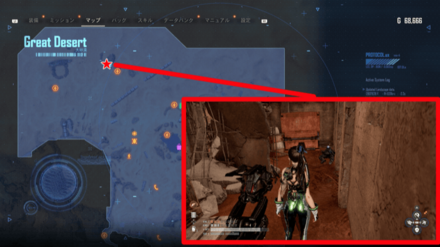
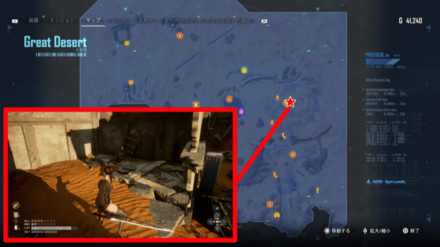
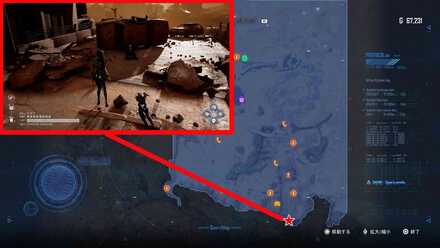
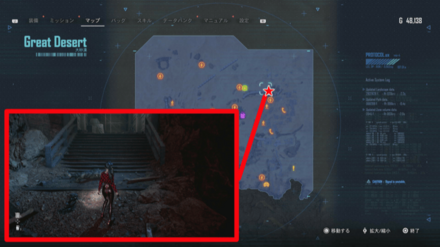
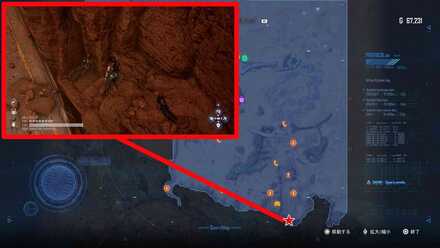
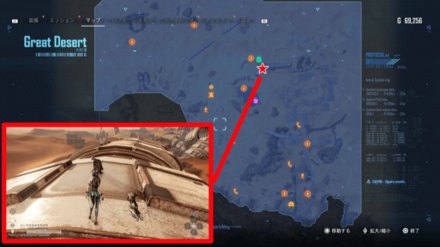
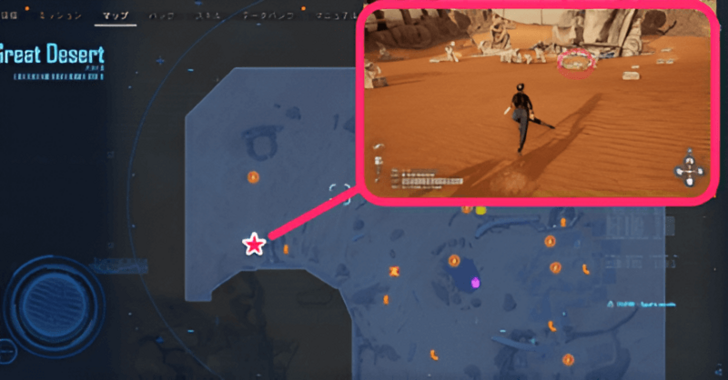
Great Desert Body Core Locations
| Map Location | How to Get |
|---|---|
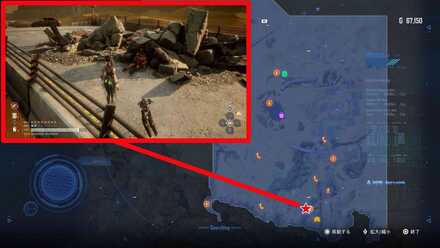
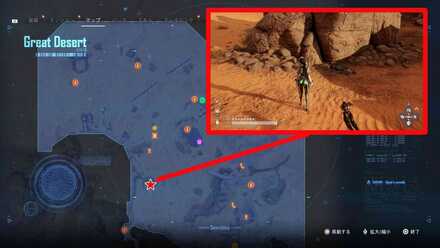
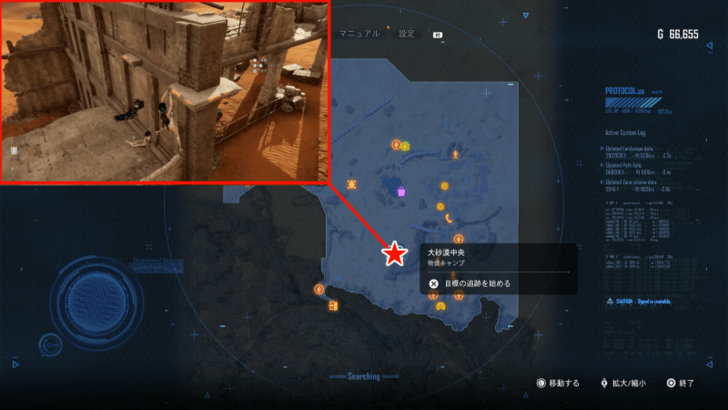 |
From the supply camp Central Great Desert, descend from the outer wall of the adjacent ruin to the second floor. Body Core Video Location |
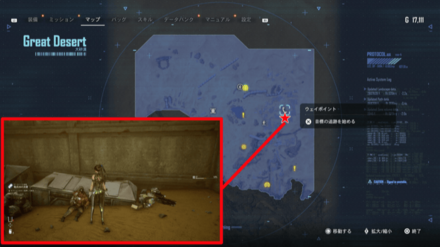
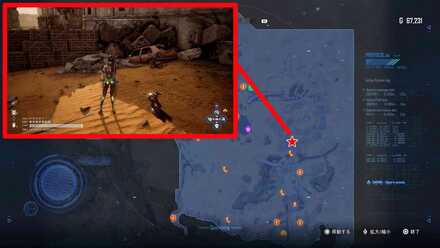
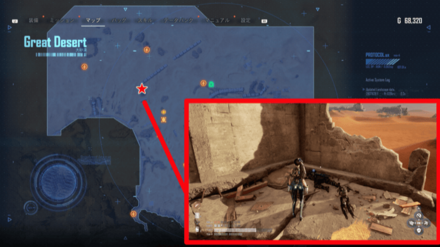
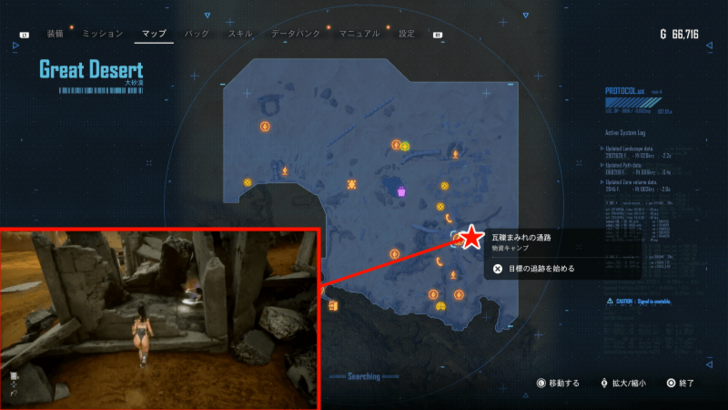 |
Inside the ruins to the east from the supply camp Debris-filled Entryway. |
 |
From the east waypoint, go north and enter the east street at the top of the uphill slope. |
Stellar Blade Body Core Locations
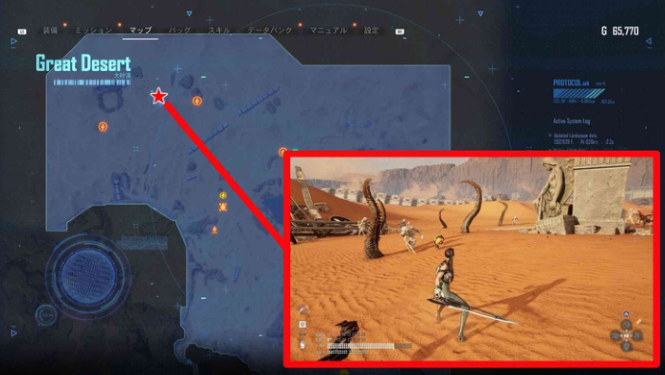
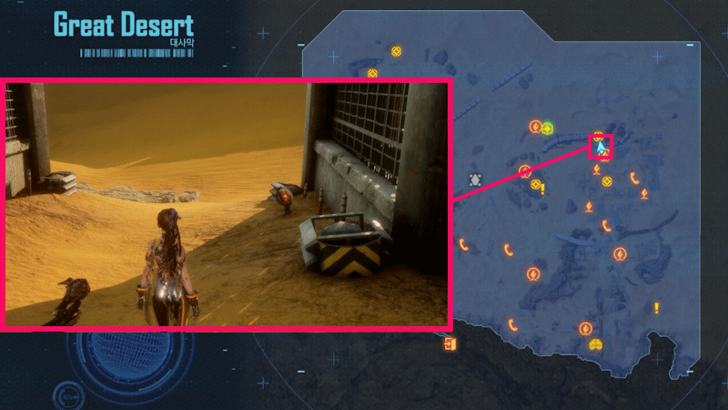
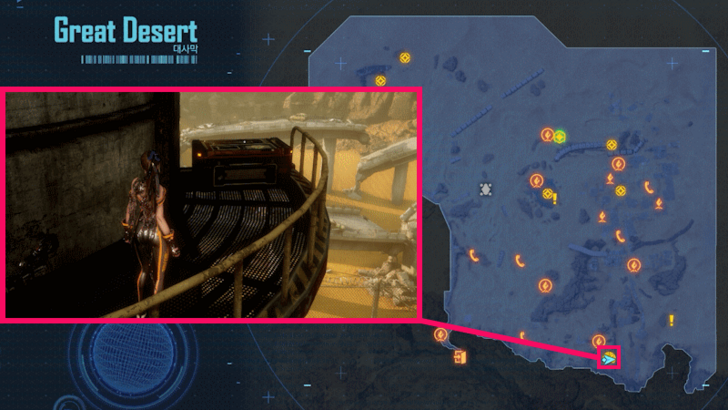
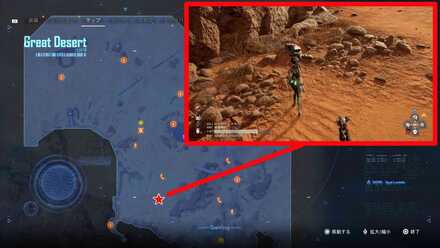
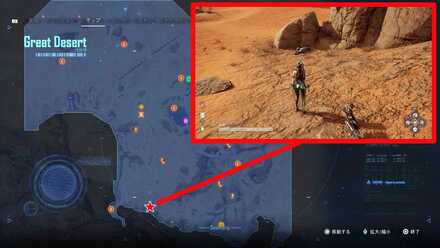
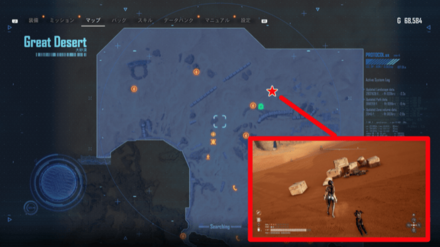
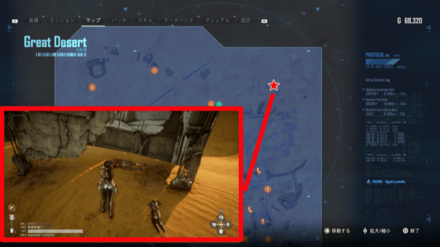
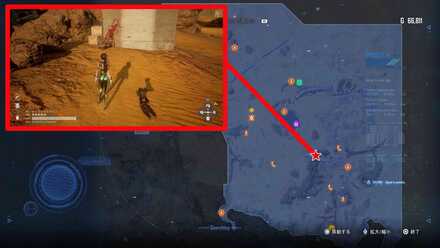
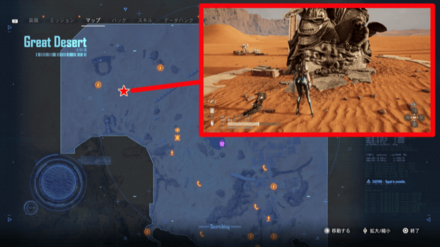
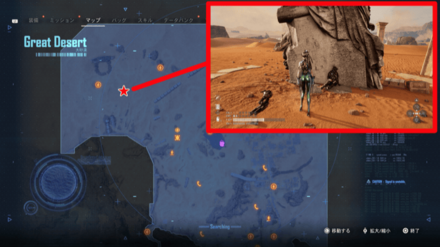
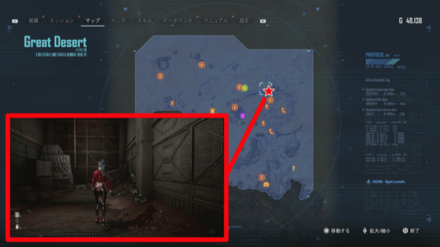
Great Desert Beta Core Locations
| Map Location | How to Get |
|---|---|
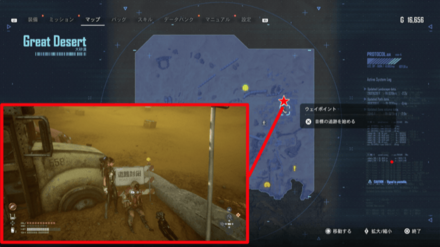
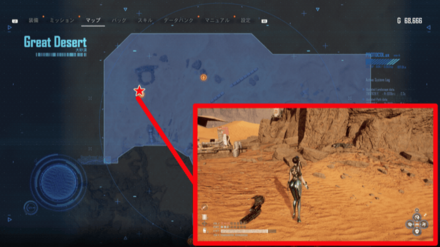
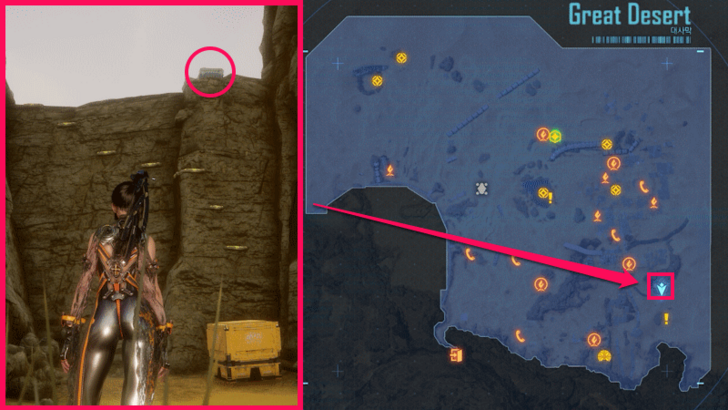
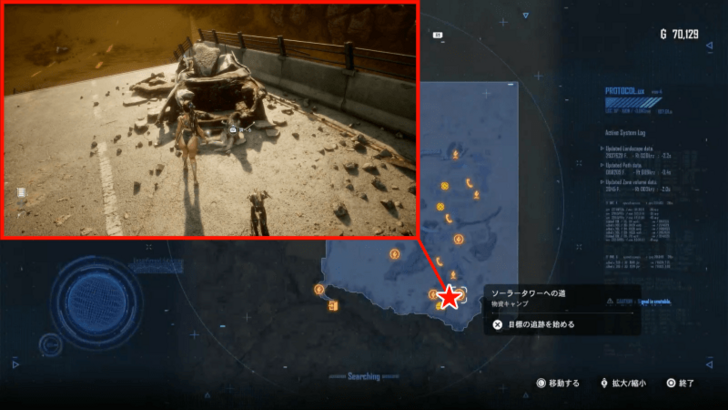 |
Head south from the Way to the Solar Tower supply camp and enter the tunnel. You can collect it from the person at the far end of the overpass. Beta Core Video Location |
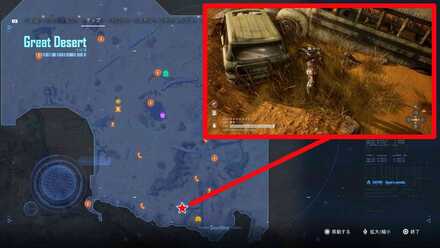
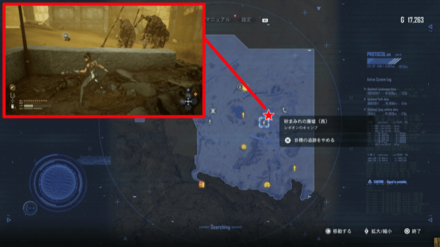
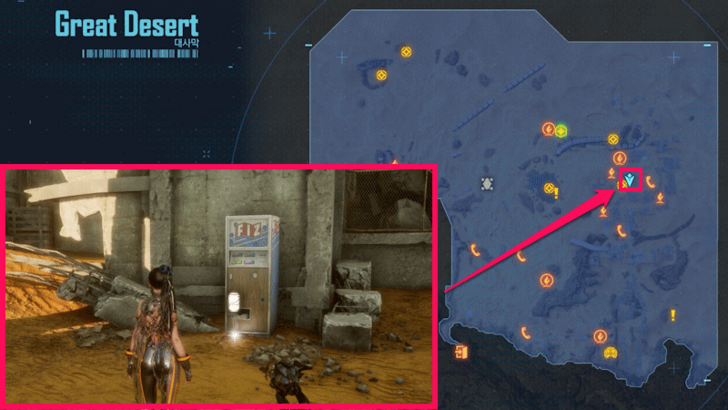
 |
Go west from the east waypoint. Beta Core Video Location |
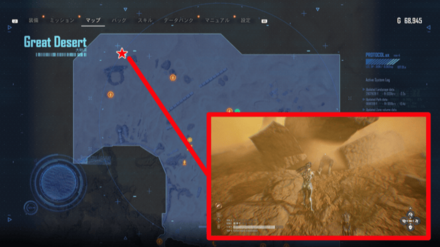
 |
From the Tetrapod, head west and climb the wall, shoot the drone, and lower the rope. Climb the rope and descend the rocky mountain. Beta Core Video Location |
Stellar Blade Beta Core Locations
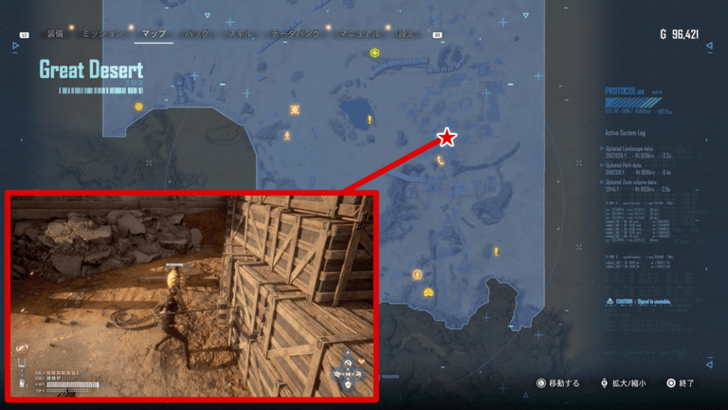
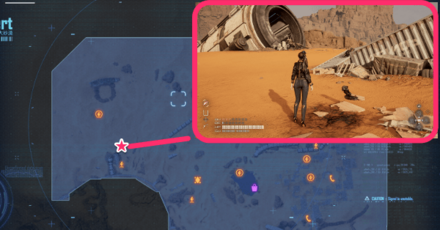
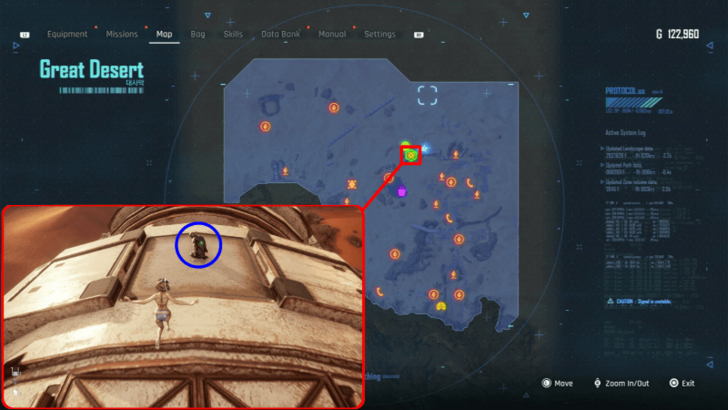
Great Desert Omnibolt Location
| Map Location | How to Get |
|---|---|
 |
To the left of the New World signboard after getting off the Crumbling Rooftop camp and head north a bit. |
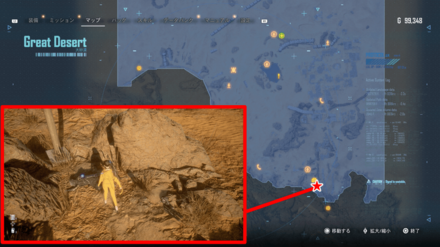
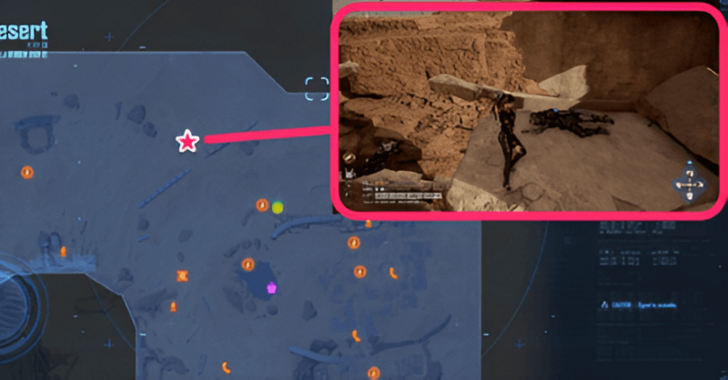
Great Desert Tumbler Expansion Module Locations
| Map Location | How to Get |
|---|---|
 |
Head for the deepest part of the ruins to the east of the Debris-filled Entryway. How to Get |
How to Get Tumbler Expansion Module
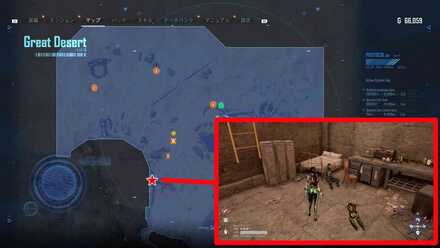
Great Desert Drone Upgrade Module Locations
| Map Location | How to Get |
|---|---|
 |
Destroy the drone when you look back after passing the saw blade. How to Get |
 |
Dropped by the drone near the angel statue west of the Twin Rock supple camp. How to Get |
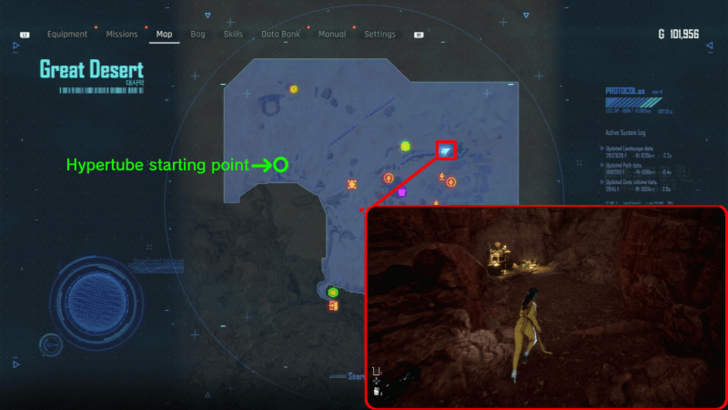
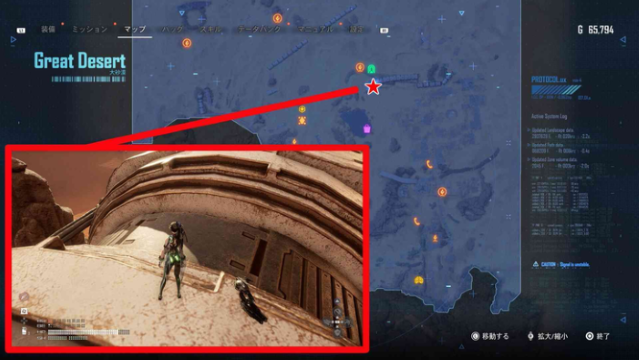 |
On top of the hypertube near the supply camp Abyss Rebois Entrance How to Get |
 |
Enter the ruins east of the Twin Rocks supply camp. From the rock outside, climb to the top and fall to obtain it. How to Get |
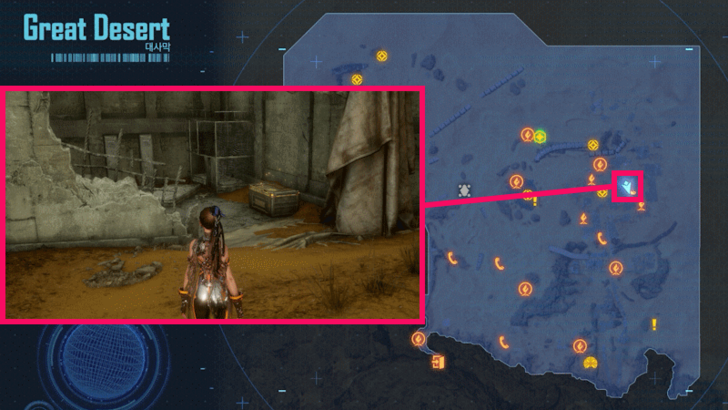
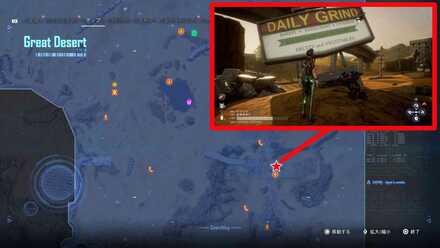
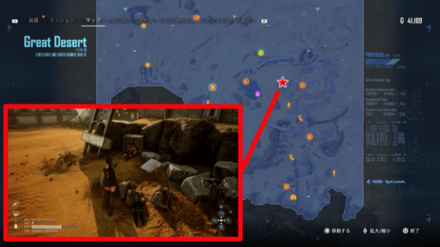
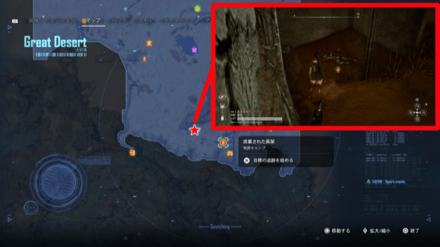
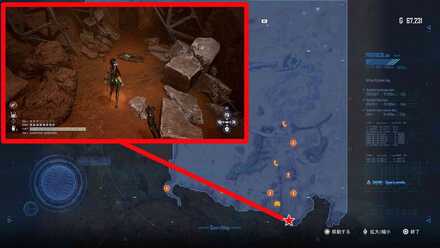
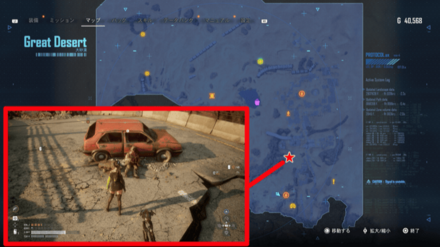
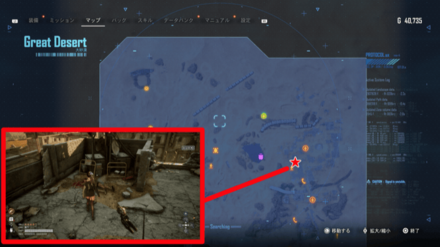
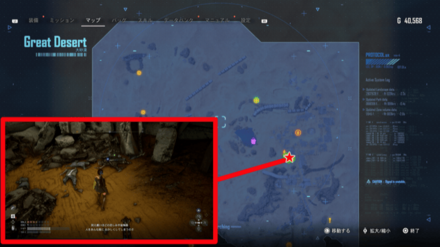
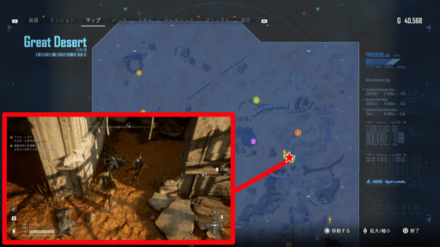
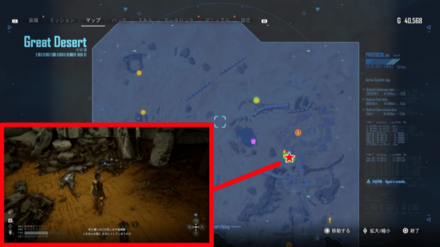
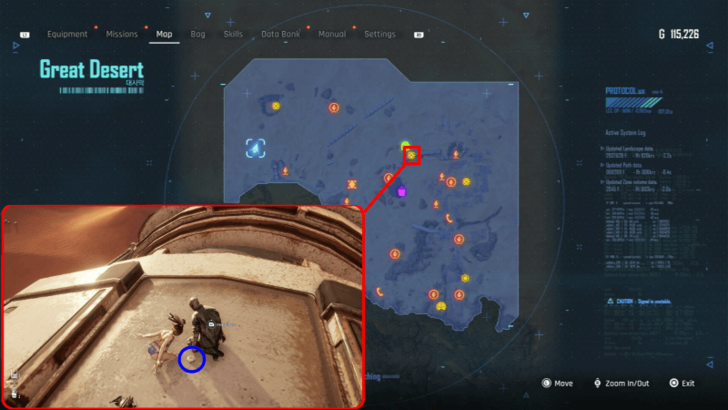
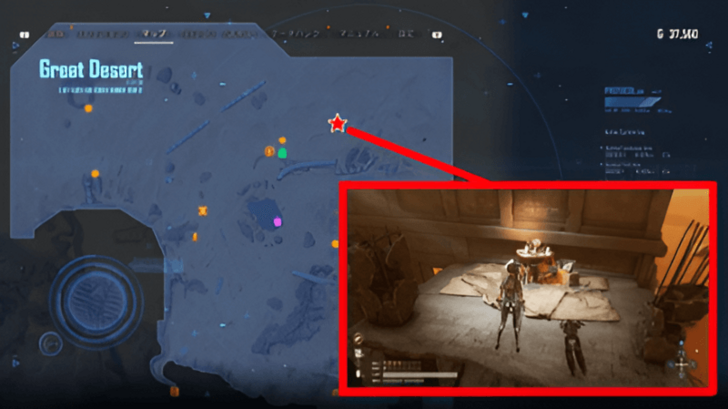
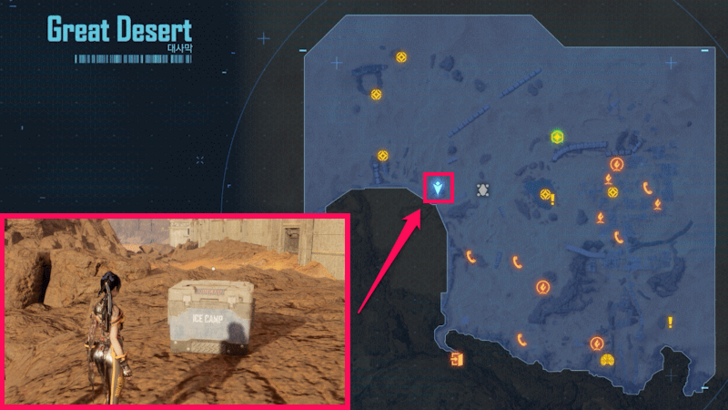
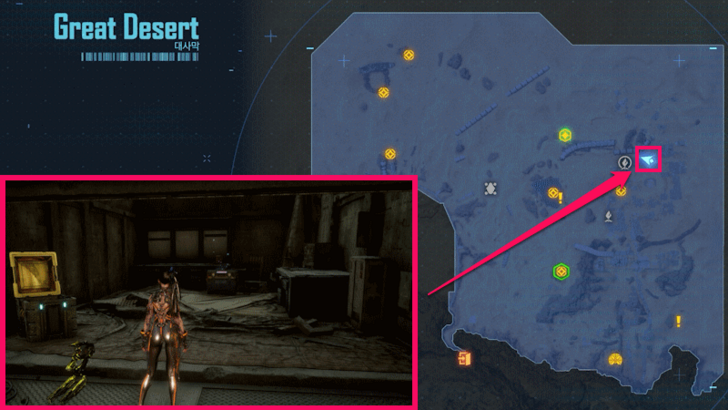
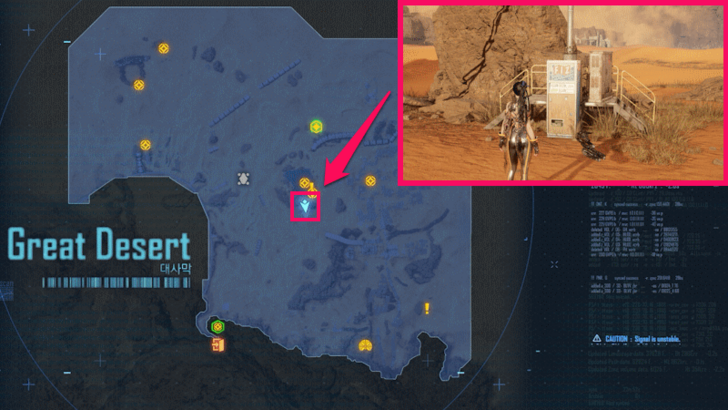
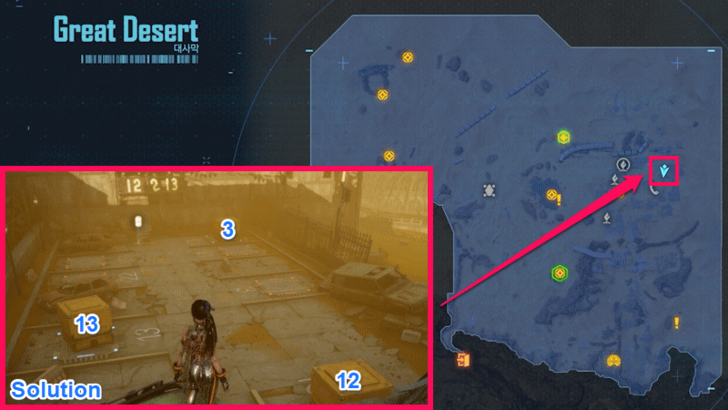
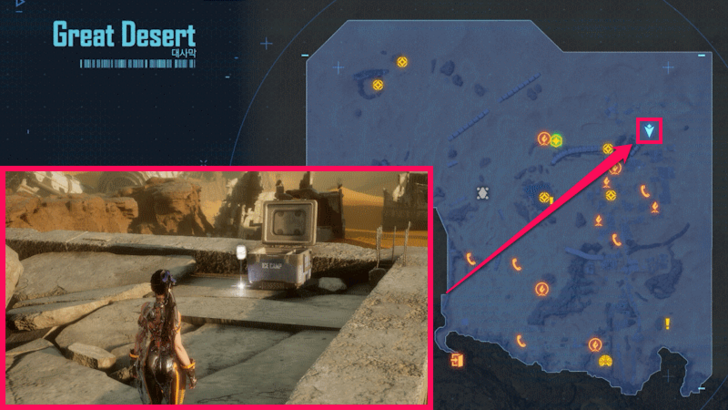
Great Desert Passcode and Chest Locations
| Overworld Image | Passcode Lock Location |
|---|---|
 Dropped by a treasure bot north of Buried Ruins Outskirt supply camp. |
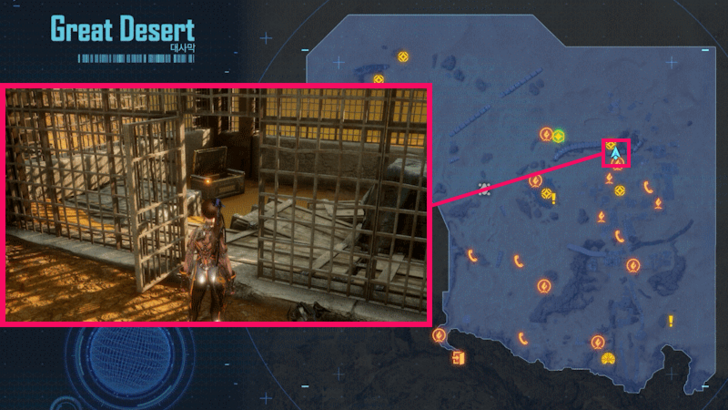 Perform a series of rope swing jumps to reach this area. |
 |
|
 Dropped by a treasure bot inside one of the few ruined building in the south. |
 Jump on the railing on the Solar Tower, then to the maintenance bots to reach this chest. |
 |
|
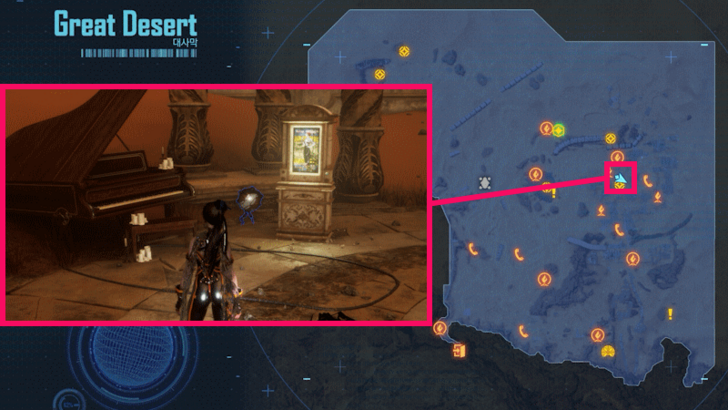 Dropped by a treasure bot in the Opera House. |
 Found in a building ruins southeast of the North of Buried Ruins camp. |
 |
|
 Complete the platforming challenge in the area to reach this room. |
 Found west of the Oasis supply camp. |
 |
|
 Found at the location of the first objective of A United People Cannot be Defeated. |
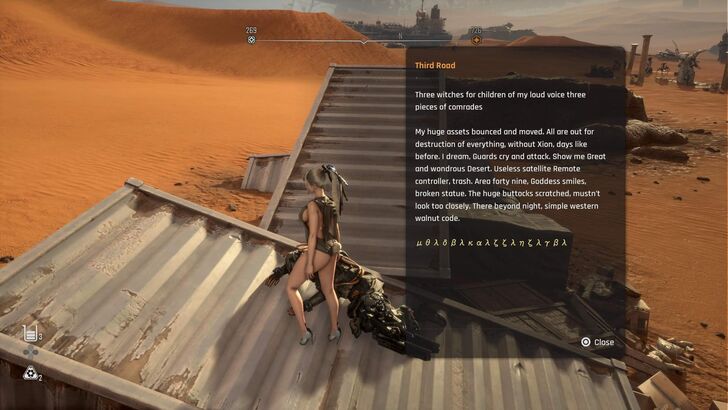
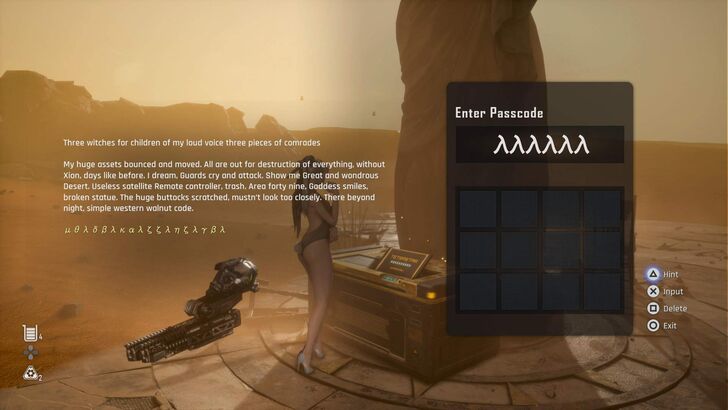 Beside the statue at the Three Witches quest location. |
 |
|
All Passcode Answers and Locations
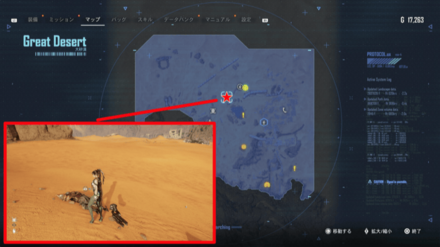
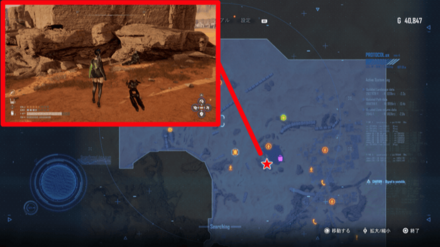
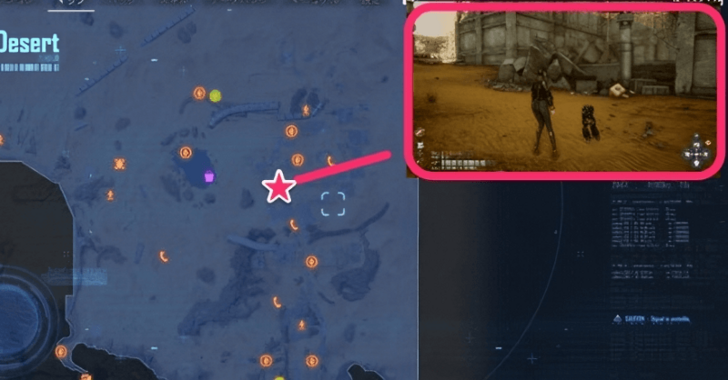
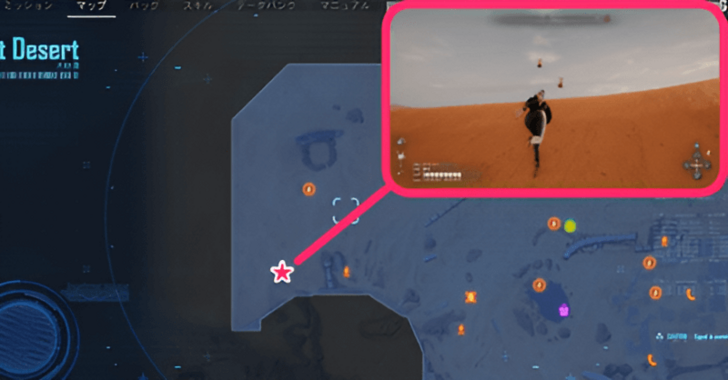
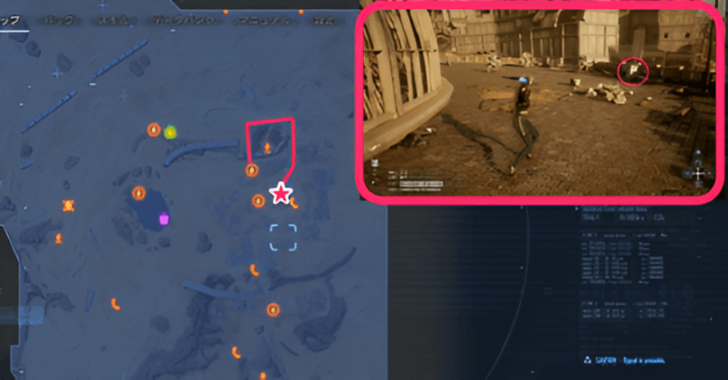
Great Desert Memorystick Locations
| Overworld Image | Location Details |
|---|---|
 Citizen 109's Resolution Citizen 109's Resolution
|
You can find Citizen 109's Resolution on a dead legionnaire between the rock formation south of the Waypoint. |
 Citizen 206's Memory Citizen 206's Memory
|
You can find Citizen 206's Memory on a dead legionnaire behind a rock formation blocked by wooden boards. |
 Citizen 246's Recollection Citizen 246's Recollection
|
You can find Citizen 246's Recollection on a dead legionnaire on top of the building ruins near the Great Desert supply camp. |
 Sentinel 39's Resolution Sentinel 39's Resolution
|
You can find Sentinel 39's Resolution on a dead legionnaire by passing through the building by jumping over the scaffolding. |
 Emil's Lament Emil's Lament
|
You can find Emil's Lament on a dead legionnaire along the southern walls of the Great Desert near the Xion entrance. |
 Citizen 218's Memory Citizen 218's Memory
|
You can find Citizen 218's Memory on a dead legionnaire beside a bus near the Abandoned Overpass. |
 Sentinel 58's Advice Sentinel 58's Advice
|
You can find Sentinel 58's Advice on a dead legionnaire beside the rubble on the Abandoned Overpass. |
 Sentinel 41's Memory Sentinel 41's Memory
|
You can find Sentinel 41's Memory on a dead legionnaire on top of the building only accessible by doing a series of bar swing jumps. |
 Scavenger 388's Plea Scavenger 388's Plea
|
You can find Scavenger 388's Plea on a dead legionnaire leaning against a car in the south entrance to the Buried Ruins. |
 Sentinel 477's Plea Sentinel 477's Plea
|
You can find Sentinel 477's Plea on a dead legionnaire near the buss north of the Buried Ruins. |
 Citizen 360's Complaint Citizen 360's Complaint
|
You can find Citizen 360's Complaint on a dead legionnaire under a lamp post near the West of Buried Ruins camp. |
 Naomi's Testament Naomi's Testament
|
You can find Naomi's Testament on a dead legionnaire leaning on a building ruin northeast of the Great Desert. |
 Scavenger 404's Advice Scavenger 404's Advice
|
You can find Scavenger 404's Advice on a dead legionnaire below the giant sign. |
 Sentinel 95's Regret Sentinel 95's Regret
|
You can find Sentinel 95's Regret on a dead legionnaire along with other crates north of the Abyss Levoire entrance. |
 Sentinel 71's Resignation Sentinel 71's Resignation
|
You can find Sentinel 71's Resignation on a dead legionnaire inside a collapsed building northeast of the Great Desert. |
 Sentintel 82's Memory Sentintel 82's Memory
|
You can find Sentintel 82's Memory on a dead legionnaire besde the rock formation south of the Waypoint. |
 Scavenger 390's Memory Scavenger 390's Memory
|
You can find Scavenger 390's Memory on a dead legionnaire on top of the ruined building at the end of the buried hypertube. |
 Citizen 779's Consolation Citizen 779's Consolation
|
You can find Citizen 779's Consolation on a dead legionnaire close to the Great Desert Outskirts supply camp. |
 Scavenger 103's Memory Scavenger 103's Memory
|
You can find Scavenger 103's Memory on a dead legionnaire under a tree at the most northeastern edge of the Great Desert. |
 Scavenger 173's Lament Scavenger 173's Lament
|
You can find Scavenger 173's Lament on a dead legionnaire behind the large orange container near the Twin Rocks supply camp. |
 Sentinel 55's Decision Sentinel 55's Decision
|
You can find Sentinel 55's Decision on a dead legionnaire in the middle of the dunes northwest of the Oasis. |
 Harry's Recollection Harry's Recollection
|
You can find Harry's Recollection on a dead legionnaire southwest of the Oasis. |
 Sentinel 46's Memory Sentinel 46's Memory
|
You can find Sentinel 46's Memory on a dead legionnaire on the rubble west of the North of Buried Ruins camp. |
 Scavenger 438's Plea Scavenger 438's Plea
|
You can find Scavenger 438's Plea on a dead legionnaire behind a vending machine in the middle of the Buried Ruins. |
 Sentinel 15's Plea Sentinel 15's Plea
|
You can find Sentinel 15's Plea on a dead legionnaire leaning on the bridge's pillar. |
 Teddy's Memory Teddy's Memory
|
You can find Teddy's Memory on a dead legionnaire hidden beside the rocks southeast of the Solar Tower. |
 Galaxy Alan's Lament Galaxy Alan's Lament
|
You can find Galaxy Alan's Lament on a dead legionnaire in a hidden room accessible by jumping on the surrounding maintenance drones. |
 Jerome's Faith Jerome's Faith
|
You can find Jerome's Faith on a dead legionnaire at the very southern end of the Collapsed Overpass. |
 Believer's Screams Believer's Screams
|
You can find Believer's Screams on a dead legionnaire leaning against the statue east of the Great Desert Outskirts supply camp. |
 We Must Find Them We Must Find Them
|
You can find We Must Find Them on a dead legionnaire leaning against the statue east of the Great Desert Outskirts supply camp. |
 Exile's Resolution Exile's Resolution
|
You can find Exile's Resolution on a dead legionnaire on the cargo containers near the hypertube entrance. |
 The Last Theorem of an Unknown The Last Theorem of an Unknown
|
You can find The Last Theorem of an Unknown on a dead legionnaire inside one of the bathroom stalls near the Matrix 11 entrance. |
 Rambling of the Ascended Rambling of the Ascended
|
You can find Rambling of the Ascended on a dead legionnaire towards the exit of the cave after going through the hypertube. |
 Lament of the Fearful Lament of the Fearful
|
You can find Lament of the Fearful on a dead legionnaire towards the exit of the cave after going through the hypertube. |
 Lament of the Isolated Lament of the Isolated
|
You can find Lament of the Isolated on a dead legionnaire behide breakable crates inside a building northwest of the Abandoned Overpass supply camp. |
 Laughter of the Isolated Laughter of the Isolated
|
You can find Laughter of the Isolated on a dead legionnaire in the first floor of the ruins south of the West of Buried Ruins camp. |
 Words Spoken: Finding Peace Before Death Words Spoken: Finding Peace Before Death
|
You can find Words Spoken: Finding Peace Before Death on a dead legionnaire in a tunnel at the end of the Collapsed Overpass. |
 Words Spoken: Embracing Death with a Smile Words Spoken: Embracing Death with a Smile
|
You can find Words Spoken: Embracing Death with a Smile on a dead legionnaire in a tunnel at the end of the Collapsed Overpass. |
 Failed Sentinel's Lament Failed Sentinel's Lament
|
You can find Failed Sentinel's Lament on a dead legionnaire by climbing the ledges to the top of the building. |
 Whiir Whiir Whiir Whiir
|
You can find Whiir Whiir on a dead legionnaire at the end of the road where the Abandoned Overpass camp is. |
 Luther's Revelation Luther's Revelation
|
You can find Luther's Revelation on a dead legionnaire by shooting the drone to drop its rope, then proceed to jump to the last building. |
 Echo's Lament Echo's Lament
|
You can find Echo's Lament on a dead legionnaire during the A United People Cannot be Defeated side mission. |
 I Felt It I Felt It
|
You can find I Felt It on a dead legionnaire at the top of the hypertube during the Let There be Light Again side mission. |
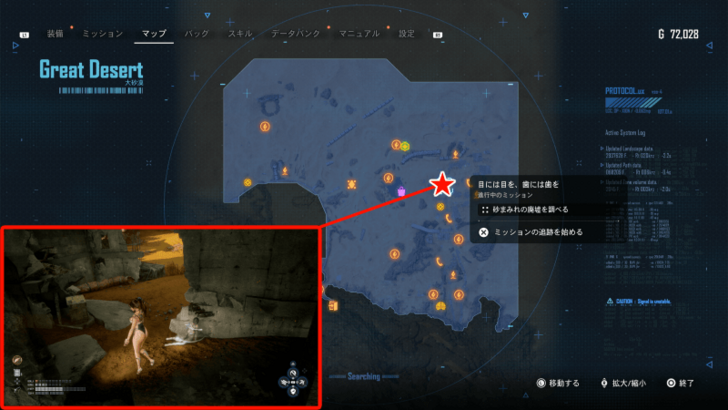
 Yo's Mutterings Yo's Mutterings
|
You can find Yo's Mutterings on a dead legionnaire during the An Eye for an Eye, a Tooth for a Tooth side mission. |
|
Ryu's Rage
|
You can find Ryu's Rage on a dead legionnaire during the An Eye for an Eye, a Tooth for a Tooth side mission. |
|
So's Resolution
|
You can find So's Resolution on a dead legionnaire during the An Eye for an Eye, a Tooth for a Tooth side mission. |
|
Lune's Last Words
|
You can find Lune's Last Words on a dead legionnaire during the An Eye for an Eye, a Tooth for a Tooth side mission. |
|
Mel's Faith
|
You can find Mel's Faith on a dead legionnaire during the An Eye for an Eye, a Tooth for a Tooth side mission. |
|
Raan's Testament
|
You can find Raan's Testament on a dead legionnaire during the An Eye for an Eye, a Tooth for a Tooth side mission. |
 May's Memory May's Memory
|
You can find May's Memory on a dead legionnaire during the A Treasure with a Name side mission. |
 July's Memory July's Memory
|
You can find July's Memory on a dead legionnaire during the A Treasure with a Name side mission. |
 August's Memory August's Memory
|
You can find August's Memory on a dead legionnaire during the A Treasure with a Name side mission. |
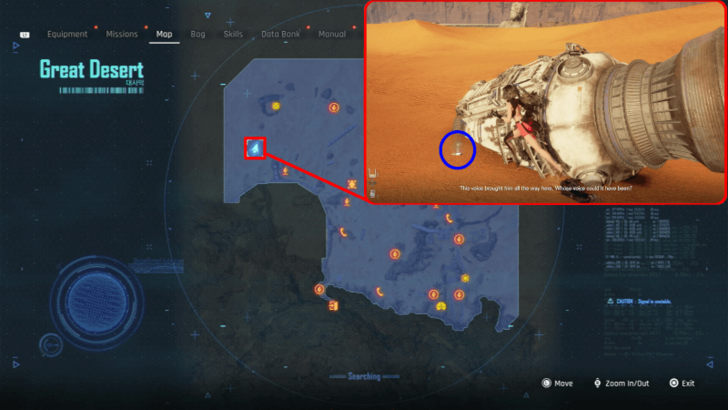
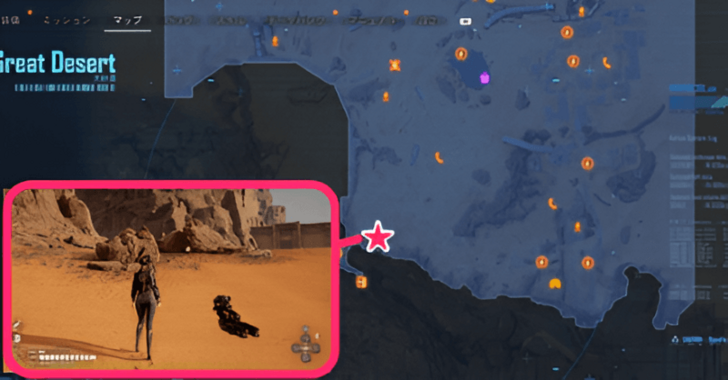
Great Desert Document Locations
| Overworld Image | Location Details |
|---|---|
 |
Found by examining a robot buried in rubble. |
 |
Found by examining a robot buried in rubble. |
 |
Found during the Let There be Light Again side quest. |
 |
Found on a submerged corpse at the cave connected to the Great Desert Hypertube during the King of the Tunnel side quest. |
 |
Found beside Felix's corpse during the Let There be Light Again side quest. |
 |
Found during the A United People Cannot be Defeated side quest. |
|
|
Found during the A United People Cannot be Defeated side quest. |
 |
Found on top of the crates near the Hypertube entrance in the Great Desert. This contains clues about the passcode to open the supply box behind Echo left behind. |
 |
Found on the second floor of one of the ruins located in the northeastern part of the Great Desert. |
 |
Found inside one of the buildings located near the Collapsed Overpass. Find a building with an explosive barrel stuck on one of its wall opening. Shoot the explosive barrel to get inside the building. |
 |
Found in the cave connected to the end of the Great Desert Hypertube. You can access the Hypertube during the King of the Tunnels side quest. |
 |
Found on the newspaper dispenser located just above the South of the Buried Ruins Camp. |
 |
Found on the newspaper dispenser near the Opera House. |
 |
Found by defeating the drone hiding underneath the rock formations southwest of the Great Desert. |
 |
Found on the boxes near a giant statue west of the Great Desert. |
 |
Found beside the debris to the left of the Abandoned Overpass supply camp. |
 |
Found on Felix's corpse during the Let There be Light Again side mission. |
 |
Found in a fallen Legionaire's body, located on a cliff next to the ruins. |
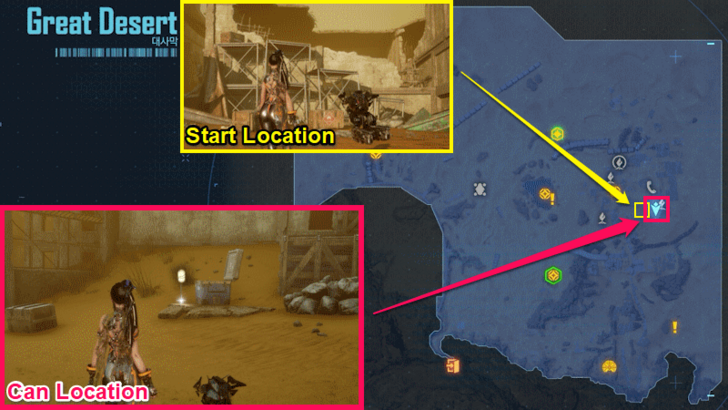
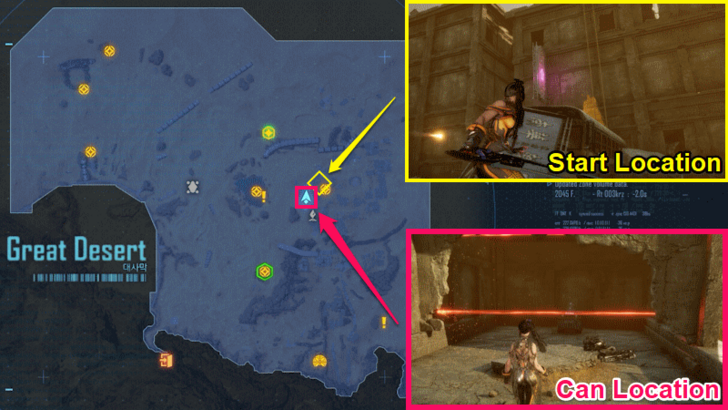
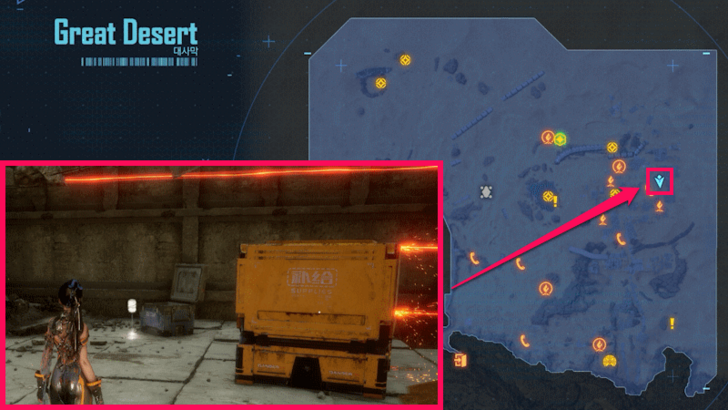
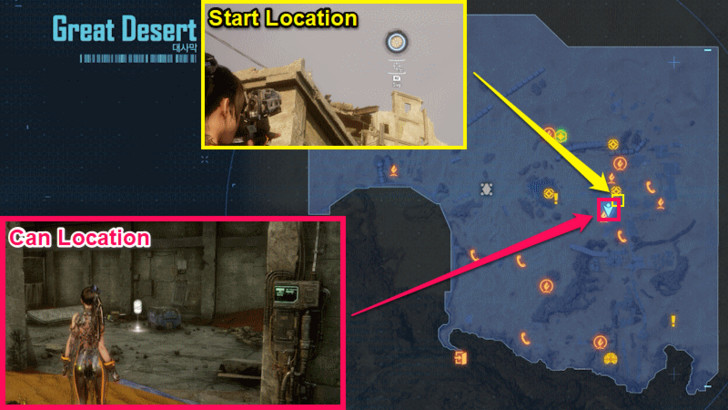
Great Desert Can Locations
| Can Name and Location | How to Get |
|---|---|
 Newfoundland Dry Zero #6 |
Shoot the wooden crate sticking out of the ground.
|
 Milky Pop Zero #8 |
Climb the yellow ledges, shoot the drone target, then swing from the branches to the rope, climb to the top, and reach the chest.
|
 Cryo Café Mocha #14 |
Open the chest and shoot the three drone targets that spawn.
|
 The Haven Earl Grey #15 |
This can be found on top of a Hypertube. Climb up this Hypertube from the west.
|
 The Haven Milk Tea #16 |
Complete the pressure plate puzzle in the area to open the room that has the can.
|
 Nectar Grape #22 |
This can be found in a vending machine south of the Oasis.
|
 Nectar Cranberry #24 |
Climb the ledge lift and jump on the maintenance bots to reach the platform with the can.
|
 Behemoth Black #29 |
Solve the pressure plate puzzle in this parking lot.
|
 Liquid Fire #30 |
Interact with the chest, then destroy all the drones that spawn.
|
 Liquid Nuclear #32 |
Climb the scaffolding, then move the large orange cart to reach the area with the can.
|
 Potential Frost #35 |
Climb the ladder, and complete the platforming challenge.
|
 Starwell #38 |
Place a Smart Mine on the shining object on the ground. The chest spawns once the Lurker hits the mine.
|
 Mountain Sparkle Everest #40 |
Move the large orange cart to block the lasers and reach the chest.
|
 Cryo the Malt #43 |
Shoot the drone to reach a console that starts a timed platforming challenge. Completing the challenge opens the locked gate below.
|
 Johnson’s Highball Lemon #48 |
Move the orange cart, and climb the ledges to reach the chest.
|
 Johnson’s Highball Ginger #49 |
This can be found in a vending machine in the middle of the city ruins.
|
Great Desert Missions
Great Desert Side Quests
| List of Side Missions | Reboot!!! | Fallen Angel |
|---|---|
| Looking Glass | |
Great Desert Bulletin Board Requests
| List of Requests | Where's the Item | Lurker Hunt |
|---|---|
| Precious Hunter | |
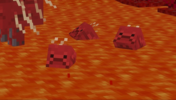
Great Desert Naytiba Enemies
Naytiba Enemies in Great Desert
| Enemies |
 Lesser Lurker |
 Lurker |
 Lesser Behemoth |
|---|---|---|
Great Desert Fishing Spot Locations
List of Fishing Spots
| Fishing Spot | Location View |
|---|---|
| Oasis |
Overworld View: Map View: 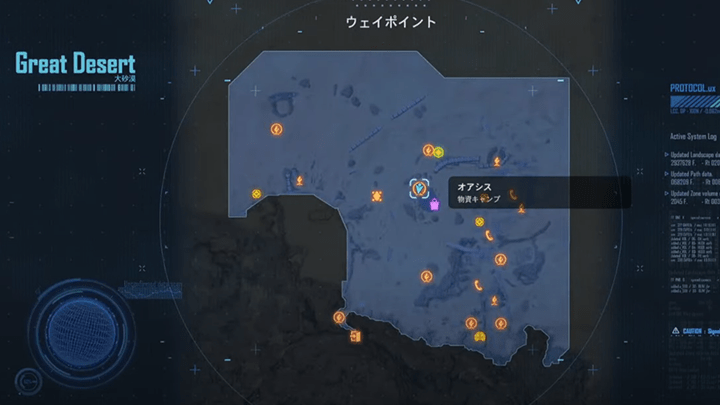 |
Stellar Blade Related Guides
All Regions
| Eidos 7 | Xion City | Wasteland |
| Altess Levoire | Matrix 11 | Great Desert |
| Abyss Levoire | Eidos 9 | Spire 4 |
Comment
Author

Great Desert Guide: All Passcodes, Collectibles and Missions
Rankings
- We could not find the message board you were looking for.
Gaming News
![Neverness to Everness (NTE) Review [Beta Co-Ex Test] | Rolling the Dice on Something Special](https://img.game8.co/4414628/dd3192c8f1f074ea788451a11eb862a7.jpeg/show)

Popular Games

Genshin Impact Walkthrough & Guides Wiki
Honkai: Star Rail Walkthrough & Guides Wiki
Arknights: Endfield Walkthrough & Guides Wiki
Umamusume: Pretty Derby Walkthrough & Guides Wiki
Wuthering Waves Walkthrough & Guides Wiki
Pokemon TCG Pocket (PTCGP) Strategies & Guides Wiki
Abyss Walkthrough & Guides Wiki
Zenless Zone Zero Walkthrough & Guides Wiki
Digimon Story: Time Stranger Walkthrough & Guides Wiki
Clair Obscur: Expedition 33 Walkthrough & Guides Wiki


Recommended Games
Fire Emblem Heroes (FEH) Walkthrough & Guides Wiki
Pokemon Brilliant Diamond and Shining Pearl (BDSP) Walkthrough & Guides Wiki
Diablo 4: Vessel of Hatred Walkthrough & Guides Wiki
Super Smash Bros. Ultimate Walkthrough & Guides Wiki
Yu-Gi-Oh! Master Duel Walkthrough & Guides Wiki
Elden Ring Shadow of the Erdtree Walkthrough & Guides Wiki
Monster Hunter World Walkthrough & Guides Wiki
The Legend of Zelda: Tears of the Kingdom Walkthrough & Guides Wiki
Persona 3 Reload Walkthrough & Guides Wiki
Cyberpunk 2077: Ultimate Edition Walkthrough & Guides Wiki


All rights reserved
© 2024 SHIFT UP Corporation. All rights reserved. Published by Sony Interactive Entertainment Inc.
The copyrights of videos of games used in our content and other intellectual property rights belong to the provider of the game.
The contents we provide on this site were created personally by members of the Game8 editorial department.
We refuse the right to reuse or repost content taken without our permission such as data or images to other sites.