

 7th Airborne Squad
 Scavenger Adam
 Xion, The Last Remaining City
 Altess Levoire
 Light of Hope
 Hidden Truth
 Abyss Levoire
 Orcal's Testimony
 Secret Garden
 Eye of the Hurricane
 Burning Xion
 Last Fragment
 Selection of Species
 EVE Protocol
 All Endings
This survey will take about 1 minute.
Your answers will help us to improve our website.
Stellar Blade
Alpha Signal Mission Guide
Alpha Signal is the sixth main mission in Stellar Blade. Read our guide for a full walkthrough on how to complete Scavenger Adam, including all passcode and important item locations, enemies encountered, as well as boss fight tips!
| ◄ Previous Mission | Next Mission ▶ |
|---|---|
| Light of Hope | Hidden Truth |
Alpha Signal Mission Summary
 |
|
|---|---|
| Directed by Orcal, the team makes its way to Matrix 11 to follow a frequency emitting from an Alpha Naytiba. | |
| Objectives | 1. Go to Matrix 11
2. Find the Alpha Naytiba 3. Defeat Subjugated Tachy |
| Bosses | •
 Stalker •
Tachy (Subjugated) |
| Locations | • Matrix 11
• Closed Off Platform • Landfill • Collapsed Rail Bridge • Railyard • Underground Sewer • Rotten Labyrinth • Temporary Armory • Train Graveyard • Contaminated Water Purification Plant |
Naytiba Enemies in Alpha Signal
| Enemies |
 Mite |
 Mutated Mite |
 Skulling |
|---|---|---|
 Skull Trooper |
 Skull Fighter |
 Skull Gunner |
 Skull Berserker |
||
Alpha Signal Walkthrough
| Jump to a Section! | ||
|---|---|---|
| Matrix 11 | Closed Off Platform | Landfill |
| Collapsed Rail Bridge | Railyard | Underground Sewer |
| Rotten Labyrinth | Temporary Armory | Train Graveyard |
| Contaminated Water Purification Plant | - | - |
Matrix 11 Walkthrough
| ◄ Previous Section | Next Section ▶ |
|---|---|
| - | Closed Off Platform |
| # | Matrix 11 Objectives |
|---|---|
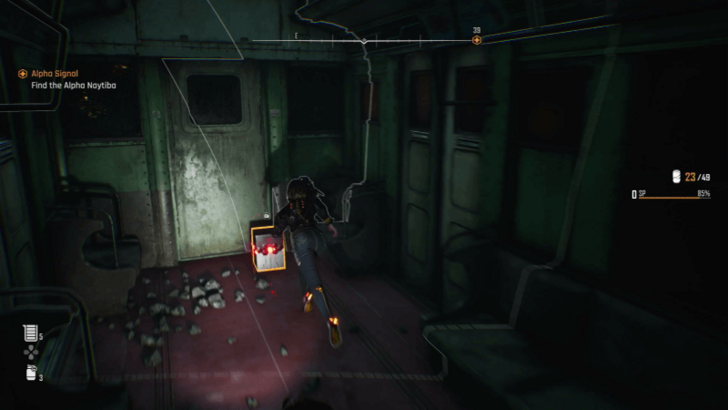
| 1 |  Head Underground Upon unlocking the first Supply Camp at Matrix 11, head towards a walkway leading underground. |
Closed Off Platform Walkthrough
| ◄ Previous Section | Next Section ▶ |
|---|---|
| Matrix 11 | Landfill |
| # | Closed Off Platform Objectives |
|---|---|
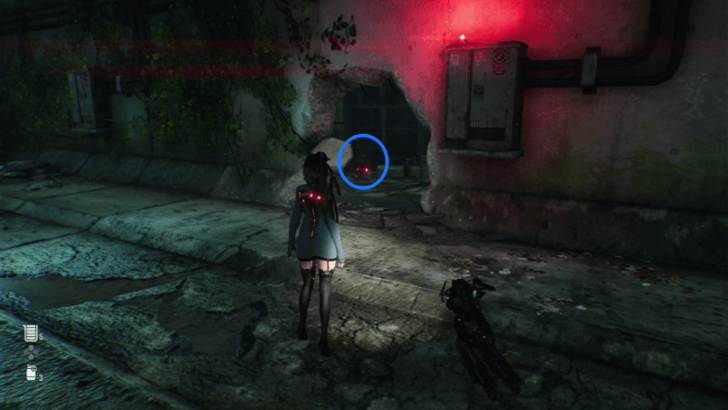
| 1 | 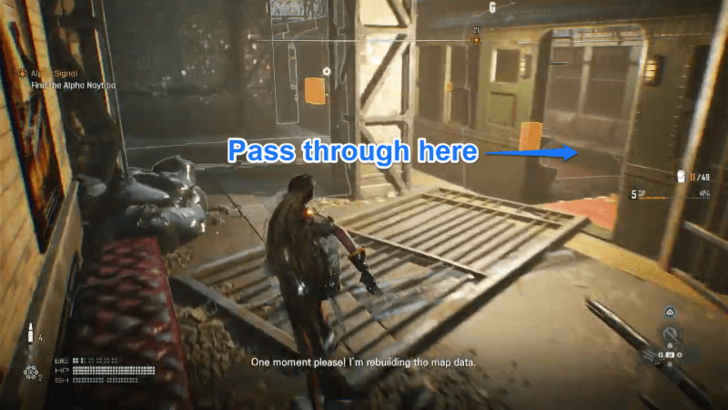 Proceed to the Other Side of the Platform Go deeper into the station by crossing through the trains in the area and reaching the stairs that will take you to the other side of the platform. |
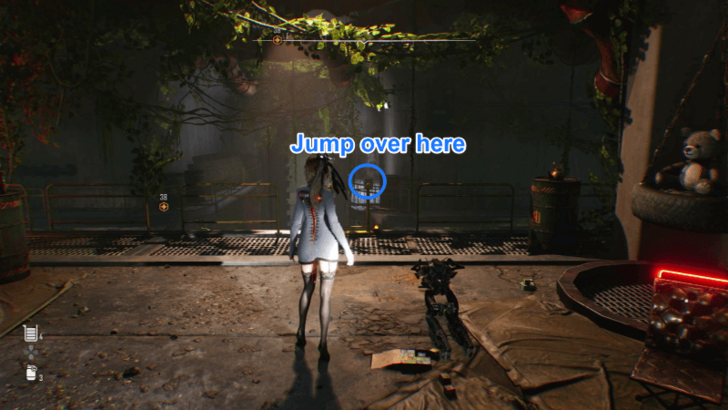
| 2 | 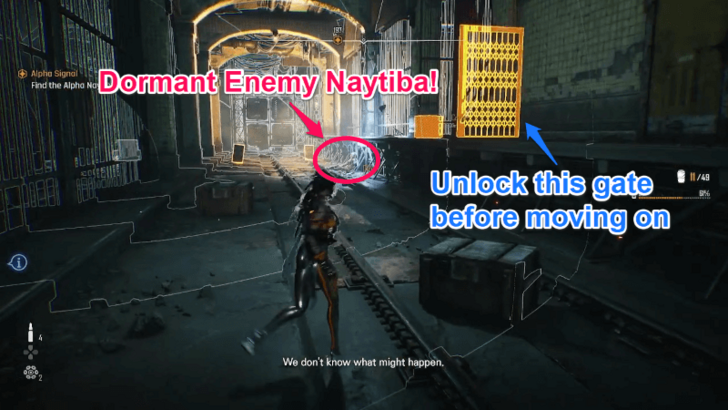 Open the Shortcut to the Entrance Open the gate to create a shortcut from the entrance. We recommend doing this before moving past said gate, as you're bound to encounter multiple strong enemies that can easily take you down. |
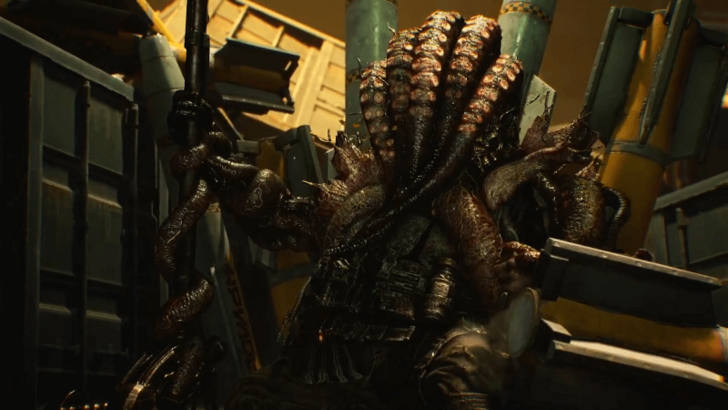
| 3 |  Defeat the Hanging Naytiba to Proceed In this mission, you'll encounter a type of Naytiba that can block your path by hanging on the walls. You will encounter more of these along the way, so keep an eye out for other blocked areas. Continue proceeding through the end of the station after defeating this Naytiba. |
| 5 |  Proceed to the Railway Tunnel Once you've unlocked the Supply Camp, move towards the railway to get to the next area. However, be careful because the train in this section will suddenly move and can kill you instantly. |
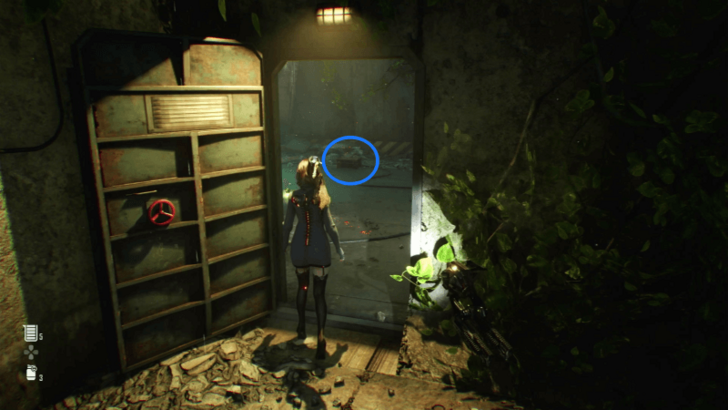
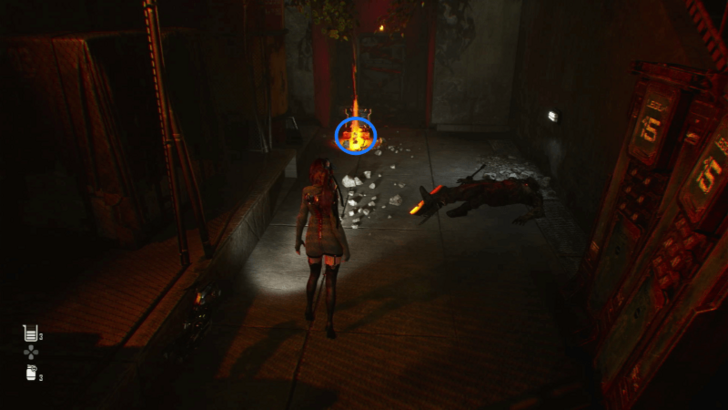
| 6 | 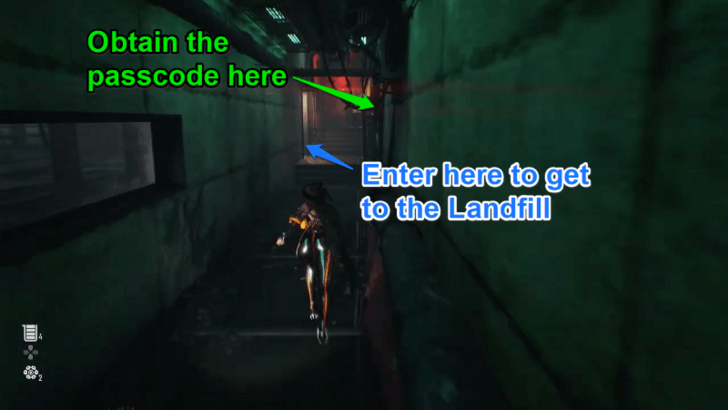 Obtain the Landfill Passcode Once the train has stopped, hop on it to get through a path on the right. Continue down this hallway, and you should see a fallen Legionaire at the end. Interact with the corpse to get the passcode, then walk out the door and exit into the landfill. ▶ List of Passcodes |
Landfill Walkthrough
| ◄ Previous Section | Next Section ▶ |
|---|---|
| Closed Off Platform | Collapsed Rail Bridge |
| # | Landfill Objectives |
|---|---|
| 1 | 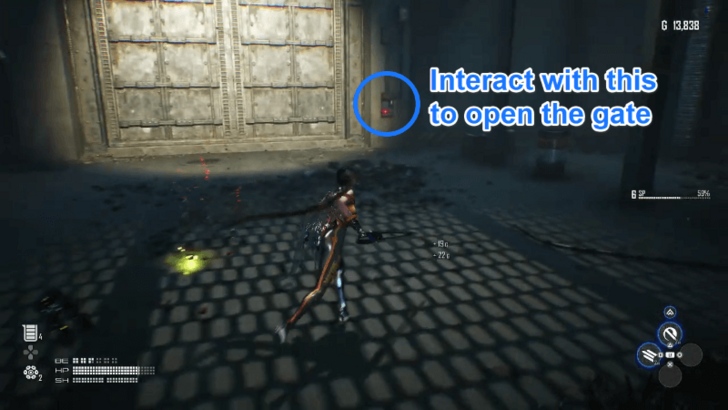 Open the Landfill Gate Head down to the lower floor of the Landfill to see a huge locked gate. You can open this gate via the control box located on the right side. |
| 2 | 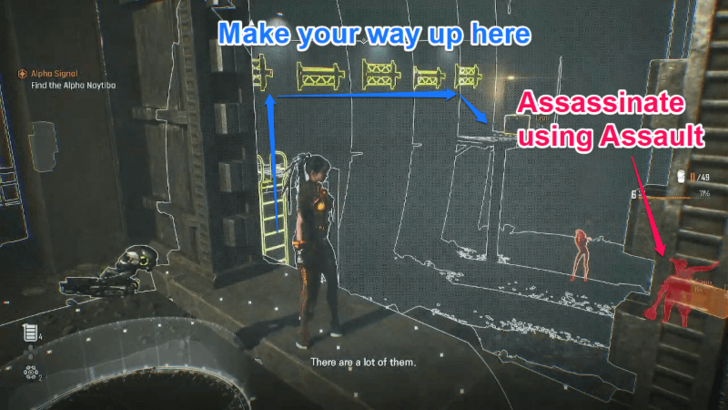 Defeat the Naytibas in the Landfill Inside the Landfill gate, you'll see a number of tough Naytibas lurking near a supply box. You can take them head-on, or you can climb on the ledges to the left and perform an Assault to instantly take down one of them. After dealing with the enemies, open the supply box using the passcode you got earlier to obtain a Fusion Cell. |
| 3 | 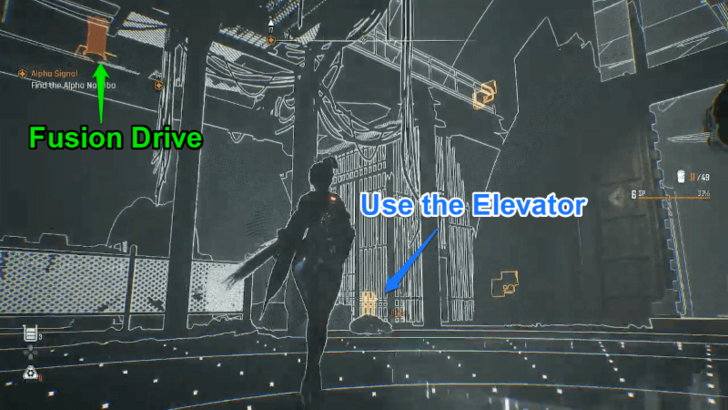 Operate the Fusion Drive in the Upper Floor Head back up the upper floor using the lift beside the gate. Once you're there, insert the Fusion Cell into the Fusion Drive nearby to open the gate leading to a tunnel connected to the Rail Bridge. |
| 4 |  Pass Through the Tunnel There will be some enemies in this tunnel and a Hanging Naytiba. Make sure to defeat the Hanging Naytiba to prevent it from spawning more mobs. |
| 5 | Unlock the Camp at the Middle of the Tunnel |
Collapsed Rail Bridge Walkthrough
| ◄ Previous Section | Next Section ▶ |
|---|---|
| Landfill | Railyard |
| # | Collapsed Rail Bridge Objectives |
|---|---|
| 1 |  Use the Broken Stringers to Cross the Bridge With the Rail Bridge destroyed, you must use the stringers protruding from the end of it to get across. |
| 2 |  Ascend the Rail Bridge Using the Hanging Ropes Make your way up the bridge by using the ropes hanging among the debris. Continue climbing up the ropes and prepare to react to some button pop-ups as the debris will start to fall. |
| 3 | Unlock the Supply Camp at the Very Top |
| 4 | 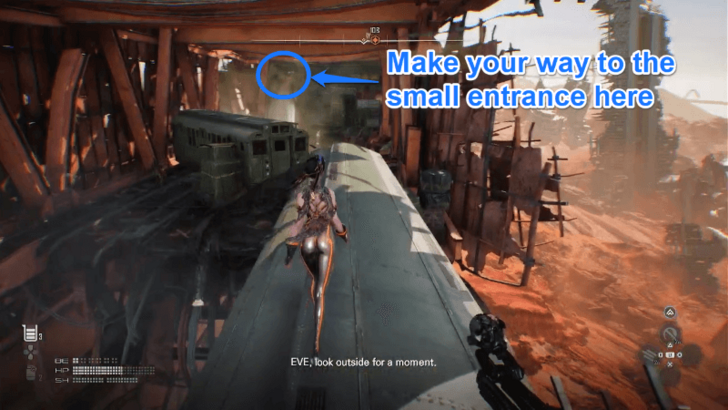 Make Your Way Through the Broken Trains |
| 5 |  Descend at the End of the Railway Descend the ladder found on the end of the railway. Continue going down that path until you reach a camp with hanging fairy lights. |
| 6 | Unlock the Camp |
| 7 |  Climb Up the Train on the Right to Reach the Railyard Next to the Supply Camp will be a train leading above ground. Climb the train after replenishing supplies. |
Railyard Walkthrough and Train Code
| ◄ Previous Section | Next Section ▶ |
|---|---|
| Collapsed Rail Bridge | Underground Sewer |
| # | Railyard Objectives |
|---|---|
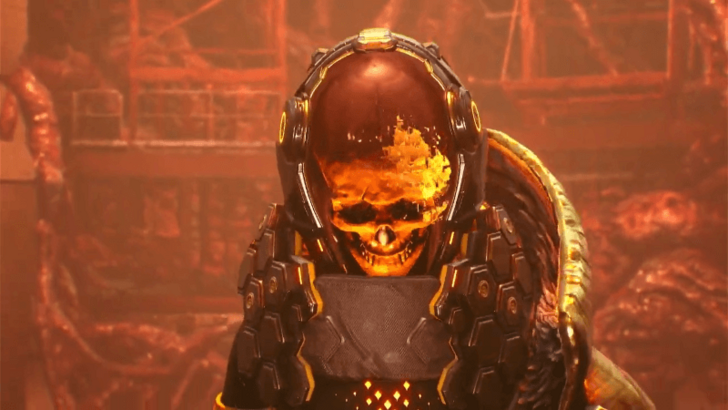
| 1 | Defeat the Stalker Players will encounter the Stalker, a boss that they need to defeat in order to progress. ▶ How to Defeat the Stalker |
| 2 | 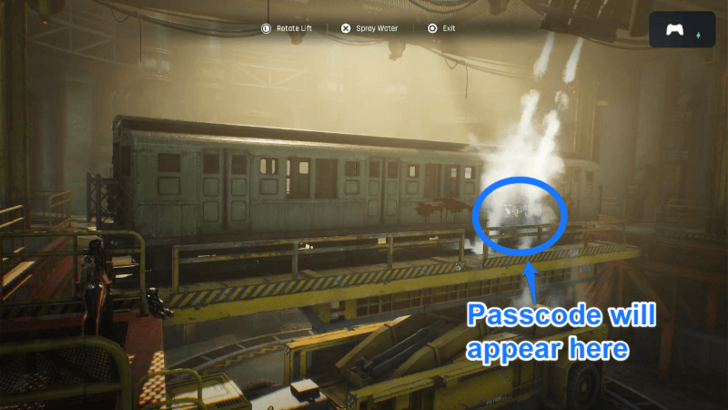 Spray Water on the Train to Get the Passcode After taking down the Stalker, you need to solve the Railyard puzzle to proceed to the next area. You can do this by turning the train to the correct side and spraying water on it. This will remove the dust that settled on the train and reveal the passcode to the locked gate. The passcode is N72R5. |
| 3 | Unlock the Supply Camp |
| 4 |  Head Down the Underground Sewer From the Supply Camp inside the locked area, follow the path going down, and you will reach the Underground Sewer. |
Underground Sewer Walkthrough
| ◄ Previous Section | Next Section ▶ |
|---|---|
| Railyard | Rotten Labyrinth |
| # | Underground Sewer Objectives |
|---|---|
| 1 |  Obtain the Underground Sewer Passcode Obtain the security code needed for the locked supply box from the kneeling Legionaire found at the bottom of the first area. The passcode is εκακδζ. ▶ List of Passcodes |
| 2 | 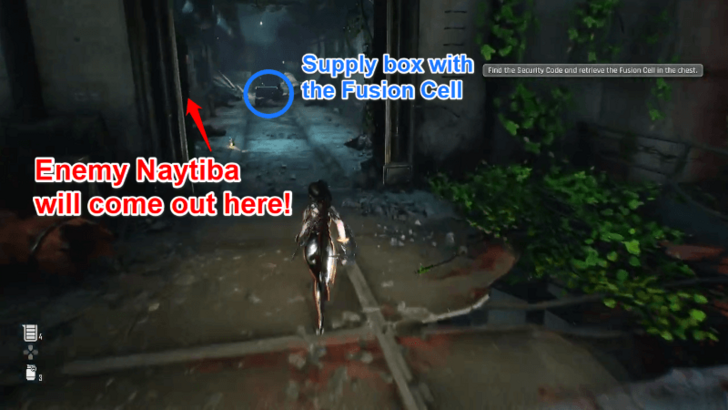 Acquire the Underground Sewer Fusion Cell Climb up the upper floor again to retrieve the Fusion Cell from the locked supply box. Be careful as an enemy Naytiba will suddenly appear from the wall on the left! |
| 3 | 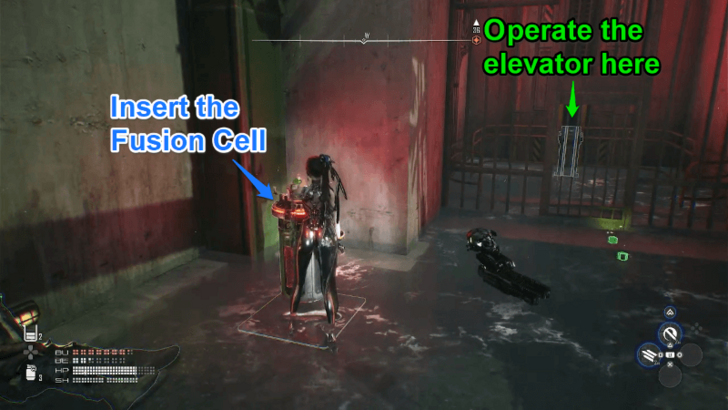 Activate the Elevator Head down again to operate the Fusion Drive. This will activate the elevator and allow you to proceed to a new area. |
| 4 |  Solve the Underground Sewer Puzzle At the top floor, you will find a path leading to a terminal that will fill the Underground Sewer with water, allowing you to swim towards the exit. To solve the puzzle, simply rotate the octagons to supply the power coming from the upper left core to the one on the lower right. |
| 5 |  Swim Towards the Exit Exit where you came from and dive in the water to swim towards the exit. |
| 6 | Unlock the Camp Below |
Rotten Labyrinth Walkthrough
| ◄ Previous Section | Next Section ▶ |
|---|---|
| Underground Sewer | Temporary Armory |
| # | Rotten Labyrinth Objectives |
|---|---|
| 1 | 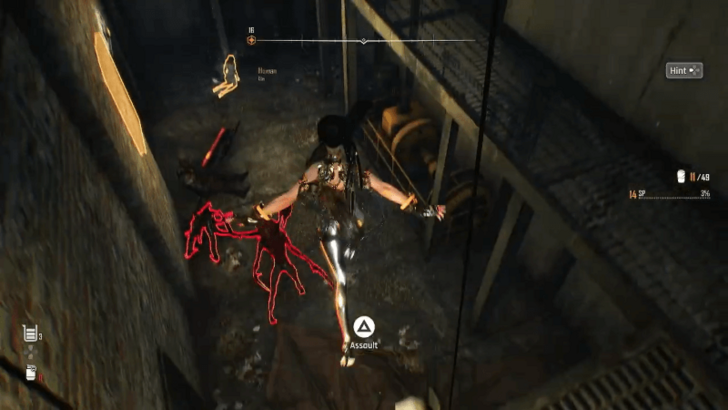 Defeat the Enemies in the Labyrinth You'll be greeted by numerous enemies upon entering the labyrinth. We suggest using the upper floors to your advantage by climbing up and triggering the Assault skill to instantly kill enemies. |
| 2 | 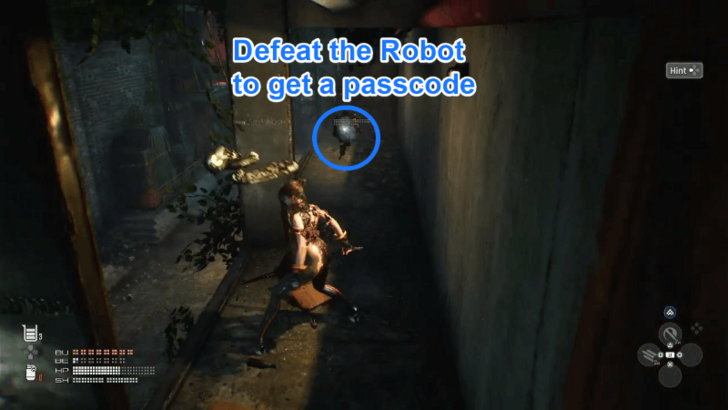 Obtain the Labyrinth Passcode Follow the trail of enemies to the left until you reach another tunnel. Kill the relic-collecting robot found on the upper floor of this new tunnel to get a passcode that will come in handy later on. ▶ List of Passcodes |
| 3 | 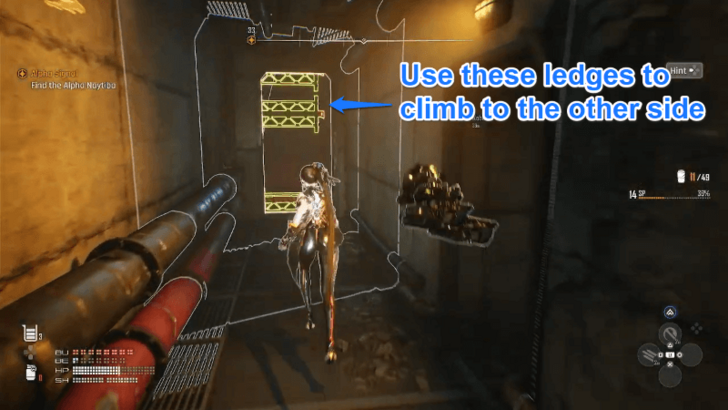 Acquire the Labyrinth Fusion CellHead deeper into the path found on the right side of the tunnel until you reach a series of ledges that you can climb on. Drop down on the other side, and you should now be able to get to the supply box that will give you a Fusion Cell. |
| 4 | 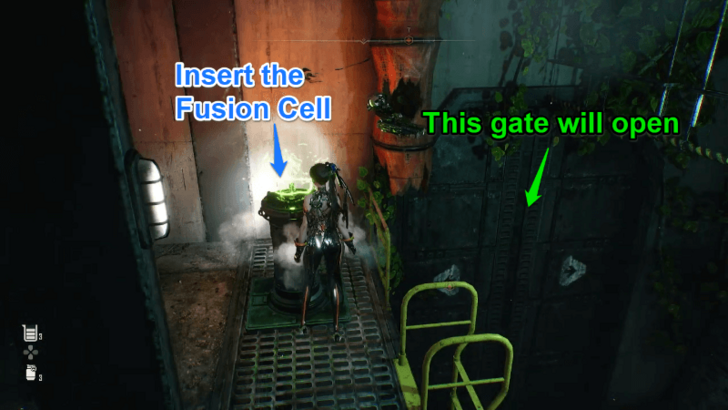 Activate the Labyrinth Fusion Drive Return to the tunnel earlier to operate the Fusion Drive and unlock the gate that will lead you to an abandoned settlement. |
| 5 | Look Around the Abadoned Settlement |
| 6 | 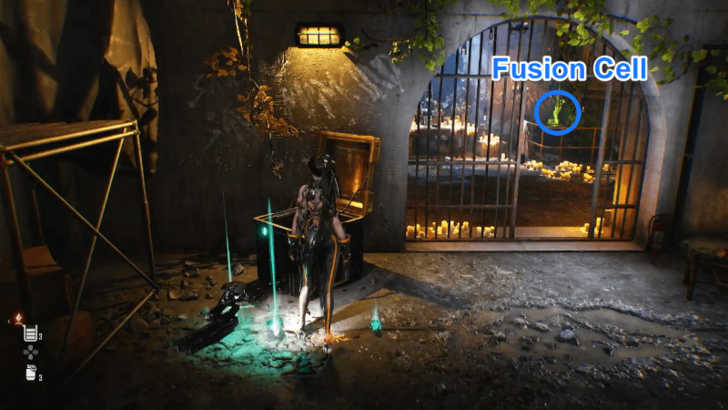 Obtain the Fusion Cell from the Abadoned Settlement In the abandoned settlement, you'll find a room that serves as a memorial shrine for the settlers who lived there before. In this room, you will find a Fusion Cell that you can use to proceed to the next area. |
| 7 |  Navigate Through the Newly Unlocked Path The area after the abandoned settlement is pretty straightforward. Keep following the trail of Naytibas until you reach a room with a generator and a cargo elevator. |
| 8 | 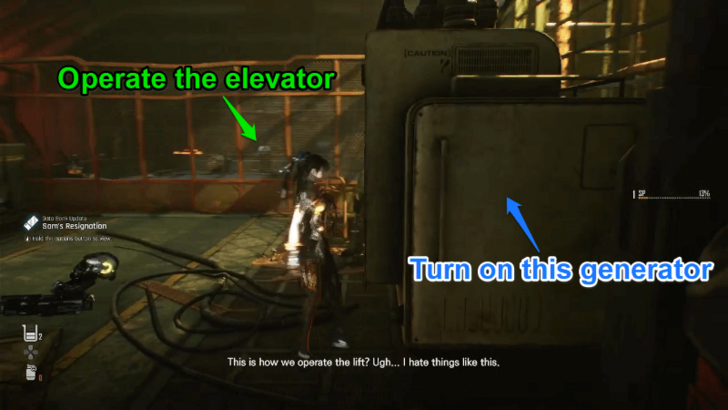 Operate the Cargo ElevatorUse the generator to power up the cargo elevator. Take the elevator going down while dealing with Naytibas that will hinder your path. |
| 9 | 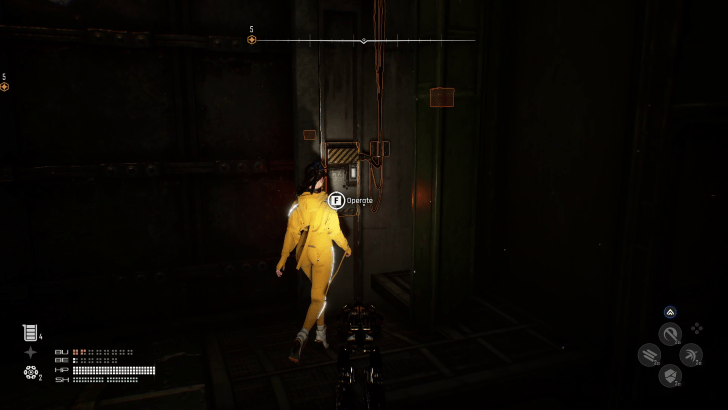 Make Your Way to the Temporary Armory Interact with the remote panel to unlock the Temporary Armory. |
Temporary Armory Walkthrough
| ◄ Previous Section | Next Section ▶ |
|---|---|
| Rotten Labyrinth | Train Graveyard |
| # | Temporary Armory Objectives |
|---|---|
| 1 | Defeat Juggernaut Progressing to the next area, players will encounter the Juggernaut, another boss that uses a large hammer to attack the player. Defeat it to progress further. ▶ How to Defeat the Juggernaut |
| 2 | 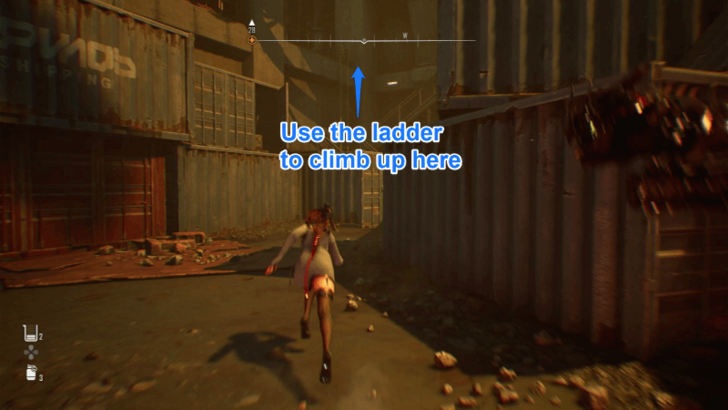 Make Your Way Up the Armory After defeating the Juggernaut, make your way up the armory through the staircase and ladder found in the right corner of the area. Continue going up until you reach a camp on the upper floor. |
| 3 | Activate the Camp Past the Armory |
| 4 | 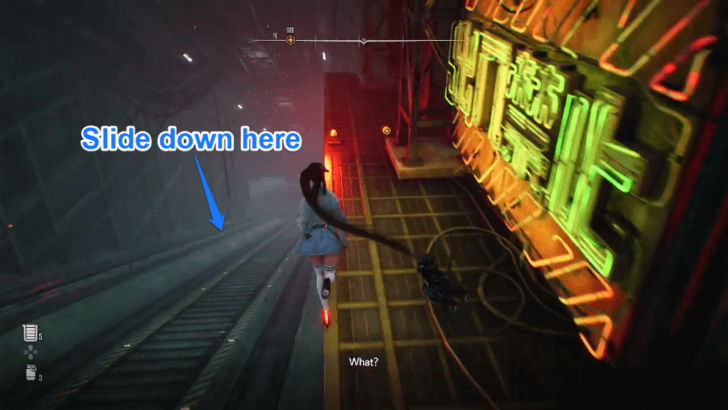 Head Down the Lift Route Slide down the lift route and swim towards your left to get to the next area. |
| 5 | 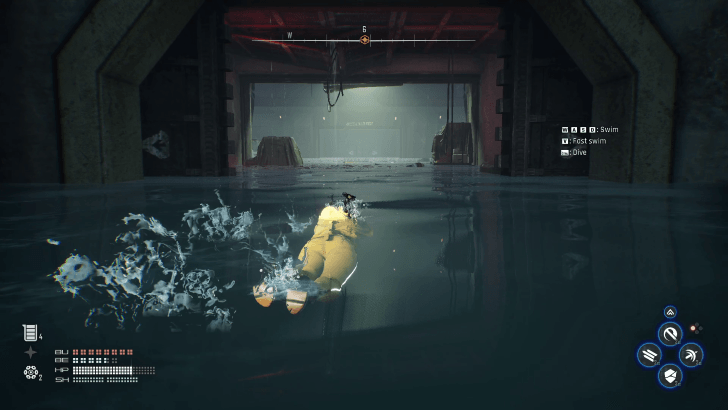 Swim Towards the Train Graveyard Take a left as you enter the water to reach the Train Graveyard. |
Train Graveyard Walkthrough
| ◄ Previous Section | Next Section ▶ |
|---|---|
| Temporary Armory | Contaminated Water Purification Plant |
| # | Train Graveyard Objectives |
|---|---|
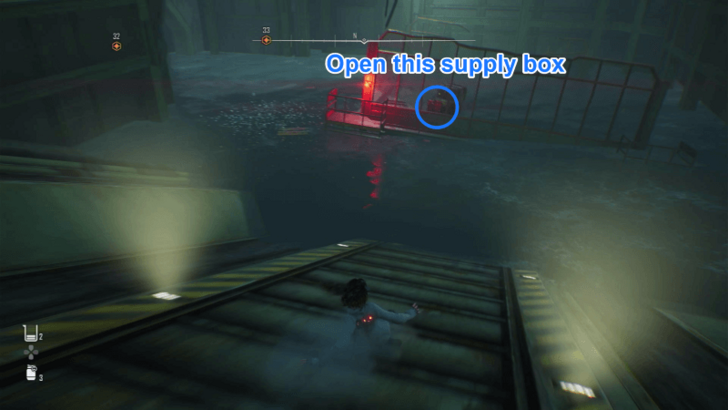
| 1 | 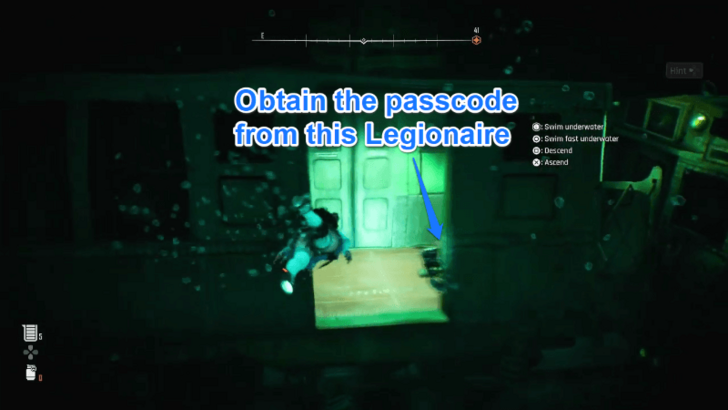 Obtain the Train Graveyard Passcode To open the gate located at the left side of the Train Graveyard, you must obtain the passcode from a submerged Legionaire near the end of the tunnel. The passcode is μηλδκα. |
| 2 | Unlock the Gate 4 Camp |
| 3 | 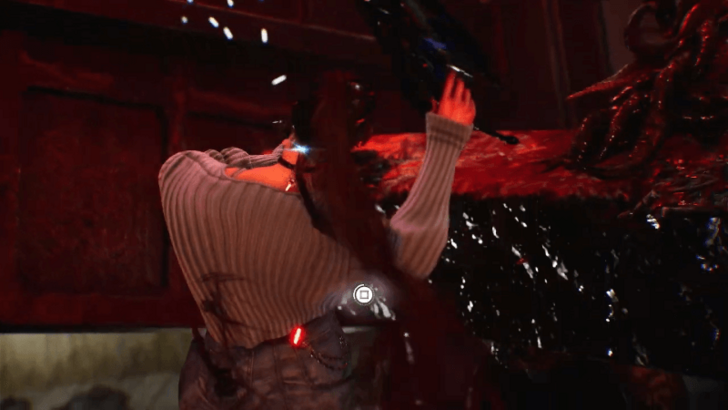 Survive the Trap After unlocking the camp inside gate 4, continue heading down until you trigger a cutscene. Prepare to press the square button as this will pop up in your screen. |
| 4 | 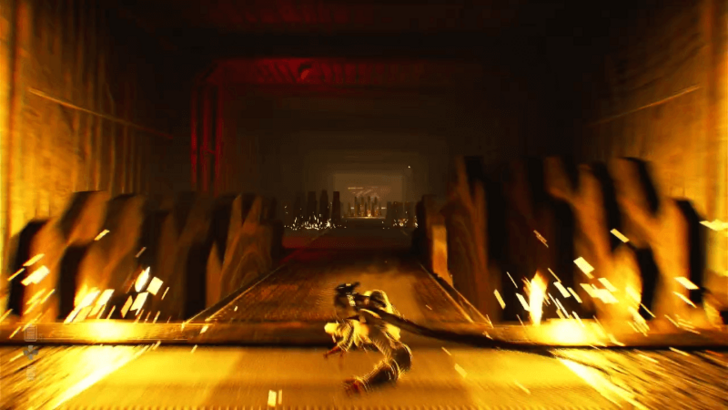 Slide Down the Collapsing Tunnel Due to the explosion, you would now need to slide through the collapsing tunnel while avoiding the grinders that will instantly kill you. To get out of here safely, you would need to position yourself accordingly: • left > middle > right > middle > right > left |
| 5 | 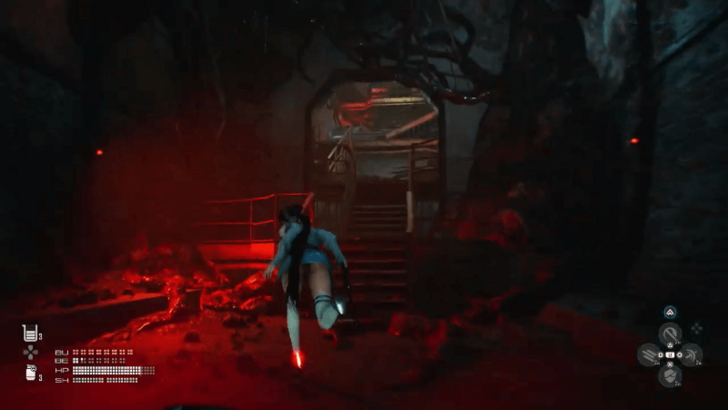 Follow the Flight of Stairs Leading Up Make your way to the end of the tunnel and up the flight of stairs leading to the next area. |
| 6 | Unlock the Supply Camp At the Top |
Contaminated Water Purification Plant Walkthrough
| ◄ Previous Section | Next Section ▶ |
|---|---|
| Train Graveyard | - |
| # | Temporary Armory Objectives |
|---|---|
| 1 | 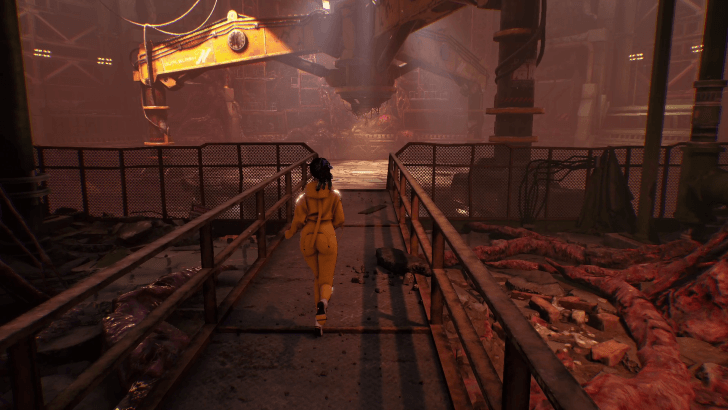 Make Your Way to the Center of the Purification Plant |
| 2 | Defeat the Subjugated Tachy For the final boss fight of this area, players will need to defeat a corrupted Tachy. This boss has three phases, each becoming more difficult than the other. It is recommended to fully upgrade your skills and replenish items at the Supply Camp nearby. ▶ How to Defeat Tachy |
Alpha Signal Boss Fights
How to Beat Stalker
| Stalker Fight Tips |
|---|
 |
|
|
How to Beat Juggernaut
| Juggernaut Fight Tips |
|---|
 |
|
|
Juggernaut Boss and How to Beat
How to Beat Tachy
| Tachy Fight Tips |
|---|
 |
|
|
Tachy Final Boss and How to Beat
Alpha Signal Tips
Unlocking Burst Skills
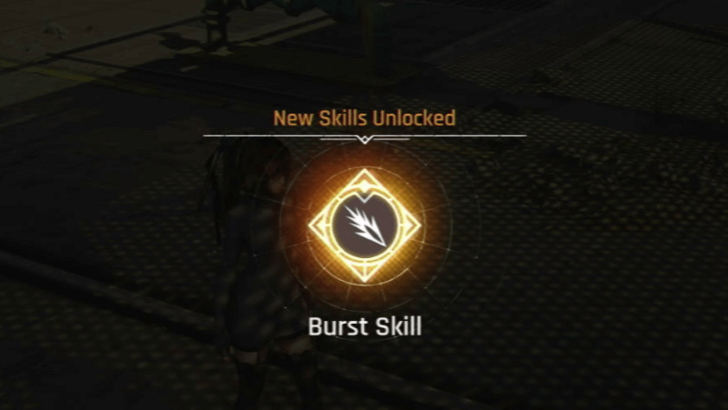
After defeating the Stalker, you'll get access to your Burst Skills by picking up one of the items it dropped on the floor. This will unlock an entirely new skill tree where you can unlock new powerful skills.
Burst Skills work similarly to Beta Skills; however, instead of gaining energy from Perfect Parries, you gain Burst Energy from Perfect Dodges or using the Beta Chain attack.
Alpha Signal Passcodes
| Location | Passcode |
|---|---|
| Landfill Supply Box | αγδμθδ |
| Underground Sewer Supply Box | εκακδζ |
| Abandoned Settlement Supply Box | λβκβδβ |
| Train Graveyard Gate 4 | μηλδκα |
Landfill Supply Box
| Passcode Location | |
|---|---|
| Unlock | 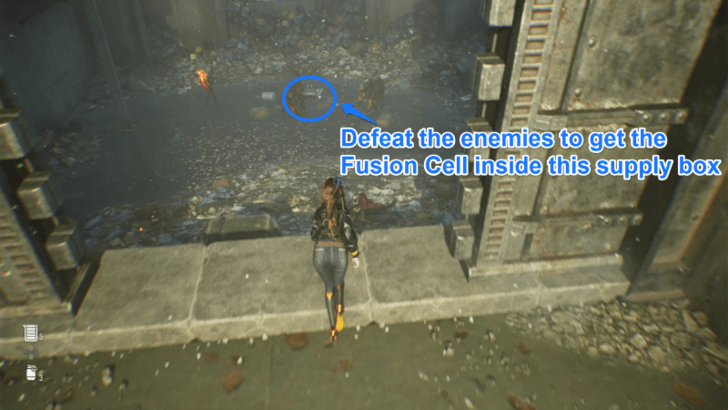 |
You can obtain the Landfill Supply Box Passcode from the fallen legionaire at the end of the corridor before reaching the area. The passcode is αγδμθδ.
Underground Sewer Supply Box
| Passcode Location | |
|---|---|
| Unlock | |
You can obtain the passcode for the supply box found in the Underground Sewer from the kneeling Legionaire on the bottom floor of the area. The passcode is εκακδζ.
Abandoned Settlement Supply Box
| Passcode Location | |
|---|---|
| Unlock | 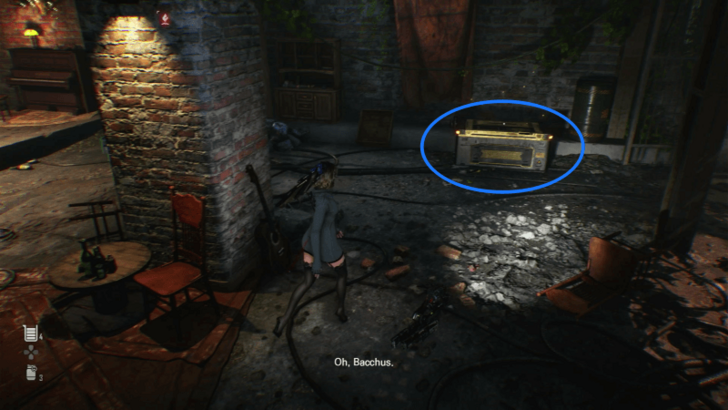 |
The passcode for the locked supply box door inside the abandoned settlement can be obtained from a robot sitting on top of a platform on the Rotten Labyrinth. The passcode is λβκβδβ.
Train Graveyard Gate 4
| Passcode Location | |
|---|---|
| Unlock | 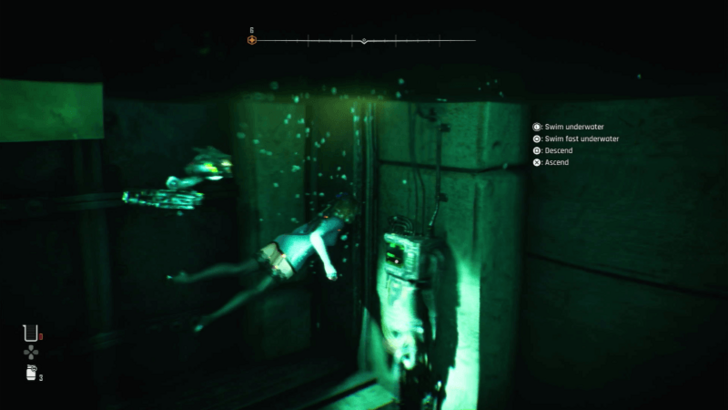 |
The passcode to open Train Graveyard Gate 4 can be obtained from a Legionaire corpse in the submerged train cart on the right side of the tunnel. The passcode is μηλδκα.
Alpha Signal Important Items
| Jump to an Important Item! | |||||||||||
|---|---|---|---|---|---|---|---|---|---|---|---|
| Omnibolts | Modules | Cores | |||||||||
| Exospines | Gear | Exterior | |||||||||
| Key Items | |||||||||||
Omnibolts
| Location | How to Get |
|---|---|
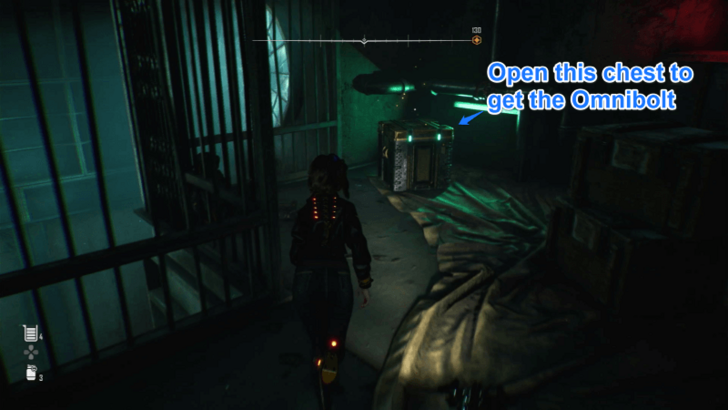 Closed Off Platform - Supply Room on the Left Side |
An Omnibolt can be obtained from a supply room on the left side of the platform tunnel. Be wary of the Naytiba that will suddenly pop out of the room! |
 Collapsed Rail Bridge - Supply Box |
Acquire an Omnibolt via the supply box located at the first floor of the rail bridge. |
 Collapsed Rail Bridge - Area Before the Railyard |
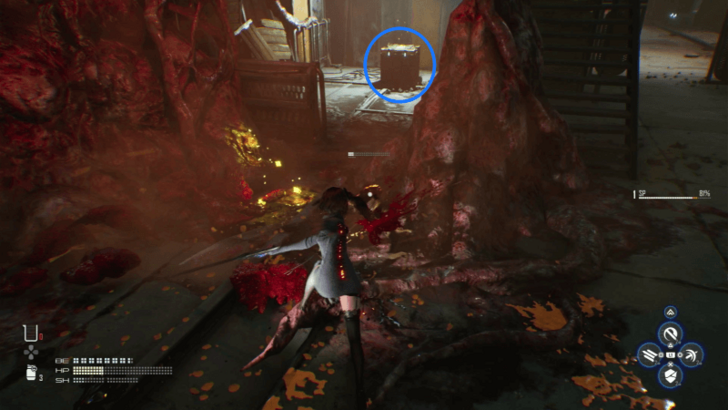
Another Omnibolt can be obtained from a supply box hidden behind a Hive before reaching the Railyard. |
 Temporary Armory - Juggernaut Boss Area |
You can get an Omnibolt from a supply box behind the crates on the left side of the Juggernaut boss area. |
 Temporary Armory - Bottom of the Lift Route |
You can acquire an Omnibolt from a supply box located on the platform floating at the bottom of the lift route past the Juggernaut boss area. |
Modules
Tumbler Expansion Module
| Location | How to Get |
|---|---|
 Closed Off Platform - Area Beside the Hive Infested Train |
You can get a Tumbler Expansion Module by killing the relic-collecting machine in an area beside the train blocked by a Hive. |
 Railyard - Platform Behind the Lifted Train |
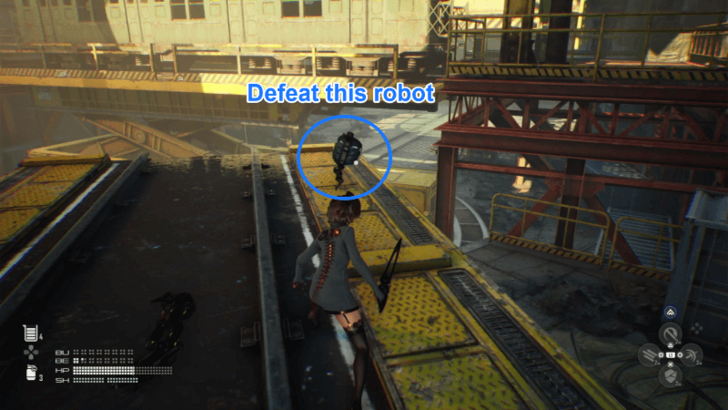
A Tumbler Expansion Module can be acquired from the robot sitting on top one of the platforms in the Railyard. |
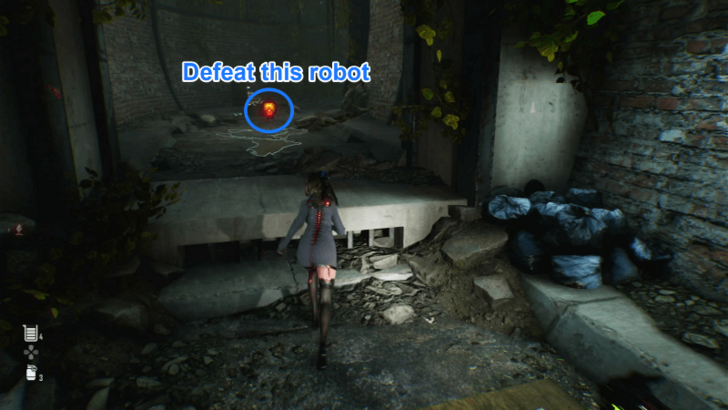
 Rotten Labyrinth - Near the Fusion Cell Supply Box |
Another Tumbler Expansion Module can be acquired from the robot near the supply box containing the Rotten Labyrinth Fusion Cell. |
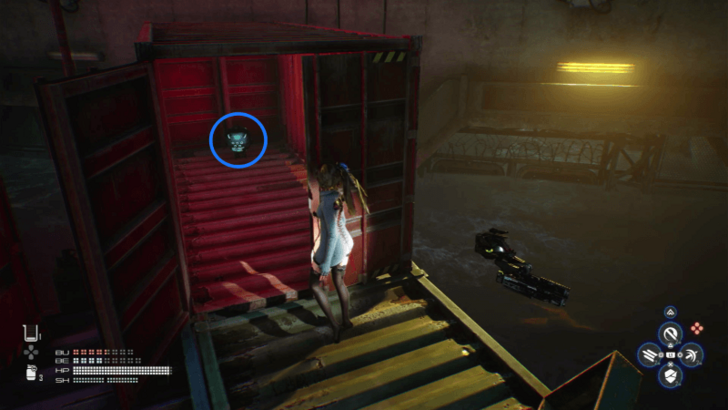 Train Graveyard - Cargo Crate on the Left |
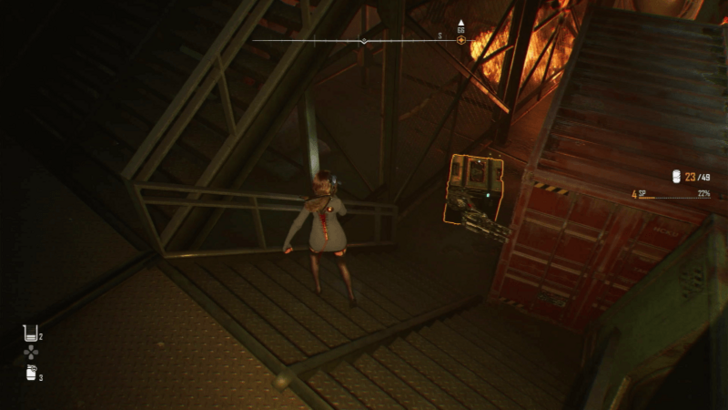
The last Tumbler Expansion Module in this region can be obtained from the robot hiding inside a cargo crate located on the left side of the Train Graveyard. |
Drone Upgrade Module
| Location | How to Get |
|---|---|
 Closed Off Platform - Platform on Top of the Camp |
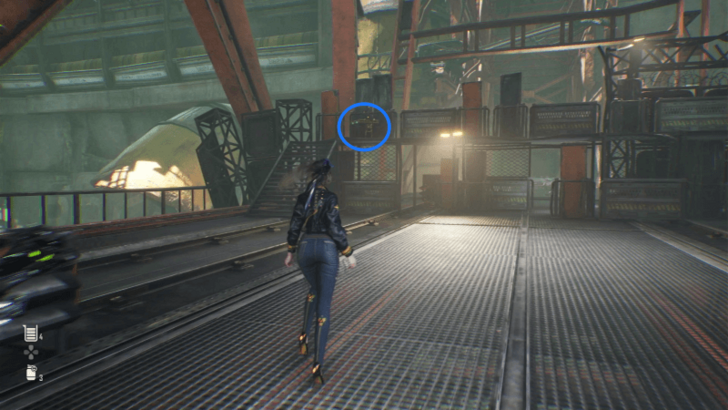
A Drone Upgrade Module can be obtained by killing the gold relic-collecting robot located above the camp at the end of the first area. |
 Closed Off Platform - Tunnel After the Camp |
Another Drone Upgrade Module can be acquired at the last tunnel of the first area. Be prepared to jump on the sides, as the train behind it will suddenly move and could instantly kill you. |
 Collapsed Rail Bridge - First Floor |
A Drone Upgrade Module can be obtained from a robot at the far end of the rail bridge's first floor. |
 Abandoned Settlement - Tunnel on the Right |
You can get a Drone Upgrade Module by taking down the robot lurking around a tunnel on the right side of the abandoned settlement. |
 Abandoned Settlement - Tunnel on the Right |
You can acquire a Drone Upgrade Module on the other side of the gated area in the Train Graveyard. Swim underneath to pass through a gap on the gate blocking your path. |
 Train Graveyard - Area Past the Trap |
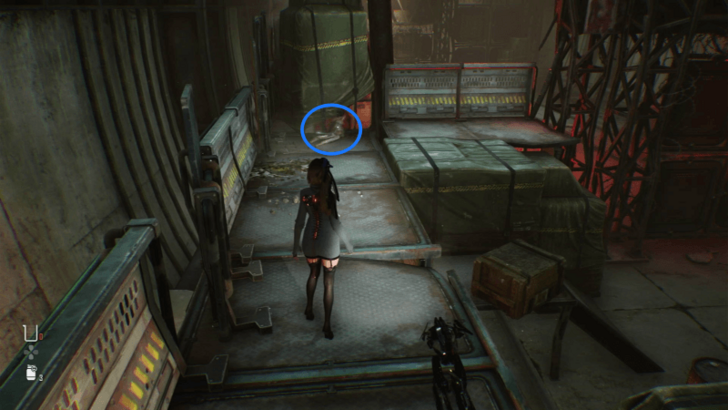
The last Drone Upgrade Module in this region can be acquired from a robot sitting on top of a platform in the area you drop down to after surviving the Gate 4 trap. |
Cores
Body Core
| Location | How to Get |
|---|---|
 Landfill - Tunnel Before the Rail Bridge |
A Body Core can be found on an area near the Rail Bridge camp. Kill the Hive blocking the way to get to the area. |
 Collapsed Rail Bridge - Area Before Railyard |
Another Body Core can be obtained in the area near the camp before reaching the Railyard. |
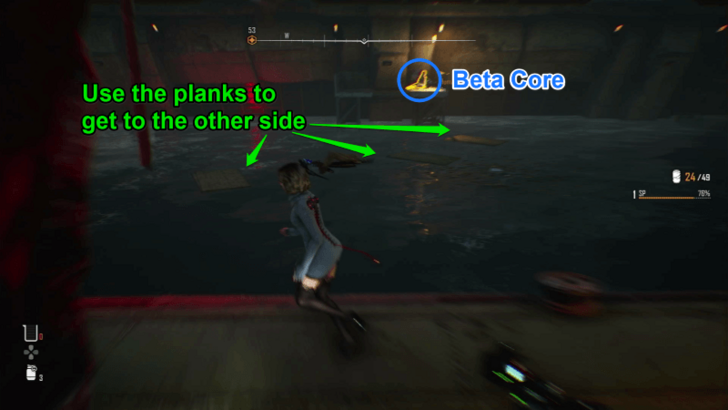 Train Graveyard - Platform on the Right Corner |
The third Body Core can be obtained from a corpse lying on top of a platform in the far right corner of the Train Graveyard. Use the planks floating nearby to reach the platform. |
 Train Graveyard - Stairs Leading to the Contaminated Water Purification Plant |
The last Body Core for this region can be obtained from a corpse lying on the flight of stairs just before you reach the Contaminated Water Purification Plant. |
Beta Core
| Location | How to Get |
|---|---|
 Collapsed Rail Bridge - Top Floor |
A Beta Core can be acquired from a corpse inside one of the train carts located on the top floor of the rail bridge. |
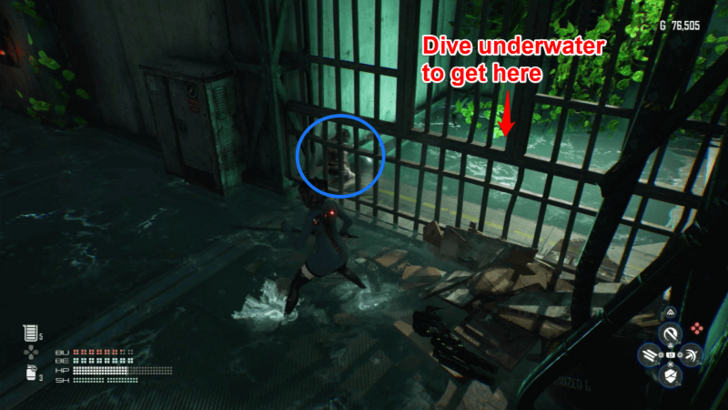 Underground Sewer - Gated Area on the Highest Floor |
You can get a Beta Core behind the gated area located on the top floor of the Underground Sewer. To get to the Beta Core, simply dive underwater and rise above the other side. |
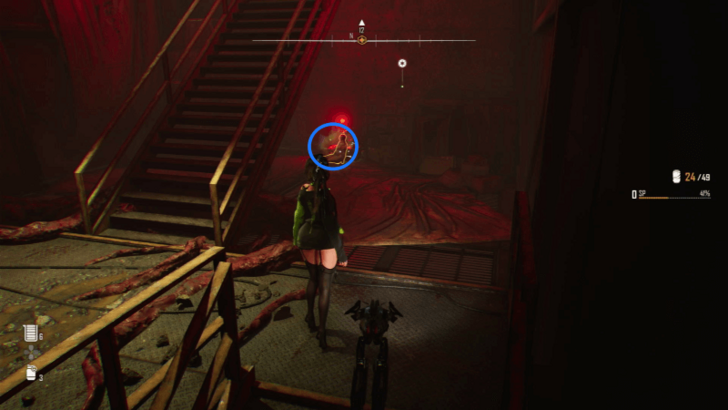
 Rotten Labyrinth - Locked Room on the Left |
Another Beta Core can be acquired in the Rotten Labyrinth. To get to this area, simply climb up the upper platforms and jump down the room full of enemy Naytibas. |
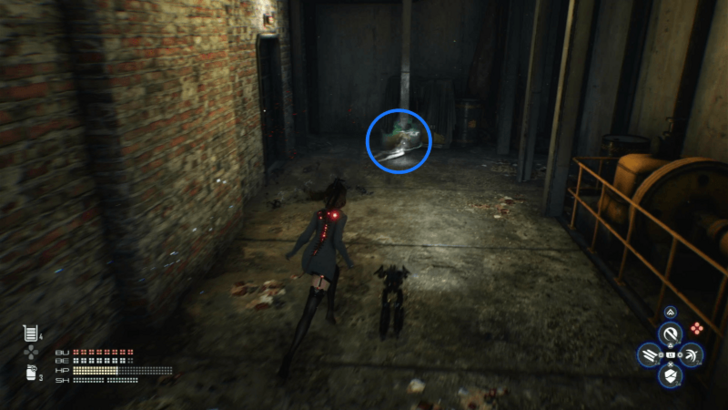
 Memory Tower - Shopping Alley |
A Beta Core can also be acquired from a corpse located in one of the paths in the sewer past the abandoned settlement. |
Weapon Core
| Location | How to Get |
|---|---|
 Railyard - Stalker Drops |
A Weapon Core can be acquired after defeating the Stalker. |
 Temporary Armory - Juggernaut Drops |
Another Weapon Core can be obtained as drops from the Juggernaut boss fight. |
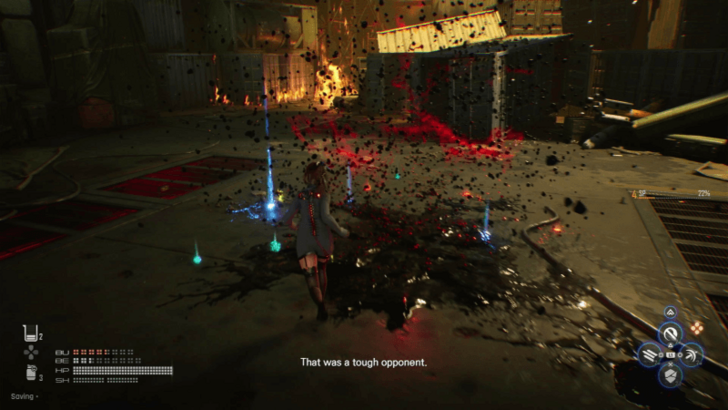
 Contaminated Water Purification Plant - Tachy Drops |
A third Weapon Core can be acquired after defeating Tachy. |
Exospines
Reflex-Type Exospine

The Reflex-Type Exospine can be obtained from a red briefcase inside the moving train as it stops at the end of the tunnel. Make sure to take this as this is one of the best Exospines in the game!
Burst-Trance Type Exospine
The Burst-Trance Type Exospine can be obtained from one of the rooms on the highest floor of the Underground Sewer. Thread carefully, as multiple Naytibas will attack you as you get closer.
Beta Trance-Type Exospine
The Beta Trance-Type Exospine can be acquired inside the gated area of the abandoned settlement. Head right upon entering the area to get there.
Gear
Speed Increase Gear
The Speed Increase Gear ★★ can be obtained from the a golden lid supply box hidden behind a Hive before reaching the Railyard.
Shield Enhancement Gear
| Gear | Effects |
|---|---|
 Shield Enhancement Gear |
・Increases Max Shield Capacity |
You can obtain the Shield Enhancement Gear ★★★ after defeating the Stalker lurking around the Railyard.
Burst Charge Gear
| Gear | Effects |
|---|---|
 Burst Charge Gear |
・Recharges more Burst Energy. |
The Burst Charge Gear ★ can also be acquired from taking down the Stalker. This is the first gear you'll receive that is related to Burst Skills.
Crit Boost Gear
| Gear | Effects |
|---|---|
 Crit Boost Gear |
・Increases Crit. Rate. |
The Crit Boost Gear ★★ can be obtained after defeating the Juggernaut in the Temporary Armory.
Beta Enhancement Gear
| Gear | Effects |
|---|---|
 Beta Enhancement Gear |
・Increases Beta Skill Attack Power. |
You can also get the Beta Enhancement Gear ★★ as drops from beating the Juggernaut.
Burst Enhancement Gear
The Burst Enhancement Gear ★ can be obtained from a supply box behind the crates on the left side of the Juggernaut boss fight area.
Burst Expansion Gear
| Gear | Effects |
|---|---|
 Burst Expansion Gear |
・Increases Max Burst Energy. |
The Burst Expansion Gear ★★ can be acquired after beating Tachy.
Combat Supply Gear
| Gear | Effects |
|---|---|
 Combat Supply Gear |
・Recovers HP when defeating an enemy. |
The Combat Supply Gear ★★★ can be obtained as drops from the Tachy boss fight.
Exterior
Blue Point
The Blue Point accessory can be obtained from a black container inside one of the train carts in the first area of the platform.
Daily Knitted Dress

The Daily Knitted Dress can be acquired in a train cart on the other end of the platform.
Chameleon

Obtain an exterior for Adam called Chameleon by opening a black container found on the highest floor of the Collapsed Rail Bridge.
Daily Mascot
You can get the Daily Mascot by opening the black container behind a wall on the second floor of the Underground Sewer.. A Naytiba will plow through the wall once you get the passcode for a nearby supply box, revealing this area.
Daily Force
The Daily Force exterior can be acquired from the platform behind the memorial shrine in the abandoned settlement.
Key Items
Fusion Cell
| Location | How to Get |
|---|---|
Landfill - Supply Box |
The Landfill Fusion Cell can be obtained from a supply box inside the gated area. The passcode to open the supply box can be acquired at the end of the corridor before reaching the area. |
Underground Sewer - Supply Box |
A Fusion Cell can be obtained from the Supply Box on the second floor of the Underground Sewer. |
Rotten Labyrinth - Supply Box |
The Rotten Labyrinth Fusion Cell can be obtained the a supply box located on the other side of the area where the Fusion Drive is located. |
Abandoned Settlement - Memorial Shrine |
A Fusion Cell can be acquried inside the Memorial Shrine of the abandoned settlement. |
Stellar Blade Related Guides
Main Missions List
Post Game Guides
| Post Game Guides | ||
|---|---|---|
| Post Game | New Game+ | 100% Guide |
Comment
Author

Alpha Signal Mission Guide
Please participate in our site
improvement survey
03/2026
improvement survey
03/2026
Would you assist in
improving Game8's site?
improving Game8's site?

×
We are listening to our users' valuable opinions and discussing how to act on them.
The information collected through this survey will be used for the purpose of improving our services. In addition, the information will only be disclosed a part of a statistic in a format that will not allow identification of personal information.
Begin Survey
Not Now
×
Please rate each item regarding Game8.co's Advertisements.
Amount of Ads
Very Dissatisfied
Somewhat Dissatisfied
Fine
Somewhat Satisfied
Highly Satisfied
Placement of Ads
Timing of Ad Display
Ad Loading Speed
Safeness of Ads
Content of Ads
×
Please rate each item regarding Game8.co's Quality of Articles.
Amount of information
Very Dissatisfied
Somewhat Dissatisfied
Fine
Somewhat Satisfied
Highly Satisfied
Frequency of updates
Speed of new information
Accuracy of articles
Understandibility of articles
Readability of sentences
×
Please rate each item regarding Game8.co's Usability of the Site.
Ease of finding information
Very Dissatisfied
Somewhat Dissatisfied
Fine
Somewhat Satisfied
Highly Satisfied
Loading Speed
Use of Color
Font Size
Visibility of Images
Easy to Understand Layout
×
Please rate each item regarding Game8.co's Message Boards, Comments.
Ease of Writing
Very Dissatisfied
Somewhat Dissatisfied
Fine
Somewhat Satisfied
Highly Satisfied
Readability
Ease in Finding Information
Comment Quality
Comment Quantity
Admin Response
×
Please rate each item regarding Game8.co's Site's new design.
Please rate our site's new design
Very Dissatisfied
Somewhat Dissatisfied
Fine
Somewhat Satisfied
Highly Satisfied
Do you think that the website's design change makes the site easier to use?
Has the new design made it easier for you to find information on the site?
Has the new design improved the overall visual appeal of the site?
How would you rate your overall satisfaction with the new design of the site?
×
How likely are you to recommend Game8 to someone you know?
Very Unlikely
0
1
2
3
4
5
6
7
8
9
10
Very Likely
If you have other opinions regarding potential improvement to the website, please share them with us. We would appreciate your honest opinion.
Note: This is a free response section, so you can proceed without entering anything.
Note: Please be sure not to enter any kind of personal information into your response.
Note: Please be sure not to enter any kind of personal information into your response.
×
Thank You
×
Thank you for participating in our survey! Your answers will help us to improve the quality of our website and services.
We hope you continue to make use of Game8.
We hope you continue to make use of Game8.
Close
Rankings
- We could not find the message board you were looking for.
Gaming News


Popular Games

Genshin Impact Walkthrough & Guides Wiki
Honkai: Star Rail Walkthrough & Guides Wiki
Umamusume: Pretty Derby Walkthrough & Guides Wiki
Pokemon Pokopia Walkthrough & Guides Wiki
Resident Evil Requiem (RE9) Walkthrough & Guides Wiki
Monster Hunter Wilds Walkthrough & Guides Wiki
Wuthering Waves Walkthrough & Guides Wiki
Arknights: Endfield Walkthrough & Guides Wiki
Pokemon FireRed and LeafGreen (FRLG) Walkthrough & Guides Wiki
Pokemon TCG Pocket (PTCGP) Strategies & Guides Wiki


Recommended Games
Diablo 4: Vessel of Hatred Walkthrough & Guides Wiki
Fire Emblem Heroes (FEH) Walkthrough & Guides Wiki
Yu-Gi-Oh! Master Duel Walkthrough & Guides Wiki
Super Smash Bros. Ultimate Walkthrough & Guides Wiki
Pokemon Brilliant Diamond and Shining Pearl (BDSP) Walkthrough & Guides Wiki
Elden Ring Shadow of the Erdtree Walkthrough & Guides Wiki
Monster Hunter World Walkthrough & Guides Wiki
The Legend of Zelda: Tears of the Kingdom Walkthrough & Guides Wiki
Persona 3 Reload Walkthrough & Guides Wiki
Cyberpunk 2077: Ultimate Edition Walkthrough & Guides Wiki


All rights reserved
© 2024 SHIFT UP Corporation. All rights reserved. Published by Sony Interactive Entertainment Inc.
The copyrights of videos of games used in our content and other intellectual property rights belong to the provider of the game.
The contents we provide on this site were created personally by members of the Game8 editorial department.
We refuse the right to reuse or repost content taken without our permission such as data or images to other sites.