Altess Levoire Mission Guide

Altess Levoire is the fourth main mission in Stellar Blade. Read our guide for a full walkthrough on how to complete Scavenger Adam, including all passcode and important item locations, enemies, as well as boss fight tips!
| ◄ Previous Mission | Next Mission ▶ |
|---|---|
| Xion, the Last Remaining City | Light of Hope |
Altess Levoire Mission Summary
 |
|
|---|---|
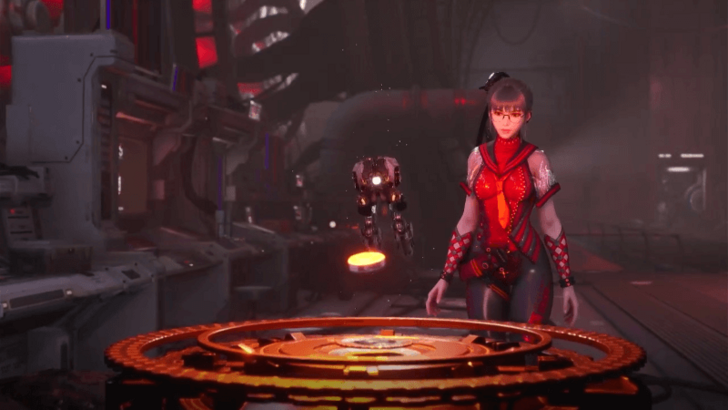
| After visiting Xion and learning about the condition of the city, EVE agrees to help Adam search for more Hyper Cells. This takes you to explore a forbidden place called Altess Levoire. | |
| Objectives | 1. Go to the Wastelands
2. Go to Altess Levoire 3. Retrieve the second Hyper Cell |
| Bosses | |
| Locations | • Wastelands
• Altess Levoire • Research Lab Entrance • Purification Scanner • Security Center • Sector A07 • Specimen Preservation Lab • Deteriorated Lobby • Air Vent |
Naytiba Enemies in Altess Levoire
| Enemies |
 Test Subject |
|---|
Altess Levoire Walkthrough
| Jump to a Section! | |||||||||||
|---|---|---|---|---|---|---|---|---|---|---|---|
| Wastelands | Altess Levoire | Research Lab Entrance | |||||||||
| Purification Scanner | Security Center | Sector A07 | |||||||||
| Specimen Preservation Lab | Deteriorated Lobby | Air Vent | |||||||||
Wastelands Walkthrough
| # | Wastelands Objectives |
|---|---|
| 1 | 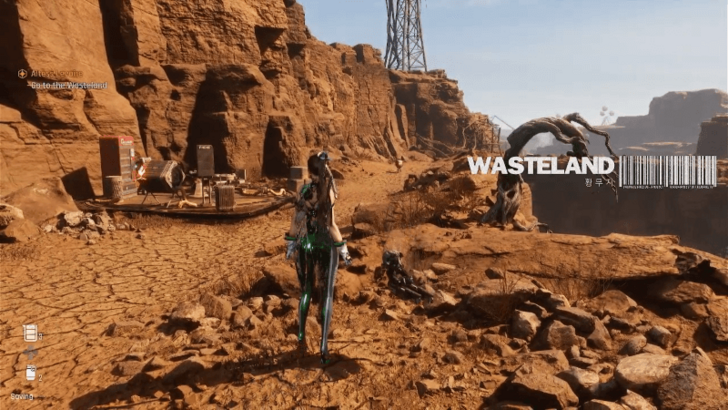 Interact with the Supply Camp Approach the first Supply Camp that you see upon arriving at the Wastelands. You'll find that there is a problem with the Solar Tower that powers all the camps in the Wastelands. This will trigger the Reboot side mission. We recommend taking on this mission first to have access to the camps in the area ▶ Complete Reboot! to Unlock Supply Camps |
| 2 | 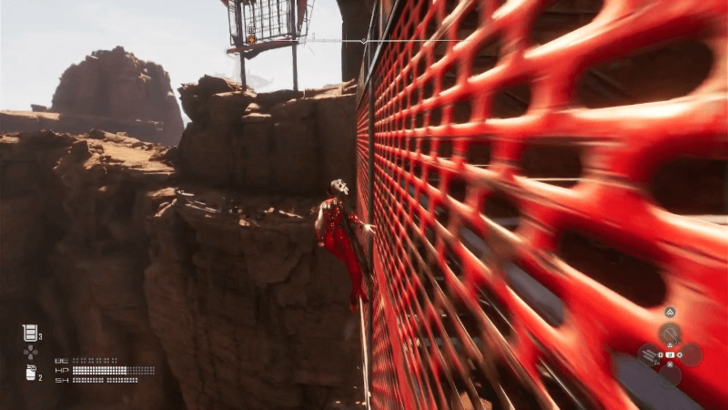 Use Wall Run on the Red Walls As you make your way towards Altess Levoire, you'll encounter marked red walls that require you to use Wall-Running. To wall run, simply approach the red walls and then press X to leap off them. |
| 3 | 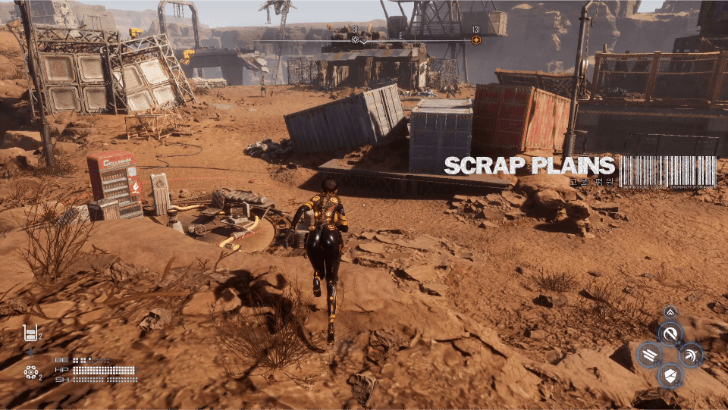 Pass Through the Scrap Plains Make your way through the wasteland headed towards the quest marker. |
| 4 | 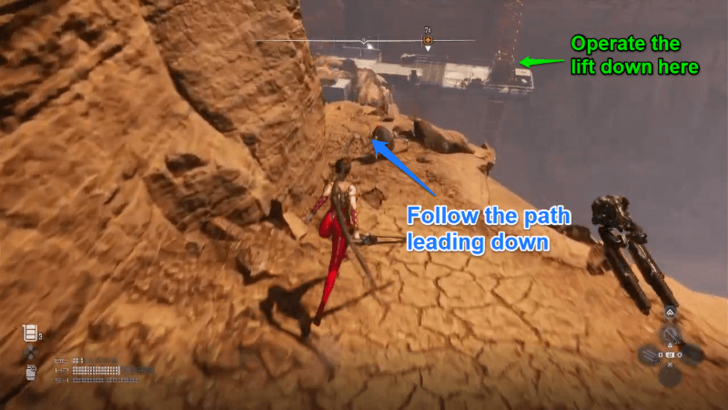 Follow the Narrow Path Leading Down Make your way through the Scrap Plains until you see a narrow path leading down. Follow that path until you reach a lift. |
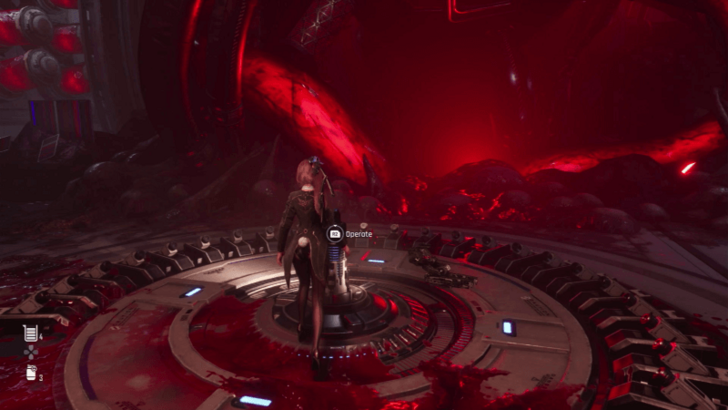
| 5 | 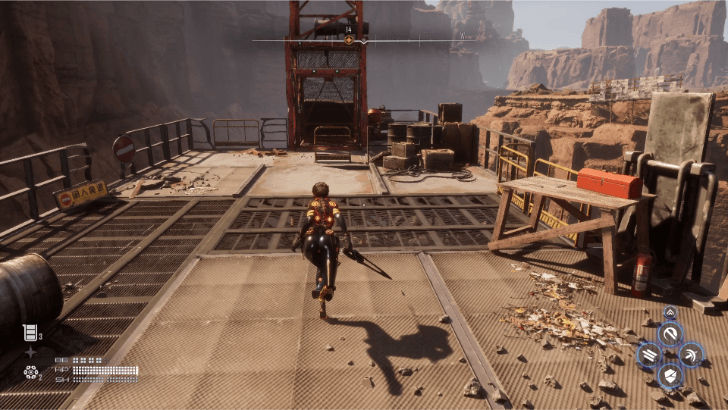 Take the Lift Down to Altess Levoire Operate the lift to drop down near the Altess Levoire. |
| 6 | 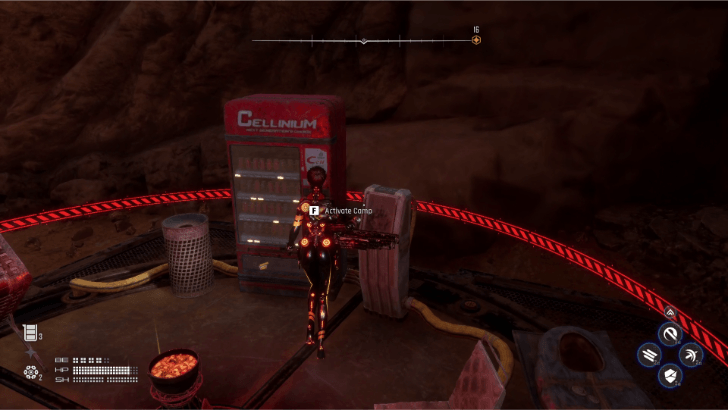 Resupply at the Supply Camp Near Altess Levoire Once you exit the lift, unlock the nearby Resupply Camp to replenish resources and unlock a fast-travel point. |
Complete Reboot! to Unlock Supply Camps
Once you arrive to the Wastelands, your first attempt to unlock a supply camp will fail. This will start the sidequest Reboot!, which takes the player to a signal tower that they need to repair.
Reboot! - Wastelands Side Quest Guide
Altess Levoire Walkthrough
| ◄ Previous Section | Next Section ▶ |
|---|---|
| Wastelands | Research Lab Entrance |
| # | Altess Levoire Objectives |
|---|---|
| 1 | 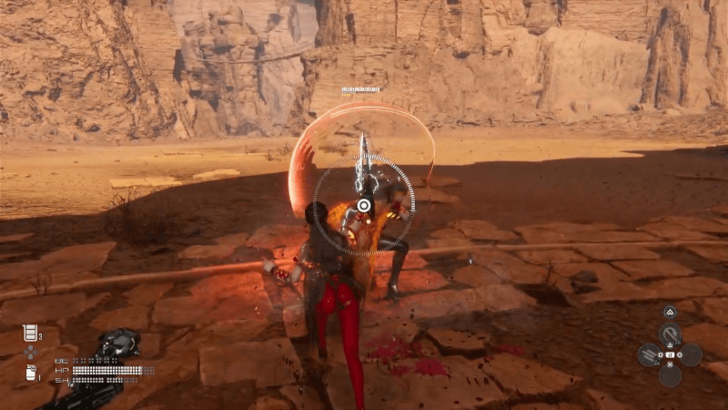 Spar with Quiel Duel with Quiel, the guardian of Altess Levoire to prove your capabilities. Stay on your toes and react to her movements to deal punishing attacks. |
| 2 | Enter the Altess Levoire Once you've beaten Quiel, enter the lift she was guarding to descend into Altess Levoire. |
Research Lab Entrance Walkthrough
| ◄ Previous Section | Next Section ▶ |
|---|---|
| Altess Levoire | Purification Scanner |
| # | Research Lab Entrance Objectives |
|---|---|
| 1 | 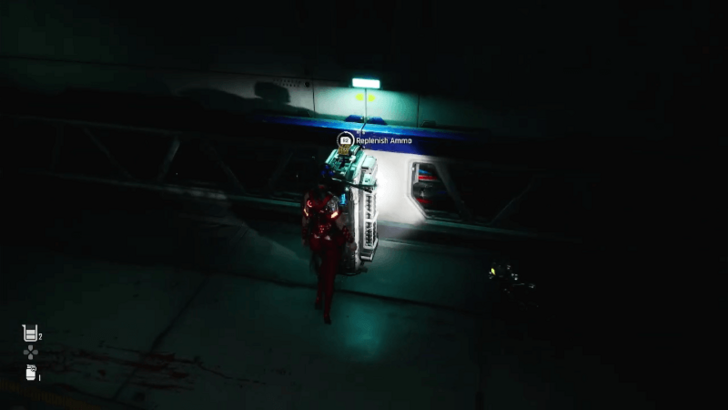 Replenish Your Ammo Due to electromagnetic interference, you'll be forced to use only guns as you venture to the research lab. Take note of the terminals where you can replenish your ammo, as these will be critical to defending yourself. |
| 2 | 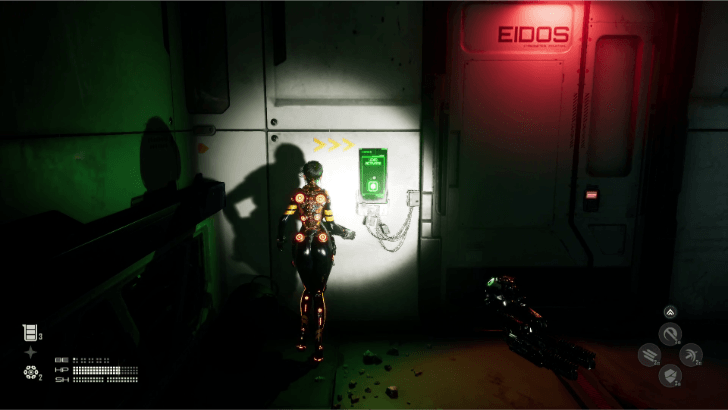 Operate the Green Remote Panels to Proceed To the left of the door will be a green panel. Interact with these to open doors. |
Purification Scanner Walkthrough
| ◄ Previous Section | Next Section ▶ |
|---|---|
| Research Lab Entrance | Security Center |
| # | Purification Scanner Objectives |
|---|---|
| 1 |
Wall Run to Reach the Rope Infront of You Use the wall-running ability you picked up earlier to reach the rope in the middle of the hallway. From there, propel yourself to reach the door on the other side. |
| 2 | 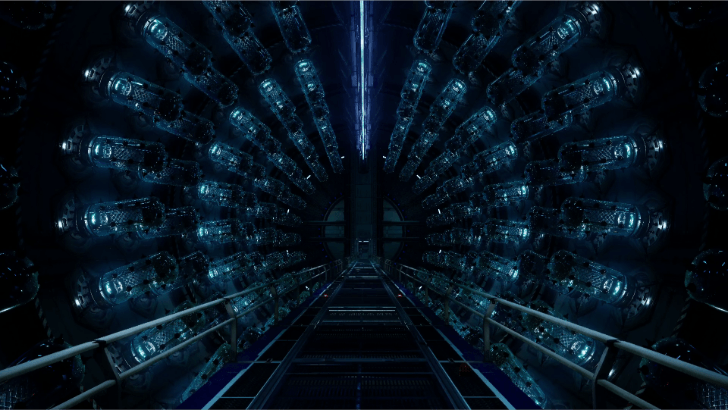 Pass Through the Area Filled with Capsules Enter through the door and walk along the bridge. There will be a door on the other end. |
| 3 | Deal with Enemies Using Your Gun As you cross the bridge enemies will spawn behind you. Dispatch these enemies to be able to interact with the green panel. |
| 4 | 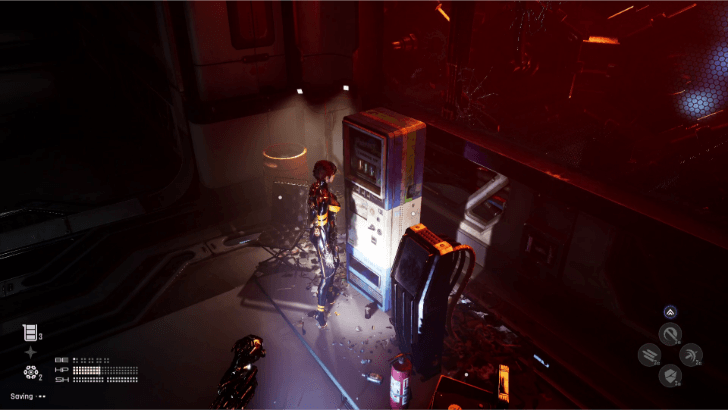 Unlock the Camp Found Inside the Laboratory Exiting the room with capsules, you'll be able to rest at a nearby supply camp. |
| 5 |
Travel Through the Area Before the Gate Closes From the remote panel, rush to the Security Center before the gate closes. Press circle after jumping to trigger an air dash that will allow you to leap over the gap in the hallway. |
Security Center Walkthrough
| ◄ Previous Section | Next Section ▶ |
|---|---|
| Purification Scanner | Sector A07 |
| # | Security Center Objectives |
|---|---|
| 1 | 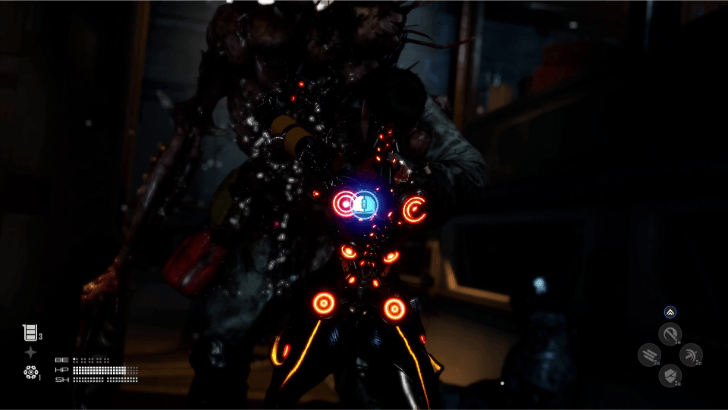 Deal with the Enemies Inside the Security Center As you enter the Security Center, be careful when checking around corners as enemies are lying in wait and can grab you. |
| 2 | 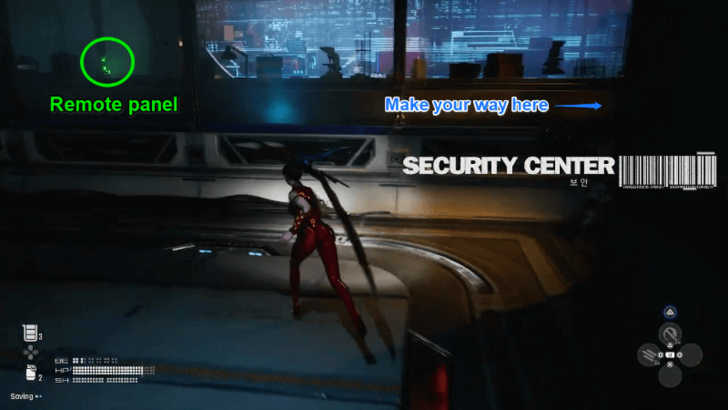 Access the Remote Panel in the Control Room From the entrance of the Security Room, turn right to get inside the control center. There, you would find a remote panel to open up the gate leading to Sector A07. |
Sector A07 Walkthrough
| ◄ Previous Section | Next Section ▶ |
|---|---|
| Security Center | Specimen Preservation Lab |
| # | Sector A07 Objectives |
|---|---|
| 1 | 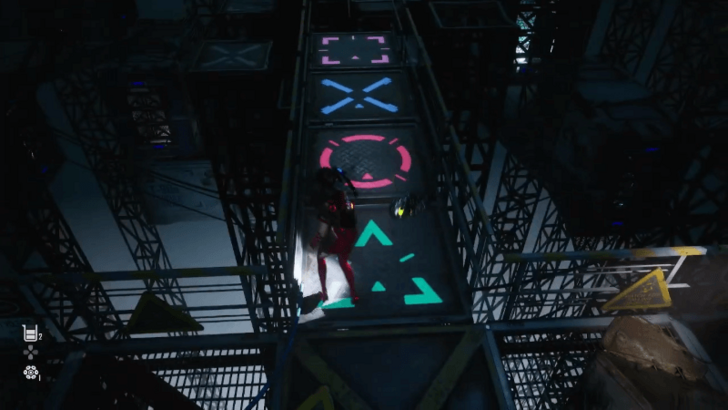 Solve the Sector A07 Tile Puzzle Entering Sector A07 will face you with a short puzzle/parkour section. You'll know that you're following the correct pattern if the tile glows after you step on it. If you're having trouble memorizing the pattern, just follow the shapes on a Playstation controller in a clockwise rotation. ▶ Sector A07 Tile Puzzle Solution |
| 2 | 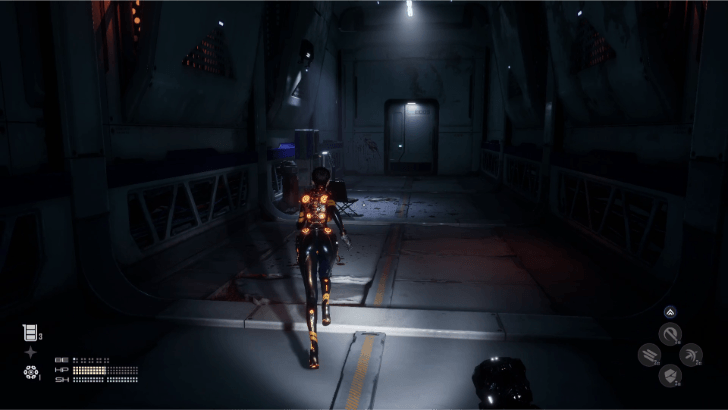 Past the door will be a Supply Camp where you can replenish supplies. |
Sector A07 Tile Puzzle Solution
The tiles in Sector A07 will require you to follow a certain pattern in order to prevent the tiles from falling. The pattern is as follows:
Specimen Preservation Lab Walkthrough
| ◄ Previous Section | Next Section ▶ |
|---|---|
| Sector A07 | Deteriorated Lobby |
| # | Specimen Preservation Lab Objectives |
|---|---|
| 1 | 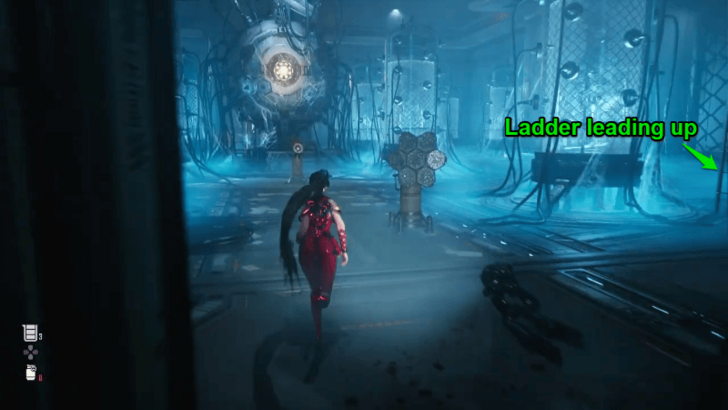 Climb the Ladder to Get to the Upper Floor Climb the ladder located at the right side of the preservation lab to get to the upper floors where the remote panel for the lasers is located. |
| 2 | 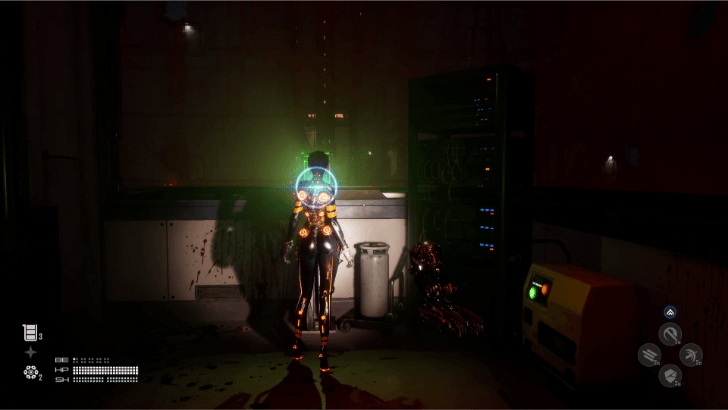 Take the ladder to the right as soon as you enter the lab. Then, go counter-clockwise activating all green panels to access the panel that activates the laser. |
| 3 | 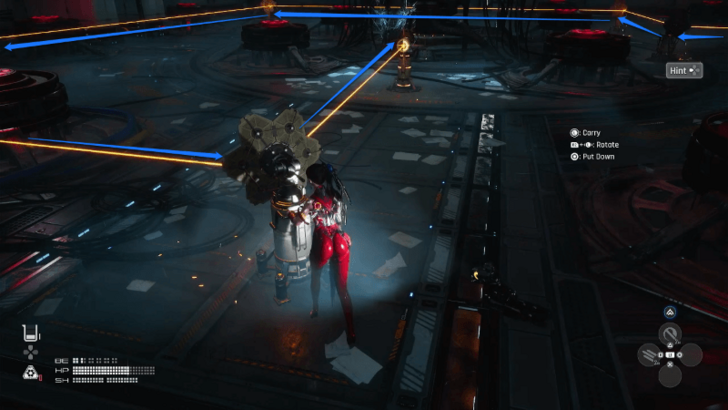 Reflect the Laser Unto the Generator Return to the preservation lab and use the reflectors to direct the lasers, allowing them to hit the generator in the middle of the lab. Be careful with where you point these lasers, as you can hit the capsules, which will wake up dormant enemies. |
| 4 | 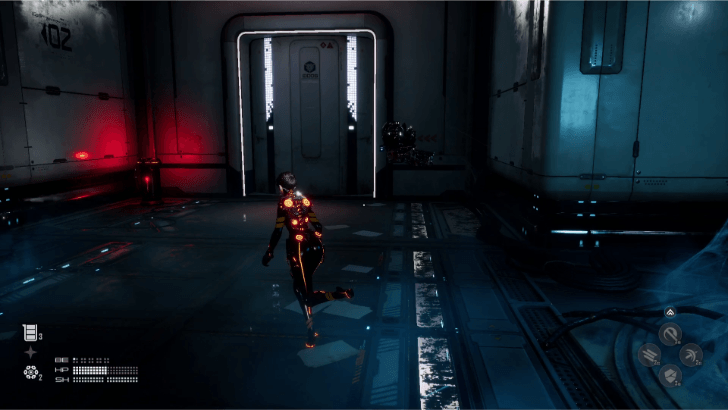 After aligning the last laser, a Fusion Cell will drop in front of you. Take it to the door behind the large construct to unlock the next section. |
Deteriorated Lobby Walkthrough
| ◄ Previous Section | Next Section ▶ |
|---|---|
| Specimen Preservation Lab | Air Vent |
| # | Deteriorated Lobby Objectives |
|---|---|
| 1 | 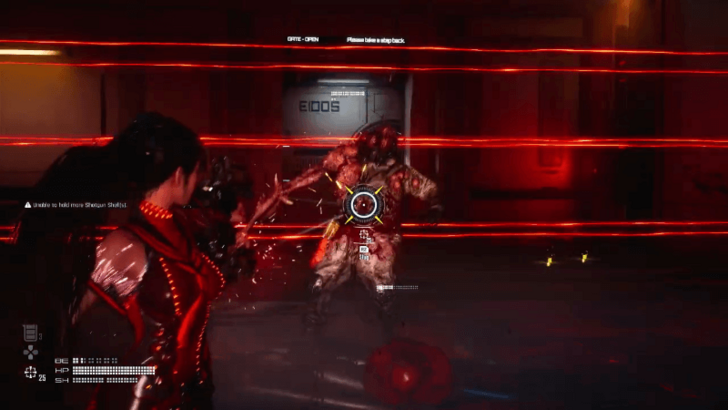 Defeat the Enemies Approaching You In the first area of the Deteriorated Lobby, you'll be forced to stay in the middle of a room to defend yourself against multiple enemies. Use what little space you have to avoid enemies coming from different directions. |
| 2 | 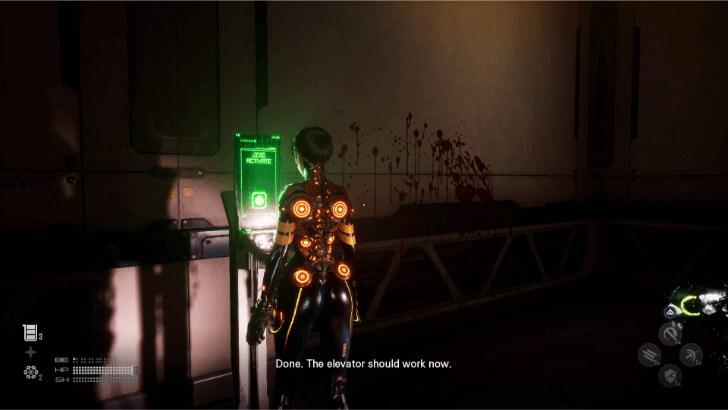 The Remote Panel will be located opposite the entrance, in the nook that was previously blocked by lasers. |
| 3 | 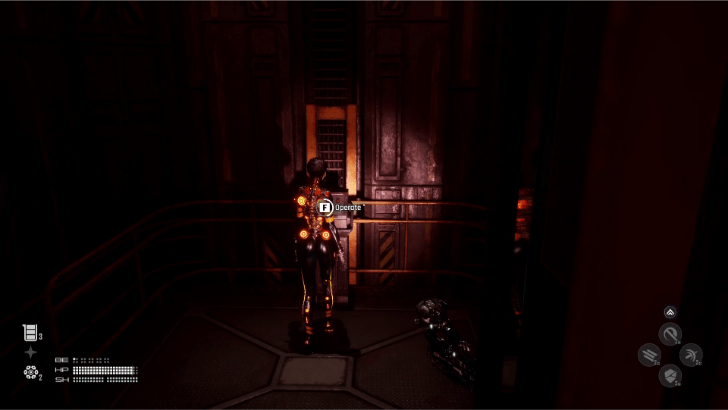 |
| 4 | Unlock the Camp Nearby Players can find a Supply camp right as they exit, as well as a station to replenish their ammo. |
| 5 | 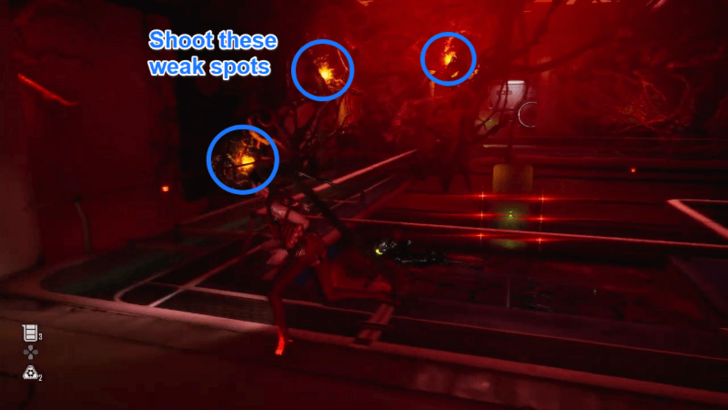 Deal with the Hive Blocking Your Path To destroy the Hive hindering your path, you must hit the orange glowing spots around its body. Destroying all three of them will cause the Hive to die. |
| 6 | 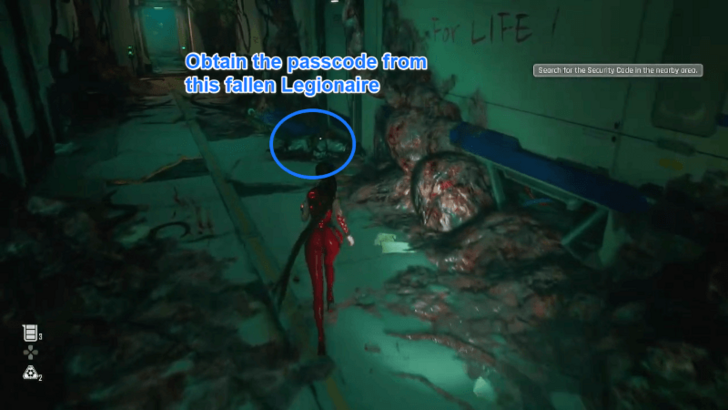 Obtain the Security Code to Access the Closed Remote Panel You can get the passcode to open the door leading to the vent from one of the fallen Legionaires in the area. From the locked door, return to the previous hallway, and you should see a corpse on your right. |
Air Vent Walkthrough
| ◄ Previous Section | Next Section ▶ |
|---|---|
| Deteriorated Lobby | - |
| # | Air Vent Objectives |
|---|---|
| 1 | 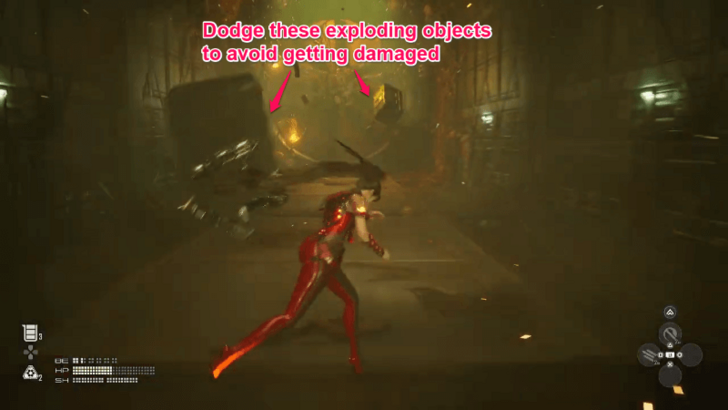 Avoid Objects Hurling at You As you go through the Air Vent, numerous objects will be hurling at you due to the wind created by the fan blades at the end of the vent. Do your best to avoid these objects, as they would explode upon impact and deal significant damage to you. |
| 2 | 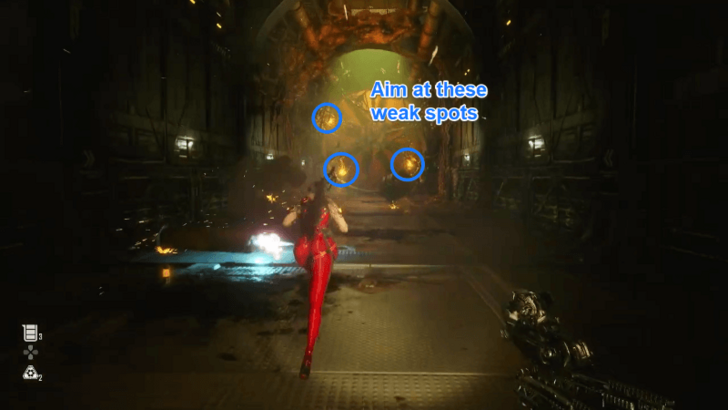 Shoot the Hive Attached to the Fan Blades Deal with the Hive controlling the fan blades at the other side of the vent by shooting at the orange glowing spots on its body. Once you've destroyed these weak points, you'll be able to pass through the Air Vent. |
| 3 | 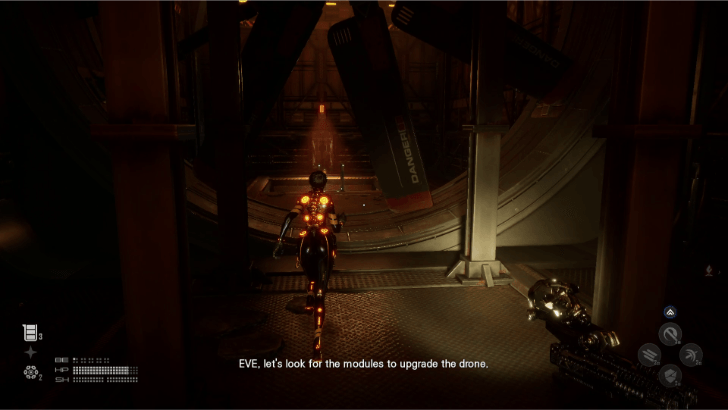 Walk through the fan to enter the next area. You won't take damage from the fan that is still moving, so walk through that as well to progress further. |
| 4 | 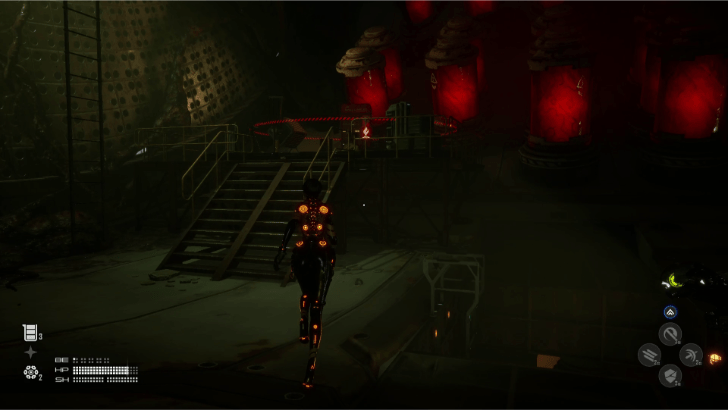 Continue through the area taking down enemies as you see them, and unlock the Supply Camp before the boss fight. |
| 5 | Climb Up the Ladder Near the Supply Camp Climb the ladder to enter the boss fight of this mission. Use the nearby Supply Camp to replenish your resources, and upgrade EVE before the fight. |
| 6 | 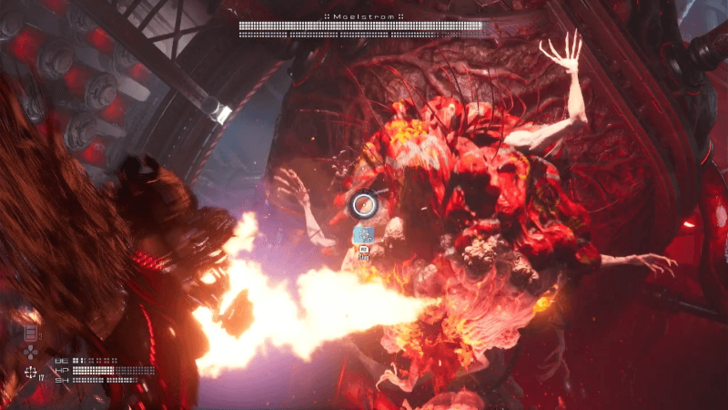 Defeat Maelstrom Take on the Naytiba guarding the Hyper Cell. This enemy excels at dealing range attacks, so make sure you react according to the direction of its shots. Also, be aware of the exploding Test Subjects it would summon during the fight. |
Altess Levoire Boss Fights
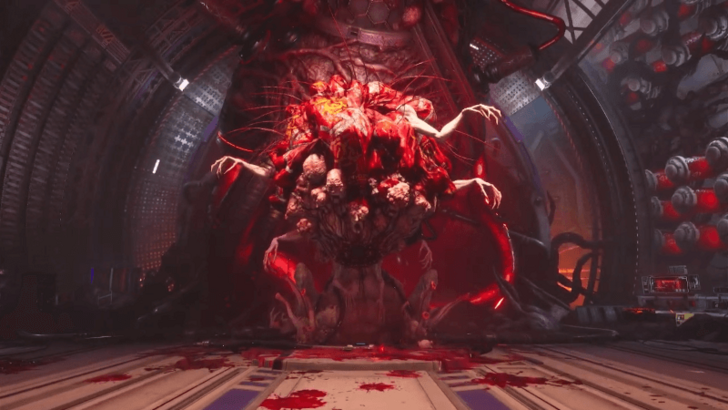
How to Beat Maelstrom
| Maelstrom Fight Tips |
|---|
 |
|
|
Maelstrom Boss and How to Beat
Altess Levoire Passcodes
| Location | Passcode |
|---|---|
| Deteriorated Lobby Door | γθαγθα |
Deteriorated Lobby Door
| Passcode Location | |
|---|---|
| Unlock | 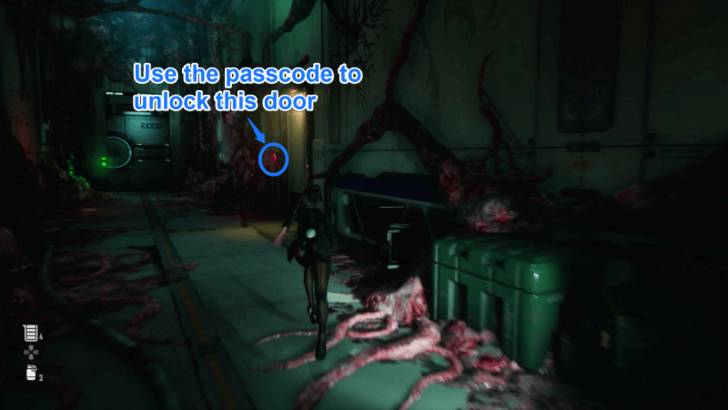 |
The passcode for the locked door in the Deteriorated Lobby can be obtained from the dead Legionaire in the second corridor. The passcode is μηλαμη.
Altess Levoire Important Items
| Jump to an Important Item! | |||||||||||
|---|---|---|---|---|---|---|---|---|---|---|---|
| Modules | Cores | Gear | |||||||||
| Key Items | |||||||||||
Modules
Tumbler Expansion Module
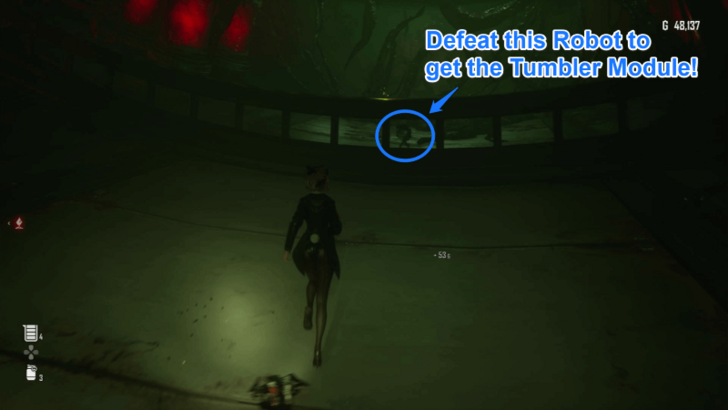
A Tumbler Expansion Module can be obtained by taking down the relic-collecting robot near the Supply Camp in the Air Vent, just before facing the area boss.
Drone Upgrade Module
| Location | How to Get |
|---|---|
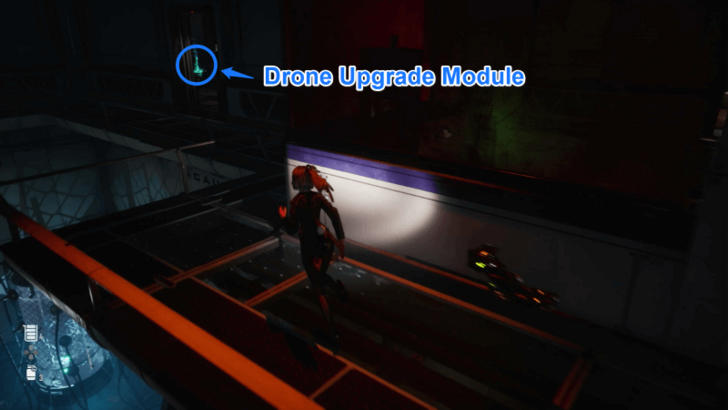 Specimen Preservation Lab - Upper Floor |
You can get a Drone Upgrade Module inside one of the rooms found in the upper floor of the Specimen Preservation Lab. |
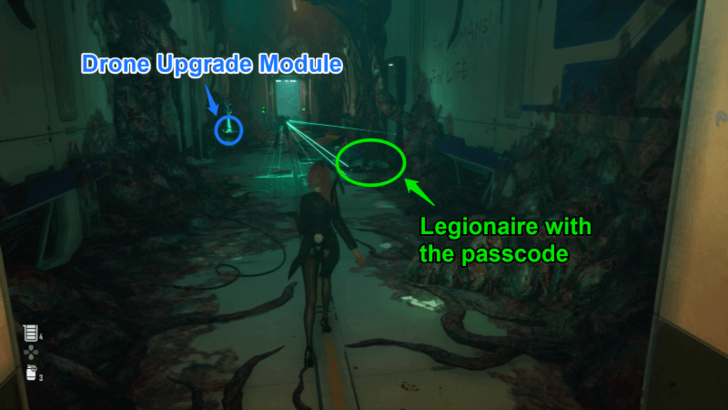 Deteriorated Lobby - Second Corridor |
Another Drone Upgrade Module can be obtained at the middle corridor of the Deteriorated Lobby, beside the Legionaire with the passcode. |
Cores
Weapon Core
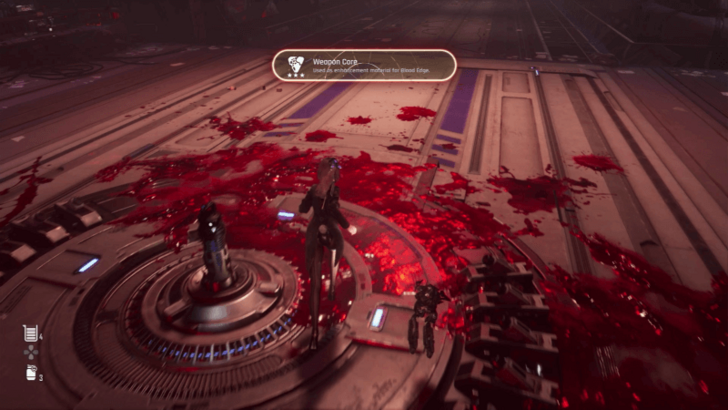
A Weapon Core can be acquired as drops from Maelstrom, the final boss of the area.
Gear
Beta Charge Gear
| Gear | Effects |
|---|---|
 Beta Charge Gear |
・Recharges more Beta Energy. |
You can obtain the Beta Charge Gear ★★ after defeating Maelstrom in the deepest chamber of Altess Levoire.
Shield Penetration Gear
| Gear | Effects |
|---|---|
 Shield Penetration Gear |
・Increases Shield Penetration. |
The Shield Penetration Gear ★ can also be acquired from defeating Maelstrom in the last area of the laboratory.
Key Items
Fusion Cell

A Fusion Cell can be obtained from the generator found in the middle of the preservation lab. To get the Fusion Cell, you must guide the laser using the reflectors to power up the terminal in front of the generator.
Hyper Cell
The Hyper Cell can be acquired in the deepest room of Altess Levoire after defeating Maelstrom.
Altess Levoire: All Passcodes and Collectibles
Altess Levoire Related Guides

Main Missions List
 7th Airborne Squad
 Scavenger Adam
 Xion, The Last Remaining City
 Light of Hope
 Alpha Signal
 Hidden Truth
 Abyss Levoire
 Orcal's Testimony
 Secret Garden
 Eye of the Hurricane
 Burning Xion
 Last Fragment
 Selection of Species
 EVE Protocol
 All Endings
Post Game Guides
| Post Game Guides | ||
|---|---|---|
| Post Game | New Game+ | 100% Guide |
Comment
Author

Altess Levoire Mission Guide
Rankings
- We could not find the message board you were looking for.
Gaming News


![Nova Roma Review [Early Access] | Newer, Better, and More Confusing](https://img.game8.co/4455512/2cbf8926e9a1c72a3ff056088f801ef4.png/thumb)
Popular Games

Genshin Impact Walkthrough & Guides Wiki
Umamusume: Pretty Derby Walkthrough & Guides Wiki
Crimson Desert Walkthrough & Guides Wiki
Monster Hunter Stories 3: Twisted Reflection Walkthrough & Guides Wiki
Honkai: Star Rail Walkthrough & Guides Wiki
Pokemon Pokopia Walkthrough & Guides Wiki
The Seven Deadly Sins: Origin Walkthrough & Guides Wiki
Wuthering Waves Walkthrough & Guides Wiki
Zenless Zone Zero Walkthrough & Guides Wiki
Arknights: Endfield Walkthrough & Guides Wiki


Recommended Games
Fire Emblem Heroes (FEH) Walkthrough & Guides Wiki
Diablo 4: Vessel of Hatred Walkthrough & Guides Wiki
Cyberpunk 2077: Ultimate Edition Walkthrough & Guides Wiki
Yu-Gi-Oh! Master Duel Walkthrough & Guides Wiki
Super Smash Bros. Ultimate Walkthrough & Guides Wiki
Pokemon Brilliant Diamond and Shining Pearl (BDSP) Walkthrough & Guides Wiki
Elden Ring Shadow of the Erdtree Walkthrough & Guides Wiki
Monster Hunter World Walkthrough & Guides Wiki
The Legend of Zelda: Tears of the Kingdom Walkthrough & Guides Wiki
Persona 3 Reload Walkthrough & Guides Wiki


All rights reserved
© 2024 SHIFT UP Corporation. All rights reserved. Published by Sony Interactive Entertainment Inc.
The copyrights of videos of games used in our content and other intellectual property rights belong to the provider of the game.
The contents we provide on this site were created personally by members of the Game8 editorial department.
We refuse the right to reuse or repost content taken without our permission such as data or images to other sites.