Abyss Levoire Mission Guide
Abyss Levoire is the eighth main mission in Stellar Blade. Read our guide for a full walkthrough on how to complete Abyss Levoire, including tips on how to beat Maelstrom for the second time!
| ◄ Previous Mission | Next Mission ▶ |
|---|---|
| Hidden Truth | Orcal's Testimony |
Abyss Levoire Mission Summary
 |
|
|---|---|
| In search of the third Hyper Cell, the group lands on the Great Desert to get to Abyss Levoire. | |
| Objectives | 1. Go to Abyss Levoire
2. Retrieve the third Hyper Cell |
| Bosses | |
| Locations | • Great Desert
• Abyss Levoire • Emergency Exit • Closed Lobby • Capsule Cluster Room • Underground Passage • Laboratory Ruins • Heart of the Contamination |
Naytiba Enemies in Abyss Levoire
| Enemies |
 Test Subject |
|---|
Abyss Levoire Walkthrough
| Jump to a Section! | |||||||||||
|---|---|---|---|---|---|---|---|---|---|---|---|
| Great Desert | Abyss Levoire | Emergency Exit | |||||||||
| Closed Lobby | Capsule Cluster Room | Underground Passage | |||||||||
| Laboratory Ruins | Heart of the Contamination | ||||||||||
Great Desert Walkthrough
| # | Great Desert Objectives |
|---|---|
| 1 | 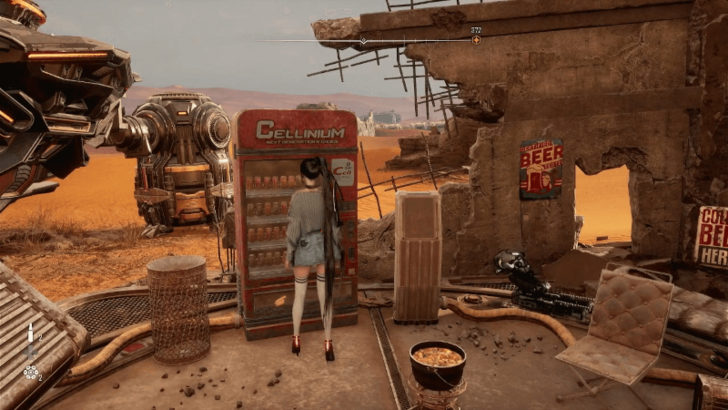 Unlock the First Supply Camp in the Great Desert Similar to the Wastelands, you must fix the Solar Tower that powers up the nearby camps in the Great Desert. Approach the first Supply Camp that you see, and you'll be able to begin the Reboot!!! side mission. To complete this mission, simply activate all four Service Drones located inside the sand storm. |
| 2 | 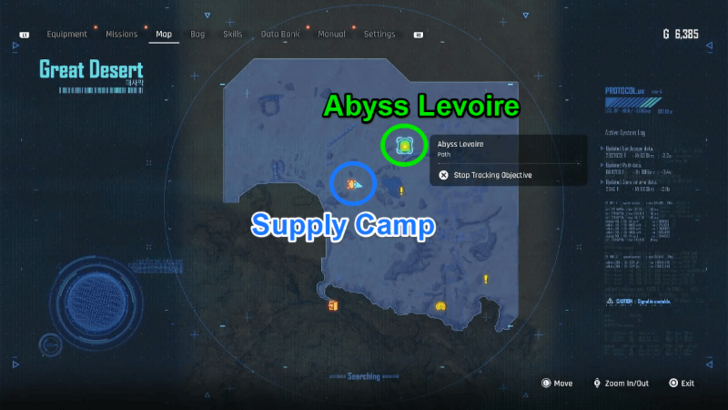 Proceed to Abyss Levoire After unlocking the first Supply Camp, head northeast to get to Abyss Levoire. |
Abyss Levoire Walkthrough
| ◄ Previous Section | Next Section ▶ |
|---|---|
| Great Desert | Emergency Exit |
| # | Abyss Levoire Objectives |
|---|---|
| 1 | 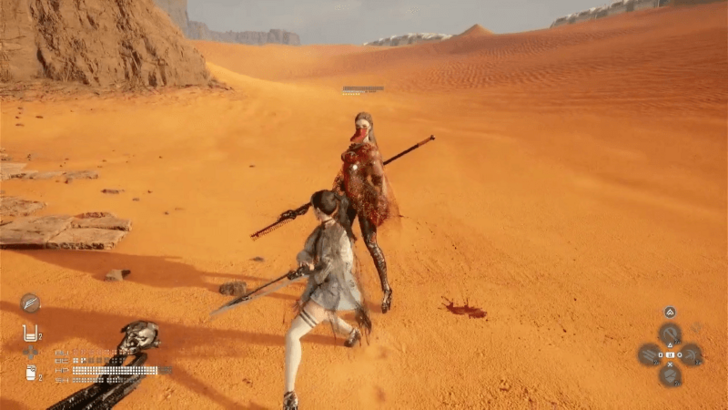 Spar with Shael Once you've arrived at Abyss Levoire, you'll be greeted by Shael, the area's guardian. Similar to what occurred with Quiel, defeat her in a duel in order to be granted access to the laboratory. |
| 2 | Enter the Abyss Levoire |
Emergency Exit Walkthrough
| ◄ Previous Section | Next Section ▶ |
|---|---|
| Abyss Levoire | Closed Lobby |
| # | Emergency Exit Objectives |
|---|---|
| 1 | 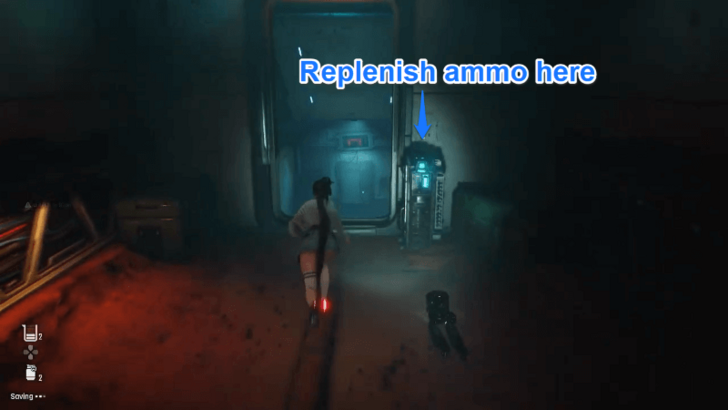 Replenish Your Ammo Identical to the Altess Levoire mission, you'll only have access to your gun. Take advantage of the terminals that can replenish your ammo. |
| 2 | Unlock the Supply Camp |
| 3 | 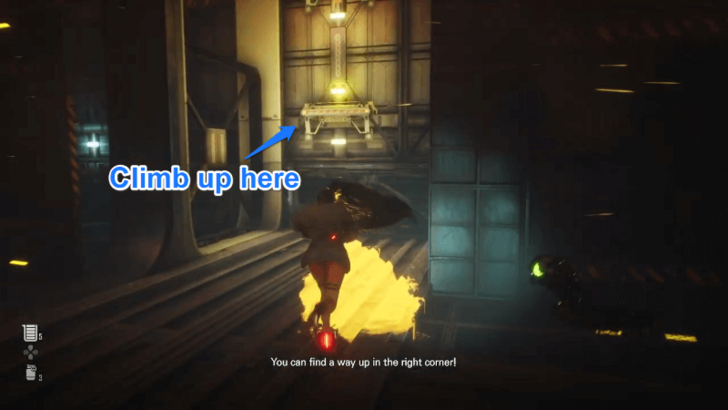 Make Your Way Up In the next area, the goal will be to shut down the wind coming from the huge propeller while avoiding the moving saw blades. Climb the ledges on the right side of the room to get through the first section. |
| 4 | 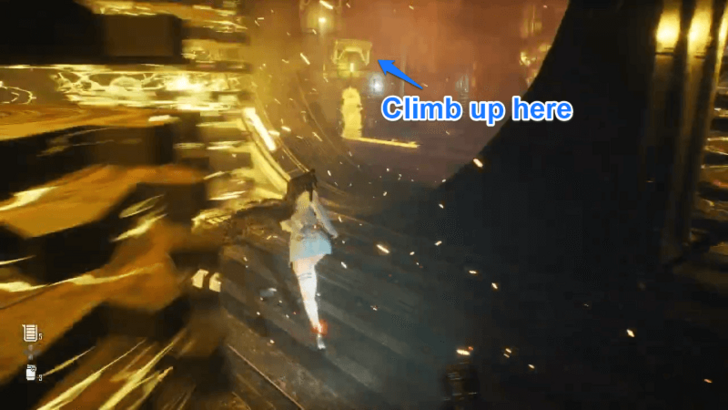 Climb the Ledges on the Left Drop down and walk towards the left side of the room, where you'll see another set of ledges that you can climb to. This will bring you to an area where you can drop down and get close to the propeller. |
| 5 | 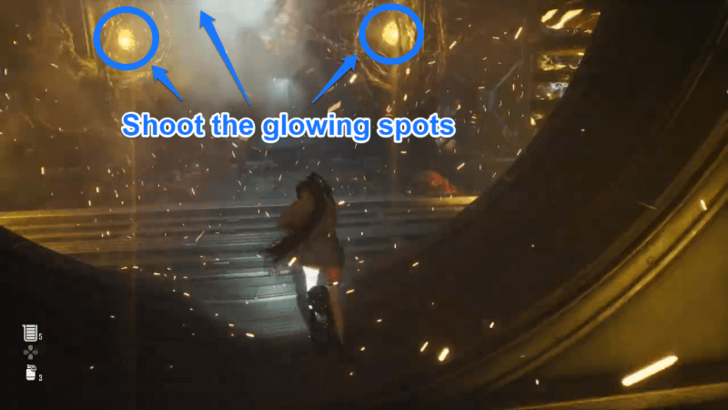 Shoot the Contamination Use your gun to take down the contamination attached to the propreller's fan blades. Aim at the glowing weak spots to kill it. |
| 6 | Unlock the Camp Before Proceeding to the Next Area |
Closed Lobby Walkthrough
| ◄ Previous Section | Next Section ▶ |
|---|---|
| Emergency Exit | Capsule Cluster Room |
| # | Closed Lobby Objectives |
|---|---|
| 1 |  Move the Cargo Blocking Your Way Upon entering the Closed Lobby, walk towards the right corridor until you come across a blocked room. Move close and move the cargo out of the way to get inside. Beware of the Naytiba waiting to ambush you! |
| 2 | 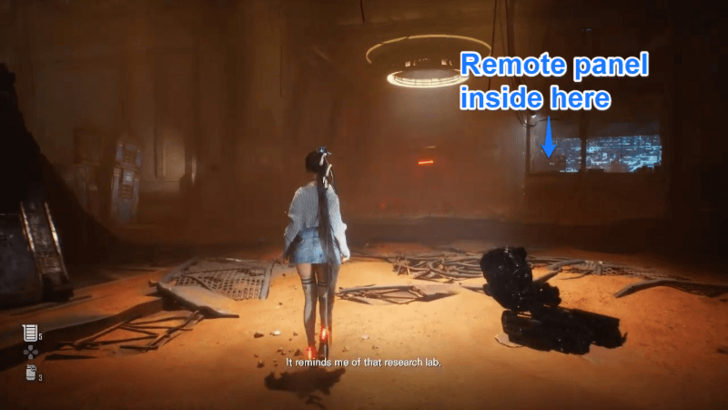 Access the Remote Panel on the Right Head inside and proceed to the right side of the room to activate the remote panel needed to open a locked door from the previous area. |
| 3 | 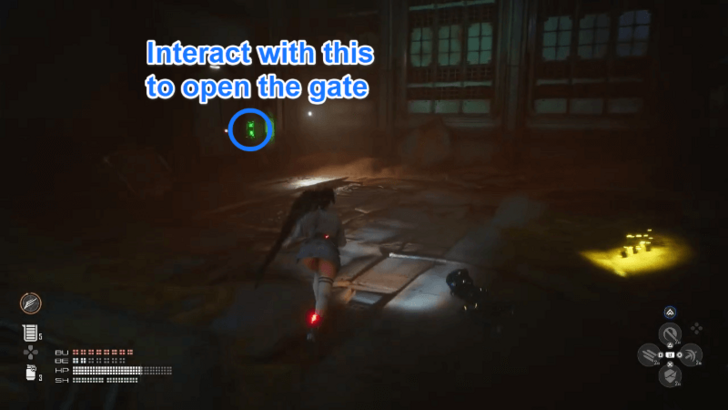 Open the Locked Gate Return to the corridor you came from and go in the other direction. If you managed to operate the correct remote panel, this door should now be accessible to you. |
Capsule Cluster Room Walkthrough
| ◄ Previous Section | Next Section ▶ |
|---|---|
| Closed Lobby | Underground Passage |
| # | Capsule Cluster Room Objectives |
|---|---|
| 1 | 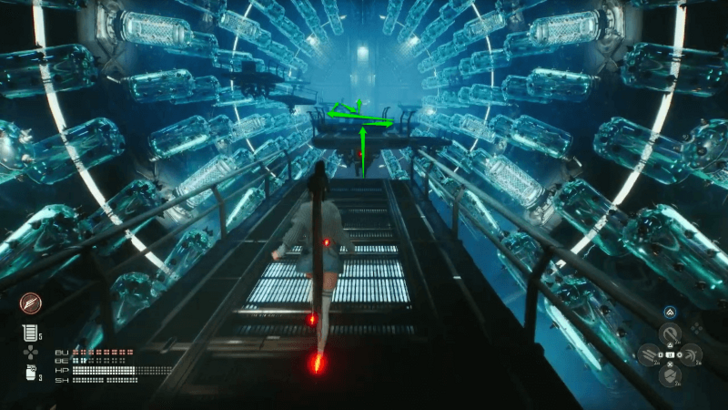 Jump on the Floating Platforms Use the floating platforms to get to the other side of the capsule room. Remain cautious, as there will be enemy Naytibas on some platforms. |
| 2 | Unlock the Camp at the End of the Room |
| 3 | 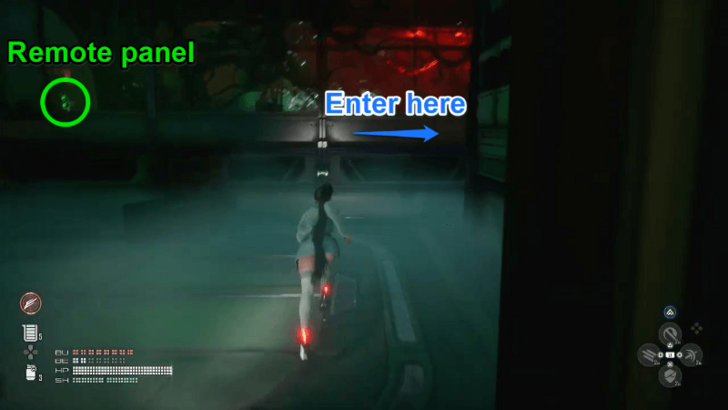 Access the Remote Panel in the Security Room In the following area, head towards the right side to get access to the remote panel that can open the locked door found within the room. |
| 4 | Unlock the Second Camp in the Area |
Underground Passage Walkthrough
| ◄ Previous Section | Next Section ▶ |
|---|---|
| Capsule Cluster Room | Laboratory Ruins |
| # | Underground Passage Objectives |
|---|---|
| 1 | 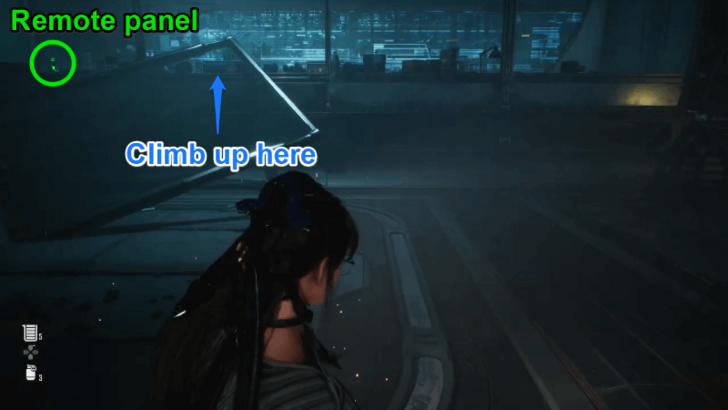 Operate the Remote Panel to Open the Gate Open the barred gate by interacting with the remote panel found in the room to the right. You can reach the remote panel by climbing up the sheet of metal penetrating through the window. |
| 2 | 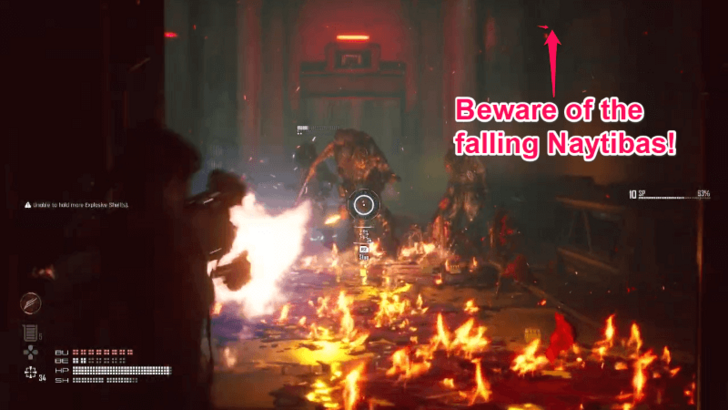 Defeat the Enemies on the Other Side of the Gate Before opening the gate, make sure that you have ample amounts of ammo since you'll have to face numerous Naytibas. Be mindful of the enemies that will drop from the ceiling and explode. |
| 3 | Unlock the Camp Past the Hallway |
| 4 | 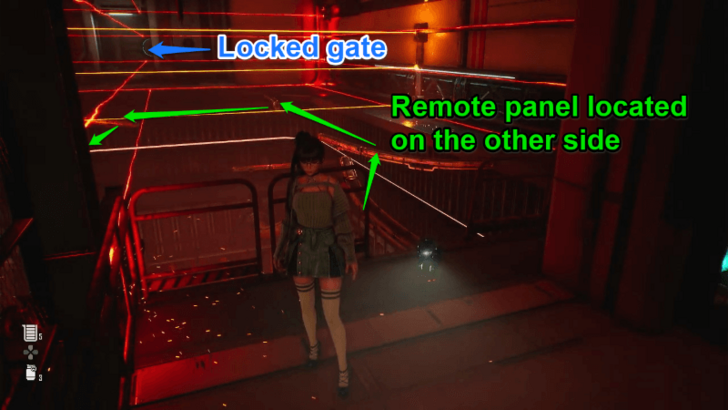 Get to the Remote Panel While Dodging the Lasers After unlocking the camp, drop down the room with moving lasers. Use the stringers to get to the left side of the room. Avoid the lasers by hanging on the bar as they pass by. Once you're on the left side of the room, interact with the remote panel there to disarm the lasers and open the door on the opposite side. |
| 5 | Unlock the Camp Before Reaching the Laboratory Ruins |
Laboratory Ruins Walkthrough
| ◄ Previous Section | Next Section ▶ |
|---|---|
| Underground Passage | Heart of the Contamination |
| # | Laboratory Ruins Objectives |
|---|---|
| 1 |  Climb up the Ledges on the Left Enter the Laboratory Ruins and climb on the ledges to your left. Continue making your way up until you reach the floor with marked walls. |
| 2 | 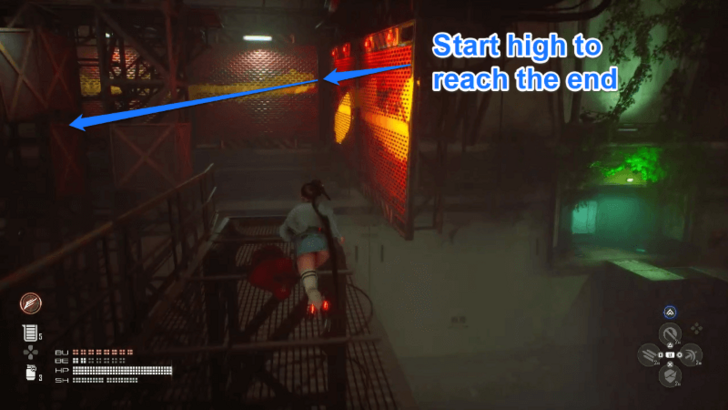 Wall Run on the Marked Walls Run through the marked walls to get to the left side of the ruins. Make sure that you start off in a high position, as gravity will be pulling you down as you walk off adjacent walls. |
| 3 | 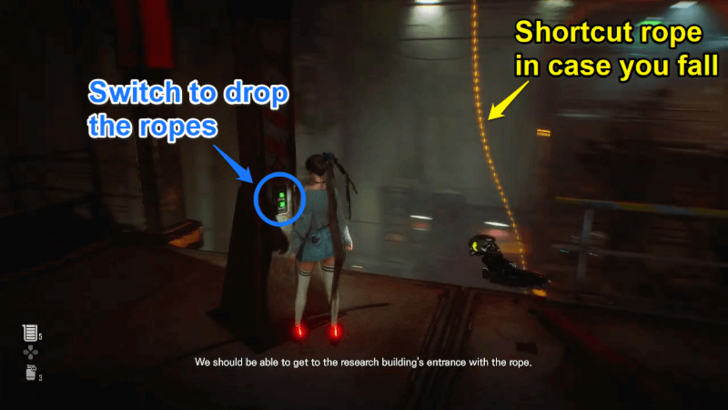 Drop Down the Ropes From the left side of the ruins, follow the path leading upwards through another set of ledges. You'll eventually reach the top floor, where you will find a small switch that will drop ropes in the area. |
| 4 | 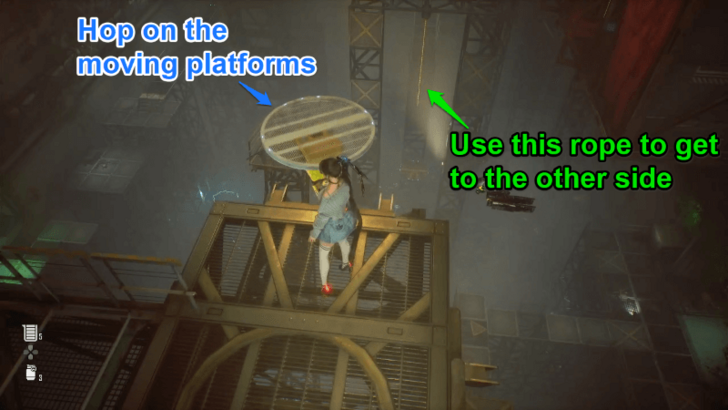 Jump on the Moving Platforms Once you've got the ropes down, move to the right, and you will see floating devices that can be used as a platform to get across. Utilize these device until you get to the opposite side of the ruins. |
| 5 | 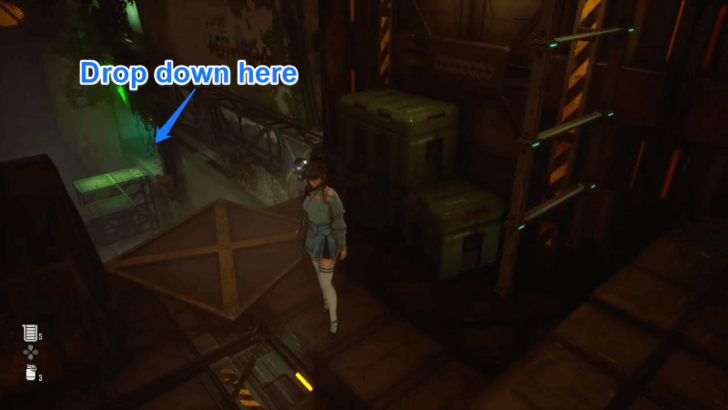 Drop Down to the Laboratory Entrance Continue heading upwards until you pass another set of ledges, marked walls, and hanging ropes. Once you're on the top level, you should see the laboratory entrance nearby. Drop down the ladder and onto the other platforms leading to the entrance. |
| 6 | Unlock the Supply Camp Before the Last Area |
Heart of the Contamination Walkthrough
| ◄ Previous Section | Next Section ▶ |
|---|---|
| Laboratory Ruins | - |
| # | Heart of the Contamination Objectives |
|---|---|
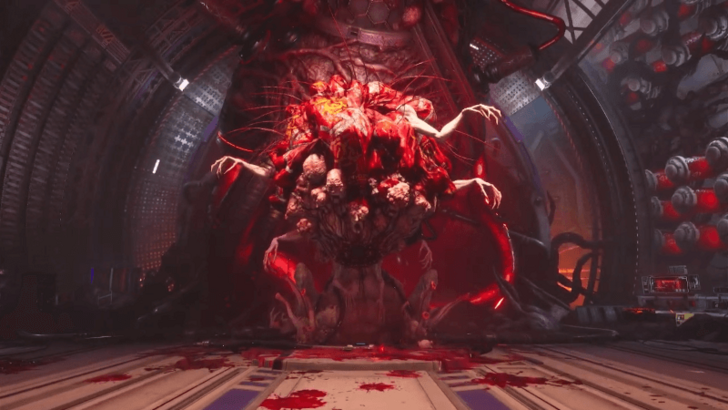
| 1 | Defeat the Maelstrom |
| 2 | Retrieve the Hyper Cell |
Abyss Levoire Boss Fights
How to Beat Maelstrom
| Maelstrom Fight Tips |
|---|
 |
|
|
Maelstrom Boss and How to Beat
Abyss Levoire Important Items
| Modules | Exteriors | Gear |
| Core | Key Items | - |
|---|
Modules
Drone Upgrade Modules
| Overworld Image | How to Get |
|---|---|
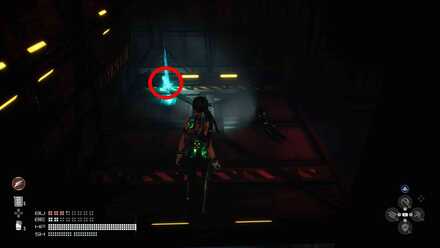 Module #1 Module #1(Abyss Levoire) |
Move the yellow container near the Camp where you defeated the Hive, get it by climbing onto the platform.
Video Guide |
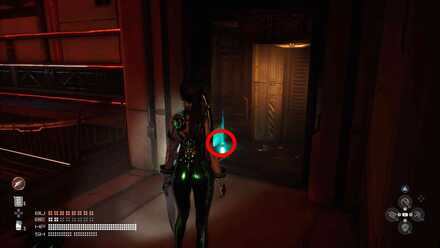 Module #2 Module #2(Abyss Levoire) |
From the area filled with enemies, there is an elevator. You can find the module inside. |
Tumbler Expansion Module
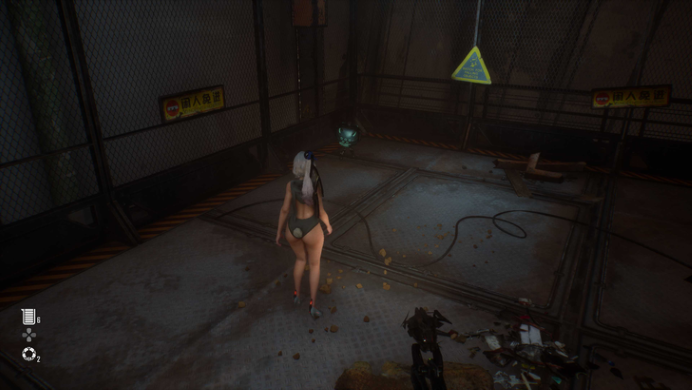
This Tumbler Expansion Module can be acquired by destroying the relic-collecting drone up past a bridge that collapses a bit in the Laboratory Ruins.
Exteriors
Planet Diving Suit (3rd)
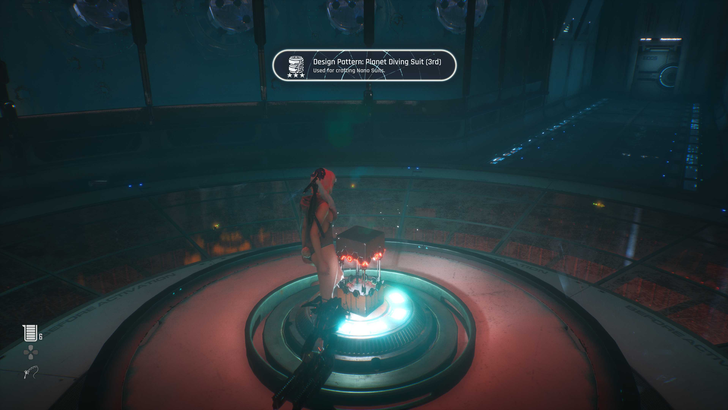
Past the camp after the large ventilation fans, take the path to the right and enter the circular room. Complete the challenge to unlock the chest and find the design pattern for Planet Diving Suit (3rd) inside.
Gears
Burst Charge Gear 2 ★
| Gear | Effects |
|---|---|
 Burst Charge Gear Burst Charge Gear |
Bonus Burst Energy Recharge by 22% |
You can acquire the Burst Charge Gear after defeating the boss Maelstrom at the end of Abyss Levoire.
Crit Enhancement Gear 2 ★
| Gear | Effects |
|---|---|
 Crit Enhancement Gear Crit Enhancement Gear |
Increases Crit. Damage by 13% |
You can acquire the Crit Enhancement Gear after defeating the boss Maelstrom at the end of Abyss Levoire.
Cores
Weapon Core
| Location | How to Get |
|---|---|
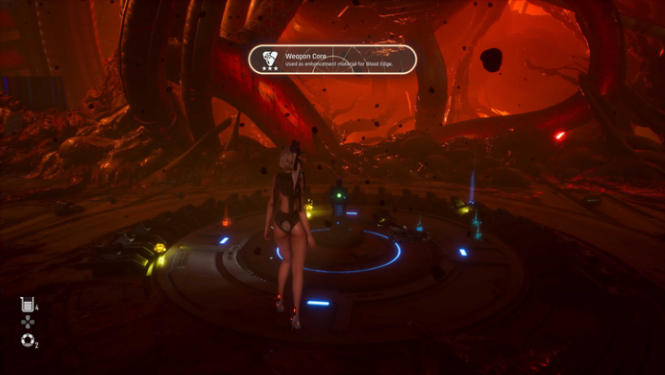 Maelstrom Drops |
A Weapon Core can be acquired after defeating Maelstrom. This is extremely important as it upgrades your weapon's damage output. |
Key Items
Hyper Cell
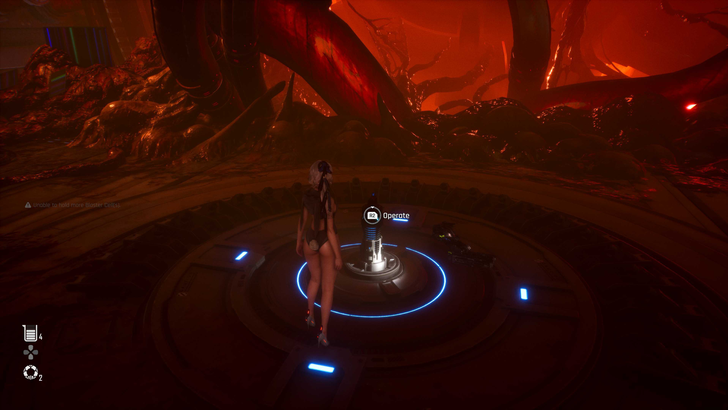
The Hyper Cell can be acquired in the deepest room of Abyss Levoire after defeating Maelstrom.
Stellar Blade Related Guides

Main Missions List
 7th Airborne Squad
 Scavenger Adam
 Xion, The Last Remaining City
 Altess Levoire
 Light of Hope
 Alpha Signal
 Hidden Truth
 Orcal's Testimony
 Secret Garden
 Eye of the Hurricane
 Burning Xion
 Last Fragment
 Selection of Species
 EVE Protocol
 All Endings
Post Game Guides
| Post Game Guides | ||
|---|---|---|
| Post Game | New Game+ | 100% Guide |
Comment
Author

Abyss Levoire Mission Guide
Rankings
- We could not find the message board you were looking for.
Gaming News
![Animal Crossing: New Horizons Review [Switch 2] | Needlessly Crossing Over to a New Generation](https://img.game8.co/4391759/47d0408b0b8a892e453a0b90f54beb8a.png/show)


Popular Games

Genshin Impact Walkthrough & Guides Wiki
Honkai: Star Rail Walkthrough & Guides Wiki
Arknights: Endfield Walkthrough & Guides Wiki
Umamusume: Pretty Derby Walkthrough & Guides Wiki
Wuthering Waves Walkthrough & Guides Wiki
Pokemon TCG Pocket (PTCGP) Strategies & Guides Wiki
Abyss Walkthrough & Guides Wiki
Zenless Zone Zero Walkthrough & Guides Wiki
Digimon Story: Time Stranger Walkthrough & Guides Wiki
Clair Obscur: Expedition 33 Walkthrough & Guides Wiki


Recommended Games
Fire Emblem Heroes (FEH) Walkthrough & Guides Wiki
Pokemon Brilliant Diamond and Shining Pearl (BDSP) Walkthrough & Guides Wiki
Diablo 4: Vessel of Hatred Walkthrough & Guides Wiki
Super Smash Bros. Ultimate Walkthrough & Guides Wiki
Yu-Gi-Oh! Master Duel Walkthrough & Guides Wiki
Elden Ring Shadow of the Erdtree Walkthrough & Guides Wiki
Monster Hunter World Walkthrough & Guides Wiki
The Legend of Zelda: Tears of the Kingdom Walkthrough & Guides Wiki
Persona 3 Reload Walkthrough & Guides Wiki
Cyberpunk 2077: Ultimate Edition Walkthrough & Guides Wiki


All rights reserved
© 2024 SHIFT UP Corporation. All rights reserved. Published by Sony Interactive Entertainment Inc.
The copyrights of videos of games used in our content and other intellectual property rights belong to the provider of the game.
The contents we provide on this site were created personally by members of the Game8 editorial department.
We refuse the right to reuse or repost content taken without our permission such as data or images to other sites.