Care Center Walkthrough
This is a Care Center walkthrough for Resident Evil Requiem (RE9). Read on for a walkthrough of the Rhodes Hill Chronic Care Center, and how to complete the area.
| ◀ Previous | Next ▶ |
|---|---|
| Wrenwood | Care Center Basement |
List of Contents
Care Center Walkthrough
| 1 | Escape |
|---|---|
| 2 | Get the Fuse |
| 3 | Investigate the Care Center (1) |
| 4 | Eliminate the Infected |
| 5 | Get Out of the Room |
| 6 | Investigate the Care Center (2) |
| 7 | Escape the Care Center |
| 8 | Find Victor's Office |
| 9 | Search Victor's Office |
Escape
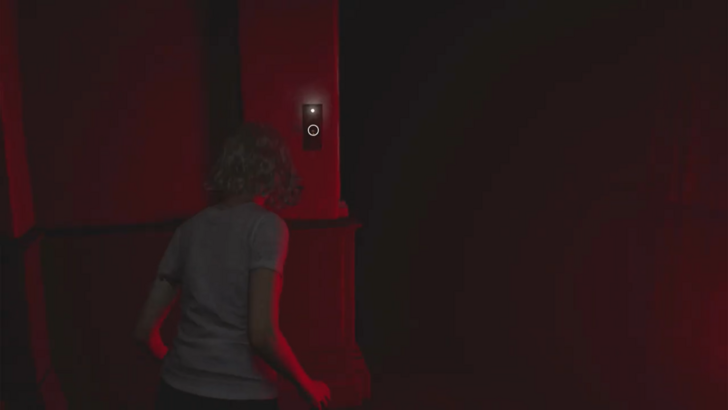
Exit the room and follow the hallway then turn right towards the passage with the red light. Flip the switch to turn on the lights for the path ahead.
Get the Fuse
| Walkthrough | |
|---|---|
| 1 | 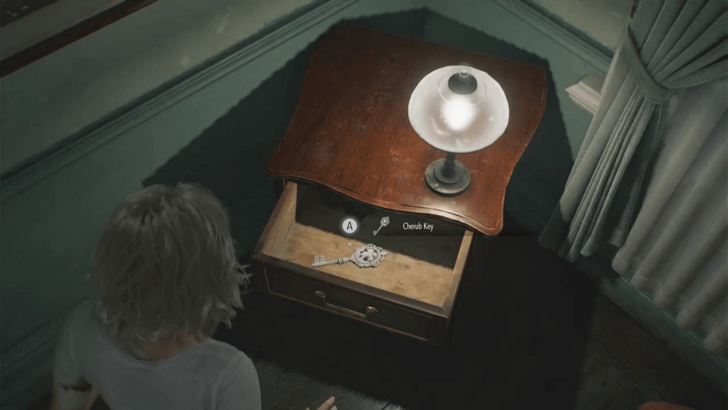 Proceed through the hall with the horse statue at the end then turn left and continue straight until you reach the end of the hall. You'll find the exit locked with bars. When you examine the fuse box, you'll see that you need another Fuse to make it work. Open the side table to get a Cherub Key. |
| 2 | 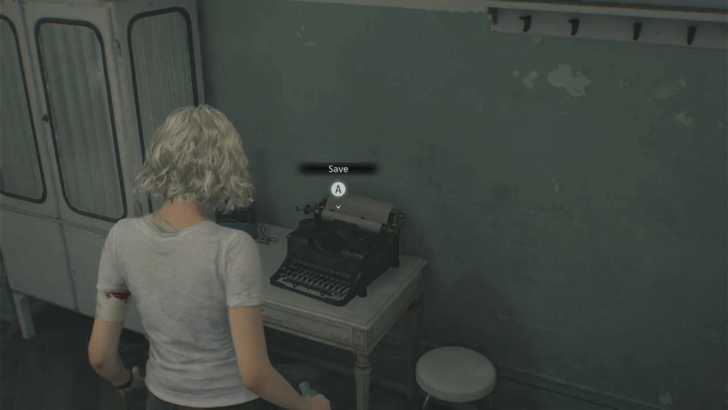 Use the Cherub Key to open the locked door near the horse statue and enter the room. You will see the first Typewriter here, which will allow you to save your progress. ▶︎ How to Save |
| 3 | 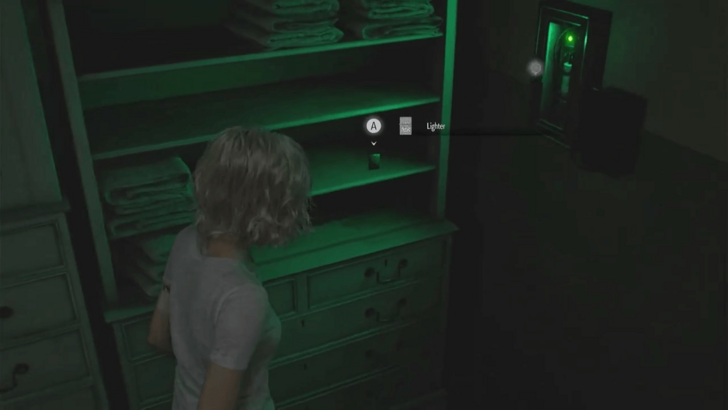 Afterwards, go into the closet room and pick up the Lighter. |
| 4 | 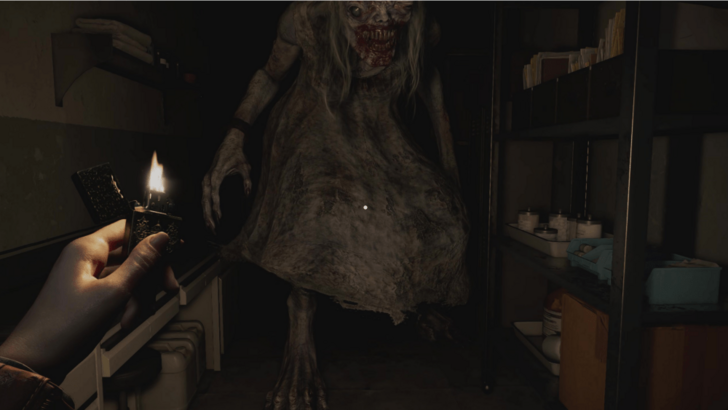 Head back all the way down the corridor, past the red light and enter the Prep Room. With your lighter on, open the door hidden in the darkness at the end of the Prep Room. It would be good to pick up the glass bottle on the floor here as well. |
| * | There are three skips you can exploit in this area to finish up fast. It requires you to face the Shadow Ghost head-on, so it's not for the faint of heart. ▶︎ Shadow Ghost Skips |
| 5 |  You will be introduced to your first boss, the Shadow Ghost. After the cutscene, immediately run towards the light as it will not be able to follow you there. Run towards the area where you got the Cherub Key or the Save Point Room. Wait there until the Shadow Ghost leaves. |
| 6 | 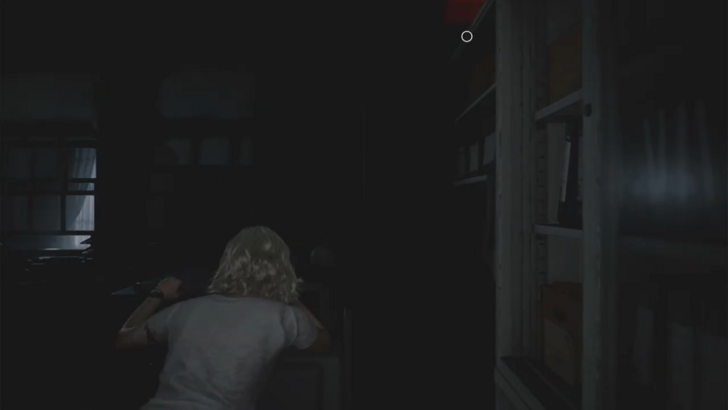 Return to the Prep Room. You will need to move the cart across the room to reach the toolbox on top of the shelf containing the Screwdriver. Moving the cart will make noise that will attract the Shadow Ghost. It will go to the room you're in. Since the Shadow Ghost goes wherever the noise is, lure it away by throwing a bottle across the room so it doesn't go near you. |
| 7 | 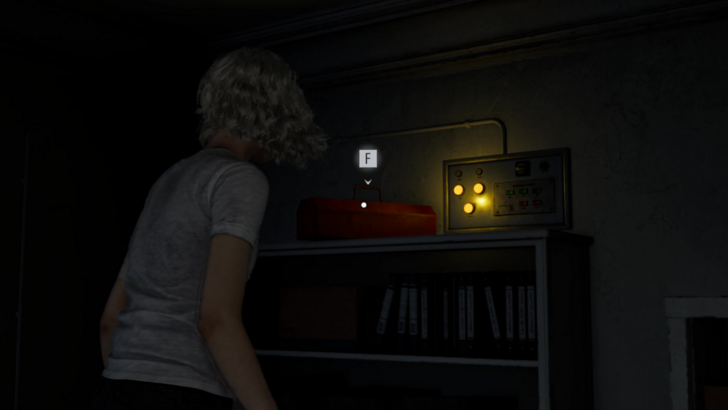 Get on top of the cart then inspect the red toolbox to get the Screwdriver. |
| 8 | 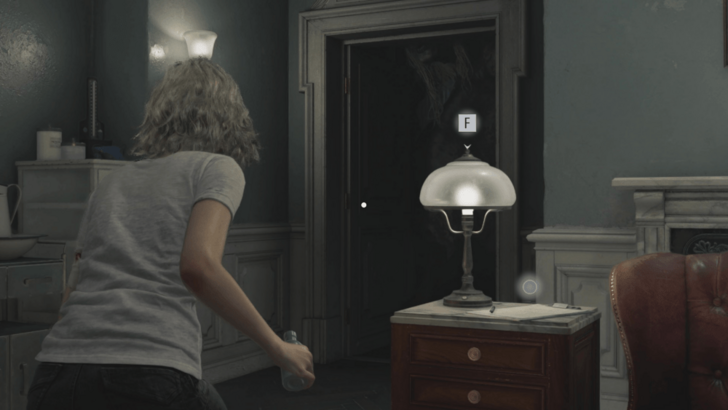 The Shadow Ghost will block your path down the hall towards the barred area past the horse statue, and will chase you when it sees you. Run to the starting room. |
| 9 | 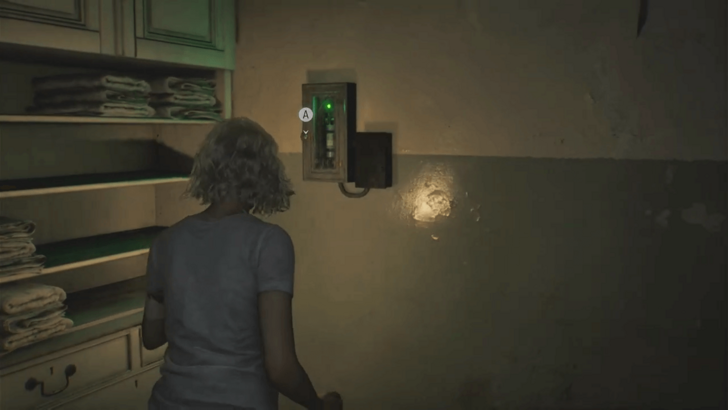 You won't be able to stay at the starting room for long. Once the lights shuts off there, sprint to the room with the Typewriter. Go to the closet and take the Fuse using the Screwdriver. |
| 10 |  Afterwards, run towards the barred area then insert the Fuse on the fuse box. |
Investigate the Care Center
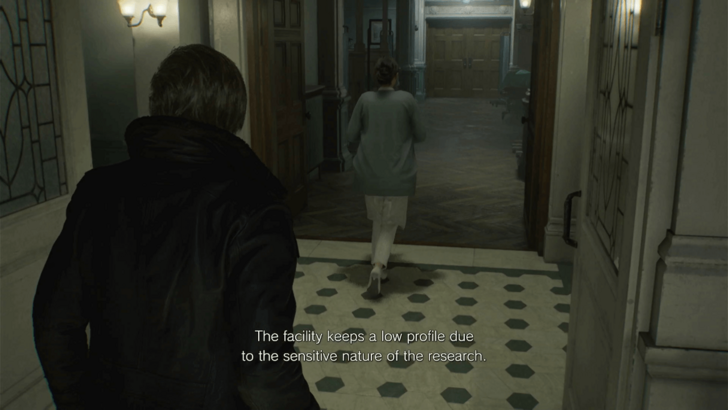
After the cutscene with Grace, you will be playing as Leon again. Follow the woman to the room where she leads you. Afterwards, you'll be thrust into a fight against infected people.
Eliminate the Infected
| Walkthrough | |
|---|---|
| 1 | 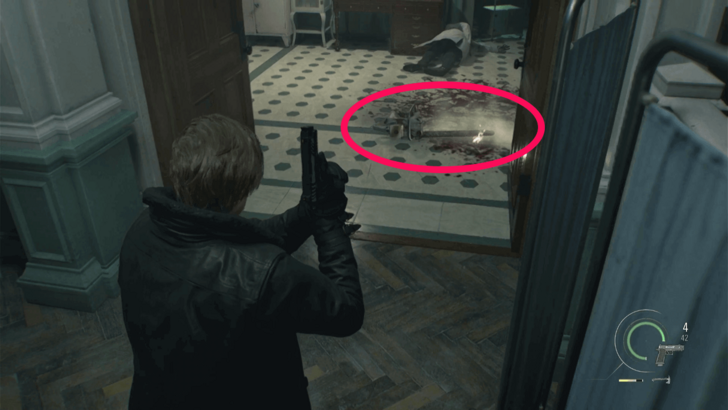 You will first be attacked by a single enemy wielding a Chainsaw. Kill him with your gun to avoid being hit. When the Chainsaw is dropped onto the ground, it will keep on spinning. Wait for it to stop moving before picking it up, as you will take damage from it. |
| 2 | More enemies will then arrive. Eliminate all of them. The enemies will also pick up the chainsaw if you haven't yet. Keep them away from it to make sure that you can get it quickly as soon as it stops spinning. |
Get Out of the Room
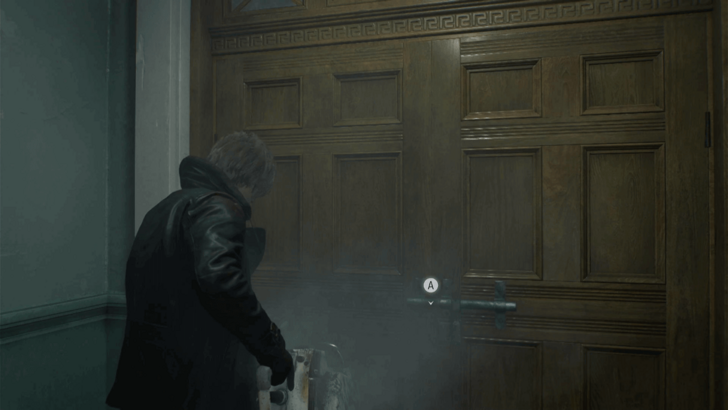
Once you've cleared all the enemies, explore the area and loot all the items there. Then, go to the locked door at the other end of the room and interact with it to use the chainsaw to open it.
Investigate the Care Center
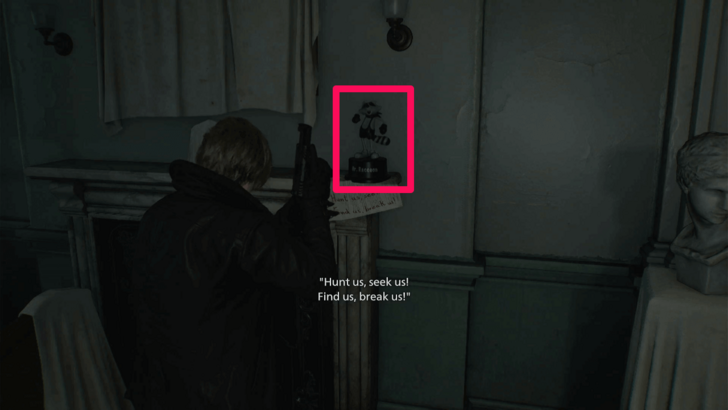
When you get out of the room, you'll see a Mr. Raccoon Statue on top of the fireplace. Break it by shooting it or by smashing it with a melee attack.
Finally, proceed up the stairs and follow the path until you triggger a cutscene, which ends the first Leon part in the Care Center.
Escape the Care Center
| Walkthrough | |
|---|---|
| 1 | 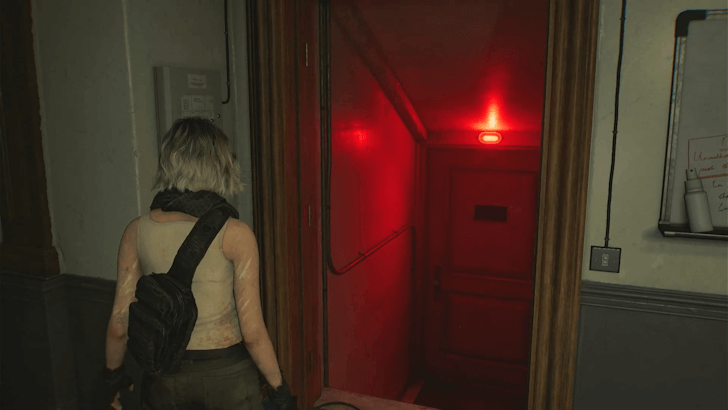 Enter the Guard office and go toward the door with a red light to continue. This will trigger a cutscene, after which you will receive the West Wing Keycard. Tip: You can pick up tons of items here that can help you with combat and exploration. |
| 2 | 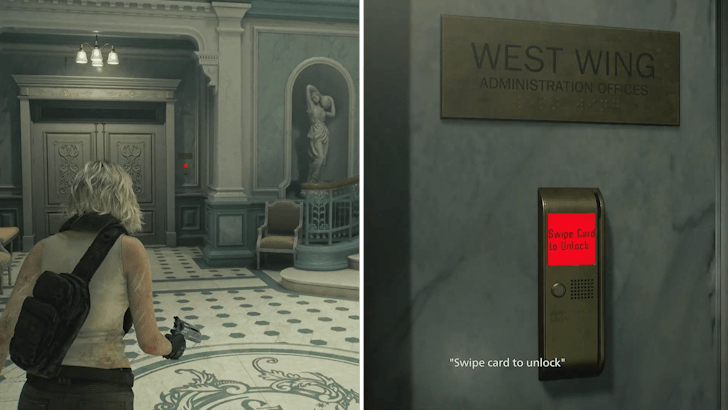 After the cutscene, exit the Guard Office and go to the door to the left of the stairs. Swipe the West Wing Keycard to unlock the door that leads to the West Wing. |
| 3 | 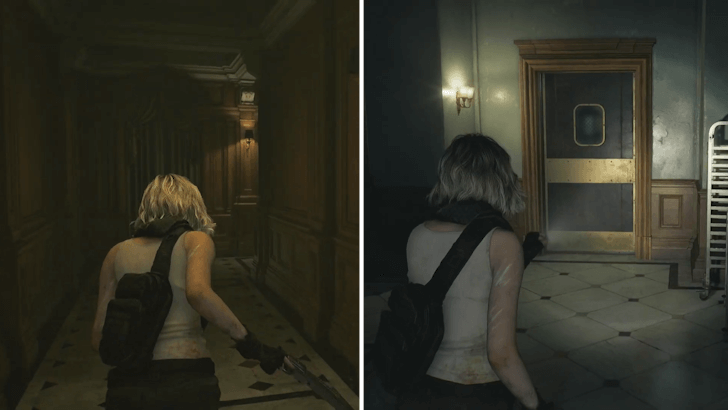 Enter the West Wing and turn left. Follow the hallway until you see the Kitchen door. |
| 4 | 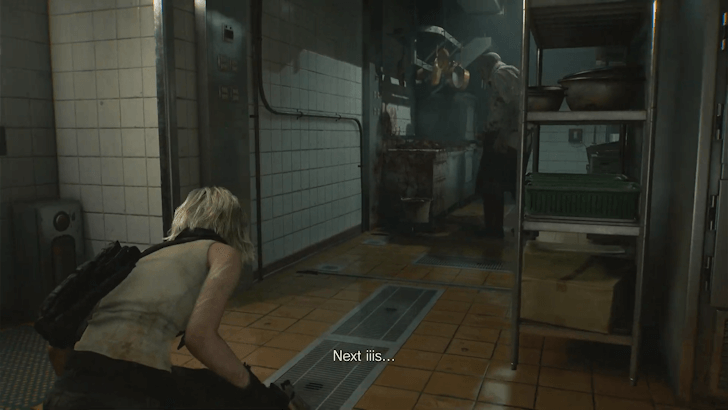 Once inside the Kitchen, crouch and sneak your way forward until you reach the Chef zombie. You can also just run past the Chef after he stops attacking once he spots you to save time. ▶︎ Chef Skip |
| 5 | 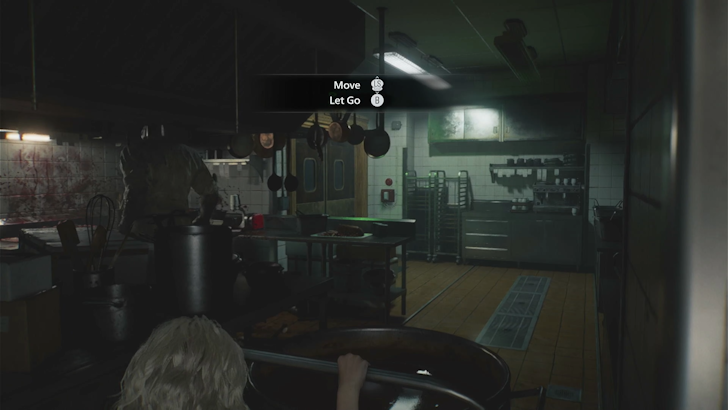 You will need to pull the cart to make a path towards the next door. push the cart while the chef has his back turned. The chef will occasionally stop chopping meat and turn toward your direction. In those instances, let go of the cart and go back to hiding. You can tell the chef is about to turn around when he says "Wrong... wrong..." |
| 6 |  Once you exit through the door on the other side of the kitchen, turn right and head to the end of the hallway. Sneak through this area by turning on the lights to lure the zombie who hates light. Unlock the door to open a path from the West Wing entrance. |
| 7 | 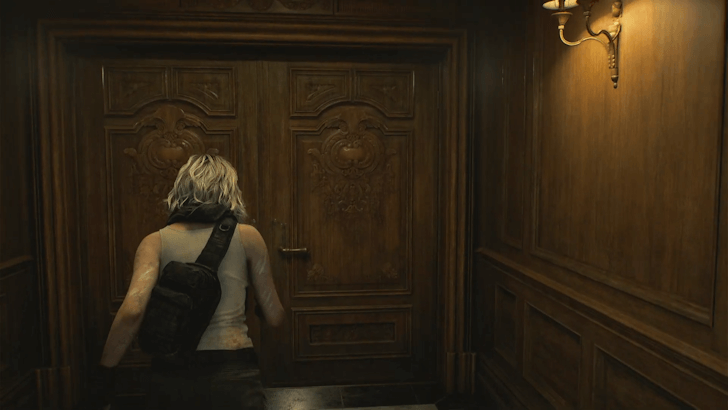 After unlocking the door, turn back and turn right. You should end up in front of double doors that lead to the Dining Room. |
| 8 | 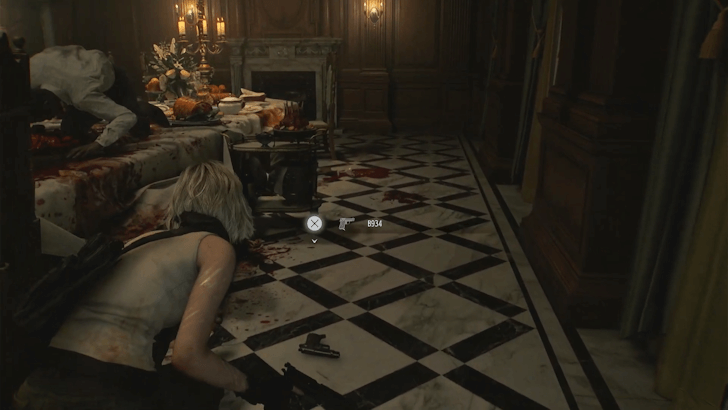 Crouch then enter the Dining Room. Make your way to the other side of the room, making sure to pick up the B934 Pistol on the right side of the room, as well as the Empty Bottle on the shelf in the left side. If you're playing on Insanity Difficulty, you can get the B934 Pistol in the East Wing Lobby instead of this location. |
| 9 | 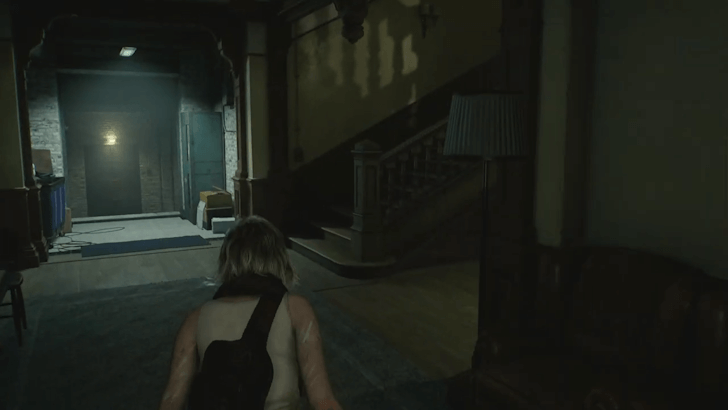 Continue down the hallway and make your way up the stairs to the second floor. Be careful as there is a zombie waiting for you in the stairs. |
| 10 | 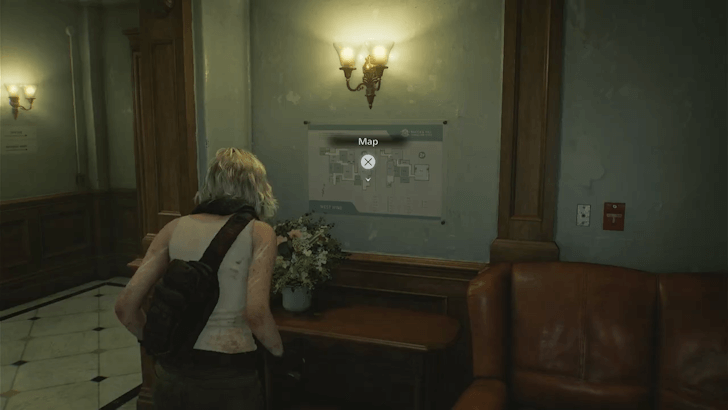 Once you reach the second floor, make sure to inspect the map on the wall. This will unlock the rest of the West Wing map, revealing all of the rooms in the first and second floor. |
| 11 | 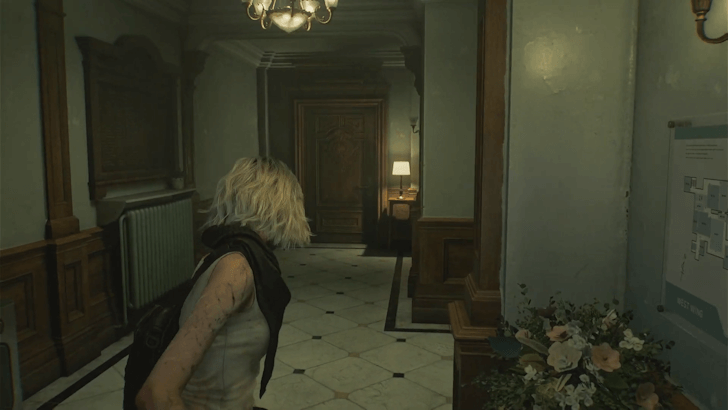 After inspecting the map, head down the hallway and go through the door. This will lead you to the Bar and Lounge. |
| 12 | 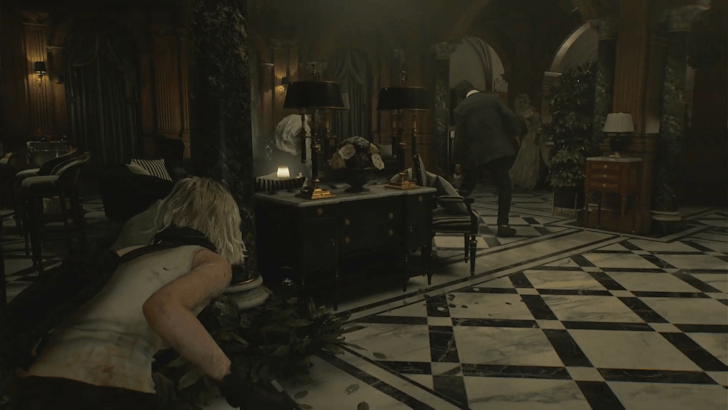 There will be three zombies roaming around the Bar and Lounge. Distract them using an Empty Bottle so you can sneak past them. Alternatively, you can kill all three zombies using your handguns and knives. Prioritize the zombie in a white dress as she can shout and stagger you. |
| * | 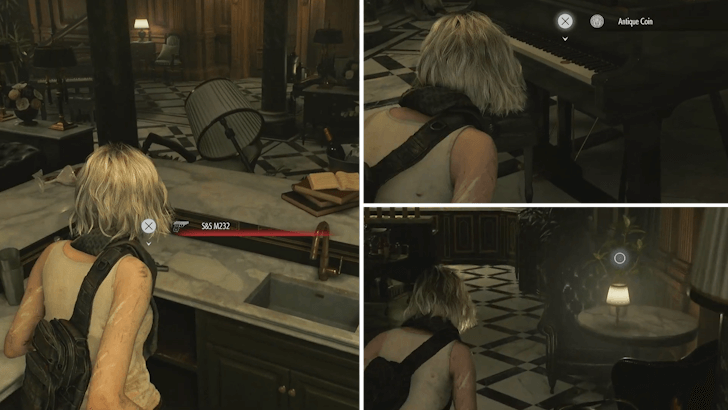 After either distracting or killing all three zombies, pick up all the loot in the Bar and Lounge. This includes the Antique Coin on the piano, the Green Herb in the side table, and the S&S M232 Pistol behind the counter. Additionally, pick up the Antique Coin that the shouting zombie dropped. |
| 13 | 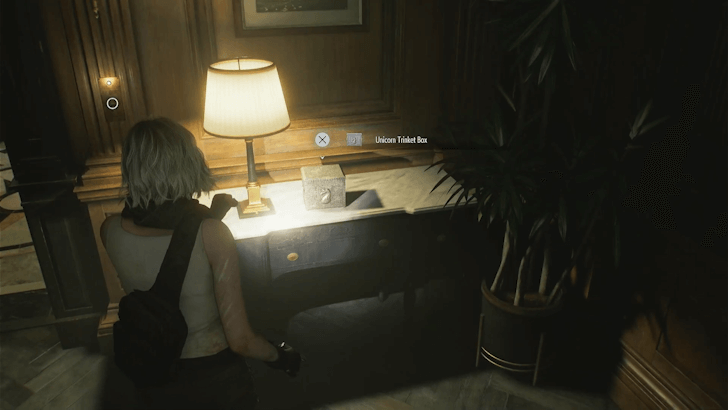 Head to the Chairman's Office across the Gallery and inspect the Unicorn Trinket Box on the table beside the door. Rotate it to find and press the hidden button. This will open the box, allowing you to get the Red Jewel. |
| 14 | 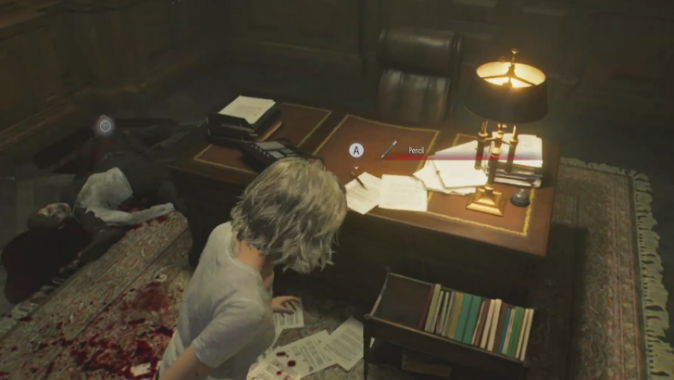 Head through the doorway to head further inside the Office where you will encounter a zombie. Kill it, then pick up the Pencil from the table. Make sure to grab the Handgun Ammo from one of the desk drawers in this room, as well as the Note to the Chairman in the trash can. |
| 15 | 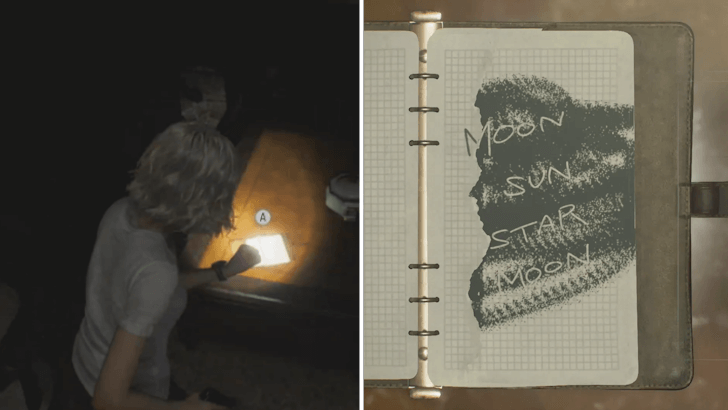 Go back outside and inspect the notebook on the table. Use the pencil on the notebook, which will reveal the words Moon Sun Star Moon. |
| 16 | 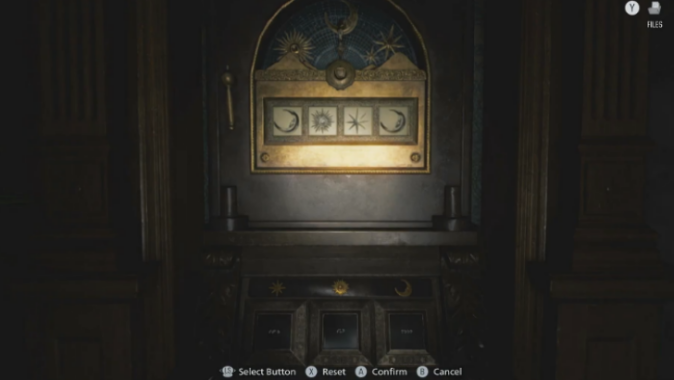 Inspect the puzzle beside the fireplace to activate it. Once activated, press the buttons in the order shown in the notebook (Moon → Sun → Star → Moon). Successfully doing so will reward you with the Moon Quartz. ▶︎ Chairman's Office Moon Puzzle Solution |
| 17 | 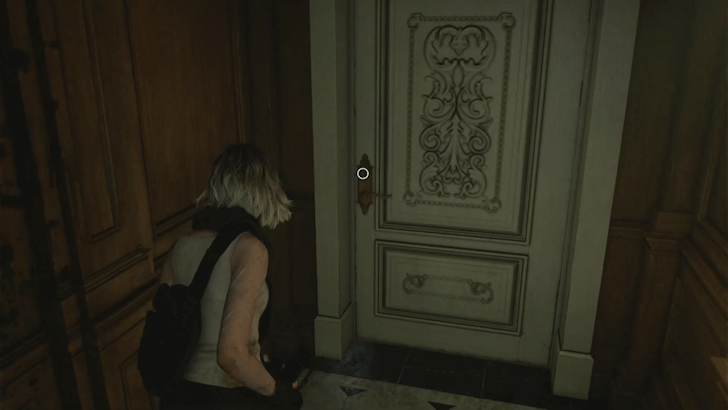 Continue down the hallway until you reach a white door that is guarded by another zombie. Take the zombie down and open the door, which will lead you back to the Central Hall. You can take this time to go back to the Guard Office and save your game. |
| 18 | 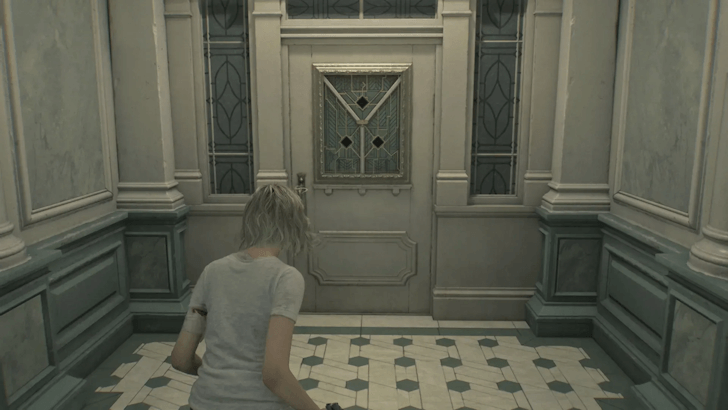 Go to the door with three holes located at the north side of the Central Hall. Insert the Moon Quartz into one of the vacant holes. |
| 19 | 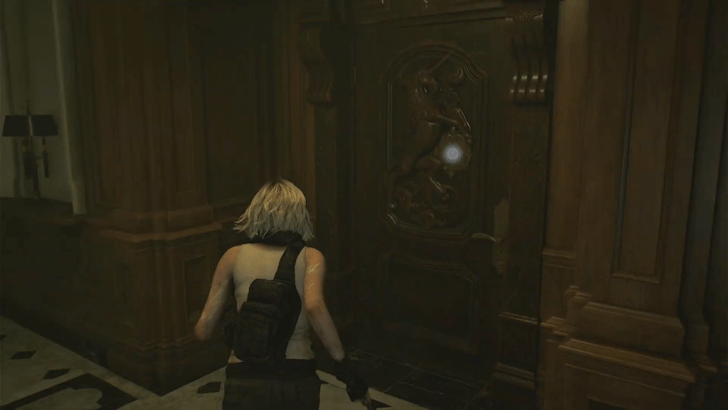 Go back the first floor of the West Wing and make your way to the door with a horse on it. Insert the Red Jewel in the empty slot to unlock the door and gain access to the Parlor. |
| 20 | 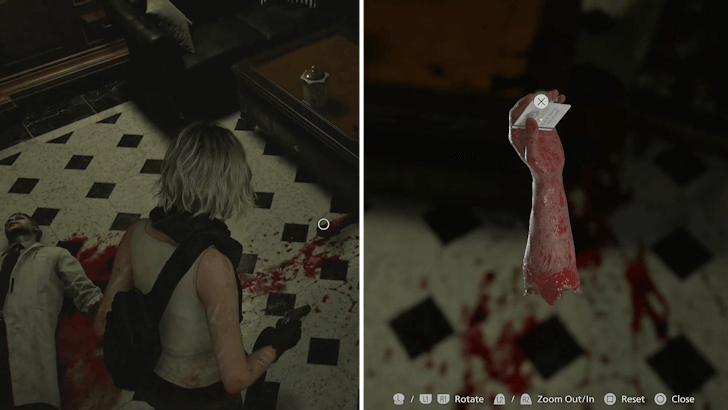 Go toward the body on the floor and inspect the arm under the table. Rotate it until you are able to get the East Wing Keycard. |
| * | 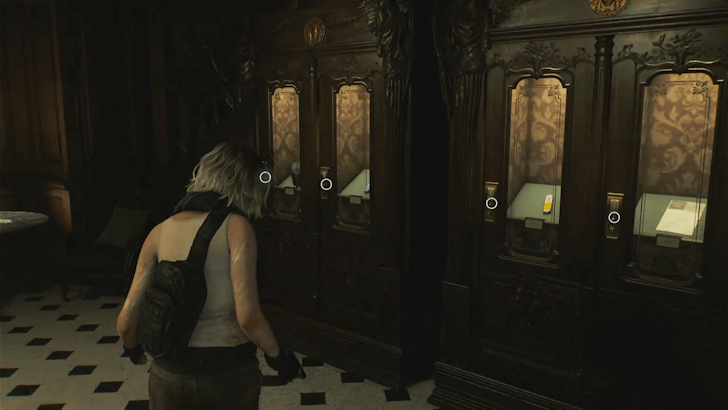 (Optional) Use your Antique Coins to unlock the Coin Cabinets to the side of the Parlor. We highly recommend getting the Hip Pouch for 3 Antique Coins, as it increases your inventory by two slots. |
| 21 |  Make your way back to the Central Hall and open the East Wing using the East Wing Keycard. |
| 22 | 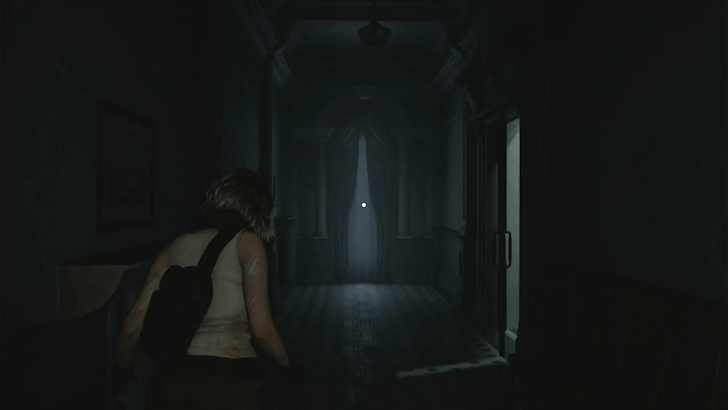 Head down the hallway until you reach the slightly opened door that leads to the Examination Room. Enter it and head for the table beside the sink to pick up the Hemolytic Injector. |
| 23 | 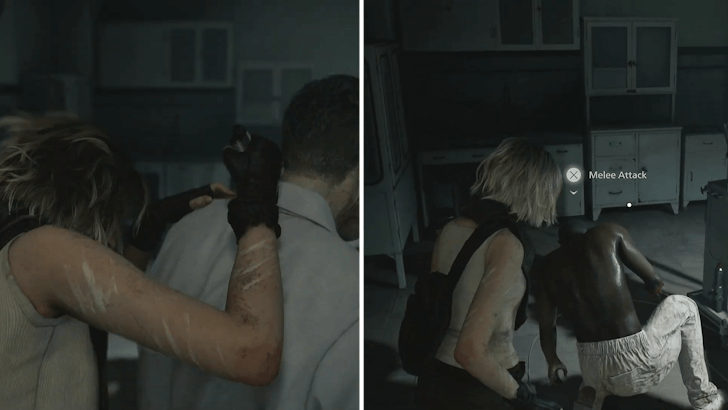 Sneak up on the nearby doctor zombie and use the Hemolytic Injector to stealthily take it down. Afterward, take down the other zombie that recently stood up. |
| 24 | 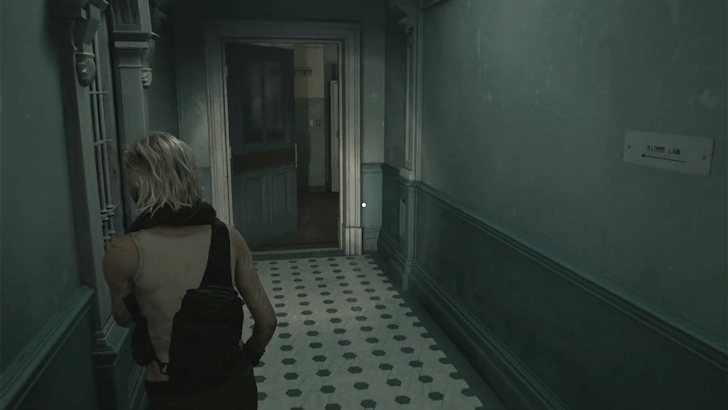 Pass through the Treatment Room and exit through the door. Go straight down the hallway until you reach the Blood Lab. |
| 25 | 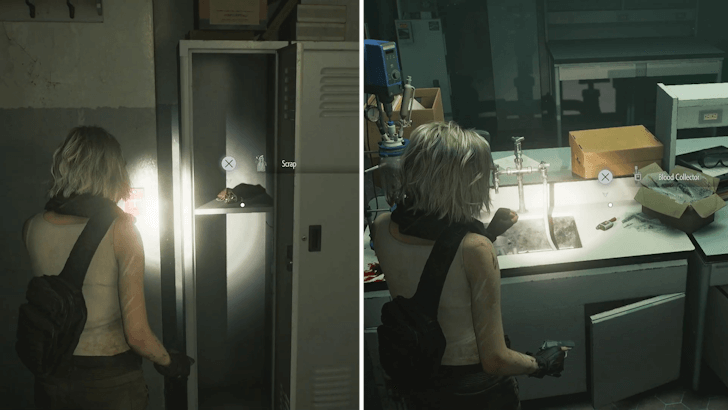 Take the Blood Collector on the table. You can also pick up some Scraps inside the locker by the door. |
| 26 | 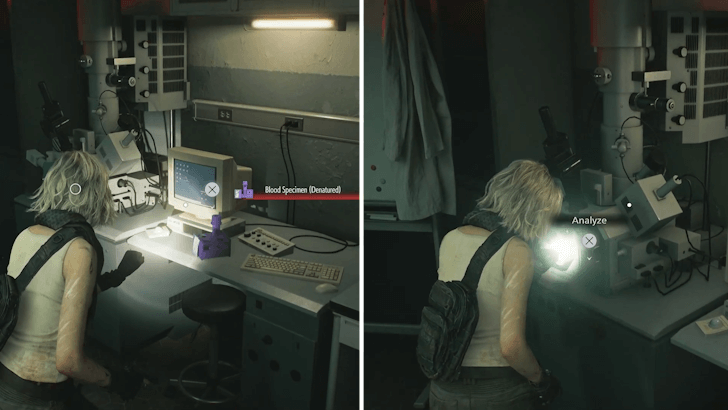 Pick up the Blood Specimen (Denatured) from the desk and analyze it using the nearby laser microscope. ▶︎ How to Get Blood Specimen (Denatured) |
| 27 |  Convert the passive atom in the middle to activate all of the atoms. Doing so will unlock the ability to craft Handgun Ammo and Hemolytic Injectors. |
| 28 | 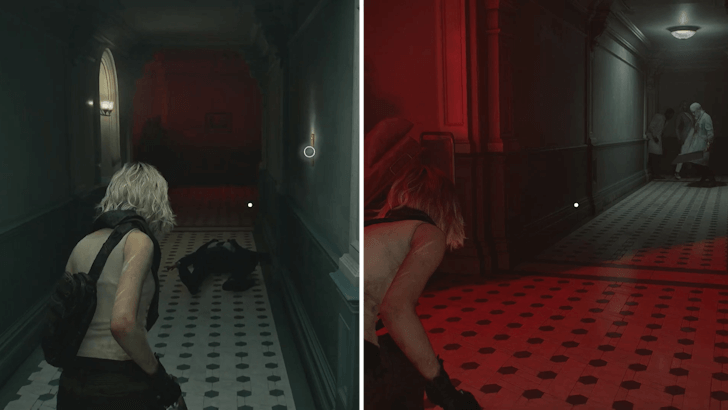 Head back to the hallway and turn left. Follow the hallway until you reach an area with a red light. Three zombies will appear down the hall, so either kill them all, or sneak past them using an Empty Bottle. |
| 29 | 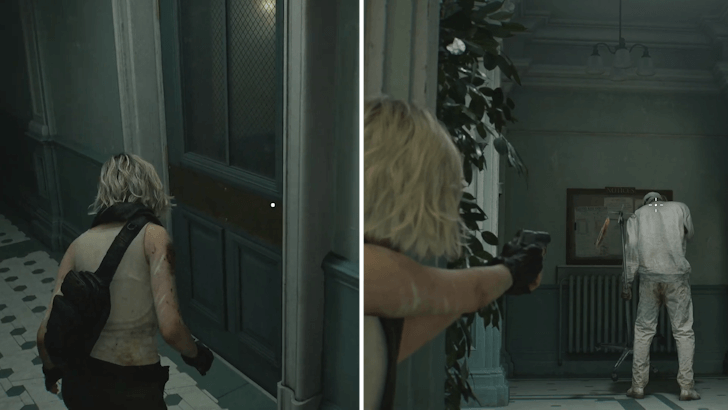 Go through the door to the right to enter the Waiting Room. Take care of the zombie roaming inside the room. He will drop a Transfusion Bag when killed. |
| 30 | 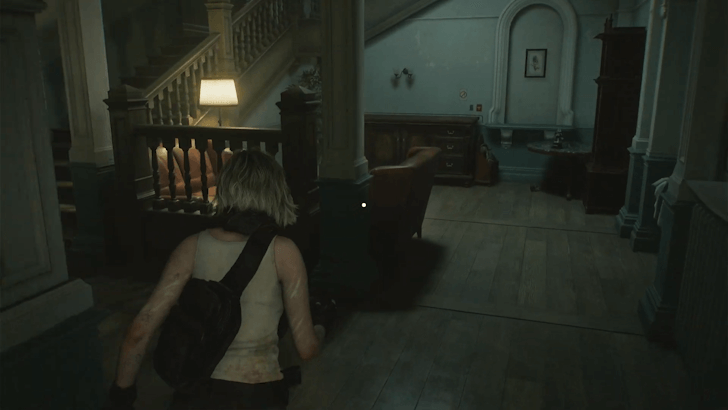 Return to the Waiting Room and head out to the unexplored hallway. Follow it until you reach the staircase leading up. You will encounter two zombies at the top, so be careful. |
| 31 | 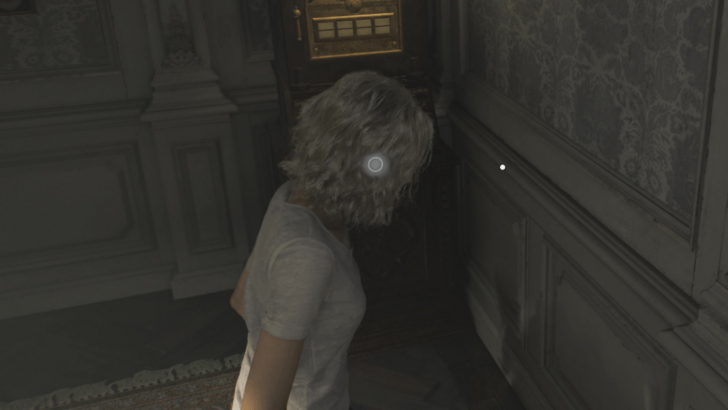 Enter the Lead Researcher's Office and go through the door at the end of the room to enter a smaller office. Inside, you will find a puzzle similar to the Chairman's Office and several files you can read. |
| 32 | 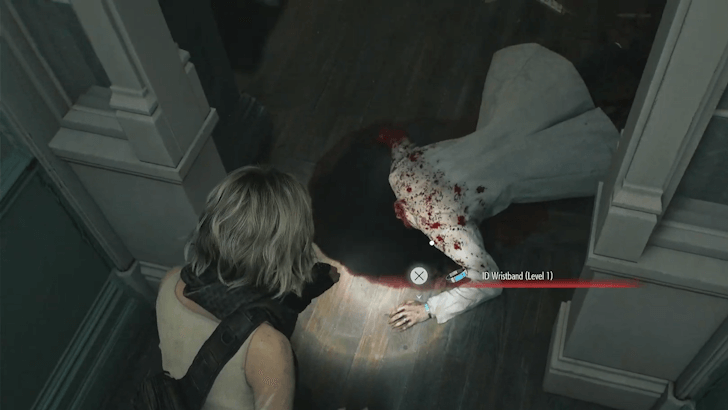 Exit the Lead Researcher's Office and inspect the headless corpse at the end of the hallway to get the ID Wristband (Level 1). Using the ID Wristband, you can now backtrack and enter numerous locked rooms. |
| 33 | 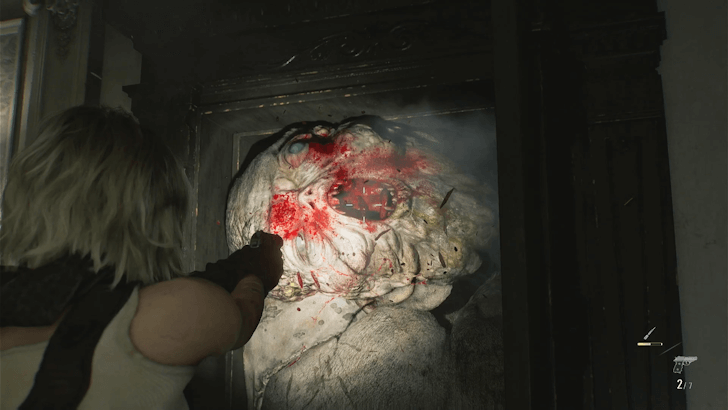 Approaching the headless corpse will make Chunk appear. Retreat to the Waiting Room instead of the Lead Researcher's Office to access the hallway where he appeared. You can then wait for Chunk to leave or you can hit him with 3 Hemolytic Injectors to kill him. Doing so will drop the Eye Spy Charm. ▶︎ Should You Kill Chunk as Grace |
| 34 | 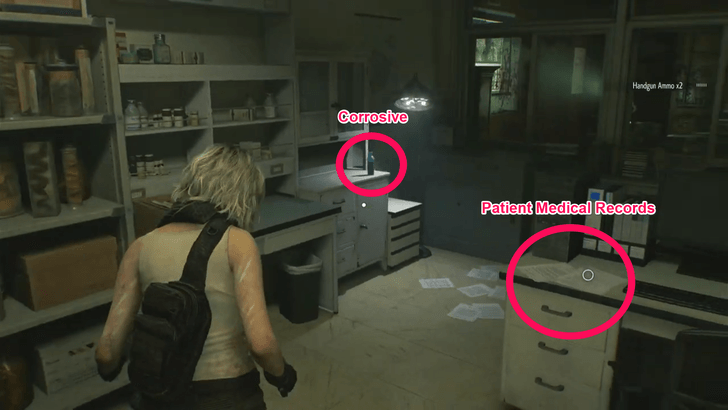 Head inside to the Conference Room after waiting or killing Chunk. There will be a the zombie singer and several zombies there, guarding the Corrosive on the drawer. Grab the Corrosive as you will need it to open the puzzle in the Lead Reseacher's Office. |
| 35 | 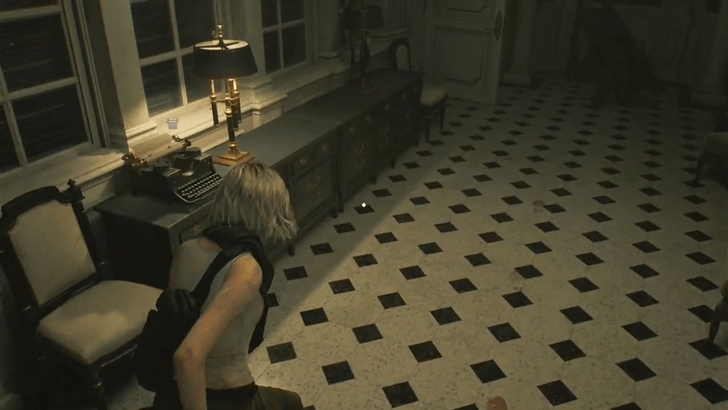 Leave the Conference Room and go to the Lead Researcher's Office next where a cutscene will play. After the event, don't forget to save your game using the typewriter nearby. Go back to the room where you met Victor Gideon earlier. |
| 36 | 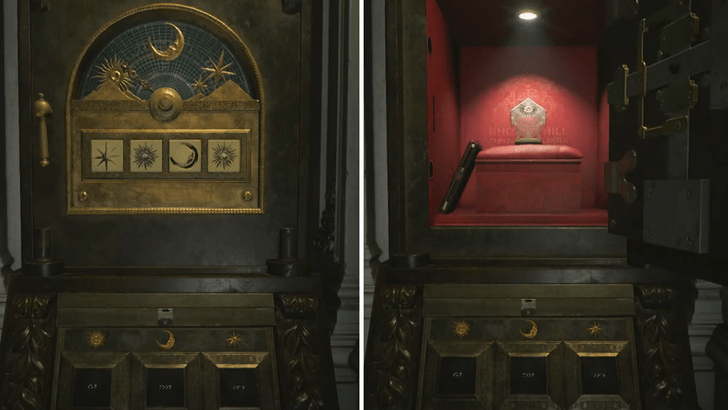 Inside this room will be another puzzle machine. Use the Corrosive to melt the padlock, then input Star → Sun → Moon → Sun to solve the puzzle. Found inside are a Sun Quartz and a Leatherbound Notebook. The notebook contains instructions on how to open the Organ Transport Box. ▶︎ Lead Researcher's Office Puzzle Solution |
| 37 | 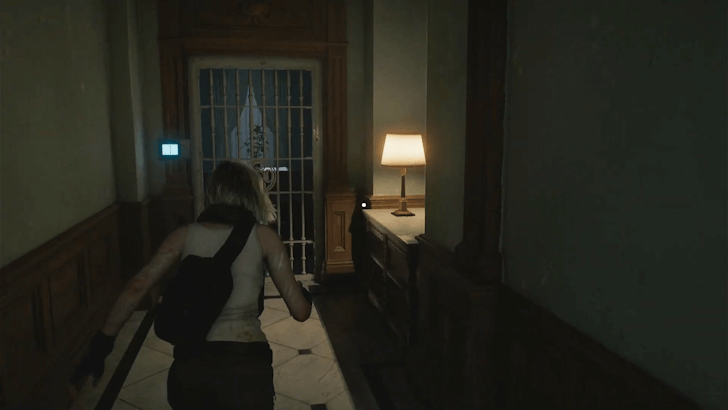 Make your way back to the West Wing hallway and head to the locked door at the end. Go through the door and enter the Custodian's Office. |
| 38 | 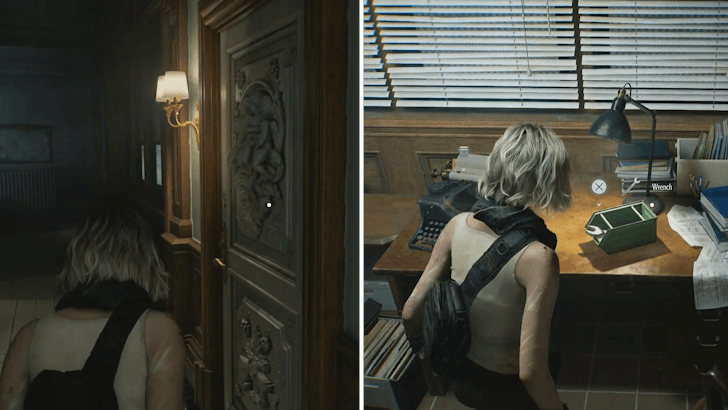 Pick up the Wrench as you will need it to open the Cold Storage. The Custodian's Office also has a Typewriter and an Item Box, so take this opportunity to save and manage your inventory. |
| 39 | 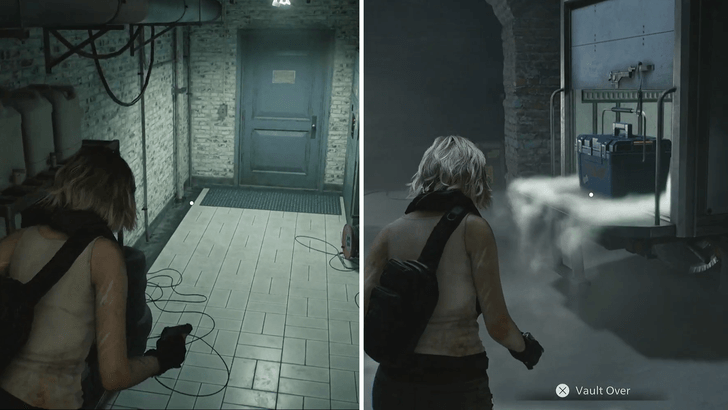 Head back out to the hallway and enter the blue door to the Garage. Continue inside then pick up the Organ Transport Box from the back of the truck, as well as some Handgun ammo inside a breakable crate near the electric box. |
| 40 | 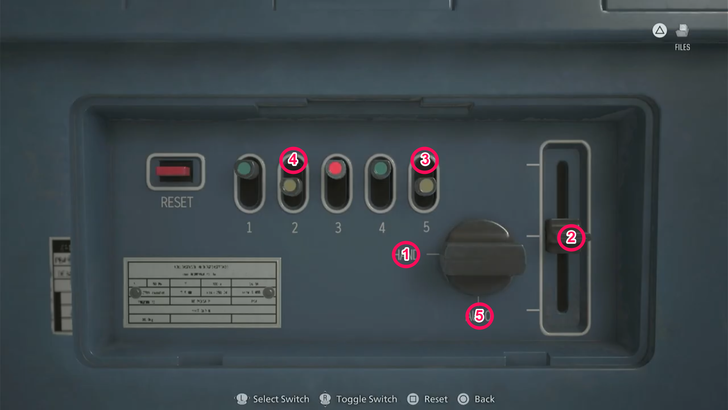 Solve the puzzle by using the instruction file you acquired from the Lead Researcher's Office or by doing the following actions: ・Turn the knob to the HAND position. ・Position the right switch to the center. ・Toggle Switch 5 first then Switch 2. ・Turn the knob back to AUTO. Opening the box will give you an Artificial Lungs. ▶︎ Organ Transport Box Puzzle Solution |
| 41 | 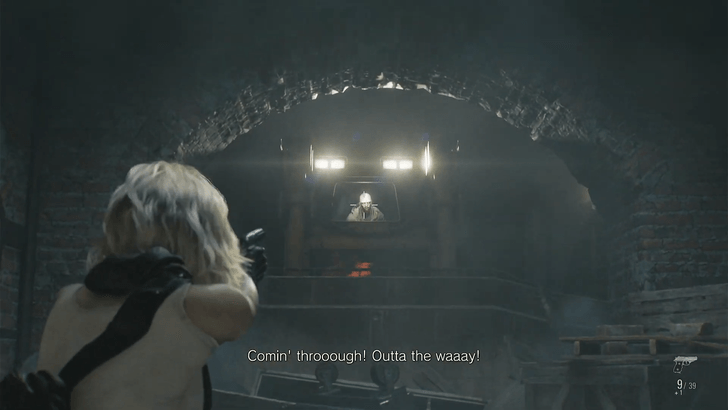 As you leave the Garage, a zombie driving a bulldozer will appear. Quickly aim and shoot the driver's head while backing away to stop the bulldozer. Once it halts, interact with the bulldozer to crawl underneath and exit the Garage. |
| 43 | 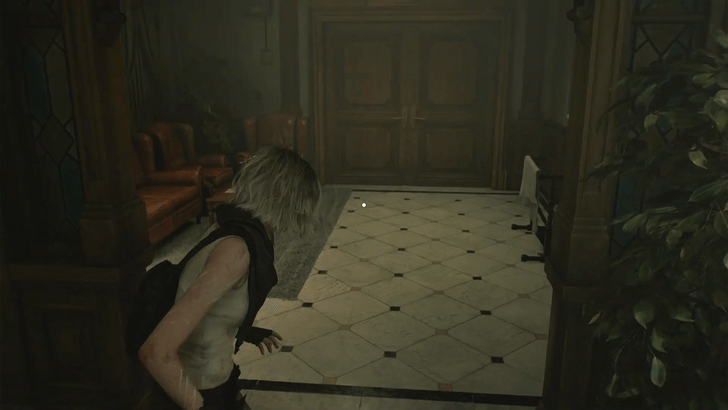 Back at the hallway, take the doorway to the left and climb the stairs to the second floor. Before proceeding, climb up the next set of stairs to find two breakable crates containing Handgun ammo and Scrap. Go back down and enter the large double doors to the Office. |
| 44 | 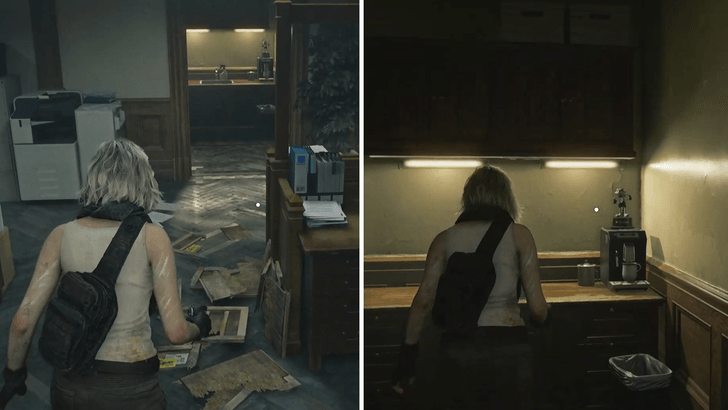 Pass through the Office and enter the Kitchenette. You can open the door leading to the stairs close to the Cold Storage. |
| 45 | 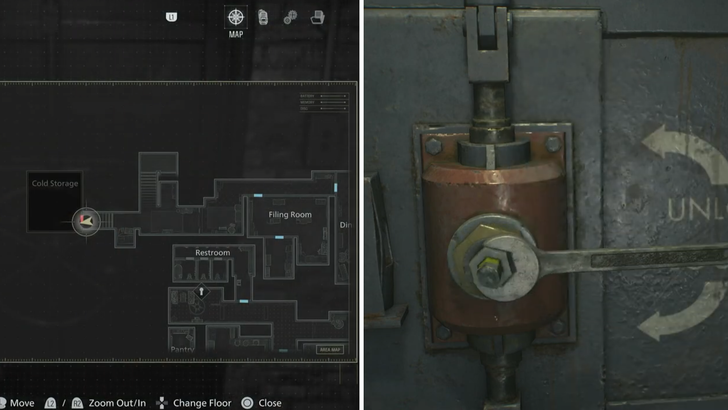 Go back to the first floor and head inside the Cold Storage in the West Wing. You'll need to use the wrench you found in the Custodian's Office to open the metal door. |
| 46 | 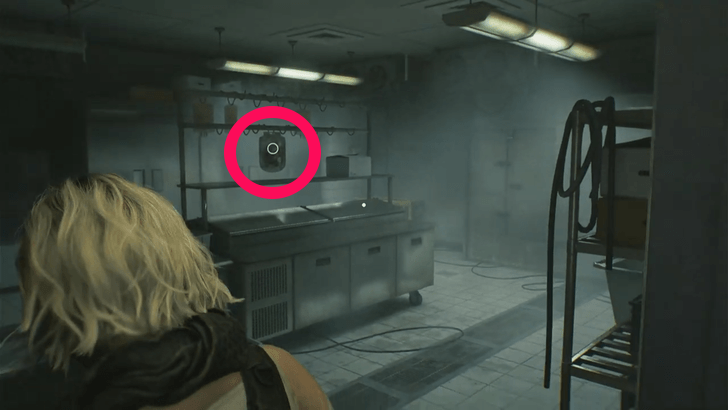 Enter the freezer and take the bag of Artificial Heart hanging on the rack. You'll also find Handgun Ammo inside the crates, a Transfusion Bag in a cabinet, and Scrap on top of a table. |
| 47 | 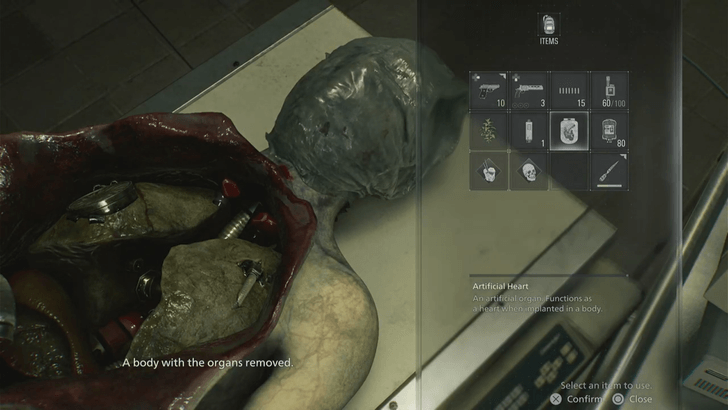 Head back to the Examination Room in the East Wing. Interact with the organless corpse in the examination table and insert the Artificial Heart and Artificial Lungs. |
| 48 | 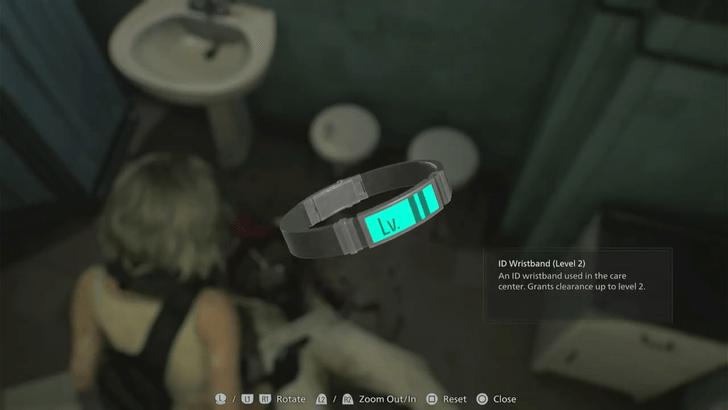 The corpse will be resurrected and attack you after putting the organs. Shoot it down to loot the ID Wristband (Level 2). |
| 49 | 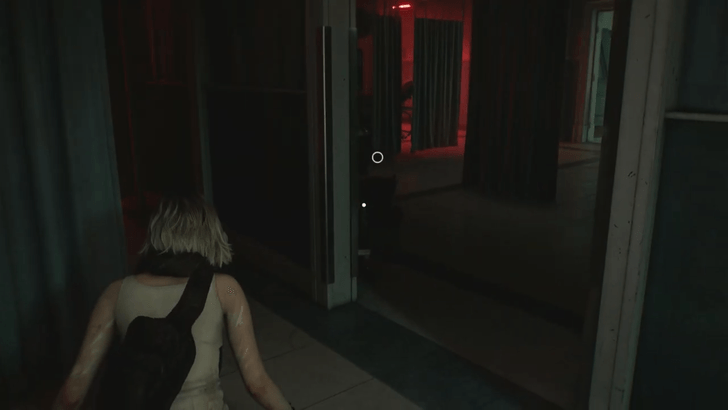 Unlock the gate to the Isolation Ward using the ID Wristband (Level 2). Walk down the hallway and enter the first door to the right. Cross the room then proceed inside the open doorway. |
| 50 | 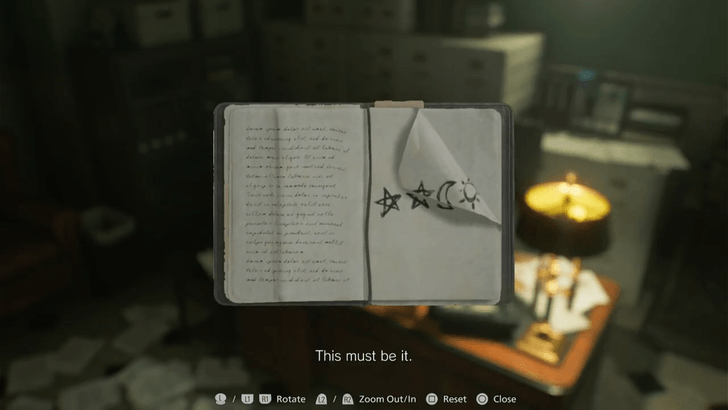 Interact with the notebook next to the dead man to get the solution for the puzzle machine in the room. However, you'll not be able to input this into the puzzle machine yet, as the only visible writing on the buttons are in braille. A short cutscene will play. |
| 51 |  When you gain control of Grace again, carry Emily (the young girl) back to the Security Manager's Office. Zombies will appear as you proceed so drop Emily off on the couch in the Guard Office to clear the way first. |
| 52 | 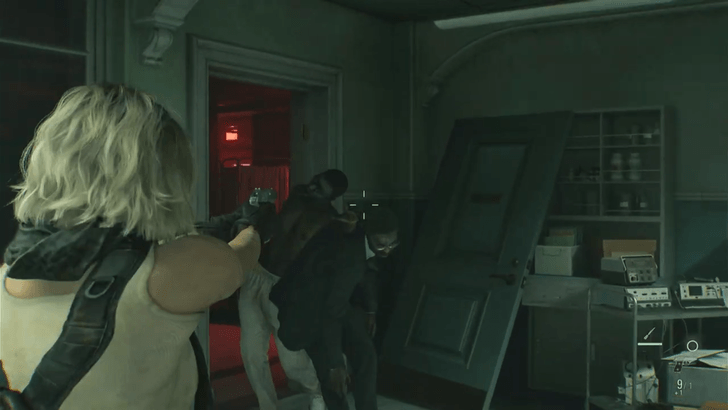 Once done, proceed to the Security Manager's Office with Emily then interct with the puzzle machine so she can start solving it. Zombies will swarm the room so eliminate them all. After killing all the zombies, a cutscene will play. |
| 53 | 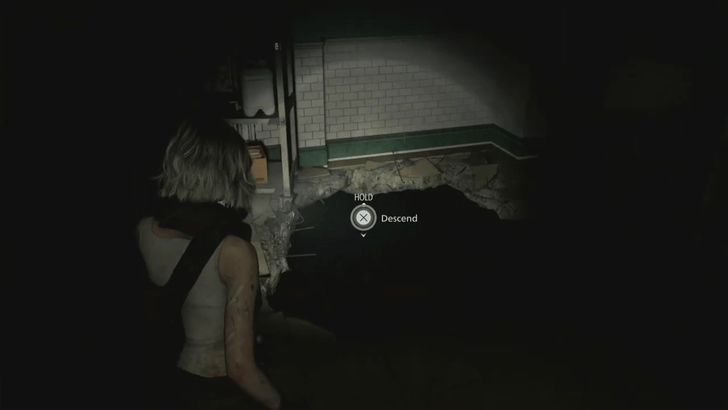 To continue, head down the large hole leading to the basement. Before you do so, it's recommended to explore the Care Center and collect all the items first before proceeding. This ends Grace's second part in the Care Center. |
Find Victor's Office
| Walkthrough | |
|---|---|
| 1 |  Follow the path and look for a way to leave the attic. You can just follow the path until you reach the other room. You can loot the items as you go, as you will be needing them on the next step. |
| 2 | 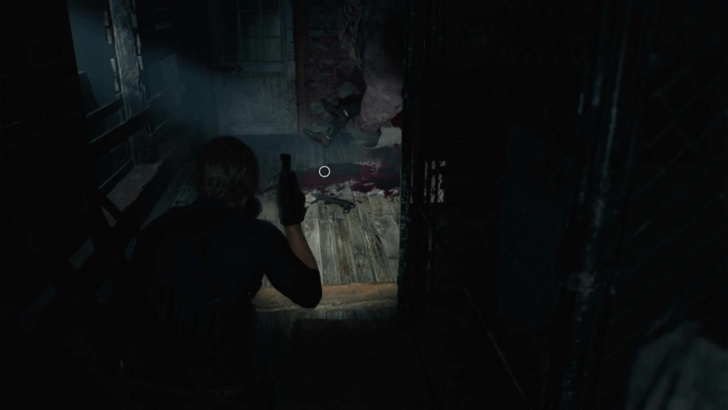 You will eventually reach a room with a Chunk eating an officer. Make sure to move carefully to not alert him, then pick up the MSBG 500 shotgun at his feet. Eliminate Chunk with the use of the shotgun you picked. You are required to kill him as you won't be able to open the door to the other room. ▶︎ How to Beat Chunk |
| 3 | Once you've defeated Chunk, he will drop two Hand Grenades. You can then search for any leftover items and leave the area after. |
| * | 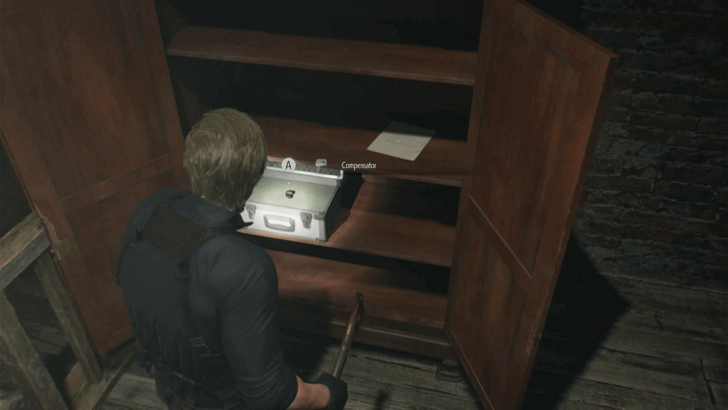 On the path towards the next area you'll find a warped cabinet. Open it to find your first weapon Custom Part, the Compensator, and the Basement Safe Code file. Attach the Compensator to the Alligator Snapper. |
| 4 | 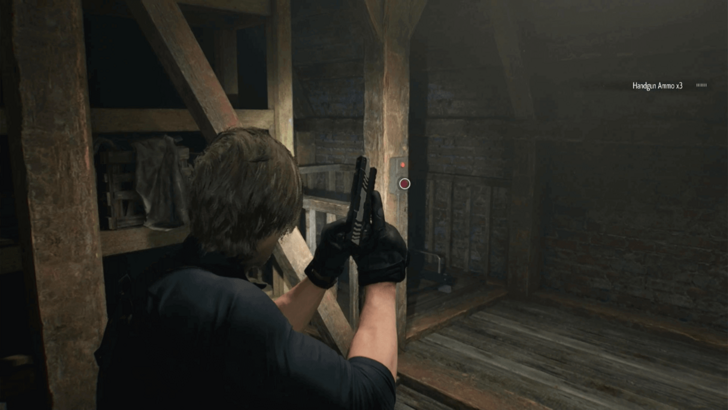 Continue to the Attic Storage until you find a panel with a red button. Press it to lower down a ladder, then climb down to get to the Chairman's Office. |
| 5 | 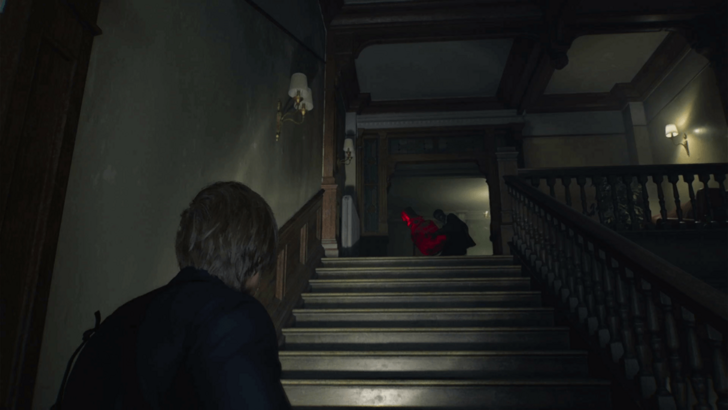 Make your way to the top floor on the West Wing.On the last set of stairs, there will be an enemy holding a gas tank. Shoot the gas tank to blow it up along with the enemy, or else he will throw it at you. |
| 6 | Enter the locked door at the top floor by using your hatchet. |
Search Victor's Office
| Walkthrough | |
|---|---|
| 1 | 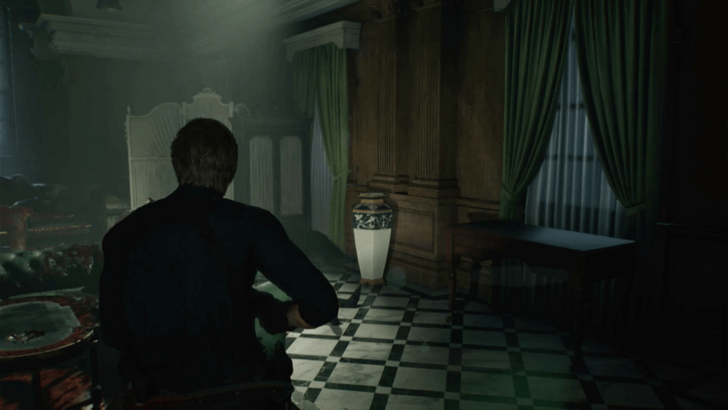 Once inside the Lounge, break the vases in the room to collect shotgun shells. The corpses will then start to mutate into Blister Heads. Take out all the enemies then search the whole area for remaining loot. |
| 2 | 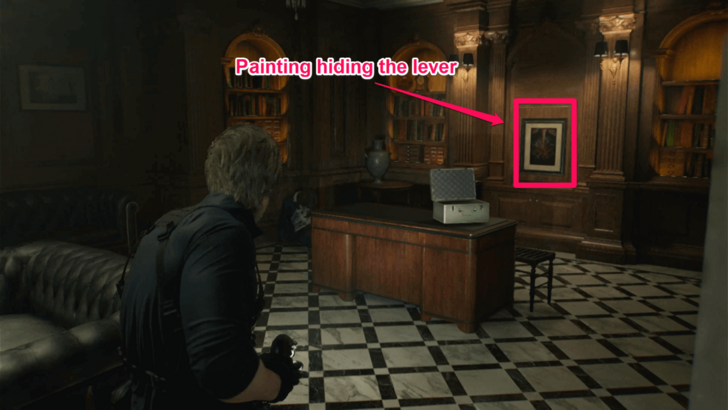 Interact with the painting behind the Director's desk to reveal a hidden lever. Turn the lever to open the secret passage. This will create noise which will reanimate another round of corpses into Blister Heads. |
| 3 | After you've cleared all the enemies, proceed into the secret passage and ride the elevator. |
Care Center Basement Walkthrough
Resident Evil Requiem (RE9) Related Guides

Main Story Order
| # | Walkthroughs |
|---|---|
| 1 | Wrenwood |
| 2 | Care Center |
| 3 | Care Center Basement |
| 4 | Care Center Courtyard |
| 5 | Water Treatment Plant |
| 6 | East Raccoon City |
| 7 | Raccoon City Center |
| 8 | Orphanage |
| 9 | ARK |
Comment
Author

Care Center Walkthrough
Premium Articles
Rankings
- We could not find the message board you were looking for.
Gaming News


![Death Stranding 2: On The Beach [PC] Review | A Port That Delivers](https://img.game8.co/4447392/15310a0c9aa1b6843bb713b2ea216930.jpeg/thumb)

Popular Games

Genshin Impact Walkthrough & Guides Wiki
Umamusume: Pretty Derby Walkthrough & Guides Wiki
Pokemon Pokopia Walkthrough & Guides Wiki
Honkai: Star Rail Walkthrough & Guides Wiki
Monster Hunter Stories 3: Twisted Reflection Walkthrough & Guides Wiki
Arknights: Endfield Walkthrough & Guides Wiki
Wuthering Waves Walkthrough & Guides Wiki
Zenless Zone Zero Walkthrough & Guides Wiki
Pokemon TCG Pocket (PTCGP) Strategies & Guides Wiki
Monster Hunter Wilds Walkthrough & Guides Wiki


Recommended Games
Fire Emblem Heroes (FEH) Walkthrough & Guides Wiki
Diablo 4: Vessel of Hatred Walkthrough & Guides Wiki
Cyberpunk 2077: Ultimate Edition Walkthrough & Guides Wiki
Yu-Gi-Oh! Master Duel Walkthrough & Guides Wiki
Super Smash Bros. Ultimate Walkthrough & Guides Wiki
Pokemon Brilliant Diamond and Shining Pearl (BDSP) Walkthrough & Guides Wiki
Elden Ring Shadow of the Erdtree Walkthrough & Guides Wiki
Monster Hunter World Walkthrough & Guides Wiki
The Legend of Zelda: Tears of the Kingdom Walkthrough & Guides Wiki
Persona 3 Reload Walkthrough & Guides Wiki


All rights reserved
©CAPCOM U.S.A., INC. ALL RIGHTS RESERVED.
The copyrights of videos of games used in our content and other intellectual property rights belong to the provider of the game.
The contents we provide on this site were created personally by members of the Game8 editorial department.
We refuse the right to reuse or repost content taken without our permission such as data or images to other sites.