Care Center Courtyard Walkthrough
This is a walkthrough for the Care Center Courtyard chapter in Resident Evil Requiem (RE9). Read on for a complete Care Center Courtyard walkthrough, including its objectives, key items, and how to complete the quest.
| ◀ Previous | Next ▶ |
|---|---|
| Care Center Basement | Water Treatment Plant |
List of Contents
Care Center Courtyard Walkthrough
Click on a step to jump to its section in the walkthrough!
Escape via the Courtyard
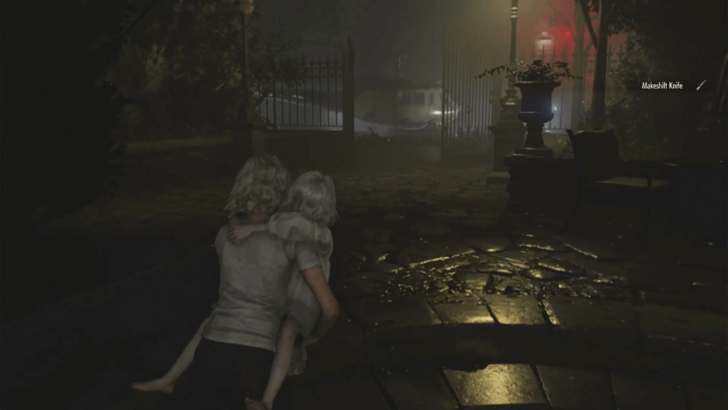
Once you're out of the building, head down the stairs to the Courtyard grounds then turn left and go straight out of the gate until you reach the Helipad.
Note: You can pick up the items scattered around the Courtyard first before heading out the gate. There is an Antique Coin in one of the white chairs in the Courtyard.
Find the Helicopter Key
| Walkthrough | |
|---|---|
| 1 | 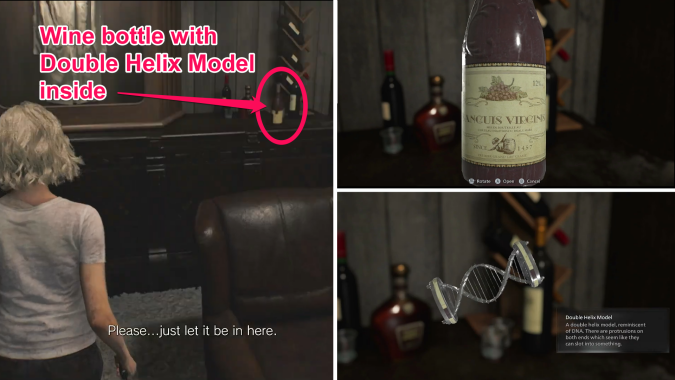 After the cutscene, enter the house and proceed to the next room down the corridor, which is the VIP Suite. Inspect the wine bottle near the set of saws in a display case. Zoom it enough to examine more, then rotate it to the right to align its label. This will open up the bottle in half, and you'll get the Double Helix Model from inside. |
| 2 | 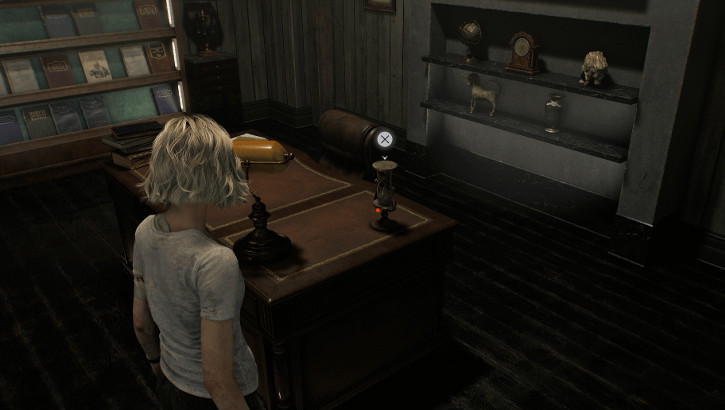 On top of the office table is an Hourglass you can examine and take. This item bears a clue related to the Final Puzzle that can only be solved on a second playthrough. ▶ Final Puzzle Guide |
| 3 | 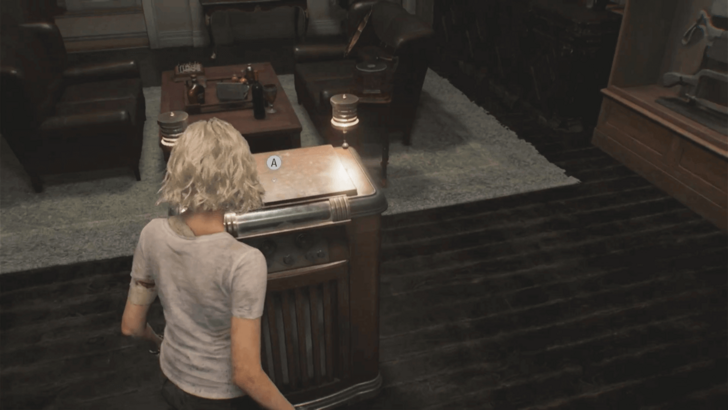 Lastly, interact with the podium in the room. After it opens up, insert the Double Helix Model on it. This will trigger a mechanism that will take you down to the lower level. |
| 4 | Once the floor is settled, go to the next room which is the Reception. This is the Safe Room in this area, where there is a Typewriter and Storage Chest. |
| 5 | 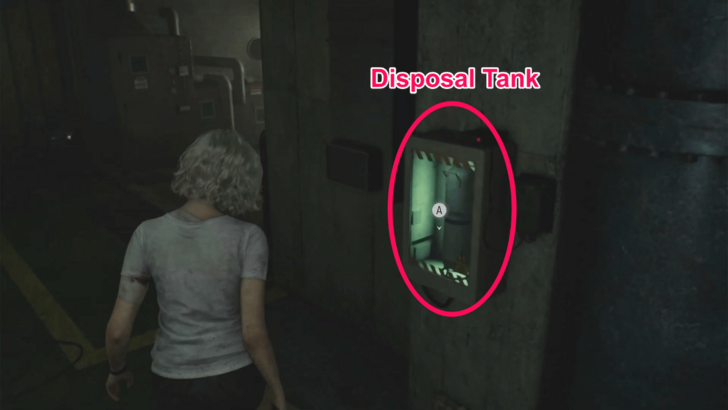 When you're done in the Reception, head down the stairs to find the Collection & Testing area. There's nothing required to do here yet, but take note of the locations of the Disposal Tanks on the wall. |
| 6 | 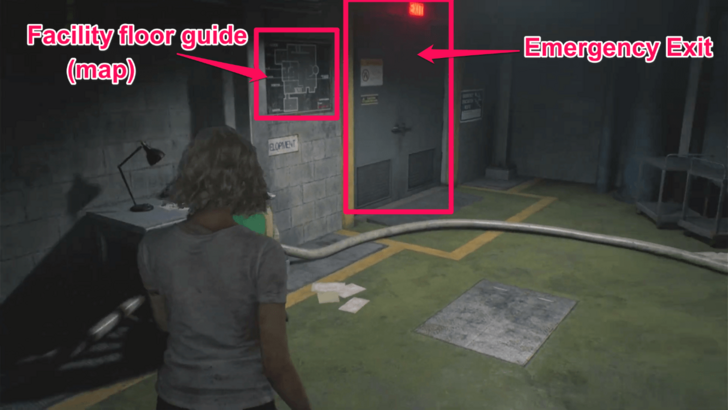 Next, inspect the floor guide on the wall to get a complete map of the facility and take note of the Emergency Evacuation Route. |
| 7 | Afterwards, go up the stairs to the Development area and proceed to the Private Lab. |
| 8 | 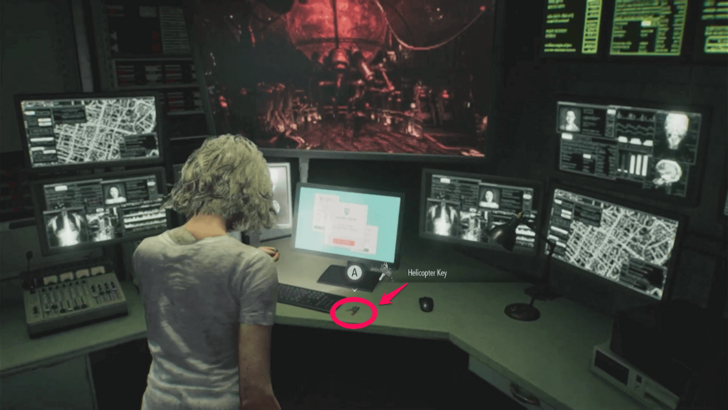 Continue ahead until you reach the monitors to find the Helicopter Key beside the keyboard. |
Return to the Helicopter
| Walkthrough | |
|---|---|
| 1 | 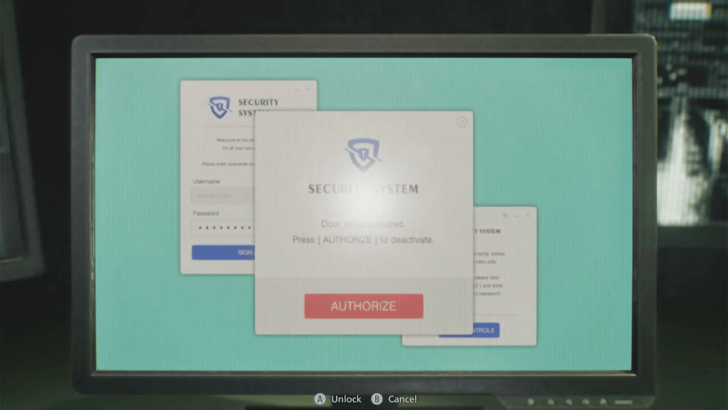 Examine the monitor with colored screen on the desk, then confirm Authorize to unlock the doors. Exiting the door will trigger a cutscene. |
| 2 | Quickly leave the Control Room. On the other side of the door, you will find that you are back at the Reception. The VIP Suite lift is gone, so you'll have to go around the Collection & Testing area and head to the Evacuation Route. |
| 3 | 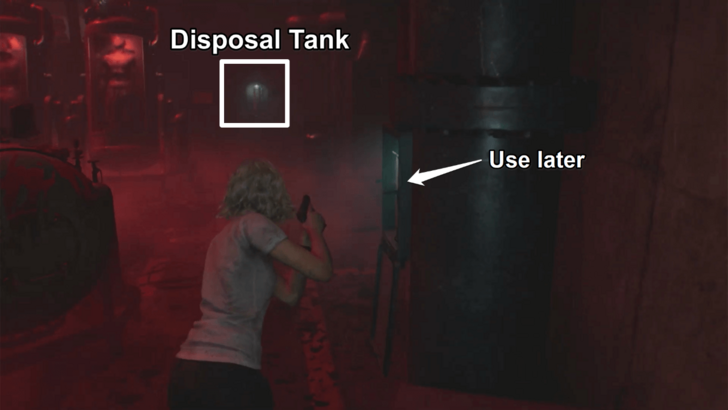 Grab the Disposal Tank at the right end of the room, then aim and spray to kill the enemies and clear your path. Skip the closest tank for now and pick it up later; this allows you to use every available tank as you cross to the other end towards the Evacuation Route. The tanks have limited charge, so you'll need to grab a new one when the tank you are using runs out. Note: It is possible to sprint to the other side of the room and bypass the enemies entirely without using the spray, but use caution as they will attempt to grab you. ▶ Speedrun Guide |
| 4 | Once you get to the Evacuation Route, follow the passage until you reach a large area with several mutating infected. You won't have to fight them. |
| 5 | 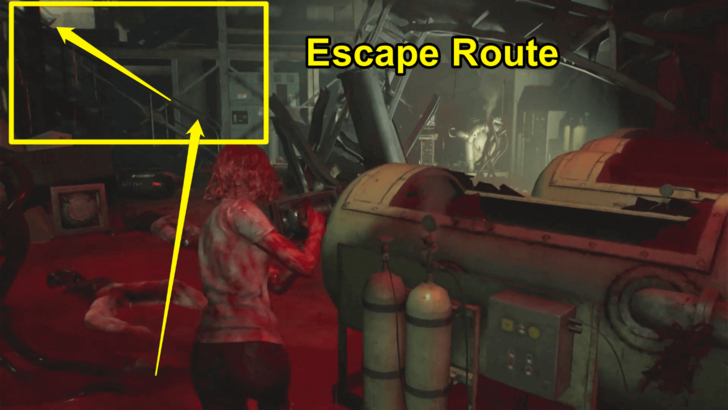 After the short scene, go up the stairs to the left. Note: If you completed the steps for the Final Puzzle, you'll be able to pick up Marie's Doll at the bottom of the stairs. |
Escape the Facility
| Walkthrough | |
|---|---|
| 1 | 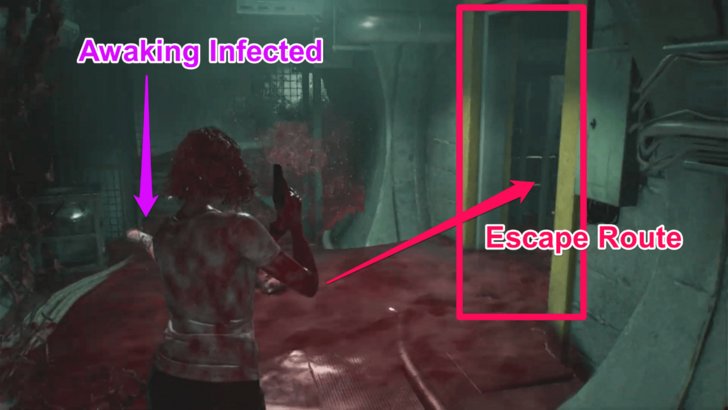 Keep running until you see a seemingly dead-end hallway with a corpse in front. |
| 2 | 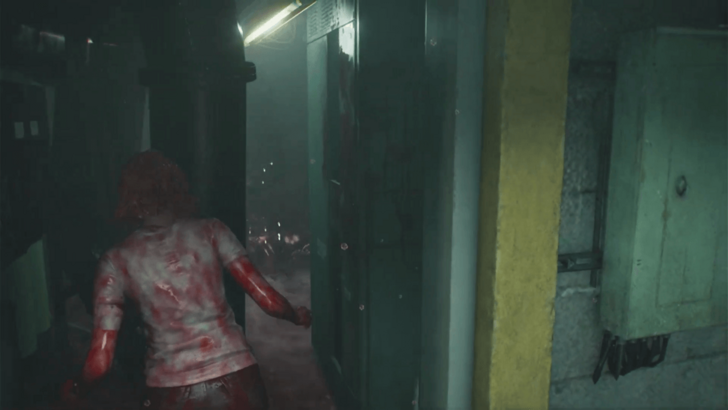 Move fast to avoid the corpse as it awakens. Turn to your right and slip through the space between the large pipe and lockers. |
| 3 |  Keep going forward, but be careful when you get to the last flight of stairs as an object will come rolling down with the blood flood and may hit you. Stick to your left as you run up the stairs to avoid it, otherwise you'll take damage. |
| 4 | 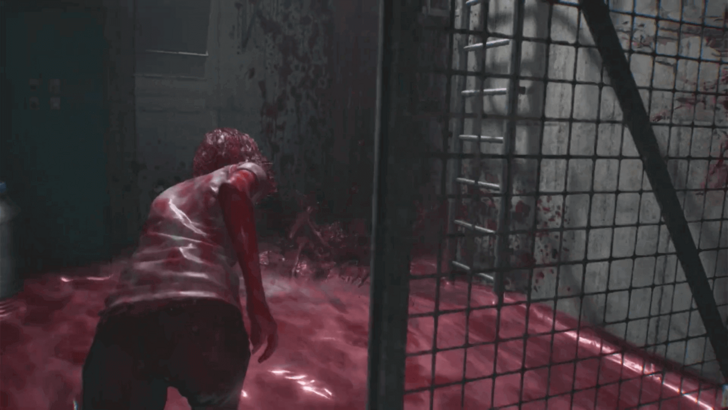 Continue ahead until you reach the ladder. Climb up to return to the surface. |
| 5 | Exit through the door and run down the path. |
Return to the Helicopter
| Walkthrough | |
|---|---|
| 1 | 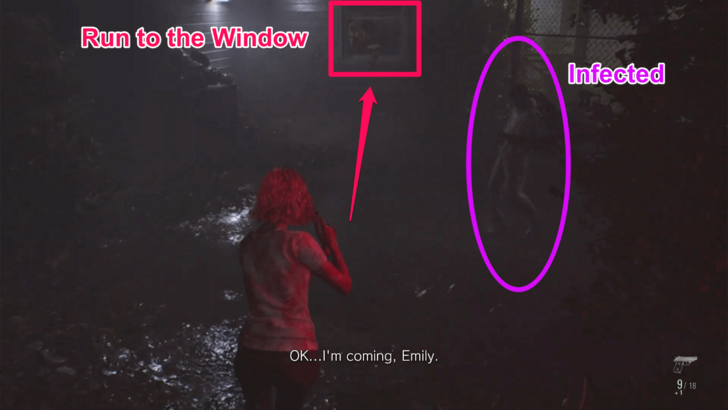 After going down the stairs, you'll be at the yard to the side of the house. An infected zombie will apear as you follow the path. You can simply ignore it and run towards the window of the house. |
| 2 | 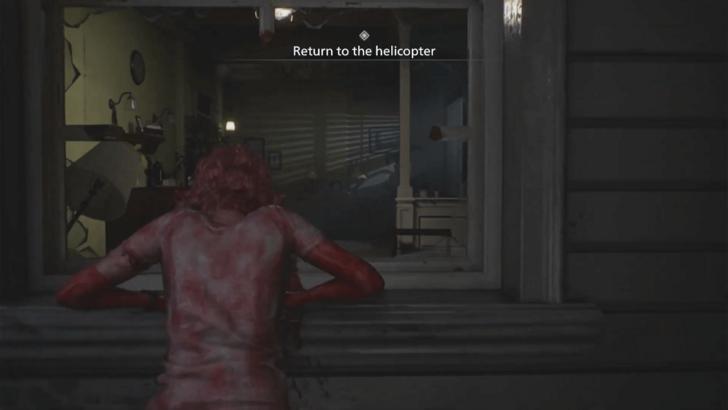 Vault over to get inside the house, then head to the Helicopter. |
Rescue Grace
| Walkthrough | |
|---|---|
| 1 | 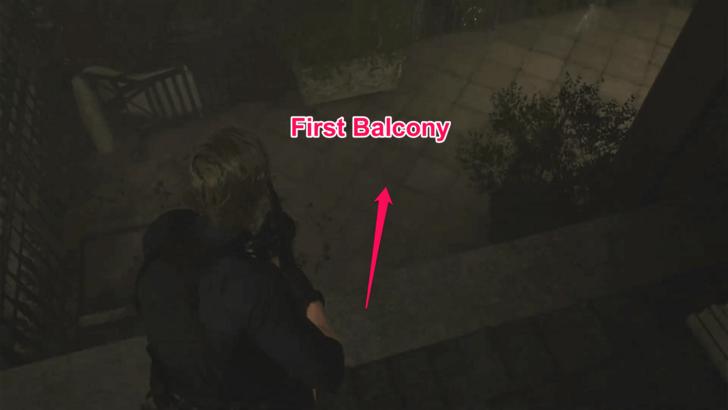 Vault over the window and follow the path to the other end of the roof, then jump down to the balcony. Note: During the second playthrough, Leon won't have the Classic 70 in his inventory despite the cutscene showing him picking it up. You will need to buy the rifle from the Supply Box for you to be able to use the correct gun in this section. Otherwise, you'll be left with just a handgun. |
| 2 | 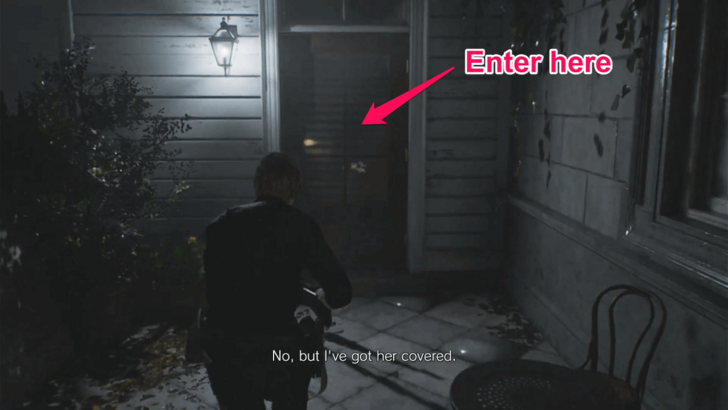 Continue ahead until you reach the door. |
Help Grace
| Walkthrough | |
|---|---|
| 1 | 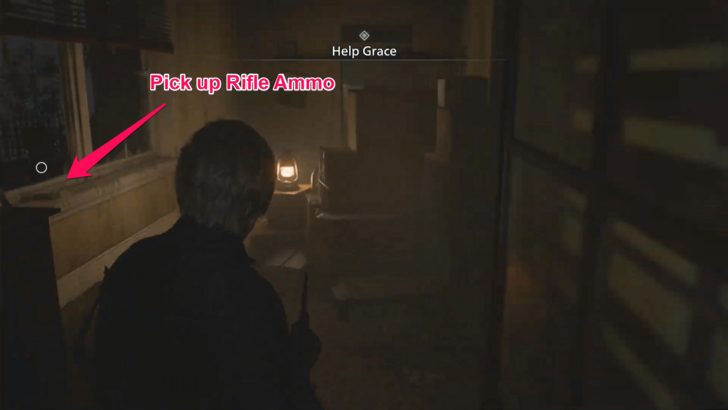 Enter through the door then pick up the Rifle Ammo by the window. |
| 2 | 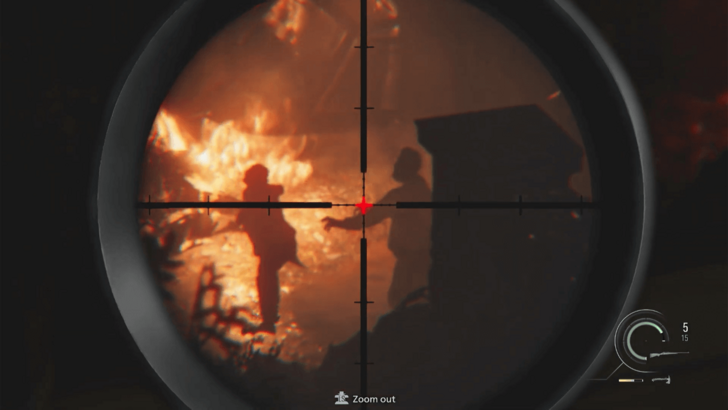 Afterwards, by the window where you got the rifle ammo, aim your scope at the burning yard. Help Grace by shooting down the infected that are attacking her and are in the vicinity to keep them away from her. |
| 3 |  Once Grace and Emily has moved on to the next section of the burning yard, head straight to the balcony in the next room. Break the crate on the balcony to get more rifle ammo. |
| 4 | Keep in mind that the rifle you have, the Classic 70, takes a while to reload. Make sure to reload when you see that there are no zombies close enough to Grace, so that you won't be caught off guard reloading when she's currently being attacked. Continue killing off the zombies as they come. |
| 5 | 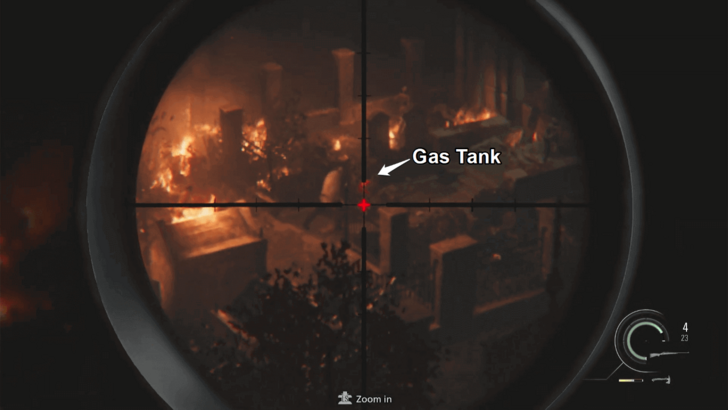 After you have killed a few zombies, a large zombie like the Chef will arrive. Shoot the red gas tank when he gets close to it to blow it up and eliminate him faster. Once all the attacking infected are dead, Leon can then head to Grace. Note: Before jumping off the ledge, head back to the window at the previous room. Make sure to shoot the Raccoon beside one of the lamp on the stone pillars, as you won't be able to get back to it once Leon goes down to the chapel courtyard. ▶ Points of No Return and Missables |
Head to the Chapel
| Walkthrough | |
|---|---|
| 1 | 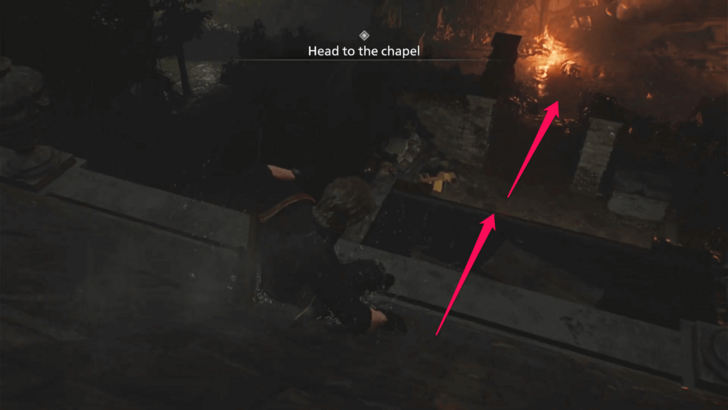 Head towards the chapel by jumping over the balcony. |
| 2 | Clear out the zombies that appear in the burning yard, then head into the chapel. Entering will trigger a cutscene. |
Fight Off the Infected
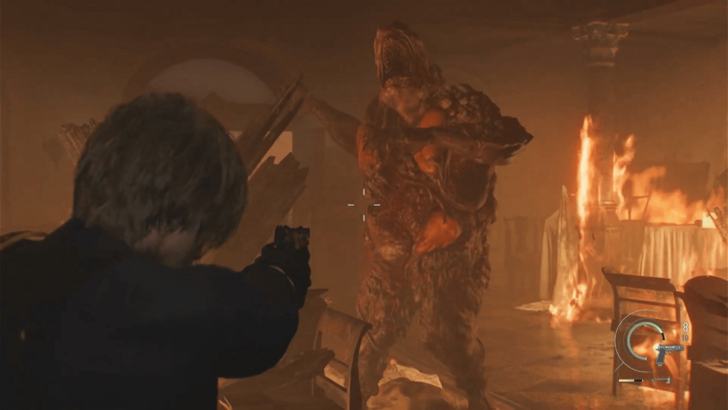
After the cutscene, you'll be thrust into a boss fight against Blister Borne. You need to shoot all the cysts in his body to kill Blister Borne. However, every time you pop one cyst, a wave of zombies will appear. When this happens deal with the minions first.
Be careful as Blister Borne can mutate zombies into Blister Heads. You can lure the regular enemies on the narrow second floor to make it easier to pick them off. Make use of the Axe that the zombies drop as well, it can stagger Blister Borne and the Blister Heads.
Water Treatment Plant Walkthrough
Resident Evil Requiem (RE9) Related Guides

Main Story Order
| # | Walkthroughs |
|---|---|
| 1 | Wrenwood |
| 2 | Care Center |
| 3 | Care Center Basement |
| 4 | Care Center Courtyard |
| 5 | Water Treatment Plant |
| 6 | East Raccoon City |
| 7 | Raccoon City Center |
| 8 | Orphanage |
| 9 | ARK |
Comment
Author

Care Center Courtyard Walkthrough
Premium Articles
Rankings
- We could not find the message board you were looking for.
Gaming News

![Death Stranding 2: On The Beach [PC] Review | A Port That Delivers](https://img.game8.co/4447392/15310a0c9aa1b6843bb713b2ea216930.jpeg/show)


Popular Games

Genshin Impact Walkthrough & Guides Wiki
Umamusume: Pretty Derby Walkthrough & Guides Wiki
Crimson Desert Walkthrough & Guides Wiki
Monster Hunter Stories 3: Twisted Reflection Walkthrough & Guides Wiki
Honkai: Star Rail Walkthrough & Guides Wiki
Pokemon Pokopia Walkthrough & Guides Wiki
The Seven Deadly Sins: Origin Walkthrough & Guides Wiki
Wuthering Waves Walkthrough & Guides Wiki
Zenless Zone Zero Walkthrough & Guides Wiki
Arknights: Endfield Walkthrough & Guides Wiki


Recommended Games
Fire Emblem Heroes (FEH) Walkthrough & Guides Wiki
Diablo 4: Vessel of Hatred Walkthrough & Guides Wiki
Cyberpunk 2077: Ultimate Edition Walkthrough & Guides Wiki
Yu-Gi-Oh! Master Duel Walkthrough & Guides Wiki
Super Smash Bros. Ultimate Walkthrough & Guides Wiki
Pokemon Brilliant Diamond and Shining Pearl (BDSP) Walkthrough & Guides Wiki
Elden Ring Shadow of the Erdtree Walkthrough & Guides Wiki
Monster Hunter World Walkthrough & Guides Wiki
The Legend of Zelda: Tears of the Kingdom Walkthrough & Guides Wiki
Persona 3 Reload Walkthrough & Guides Wiki


All rights reserved
©CAPCOM U.S.A., INC. ALL RIGHTS RESERVED.
The copyrights of videos of games used in our content and other intellectual property rights belong to the provider of the game.
The contents we provide on this site were created personally by members of the Game8 editorial department.
We refuse the right to reuse or repost content taken without our permission such as data or images to other sites.