Care Center Basement Walkthrough

This is a walkthrough for the Care Center Basement chapter in Resident Evil Requiem (RE9). Read on for a complete Care Center Basement walkthrough, including its objectives, key items, and how to complete the quest.
| ◀ Previous | Next ▶ |
|---|---|
| Care Center | Care Center Courtyard |
List of Contents
Care Center Basement Walkthrough
| 1 | Rescue Emily |
|---|---|
| 2 | Find the Joint Plugs |
| 3 | Unlock the Cells |
| 4 | Escape via the Elevator |
| 5 | Unlock the Door at the Central Hall |
Click on a step to jump to its section in the walkthrough!
Rescue Emily
| Walkthrough | |
|---|---|
| 1 |  Continue following the tunnel until you reach the Security Room. It is the Safe Room in this floor where you can save your progress and store your items. |
| 2 | Once you're ready, leave the Security Room then turn right towards the Holding Cells. There is no need to kill the infected in the cells as they won't be able to attack you anyway. |
| 3 | 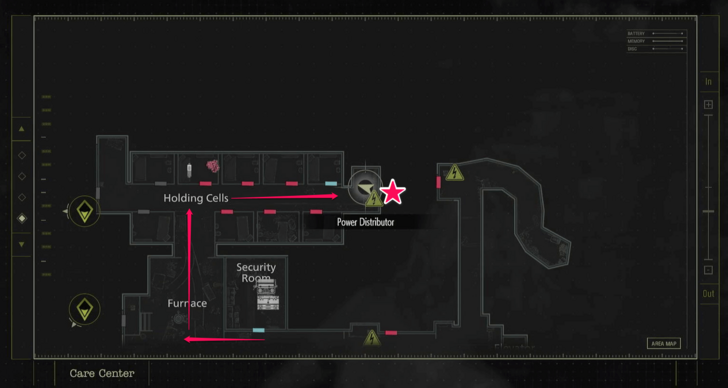 After the cutscene, proceed to the end of the cell block towards the right. Inside the open cell is a Scrap for crafting. Turn to the wall to find a Power Control System. |
| 4 | 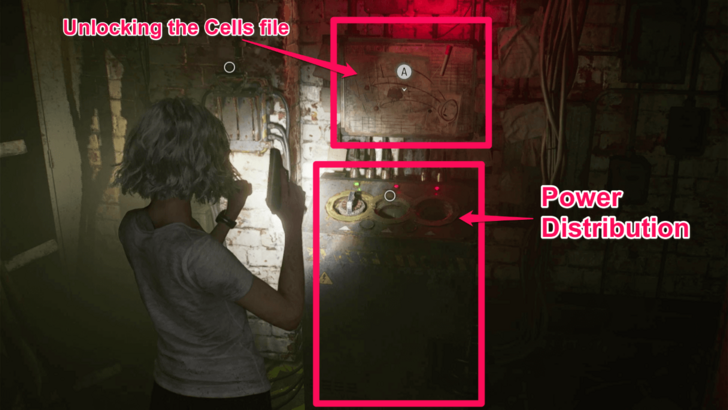 Examine the document on the wall to get the file Unlocking the Cells and to understand how the power system works. Then, remove the Joint Plug on the slot. |
Find the Joint Plugs
| Walkthrough | |
|---|---|
| 1 | You will need two more Joint Plugs in order release Emily. One can be found in the room beyond the Furnace area and the other in the Processing area. |
| 2 | 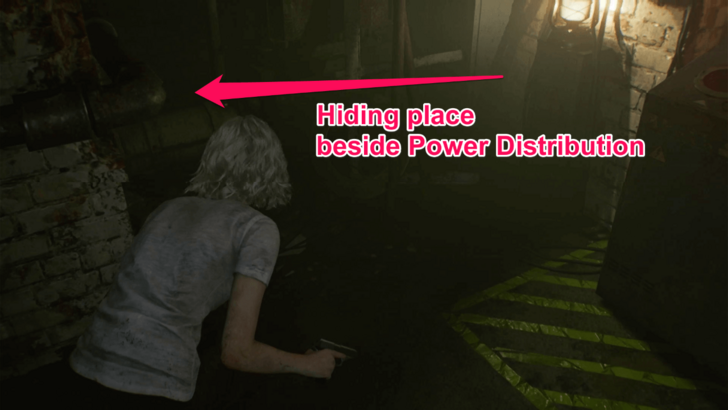 After removing the Joint Plug and walking back, The Girl will appear. Turn off your flashlight and hide inside the open cell or stick to the corner crevice beside the Power Distribution, then wait for it to turn around and leave. Don't move to not make any noise or it will notice you. |
| 3 | 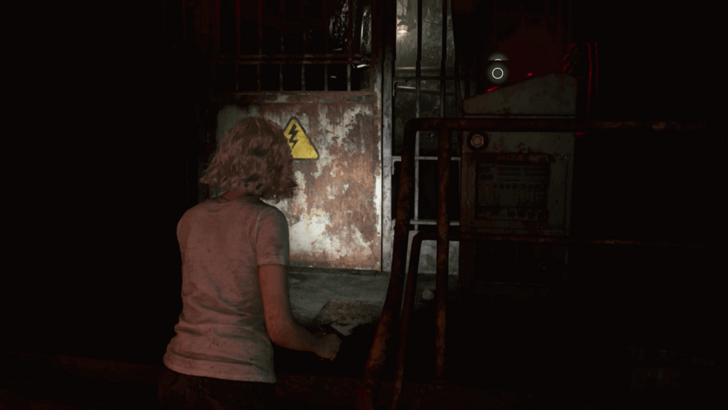 Once The Girl is gone, exit your hiding place and head to the Furnace area. Insert the Joint Plug on the power distributon terminal to get to the room leading to Workshop and Inspection room. |
| 4 | 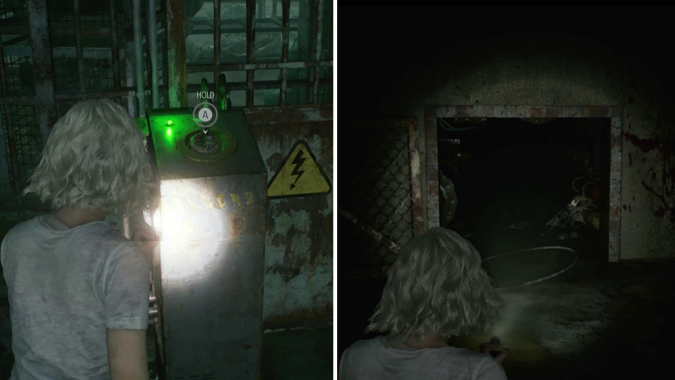 Remove the Joint Plug on the slot near the fork lift. Then, crawl your way through the vent towards the Workshop. |
| 5 | 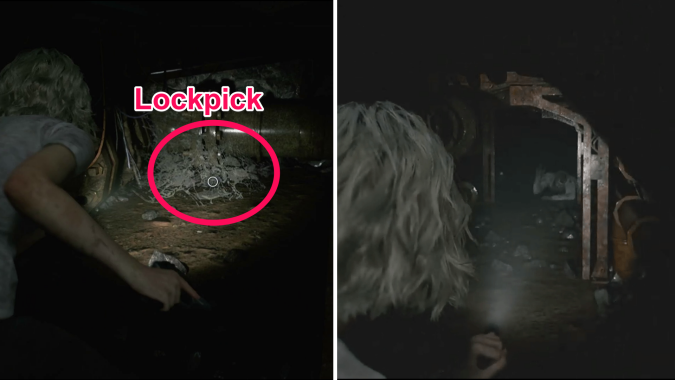 Pick up the Lockpick you'll come across in the vent tunnel. When you're near the vent exit, you will see a struggling infected. Don't open fire. Hault your movement and simply wait until The Girl leaves. Once she's gone, come out of the vent. Exit the Workshop by climbing the box in the corner and vaulting over the hole above it. |
| 6 | Leave the Joint Plug on the Furnace for now, so you'll have a lighted space you can run off to later. Head down the corridor of the Security Room, then insert the Joint Plug to the power distribution slot near it to open up the Boiler Room. |
| 7 | 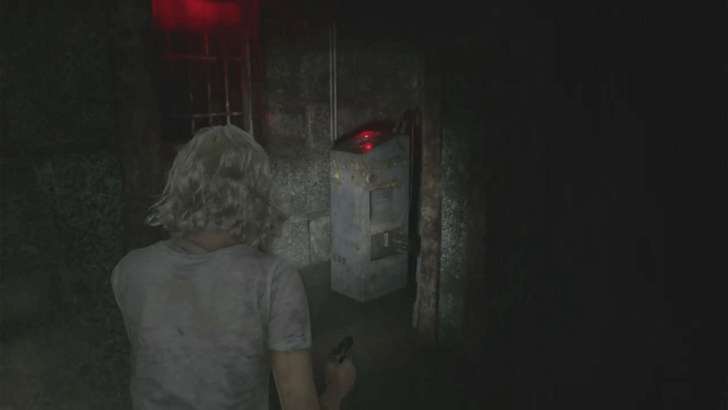 Remove the Joint Plug in front of the Boiler Room, then head towards the starting point passage of the Basement. Insert the plug on the first power distribution slot you found earlier. This will light up the other side of the Boiler Room. |
| 8 | 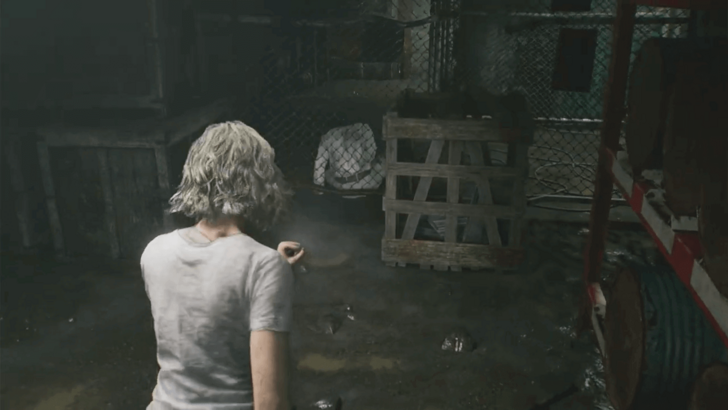 Push the wooden crate that's blocking the hole in the wire fence, then squeeze through. |
| 9 | 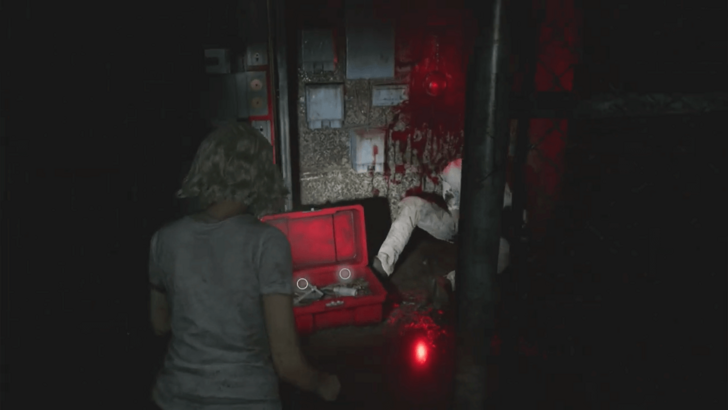 Search the Boiler Room for the red toolbox to get the Square Socket Wrench. Once you take the wrench, The Girl will appear. |
| 10 | 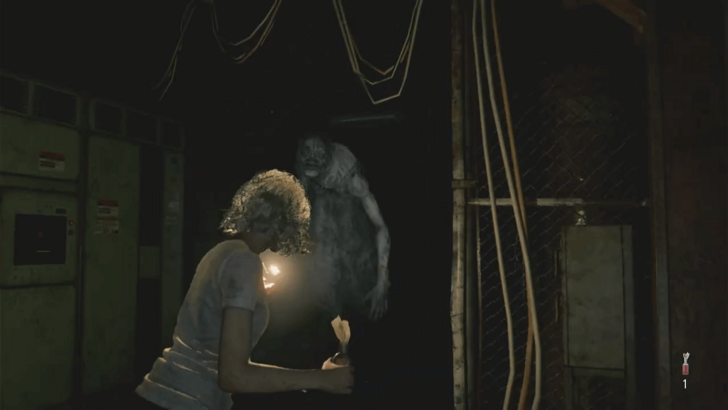 The Girl will feed on the corpse near where you entered, then the corpse near the toolbox. Use the structures to take cover and avoid her. If unfortunately she spots you, throw a Molotov Cocktail on her to make her go away. However, this is only temporary. Quickly run towards the light near the power distribution slot. Remain under the protection of the light until she leaves. |
| 12 | 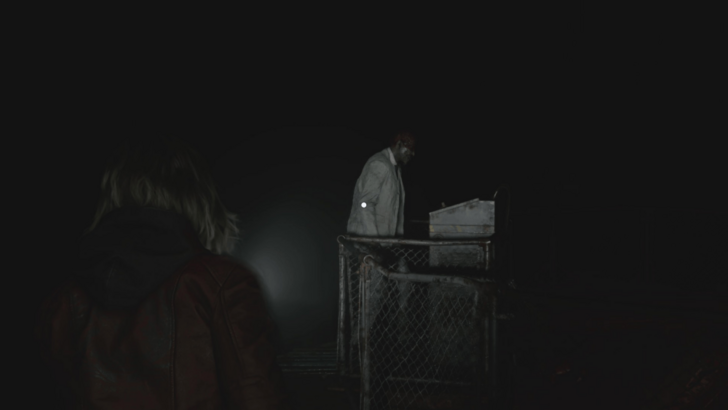 When the coast is clear, remove the Joint Plug and head towards the Collection Pool. You can take the Joint Plug at the Furnace area before going to the Collection Pool if you don't want to go back and forth. Or you can also leave it first then go back for it so you have a lighted space you can retreat to. |
| 13 | 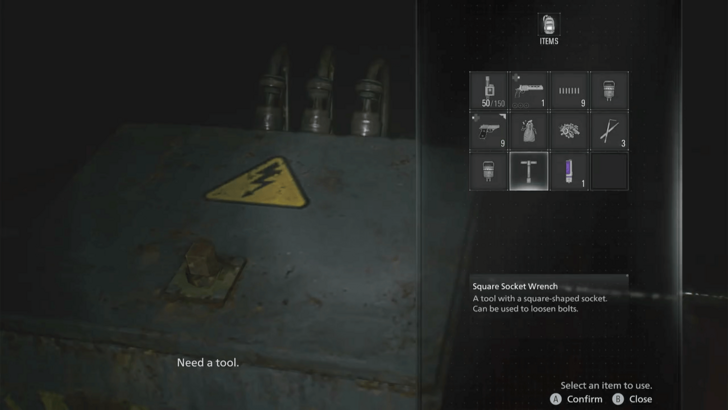 If you didn't retrieve the Joint Plug at the Furnace yet, take this time to retrieve it now. Otherwise if you already have two Joint Plugs on hand, interact with the board and unlock it with the Square Socket Wrench. Then, insert the two Joint Plugs on the two empty slots. |
| 14 | 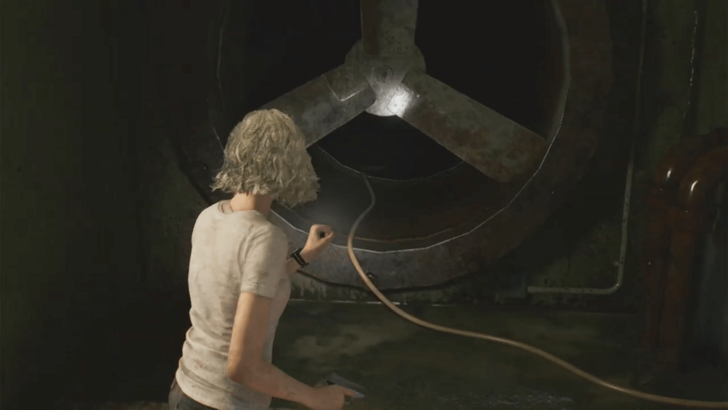 Proceed to the hall leading to the Processing area. However, your path forward will be cut off. Turn to your left to the unpowered fan. Crouch down and go through the vent to the other side. |
| 15 | Once you exit the vent, you'll find a Green Herb between the pipes. Climb the ladder to the side to reach the Processing room proper. |
| 16 | 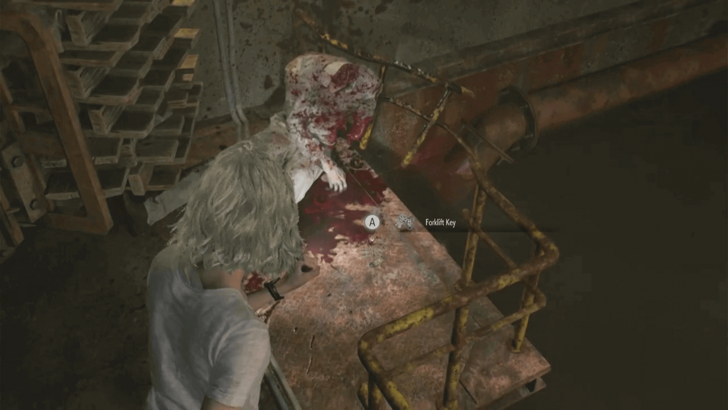 Don't take the Joint Plug yet. Approach the corpse at the end of the platform to find the Forklift Key beside it. You can immediately use it on the forklift nearby to get a Hip Pouch and some other items. |
| 17 | 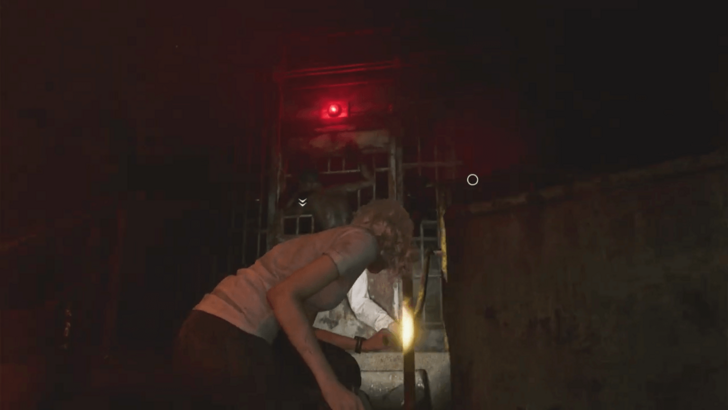 Leave the Joint Plug in the Processing for now. Exit the area through the vent, then take the two Joint Plugs at the Collection Pool and head towards the Workshop. |
| 18 | Insert a Joint Plug at the Workshop, then crawl through the vent. Observe carefully where The Girl is before exiting the vent. When she moves away from the forklift, crawl out of the vent and quickly insert a Joint Plug on the power slot. If she still notices you, shoot her with the Requiem to drive her away. Using Requiem on The Girl and effectively stunning her with it will reward you the Bring Out The Big Guns trophy. |
| 19 | Use the key on the forklift to unblock the path towards the Inspection area. |
| 20 | 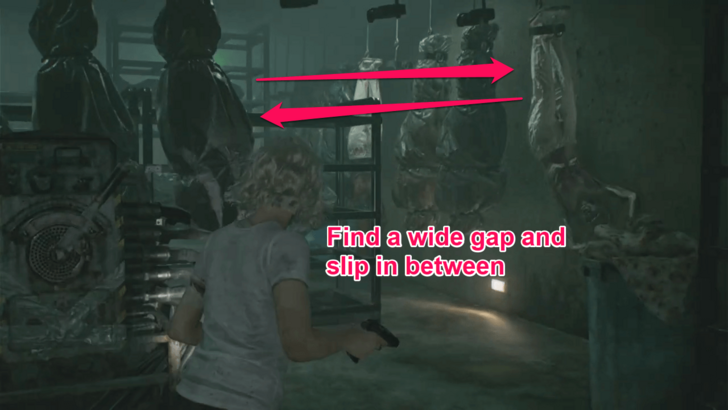 Look for a wide gap between the body bags, ideally with only one infected body not in a bag at the other end. Move alongside the bodies while keeping away from the infected. |
| 21 | 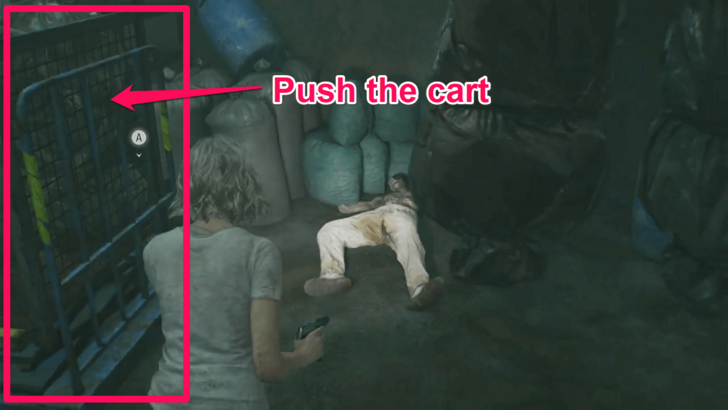 Make a stop at the next section to pick up the ammo on the shelf and push the cart to create a path. Some hanging uncovered infected will fall off from the conveyor, take them out in this space to avoid being sandwiched by enemies. |
| 22 | With a path opened up towards the front, sprint back towards the lever and pull it again. |
| 23 | 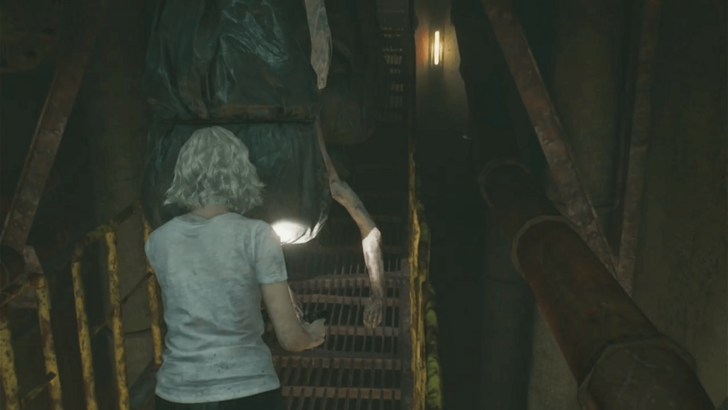 Find another wide gap between the bodies to slip into, ideally with one covered in a bag in front of you. Move alongside the bodies until you reach the Processing pool platform. |
| 24 | 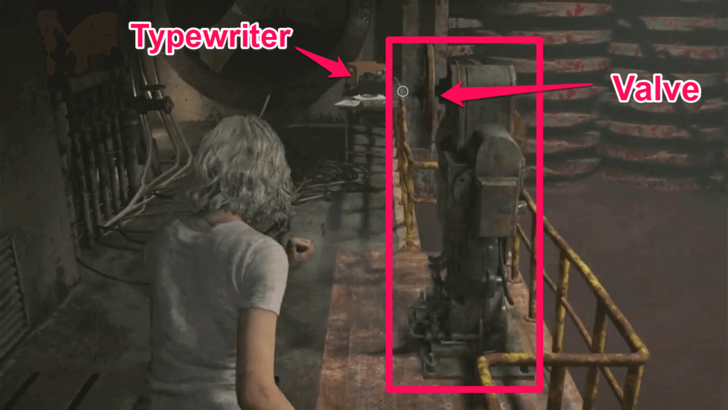 Go towards the valve and turn it to drain the pool. If you want to do the Final Puzzle, make sure to wait for 15 minutes or more first. It needs to be done in your first playthrough, you would have to do another run just to start it. ▶︎ Final Puzzle Steps and Solution |
| 25 | 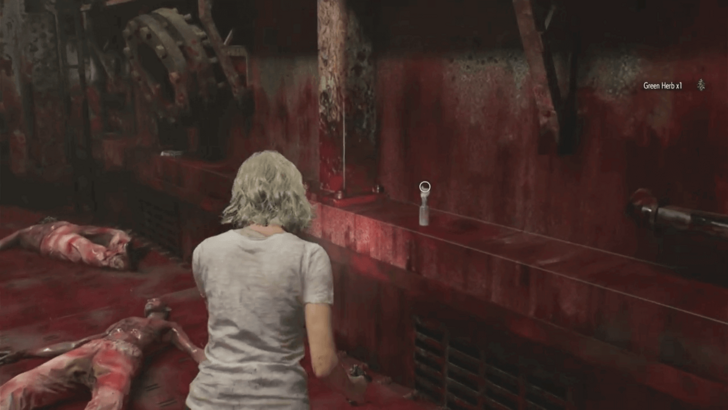 Descend the ladder and quickly grab the Molotov Cocktail and ammos on the side of the pool. |
| 26 | 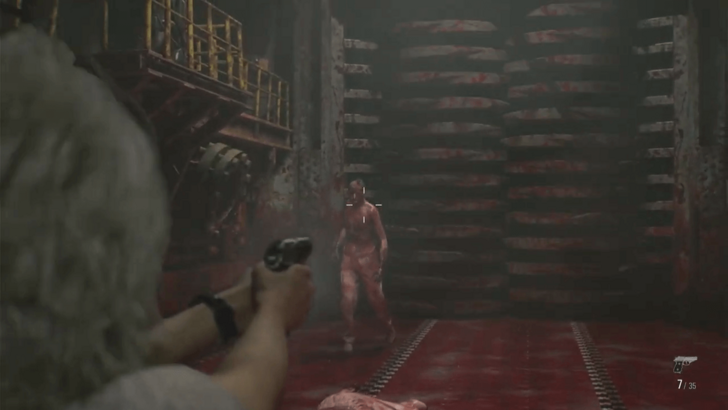 The grinder and the conveyor will activate once you get close to the ladder leading to the next side, destroying everything that it touches. Move to the other end and keep your distance from the zombies that are getting up. If you want to continue with the Final Puzzle, make sure not to kill the zombies yourself and let them get shredded by the grinder. |
| 27 | Once the grinder stops, climb the ladder to the other side of the pool. You can now take third Joint Plug. |
Unlock the Cells
| Walkthrough | |
|---|---|
| 1 | Return to the other side of the Processing area. Be careful as you climb down to the pool, as there may be leftover zombies that will attack you. |
| 2 | 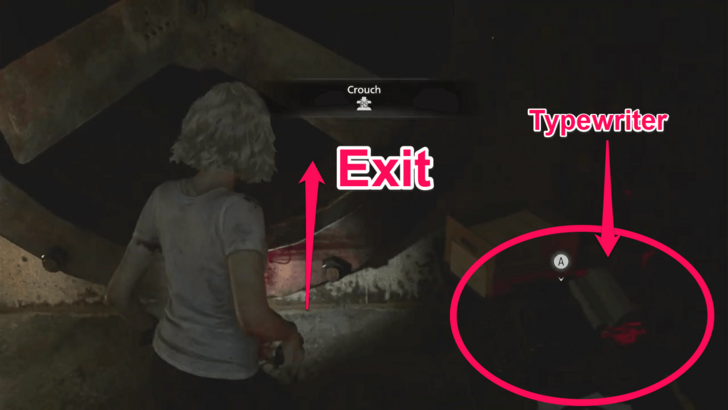 Crawl through the vent beside the Typewriter. This will lead you to the level below the Collection Pool. |
| 3 |  Head towards the Furnace area and place one of the Joint Plugs if you haven't. It will act as a safe space whenever you get chased by The Girl. |
| 4 | 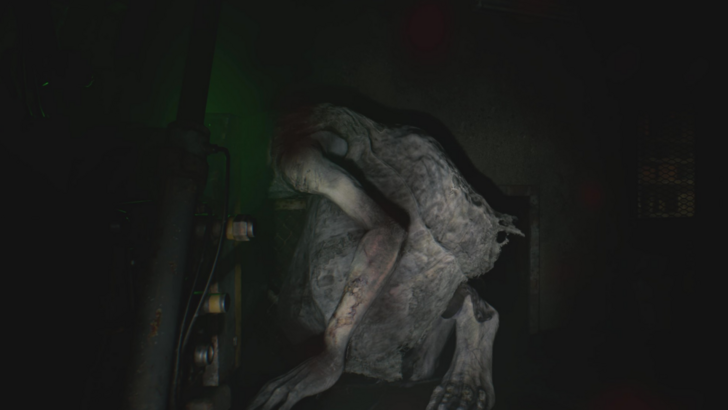 Proceed to the Inspection area and take the Joint Plug there first. Be careful as the corpses will get up on the way and attack you. The Girl will appear on your back after taking the Joint Plug there. Make sure to put it back immediately after taking it to make her go away. You can take it again once she crawls again in the ceiling. |
| 5 | 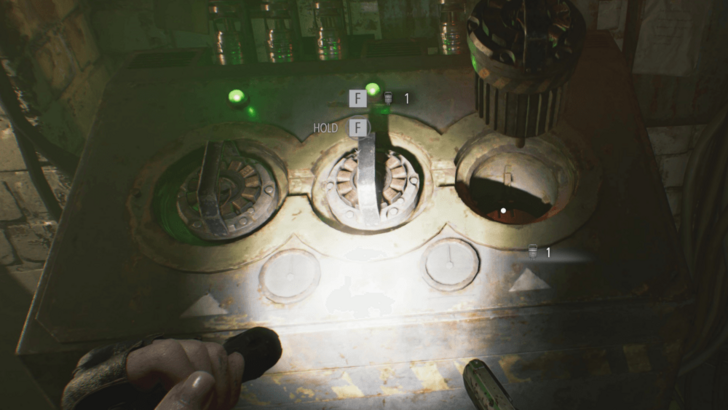 You can now then retrieve the Joint Plugs at the Workshop and the Furnace. By now, you should have all the Joint Plugs needed to open the cells and save Emily. Insert them all on the power system at the end of the hallway. |
Escape via the Elevator
| Walkthrough | |
|---|---|
| 1 | 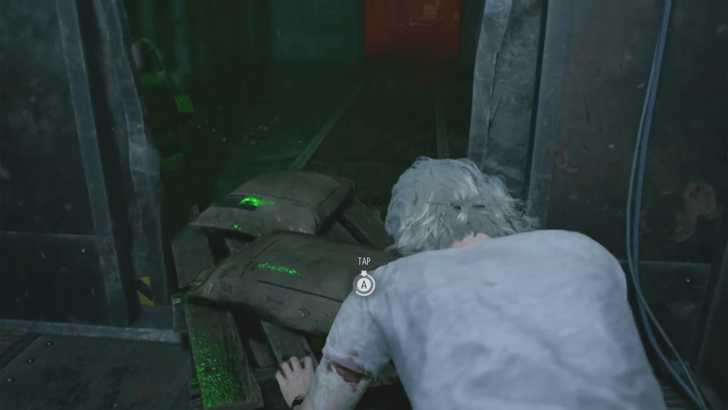 Once you're inside the elevator, Grace will put down Emily. Quickly turn around and push out the object that's preventing the elevator door from closing. Don't mind The Girl and the zombie, just keep pushing. After the obstruction has been removed, the doors will automatically close and the elevator will start going up. |
| 2 | As the elevator nears the top floor, The Girl will start attacking. Don't waste any bullets as you won't be able to hit her anyway. |
| 3 | 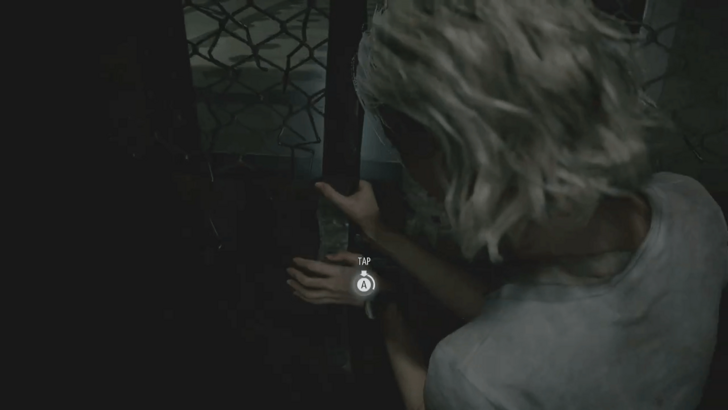 When the elevator stops, that is when you can shoot her with the Requiem. You can also simply avoid her hand and quickly focus on opening the elevator door. |
| 4 | After the cutscene, you'll be back at the 1st floor of the Care Center. |
Unlock the Door at the Central Hall
| Walkthrough | |
|---|---|
| 1 | 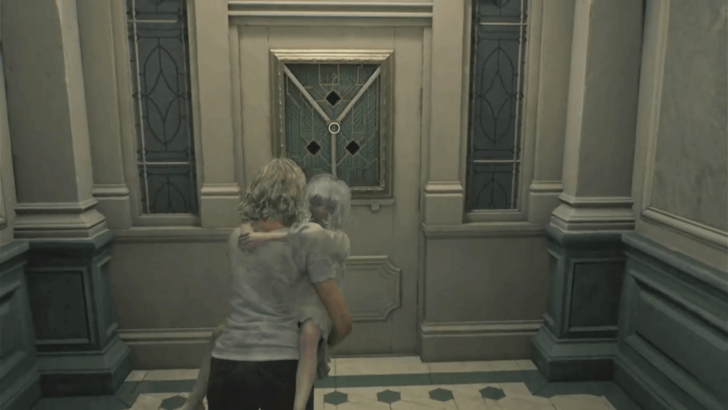 Proceed to the door at the Central Hall and insert the remaining quartz on the holes. |
| 2 | You can now open the door and exit to the Courtyard. |
Care Center Courtyard Walkthrough
Resident Evil Requiem (RE9) Related Guides

Main Story Order
| # | Walkthroughs |
|---|---|
| 1 | Wrenwood |
| 2 | Care Center |
| 3 | Care Center Basement |
| 4 | Care Center Courtyard |
| 5 | Water Treatment Plant |
| 6 | East Raccoon City |
| 7 | Raccoon City Center |
| 8 | Orphanage |
| 9 | ARK |
Comment
Author

Care Center Basement Walkthrough
Premium Articles
Rankings
- We could not find the message board you were looking for.
Gaming News

![Star Savior Review [First Impressions] | Engaging, Entertaining, and Expensive](https://img.game8.co/4447603/8f500e9bf666bdb8adb1af478e9dfdbd.png/show)


Popular Games

Genshin Impact Walkthrough & Guides Wiki
Umamusume: Pretty Derby Walkthrough & Guides Wiki
Crimson Desert Walkthrough & Guides Wiki
Monster Hunter Stories 3: Twisted Reflection Walkthrough & Guides Wiki
Honkai: Star Rail Walkthrough & Guides Wiki
Pokemon Pokopia Walkthrough & Guides Wiki
The Seven Deadly Sins: Origin Walkthrough & Guides Wiki
Wuthering Waves Walkthrough & Guides Wiki
Zenless Zone Zero Walkthrough & Guides Wiki
Arknights: Endfield Walkthrough & Guides Wiki


Recommended Games
Fire Emblem Heroes (FEH) Walkthrough & Guides Wiki
Diablo 4: Vessel of Hatred Walkthrough & Guides Wiki
Cyberpunk 2077: Ultimate Edition Walkthrough & Guides Wiki
Yu-Gi-Oh! Master Duel Walkthrough & Guides Wiki
Super Smash Bros. Ultimate Walkthrough & Guides Wiki
Pokemon Brilliant Diamond and Shining Pearl (BDSP) Walkthrough & Guides Wiki
Elden Ring Shadow of the Erdtree Walkthrough & Guides Wiki
Monster Hunter World Walkthrough & Guides Wiki
The Legend of Zelda: Tears of the Kingdom Walkthrough & Guides Wiki
Persona 3 Reload Walkthrough & Guides Wiki


All rights reserved
©CAPCOM U.S.A., INC. ALL RIGHTS RESERVED.
The copyrights of videos of games used in our content and other intellectual property rights belong to the provider of the game.
The contents we provide on this site were created personally by members of the Game8 editorial department.
We refuse the right to reuse or repost content taken without our permission such as data or images to other sites.