Chapter 3: Seattle Day 2 - The Seraphites Walkthrough
Welcome to Game8's Last of Us Part 2 guide. Feel free to get started by checking out one of our popular guides from the list below!
See our guides for getting 100% of the trophies!
The Jury is out! Read our full spoiler-free review here!

This is a walkthrough for Chapter 3: Seattle Day 2 - The Seraphites in The Last of Us Part 2 (TLOU2). For a list of objectives in this section, items, collectible locations, enemy strategy and other tips & tricks, read on!
| Previous Section | Next Section |
|---|---|
| Finding Strings | St. Mary's Hospital |
List of Contents
Seattle Day 2: The Serpahites Walkthrough
| 1 | Follow Route 5 to track Nora. |
|---|---|
| 2 | Go through the metal door, then go above the wall. |
| 3 | Cross through the Quickmart, then head onto the street. |
| 4 | Continue moving towards Route 5. |
| 5 | Go to the left side of the street, where a gate will be blocking it. Use the red garbage can to jump over. |
| 6 | Get inside the garage and take the other garbage can outside. |
| 7 | Jump over the garbage can and head upstairs. |
| 8 | Upon seeing the St. Mary's hospital, continue moving forward and break one of the window to get inside the building. |
| 9 | Get down using the scaffholding. |
| 10 | Proceed to enter the door with the Suite 13031 sign on it. |
| 11 | You will encounter Stalkers in this area. Proceed down the hallway, then jump over the barricaded doors. |
| 12 | Head to the other end of the area and smash the windows to get out. |
| 13 | At the edge of the building, head upstairs and jump through to cross to the other side. |
| 14 | Enter the broken window after jumping down. You will encounter Clickers and Stalkers in this area. |
| 15 | Go to the other end of the area and exit through the Yellow door. |
| 16 | Swim through the sewers and climb up the ladder. |
| 17 | Move upstairs and exit through the gate of the station. |
| 18 | Cut through the park to reach the Hospital. |
| 19 | While cutting through the park, you will encounter the Seraphites in this area. |
| 20 | After cutting through the park, head inside the building with the fire in front of it. |
| 21 | Go upstairs and enter the master bedroom, then exit through the door. |
| 22 | Use the alleyway to continue moving towards the hospital. |
| 23 | You will encounter more Seraphites on this area. Go prone and use tall grass to sneak past through. |
| 24 | Get inside the abandoned carpark building then, head upstairs to cross through. |
| 25 | Move forward, then jump through the gap and enter the mall. |
| 26 | Get inside the cosmetics shop, then enter the red door. There will be a large man guarding the door. |
| 27 | Squeeze through the double doors, then head upstairs to get through the roof. |
| 28 | Continue moving through the roof, then go down the Ladder. |
| 29 | Swim through the flooded area to get to the hospital. |
| 30 | When you are near the hospital, dive undearneath, then squeeze through the tight space. |
| 31 | Approach the WLF member sitting in the area. |
| 32 | Head upstairs to find Nora. |
| 33 | Get inside the main entrance of the Hospital. |
| 34 | After getting inside, continue moving until you reach the other end of the area, then enter the double doors. |
| 35 | Go upstairs, then go through the vents. |
| 36 | Exit the vents, then confront Nora in the room. |
| 37 | Chase after Nora. |
| 38 | After the cutscene, pit the Clicker against the WLF, then escape through the double doors. |
| 39 | Continue moving forward to chase Nora. |
Seattle Day 2 - The Seraphites Tips and Strategy
Following Route 5
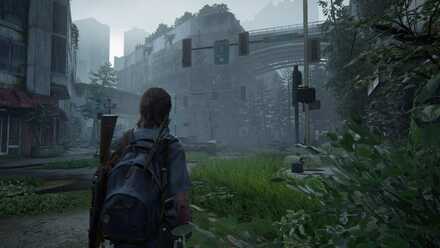
The path to Route 5 is shown using Traffic Signs, making it a lot easier to travel and not get lost.
Taking the Garbage Can outside
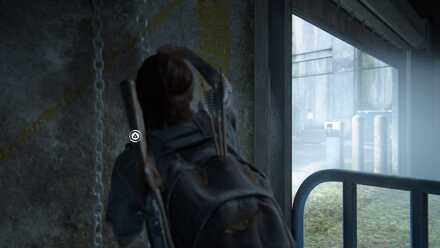
Since this chain door cannot hold up and closes when you let go of it, the garbage can is rather hard to take it out. Use the ramp that can be found inside and put the garbage can there, then let physics do the work and open the chain doors.
Encountering Stalkers
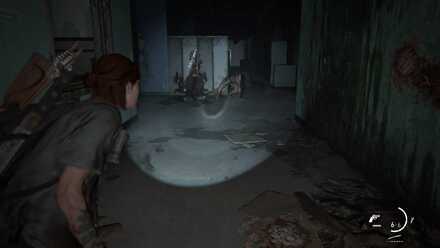
Stalkers are the second stage of infection. They are quiet and hide from their prey, waiting for a perfect time to attack. You can flush them out from hiding by using a Bottle or Brick as a distraction.
Dealing with Seraphites
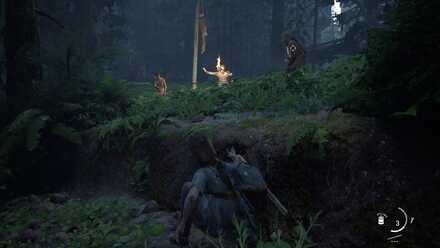
These faction members use Bows and communicate to each other using whistles. When dealing with this group, it is recommended to go prone and use the tall grass as cover to hide from them.
Dealing with the Big Guy with a Sledgehammer
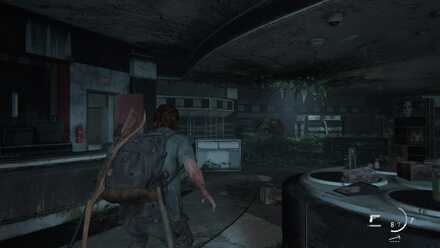
After getting inside the Cosmetics shop, you will encounter a big man guarding the red door. You can use a Stun Bomb and hide from his sight to avoid wasting ammo.
Pitting the Infected against the WLF
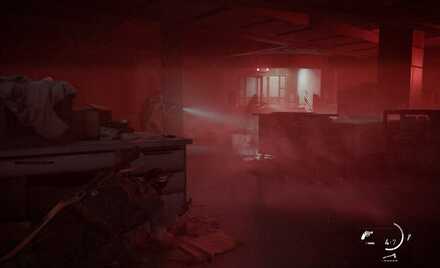
During this event, you can always use the infected and cause a distraction against the WLF members. Take advantage of the confusion, then go straight to the door to escape from them.
Seattle Day 2 - Safe Locations
Apartment Safe Code
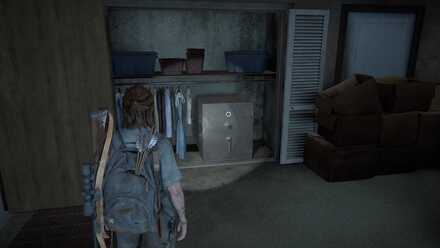
There is an apartment building on the left once the road comes to an end. The front door will be locked, so you will need to enter through the 2nd floor. You can climb a white truck to get in. The safe is in the bedroom closet.
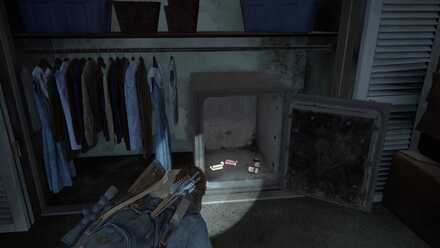
| Safe Combination |
|---|
| 10-08-83 |
Chapter 3: Seattle Day 2 - The Seraphites Walkthrough
Pharmacy Safe Code
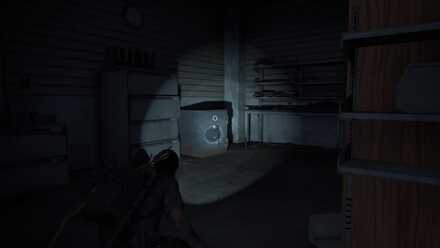
After fighting the seraphites and just before swimming to the hospital, there is a pharmacy to the left, next to the water. There is a safe hidden in the back. To get to the safe, you will need to go prone through a hole in the wall next to the counter. The code is on a shelf behind the counter.
| Safe Combination |
|---|
| 38-55-23 |
Seattle Day 2 - The Serpahites Collectibles
Artifacts
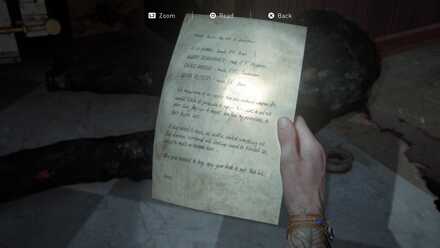 WLF Target List WLF Target List |
|
| Chapter | Seattle Day 2 - The Seraphites |
|---|---|
| Location | This artifact will be dropped by a Runner when you kill them inside the Kingsgate Brewing Co. building. |
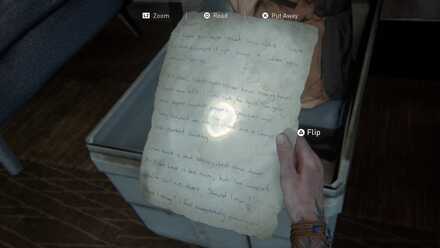 Last Letter to Husband Last Letter to Husband |
|
| Chapter | Seattle Day 2 - The Seraphites |
|---|---|
| Location | This artifact is on the floor beside the couches in the locked room on the second floor of the Conference Center. You can get into the locked room by breaking the nearest window and the glass platform when you look outside to your left, then throwing the rope from the window to the open platform. |
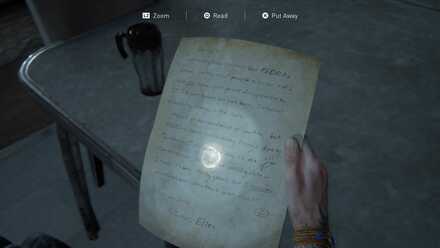 Evacuation Letter Evacuation Letter |
|
| Chapter | Seattle Day 2 - The Seraphites |
|---|---|
| Location | This artifact is on the dining table of the room to your right inside the apartment building |
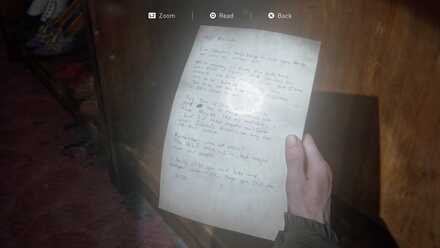 WLF Deserter Letter WLF Deserter Letter |
|
| Chapter | Seattle Day 2 - The Seraphites |
|---|---|
| Location | This artifact is on the table with the TV in the room to your left at the apartment building. You need to interact with the workbench first, then a group will attack you from the locked room before you can enter. |
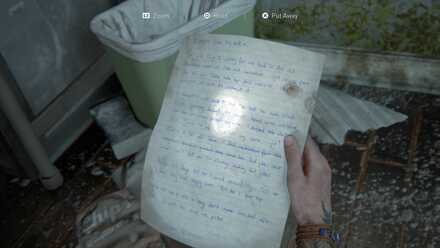 Dying Husband's Plea Dying Husband's Plea |
|
| Chapter | Seattle Day 2 - The Seraphites |
|---|---|
| Location | This artifact is beside a corpse in room 302 on the third floor of the Garden Suites 113. You can get into the room by climbing up the fire escape from room 201 and by breaking the window from the fire escape. |
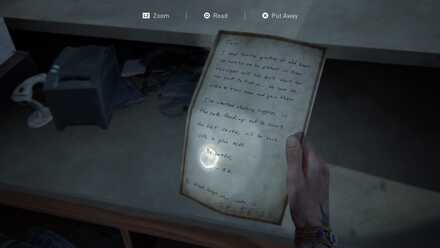 Pharmacy Note Pharmacy Note |
|
| Chapter | Seattle Day 2 - The Seraphites |
|---|---|
| Location | This artifact is on a shelf behind the counter of the Weston's Pharmacy. |
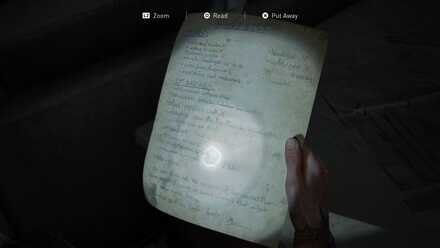 Hospital Supply List Hospital Supply List |
|
| Chapter | Seattle Day 2 - The Seraphites |
|---|---|
| Location | This artifact is on the counter in the next room after you reach the second floor of the hospital. |
Journal Entries
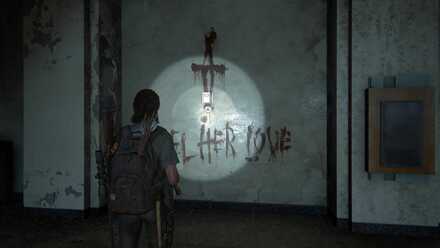 The Message The Message |
|
| Chapter | Seattle Day 2 - The Seraphites |
|---|---|
| Location | This journal entry can be gained by examining the Seraphite message written in blood inside the Conference Center just across the street from Kingsgate Brewing Co.. |
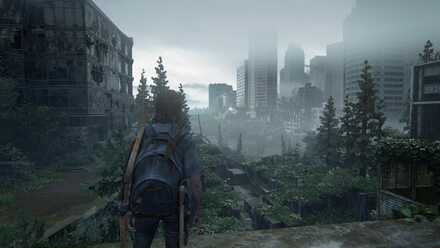 The Hospital The Hospital |
|
| Chapter | Seattle Day 2 - The Seraphites |
|---|---|
| Location | This journal entry can be gained automatically when Ellie discovers the hospital. |
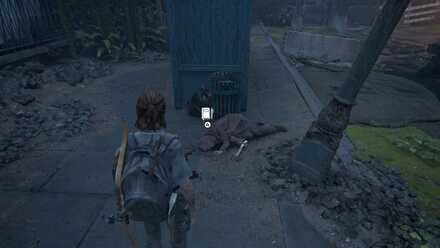 SCARS SCARS |
|
| Chapter | Seattle Day 2 - The Seraphites |
|---|---|
| Location | This journal entry can be gained by examining the corpse beside the bus stop after you cut through the park. |
Trading Cards
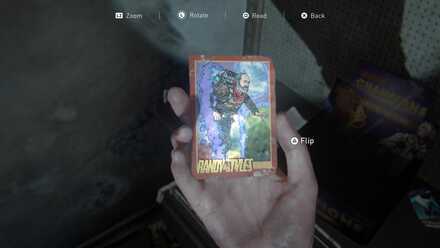 Randy Styles Randy Styles |
|
| Chapter | Seattle Day 2 - The Seraphites |
|---|---|
| Location | This trading card is on the shelf near the wall and beside the counter at Quickmart . |
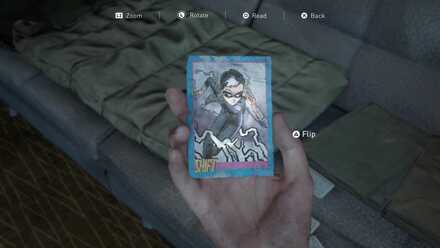 Shift Shift |
|
| Chapter | Seattle Day 2 - The Seraphites |
|---|---|
| Location | This trading card is on one of the couches in the locked room on the second floor of the Conference Center. You can get into the locked room by breaking the nearest window and the glass platform when you look outside to your left, then throwing the rope from the window to the open platform. |
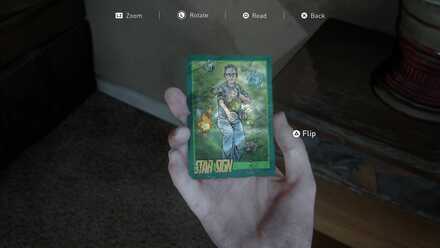 Star Sign Star Sign |
|
| Chapter | Seattle Day 2 - The Seraphites |
|---|---|
| Location | This trading card is inside the drawer of the nightstand in the room to your right at the apartment building. |
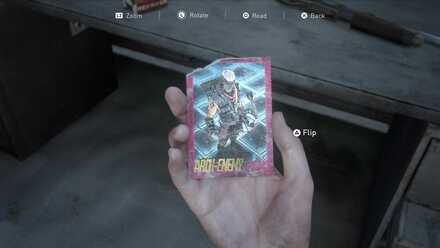 Arch-Enemy Arch-Enemy |
|
| Chapter | Seattle Day 2 - The Seraphites |
|---|---|
| Location | This trading card is inside the drawer of a desk in a locked room at the ground floor of the Seattle Conference Center. To get into the room, you will need to throw a bottle or a brick to break a window at the back of the room to enter. |
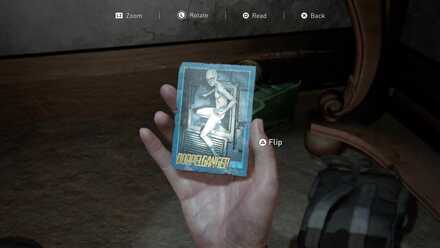 Doppelganger Doppelganger |
|
| Chapter | Seattle Day 2 - The Seraphites |
|---|---|
| Location | This trading card is on the floor near room 212 at the corner of the hallway on the second floor of Garden Suites 113. |
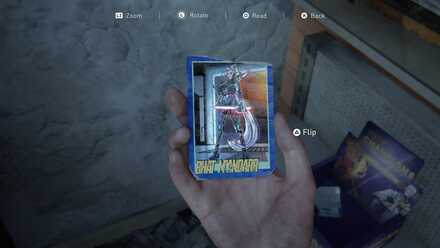 Bhat M'Andarr Bhat M'Andarr |
|
| Chapter | Seattle Day 2 - The Seraphites |
|---|---|
| Location | This trading card is on a shelf beside the counter of the Weston's Pharmacy. |
Last of Us 2 Related Links
| Previous Section | Next Section |
|---|---|
| Finding Strings | St. Mary's Hospital |
| Chapter 1 | Jackson |
|---|---|
| Chapter 2 | Seattle Day 1 |
| Chapter 3 | Seattle Day 2 |
| Chapter 4 | Seattle Day 3 |
| Chapter 5 | The Park |
| Chapter 6 | Seattle Day 1 |
| Chapter 7 | Seattle Day 2 |
| Chapter 8 | Seattle Day 3 |
| Chapter 9 | The Farm |
| Chapter 10 | Santa Barbara |
| Chapter 11 | The Farm |
Author
Chapter 3: Seattle Day 2 - The Seraphites Walkthrough
improvement survey
03/2026
improving Game8's site?

Your answers will help us to improve our website.
Note: Please be sure not to enter any kind of personal information into your response.

We hope you continue to make use of Game8.
Rankings
- We could not find the message board you were looking for.
Gaming News
Popular Games

Genshin Impact Walkthrough & Guides Wiki

Honkai: Star Rail Walkthrough & Guides Wiki

Umamusume: Pretty Derby Walkthrough & Guides Wiki

Pokemon Pokopia Walkthrough & Guides Wiki

Resident Evil Requiem (RE9) Walkthrough & Guides Wiki

Monster Hunter Wilds Walkthrough & Guides Wiki

Wuthering Waves Walkthrough & Guides Wiki

Arknights: Endfield Walkthrough & Guides Wiki

Pokemon FireRed and LeafGreen (FRLG) Walkthrough & Guides Wiki

Pokemon TCG Pocket (PTCGP) Strategies & Guides Wiki
Recommended Games

Diablo 4: Vessel of Hatred Walkthrough & Guides Wiki

Fire Emblem Heroes (FEH) Walkthrough & Guides Wiki

Yu-Gi-Oh! Master Duel Walkthrough & Guides Wiki

Super Smash Bros. Ultimate Walkthrough & Guides Wiki

Pokemon Brilliant Diamond and Shining Pearl (BDSP) Walkthrough & Guides Wiki

Elden Ring Shadow of the Erdtree Walkthrough & Guides Wiki

Monster Hunter World Walkthrough & Guides Wiki

The Legend of Zelda: Tears of the Kingdom Walkthrough & Guides Wiki

Persona 3 Reload Walkthrough & Guides Wiki

Cyberpunk 2077: Ultimate Edition Walkthrough & Guides Wiki
All rights reserved
© 2020 Sony Interactive Entertainment LLC. Created and developed by Naughty Dog LLC
The copyrights of videos of games used in our content and other intellectual property rights belong to the provider of the game.
The contents we provide on this site were created personally by members of the Game8 editorial department.
We refuse the right to reuse or repost content taken without our permission such as data or images to other sites.





![Everwind Review [Early Access] | The Shaky First Step to A Very Long Journey](https://img.game8.co/4440226/ab079b1153298a042633dd1ef51e878e.png/thumb)

![Monster Hunter Stories 3 Review [First Impressions] | Simply Rejuvenating](https://img.game8.co/4438641/2a31b7702bd70e78ec8efd24661dacda.jpeg/thumb)


