This survey will take about 1 minute.
Your answers will help us to improve our website.
Last of Us 2
Chapter 2: Seattle Day 1 - The Tunnels Walkthrough
Welcome to Game8's Last of Us Part 2 guide. Feel free to get started by checking out one of our popular guides from the list below!
See our guides for getting 100% of the trophies!
The Jury is out! Read our full spoiler-free review here!
This is a walkthrough for Chapter 2: Seattle Day 1 - The Tunnels in The Last of Us Part 2 (TLOU2). For a list of objectives in this section, items, collectible locations, enemy strategy and other tips & tricks, read on!
| Previous Section | Next Section |
|---|---|
| Capitol Hill | The Theater |
List of Contents
Seattle Day 1 - The Tunnels Walkthrough
| 1 | Continue heading down and you will encounter a Spore-Infected Area. |
|---|---|
| 2 | Go prone to cross through the tight space and open the gate. |
| 3 | Head downstairs and squeeze through the tight space. |
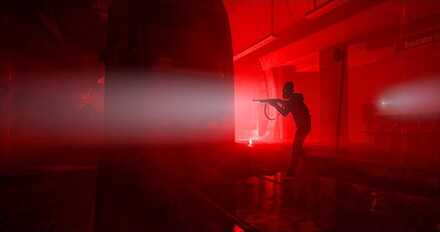
| 4 | At the subway station, pit the Clickers against the WLF to cause a distraction. |
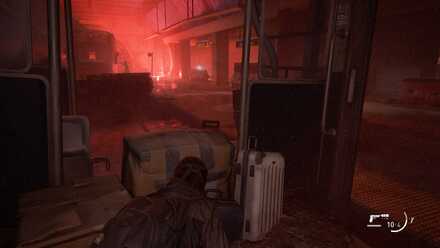
| 5 | Amidst the chaos, grab the chance to get past them, and get inside the train at the other end of the area. |
| 6 | Move forward and force open the train door with the help of Dina. |
| 7 | The path will be blocked. Go to the left side of the door and squeeze through to go outside the train. |
| 8 | Go Prone and get underneath the train to cross. |
| 9 | Enter the room with a red light on it. |
| 10 | Climb the ladder and use the rope to create a swing for you to cross the gap. |
| 11 | After crossing the gap, enter the blue door and cross through the vent. |
| 12 | While crossing through the vents, you will see WLF members battling a new type of infected. |
| 13 | Getting down from the vents. This area will contain 2 Shamblers and 2 Runners. |
| 14 | Head to the source of the red light and you will see a garage door then open it. |
| 15 | Continue moving forward, and you will encounter a locked door. Go around it and jump at the yellow barrier. |
| 16 | Entering the area, you will encounter 2 Shamblers and 2 runners. |
| 17 | Get inside the electrical area, then through the red doors with an Exit sign. |
| 18 | Exiting through the doors, get inside of the train via an open door, and continue heading outside. |
| 19 | After the cutscene, run as fast you can to escape the horde of infected. |
| 20 | Head to the theater. |
Seattle Day 1 - The Tunnels Tips and Strategy
Pitting the Infected against the WLF
While at the subway, you can use the infected to cause a distraction against the WLF members. You can clean up the remaining enemies or take advantage of the confusion to simply run away from them.
Crossing the Gap
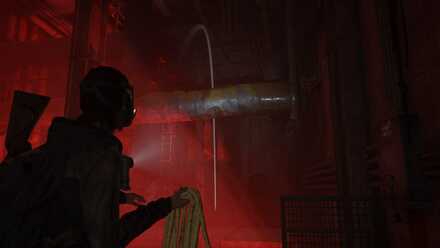
Just like the other Rope challenges, you need to throw the rope above the pipe to use it as a swinging boost to cross the gap.
New Type of Infected! Shamblers
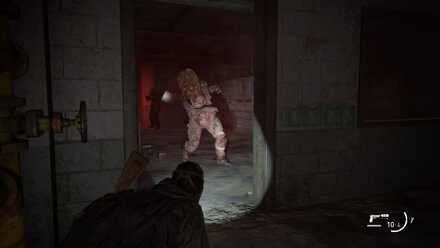
Shamblers are a new stage of infected that is introduced in this part. These guys run towards you and emit acid from their body.
Seattle Day 1 - The Tunnels Safe Locations
Soda Can Code

In the tunnels, there will be a narrow passage and some rooms on the right. In one of those room, there will be many vending machines. A note can be found on a table, which will give a hint to where the combination is.
| Safe Combination |
|---|
| 15243 |
Seattle Day 1 - The Tunnels Collectibles
Artifacts
 Subway Note Subway Note |
|
| Chapter | Seattle Day 1 - The Tunnels |
|---|---|
| Location | This artifact is on the left wall at the very end of the train car where Dina helped you in opening the door. |
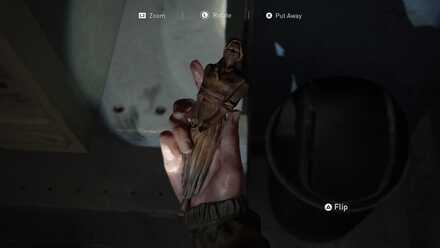 Whittled Statue Whittled Statue |
|
| Chapter | Seattle Day 1 - The Tunnels |
|---|---|
| Location | This artifact is beside the microwave once you enter the lounge for the office. |
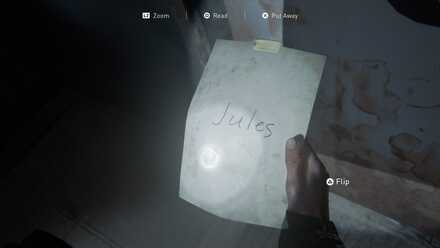
 Locker Room Note Locker Room Note |
|
| Chapter | Seattle Day 1 - The Tunnels |
|---|---|
| Location | This artifact is on the table at the end of the lounge for the office. |
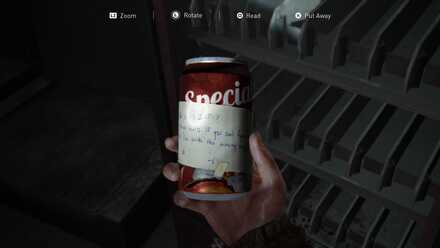 Soda Can Note Soda Can Note |
|
| Chapter | Seattle Day 1 - The Tunnels |
|---|---|
| Location | This artifact is inside the vending machine beside the artifact Locker Room Note. |
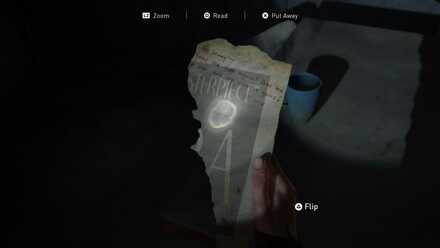
 Subway Station Note Subway Station Note |
|
| Chapter | Seattle Day 1 - The Tunnels |
|---|---|
| Location | This artifact is on the wall to your right after climbing the wreck trains. |
Journal Entries
 Shamblers Shamblers |
|
| Chapter | Seattle Day 1 - The Tunnels |
|---|---|
| Location | This journal entry can be gained by examining the Shambler's corpse after your first time killing them. |
Trading Cards
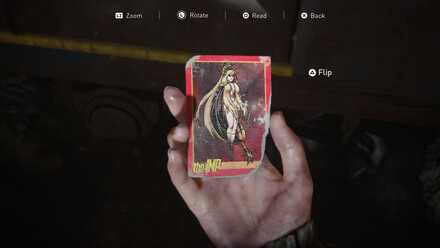 the Imp the Imp |
|
| Chapter | Seattle Day 1 - The Tunnels |
|---|---|
| Location | This trading card is hidden between trash bags at the end of the tunnel where you hear a WLF soldier getting attacked by infected. |
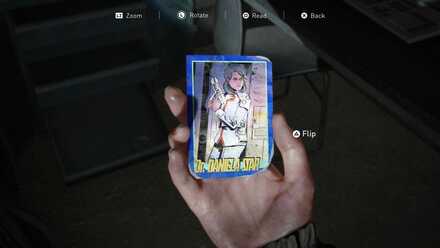 Dr. Daniela Star Dr. Daniela Star |
|
| Chapter | Seattle Day 1 - The Tunnels |
|---|---|
| Location | This trading card is on the desk behind the fenced office cubicle. You can go around the fence and crouch under an opening to get to this trading card. |
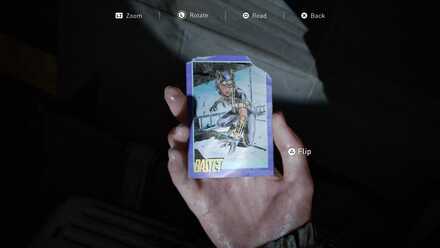 Bastet Bastet |
|
| Chapter | Seattle Day 1 - The Tunnels |
|---|---|
| Location | This trading card is in a luggage bag behind the train where you can crawl under at the subway station with multiple other wrecked trains. |
Last of Us 2 Related Links
| Previous Section | Next Section |
|---|---|
| Capitol Hill | The Theater |
| Chapter 1 | Jackson |
|---|---|
| Chapter 2 | Seattle Day 1 |
| Chapter 3 | Seattle Day 2 |
| Chapter 4 | Seattle Day 3 |
| Chapter 5 | The Park |
| Chapter 6 | Seattle Day 1 |
| Chapter 7 | Seattle Day 2 |
| Chapter 8 | Seattle Day 3 |
| Chapter 9 | The Farm |
| Chapter 10 | Santa Barbara |
| Chapter 11 | The Farm |
Author

Chapter 2: Seattle Day 1 - The Tunnels Walkthrough
Please participate in our site
improvement survey
03/2026
improvement survey
03/2026
Would you assist in
improving Game8's site?
improving Game8's site?

×
We are listening to our users' valuable opinions and discussing how to act on them.
The information collected through this survey will be used for the purpose of improving our services. In addition, the information will only be disclosed a part of a statistic in a format that will not allow identification of personal information.
Begin Survey
Not Now
×
Please rate each item regarding Game8.co's Advertisements.
Amount of Ads
Very Dissatisfied
Somewhat Dissatisfied
Fine
Somewhat Satisfied
Highly Satisfied
Placement of Ads
Timing of Ad Display
Ad Loading Speed
Safeness of Ads
Content of Ads
×
Please rate each item regarding Game8.co's Quality of Articles.
Amount of information
Very Dissatisfied
Somewhat Dissatisfied
Fine
Somewhat Satisfied
Highly Satisfied
Frequency of updates
Speed of new information
Accuracy of articles
Understandibility of articles
Readability of sentences
×
Please rate each item regarding Game8.co's Usability of the Site.
Ease of finding information
Very Dissatisfied
Somewhat Dissatisfied
Fine
Somewhat Satisfied
Highly Satisfied
Loading Speed
Use of Color
Font Size
Visibility of Images
Easy to Understand Layout
×
Please rate each item regarding Game8.co's Message Boards, Comments.
Ease of Writing
Very Dissatisfied
Somewhat Dissatisfied
Fine
Somewhat Satisfied
Highly Satisfied
Readability
Ease in Finding Information
Comment Quality
Comment Quantity
Admin Response
×
Please rate each item regarding Game8.co's Site's new design.
Please rate our site's new design
Very Dissatisfied
Somewhat Dissatisfied
Fine
Somewhat Satisfied
Highly Satisfied
Do you think that the website's design change makes the site easier to use?
Has the new design made it easier for you to find information on the site?
Has the new design improved the overall visual appeal of the site?
How would you rate your overall satisfaction with the new design of the site?
×
How likely are you to recommend Game8 to someone you know?
Very Unlikely
0
1
2
3
4
5
6
7
8
9
10
Very Likely
If you have other opinions regarding potential improvement to the website, please share them with us. We would appreciate your honest opinion.
Note: This is a free response section, so you can proceed without entering anything.
Note: Please be sure not to enter any kind of personal information into your response.
Note: Please be sure not to enter any kind of personal information into your response.
×
Thank You
×
Thank you for participating in our survey! Your answers will help us to improve the quality of our website and services.
We hope you continue to make use of Game8.
We hope you continue to make use of Game8.
Close
Rankings
- We could not find the message board you were looking for.
Gaming News


![Everwind Review [Early Access] | The Shaky First Step to A Very Long Journey](https://img.game8.co/4440226/ab079b1153298a042633dd1ef51e878e.png/thumb)

![Monster Hunter Stories 3 Review [First Impressions] | Simply Rejuvenating](https://img.game8.co/4438641/2a31b7702bd70e78ec8efd24661dacda.jpeg/thumb)
Popular Games

Genshin Impact Walkthrough & Guides Wiki
Honkai: Star Rail Walkthrough & Guides Wiki
Umamusume: Pretty Derby Walkthrough & Guides Wiki
Pokemon Pokopia Walkthrough & Guides Wiki
Resident Evil Requiem (RE9) Walkthrough & Guides Wiki
Monster Hunter Wilds Walkthrough & Guides Wiki
Wuthering Waves Walkthrough & Guides Wiki
Arknights: Endfield Walkthrough & Guides Wiki
Pokemon FireRed and LeafGreen (FRLG) Walkthrough & Guides Wiki
Pokemon TCG Pocket (PTCGP) Strategies & Guides Wiki


Recommended Games
Diablo 4: Vessel of Hatred Walkthrough & Guides Wiki
Fire Emblem Heroes (FEH) Walkthrough & Guides Wiki
Yu-Gi-Oh! Master Duel Walkthrough & Guides Wiki
Super Smash Bros. Ultimate Walkthrough & Guides Wiki
Pokemon Brilliant Diamond and Shining Pearl (BDSP) Walkthrough & Guides Wiki
Elden Ring Shadow of the Erdtree Walkthrough & Guides Wiki
Monster Hunter World Walkthrough & Guides Wiki
The Legend of Zelda: Tears of the Kingdom Walkthrough & Guides Wiki
Persona 3 Reload Walkthrough & Guides Wiki
Cyberpunk 2077: Ultimate Edition Walkthrough & Guides Wiki


All rights reserved
© 2020 Sony Interactive Entertainment LLC. Created and developed by Naughty Dog LLC
The copyrights of videos of games used in our content and other intellectual property rights belong to the provider of the game.
The contents we provide on this site were created personally by members of the Game8 editorial department.
We refuse the right to reuse or repost content taken without our permission such as data or images to other sites.