100% Walkthrough Guide
★ Interactive Map and Locations
┗ Secret Spots | Sparkly Spots | Mini Medals
☆ 100% Walkthrough Guide
┗Post Game Guide
☆ Trophy Guide: How to Get Platinum
★ Playing the first game? DQ1 Wiki here!
This is a 100% walkthrough guide for Dragon Quest 2 HD-2D Remake (DQ2). It includes all the story steps from the early, mid, and late games, as well as tips on how to beat bosses.
List of Contents
 Attention! Attention! |
This page contains major spoliers for Dragon Quest 2 HD-2D Remake! Continue reading on at your own risk. |
|---|
List of All Story Walkthroughs
These walkthroughs are divided by location up to a certain endpoint since there are no chapters or separate main quests in this game, and the Scions of Erdrick set out on one long journey from start to end.
Midenhall to Cannock Walkthrough Guide
| Jump to Walkthrough Section | |||
|---|---|---|---|
| 1 | Midenhall | 2 | Leftwyne |
| 3 | Cannock | 4 | Wellspring of the Hero |
Midenhall
| 1 |
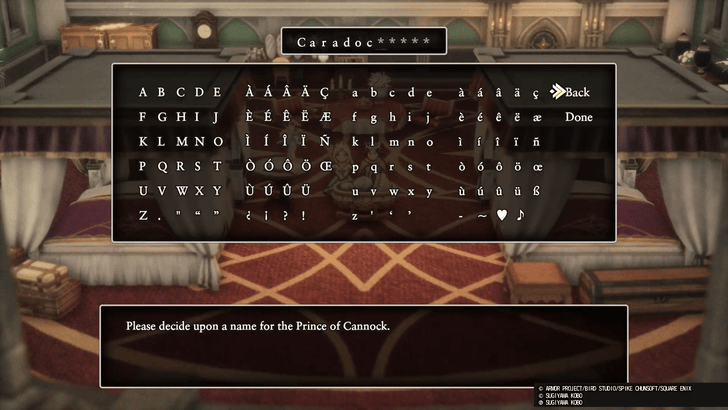 Decide the name of the Prince of Cannock and Princess of Moonbrooke. ▶ What are the Characters' Canon Names? |
|---|---|
| 2 |
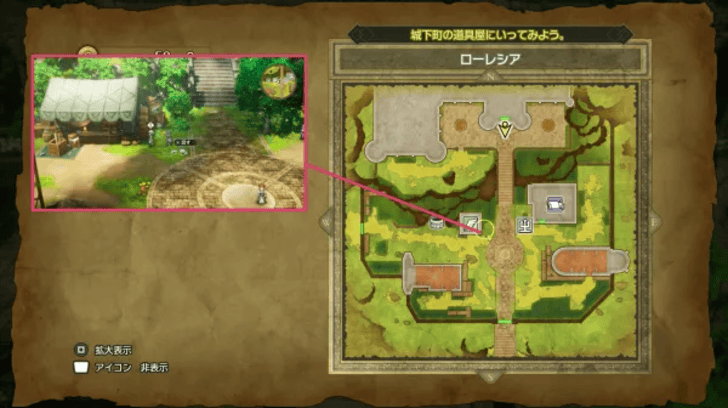 Step outside the castle and head south to reach the town. Go to the Item Shop, which you can find on the left, and speak to the woman running the shop. |
| 3 |
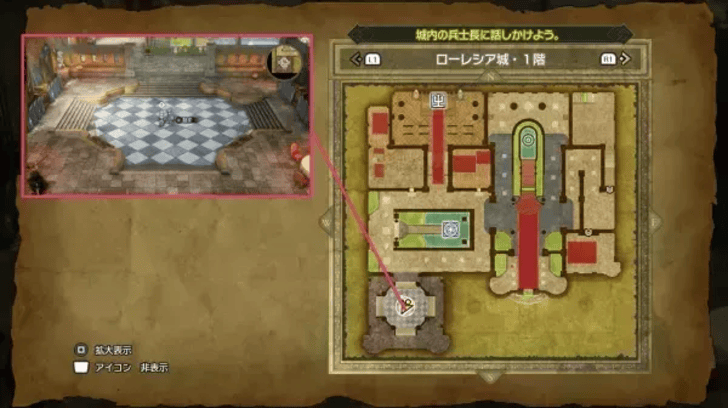 Head back to the castle and go left to the training hall. Talk to the guard in attendance to start your training. |
| 4 |
 After the cutscene, head to the castle entrance and talk to the king. He’ll bestow the Princess’s Pledge upon you before you set out on your journey. |
Leftwyne
| 1 | 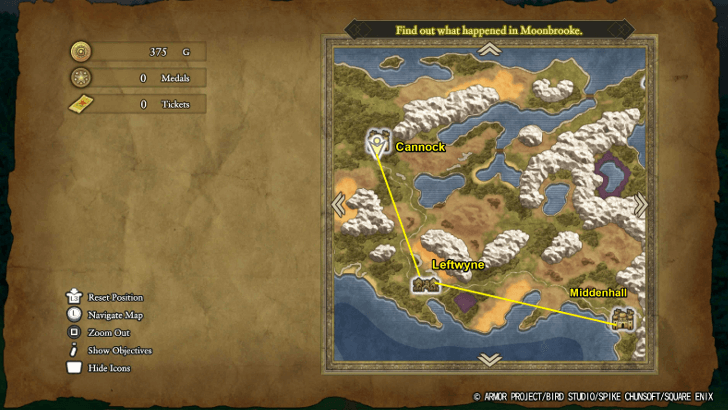 Head west from Midenhall Castle to reach the town of Leftwyne. |
|---|---|
| * | Be sure to manage your equipment before proceeding further. Buy anything you need from the armor and weapon shop! We suggest picking up the Copper Sword as an early game upgrade and Medicinal Herbs to heal. ▶ Best Party Builds and Equipment |
Cannock
| 1 | After leaving Leftwyne, head to Cannock by continuing northwest. Try reaching Level 4 along the way to learn Stone's Throw, an ability that will be helpful when facing monsters. ▶ List of All Spells and Abilities |
|---|---|
| 2 |  |
Wellspring of the Hero
| 1 |
 Go to the Wellspring of the Hero, which you can access by heading east of Cannock. |
|---|---|
| 2 | 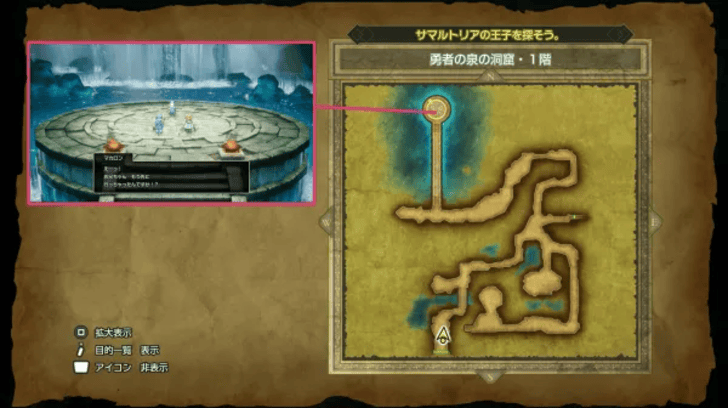 Speak to the man inside to learn more about the Prince of Cannock's whereabouts. Afterwards, speak to the King of Midenhall. |
| * | 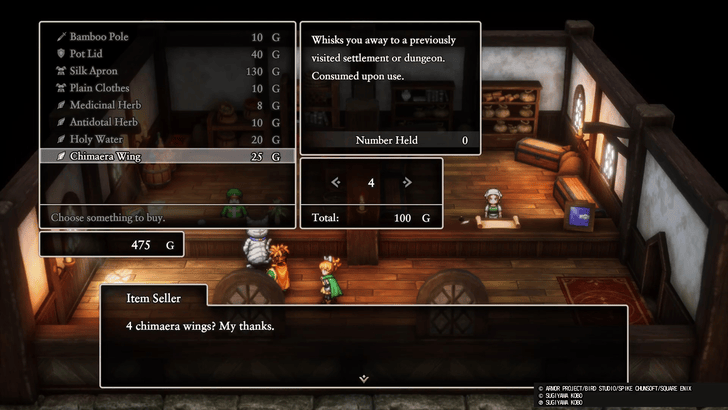 From this point onward, it's recommended to fast travel instead, as moving from one place to another can get tedious. Use a Chimaera Wing or the Zoom spell to travel quickly, if you have it. |
| 3 | 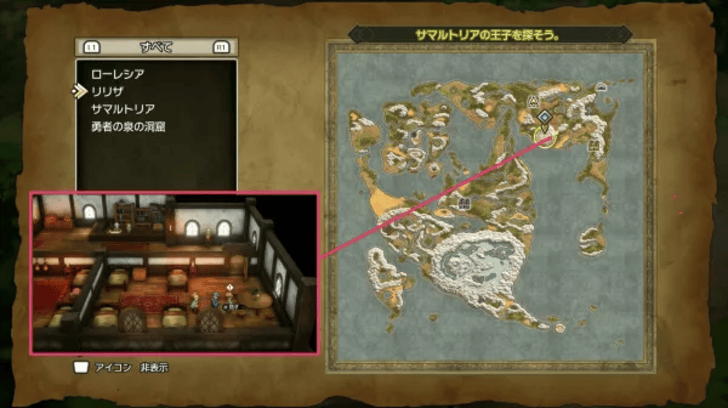 Head back to Leftwyne and go to the inn. Inside, you'll find the Prince of Cannock, who will join your party. |
| 4 | 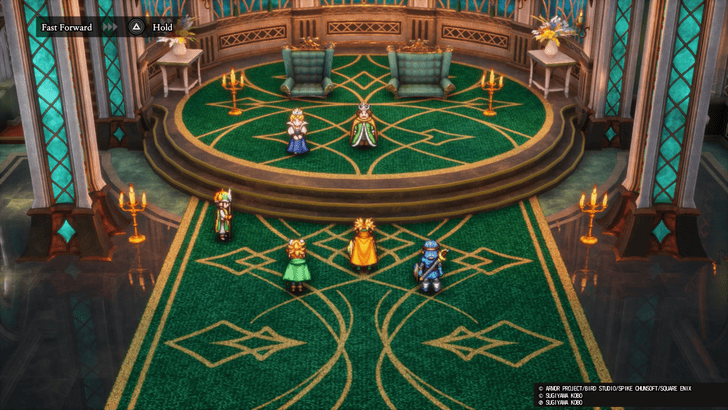 Head back to Cannock and speak to the royals again. The queen will give you Gwaelin's Pass, which you can use to access Gwaelin's Gate. The Princess of Cannock will also leave your party afterwards. |
Cave of the Lake to Moonbrooke Walkthrough Guide
| Jump to an Area Walkthrough! | |||
|---|---|---|---|
| 1 | Cave of the Lake | 2 | Gwaelin's Gate |
| 3 | Moonahan | 4 | Moonbrooke |
| 5 | Swamp Shrine | 6 | - |
Cave of the Lake
| 1 | 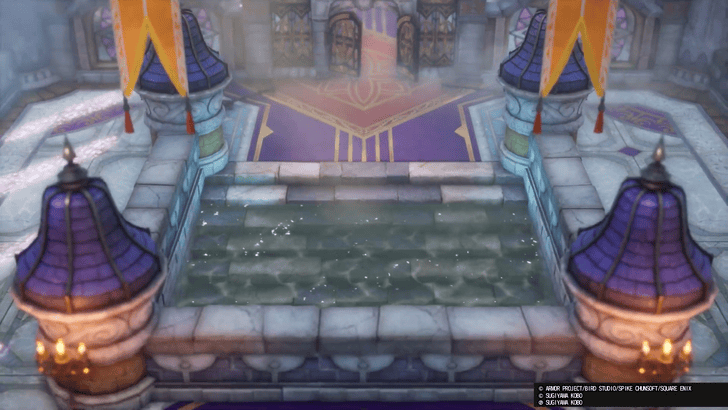 After leaving Cannock, head to Gwaelin’s Gate to the west. The gate will be flooded, preventing you from proceeding. The only way to pass is by using a Bottomless Pot, which you can obtain later in the Cave of the Lake. |
|---|---|
| 2 | 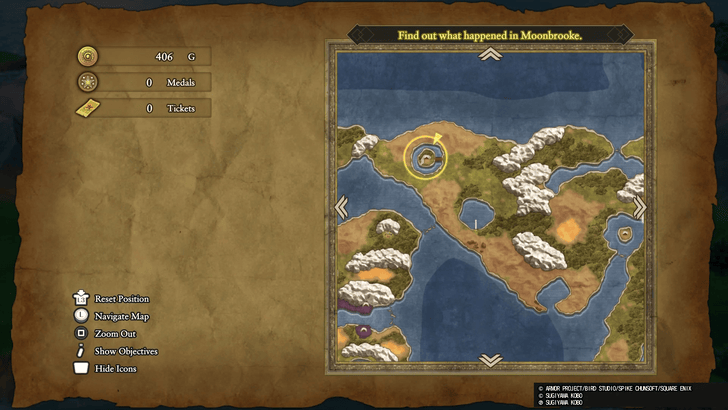 Go to the Cave of the Lake, located northwest of Leftwyne. |
| * | Watch out for Bubble Slimes and Cobra Kings in the area. These enemies can poison you, so make sure to bring a couple of Antidotal Herbs before exploring the Cave of the Lake. Once the Prince of Cannock reaches Level 6, he can use Squelch to cure poison. ▶ EXP Farm: How to Level Up Fast |
| 3 | 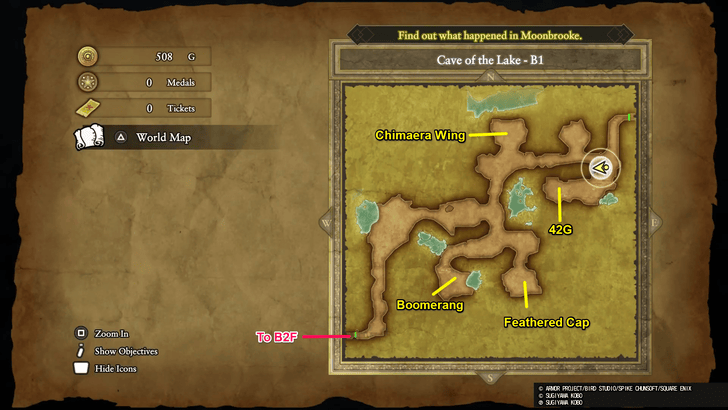 Navigate the first floor to reach B2F. Feel free to explore the area first, as you can find weapons and money here, such as the Chain Sickle, which is a good upgrade from your Copper Sword. |
| 4 | 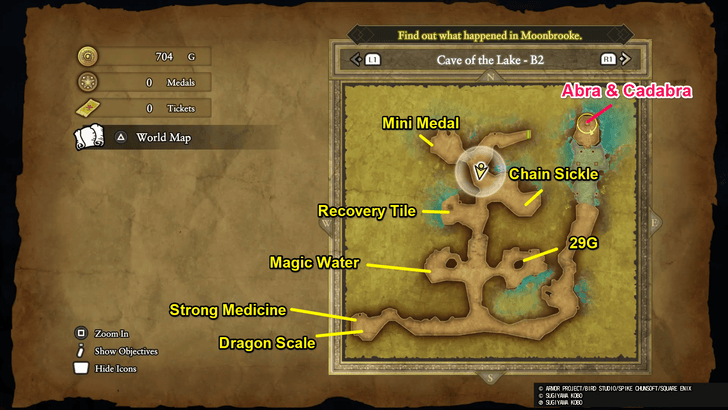 On the next floor, reach the healing tile in the middle before proceeding further. A boss battle is up ahead, and it’s recommended to train up to Level 10 before challenging it. You can train around this tile to keep healing after every battle. |
| 5 | 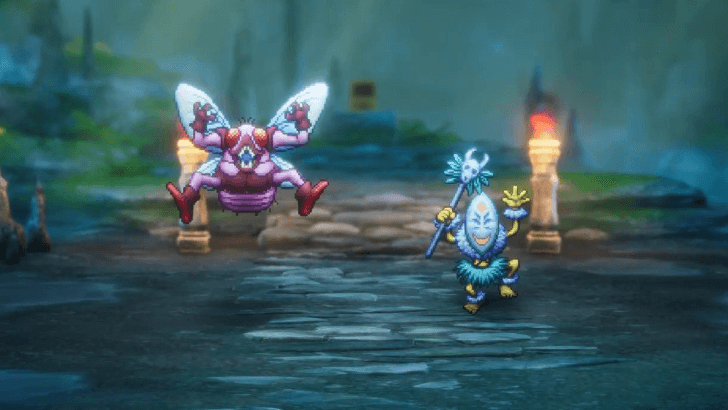 Once you’re ready, go ahead and challenge Abra and Cadabra. A good strategy is to focus on Cadabra first, as it can heal itself. After that, take on Abra and use Flying Knee to deal more damage. Once both are defeated, you’ll get the Bottomless Pot. |
Gwaelin's Gate
| 1 |
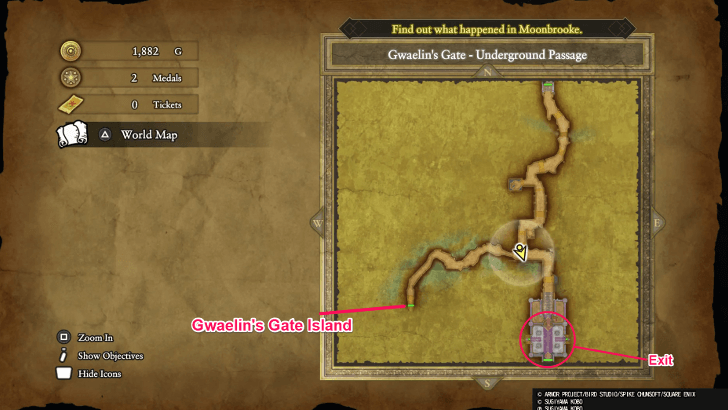 Head back to Gwaelin’s Gate and pass through it to finally continue your journey to Moonbrooke. You can make a stop on the left at Gwaelin’s Gate Island to get a Seed of Defense, but that’s completely optional. Exit the gate and go south to Moonahan. |
|---|
Moonahan
| 1 |  Talk to the soldier northwest of the island. Exit Moonahan afterwards and proceed to Moonbrooke. |
|---|
Moonbrooke
| 1 | 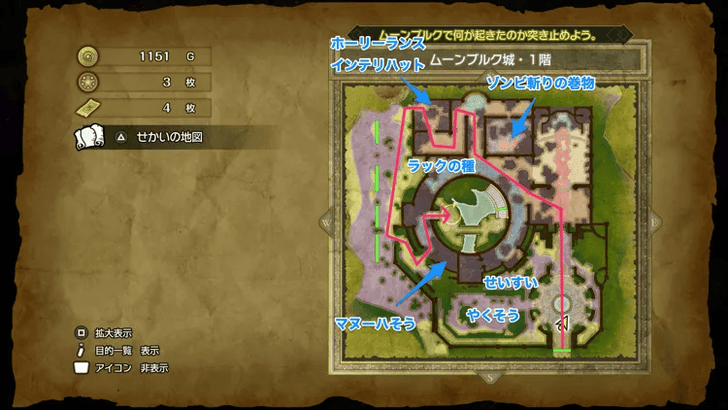 Head to the courtyard in the middle. You can explore some of the areas to get a few items here, such as the Undead Undoer Scroll found at the top near a ghost. ▶ List of All Scrolls and Locations |
|---|
Swamp Shrine
| 1 | 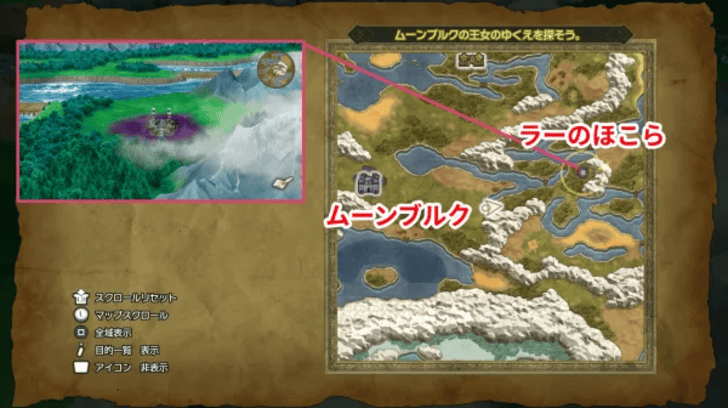 Head to the Swamp Shrine to get Ra's Mirror. You can find this place east of Moonbrooke. |
|---|---|
| * |
 Make sure to have a Chimaera Wing for easy fast travel, as the Swamp Shrine is quite far from Moonahan, the next location you need to visit. |
| 2 |
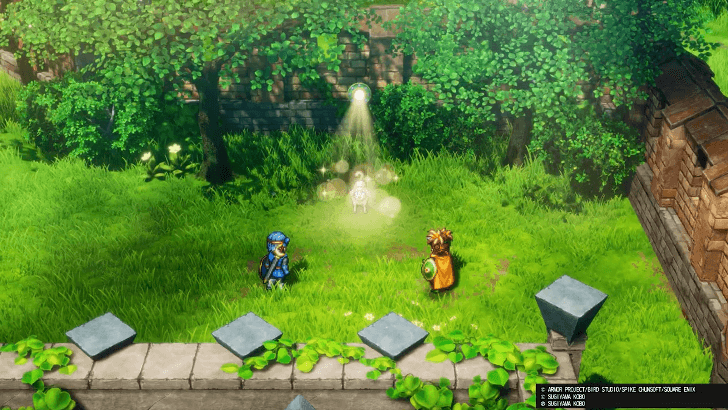 Head back to Moonahan and find the dog north of town. Talk to it and use Ra's Mirror to reveal the Princess of Moonbrooke. |
| 3 |
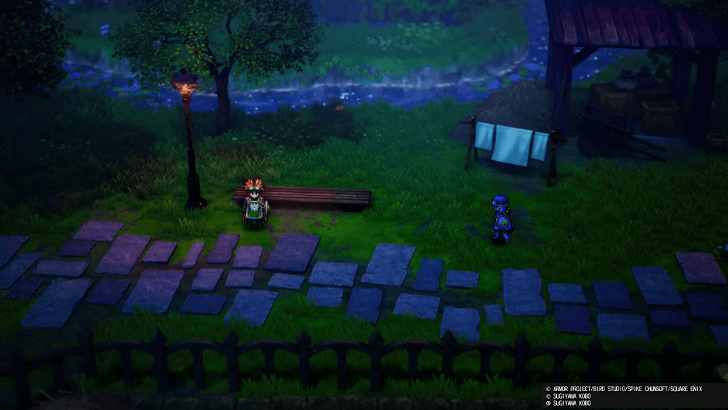 Head outside the inn and talk to the Prince of Cannock. After the cutscene, the Princess of Moonbrooke will finally join your party. |
| 4 |
 With Zoom now available, fast travel to Midenhall, Cannock, and Moonbrooke. Get the Mark of Midenhall, the Mark of Cannock, and the Thief's Key from these locations, respectively. |
| * |
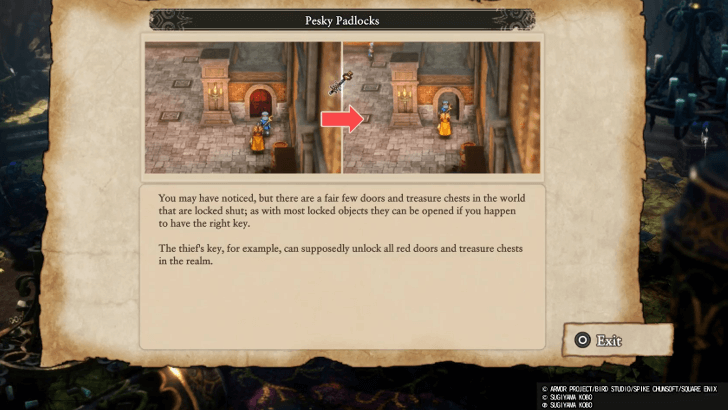 With the Thief’s Key now available, you can go back to previous locations to open any locked doors and treasure chests! |
Pillar of the Winds to Rippleport Walkthrough Guide
| Jump to an Area Walkthrough! | |||
|---|---|---|---|
| 1 | Pillar of the Winds | 2 | South Tower |
| 3 | North Tower | 4 | Rippleport |
Pillar of the Winds
| 1 |
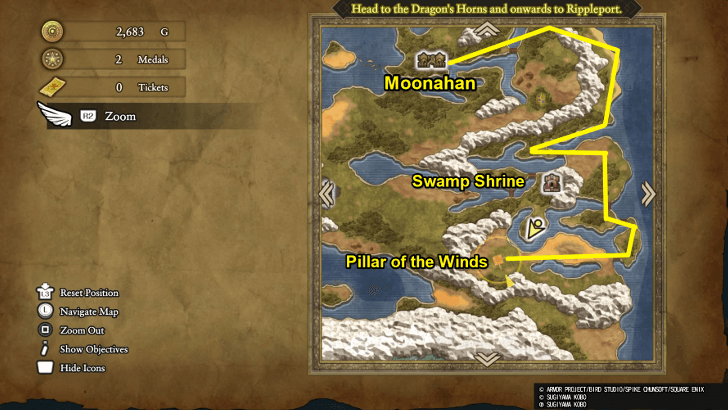 To reach the Pillar of the Winds, fast travel to Moonahan and head east, then go north behind the mountain. Follow the path down and go past the Swamp Shrine, and you should reach the Pillar of the Winds southeast of it. |
|---|---|
| 2 |
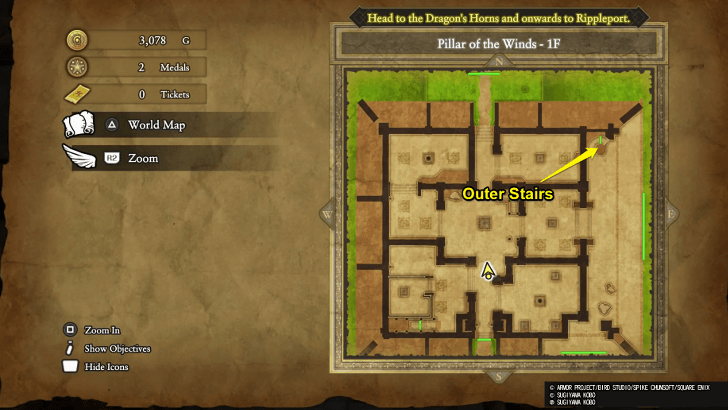 Enter the Pillar of the Winds and head to the outer stairs. Take them and keep climbing the exterior sets of stairs until you reach the top. |
| * |
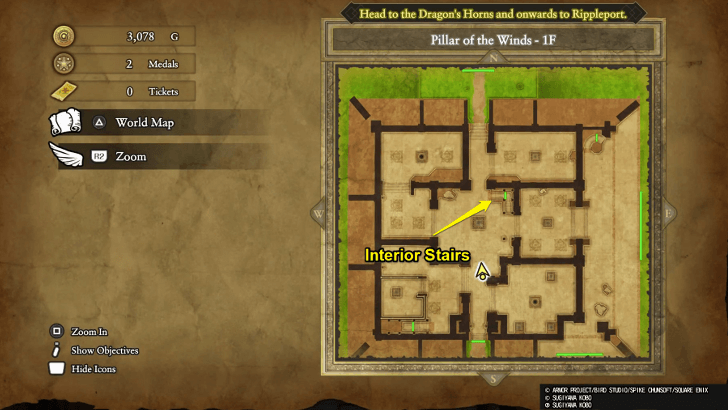 If you want to loot items, you can start with the interior stairs, but to progress the story, the exterior stairs are the way to go. |
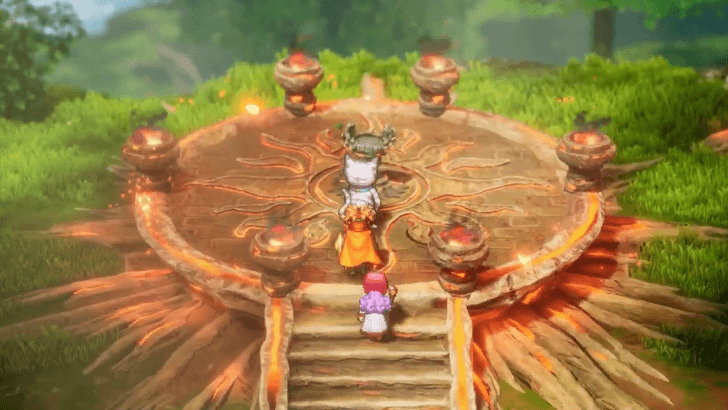
| 3 | 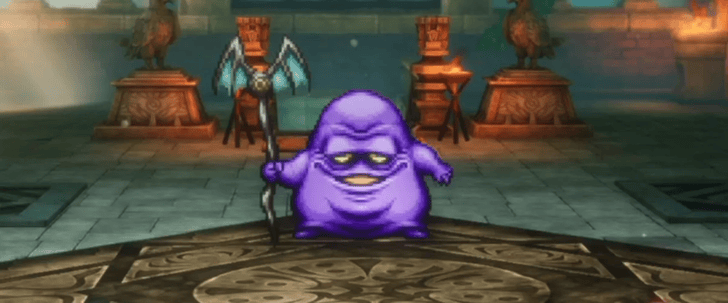 At the top, there will be a boss battle against the Lumpfather. A good strategy is to keep a dedicated healer, such as the Princess of Moonbrooke, since the Lumpfather attacks twice each turn. |
| 4 | 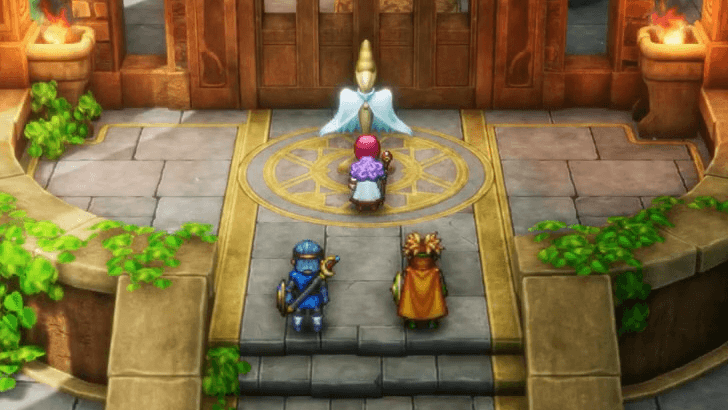 After defeating the Lumpfather, take the stairs ahead and claim the Windbreaker. If you don’t plan to loot or explore the Pillar any further, you can fast travel to Moonbrooke afterwards and head toward the Dragon's Horn. |
Dragon's Horns South Tower
| 1 |
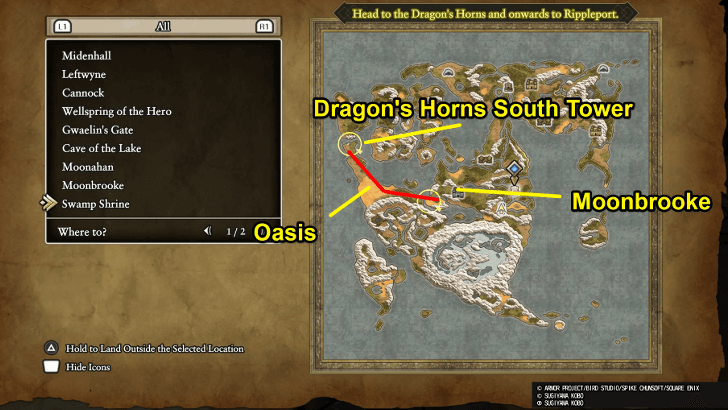 Head to Dragon’s Horn by going west of Moonbrooke. It’s a long journey, so feel free to stop at the Oasis first to rest and gather more weapons and armor before continuing your trip to the tower. |
|---|---|
| 2 |
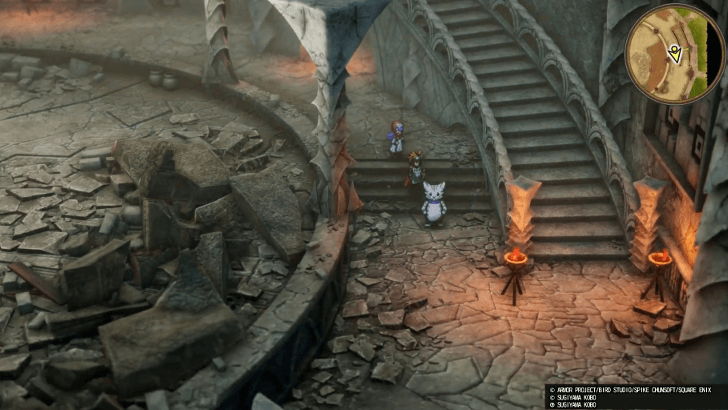 Enter the tower and make your way to the top. The South Tower has six floors, and the path is straightforward. Just follow the stairs on the map and you’ll reach the peak in no time. |
| * |
 Be careful when approaching the hole in the center, especially if you’re already high up. You can fall through it and end up back on the first floor! |
| 3 |
 Approach the top center of the peak on the open ledge, and use the Windbreaker to reach the North Tower. |
Dragon's Horns North Tower
| 1 |
 You can start exploring the North Tower, but this is completely optional. However, there is a key item here, so if you want to get it in advance, head to the third floor and get the Celestial Skein! |
|---|
Rippleport
| 1 |
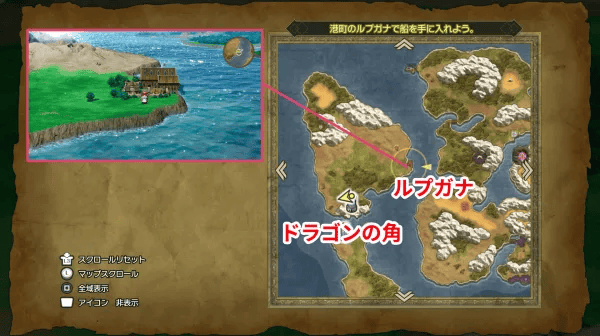 Upon reaching Rippleport, head to the port just north of town and talk to the mayor. He’ll point you toward how to get your ship! |
|---|---|
| 2 |
 Leave the town and head to the mountain north of it. Be prepared, as this leads to the next boss battle, so make sure to get everything you need in Rippleport before leaving. |
| 3 |
 Up ahead, you'll face the Twisted Sister and Mummy Dearest. They'll be accompanied by two Gremlins, and a good strategy is to target the weaker ones first before focusing on the others. Defeat them to progress. |
| 4 |
 Report back to the mayor and stay at the inn afterward. The next day, your ship will be up and ready for you to use! |
| * |
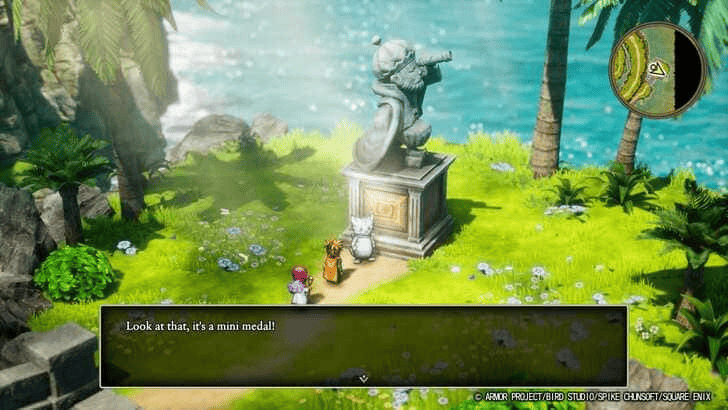 If you have enough medals, feel free to take a detour to the Isle of the Monarch of Medals. You can exchange your Mini Medals here if you've collected enough and even change names if you'd like. ▶ All Mini Medal Locations |
| * |
 Now that you have the ship, the world has opened up and you're free to go anywhere that you please. However, certain areas have high-level enemies that you may not be prepared for, and it's recommended to visit the next story locations in the following order: 1. Tantegel to Dragonlord's Castle 2. Burrowell to Gaggle Rock 3. Beran to Yggdrasil's Arbour Dragonlord's Castle has a dungeon that serves as a great training ground for leveling up. Burrowell can come next, and take Beran last, as no area in that part of the story is useful for leveling up. |
Tantegel to Dragonlord's Castle Walkthrough Guide
| Jump to an Area Walkthrough! | |||
|---|---|---|---|
| 1 | Tantegel | 2 | Dragonlord's Castle |
Tantegel
| 1 |
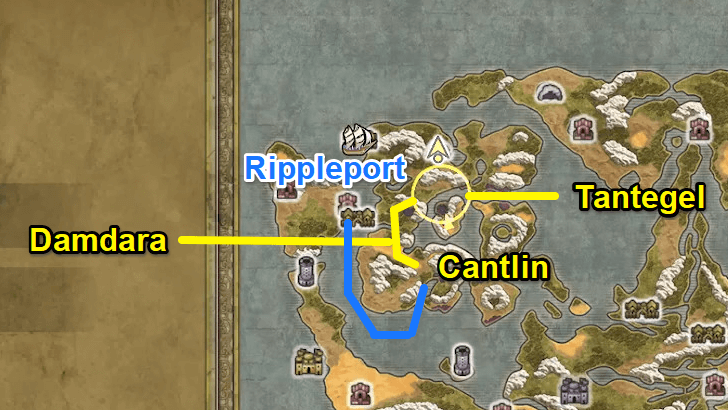 To reach Tantegel, sail from Rippleport and head to Cantlin. From there, walk north, then east toward Tantegel, passing by Damdara along the way. ▶ How to Unlock and Get the Ship |
|---|---|
| 2 |
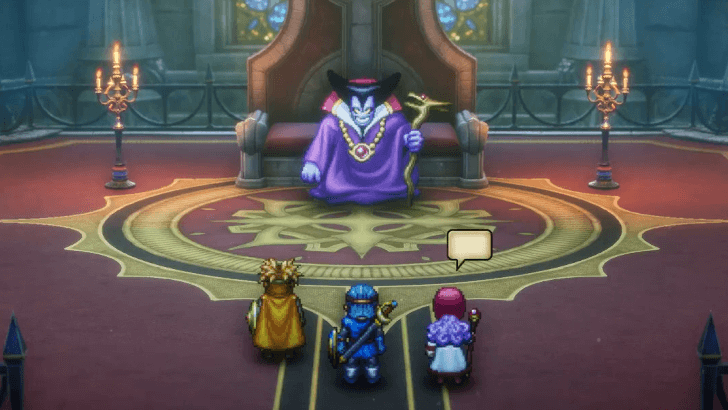
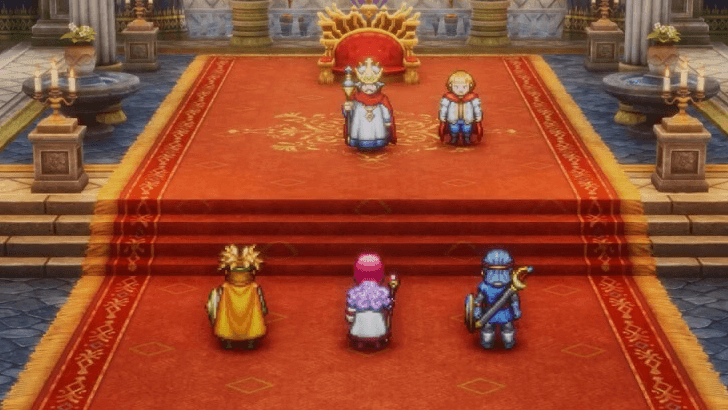 Head to the throne room and speak to the King to find out more about the Dragonlord's Castle. |
| 3 |
 Meet the King again outside the throne room by exiting behind the stairs to get the Rainbow Drop. |
| 4 | 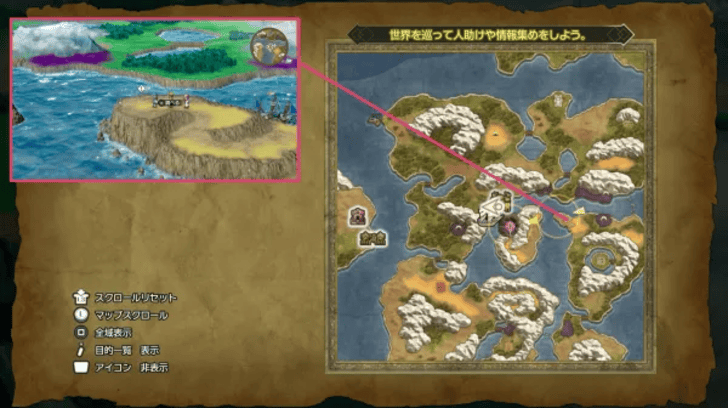 After obtaining the Rainbow Drop, head to the open sea again and sail toward the cliff on the opposite side of the Dragonlord's Castle. |
Dragonlord's Castle
| 1 | 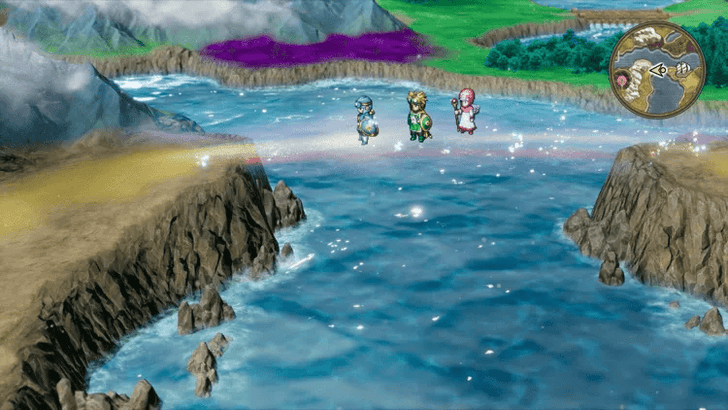 Once ready, use the Rainbow Drop to connect the cliff to the Dragonlord's Castle. Cross it and make your way toward the castle after. |
|---|---|
| 2 | 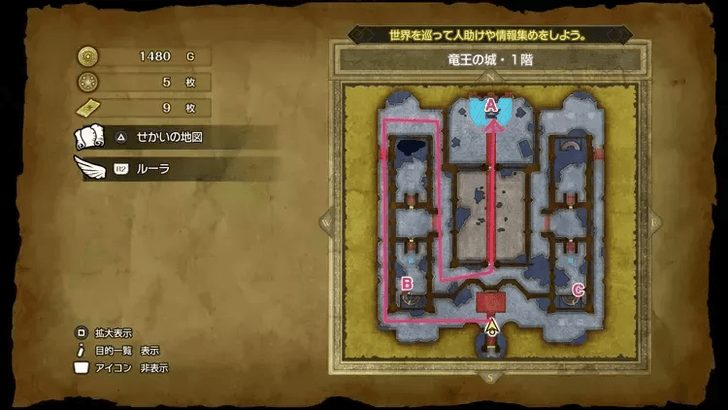 Enter the Dragonlord's Castle and take the hallway on the far left to reach the throne in the middle. Go behind the throne to access the basement stairs. Keep in mind that the blue tiles can electrocute the team and cause 7 damage per zap. Don’t stay on them too long, and move to the floor below as soon as possible. |
| 4 | 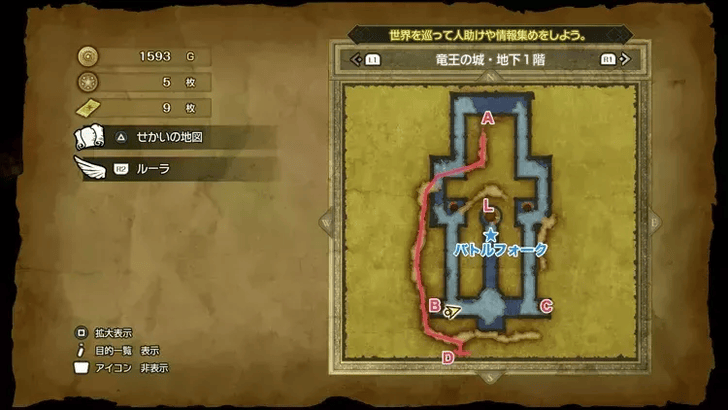 On the first basement floor, continue along the outer path on the left and go down to the next floor. |
| 5 | 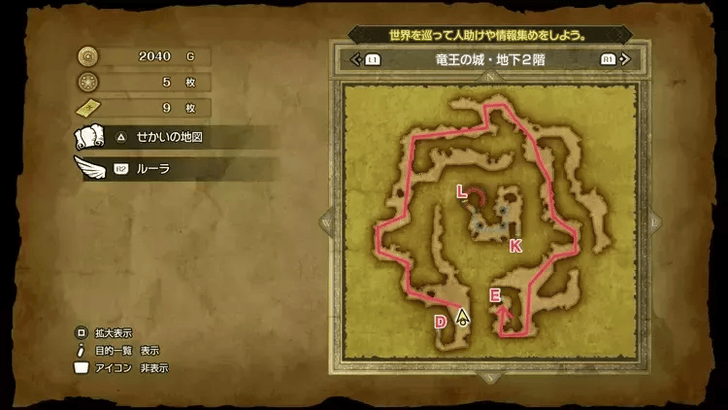 Continue along the same path on the next floor by taking the outer routes instead of the inner ones. Go around to reach the 3rd floor. |
| 6 |  Do the same for the next floor and continue heading to the top left this time. |
| 7 |  On the fourth basement floor, continue along the path north to the right. |
| 8 |  Defeat the Midnight Manguini and Goyling up ahead to access the stairs going down. These enemies are aggressive and will always go on the offensive. Be sure to prepare first by either upgrading your equipment for better defense or changing your tactics to include a dedicated healer. |
| 9 |  Continue on the 5th floor by taking the path to the right, then head down to the 6th floor. |
| 10 |  On the sixth floor, follow the outer path again and go around to reach the outside. Continue going down, and you should reach the Dragonlord's Great-Grandson. |
| 11 | Talk to the Dragonlord's Great-Grandson and learn about the five sigils. Speak to your party afterwards, then talk to the Dragonlord's Great-Grandson again before continuing your journey. ▶ List of All 5 Sigil Locations |
| * |  You can use the portal in front of the throne to head out, or just use Zoom or a Chimaera Wing to continue your journey. |
Burrowell to Gaggle Rock Walkthrough Guide
| Jump to an Area Walkthrough! | |||
|---|---|---|---|
| 1 | Burrowell | 2 | Shrine of Flames |
| 3 | Zahan | 4 | Gaggle Rock |
| 5 | Shipwright's Shrine | 6 | - |
Burrowell
| 1 |
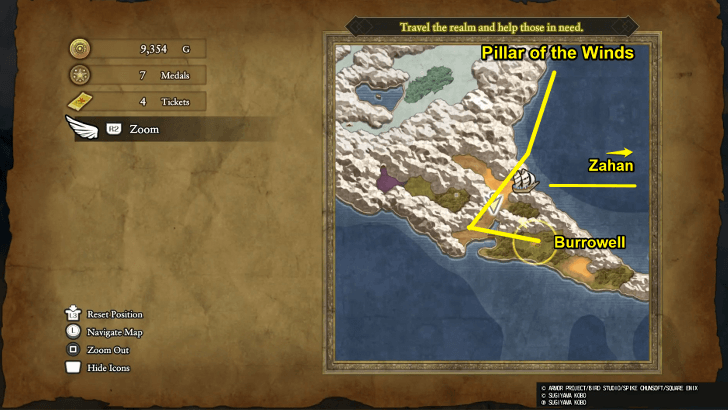 Fast travel to the Pillar of the Winds, and with your new ship, head east and sail down to Burrowell. ▶ How to Unlock and Get the Ship |
|---|---|
| 2 |
 Upon arriving in Burrowell, follow the captain to the next room. You'll be prompted to choose who to side with, but this won't affect any outcomes. |
| 3 |
 Follow the guards outside, and you'll face Succubeast shortly after. A simple strategy of using Flying Knee works best here, as she's a flying enemy. Defeat her to continue the story. |
| 4 |  Stay at the inn after defeating the Succubeast. Then, head back to your ship and sail to Zahan. |
Shrine of Flames
| 1 |
 Along the way, make a stop at the Shrine of Flames. Head to the top of the hill and take the Sun Sigil. Board your ship after and continue making your way to Zahan. |
|---|
Zahan
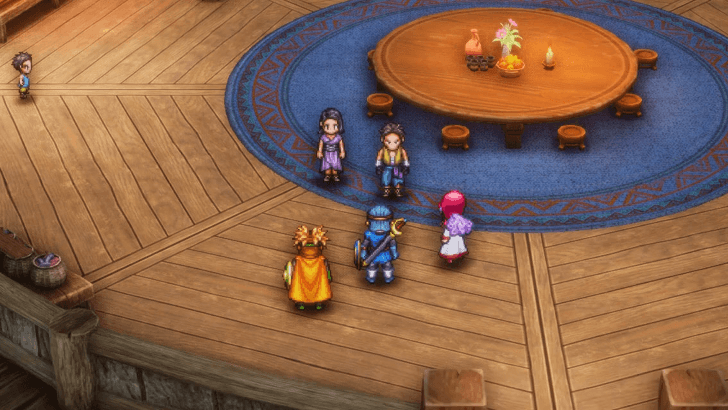
| 1 |
 Upon arriving in Zahan, head into the first building you see to learn more about the situation. |
|---|---|
| 2 |
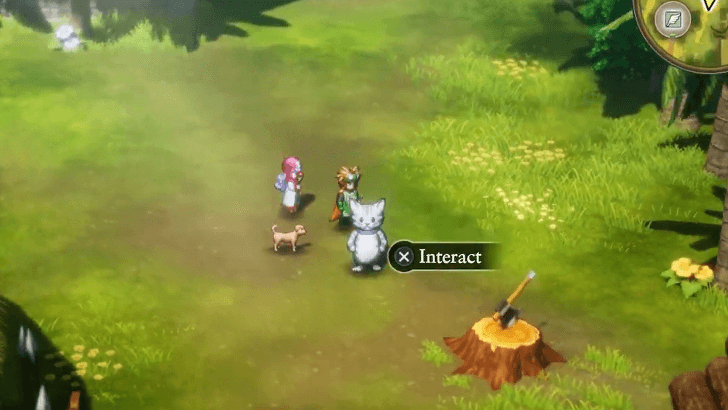
 Head out after and talk to the fisherman east of Zahan. After the conversation with him, Gaggle Rock will now be marked on your map. |
Gaggle Rock
| * |
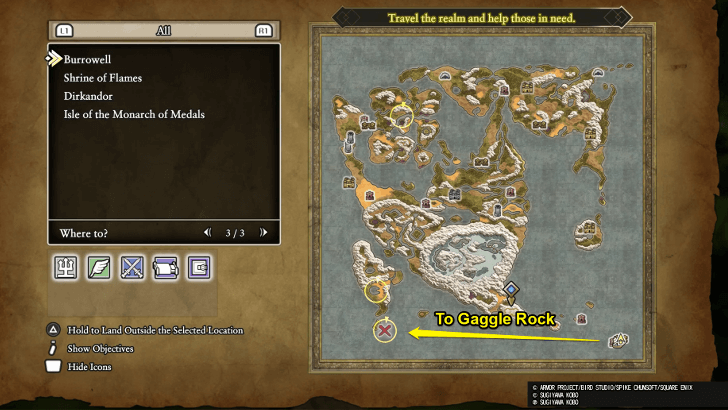 Before sailing to Gaggle Rock, stock up on items, specifically Holy Water, since the enemies you can encounter in the open sea vary in level. It's best to ward them off or flee if you encounter some to save time on your long journey. |
|---|---|
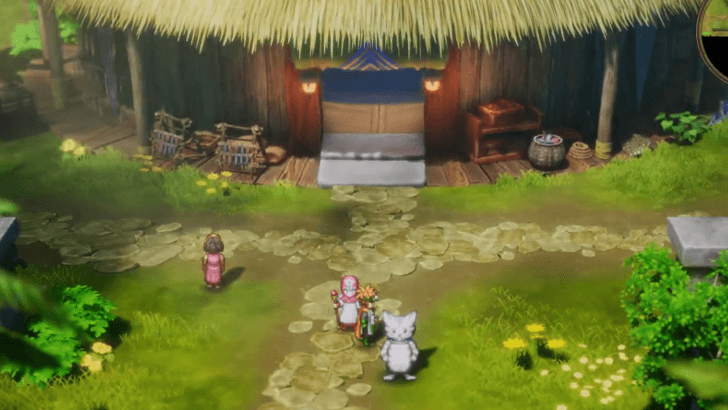
| 1 |
 Upon reaching Gaggle Rock, defeat the guarding Madder Merman and proceed further. You’ll eventually meet two mermaids, Elaine and Melinda. Talk to them to progress. |
| 2 |
 Head back to Zahan and visit Sylvester's family in the first building. There's no need to sail manually, as you can use Zoom or a Chimaera Wing to return. Your ship will be docked in Zahan afterwards. |
Shipwright's Shrine
| 1 |
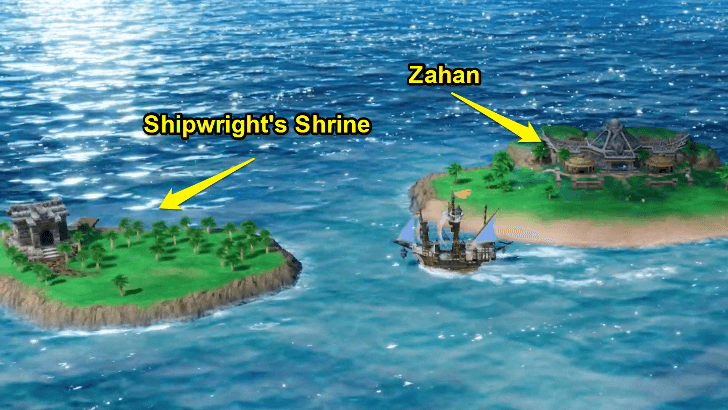 Go to Shipwright’s Shrine next, which you can reach by sailing to the island near Zahan. Enter the temple afterwards. |
|---|---|
| 2 |
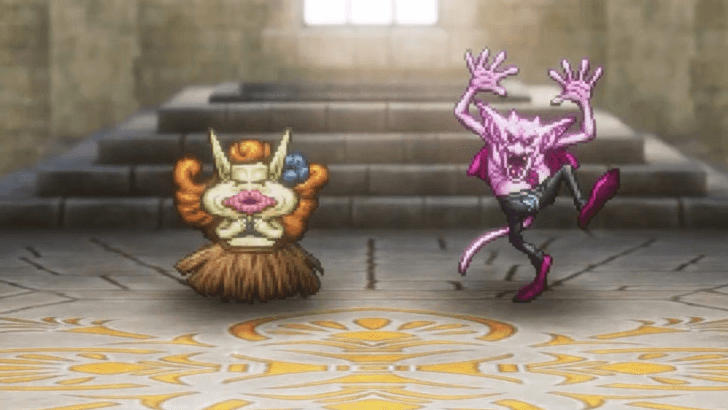 As you enter the shrine, you’ll encounter the Hula Ruler and Disco Demon. Defeat them and take Sylvester's present from them. |
| 3 |
 Fast travel to Gaggle Rock again and talk to the two mermaids. Then, report back to Zahan by watching the cutscene you can trigger in the northeast section of the town. |
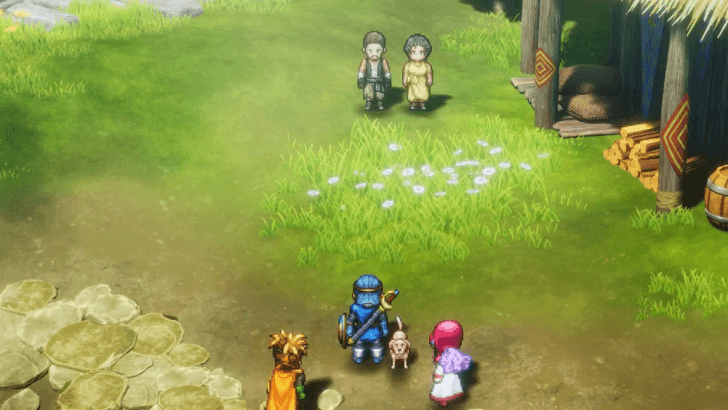
| * |
 Follow the dog afterwards and examine the spot in front of him. You’ll find a Gold Platter buried there for you to take. |
Beran to Yggdrasil's Arbour Walkthrough Guide
| Jump to an Area Walkthrough! | |||
|---|---|---|---|
| 1 | Beran | 2 | Cannock |
| 3 | Yggdrasil's Arbour | 4 | - |
Beran
| 1 |
 Head to Beran by either sailing from the Isle of the Monarch of Medals or, if you haven't unlocked that island yet, from the Oasis or Rippleport. ▶ How to Unlock and Get the Ship |
|---|---|
| * |
 Sail west of the island ahead, since the path on the east is too rocky for ships to pass through, blocking your entrance to Beran from that route. |
| 2 |
 Upon arriving in Beran, feel free to explore or rest first. There's a boss battle up ahead, and if you're ready, head to the port south of town and talk to the Prince of Cannock to get started. |
 Defeat the Brute Bat. The Brute Bat has a gimmick where it spams snooze spells that put your party to sleep. Spells like Fizzle and items like the Banishing Bell are great ways to prevent your party from being hit by Snooze, so make sure to have these prepared before battling him. ▶ List of All Spells and Abilities |
Cannock
| 1 |  After the battle, the Brute Bat curses the Prince of Cannock with an illness. Because of this, he will leave your party and stay in Beran until he's cured. Seek his parents' help in Cannock to find the cure. |
|---|---|
| 2 | 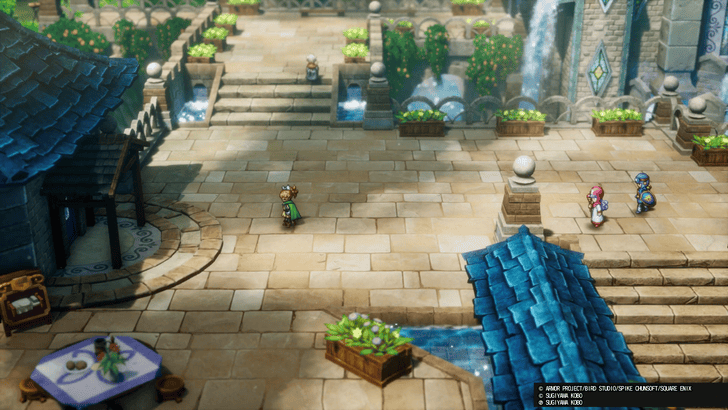 Head back to Beran afterwards to learn more about the Yggdrasil Leaf. The Princess of Cannock will be ahead of you, and after a short confrontation, she'll join your search. |
| 3 | 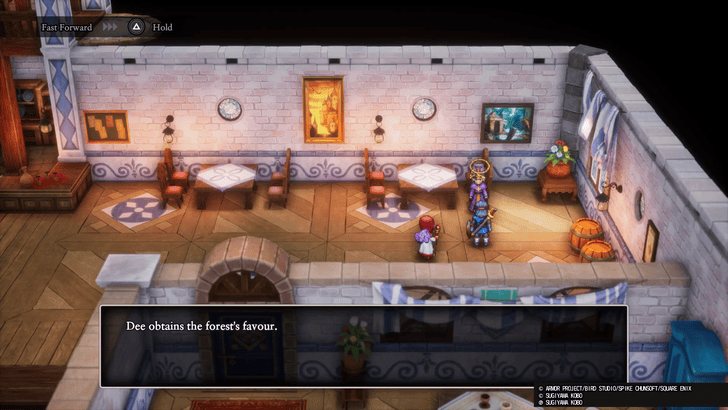 Receive the Forest's Favour from the priest attending to the Prince of Cannock. You can find him in the inn, at the end of the main hallway. |
Yggdrasil's Arbour
| 1 |
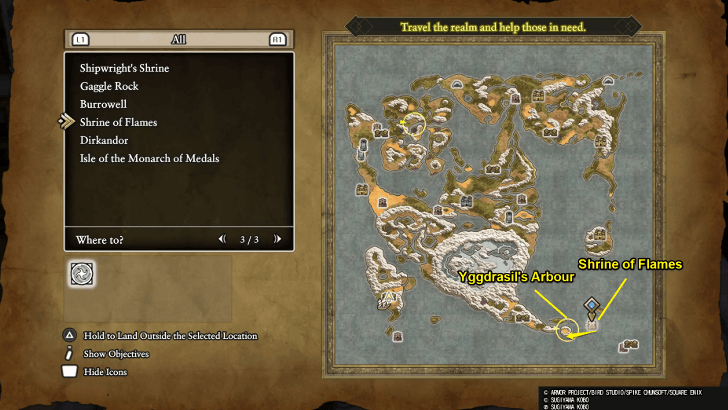 Sail to Yggdrasil’s Arbour by fast travelling to the Shrine of Flames. This should be a short trip since you can fast-travel to this location. Otherwise, you'd have to take a long sail from either Beran or the Pillar of the Winds. |
|---|---|
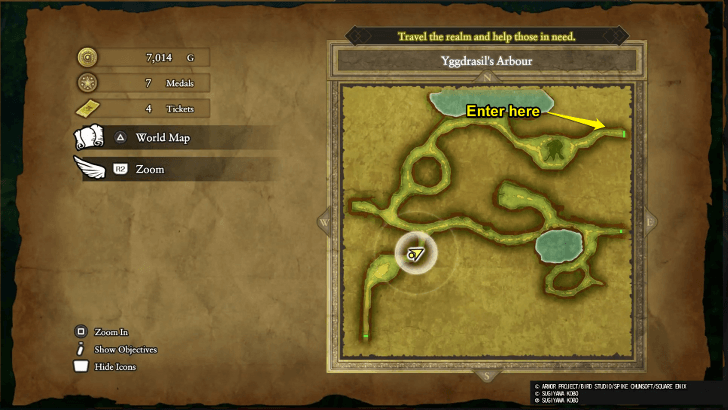
| 2 |
 Take the upper entrance, since the lower path will just lead you to a dead end. Continue heading up on the next floor, and you should reach Yggdrasil shortly. Don’t worry about travelling with one less party member. Since you’re with the Princess of Cannock, she can provide temporary help, though you won’t be able to control her. |
| 3 |
 Approach the fountain ahead, and you’ll be able to get the Yggdrasil Leaf. Head back to Beran afterwards. |
| 4 |
 Once the Prince of Cannock is cured, the Princess of Cannock will join you permanently this time, expanding your party to a full four members. |
Rain Shrine to Faerie Palace
| Jump to an Area Walkthrough! | |||
|---|---|---|---|
| 1 | Rain Shrine | 2 | Dirkandor |
| 3 | Lighthouse | 4 | Dreamer's Lake |
| 5 | Faerie Palace | 6 | - |
Rain Shrine
| 1 |
To start, head to the Shrine of Rain first by fast travelling to Tantegel Castle. Sail northeast, and you should be able to reach the shrine right away.
▶ How to Unlock and Get the Ship |
|---|---|
| 2 | After reaching the Shrine of Rain, head inside and proceed forward to reach the back gate. |
| 3 | Continue moving forward once you reach the back gate, and you should encounter the first boss in this area, Scytan. Defeat it to save the first group of faeries. |
| 4 |
Move to the next floor by taking the stairs near the tower on the right. After that, climb it again to fight the Cool-Headed Winocerus, but you can also check the tower on the left to get the Kabuff Scroll first.
▶ List of All Scrolls and Locations |
| 4 | After defeating the Cool-Headed Winocerus, go up to the fifth floor to face the last boss, Togrus Immensus. This is mostly a physical fight, and it doesn’t use many spells, so make sure to buff your defenses before approaching it. |
| 5 |
Take the Echo Flute from the Over-Seer, and you can now start locating the sigils.
▶ List of All 5 Sigil Locations |
Dirkandor
| 1 | Sail to Dirkandor from either Zahan or the Pillar of the Winds. If you’ve already visited the Shrine of Flames, there's a teleporter inside that can take you to Dirkandor. Head out again, and the place will now be marked for fast travel. |
|---|---|
| 2 | Go to the castle and head to the throne room to speak with the king. |
| 3 | The task ahead is a test of strength, and you’ll be facing three consecutive bosses, so be sure to prepare first. You’ll get to heal between matches, but it’s still recommended to prepare your equipment and buy items before attempting them all. |
| 4 | The first match is against three Hades Condors. Since these enemies are airborne, abilities like Flying Knee should do the trick. |
| 5 | Next, you’ll face two Smackanapes. These enemies are weak to ice attacks, so spells like Crackle can help you defeat them with ease. |
| 6 | The last enemy will be a Striking Sabrecat. You can use the same strategy as with the Smackanapes and attack its weakness with spells and abilities like Crackle. |
| 7 | The last enemy will be a Striking Sabrecat. You can use the same strategy as with the Smackanapes and attack its weakness with spells and abilities like Crackle. |
| 7 | The last enemy will be a Striking Sabrecat. You can use the same strategy as with the Smackanapes and attack its weakness with spells and abilities like Crackle. |
| 8 | Once that’s all done, you can now get the Moon Sigil! You can now leave Dirkandor and search for the other Sigils. |
Lighthouse
| 1 | Fast travel to Rippleport and sail to the lighthouse. You can find this location just southeast of Rippleport. |
|---|---|
| 2 | Proceed to the first floor, then navigate the map to reach the second floor. The layout of the first floor is quite complicated, so make sure to refer to the map often to avoid dead ends. |
| 3 | On the second floor, take the stairs north of where you came from. No other stairs will be accessible, so this should be a short trip up. |
| 4 | On the third floor, proceed forward and watch the cutscene with the old man. The stairs should be nearby, so take them after the scene. |
| 5 | Make your way to the fourth floor by going around the circular room. The stairs should be located behind it. |
| 6 | For the next floors, head to the right and take the stairs to the sixth floor. Then, take the outer stairs on the top left to reach the seventh floor. |
| 7 | Head to the room on the rightmost section of the seventh floor and watch another cutscene. |
| 8 | After the cutscene, head back down to the second floor by taking the stairs on the bottom left. Continue descending to the second floor, and find the next sigil. |
| 9 | Defeat the Nekomancer and his army of Gremlins. Once they’re defeated, the Star Sigil is yours to take. |
| 10 | Head back to the Shrine of Rain afterwards and talk to the faeries. |
Dreamer's Lake
| 1 | Head to Gaggle Rock and speak with Melinda and Elaine again. After the cutscene, you’ll receive the Faerie Trumpet from them. |
|---|---|
| 2 | Fast travel to Dreamer’s Lake and enter it. Head inside immediately and use the Faerie Trumpet to access the Faerie Palace. |
Faerie Palace
| 1 | Enter the Faerie Palace and continue toward the stairs on the west side of the first floor. |
|---|---|
| 2 | From the second floor, take the stairs on the right to head back down to the first floor. |
| 3 | Climb back up to the second floor using the staircase on the right. |
| 4 | Continue through the second floor and head up to the third floor, where a boss battle awaits. |
| 5 | On the third floor, you’ll face Belial, who uses powerful magic attacks. Spells and equipment that reduce incoming magic damage, such as Magic Barrier, will be immensely useful here, as they can greatly increase your survivability against Belial. |
Mersea to Mermaid's Sanctuary Walkthrough Guide
| Jump to an Area Walkthrough! | |||
|---|---|---|---|
| 1 | Mersea | 2 | Mermaid’s Sanctuary |
Mersea
| 1 | After defeating Belial, you’ll receive Lorelei’s Harp from the Dream-Whisperer. This item allows you to explore the open sea from below, so head to Gaggle Rock and talk to the mermaids about it. |
|---|---|
| 2 | After talking to the mermaids in Mersea, dive at the location indicated on the map to find the Mermaid’s Sanctuary. |
Mermaid’s Sanctuary
| 1 | Enter the Mermaid’s Sanctuary and head north. Keep in mind that your starting point changes depending on where you enter, but always aim north, since you’ll find the stairs there. |
|---|---|
| 2 | On the next basement floor, head north, then go right toward the next set of stairs. |
| 3 | Once you reach the third floor, head east to climb back up to the second floor. |
| 4 | Defeat the two Octopests up ahead. You can use attacks such as Zap to deal heavy damage, as they’re weak to it. |
| 5 | After the battle, head down and take the stairs back up to the first basement floor. |
| 6 | Take the nearest stairs down south to return to the second basement floor. |
| 7 | Defeat the three Yellowfinks up ahead. You can use spells like Swoosh to target their weakness. |
| 8 | Head west after the battle and take the stairs down to the third basement floor. |
| 9 | Descend further to the fourth floor. There’s no complicated stair maze here, so just proceed to the boss battle against the Toadalitarian, Venomollusks, and Women O’War. |
| 10 | After the battle, you’ll be taken back to Mersea. Finish the cutscene to get the Magic Key. |
| 11 | Leave the Faerie Castle afterwards and continue searching for the last set of sigils. |
Den of Iniquity to Thief's Hideout Walkthrough Guide
| Jump to an Area Walkthrough! | |||
|---|---|---|---|
| 1 | Den of Iniquity | 2 | Mariella's Lair |
| 3 | Deserted Village | 4 | Thief's Hideout |
Den of Iniquity
| 1 | Head back to Mersea and talk to the Queen. |
|---|---|
| 2 | Fast travel to the Shrine of the Spirit and sail toward the location. Dive down afterwards. |
| 3 | Enter the cave on the wall to access the Den of Iniquity. |
| 4 | Head to the first floor and proceed through the stairs on the right. With the Magic Key, you should be able to open this door right away. |
| 5 | On the next floor, there will be a short boss battle. Be sure to prepare before attempting it! |
| 6 | Defeat the three Shining Armours ahead. A good strategy here is to go all out with magic spells, as they’re more vulnerable to them than to physical attacks. |
| 7 | After defeating them, head northeast and flip the switch. |
| 8 | Go back to the first floor and proceed to the stairs on the east side this time. |
| 9 | Head northwest and go to the room opposite the first switch. You’ll find another one here and flip it. |
| 10 | Without leaving the floor, go south and face the three Osteonauts. Defeat them to proceed. |
| 11 | Use abilities like Undead Undoer to defeat them easily. Try not to drag out this battle, as each Osteonaut can deal heavy damage to your team. |
| 12 | Head to the room in the middle, where you’ll fight another set of Osteonauts. Apply the same strategy as above! |
Mariella's Lair
| 1 | Head back to the first floor, and you should be able to open the sealed door ahead. |
|---|---|
| 2 |
Proceed and defeat Mariella. Since she’s both airborne and undead, abilities like Undead Undoer and Flying Knee can help you deal heavy damage against her. Once defeated, you’ll get the Soul Sigil. Report back to Dirkandor to find out the location of the last sigil. |
Deserted Village
| 1 | Head to the Deserted Village, which you can reach by going west of Moonahan. |
|---|---|
| 2 | Enter the village and head west toward the hut. Proceed inside once you find it. |
| 3 | Head down the stairs and continue moving forward. |
| 4 | Defeat the Wild Hog, the Pillager, and the Surgical Spirit. Prioritize defeating the Surgical Spirit first, as it can put the party to sleep. Defeat the other enemies after it’s down. |
| 5 | Head back to Moonahan and proceed to the building near the entrance, east of the small pond at the top left. |
Thief's Hideout
| 1 | Use the Magic Key to open the gate ahead. Enter it to access the Thief's Hideout. |
|---|---|
| 2 | Defeat the Grimlins and the Sinister Minister up ahead. Focus on the Sinister Minister first, as it can revive the Grimlins if you defeat them. To avoid a long battle, prioritize taking down the Sinister Minister. |
| 3 | Take the Water Sigil afterwards and leave the hideout to go to the Faerie Palace. |
| 4 | Tell the Dream-Whisperer that you have all the sigils. You’ll receive a Spirit Bracer and two Phials of Sage’s Elixir as rewards. |
Cantlin to Slewse Walkthrough Guide
| Jump to an Area Walkthrough! | |||
|---|---|---|---|
| 1 | Cantlin | 2 | Tantegel |
| 3 | Kol | 4 | Burrowell |
| 5 | Slewse | 6 | Tower of the Moon |
Cantlin
| 1 | Fast travel to Cantlin, or sail to it from Rippleport if you haven’t unlocked it yet. |
|---|---|
| 2 | Head to the building west of Cantlin and enter it. |
Tantegel
| 1 | Move to Tantegel afterwards and go to the throne room. Speak to the King. |
|---|
Kol
| 1 | Fast travel to Kol and head to the hot springs northwest of the town. |
|---|---|
| 2 | Examine the sparkly spot afterwards to obtain the Faerie Flute. |
| 3 | Speak to the Firstborn Protector again outside of town. |
Burrowell
| 1 | Head to Burrowell and enter the building east of it. |
|---|---|
| 2 | Talk to the Black Sanguini and Roge Fastfinger afterwards. |
| 3 | Exit Burrowell to trigger two more cutscenes. |
Slewse
| 1 | Head to Slewse or sail to it from the Mermaid’s Sanctuary. |
|---|---|
| 2 | Check the marked location on the map, which should be a keyhole to open the Floodgate. Interact with it to do so. |
Tower of the Moon
| 1 | Head to the Tower of the Moon from the Mermaid’s Sanctuary. It’s not recommended to travel there from Slewse as the area is surrounded by poisonous swamps. |
|---|---|
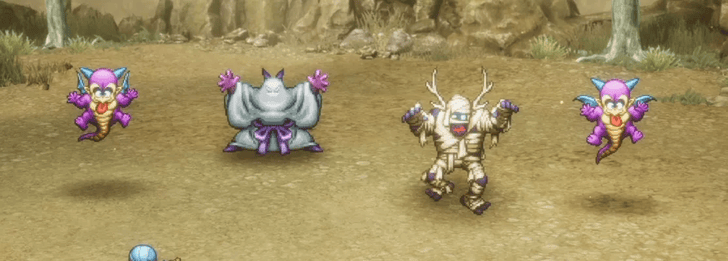
| 2 | Go to the middle and defeat the Antlerkazams. You can go all out on them since they don’t have much HP and can be taken down easily. |
| 3 | On the first floor, take the stairs on the south side of the room to reach the next floor. |
| 4 | On the second floor, take the stairs in the center. |
| 5 | On the third floor, do the same and take the nearest stairs in the center. |
| 6 | On the fourth floor, go west from the east side to reach the next floor. |
| 7 | On the fifth floor, take the nearest stairs instead of the southern one to reach the sixth floor. |
| 8 | Finally, go around on the next floor to face the next boss. |
| 9 | Defeat the Lunagriff on the same floor. Be sure to prepare for this one by buying several recovery items, preferably higher-grade ones to restore more HP, and assign a dedicated healer since the fight can get tough. |
| 10 | Report back to the Black Sanguini after the battle. |
Volcanic Grotto to Dirkandor
| Jump to an Area Walkthrough! | |||
|---|---|---|---|
| 1 | Volcanic Grotto | 2 | Dirkandor |
Volcanic Grotto
| 1 | Fast travel to the Shrine of Flames and sail north toward the marked location. |
|---|---|
| 2 | Use the Moonshard to clear the way, then enter the Volcanic Grotto. |
| 3 | On the first basement floor, go southwest to reach the next floor. Be sure to use Safe Passage to prevent the party from taking damage from magma. |
| 4 | On the second basement floor, go northwest this time to reach the next floor. You can explore the lower area to find collectables such as Mini Medals, Scrolls, and the Fire Blade. |
| 5 | On the third floor, you’ll reach an area full of ladders. Take the closest one on the far left to reach the fourth basement floor. |
| 6 | Once you’re on the fourth floor, take the stairs on the left. |
| 7 | Continue on the fifth floor, but prepare for the boss battle ahead. |
| 8 | Defeat Pazuzu to proceed. A good strategy is to use Magic Barrier, debuff spells, and light attacks. Maintain a good balance of defense and offense since Pazuzu uses a variety of spells against the party. |
Dirkandor
| 1 | Fast travel to Dirkandor and talk to the king. |
|---|---|
| 2 | Defeat the King of Dirkandor. He mostly relies on physical moves that hit all party members, so make sure to buff your defenses and have a healer ready to maintain HP. |
| 3 | Visit the priest in Beran, the Dream-Whisperer in the Faerie Palace, and the Mermaid Queen in Mersea afterwards. Each will have a cutscene that reveals your next destination. |
Sunken Ship to Passage to Rendarak
| Jump to an Area Walkthrough! | |||
|---|---|---|---|
| 1 | Sunken Ship | 2 | Shrine of Rubiss |
| 3 | Passage to Rendarak | 4 | - |
Sunken Ship
| 1 | Teleport to Galenholm and take your ship north until you can dive. Once you're on the seabed, continue heading north until you get to the Sunken Ship. |
|---|---|
| 2 | Explore the ship for any treasures, and when you're done, open the chest at the top of B2 to get the Pearl Earring and the Letter in a Bottle. |
| 3 | Head back to Mersea and talk to the queen to give her the earring and bottle. Doing this will upgrade Lorelei's Harp and allow you to dive deeper into the dark parts of the ocean. |
Shrine of Rubiss
| 1 | With the upgraded harp, you'll now be able to get to the Shrine of Rubiss. Teleport to Dirkandor and take the ship northwest until you can dive twice to reach the shrine. |
|---|---|
| 2 | Before following the path north and going further into the shrine, make sure you're healed up and your equipment is upgraded, since you'll encounter the boss Atlas here. They only use high-power physical attacks, so make sure to employ strategies that help either minimize the damage or dodge their hits. |
| 3 | After the boss has been defeated, you can continue following the path until you reach the end. Once the cutscene is over, you'll now have the Eye of Rubiss. |
Passage to Rendarak
| 1 | When you're ready, head to Beran and go through the teleportal behind the church to reach the Shrine South of Rendarak. |
|---|---|
| 2 | After exploring the area, head out west until you reach the mountain range. Interact with the closed-off entrance to open up the Passage to Rendarak. This is a pretty long and difficult dungeon, so you can leave first and teleport back here if you need to stock up on supplies. |
| 3 | Once you're inside the cave, explore the area first while avoiding the pitfalls scattered around the floor. When you're ready to proceed, head to the northeast exit to reach an area that doesn't have a map. |
| 4 | To get through the seemingly never-ending corridors, you'll need to go to the room with a ladder on the top right. The room is found in the center of the area, and from the staircase from the previous room, you will need to head right and go down the third staircase. |
| 5 | Now that you're free from that area and can see the map again, continue exploring the area for any treasures. Make sure that you don't miss Erdrick's Armor in the bottom right room, since this will be one of the best armor pieces you can use for a while. |
| 6 | Once you reach the 5th floor room with many pitfalls, it's recommended to fall down to the 4th and 3rd floors to get the treasures in both areas. However, this will mean you will need to go through the entire dungeon again, so it's up to you if it's worth getting the Mini Medal and Thunderbolt Blade now or later. |
| 7 | Before going up the ladder in the top right of the 5th floor, make sure that the Prince of Midenhall is wearing the best equipment possible, even if you have to unequip items from your other party members. When you're ready, head up the ladder to enter a 1-on-1 boss fight against the Hypermalediction. This fight can be hard since you're solo, so make sure to use Meditation and block whenever necessary. |
| 8 | After the boss goes down, you'll reunite with your party members. Before exploring again, make sure that everyone has re-equipped their items if you removed something before the 1-on-1 boss fight. |
| 9 | When you're ready to proceed, head out right from the boss room and follow the candles until you reach a healing tile. This is an obvious indicator that there's an upcoming boss fight, so make sure that you're prepared before continuing on. |
| 10 | Approach the end of the dungeon to face Belial again, who's a lot stronger since your last encounter. This fight can easily be won as long as you're applying buffs, like the Prince of Cannock's Souped-Up Kabuff, so keep fighting until the boss goes down. Once he's been defeated, you can leave the dungeon and finally reach the final area of the game, Rendarak. However, if you're low on HP, it's recommended to back track a bit just so you can heal at the green tile. |
Rendarak Shrine to Hall of Hargon
| Jump to an Area Walkthrough! | |||
|---|---|---|---|
| 1 | Rendarak Shrine | 2 | Hall of Hargon |
Rendarak Shrine
| 1 | After exiting the cave, head northeast until you reach Rendarak Shrine. After the cutscene, you will get the Ultimate Key, as well as the ability to heal and save when you talk to the priest. |
|---|---|
| 2 | Now that you have the Ultimate Key, take some time to revisit every location and unlock all the green chests and doors you come across. Make sure not to miss the Mark of Erdrick in Midenhall, since you'll need that accessory to get Erdrick's Helm in the Sanctum. Also, make sure that you talk to the man beside the counter on the second floor of Kol's weapon shop so that you can start the Side Quest to repair Erdrick's Sword. ▶ How to Get the Ultimate Key and Where to Use It |
| 3 | When you're done exploring and using the Ultimate Key, head west from Rendarak to reach the Hall of Hargon. Also, as a note, you can visit the Shivering Shrine just east of the final dungeon so that you can grab the treasures found inside. |
Hall of Hargon
| 1 | Head inside the Hall of Hargon, and after the cutscene, you will be in what appears to be Midenhall's Castle. Head up and talk to the king, then head back down and use the Eye of Rubiss from your inventory. |
|---|---|
| 2 | Now that you can see the real Hall of Hargon, head forward to initiate a boss fight with Mariella. The boss fight can be made trivial by putting her to sleep, so make sure the Princess of Moonbrooke is spamming Wild Side Duplic Hat boosted Snoozes. |
| 3 | Once she's been defeated, you're free to start exploring Hargon's lair. The dungeon is very straightforward compared to the Passage to Rendarak, but be careful since this dungeon contains a boss gauntlet before the final fight. |
| 4 | When you reach the 4th floor, make sure you're fully ready since you'll face Atlas in the area before the staircase upwards. He'll largely be the same as his previous fight, with the exception of more AoE attacks, so make sure to increase your Defense and block before he hits you with powered-up attacks. |
| 5 | The next boss after Atlas will be Pazuzu, encountered on the 5th floor. Make sure everyone has a Banishing Bell equipped, and also increase your magical defenses. Also, as a note, he's susceptible to sleep, so make sure the Princess of Moonbrooke is using Wild Side Duplic Hat boosted Snoozes, similar to the Mariella fight. |
| 6 | Finally, the last boss of the gauntlet, Belial, will be fought on the 6th floor. Similar to his last encounter, make sure to spam every defensive buff you have, especially the Souped-Up Kabuff from the Prince of Cannock, and heal whenever necessary. |
| 7 | After the boss gauntlet is over, the only change remaining is Hargon himself. Finish up exploring the dungeon for any treasures and head to the 7th floor to activate the teleport that connects back to the entrance. |
| 8 | Since the only thing left is the final boss of the game, make sure to tie up any loose ends, such as Mini Medals, Key Chests, or Side Quests, like restoring Erdrick's Sword. |
| 9 | When you're ready and fully healed up, head through the door on the 7th floor to face Hargon. Make sure to preserve your MP since there's no downtime between the first and second parts of the final boss fight. |
| 10 | Once the final boss has been defeated, you'll have successfully saved the world! Before heading back to Midenhall, make sure to stop by towns, like Beran, Moonbrooke, or Cannock, and talk to NPCs for unique dialogue and cutscenes. |
| 11 | After you're done exploring the world and talking to NPCs, head back to Midenhall and talk to the king to officially beat the game. However, there's still post-game activities to do, so load your completed save and hop right back in! ▶ Post Game Guide |
All Endings Guide
Two Different Endings
There are two different endings that you can get, with the second one only being available during the post-game. This means that you'll need to beat the game and see the first ending at least once before you can see the second one.
Endings Guide: List of All Endings
Dragon Quest 2 HD-2D Remake (DQ2) Related Guides
Dragon Quest 2 HD-2D Remake Wiki Front
Guides by Category
 Walkthrough Walkthrough |
 Tips and Tricks Tips and Tricks |
 Bosses Bosses |
 Spells and Abilities Spells and Abilities |
 Locations Locations |
 Equipment Equipment |
 Items Items |
 Enemies Enemies |
 Seeds Seeds |
 Characters Characters |
Recommended Guides
Author

100% Walkthrough Guide
Rankings
- We could not find the message board you were looking for.
Gaming News

![Star Savior Review [First Impressions] | Engaging, Entertaining, and Expensive](https://img.game8.co/4447603/8f500e9bf666bdb8adb1af478e9dfdbd.png/show)


Popular Games

Genshin Impact Walkthrough & Guides Wiki
Umamusume: Pretty Derby Walkthrough & Guides Wiki
Crimson Desert Walkthrough & Guides Wiki
Monster Hunter Stories 3: Twisted Reflection Walkthrough & Guides Wiki
Honkai: Star Rail Walkthrough & Guides Wiki
Pokemon Pokopia Walkthrough & Guides Wiki
The Seven Deadly Sins: Origin Walkthrough & Guides Wiki
Wuthering Waves Walkthrough & Guides Wiki
Zenless Zone Zero Walkthrough & Guides Wiki
Arknights: Endfield Walkthrough & Guides Wiki


Recommended Games
Fire Emblem Heroes (FEH) Walkthrough & Guides Wiki
Diablo 4: Vessel of Hatred Walkthrough & Guides Wiki
Cyberpunk 2077: Ultimate Edition Walkthrough & Guides Wiki
Yu-Gi-Oh! Master Duel Walkthrough & Guides Wiki
Super Smash Bros. Ultimate Walkthrough & Guides Wiki
Pokemon Brilliant Diamond and Shining Pearl (BDSP) Walkthrough & Guides Wiki
Elden Ring Shadow of the Erdtree Walkthrough & Guides Wiki
Monster Hunter World Walkthrough & Guides Wiki
The Legend of Zelda: Tears of the Kingdom Walkthrough & Guides Wiki
Persona 3 Reload Walkthrough & Guides Wiki


All rights reserved
© ARMOR PROJECT/BIRD STUDIO/SPIKE CHUNSOFT/SQUARE ENIX
© SUGIYAMA KOBO ℗ SUGIYAMA KOBO
The copyrights of videos of games used in our content and other intellectual property rights belong to the provider of the game.
The contents we provide on this site were created personally by members of the Game8 editorial department.
We refuse the right to reuse or repost content taken without our permission such as data or images to other sites.
Your guide is not entirely helpful with knowing what to get or mini medals as the first DQ guide however is useful with the story it is hard to know what rare equipment to equip or where to find the scrolls for my party members