This survey will take about 1 minute.
Your answers will help us to improve our website.
Zelda: Breath of the Wild (BotW)
EX Trial of the Sword Walkthrough: How to Upgrade the Master Sword
★ Sequel: Tears of the Kingdom Guide here!
★ Get a head start with our Beginner's Guide
┗ The Best Recipes to Cook | Rupee Farming
★ Shrines Locations | Korok Seeds Locations
★ Explore after the story with our Post Game Guide

The EX Trial of the Sword is a DLC Side Quest in The Legend of Zelda: Breath of the Wild (BotW) where you can complete challenging Trials and upgrade the Master Sword! Here are tips on how to prepare for the Trials and strategies to get you through each floor!
| All Trial of the Sword Guides | ||
|---|---|---|
| EX Trial of the Sword | ||
| The Beginning Trials | The Middle Trials | The Final Trials |
List of Contents
How to Upgrade the Master Sword
Complete All the Master Sword Trials

The Master Sword will be upgraded to its full potential after completing the Beginning Trials, Middle Trials, and Final Trials. After completing all 54 floors, the Master Sword will permanently have 60 base power, not just when near Guardians or areas with the Ganon's presence (Divine Beasts and Hyrule Castle).
How to Start the Trial of the Sword
Place the Master Sword Back in Its Pedestal

Link can access the trial at any time after finishing The Hero's Sword main quest. Simply place the Master Sword back in its pedestal to start the trial.
Preparing for the Trial of the Sword
Get as Much Stamina and Hearts as Possible

Link will fight through the trials with the current health he has, and while it's possible to complete all three trials with just 13 Heart Containers, every extra heart container helps—especially when you reach the tougher levels!
Boosting Link's stamina is also a good idea as some levels require Link to climb, swim, and even paraglide across environmental hazards.
Check out our shrine list below to learn how to solve each shrine and get enough Spirit Orbs to boost Link's hearts and stamina.
Shrines Map and All Shrine Locations
Expand Your Inventory Space

Although Link can't bring any weapons and armor during the trials, he can gain a lot of weapons as he progresses throughout each level.
Link needs all the spare weapons he can get to succeed each trial, so expanding your inventory is a must! You don't need to find all Korok Seeds though. just enough that you can store five or more weapons, bows, and shields.
Eat Hearty Dishes Before Starting a Trial

Since Link starts each trial with the amount of health he currently has, it's a good idea to boost it before actually starting the challenge.
The best dishes to eat are meals made from Hearty ingredients, such as Hearty Radishes, Hearty Truffles, and Hearty Durians. These dishes also provide Golden Temporary Hearts, which is very useful especially if you don't have maximum hearts.
Eat Mighty Dishes Before Starting a Trial

If you have enough hearts and are confident in your combat skills, you can also eat Mighty Dishes before starting a trial. These provide a temporary attack boost that can help Link quickly dispatch enemies throughout the levels.
The best food to eat is Mighty Simmered Fruit made with five Mighty Bananas. This fruit is very easy to farm as Yiga Footsoldiers and Yiga Blademasters that ambush Link frequently drop it. It's also easy to find in the forests in the Faron Region.
Upgrade the Sheikah Runes

It's also a good idea to upgrade Link's runes by finishing the Slated for Upgrades quest given by Purah in the Hateno Ancient Tech Lab.
The damage boost to the Remote Bombs, as well as the duration boost for the Stasis rune, can help Linkin certain levels where weapons are scarce or have tough enemies.
Practice Your Parries

Since there are a limited amount of shields in the trials, it's important to master parrying attacks to conserve the durability of each shield you get.
The best monsters to practice against are Guardian Stalkers and Silver Lynels. Guardian Stalkers have a countdown that can help you get the timing right, while Lynels use a plethora of attacks and different weapons that require different timings.
Master Evading

Evading is another skill to master when progressing through the trials. Evading at the right moment allows Link to unleash a flurry of attacks that can quickly dispatch enemies.
How to Perfect Dodge and Flurry Rush
EX Trial of the Sword Walkthrough
The Beginning Trials Walkthrough
The Beginning Trials has a total of 13 floors with one Resting Spot. Completing the Beginning Trials leads you to the room where you can boost the Master Sword's power from 30 to 40.
The Beginning Trials Walkthrough
Beginning Trials Floor Summaries
| 1 | Equipment | Enemies |
|---|---|---|
|
・Tree Branch (3) ・Boko Club (1) ・Woodcutter's Axe (1) ・Boko Spear (1) ・Boko Shield (1) |
・Bokoblin (3) |
Food & Materials |
|
・Seared Steak (1) ・Various Food (Multiple) |
||
| 2 | Equipment | Enemies |
|
・Traveler's Sword (1) ・Boko Bat (1) ・Boko Bow (2) ・Arrow (Multiple) ・Traveler's Shield (1) |
・Bokoblin (4) ・Fire Chuchu (1) |
Food & Materials |
|
・Various Food (Multiple) |
||
| 3 | Equipment | Enemies |
|
・Boomerang (1) ・Fire Arrow (5) |
・Fire Chuchu (4) ・Chuchu (4) |
Food & Materials |
| None | ||
| 4 | Equipment | Enemies |
|
・Soldier's Broadsword (1) ・Boko Club (1) ・Spiked Boko Bat (1) ・Traveler's Spear (1) ・Boko Spear (1) ・Traveler's Bow (1) ・Spiked Boko Bow (1) ・Arrow (Multiple) ・Fire Arrow (Multiple) ・Soldier's Shield (1) |
・Blue Bokoblin (2) ・Bokoblin (5) |
Food & Materials |
|
・Bird Egg (2) |
||
| 5 | Equipment | Enemies |
|
・Spiked Boko Club (1) ・Spiked Boko Bat (1) ・Moblin Club (1) ・Spiked Boko Spear (1) ・Moblin Spear (1) ・Arrow (Multiple) ・Spiked Boko Shield (1) |
・Moblin (2) ・Blue Bokoblin (3) |
Food & Materials |
|
・Various Food (Multiple) |
||
| 6 | Equipment | Enemies |
| None |
・Stone Talus (1) |
Food & Materials |
| None | ||
| 7 | Equipment | Enemies |
|
・Torch (1) ・Eightfold Blade (1) ・Serpentine Spear (1) ・Arrow (Multiple) ・Fire Arrow (Multiple) ・Shield of the Mind's Eye (1) |
None | Food & Materials |
|
・Apple (2) ・Armored Carp (3) ・Fairy (1) ・Ironshroom (2) ・Razorshroom (2) ・Various Food (Multiple) |
||
| 8 | Equipment | Enemies |
|
・Lizal Boomerang (1) ・Throwing Spear (1) ・Boko Spear (4) ・Lizal Bow (1) ・Arrow (10) |
・Blue Lizalfos (2) ・Lizalfos (2) ・Electric Chuchu (1) |
Food & Materials |
|
・Roasted Bass (3) ・Various Food (Multiple) |
||
| 9 | Equipment | Enemies |
|
・Lightning Rod (1) ・Arrow (10) |
・Electric Wizzrobe (1) ・Water Octorok (2) |
Food & Materials |
| None | ||
| 10 | Equipment | Enemies |
|
・Lizal Boomerang (1) ・Lizal Spear (1) ・Lizal Bow (1) ・Arrow (Multiple) ・Lizal Shield (1) |
・Black Lizalfos (2) ・Blue Lizalfos (1) |
Food & Materials |
|
・Various Food (Multiple) |
||
| 11 | Equipment | Enemies |
|
・Soldier's Broadsword (1) ・Dragonbone Boko Club (1) ・Spiked Boko Bat (1) ・Soldier's Spear (1) ・Spiked Boko Spear (1) ・Spiked Boko Bow (4) ・Arrow (Multiple) ・Fire Arrow (10) ・Shock Arrow (10) ・Dragonbone Boko Shield (1) |
・Black Moblin (1) ・Black Bokoblin (1) ・Blue Bokoblin (1) ・Bokoblin (6) |
Food & Materials |
|
・Various Food (Multiple) |
||
| 12 | Equipment | Enemies |
|
・Knight's Broadsword (1) ・Knight's Bow (1) ・Knight's Shield (1) |
・Blue Hinox (1) |
Food & Materials |
|
・Palm Fruit (Multiple) |
The Middle Trials Walkthrough
The Middle Trials has a total of 17 floors with two Resting Spots. Completing the Middle Trials leads you to the room where you can boost the Master Sword's power from 40 to 50.
Middle Trials Floor Summaries
| 1 | Equipment | Enemies |
|---|---|---|
|
・Soldier's Broadsword (1) ・Boko Club (1) ・Spiked Boko Club (1) ・Woodcutter's Axe (1) ・Boko Spear (1) ・Spiked Boko Spear (1) ・Soldier's Bow (2) ・Boko Bow (1) ・Arrow (Multiple) ・Fire Arrow (Multiple) ・Spiked Boko Shield (1) |
・Bokoblin (5) |
Food & Materials |
|
・Various Food (Multiple) |
||
| 2 | Equipment | Enemies |
|
・Soldier's Broadsword (1) ・Feathered Edge (1) ・Fire Rod (1) ・Meteor Rod (1) ・Soldier's Spear (1) ・Spiked Boko Bow (1) ・Arrow (Multiple) ・Soldier's Shield (1) |
・Blue Bokoblin (1) ・Bokoblin (2) ・Meteo Wizzrobe (1) ・Fire Wizzrobe (1) |
Food & Materials |
|
・Various Food (Multiple) |
||
| 3 | Equipment | Enemies |
|
・Lizal Forked Boomerang (1) ・Feathered Spear (1) ・Enhanced Lizal Spear (1) ・Phrenic Bow (1) ・Boko Bow (1) ・Spiked Boko Bow (2) ・Arrow (Multiple) ・Reinforced Lizal Shield (1) |
・Blue Bokoblin (2) ・Bokoblin (5) |
Food & Materials |
|
・Various Food (Multiple) |
||
| 4 | Equipment | Enemies |
|
・Soldier's Bow (1) ・Arrow (Multiple) ・Knight's Shield (1) |
・Decayed Guardian (1) |
Food & Materials |
| None | ||
| 5 | Equipment | Enemies |
|
・Torch (1) ・Knight's Broadsword (1) ・Woodcutter's Axe (1) ・Falcon Bow (1) ・Arrow (Multiple) ・Hylian Trousers (1) |
None | Food & Materials |
|
・Apple (2) ・Fairy (1) ・Hylian Shroom (2) ・Hyrule Bass (3) ・Ironshroom (2) ・Various Food (Multiple) |
||
| 6 | Equipment | Enemies |
| None |
・Fire Keese (5) ・Electric Chuchu (1) |
Food & Materials |
| None | ||
| 7 | Equipment | Enemies |
|
・Torch (1) ・Flameblade (1) ・Forest Dweller's Spear (1) ・Enhanced Lizal Spear (1) ・Strengthened Lizal Bow (1) ・Fire Arrow (Multiple) |
・Fire-Breath Lizalfos (2) ・Blue Lizalfos (2) |
Food & Materials |
|
・Various Food (Multiple) |
||
| 8 | Equipment | Enemies |
|
・Torch (2) ・Soldier's Broadsword (1) ・Rusty Broadsword (2) ・Dragonbone Boko Club (1) ・Meteor Rod (1) ・Dragonbone Boko Bat (1) ・Rusty Halberd (1) ・Arrow (Multiple) ・Soldier's Shield (1) ・Rusty Shield (1) |
・Black Bokoblin (2) ・Blue Bokoblin (1) ・Meteo Wizzrobe (1) |
Food & Materials |
|
・Seared Steak (1) ・Various Food (Multiple) |
||
| 9 | Equipment | Enemies |
|
・Torch (2) ・Rusty Broadsword (1) ・Arrow (Multiple) ・Rusty Shield (1) |
・Decayed Guardian (1) |
Food & Materials |
| None | ||
| 10 | Equipment | Enemies |
|
・Torch (2) ・Knight's Broadsword (1) ・Thunderstorm Rod (1) ・Rusty Claymore (1) ・Rusty Halberd (1) ・Knight's Bow (1) ・Arrow (Multiple) |
・Black Hinox (1) |
Food & Materials |
| None | ||
| 11 | Equipment | Enemies |
|
・Forest Dweller's Sword (1) ・Forest Dweller's Spear (1) ・Arrow (Multiple) ・Hylian Tunic (1) |
None | Food & Materials |
|
・Apple (2) ・Endura Shroom (2) ・Fairy (2) ・Hyrule Bass (3) ・Ironshroom (2) ・Various Food (Multiple) |
||
| 12 | Equipment | Enemies |
|
・Arrow (10) |
・Guardian Scout I (6) |
Food & Materials |
| None | ||
| 13 | Equipment | Enemies |
|
・Guardian Sword (1) ・Ancient Battle Axe (1) ・Guardian Spear (1) ・Duplex Bow (1) |
・Guardian Scout II (3) |
Food & Materials |
| None | ||
| 14 | Equipment | Enemies |
|
・Guardian Sword (2) ・Eightfold Longblade (1) ・Guardian Shield (2) |
・Guardian Scout II (2) ・Guardian Scout I (4) |
Food & Materials |
| None | ||
| 15 | Equipment | Enemies |
|
・Guardian Sword+ (1) ・Ancient Battle Axe (1) ・Guardian Spear (1) ・Guardian Shield+ (1) |
・Guardian Scout II (2) |
Food & Materials |
| None | ||
| 16 | Equipment | Enemies |
|
・Guardian Sword+ (1) ・Ancient Battle Axe+ (1) ・Guardian Spear+ (1) |
・Guardian Scout IV (1) |
Food & Materials |
| None |
The Final Trials Walkthrough
The Final Trials has a total of 24 floors with three Resting Spots. Completing the Final Trials fully awakens the Master Sword, boosting its base power from 50 to 60.
Final Trials Floor Summaries
Trial of the Sword Master Mode Tips
Extend Food Buff Effects with Dragon Horns
Link will be spending more time clearing each floor on Master Mode due to the tougher enemies. As a result, normal food buffs will likely run out before you even get a chance to face the first boss!
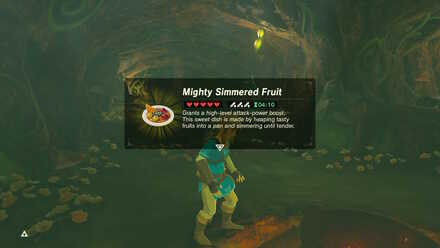 Enlarge EnlargeNormal Mighty Simmered Fruit |
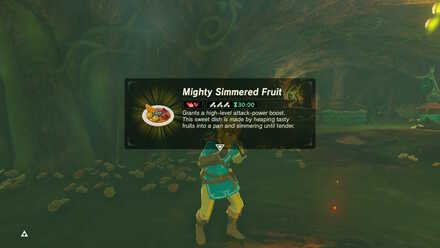 Enlarge EnlargeMighty Simmered Fruit with Dragon Horn |
When cooking up a dish with a buff, such as Migthy Dishes, add any Dragon Horn (Naydra's / Farosh's / Dinraal's Horn) to the mix to extend the duration of its effects to 30 minutes!
Maximize the Use of Stasis and Two-Handed Charged Attacks
Master Mode enemies regenerate lost health after not being attacked for a short while, so you don't want them getting flung away by your combos. Try using Stasis to hold enemies in place, especially fast ones like Lizalfos, before performing a combo.
Using Charged Attacks while wielding a Two-Handed weapon dishes out higher damage than a normal combo, so make use of this against a frozen enemy to maximize the rune's duration.
What is the Trial of the Sword?
Part of The Master Trials DLC
The Trial of the Sword is a mini-dungeon added in the game as part of The Master Trials DLC.
Also known as the Sword Monk's Shrine, it is widely considered the toughest challenge in the game and is designed to test the limits of Link's strength and willpower by pitting him against waves of enemies across 54 floors.
A Champion's Challenge

Once Link starts a trial, he is unable to use any of his weapons, armor, shields, food, and materials. Runes are still useable and are often instrumental in progressing through certain floors.
Additionally, Link can't use any of his Champion Abilities and must rely instead on his wits and cunning to defeat all enemies in each floor.
Upgrade the Master Sword

Clearing a set of trials boosts the power of the Master Sword by 10, eventually reaching a base power of 60 after completing all three sets.
A fully awakened Master Sword will always glow with energy and using the Sword Beam when at full health no longer drains its durability. It will still eventually lose energy and will need to recharge, but the boost in power makes it the most reliable weapon in the game.
Three Sets of Combat Trials
The Trial of the Sword is composed of three sets of trials - 13 Beginning Trials, 16 Middle Trials, and 23 Final Trials for a total of 54 floors.
Link needs to defeat all enemies in each floor to progress to the next one. While this may seem like a daunting task, the trials have floors that act as Resting Spots where Link can recuperate and cook food, acquire armor and weapons, and even catch fairies!
Zelda: BotW Related Guides

Trial of the Sword Guides
| All Trial of the Sword Guides | ||
|---|---|---|
| EX Trial of the Sword | ||
| The Beginning Trials | The Middle Trials | The Final Trials |
Other DLC Quests
Author

The Legend of Zelda: Breath of the Wild Walkthrough & Guides Wiki
EX Trial of the Sword Walkthrough: How to Upgrade the Master Sword
Please participate in our site
improvement survey
03/2026
improvement survey
03/2026
Would you assist in
improving Game8's site?
improving Game8's site?

×
We are listening to our users' valuable opinions and discussing how to act on them.
The information collected through this survey will be used for the purpose of improving our services. In addition, the information will only be disclosed a part of a statistic in a format that will not allow identification of personal information.
Begin Survey
Not Now
×
Please rate each item regarding Game8.co's Advertisements.
Amount of Ads
Very Dissatisfied
Somewhat Dissatisfied
Fine
Somewhat Satisfied
Highly Satisfied
Placement of Ads
Timing of Ad Display
Ad Loading Speed
Safeness of Ads
Content of Ads
×
Please rate each item regarding Game8.co's Quality of Articles.
Amount of information
Very Dissatisfied
Somewhat Dissatisfied
Fine
Somewhat Satisfied
Highly Satisfied
Frequency of updates
Speed of new information
Accuracy of articles
Understandibility of articles
Readability of sentences
×
Please rate each item regarding Game8.co's Usability of the Site.
Ease of finding information
Very Dissatisfied
Somewhat Dissatisfied
Fine
Somewhat Satisfied
Highly Satisfied
Loading Speed
Use of Color
Font Size
Visibility of Images
Easy to Understand Layout
×
Please rate each item regarding Game8.co's Message Boards, Comments.
Ease of Writing
Very Dissatisfied
Somewhat Dissatisfied
Fine
Somewhat Satisfied
Highly Satisfied
Readability
Ease in Finding Information
Comment Quality
Comment Quantity
Admin Response
×
Please rate each item regarding Game8.co's Site's new design.
Please rate our site's new design
Very Dissatisfied
Somewhat Dissatisfied
Fine
Somewhat Satisfied
Highly Satisfied
Do you think that the website's design change makes the site easier to use?
Has the new design made it easier for you to find information on the site?
Has the new design improved the overall visual appeal of the site?
How would you rate your overall satisfaction with the new design of the site?
×
How likely are you to recommend Game8 to someone you know?
Very Unlikely
0
1
2
3
4
5
6
7
8
9
10
Very Likely
If you have other opinions regarding potential improvement to the website, please share them with us. We would appreciate your honest opinion.
Note: This is a free response section, so you can proceed without entering anything.
Note: Please be sure not to enter any kind of personal information into your response.
Note: Please be sure not to enter any kind of personal information into your response.
×
Thank You
×
Thank you for participating in our survey! Your answers will help us to improve the quality of our website and services.
We hope you continue to make use of Game8.
We hope you continue to make use of Game8.
Close
Rankings
- We could not find the message board you were looking for.
Gaming News


![Tides of Tomorrow Review [Early Preview] | A Real Tide Turner](https://img.game8.co/4430520/55ac77566157b2a1d29564ff575d5274.png/thumb)
Popular Games

Genshin Impact Walkthrough & Guides Wiki
Resident Evil Requiem (RE9) Walkthrough & Guides Wiki
Honkai: Star Rail Walkthrough & Guides Wiki
Monster Hunter Wilds Walkthrough & Guides Wiki
Umamusume: Pretty Derby Walkthrough & Guides Wiki
Pokemon TCG Pocket (PTCGP) Strategies & Guides Wiki
Arknights: Endfield Walkthrough & Guides Wiki
Wuthering Waves Walkthrough & Guides Wiki
Zenless Zone Zero Walkthrough & Guides Wiki
Digimon Story: Time Stranger Walkthrough & Guides Wiki


Recommended Games
Yu-Gi-Oh! Master Duel Walkthrough & Guides Wiki
Super Smash Bros. Ultimate Walkthrough & Guides Wiki
Diablo 4: Vessel of Hatred Walkthrough & Guides Wiki
Fire Emblem Heroes (FEH) Walkthrough & Guides Wiki
Pokemon Brilliant Diamond and Shining Pearl (BDSP) Walkthrough & Guides Wiki
Elden Ring Shadow of the Erdtree Walkthrough & Guides Wiki
Monster Hunter World Walkthrough & Guides Wiki
The Legend of Zelda: Tears of the Kingdom Walkthrough & Guides Wiki
Persona 3 Reload Walkthrough & Guides Wiki
Cyberpunk 2077: Ultimate Edition Walkthrough & Guides Wiki


All rights reserved
© 2020 Nintendo. The Legend of Zelda, Wii U, and Nintendo Switch are trademarks of Nintendo.
The copyrights of videos of games used in our content and other intellectual property rights belong to the provider of the game.
The contents we provide on this site were created personally by members of the Game8 editorial department.
We refuse the right to reuse or repost content taken without our permission such as data or images to other sites.