Destroy Ganon Walkthrough: How to Get Through Hyrule Castle
★ Sequel: Tears of the Kingdom Guide here!
★ Get a head start with our Beginner's Guide
┗ The Best Recipes to Cook | Rupee Farming
★ Shrines Locations | Korok Seeds Locations
★ Explore after the story with our Post Game Guide

This is a guide to the Main Quest, Destroy Ganon, in The Legend of Zelda: Breath of the Wild (BotW). This guide will show you how to progress through Hyrule Castle and find Calamity Ganon, the final boss of the game.
List of Contents
How to Start Destroy Ganon
Destroy Ganon Location
| Quest Giver | King Rhoam |
|---|---|
| Location | Kakariko Village |
| Region | Central |
After completing The Isolated Plateau quest, the King will tell you your ultimate task: to save Princess Zelda and defeat Ganon to restore the land of Hyrule.
Tips Before Going to Hyrule Castle
This is a list of what you should do before heading out to the ever-dangerous Hyrule Castle. Before you can even reach Ganon, you will be encountering a lot of Guardians, as well as poweful monsters such as Lynels.
| Objectives | Guide |
|---|---|
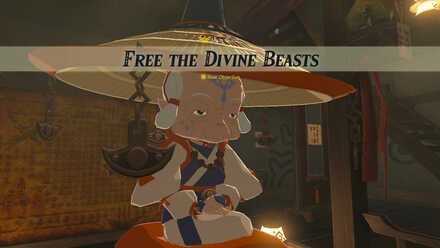 Free the Divine Beasts |
Before heading to Hyrule Castle, it is recommended to defeat the four phantoms of Ganon inside the Divine Beasts. Doing so will gain you assistance from the Divine Beasts, dealing damage to Ganon's HP before the start of the battle. ・Free the Divine Beasts Walkthrough and Guide |
 Get the Master Sword |
The Master Sword, or the sword that seals the darkness, is a powerful weapon against Ganon, Guardians, and Malice-infested monsters It is highly reccomended to get this for your battles in the Divine Beasts and against Calamity Ganon. ・The Hero's Sword Walkthrough and Guide |
 Upgrade Your Armor |
Wearing high-defense armor is also important. You can upgrade your armor once you have unlocked a Great Fairy Fountain. You can get also the Champion's Tunic from Impa after recovering one memory from the album. You can also have the Ancient Set crafted in the Akkala Ancient Tech Lab. ・Find the Fairy Fountain Walkthrough and Guide |
 Maximize Your Hearts |
The enemies inside and around the castle deal huge amounts of damage. Toughen up by freeing Divine Beasts, clearing more Shrines, and exchanging Spirit Orbs to get more Heart Containers. You can also cook up Hearty meals to get extra temportary hearts. ・Shrines Map and All Shrine Locations ・The Best Recipes You Need to Cook |
 Stock Up on Arrows |
No matter how much you will try to avoid Guardians, you will need to get rid of some of them. Stock up on Ancient Arrows to get them in one hit. There will also be Treasure Chests all around the castle, containing different kinds of Arrows such as Ice Arrows and Bomb Arrows. |
When Should You Go to Hyrule Castle?

Ideally, going to Hyrule Castle to defeat Calamity Ganon is the last thing you should do in the game, but you are free to try going for it at any moment.
We recommend heading out to Hyrule Castle after getting the Master Sword, and freeing all the Divine Beasts.
To be extra safe, you should get as many Heart Containers as you can, along with increasing your Stamina Wheel. Packing up food and elixirs with boosting effects will be helpful as well.
Destroy Ganon Walkthrough
Guide Overview
|
|
Get Into Hyrule Castle
| Objectives | Guide | |
|---|---|---|
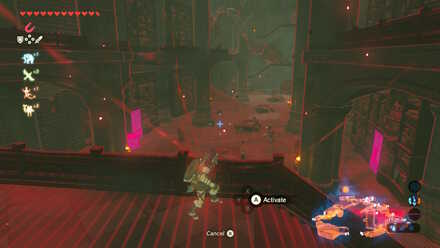
| 1 | Enter the Castle Premises | The castle perimiter itself is already dangerous as Malice and Guardians are all over the place. We recommend going through the back of the castle in the north because it is safer and faster to get to Ganon. The entrance of the castle to the south is teeming with Guardians and Malice. |
| 2 | 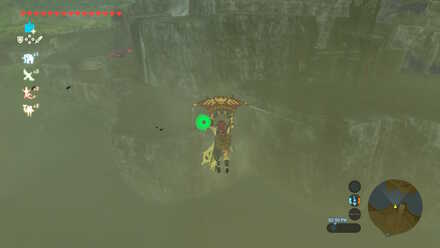 Use the north approach |
From the northern pillar of Hyrule Castle, glide to the other side while avoiding the Guardian Skywatcher. You'll be greeted by a Guardian Turret so take it down with 3 deflected beams. |
| 3 |  Enter the castle |
Unlike the Divine Beasts, your only goal here is to get to the top where Calamity Ganon is. Start by climbing the wall where the Turret was positioned. |
 Chest behind the wall (Optional) |
Go down the wall and around it to see a pile of rocks hiding a chest with 5 Shock Arrows. | |
| 4 | 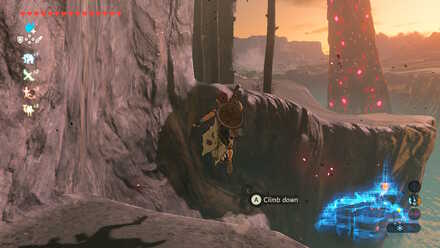 Climb the ledges |
Climb the ledges to your right until you reach a gate. |
 Chest along the ledge (Optional) |
While heading to the gate, you'll come across another pile of rocks. Destroy it with a bomb for a chest containing 5 Bomb Arrows. | |
| 5 |  Enter the gate |
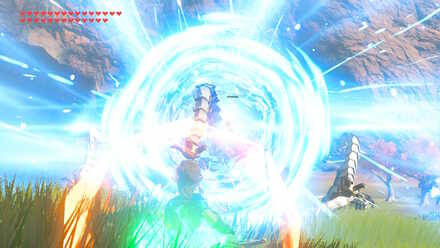
Enter through the gate and go up. Two Guardians will lock on to you at the end of the path, destroy them one by one. |
| 6 |  Go to the library |
Head left until you find a passage going down guarded by a Decayed Guardian. Go down and take out the Malice blocking the library. |
Stock Up on Weapons
| 7 |  Get through the library |
On the same floor, make your way to the other side of the library while dealing with Lizalfoses attacking you. You'll find a Great Frostblade stuck in the corner of the next room. |
|---|---|---|
 Treasures behind metal shelves (Optional) |
Use Magnesis in the Library to locate metal shelves. Drag them out for rooms with chests and rare items. | |
| 8 |  Reach the Dining Hall |
Make your way through the hallway until you reach a room with a Black Moblin. Defeat it so you can freely grab the weapons in the room. Go up then right at the fork to reach the doors of the Dining Hall. |
 Treasures behind breakable walls (Optional) |
If you go left at the fork, you'll find two breakable walls. The right wall has a sleeping Lizalfos while the other one has rusty weapons and a Royal Guard's Sword. | |
| 9 |  Reach the Observation Room |
Go down the hallway past the Dining Hall to reach a pool of Malice and a Moblin. Upstairs is the Observation Room which contains another pair of the previous enemies as well as some weapons. |
 Loot the Dining Hall (Optional) |
Inside the Dining Hall are 4 Moblins, two on either sides. They can only get through the leftmost door so you can snipe them with your bow through the slightly opened doors before going inside to pick up the food materials inside as well as the Royal Guard's Spear in the fireplace (use Magnesis). |
Make Your Way to the Sanctum
| 10 |  Climb the cliffs |
From the entrance of the library, go left past the Decayed Guardian until you find 3 burnt trees. Climb one of them then once you're at the top, jump over to the cliffside. Be quick on climbing to the top so you can take cover from the Guardian Turret. |
|---|---|---|
| 11 |  Go to the Sanctum |
Now it's just a short walk to the entrance of the Sanctum but be aware that there are still Guardians in the area. |
Defeat Ganon
| 12 | Defeat the Phantom Ganons | If you have not defeated the phantoms of Ganon in the Divine Beasts, you will be facing them first in a series of battles.
Ganon Boss Guides: ・Waterblight Ganon Guide ・Fireblight Ganon Guide ・Windblight Ganon Guide ・Thunderblight Ganon Guide |
|---|---|---|
| 13 | 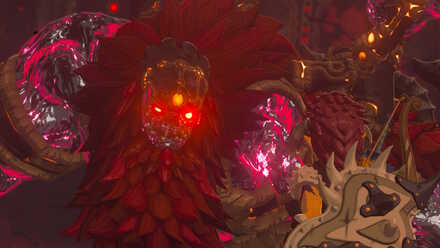 Defeat Calamity Ganon |
You'll now face against Calamity Ganon itself. The Divine Beasts that you have freed will reduce the Ganon's health down to about 50%. Otherwise, you'll fight Calamity Ganon at full strength. |
Is there Post-Game Content?
Breath of the Wild does not have any post-game content. After defeating Ganon and getting the ending cut-scene, you will be taken back to your last save before your battle in Hyrule Castle. A star will be marked beside your save file indicating your game completion.
Destroy Ganon Quest Rewards
| Destroy Ganon Quest Rewards |
|---|
| - |
Adventure Log Entries
This is a full list of the Adventure Log entries for Destroy Ganon.
| Entry | Entry Text |
|---|---|
| Quest Start | The ghost of King Rhoam told you that Hyrule is on the brink of annihilation. Princess Zelda is currently fighting to contain Calamity Ganon inside Hyrule Castle, but her power cannot keep him at bay forever. Eventually Ganon will regain his full strength and destroy the world. Your ultimate task is to aid Princess Zelda in defeating Ganon before that can happen. |
| Quest Clear |
Zelda: BotW Related Guides

Main Quest Guides
Quests by Type
| BotW Quest Types | |||
|---|---|---|---|
| Main Quests | Side Quests | ||
| Shrine Quests | DLC Quests | ||
Author

The Legend of Zelda: Breath of the Wild Walkthrough & Guides Wiki
Destroy Ganon Walkthrough: How to Get Through Hyrule Castle
Rankings
- We could not find the message board you were looking for.
Gaming News
![Animal Crossing: New Horizons Review [Switch 2] | Needlessly Crossing Over to a New Generation](https://img.game8.co/4391759/47d0408b0b8a892e453a0b90f54beb8a.png/show)


Popular Games

Genshin Impact Walkthrough & Guides Wiki
Honkai: Star Rail Walkthrough & Guides Wiki
Arknights: Endfield Walkthrough & Guides Wiki
Umamusume: Pretty Derby Walkthrough & Guides Wiki
Wuthering Waves Walkthrough & Guides Wiki
Pokemon TCG Pocket (PTCGP) Strategies & Guides Wiki
Abyss Walkthrough & Guides Wiki
Zenless Zone Zero Walkthrough & Guides Wiki
Digimon Story: Time Stranger Walkthrough & Guides Wiki
Clair Obscur: Expedition 33 Walkthrough & Guides Wiki


Recommended Games
Fire Emblem Heroes (FEH) Walkthrough & Guides Wiki
Pokemon Brilliant Diamond and Shining Pearl (BDSP) Walkthrough & Guides Wiki
Diablo 4: Vessel of Hatred Walkthrough & Guides Wiki
Super Smash Bros. Ultimate Walkthrough & Guides Wiki
Yu-Gi-Oh! Master Duel Walkthrough & Guides Wiki
Elden Ring Shadow of the Erdtree Walkthrough & Guides Wiki
Monster Hunter World Walkthrough & Guides Wiki
The Legend of Zelda: Tears of the Kingdom Walkthrough & Guides Wiki
Persona 3 Reload Walkthrough & Guides Wiki
Cyberpunk 2077: Ultimate Edition Walkthrough & Guides Wiki


All rights reserved
© 2020 Nintendo. The Legend of Zelda, Wii U, and Nintendo Switch are trademarks of Nintendo.
The copyrights of videos of games used in our content and other intellectual property rights belong to the provider of the game.
The contents we provide on this site were created personally by members of the Game8 editorial department.
We refuse the right to reuse or repost content taken without our permission such as data or images to other sites.