Lanayru Tower Region: Korok Seed Map, Shrines, and Quests
★ Sequel: Tears of the Kingdom Guide here!
★ Get a head start with our Beginner's Guide
┗ The Best Recipes to Cook | Rupee Farming
★ Shrines Locations | Korok Seeds Locations
★ Explore after the story with our Post Game Guide
This page is a map of the Lanayru Tower Region in The Legend of Zelda: Breath of the Wild (BotW). Here you can find all Korok Seed locations in the Lanayru Tower Region, as well as quests, shrines, and other locations.
List of Contents
Lanayru Tower Region Korok Seed Map
Map of All Lanayru Tower Korok Seeds
| Lanayru Korok Seed Map |
|---|
 Enlarge EnlargeView Full Map Image |
How to Get All Lanayru Koroks
| Total No. | Korok in Region | Solution & Video Link |
|---|---|---|
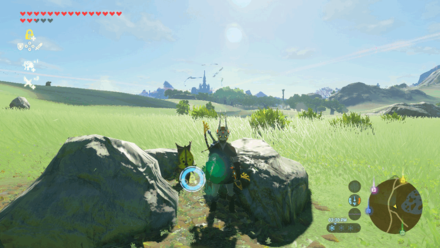
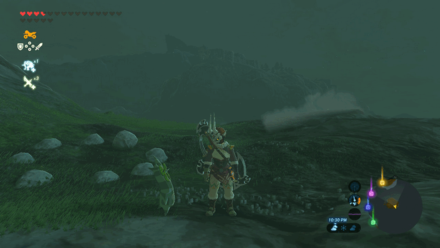
| 149 |
 Enlarge Enlarge |
Fruit Offering
Put one apple on the empty statue. |
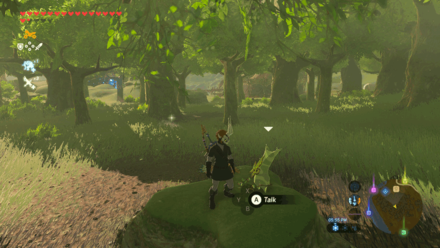
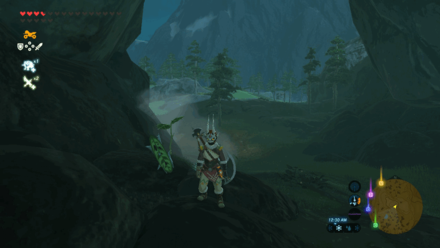
| 150 |
 Enlarge Enlarge |
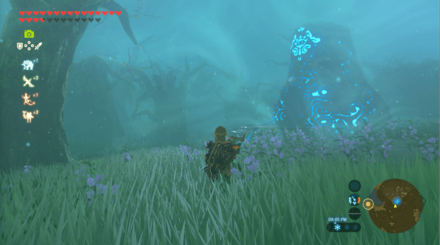
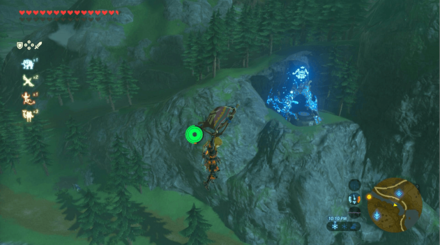
Moving Sparkles
Chase the sparkle and interact with it to reveal the Korok. |
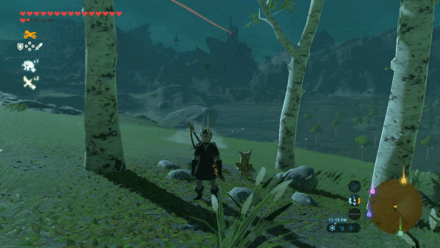
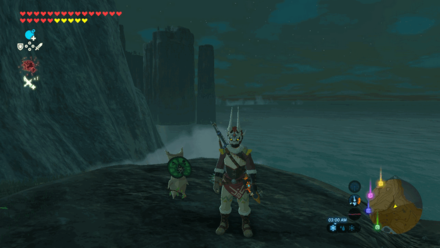
| 151 |
 Enlarge Enlarge |
Fruit Match
Match the tree with many apples to those with only one apple. The exact location of the apple is important as well. |
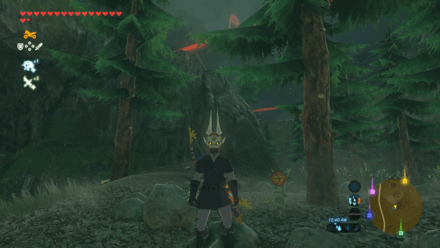
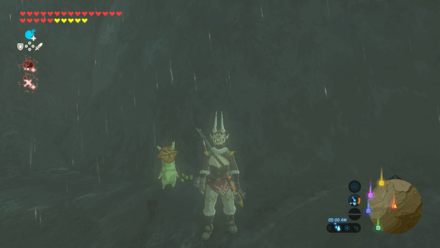
| 152 |
 Enlarge Enlarge |
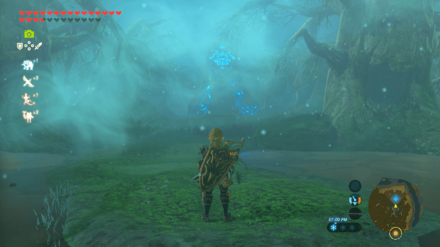
Moving Sparkles
Chase the sparkle and interact with it to reveal the Korok. |
| 153 |
 Enlarge Enlarge |
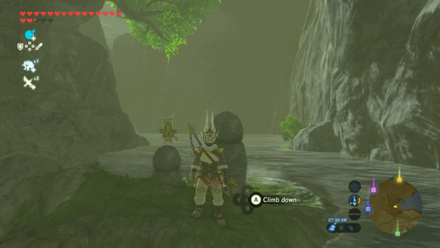
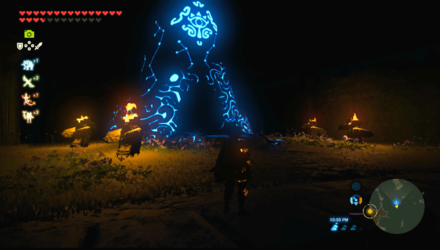
Hidden Rock
Use Stasis on the big boulder and hit it with a weapon to make it blast off to reveal a smaller stone. Lift it up to reveal the Korok. |
| 154 |
 Enlarge Enlarge |
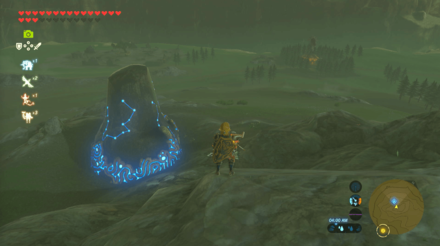
Rock
Put the surrounding vines on fire to gain access to the lonely rock. Lift it up to reveal the Korok. |
| 155 |
 Enlarge Enlarge |
Rock Pattern
Pick up the rock near the trees and put it in the spot of the pattern where its missing a rock. |
| 156 |
 Enlarge Enlarge |
Rock Pattern
Pick up the rock near the water and use it to complete the rock pattern that's surrounding a tree. The Korok will show up once the pattern is finished. |
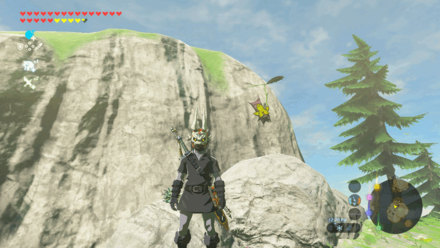
| 157 |
 Enlarge Enlarge |
One Balloon
Shoot the Balloon hidden in the leaves of the tree to reveal the Korok. |
| 158 |
 Enlarge Enlarge |
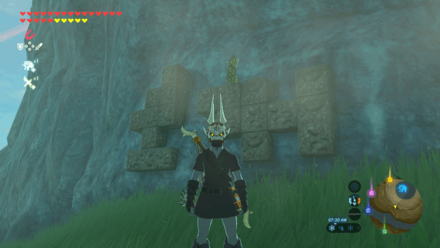
Rock Pattern
Get the rock from the first ruined building to the left and place it on the third ruined building that's missing a rock. Match the third pattern to those of the other three to reveal the Korok. |
| 159 |
 Enlarge Enlarge |
Chained Ball
Use Magnesis to put the metal boulder with a chain inside the well. |
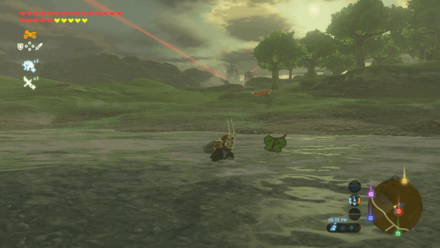
| 160 |
 Enlarge Enlarge |
Moving Sparkles
Chase or wait for the sparkle to get close to you and interact with the it to reveal the Korok. |
| 161 |
 Enlarge Enlarge |
One Acorn
Shoot the hanging acorn on the tree to reveal the Korok. |
| 162 |
 Enlarge Enlarge |
Rock Pattern
Pick up a nearby rock and use it to complete the rock pattern that's surrounding a tree. The Korok will show up once the pattern is finished. |
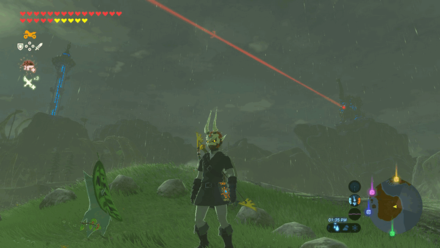
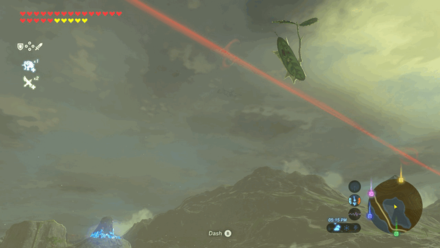
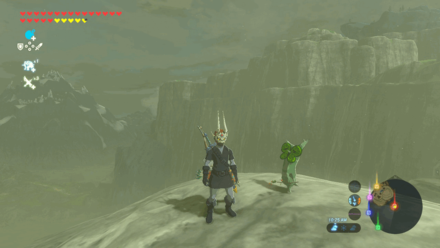
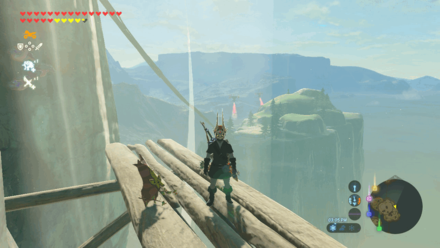
| 163 |
 Enlarge Enlarge |
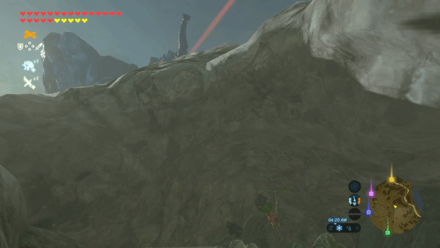
Timed Ring
Glide and run to the other hill's peak to reach the ring. |
| 164 |
 Enlarge Enlarge |
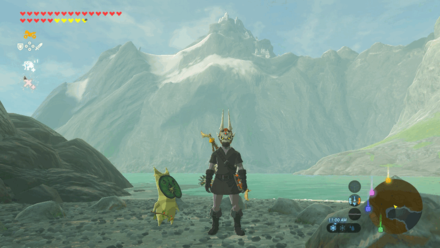
Water Ring
Go to the nearest cliff high enough for you to glide down to the ring of plants in the water. Dive in the middle to reveal the Korok. |
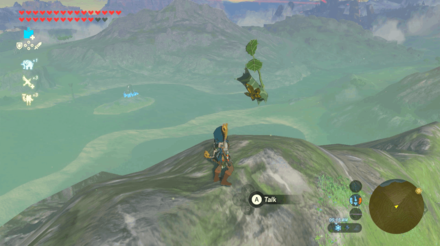
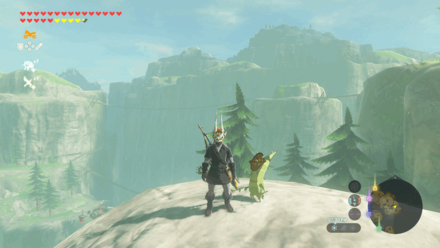
| 165 |
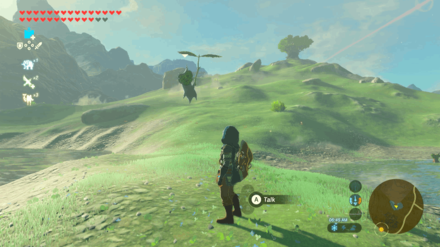 Enlarge Enlarge |
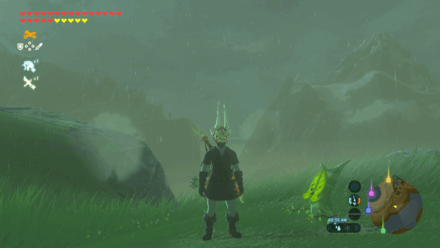
Timed Ring
Shield surf down the hill to reach the ring. |
| 166 |
 Enlarge Enlarge |
Moving Sparkles
Chase the sparkle hovering the body of water, and interact with the it to reveal the Korok. |
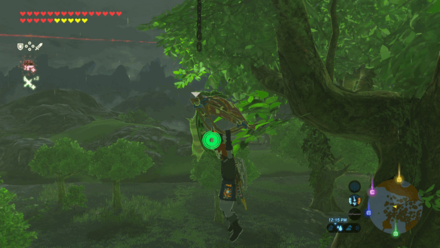
| 167 |
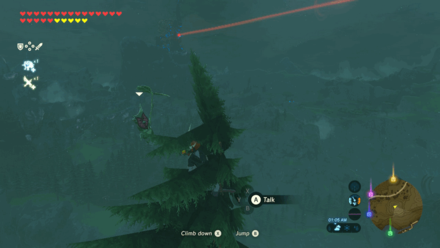 Enlarge Enlarge |
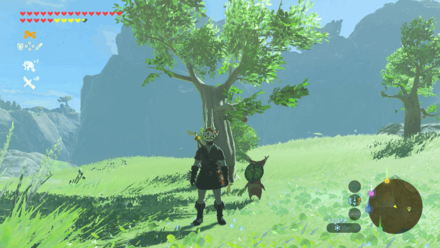
Peak Sparkles
Climb up the single tree and interact with the sparkle to reveal the Korok. |
| 168 |
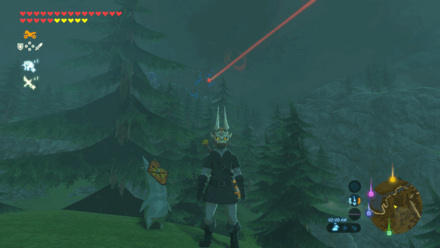 Enlarge Enlarge |
Rock
Lift up the rock to reveal the Korok. |
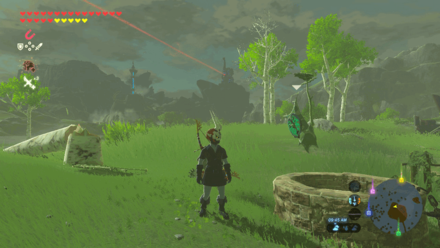
| 169 |
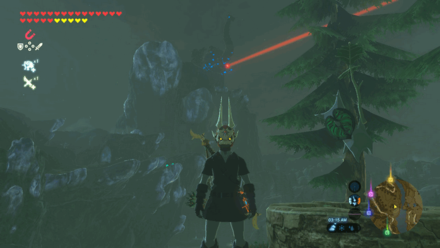 Enlarge Enlarge |
Chained Ball
Use Magnesis to put the metal boulder with a chain inside the well. |
| 170 |
 Enlarge Enlarge |
Rock Circle
Pick up a nearby rock and throw it in the middle of the rock formation in the water. |
| 171 |
 Enlarge Enlarge |
Metal Block
Use Magnesis to place the block on the right spot. |
| 172 |
 Enlarge Enlarge |
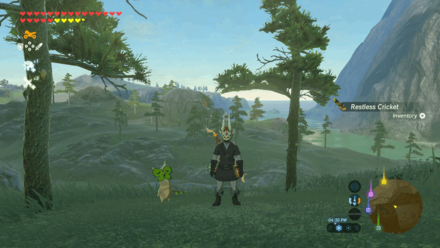
Moving Sparkles
Chase the sparkle and interact with the it to reveal the Korok. |
| 173 |
 Enlarge Enlarge |
Rock Pattern
Pick up the rock from the other side of the rock pattern and drop it on the gap in the pattern to reveal the Korok. |
| 174 |
 Enlarge Enlarge |
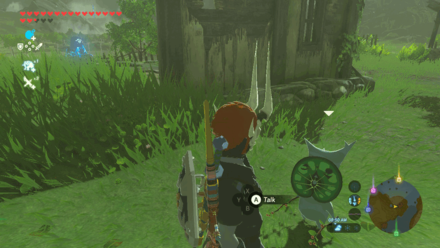
Hidden Rock
Destroy the pile of leaves to reveal the rock. Pick it up to reveal the Korok. |
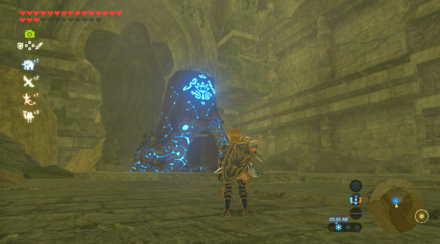
| 175 |
 Enlarge Enlarge |
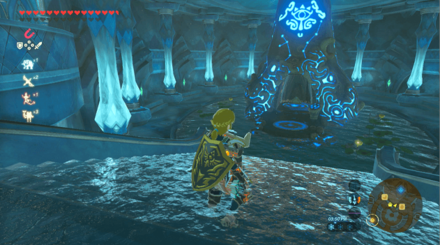
Follow the Flowers
Follow the flowers to the other end of the cave. |
| 176 |
 Enlarge Enlarge |
Hidden Rock
Use a Rune Bomb to destroy the stone rubble and reveal the rock. Lift the rock to reveal the Korok. |
| 177 |
 Enlarge Enlarge |
Rock
Lift the rock to reveal the Korok. |
| 178 |
 Enlarge Enlarge |
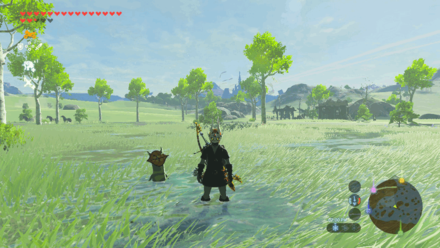
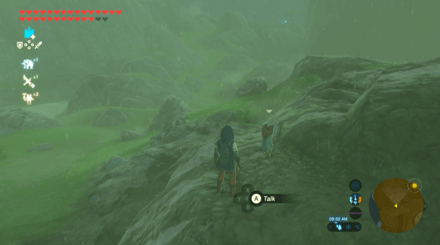
Moving Sparkles
Chase the sparkle and interact with the it to reveal the Korok. |
| 179 |
 Enlarge Enlarge |
Metal Block
Use Magnesis on the metal cube and place it on the block on the wall while matching the placement of the blocks on the ground. |
| 180 |
 Enlarge Enlarge |
Rock Circle
Pick up a nearby rock and throw it in the middle of the rock formation in the water. |
| 181 |
 Enlarge Enlarge |
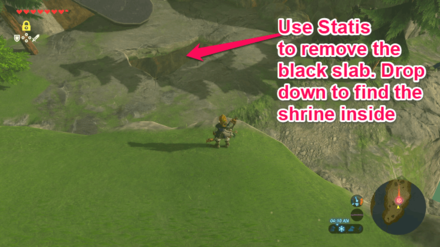
Hidden Rock
Use Stasis on the flat slate and hit it with a weapon to blast it off. Pick up the rock underneath to reveal the Korok. |
| 182 |
 Enlarge Enlarge |
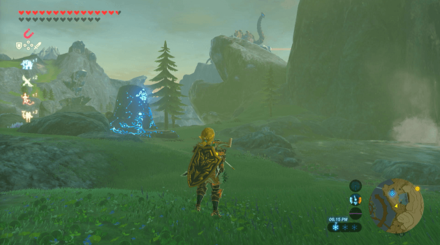
Follow the Flowers
Chase the yellow flowers until it becomes a white flower. Go near the white flower to reveal the Korok. |
| 183 |
 Enlarge Enlarge |
Follow the Flowers
Chase the yellow flowers until it becomes a white flower. Go near the white flower to reveal the Korok. |
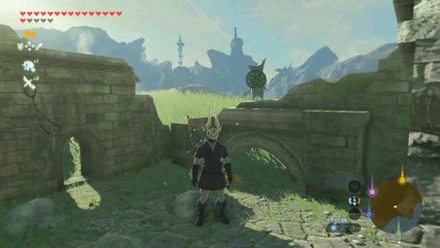
| 184 |
 Enlarge Enlarge |
Rock Pattern
Pick up a nearby rock and drop it on the gap in the pattern to reveal the Korok. |
| 185 |
 Enlarge Enlarge |
One Balloon
Shoot the balloon inside a cave to reveal the Korok. |
| 186 |
 Enlarge Enlarge |
Hidden Rock
Use a Rune Bomb to destroy the stone rubble and reveal the rock. Lift the rock to reveal the Korok. |
| 187 |
 Enlarge Enlarge |
Hidden Rock
Use a Rune Bomb to destroy the stone rubble and reveal the rock. Lift the rock to reveal the Korok. |
| 188 |
 Enlarge Enlarge |
Metal Block
Use Magnesis on the metal cube and match the pattern on the ground with the pattern on the wall. |
| 189 |
 Enlarge Enlarge |
Follow the Flowers
Chase the yellow flowers until it becomes a white flower. Go near the white flower to reveal the Korok. |
| 190 |
 Enlarge Enlarge |
Chained Ball
Use Magnesis on the big boulder on the other side of the waterfall and put it in the big hole to reveal the Korok. |
| 191 |
 Enlarge Enlarge |
Hidden Rock
Use a Rune Bomb to destroy the stone rubble and reveal the rock. Lift the rock to reveal the Korok. |
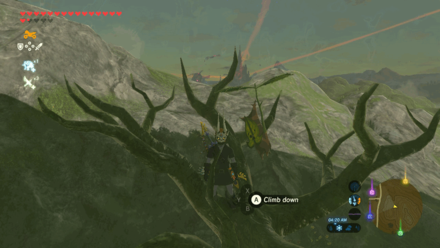
| 192 |
 Enlarge Enlarge |
Moving Sparkles
Chase the sparkle and interact with the it to reveal the Korok. |
| 193 |
 Enlarge Enlarge |
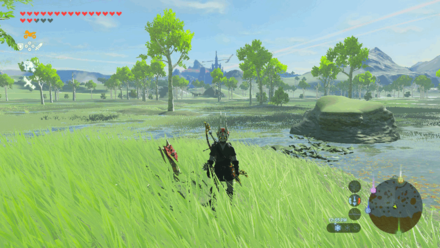
Rock
Climb at the top of the hill and pick up the rock to reveal the Korok. |
| 194 |
 Enlarge Enlarge |
Metal Block
Use Magnesis on the metal cube and match the pattern on the ground with the pattern on the wall. |
| 195 |
 Enlarge Enlarge |
Follow the Flowers
Follow the flower along the sides and up the large rock formation. |
| 196 |
 Enlarge Enlarge |
Rock Pattern
Pick up a nearby rock and drop it on the gap in the pattern to reveal the Korok. |
| 197 |
 Enlarge Enlarge |
Moving Sparkles
Chase the sparkle and interact with the it to reveal the Korok. |
| 198 |
 Enlarge Enlarge |
Rock
Climb at the top of Ruto Mountain and pick up the rock to reveal the Korok. |
| 199 |
 Enlarge Enlarge |
Rock
Climb at the top of the hill and pick up the rock to reveal the Korok. |
| 200 |
 Enlarge Enlarge |
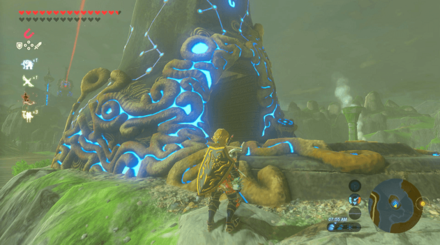
Rock
Climb until you reach the edge near Divine Beast Vah Ruta and pick up the rock to reveal the Korok. |
| 201 |
 Enlarge Enlarge |
Metal Block
Use Magnesis on the metal cube and match the pattern on the ground with the pattern on the wall. |
| 202 |
 Enlarge Enlarge |
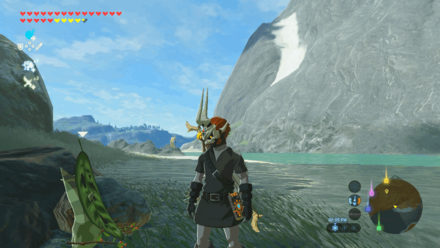
Peak Sparkles
Climb up the fish statue in Zora's Domain up the tail, and interact with the Sparkle to reveal the Korok. |
| 203 |
 Enlarge Enlarge |
Peak Sparkles
Climb up the fish statue in Zora's Domain and on the head, interact with the Sparkle to reveal the Korok. |
| 204 |
 Enlarge Enlarge |
Hidden Rock
Use a Rune Bomb to destroy the stone rubble and reveal the rock. Lift the rock to reveal the Korok. |
| 205 |
 Enlarge Enlarge |
Water Ring
Go to the nearest cliff high enough for you to glide down to the ring of plants in the water. Dive in the middle to reveal the Korok. |
| 206 |
 Enlarge Enlarge |
Rock
Lift the rock to reveal the Korok. |
| 207 |
 Enlarge Enlarge |
Rock
Lift the rock to reveal the Korok. |
| 208 |
 Enlarge Enlarge |
Follow the Flowers
Chase the yellow flowers until it becomes a white flower. Go near the white flower to reveal the Korok. |
Korok Seeds Map and All Korok Seed Locations
Shrines in Woodland Tower Region
Woodland Tower Region Shrines
| Woodland Region Shrine Map |
|---|
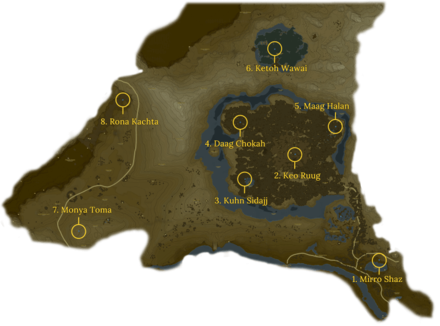 Enlarge EnlargeView Full Map Image |
| Shrine Number | Shrine | Overview |
|---|---|---|
| 1 |
 Enlarge Enlarge |
Trial: Tempered Power Location: Woodland Stable, Woodland Region Rewards: ・Iron Sledgehammer ・ Iron Sledgehammer ・ Giant Ancient Core |
| 2 |
 Enlarge Enlarge |
Trial: Fateful Stars Location: Korok Forest, Woodland Region Rewards: ・Knight's Claymore |
| 3 |
 Enlarge Enlarge |
Trial: Kuhn Sidajj's Blessing Requirements: Start The Hero's Sword and The Korok Trials Shrine Quest: Trial of Second Sight Location: Lake Saria, Woodland Region Rewards: ・Giant Ancient Core |
| 4 |
 Enlarge Enlarge |
Trial: Daag Chokah's Blessing Requirements: Start The Hero's Sword and The Korok Trials Shrine Quest: The Lost Pilgrimage Location: Korok Forest, Woodland Region Rewards: ・Ancient Core |
| 5 |
 Enlarge Enlarge |
Trial: Maag Halan's Blessing Requirements: Start The Hero's Sword and The Korok Trials Shrine Quest: The Test of Wood Location: Mido Swamp, Woodland Region Rewards: ・Giant Ancient Core |
| 6 |
 Enlarge Enlarge |
Trial: Ketoh Wawai's Blessing Shrine Quest: Shrouded Shrine Location: Typhlo Ruins, Woodland Region Rewards: ・Ancient Core |
| 7 |
 Enlarge Enlarge |
Trial: Drawing Parabolas Location: Salari Hills, Woodland Region Rewards: ・Thunderblade |
| 8 |
 Enlarge Enlarge |
Trial: Rona Kachta's Blessing Location: Forgotten Temple, Woodland Region Rewards: ・Great Flameblade |
| ▲ Back to All Shrines by Tower Region ▲ | ||
Shrines Map and All Shrine Locations
Shrines in Lanayru Tower Region
Lanayru Tower Region Shrines
| Lanayru Region Shrine Map |
|---|
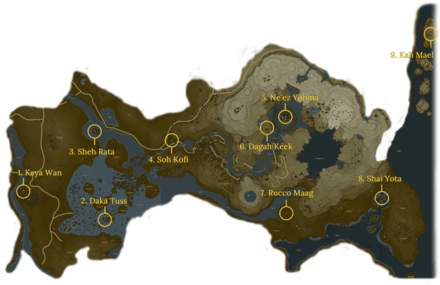 Enlarge EnlargeView Full Map Image |
| Shrine Number | Shrine | Overview |
|---|---|---|
| 1 |
 Enlarge Enlarge |
Trial: Shields from Water Location: Wetland Stable, Lanayru Region Rewards: ・Ancient Core ・ Knight's Broadsword |
| 2 |
 Enlarge Enlarge |
Trial: Sunken Scoop Location: Shrine Island - Lanayru Wetlands, Lanayru Region Rewards: ・Silver Longsword |
| 3 |
 Enlarge Enlarge |
Trial: Speed of Light Location: Lanayru Wetlands, Lanayru Region Rewards: ・Opal ・ Giant Boomerang |
| 4 |
 Enlarge Enlarge |
Trial: A Minor Test of Strength Location: Inogo Bridge, Lanayru Region Rewards: ・Knight's Bow |
| 5 |
 Enlarge Enlarge |
Trial: Pushing Power Location: Zora's Domain, Lanayru Region Rewards: ・Zora Spear |
| 6 |
 Enlarge Enlarge |
Trial: Dagah Keek's Blessing Requirements: Clear Divine Beast Vah Ruta Shrine Quest: The Ceremonial Song Location: Veiled Falls, Lanayru Region Rewards: ・Silver Rupee |
| 7 |
 Enlarge Enlarge |
Trial: Five Flames Location: Samasa Plain, Lanayru Region Rewards: ・Opal ・ Silver Bow |
| 8 |
 Enlarge Enlarge |
Trial: Shai Yota's Blessing Shrine Quest: Master of the Wind Location: Horon Lagoon, Lanayru Region Rewards: ・Great Flameblade |
| 9 |
 Enlarge Enlarge |
Trial: Drop and Rise Location: Tingel Island, Lanayru Region Rewards: ・Diamond |
| ▲ Back to All Shrines by Tower Region ▲ | ||
Shrines Map and All Shrine Locations
Quests in Lanayru Tower Region
Main Quests
| Quest | Type | Quest Giver & Location |
|---|---|---|
| Divine Beast Vah Ruta | Main Quest | King Dorephan Zora's Domain |
| Reach Zora's Domain | Main Quest | Sidon Inogo Bridge |
Side Quests
| Quest | Type | Quest Giver & Location |
|---|---|---|
| Riverbed Reward | Side Quest | Izra Wetland Stable |
| A Wife Washed Away | Side Quest | Fronk Zora's Domain |
| Luminous Stone Gathering | Side Quest | Ledo Zora's Domain |
| Diving is Beauty! | Side Quest | Gruve Zora's Domain |
| Zora Stone Monuments | Side Quest | Jiahto Zora's Domain |
| Frog Catching | Side Quest | Tumbo Zora's Domain |
| The Giant of Ralis Pond | Side Quest | Torfeau Zora's Domain |
| Lynel Safari | Side Quest | Laflat Zora's Domain |
| Special Delivery | Side Quest | Finley Bank of Wishes |
Shrine Quests
| Quest | Type | Quest Giver & Location |
|---|---|---|
| Master of the Wind | Shrine Quest | Kass Horon Lagoon |
| The Ceremonial Song | Shrine Quest | Laruta Zora's Domain |
DLC Quests
| Quest | Type | Quest Giver & Location |
|---|---|---|
| EX Champion Mipha's Song | DLC Main Quest | ??? Ja'Abu Ridge |
All Locations in Lanayru Tower Region
| Zora River | Zodobon Highlands | Zelo Pond | Zauz Island |
| Wintre Island | Wetland Stable | Wes Island | Veiled Falls |
| Upland Zorana | Trilby Plain | Toto Lake | Tingel Island |
| Thims Bridge | Ternio Trail | Tarm Point | Talus Plateau |
| Tal Tal Peak | Tabahl Woods | Spool Bight | Shrine Island |
| Shattered Point | Samasa Plain | Ruto Precipe | Ruto Mountain |
| Ruto Lake | Rutala River | Rutala Dam | Rikoka Hills |
| Rebonae Brige | Ralis Pond | Ploymus Mountain | Oren Bridge |
| Moor Garrison Ruins | Molida Island | Millennio Sandbar | Mikau Lake |
| Mercay Island | Luto's Crossing | Lulu Lake | Lodrum Headland |
| Linebeck Island | Lanayru Bay | Knuckel Island | Kincean Island |
| Ja'Abu Ridge | Inogo Bridge | Horon Lagoon | Goponga Village Ruins |
| Goponga Island | East Reservoir Lake | Davdi Island | Crenel Peak |
| Brynna Point | Bonè Pond | Bannan Island | Bank of Wishes |
| Ankel Island |
Zelda: BotW Related Guides

Points of Interest
| All Maps and Locations | |
|---|---|
| Shrines | Stables |
| Great Fairy Fountains | Korok Seeds |
Tower Regions
Author

The Legend of Zelda: Breath of the Wild Walkthrough & Guides Wiki
Lanayru Tower Region: Korok Seed Map, Shrines, and Quests
Rankings
- We could not find the message board you were looking for.
Gaming News

![Monster Hunter Stories 3 Review [First Impressions] | Simply Rejuvenating](https://img.game8.co/4438641/2a31b7702bd70e78ec8efd24661dacda.jpeg/show)


![Monster Hunter Stories 3 Review [First Impressions] | Simply Rejuvenating](https://img.game8.co/4438641/2a31b7702bd70e78ec8efd24661dacda.jpeg/thumb)
Popular Games

Genshin Impact Walkthrough & Guides Wiki
Honkai: Star Rail Walkthrough & Guides Wiki
Umamusume: Pretty Derby Walkthrough & Guides Wiki
Pokemon Pokopia Walkthrough & Guides Wiki
Resident Evil Requiem (RE9) Walkthrough & Guides Wiki
Monster Hunter Wilds Walkthrough & Guides Wiki
Wuthering Waves Walkthrough & Guides Wiki
Arknights: Endfield Walkthrough & Guides Wiki
Pokemon FireRed and LeafGreen (FRLG) Walkthrough & Guides Wiki
Pokemon TCG Pocket (PTCGP) Strategies & Guides Wiki


Recommended Games
Diablo 4: Vessel of Hatred Walkthrough & Guides Wiki
Cyberpunk 2077: Ultimate Edition Walkthrough & Guides Wiki
Fire Emblem Heroes (FEH) Walkthrough & Guides Wiki
Yu-Gi-Oh! Master Duel Walkthrough & Guides Wiki
Super Smash Bros. Ultimate Walkthrough & Guides Wiki
Pokemon Brilliant Diamond and Shining Pearl (BDSP) Walkthrough & Guides Wiki
Elden Ring Shadow of the Erdtree Walkthrough & Guides Wiki
Monster Hunter World Walkthrough & Guides Wiki
The Legend of Zelda: Tears of the Kingdom Walkthrough & Guides Wiki
Persona 3 Reload Walkthrough & Guides Wiki


All rights reserved
© 2020 Nintendo. The Legend of Zelda, Wii U, and Nintendo Switch are trademarks of Nintendo.
The copyrights of videos of games used in our content and other intellectual property rights belong to the provider of the game.
The contents we provide on this site were created personally by members of the Game8 editorial department.
We refuse the right to reuse or repost content taken without our permission such as data or images to other sites.
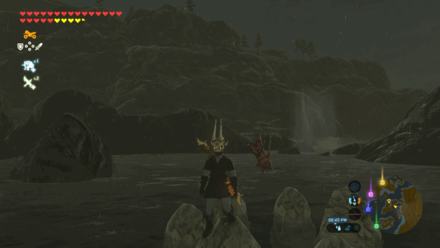
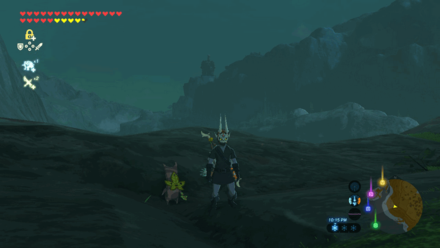
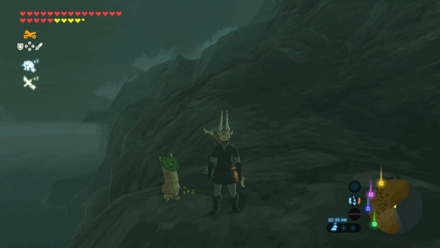
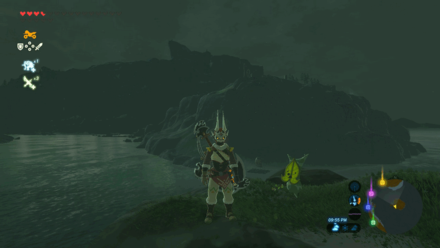
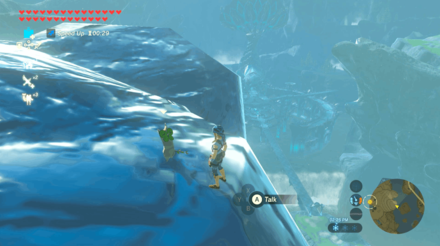
There are 3 small rocks scattered in the Lanayru Sea right off the Afromsia Coast. I can get to 2 of them in the shallow water but the 3rd is in the deep part of the water and I can’t get it out. Does anyone know how?