Monk Maz Koshia Boss Guide
★ Sequel: Tears of the Kingdom Guide here!
★ Get a head start with our Beginner's Guide
┗ The Best Recipes to Cook | Rupee Farming
★ Shrines Locations | Korok Seeds Locations
★ Explore after the story with our Post Game Guide
This is a guide to the Monk Maz Koshia boss fight in The Legend of Zelda: Breath of the Wild (BotW).
List of Contents
Monk Maz Koshia Base Info
| Monk Maz Koshia | |
|---|---|
| HP | Unknown |
| Species | Sheikah |
| The arbiter of worthiness for the hero who wishes to control a Divine Beast, following a revelation from the goddess Hylia. As the last part of the final trial, the monk offers a challenge of ancient techniques. |
|
Where to Find Monk Maz Koshia
Monk Maz Koshia Location
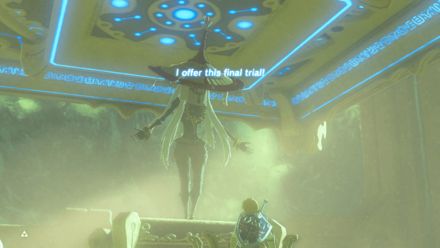
Monk Maz Koshia is fought at the end of The Champion's Ballad main DLC quest, and serves as the final boss of the Divine Beast Tamer's Trial. Check below for a full guide on how to unlock and clear the dungeon, as well as a list of the treasures available in it!
Divine Beast Tamer's Trial Dungeon Walkthrough
How to Beat Monk Maz Koshia

Monk Maz Koshia is fast, can teleport, and employs a variety of attacks and strategies depending on the percentage of his health.
Reducing his health by 25% causes him to move to his next attack phase. Once his heath has been reduced by 50%, he will move on to his last attack phase.
Monk Maz Koshia Phase 1 Strategy
 Enlarge Enlarge |
Monk Maz Koshia will teleport to the air and shoot Link with elemental arrows ranging from Fire Arrows, Ice Arrows, and Shock Arrows. Link can shoot at the Monk or use Stasis to interrupt his attacks. |
 Enlarge Enlarge |
Monk Maz Koshia will teleport away from Link and charge towards him. ending with slash from his Guardian Sword. Although intimidating, the attack is easy to parry or dodge away. Perfect parrying this attack stuns him momentarily, while a successful dodge allows Link to unleash a flurry attack. |
 Enlarge Enlarge |
The Monk will use a Sheikah spell that summons an Earth Pillar, similar to what the Yiga Blademasters use against Link except the pillar is taller and hits harder. Link should run away from the spell until air vents appear from the ground. Use these vents to paraglide upwards and avoid the spell, as well as shoot the Monk with arrows to stun him. |
 Enlarge Enlarge |
Monk Maz Koshia will quickly teleport across the arena and end with a powerful slash attack. This attack is very similar to the one Thunderblight Ganon uses. This attack is very difficult to avoid or parry against. Make sure you have Daruk's Protection ready to block the slash attack and quickly retaliate with your own attacks. |
Stay Close
Monk Maz Koshia's first phase has him employ attacks similar to Yiga Clan Footsoldiers. The Monk will teleport around the arena and quickly rush down and attempt to hit Link with his Guardian Sword or cast magic similar to the ones used by Yiga Clan Blademasters. Alternatively, he will shoot at Link with his elemental arrows if he gets too far.
During this phase of the battle, stay as close as possible to the Monk and overwhelm him with your attacks.
Use Stasis
Monk Maz Koshia will teleport immediately after his rushdown or magic attack; using the Stasis rune on him ensures that you can get at least a couple of hits before he teleports away.
Monk Maz Koshia Phase 2 Strategy

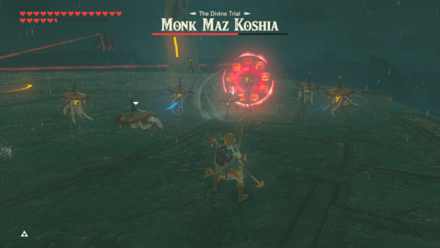
At the start of Phase 2, Monk Maz Koshia will teleport to the sky and summon nine copies of himself. Each copy has only 1 HP, but can use all of the Monk's attacks such as teleport strikes, downward thrusts, and bow attacks.
 Enlarge Enlarge |
Monk Maz Koshia and his clones wil attempt to overwhelm Link with their combined attacks. Each clone will attack Link independently, using moves from the first phase such as rush attacks, elemental arrows, and plunging attacks. Keep your distance and try to hit as much targets as possible. Charged attacks, Remote Bombs, and Multi-Hit Bows are all useful at eliminating groups of clones to find the real Monk. |
 Enlarge Enlarge |
The Monks will slowly surround Link and quickly rush at him, inflicting considerable damage when all attacks land. Make sure you have Daruk's Protection ready so that you can block all attacks at once and retaliate with a charged attack. |
Keep Your Distance
It's best to use ranged attacks for this phase of the battle, especially when the Monk and his clones try to overwhelm Link with combined attacks. Multi-Hit Bows are very useful for this fight as it can hit multiple copies and reveal the real Monk.
Use Stasis
Once you find the real Monk, quickly use Stasis against him. Not only does this give you more time to hit him with your weapons, it also prevents him from resummoning more clones.
Monk Maz Koshia Phase 3 Strategy

At the start of Phase 3, Monk Maz Koshia will teleport to the sky and grow into a giant form roughly the size of a Hinox. The Monk will continue to levitate in the sky unless stunned or brought down by powerful attacks.
 Enlarge Enlarge |
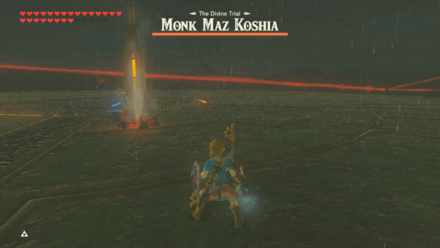
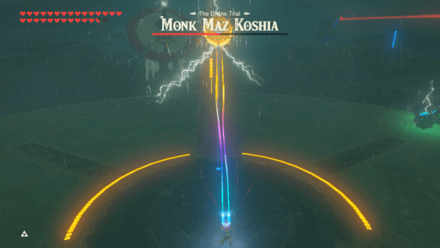
Monk Maz Koshia will summon spiked metal balls that he will hurl at Link. He will then summon a lightning storm that will strike at the balls and hit nearby targets for AOE damage. The metal balls are easy to dodge and you can reverse the lightning attack by using Magnesis on a ball and brining it close to the Monk. |
 Enlarge Enlarge |
Monk Maz Koshia will use a spell that tilts the arena, and he can change the angle several times. He often uses this move in conjunction with his spiked metal ball attack. |
 Enlarge Enlarge |
Monk Maz Koshia will stomp around the arena in an attempt to flatten Link. He often uses this after getting knocked down the arena and, while the attack does considerable damage, it's easy to run away from. |
 Enlarge Enlarge |
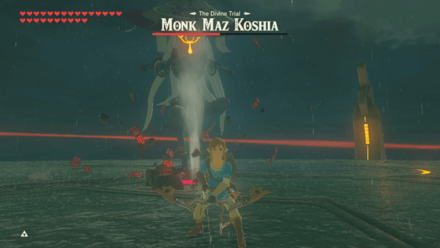
Monk Maz Koshia will stomp on the arena and summon a massive earth pillar that will knock Link off his feet. Although this spell travels faster, you can still run away from it and employ the same strategies as the previous earth pillar attack. |
 Enlarge Enlarge |
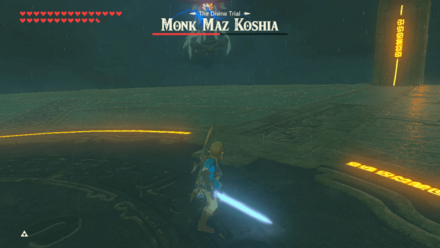
Monk Maz Koshia will begin channeling a laser attack, similar to the ones used by Guardians. The attack is easy to deflect because it has a countdown. Alternatively, you can use Daruk's Protection to safely parry the laser. A successful laser parry will knock the Monk down to the ground and leave him open to attacks. |
Reverse the Monk's Lightning
 Enlarge Enlarge |
 Enlarge Enlarge |
When Monk Maz Koshia uses his Spiked Metal Ball attack, grab one of them using Magnesis and bring it close to him. When Maz Koshia unleashes his lightning attack, he will be hit by his own attack. This stuns him, causing him to drop to the ground, and leave him open to your attacks!
Use Stasis
Every time the Monk falls to the arena, use Stasis on him so that you can continue to attack pummel him with your strongest weapons!
Monk Maz Koshia Drop
| Monk Maz Koshia Reward |
|---|
| Master Cycle Zero Rune |
Zelda: BotW Related Guides

| Master Kohga | Monk Maz Koshia | Thunderblight Ganon | Fireblight Ganon |
| Waterblight Ganon | Windblight Ganon | Calamity Ganon | Dark Beast Ganon |
Author

The Legend of Zelda: Breath of the Wild Walkthrough & Guides Wiki
Monk Maz Koshia Boss Guide
Rankings
- We could not find the message board you were looking for.
Gaming News


![Monster Hunter Stories 3 Review [First Impressions] | Simply Rejuvenating](https://img.game8.co/4438641/2a31b7702bd70e78ec8efd24661dacda.jpeg/thumb)
Popular Games

Genshin Impact Walkthrough & Guides Wiki
Honkai: Star Rail Walkthrough & Guides Wiki
Umamusume: Pretty Derby Walkthrough & Guides Wiki
Pokemon Pokopia Walkthrough & Guides Wiki
Resident Evil Requiem (RE9) Walkthrough & Guides Wiki
Monster Hunter Wilds Walkthrough & Guides Wiki
Wuthering Waves Walkthrough & Guides Wiki
Arknights: Endfield Walkthrough & Guides Wiki
Pokemon FireRed and LeafGreen (FRLG) Walkthrough & Guides Wiki
Pokemon TCG Pocket (PTCGP) Strategies & Guides Wiki


Recommended Games
Diablo 4: Vessel of Hatred Walkthrough & Guides Wiki
Cyberpunk 2077: Ultimate Edition Walkthrough & Guides Wiki
Fire Emblem Heroes (FEH) Walkthrough & Guides Wiki
Yu-Gi-Oh! Master Duel Walkthrough & Guides Wiki
Super Smash Bros. Ultimate Walkthrough & Guides Wiki
Pokemon Brilliant Diamond and Shining Pearl (BDSP) Walkthrough & Guides Wiki
Elden Ring Shadow of the Erdtree Walkthrough & Guides Wiki
Monster Hunter World Walkthrough & Guides Wiki
The Legend of Zelda: Tears of the Kingdom Walkthrough & Guides Wiki
Persona 3 Reload Walkthrough & Guides Wiki


All rights reserved
© 2020 Nintendo. The Legend of Zelda, Wii U, and Nintendo Switch are trademarks of Nintendo.
The copyrights of videos of games used in our content and other intellectual property rights belong to the provider of the game.
The contents we provide on this site were created personally by members of the Game8 editorial department.
We refuse the right to reuse or repost content taken without our permission such as data or images to other sites.