This survey will take about 1 minute.
Your answers will help us to improve our website.
Zelda: Breath of the Wild (BotW)
The Beginning Trials Walkthrough
★ Sequel: Tears of the Kingdom Guide here!
★ Get a head start with our Beginner's Guide
┗ The Best Recipes to Cook | Rupee Farming
★ Shrines Locations | Korok Seeds Locations
★ Explore after the story with our Post Game Guide
The Beginning Trials is the first set of challenges added in The Master Trials DLC of The Legend of Zelda: Breath of the Wild (BotW). Here are tips on how to clear all 13 floors of The Beginning Trials and what to expect on each floor!
| All Trial of the Sword Guides | ||
|---|---|---|
| EX Trial of the Sword | ||
| The Beginning Trials | The Middle Trials | The Final Trials |
List of Contents
The Beginning Trials Walkthrough
| Jump to a floor! | ||
|---|---|---|
| Floor 1 | Floor 2 | Floor 3 |
| Floor 4 | Floor 5 | Floor 6 |
| Floor 7 | Floor 8 | Floor 9 |
| Floor 10 | Floor 11 | Floor 12 |
| Floor 13 | ||
The Beginning Trials has a total of 13 floors with one Resting Spot. Completing the Beginning Trials leads you to the room where you can boost the Master Sword's power from 30 to 40.
Floor 1

| Enemies |
・Bokoblin (3) |
|---|---|
| Equipment |
・Tree Branch (3) ・Boko Club (1) ・Woodcutter's Axe (1) ・Boko Spear (1) ・Boko Shield (1) |
| Food & Materials |
・Seared Steak (1) ・Various Food (Multiple) |
The first floor of the Beginning Trials pits you against three Bokoblin. Sneak and climb up one of the trees near the camp. From up there, throw a Remote Bomb to defeat them before they get to their weapons.
Once you take care of them, pick up all of the weapons and food scattered throughout the level. You'll need them in the succeeding floors!
Floor 2

| Enemies |
・Bokoblin (4) ・Fire Chuchu (1) |
|---|---|
| Equipment |
・Traveler's Sword (1) ・Boko Bat (1) ・Boko Bow (2) ・Arrow (Multiple) ・Traveler's Shield (1) |
| Food & Materials |
・Various Food (Multiple) |
There are four Bokoblins in this level, with two serving as lookouts for the rest. Prioritize taking out the Bokoblin on the tower and then pick off the rest. There is a Fire Chuchu you can easily defeat to light up the grass, creating an updraft that you can use to head up the fort near the tower.
Destroy the crates and barrels before leaving and pick up any arrows that the Bokoblin Archers shot at you.
Floor 3

| Enemies |
・Fire Chuchu (4) ・Chuchu (4) |
|---|---|
| Equipment |
・Boomerang (1) ・Fire Arrow (5) |
| Food & Materials | None |
This floor pits you against waves of Chuchus that are fairly easy to beat so long as you keep your distance. Simply use your Remote Bomb to safely dispatch each wave of Chuchus.
To access the two treasure chests in this level, draw one of the Fire Chuchus close to the where the chests are. Defeat the Chuchu and use the updraft to reach the chest.
Floor 4

| Enemies |
・Blue Bokoblin (2) ・Bokoblin (5) |
|---|---|
| Equipment |
・Soldier's Broadsword (1) ・Boko Club (1) ・Spiked Boko Bat (1) ・Traveler's Spear (1) ・Boko Spear (1) ・Traveler's Bow (1) ・Spiked Boko Bow (1) ・Arrow (Multiple) ・Fire Arrow (Multiple) ・Soldier's Shield (1) |
| Food & Materials |
・Bird Egg (2) |
This floor pits you against five Bokoblins and two Blue Bokoblins. The most dangerous enemy here is the Archer at the very top of the fort who will shoot fire arrows at Link.
There are many ways you can take out this enemy; you can shoot it with an arrow or use Magnesis on one of the metal crates and use it to push both the archers off their sniping spots.
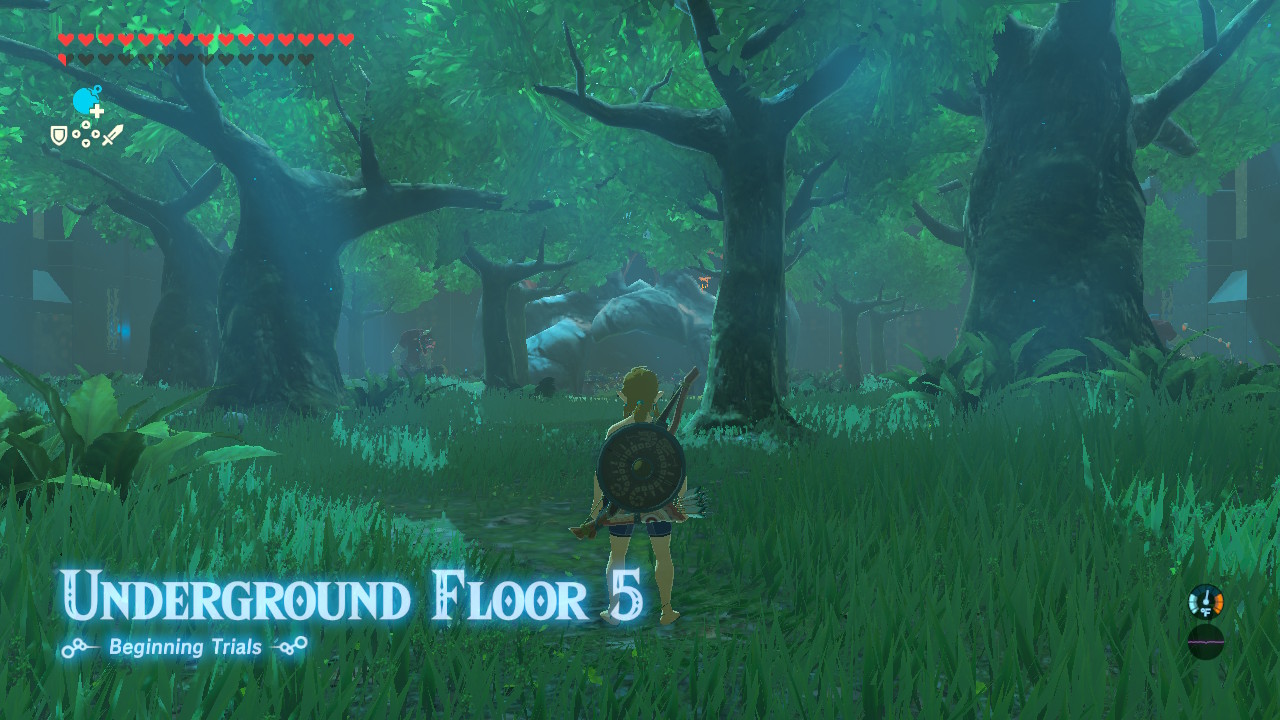
Floor 5
| Enemies |
・Moblin (2) ・Blue Bokoblin (3) |
|---|---|
| Equipment |
・Spiked Boko Club (1) ・Spiked Boko Bat (1) ・Moblin Club (1) ・Spiked Boko Spear (1) ・Moblin Spear (1) ・Arrow (Multiple) ・Spiked Boko Shield (1) |
| Food & Materials |
・Various Food (Multiple) |
This level has a skull cave with three Blue Bokoblins hiding inside. The two Moblins that patrol near the mouth of the cave are the toughest enemies in this level, but are otherwise fairly easy to engage.
Lure the Moblins Away from the Cave
Although stronger than their Bokoblin counterparts, Moblins are simple enemies that you can trick and lure away from the cave they are guarding. You can even lure them separately, allowing you to engage them one-on-one.
Once the two Moblin patrols are taken care of, you can now attack the three Blue Bokoblins. There is a lantern in the skull cave that you can shoot to quickly defeat the Bokoblins, but this may cause the weapons inside to burn up.
If you want to preserve the weapons inside the cave, you can lure out the three Bokoblins into the open and grab the items afterwards.
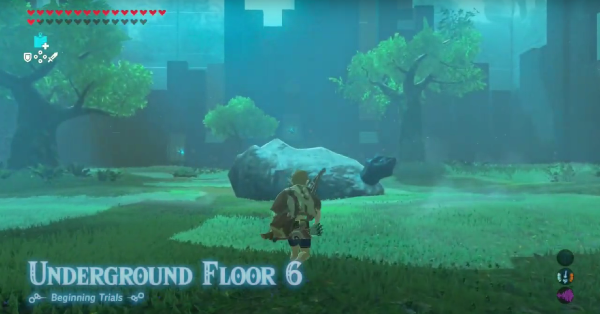
Floor 6
| Enemies |
・Stone Talus (1) |
|---|---|
| Equipment | None |
| Food & Materials | None |
A Stone Talus is the first boss for the Beginning Trials. As with all Taluses, this rocky titan will only awaken if you get close to it. Use this opportunity to ready your weapons and get into position.
Defeating the Stone Talus
As with all Taluses, it can only be damaged by hitting the rocky outcropping in its body. Shooting an arrow at this outcropping stuns the Talus, allowing you to jump on its body and hit it repeatedly with a strong weapon.
The Stone Talus' most dangerous attack is its rock blast attack. Since the arena is relatively small, it can be difficult to run way from this attack.
To prevent the Stone Talus from using its powerful attacks, use a Remote Bomb to destroy its arms. This also causes it to fall over momentarily, allowing you to climb on its body or shoot its weak point with a bow.
A Talus that's missing one or both of its arms also stops attacking you in an attempt to regenerate its missing limbs. You can do this repeatedly, essentially stunlocking it so that it can't attack.
Finally, you can use the Stasis rune to freeze the Talus in place, allowing you to destroy its arms or shoot its weak point easily.
Floor 7

| Enemies | None |
|---|---|
| Equipment |
・Torch (1) ・Eightfold Blade (1) ・Serpentine Spear (1) ・Arrow (Multiple) ・Fire Arrow (Multiple) ・Shield of the Mind's Eye (1) |
| Food & Materials |
・Apple (2) ・Armored Carp (3) ・Fairy (1) ・Ironshroom (2) ・Razorshroom (2) ・Various Food (Multiple) |
Floor 7 is a Resting Spot. Use this opportunity to cook food and capture fairies.
It's also a good idea to destroy all the trees here and use the wood to cook Rock-Hard Food Food. While disgusting to eat, it still recovers hearts and can be invaluable in later floors once your food starts running out.
Floor 8

| Enemies |
・Blue Lizalfos (2) ・Lizalfos (2) ・Electric Chuchu (1) |
|---|---|
| Equipment |
・Lizal Boomerang (1) ・Throwing Spear (1) ・Boko Spear (4) ・Lizal Bow (1) ・Arrow (10) |
| Food & Materials |
・Roasted Bass (3) ・Various Food (Multiple) |
This level has two Blue Lizalfos prowling about and two regular Lizalfos hanging around the camp. Their erratic behaviour and combat style makes them tough enemies to deal with in groups, so it's a good idea to take them out one-on-one.
The solitary Blue Lizalfos near the rocks can prove troublesome if you decide to head directly to their camp, so take it out from a distance with your arrows. There's an Electric Chuchu in the camp that you can shoot to stun the two Lizalfos and take out without retaliation.
Once all enemies are taken care of, grab all of the food items in this level. You will need it in the succeeding floors.
Floor 9

| Enemies |
・Electric Wizzrobe (1) ・Water Octorok (2) |
|---|---|
| Equipment |
・Lightning Rod (1) ・Arrow (10) |
| Food & Materials | None |
This floor has two Water Octorocks and one Electric Wizzrobe. Ignore the Wizzrobe for now and focus on taking out the Water Octorocks. Their rock spit attack does more damage and has a nasty habit of stunning Link.
Once the two Water Octorocks are taken care off, you can safely engage the Wizzrobe. If you're having trouble hitting it, simply use Stasis on it. Make sure to grab the Lightning Rod it drops; it will help you against the monsters on the next floor!
Floor 10

| Enemies |
・Black Lizalfos (2) ・Blue Lizalfos (1) |
|---|---|
| Equipment |
・Lizal Boomerang (1) ・Lizal Spear (1) ・Lizal Bow (1) ・Arrow (Multiple) ・Lizal Shield (1) |
| Food & Materials |
・Various Food (Multiple) |
Floor 10 is arguably the most difficult floor in the Beginning Trials as the Blue Lizalfos will immediately spot you once you warp into the level. When this happens, it will often call the two Black Lizalfos who will promptly gang up on you.
Immediately use Stasis on the first Lizalfos and quickly snipe it with your strongest bow. One headshot should take it out.
Sneak behind either of the two remaining Lizalfos, use Stasis, and attack it with your strongest weapon to make sure it's defeated before the rune wears off. Do the same on the last Lizalfos.
Stun Enemies with the Lightning Rod
All three Lizalfos wield spears that have an even greater reach due to the Lizalfos' long arms. Keep your distance and use the Lightning Rod to stun them and then rush them with your strongest weapons. You can also use the Remote Bomb to knock them off balance if they are grouped together.
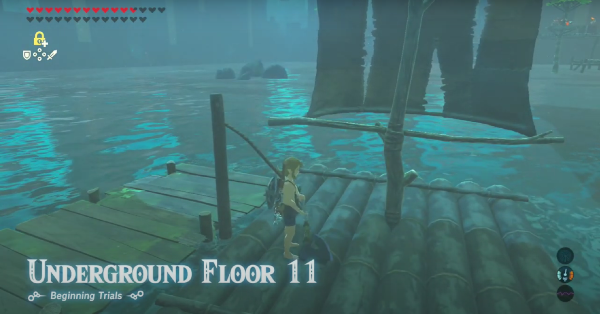
Floor 11
| Enemies |
・Black Moblin (1) ・Black Bokoblin (1) ・Blue Bokoblin (1) ・Bokoblin (6) |
|---|---|
| Equipment |
・Soldier's Broadsword (1) ・Dragonbone Boko Club (1) ・Spiked Boko Bat (1) ・Soldier's Spear (1) ・Spiked Boko Spear (1) ・Spiked Boko Bow (4) ・Arrow (Multiple) ・Fire Arrow (10) ・Shock Arrow (10) ・Dragonbone Boko Shield (1) |
| Food & Materials |
・Various Food (Multiple) |
Floor 11 is a mostly water level with a few rocks and enemies positioned on wooden platforms. Get on the raft and cut the line holding it to slowly make your way to the area with the enemies. You can use Cryonis on the water to stop the raft from moving any further.
Take out the Archers
There are two Blue Bokoblin Archers that will spot you as soon as you near the camp. These shoot Fire Arrows at you, so be careful and try to engage them at a distance. Alternatively, you can rush towards the right platform and attack the Bokoblin directly as its safer to shoot the other Bokoblin from the platform.
Knock the Enemies Into the Water
If you have a Korok Leaf, which you can get from any of the trees you knocked over in the past floors, you can use it to simply push the enemies off the platforms. All of the enemies here, from the Bokoblins to the lone Black Moblin, will drown once they hit the water.
Even without a Korok Leaf, you can use the Remote Bomb to knock the Bokoblins off their feet and into the water. The Moblin can be knocked into the water by throwing any weapon at it, although you may need to disarm its shield to do so.
Floor 12

| Enemies |
・Blue Hinox (1) |
|---|---|
| Equipment |
・Knight's Broadsword (1) ・Knight's Bow (1) ・Knight's Shield (1) |
| Food & Materials |
・Palm Fruit (Multiple) |
Your last challenge is a Blue Hinox. Before engaging the boss, ready your weapons and gather the Palm Fruit in the arena for extra healing. The Hinox will stay asleep until you actually attack it.
You can also sneak up and climb its open palm. This causes the Hinox to bring you to its stomach, allowing you to get the weapons hanging on its neck.
Defeat the Blue Hinox
The boss is fairly easy so long as you keep your distance. It's attacks are powerful but slow, and you often have enough time and space to run away before its attacks hit.
As with all Hinox, you can easily stun it by shooting its eye with an arrow. Once it's stunned, use your strongest weapon and attack it! You can also throw weak weapons at its eye to stun it if you run out of arrows.
The Hinox will start covering its eye once its health reaches a certain level. Use Stasis on it and shoot its eye to stun it, then use your most powerful weapons to finish it off!
Floor 13

Walk up to the Master Sword to complete The Beginning Trials and boost the Master Sword's power from 30 to 40.
Breath of the Wild Related Guides

Trial of the Sword Guides
| All Trial of the Sword Guides | ||
|---|---|---|
| EX Trial of the Sword | ||
| The Beginning Trials | The Middle Trials | The Final Trials |
Other DLC Quests
Comment
Author

The Legend of Zelda: Breath of the Wild Walkthrough & Guides Wiki
The Beginning Trials Walkthrough
Please participate in our site
improvement survey
03/2026
improvement survey
03/2026
Would you assist in
improving Game8's site?
improving Game8's site?

×
We are listening to our users' valuable opinions and discussing how to act on them.
The information collected through this survey will be used for the purpose of improving our services. In addition, the information will only be disclosed a part of a statistic in a format that will not allow identification of personal information.
Begin Survey
Not Now
×
Please rate each item regarding Game8.co's Advertisements.
Amount of Ads
Very Dissatisfied
Somewhat Dissatisfied
Fine
Somewhat Satisfied
Highly Satisfied
Placement of Ads
Timing of Ad Display
Ad Loading Speed
Safeness of Ads
Content of Ads
×
Please rate each item regarding Game8.co's Quality of Articles.
Amount of information
Very Dissatisfied
Somewhat Dissatisfied
Fine
Somewhat Satisfied
Highly Satisfied
Frequency of updates
Speed of new information
Accuracy of articles
Understandibility of articles
Readability of sentences
×
Please rate each item regarding Game8.co's Usability of the Site.
Ease of finding information
Very Dissatisfied
Somewhat Dissatisfied
Fine
Somewhat Satisfied
Highly Satisfied
Loading Speed
Use of Color
Font Size
Visibility of Images
Easy to Understand Layout
×
Please rate each item regarding Game8.co's Message Boards, Comments.
Ease of Writing
Very Dissatisfied
Somewhat Dissatisfied
Fine
Somewhat Satisfied
Highly Satisfied
Readability
Ease in Finding Information
Comment Quality
Comment Quantity
Admin Response
×
Please rate each item regarding Game8.co's Site's new design.
Please rate our site's new design
Very Dissatisfied
Somewhat Dissatisfied
Fine
Somewhat Satisfied
Highly Satisfied
Do you think that the website's design change makes the site easier to use?
Has the new design made it easier for you to find information on the site?
Has the new design improved the overall visual appeal of the site?
How would you rate your overall satisfaction with the new design of the site?
×
How likely are you to recommend Game8 to someone you know?
Very Unlikely
0
1
2
3
4
5
6
7
8
9
10
Very Likely
If you have other opinions regarding potential improvement to the website, please share them with us. We would appreciate your honest opinion.
Note: This is a free response section, so you can proceed without entering anything.
Note: Please be sure not to enter any kind of personal information into your response.
Note: Please be sure not to enter any kind of personal information into your response.
×
Thank You
×
Thank you for participating in our survey! Your answers will help us to improve the quality of our website and services.
We hope you continue to make use of Game8.
We hope you continue to make use of Game8.
Close
Rankings
- We could not find the message board you were looking for.
Gaming News


![Everwind Review [Early Access] | The Shaky First Step to A Very Long Journey](https://img.game8.co/4440226/ab079b1153298a042633dd1ef51e878e.png/thumb)

![Monster Hunter Stories 3 Review [First Impressions] | Simply Rejuvenating](https://img.game8.co/4438641/2a31b7702bd70e78ec8efd24661dacda.jpeg/thumb)
Popular Games

Genshin Impact Walkthrough & Guides Wiki
Honkai: Star Rail Walkthrough & Guides Wiki
Umamusume: Pretty Derby Walkthrough & Guides Wiki
Pokemon Pokopia Walkthrough & Guides Wiki
Resident Evil Requiem (RE9) Walkthrough & Guides Wiki
Monster Hunter Wilds Walkthrough & Guides Wiki
Wuthering Waves Walkthrough & Guides Wiki
Arknights: Endfield Walkthrough & Guides Wiki
Pokemon FireRed and LeafGreen (FRLG) Walkthrough & Guides Wiki
Pokemon TCG Pocket (PTCGP) Strategies & Guides Wiki


Recommended Games
Diablo 4: Vessel of Hatred Walkthrough & Guides Wiki
Fire Emblem Heroes (FEH) Walkthrough & Guides Wiki
Yu-Gi-Oh! Master Duel Walkthrough & Guides Wiki
Super Smash Bros. Ultimate Walkthrough & Guides Wiki
Pokemon Brilliant Diamond and Shining Pearl (BDSP) Walkthrough & Guides Wiki
Elden Ring Shadow of the Erdtree Walkthrough & Guides Wiki
Monster Hunter World Walkthrough & Guides Wiki
The Legend of Zelda: Tears of the Kingdom Walkthrough & Guides Wiki
Persona 3 Reload Walkthrough & Guides Wiki
Cyberpunk 2077: Ultimate Edition Walkthrough & Guides Wiki


All rights reserved
© 2020 Nintendo. The Legend of Zelda, Wii U, and Nintendo Switch are trademarks of Nintendo.
The copyrights of videos of games used in our content and other intellectual property rights belong to the provider of the game.
The contents we provide on this site were created personally by members of the Game8 editorial department.
We refuse the right to reuse or repost content taken without our permission such as data or images to other sites.